Gas pipes in the kitchen: is it possible to redo the piping to the stove
This article is an attempt to clearly explain what a resident of an apartment building can do with his own hands with an internal gas pipeline in his apartment. I will pay attention to the restrictions set out in the regulatory documentation, and talk about my own practical experience regarding how and with what you can move the gas pipe in the kitchen. So, let's go.
Hands off!
Let's talk about prohibitions first. Yes, yes, dear reader, I have no doubt that you are full of enthusiasm and eager to carry out the transfer of the gas pipe in the kitchen yourself. However, take the restrictions I have listed as seriously as possible:
- You can not move the gas riser in the kitchen. All you can do is change where the branch is attached to it or the length of this branch;

- Polyethylene and plastic pipes in general cannot be used indoors.. SNiP 2.04.08-87 in clause 4.85 expressly states that polyethylene is prohibited for laying in residential buildings, and in clause 6.2 it indicates what materials should be used;
Extract from SNiP: gas pipelines from steel pipes should be installed inside buildings and structures. To connect gas appliances, it is permissible to use rubber or rubber-fabric sleeves (read - reinforced gas hoses). However, it is still recommended to use hard eyeliners.
- It is impossible to block common plug, ball valves and gate valves at the inlets and risers of gas supply. If at the time when you turn off the gas, someone cooks food, the fire will go out, and after starting it will continue to flow into the kitchen. The result of such a development of events is usually described in TV reports by bystanders: there is no one among the residents to tell about it;
Captain Evidence suggests: for any work related to disconnecting the riser and carried out by gas service specialists, it is necessary that the residents of all apartments be at home. At launch, all tenants are notified about it personally.

- Finally, the main thing: PB (safety rules) 12-368-00 prohibit any gas hazardous work carried out by persons who have not been instructed and examined in safe working methods.
Simply put: only a representative of Gorgaz or a licensed gas equipment maintenance company should connect any gas appliances.
What will happen
If you are fabulously lucky and you, without the necessary knowledge and practical experience, do not allow a gas leak, your amateur performance will be revealed at the very first scheduled inspection of gas equipment by representatives of the gas service.
The consequences are unpredictable: they can both turn a blind eye to the work you have done, and draw up a protocol on an administrative offense that endangered the life and health of people.
Worst scenario... Comrades, I won't spoil your mood. What is a gas explosion in a residential building - everyone represents.
fly in the ointment
There are two reasons:
- Timing. Drafting and approval may take three to four months;
- Price. The project, together with the work, will cost from 10 to 40 - 50 thousand rubles.
Only shhh
So, what to do if you are still very impatient to move the gas stove or shorten the gas pipe outlet?
Theory
No, no, mon ami, do not rush to pick up the keys and the hacksaw. In the beginning - a little tedious, but necessary for familiarization with regulatory requirements.

The norms for a gas pipe in the kitchen are set out in the document I have already mentioned - SNiP 2.04.08-87.
- Gas distribution in a residential building must be performed predominantly at the weld. Threaded and other collapsible connections are allowed only on connections to shut-off valves, gas meters and consumer devices;
On the practical side, this means for us that the internal gas pipeline in the apartment cannot be assembled from pieces. Climbing to the gas pipeline with welding, not being able to completely turn it off, really, is not worth it.
Another nuance: this paragraph of SNiP does not completely prohibit the use of collapsible connections, but only recommends refraining from them.
- All detachable connections must be made in places accessible for inspection and repair. You should not hide them in non-separable kitchen furniture;
- The gas pipe must be laid, as a rule, openly;
- If there are several gas consumers, shut-off valves must be installed in front of each of them;
- In places of passage of people (for example, above or in the hallway), the gas pipe must run at a height of at least 220 centimeters. What is the instruction connected with - I think you can not explain;
- Steel internal gas pipelines are recommended to be painted for corrosion protection. At the same time, the decor of the gas pipe in the kitchen or in the hallway must be waterproof.

Practice
After tap
First and foremost: in the vast majority of cases, you don’t need to cut or cut anything. To transfer the slab, it is enough to lengthen the connection between it and the shut-off valve. To hide the untidy steel eyeliner, you can simply build a cabinet around it (of course, collapsible or with wide-opening doors).
How can you connect a stove or other gas appliance without violating the requirements of SNiP?
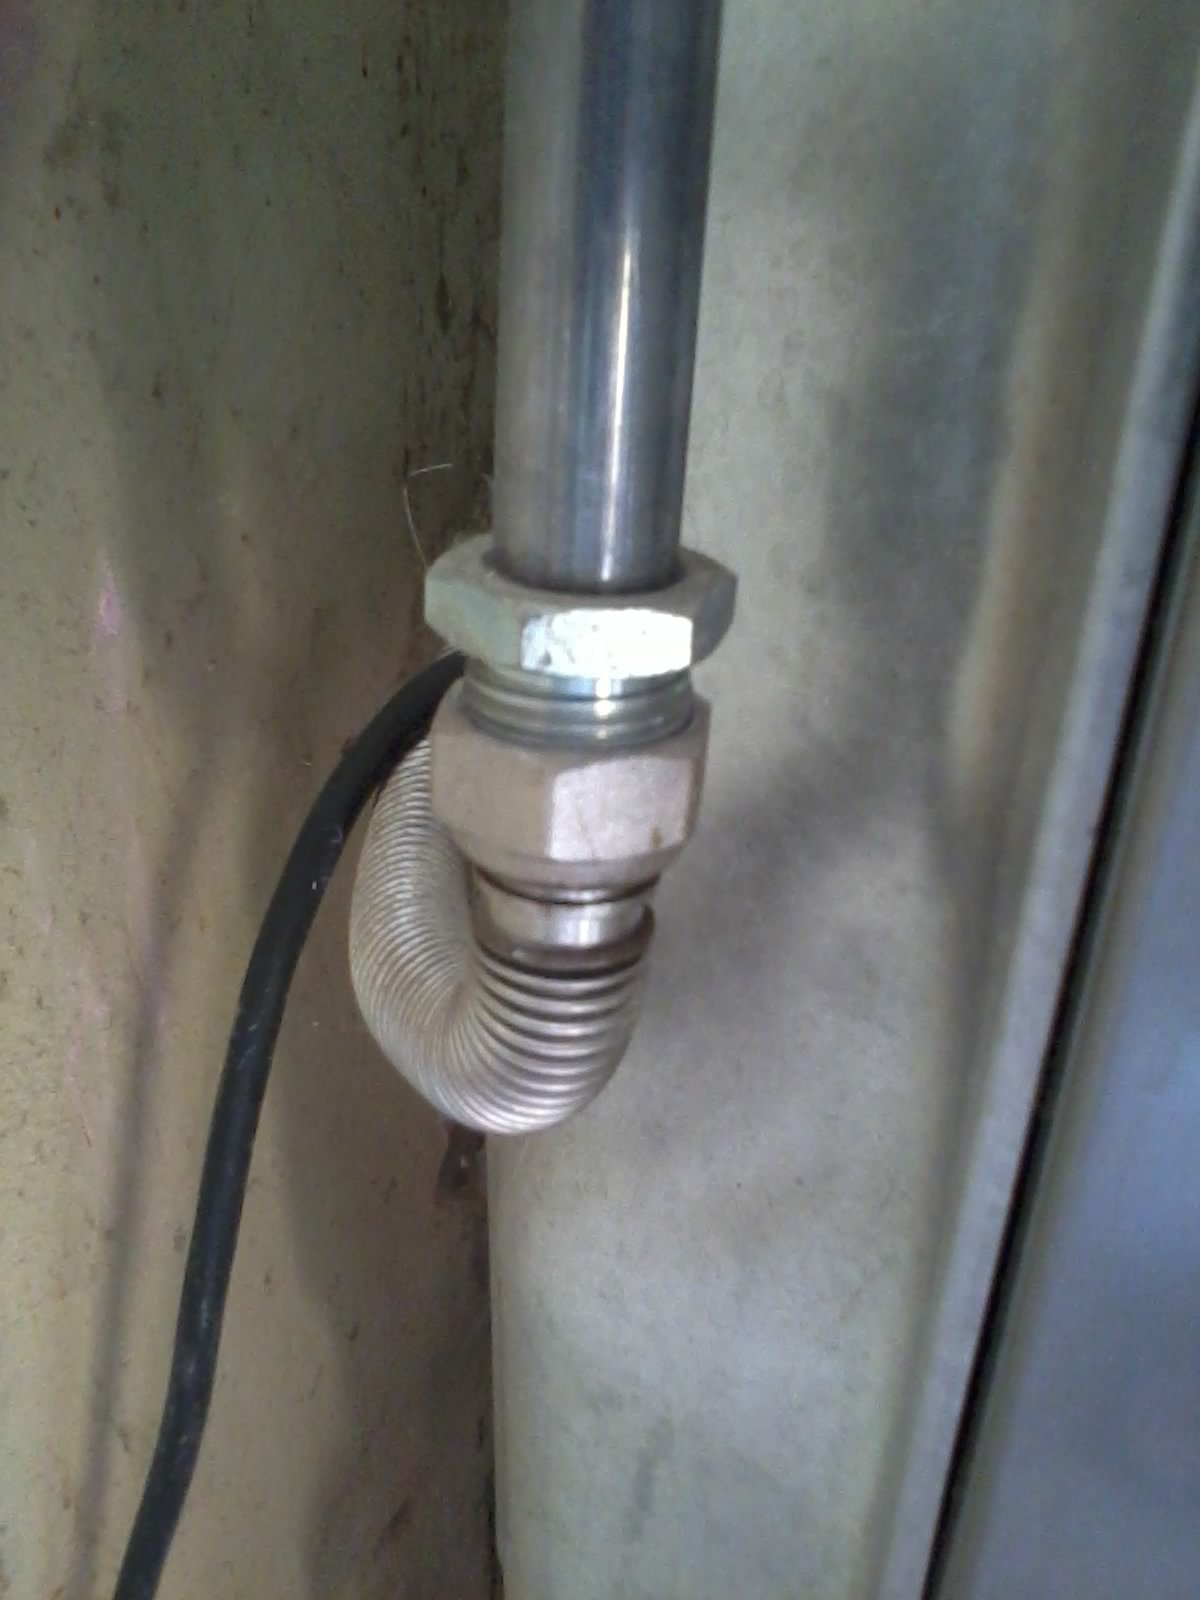
Corrugated stainless steel pipe. In this case, the key requirements will be met:
- The connection to the device will be rigid (corrugated stainless pipe obviously has nothing to do with hoses);
- The wiring will be done with a steel pipe. Who's to say that stainless steel is not steel?
When a corrugated stainless pipe had not yet appeared on the Russian market, I successfully transferred gas stoves with an oxygen or acetylene hose on steel or brass fittings.
To fix the hose on the fitting, an aluminum clamp was used for a screwdriver.

Stainless steel connections are mounted on compression fittings: the pipe is inserted into the fitting with a loose union nut, after which it is tightened and compresses the pipe with a silicone sealant.
The threads on the connections of the fittings with the plate branch pipe and the tap are wound up with FUM tape.
At start-up, all detachable connections must be checked for gas leaks: soap suds are applied to each of them with a brush. If it bubbles, the connection needs to be sorted out.

Do not test connections with a lit match. It's not a matter of safety: for a gas to explode, you need its mixture with air in sufficient concentration.
The fact is that in small concentrations, with minor leaks, it simply does not catch fire.
Faucet replacement
Soviet-style gas plug valves are not very convenient to use and need regular maintenance. In particular, the cork must be liberally lubricated. The lubricant fills the grooves to prevent gas leaks and reduces the force required to turn the plug.
Can I change the faucet myself?

If so, the rate of gas outflow from the pipe will be minimal, and the pressure will not prevent the installation of a new valve instead of the old one.
The replacement algorithm looks like this:

All work is carried out only with the machines turned off in the electrical panel and with the windows wide open.
Violation of this simple and understandable rule can lead to a gas explosion.
What to change the gas valve? On a modern cork. Its purpose for gas is indicated by the yellow marking of the handle.

Thread cutting
How to cut a gas pipe in the kitchen and cut a thread on it?
With due observance of safety rules, this work is no more dangerous than the previous one:
- We are preparing a tool - a hacksaw for metal, a rough file and a die according to the diameter of the pipe (as a rule, the connection to the stove has a size of DN 15). In addition to the tool, you will need a FUM tape and any lubricant - up to motor mining or a solarium;
- We make a wooden or rubber chopstick according to the size of the pipe. Its dimensions should not prevent you from cutting threads on the outer surface of the cut eyeliner;
- We de-energize the whole apartment. Namely, automatic machines, and not switches and cords pulled out of the socket. Any accidental spark can be fatal;
- We open wide all the windows in the apartment;
- We disassemble the squeegee, remove the crane and insert a chopik in its place;
- With a file, we remove the outer chamfer on the pipe at an angle of 15 - 20 degrees to its longitudinal axis. This will be the entry for the die;
- We lubricate the entry and the first few centimeters of the eyeliner;
- We put the die with a guide frame on the eyeliner;

If you want to express gratitude, add a clarification or objection, ask the author something - add a comment or say thanks!