What to glue between the wallpaper and the ceiling. Sticking ceiling tiles with your own hands. Do-it-yourself wallpapering on the ceiling
The most common way to decorate the premises, of course, is the use of wallpaper. Moreover, they can be glued not only on the walls, but also on the ceiling of the room. It should be noted that pasting the ceiling with wallpaper with your own hands is not much more difficult than wall decoration. Therefore, having familiarized yourself with the procedure for carrying out such work, you will be able to do it yourself.
Advantages and disadvantages of pasting the ceiling
Applying wallpaper to the ceiling has the following advantages:
- the possibility of implementing various design solutions- a variety of colors and textures of the material allows you to create an unusual interior;
- creating visual effects- pasting the ceiling with wallpaper allows you to visually enlarge or vice versa, reduce the room. In addition, the room can be visually divided into several zones. This is very important for those cases when one room is both a bedroom and a dining room and an office;
- additional soundproofing- it is provided when using wallpaper with a porous structure.
It also has a number of disadvantages:
- the possibility of psychological discomfort- some people feel uncomfortable when they are in such rooms, it seems to them that they are in a cramped, enclosed space;
- the need to work with an assistant- you should not think about how to wallpaper the ceiling alone. It is very difficult to do such work qualitatively, carrying it out alone. Therefore, it is better to immediately find a partner.
It should be noted that not all wallpapers are suitable for finishing the ceiling, but only special, ceiling ones. They are heavier and denser than conventional wall materials.
It is most preferable to use non-woven or embossed textile wallpaper. They will hide small surface flaws, as well as provide sound insulation.
The process of wallpapering the ceiling
Cleaning and priming
Before you paste over the ceiling with wallpaper, it must be carefully prepared. First of all, it should be cleaned with a spatula from old plaster or paint. The resulting irregularities must be puttied.
Next is executed. Please note that the mixture used must match the type of wallpaper used. Most often it is an acrylic primer that penetrates deeply into the material being processed. The instructions on the container with this substance will tell you about its correct use.

Ceiling markings
The next stage of work involves marking the ceiling.
It is done like this:
- you need to select one wall and measure from it a distance equal to the width of the wallpaper;
- from the opposite wall, the same gap should be noted;
- in the marked places, a dowel is installed in the ceiling - nails, between which a rope painted with chalk is tied. Then it stretches and releases. After hitting the ceiling, it will leave a trace. In the same way, the remaining lines are applied across the entire width of the room.

Advice!
So that in the future there are no noticeable joints between the wallpaper, they should be located in the direction of the incident light, that is, from the window.
Therefore, the markup should be done in the same way.

Preparing wallpaper and glue
Now you need to measure and cut off the required number of strips. They are prepared with an overlap of 20 millimeters. If there is a pattern that requires alignment, then one strip is first cut out and all other elements are already selected along it.

Next, prepare the wallpaper paste. To do this, water is poured into the bucket, after which the adhesive composition is slowly poured into it. In this case, the entire solution is constantly stirred until a homogeneous consistency is obtained.
Advice!
Choose high-quality, expensive compositions.
Remember that the low price of glue in most cases indicates a poor quality product and its low adhesive power.
Wallpaper gluing

The first strip is covered with glue using a roller, after which it must be folded with an accordion. So it will be more convenient to deal with it. During folding, make sure that the canvas does not wrinkle and its front side gets dirty.
If you use vinyl or non-woven, you need not on them, but on the ceiling itself. This processes a width slightly larger than the size of the roll.
The glue is applied with a roller and this is done in two layers. At the same time, gaps and smudges should not be allowed.
Advice!
To make the pasting process faster, you can make a simple stand.
To do this, you will need 2 ladders and two wide, thick and long boards that are placed between the steps of two stairs.

Pick up the beginning of the canvas, and let your assistant take the rest of the harmonica. Attach the canvas exactly along the marked line. Then run your palm along its middle, and then along the edges. You can finally level the surface with a wallpaper spatula.

Having glued one strip, in the same way you need to attach the rest of the canvas. When answering the question of how to properly wallpaper the ceiling, one more important point cannot be ignored - in the process of work, it is necessary to constantly ensure that the glued elements do not go beyond the edges of the markings. Otherwise, the material will stick unevenly and it will look ugly.
Having fixed all the strips, you need to cut off with a clerical knife or scissors their excess that is on the walls of the room. Then, picking up a dry roller wrapped in a clean rag, it is necessary to process each strip with it. First, movements are made from the center to the edges of the canvas, and after that - along the entire canvas.

Conclusion
Pasting the ceiling allows you to implement interesting design ideas, as well as create the necessary visual effect. For such work, non-woven or vinyl products are most suitable, which must be glued together with an assistant.
The procedure for this has been described above. You can get more information about this work from the video in this article.
Do-it-yourself repairs always begin with the choice of finishing materials. After all, it is under them that all construction work will be carried out, and hence the purchase of additional materials. This fully applies to the decoration of ceilings. More recently, ceilings were simply painted or whitewashed, today their decoration is a huge choice in terms of the materials used, designs and shapes. But not everything is so simple, because any repair is a big financial investment, so many ordinary people try to find design options that would not hit the family budget too hard. One of them is wallpapering the ceiling.
Let's face it, this process is not the easiest when the task is to do it yourself, because it is associated with the inconvenience of doing the work. What can I say, it is more difficult to work under the ceiling than against the wall. But all the basic construction operations will be exactly the same, like wallpapering the walls. And this is the maximum alignment of the ceiling surfaces with your own hands, their strengthening. So let's look at the process itself step by step.
Stage number 1 - preparatory repair of the ceiling
To be honest, this is one of the most complex and time-consuming processes that you can do yourself. What is needed for this?
You need to prepare the tools:
- rule
- spatulas (wide and narrow)
- construction mixer
- roller and brush
- rubber roller
- scissors and construction knife
- ruler and pencil
- bucket
From materials:
- wallpaper glue
- putty
- deep penetration primer

Repair of the ceiling begins with the preparation of the surface to be trimmed, therefore, first of all, the ceiling must be inspected and its defects determined. If it was covered with whitewash before the repair, then it must be got rid of it. This is usually done with a spatula, and the final bottom layer is washed with warm water using a brush or sponge.
If there are serious enough defects on the ceiling, then it is necessary to repair them, namely, to expand the cracks, deepen the recesses, apply a primer inside the flaws and wait until it dries. After that, all defects are filled with putty mortar. Particular attention to oil and grease stains and stains on the ceiling. They must be removed without fail, using any means and sparing no effort. You can offer this recipe: treat the greasy stain on the ceiling with acetone, let it dry, and then wash it with soapy water. If metal profiles from the reinforcing frame appeared on the surface of the ceiling, then it is better to clean them from rust and cover them with paint (oil or enamel).
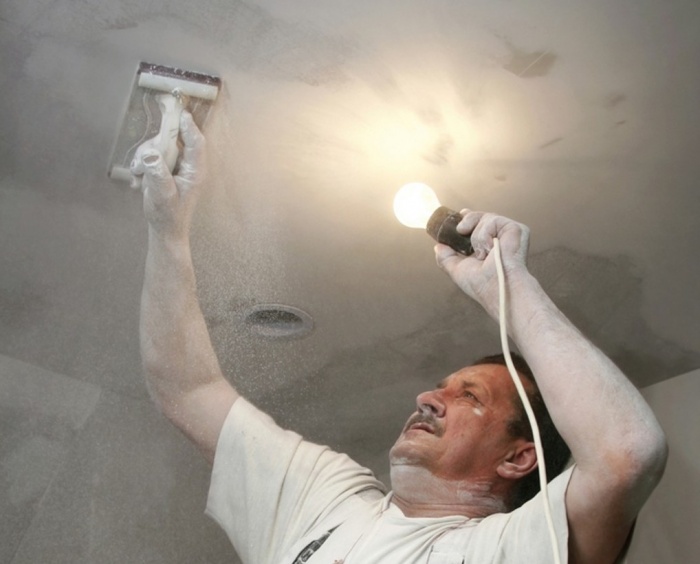
Attention! Working under the ceiling requires strict adherence to safety rules and conditions. Therefore, a reliable pedestal must be installed under the feet, gloves are put on the hands, a respirator is used when cleaning the surface, the head must be covered.
So, the ceiling is cleaned, you can proceed to strengthening operations. For this, a deep penetration primer is used. This is a ready-to-use liquid material that is applied to the ceiling surface either with a brush or a roller. The purpose of the primer is not only to make the surface with a high degree of adhesion, but also to strengthen the top layer. The liquid penetrates deep into the ceiling material, where it polymerizes, forming strong bonds between the particles of the ceiling material. The applied layer dries usually within 4-6 hours.
Leveling the ceiling surface with your own hands
And now the ceiling is being leveled. Not the easiest process. First of all, it is necessary to determine the difference in the plane. This is done like this:
- all the heights of the corners in the room are measured;
- they are compared;
- if the difference was only one centimeter, then repair (levelling) can be carried out with a putty applied in two layers;
- if the difference is 2-4 centimeters, then you will have to use a multi-layer application with the installation of a fiberglass reinforcing mesh, which is attached to the ceiling itself either with glue or self-tapping screws;
- a difference of more than 5 cm requires the installation of a suspended or stretch ceiling structure.
By the way, the second position with a ceiling drop of 2-4 cm is considered one of the most time-consuming and long. The thing is that the putty mortar is applied in several layers with a small thickness (no more than 0.5 cm). In addition, each layer must be primed and wait until it dries. That is, the putty layer itself dries, and the primer applied to it.
If, after applying the putty mortar, the plane difference has become zero, then it is necessary to grind the ceiling using fine-grained sandpaper. What is it for? No matter how hard you try not to leave marks from the spatula on the applied layer with your own hands, you will not succeed. In addition, there is a possibility (it is small, but still there) that the putty in its composition will have small inclusions of unmixed particles of the mixture components. And we need to get rid of all this. By the way, if the ceiling surfaces are glued with thick vinyl wallpaper, then this operation can be abandoned.
Attention! The preparation of putty requires a certain sequence.
First, water is poured into the bucket, and only then the dry mixture is poured. In this case, it is necessary to continuously mix the solution using a construction mixer.
Experts believe that a perfectly smooth surface of the flow will be only after the so-called finishing layer of the putty mixture is applied to it. This is a thin layer applied with a liquid solution. It is he who will need to be cleaned with sandpaper. After that, the ceiling is primed again. Be sure to dry the surface after applying the putty.
So, do-it-yourself repair of ceiling decoration is approaching the final stage, namely, pasting the ceiling with wallpaper begins.
Stage number 2 - main (wallpaper sticker)
In principle, wallpapering the ceiling is done using exactly the same technology as wallpapering the walls. But there are also subtleties here. Therefore, let's go through the stages sequentially, indicating the nuances of the process.

- A line is drawn on the ceiling at a distance of 50 cm from the wall, as a reference point in the process of installing wallpaper strips. To do this, marks are made at this distance from two opposite walls directly on the ceiling. They are interconnected with a colored thread (it is also called a chopping thread), pulled and released. A clearly visible line should remain on the surface.
- Wallpaper rolls are rolled out on the floor and cut to the length or width of the room (see video). It depends on how you decide to lay the finishing material. A prerequisite is an allowance for a length of 8-10 cm, which will wind up on the walls of the room. It will then need to be cut off.
- After that, the wallpaper on the reverse side is treated with an adhesive composition.
- Now the strip is folded into three layers in the form of an accordion. It's just so convenient to work at the top.
- Set one edge to the wall and press it down with your hand.
- Release one wave and press the wallpaper to the surface. And so to the opposite wall.
As for the line applied to the ceiling, it is along it that the first strip of wallpaper will have to be laid. The second strip is installed end-to-end with the first using the same technology.
Attention! A very important point is to squeeze out air and excess glue from under the finishing roll material.
Therefore, you need to take a rubber roller and roll the wallpaper with your own hands from the middle to the edges of the strip. Excess adhesive must be wiped off with a clean cloth. Make sure that the glue does not get on the front side of the wallpaper, there may be stains that cannot be removed by anything.

After applying all the strips of wallpaper and the glue has completely dried, you need to cut off the allowance with a knife. It remains to close the free section of the ceiling, which is separated by a line drawn on it. To do this, you will have to strictly measure the width of the site in several places and trim the strip of wallpaper exactly along them. After that, a piece of wallpaper is glued in the same way as everyone else.
One of the most economical ways to finish the ceiling is to glue the ceiling tiles. This process has a number of nuances, so it is important to learn the basic rules for gluing tiles with your own hands, as well as how to lay them.
Types of tiles
All models of ceiling tiles differ in their density, texture, and composition. Consider the main types.


plastic
Plastic tiles are quite durable and of high quality, but they are far from environmentally friendly. It is easy to care for such a ceiling: plastic can be washed and cleaned in many ways. It has the ability to fade, so this material is not suitable for rooms flooded with sun.

extruded
Such material has a smooth surface without particularly convex relief elements. As a rule, extruded boards have a thickness of no more than 3 mm, although the material is dense. Manufacturers present models of different colors. Some of them imitate marble and wood.
Extruded tiles should not be painted. because the paint does not adhere well to the surface. The stores offer a wide selection of models with different patterns in different colors. Extruded tiles are made from expanded polystyrene. She is easy to care for. It does not create difficulties in the gluing process.


The only downside to extruded tiles is their high price.
Styrofoam
In another way, it is called stamped or PVC. In composition, it is more loose. The surface of such tiles is grainy and porous.
The presence of a large number of pores on the surface makes it difficult to care for foam tiles. They get clogged with dirt, the color of the tiles fades. To avoid this problem, such material is often coated with paint. But water-based formulations are not suitable. It is advisable to use acrylic dispersion paints for painting such ceiling tiles.


In thickness, each plate is from 6 to 8 mm, depending on the specific model. The pattern on it is squeezed out using the technology of a large press. This tile has a huge drawback: it is loose, quickly breaks, deteriorates, translucent. Difficulties cause her pruning. Therefore, you should purchase such models with a margin. The big advantage of foam tiles is the low cost.
injection
Such varieties are made from polystyrene foam, which is baked in a certain shape, creating the desired pattern on the surface. The drawings are clearer than those of previous analogues, the texture is more interesting. This material has an average cost and quality. Manufacturers allow painting this material. With the help of such tiles, you can make a completely seamless ceiling, so it is in demand.
The big advantage of this composition is fireproof and environmental friendliness. Such material has good sound insulation and does not deteriorate from high humidity. However, it is always produced in white, so it is often dyed with different compositions after installation.


Most types of ceiling tiles are produced in 50 by 50 cm squares. But there are also non-standard rectangular tile models.
By edge type
There are different types of ceiling tiles that differ in the type of edging. There are models:
- with straight edges without a seam;
- having clear edges between each plates;
- with curvy edges that look more interesting.
A different type of edge does not affect the gluing of the ceiling tiles, it only changes the appearance of the ceiling.


according to drawing
Models are divided according to the type of drawing. There are interesting types of tiles with:
- geometric print;
- floral ornament;
- lace motifs;
- imitation of plaster moldings;
- concise lines.

A neutral option is a smooth tile without a pattern. From the rich selection presented by modern manufacturers for sale, you can choose an option for finishing the ceiling for every taste and budget.

Surface preparation
Before gluing the tiles, it is necessary to carefully prepare the surface of the ceiling. In order for the result of the work to please, and the tiles to stay on the ceiling for a long time, a number of rules must be observed. The ceiling must be cleaned of old coatings. The whitewashed ceiling should be thoroughly washed off, the plastered layer, wallpaper and paint should be peeled off and removed. Depending on the type of coating, a spatula or a perforator can be used for this.
Then it is necessary to correct the defects that remained on the cleaned ceiling. More often, cracks, bulges and depressions appear on it. To fix an uneven ceiling, putty should be used. With the help of this composition, defects can be grouted. Putty is able to correct defects of any complexity.

After the putty has dried (after about 12 hours), it is necessary to start priming the ceiling. It is better to apply the primer in several layers, observing a certain time interval, so that each layer dries completely. The primer will improve the adhesion of the tile to the ceiling surface and make such a coating more reliable.. It will make the overlap homogeneous due to penetrating power.
An exceptional option for surface preparation is when the whitewash is in good condition and securely adheres to the ceiling. In this case, the ceiling is not cleaned of whitewash, but immediately primed. However, it is worth considering: on such a basis, the tiled coating will not be able to hold on for a long time, over time it will move away, it may be deformed. This solution should be resorted to only if you need urgent cosmetic repairs.

Surface preparation with a primer is different depending on the type of ceiling:
- For a concrete ceiling, a special compound called betonokontakt should be used.
- Gypsum ceiling is best treated with a deep penetration agent.
- If the room is damp, it is worth treating the surface of the base with a primer with an antiseptic effect in order to exclude the appearance of an environment for microorganisms.


If the ceiling is loose and loose, it must be primed. After the preparatory composition is absorbed, you can proceed to gluing the tiles.
Adhesive selection
For gluing, standard types of glue are usually used ("Titan", "Moment" or "Naset"). These compounds are quite common and have an average cost. However, some of them create difficulties in the gluing process. For example, after applying the adhesive, the tile must be pressed against the ceiling for 5 to 10 seconds and fully held.
Moment glue has the fastest action of these compounds.. It sets in about 3 seconds. Before gluing the ceiling tiles with it, it is necessary to keep the composition in the air for a certain time. After that, the fragment should be firmly pressed to the base. Ceiling tiles are often glued with liquid nails. They are able to fix coatings well, they are also used for the reconstruction of ceilings.


For gluing ceiling tiles often use a special mastic. It is sold in buckets and has a pasty texture. Such glue is much easier to use because it is flexible: each element of the coating is immediately fixed on the ceiling, it does not need to be held for a long time. Mastic and tile adhesive are used only for ceilings with a flat surface.
If there are defects or irregularities on the ceiling, gypsum-based putty is used for pasting. Besides her you can stick coatings on an uneven ceiling using a composition called Knauf. It is suitable for drop heights of 5 mm. For large defects, the ceiling should be initially leveled.


Sticking schemes
There are several common options for laying tiles on the ceiling.


Classic scheme
It involves placing tiles in rows close to each other along the walls. Sticking starts from the central part. This solution is resorted to if a seamless tile for the ceiling is used. By gluing tiles according to the classical scheme, you can create an integral surface.
Classic styling has a second interpretation. In the process of gluing, the tiles are applied with a shift so that each row is half the slab ahead of the previous one. So the ceilings become lighter and airier.


It is better to choose types of gluing depending on the height of the ceiling in a particular room.
Diagonal (oblique)
This is the most common option, it is universal, because it is suitable for any size rooms. To lay tiles in this way, mark up diagonal lines in advance so that the tiles run along them. However gluing diagonally involves a large consumption of finishing material. You will be left with a lot of scraps.
Visually, placing tiles diagonally (rhombus) looks more presentable. Seams with such styling are almost invisible. Placement of tiles diagonally must start from the chandelier. It is important to control the correct laying in such a way that all the plates go strictly along the lines.


Diagonals can be drawn using threads, marking them with their help.
There are a number of rules that should be followed in order to properly tile the ceiling diagonally:
- The first element must be positioned so that it is at an angle of 45 degrees from each wall of the room.
- Then the following tile elements must be attached closely to the central element.
- After that, it is necessary to make an even docking of all subsequent elements until the entire surface of the ceiling is covered with tiles.
If you follow these rules, you can carry out an elegant and interesting styling.

Checkerboard
To finish the ceiling in this way, it is necessary to purchase materials in two different shades. Usually choose contrasting colors. Sticking comes from the center of the ceiling. In this case, the edges of the tiles are placed parallel to the side walls. Gluing occurs by the method of alternation. This creates a checkerboard effect on the ceiling.
The advantage of this type of gluing is the fact that it is able to hide the unevenness of the base.


Snake styling
This styling scheme is a combination of two shades. Colors can be contrasting and similar. Sticking is carried out starting from the center of the room in such a way that a graphic-type image of a snake is obtained. Usually they try to simplify this process by acquiring a plain tile, and only then, after laying, they paint it with water-based paint in different colors.


Calculation of the amount of materials
Calculating the amount of material that will be spent on finishing the ceiling is quite simple. It is necessary to find out the surface area of the ceiling. If the room is rectangular, you can multiply the length by the width of the room by measuring the walls with a tape measure. When the room has non-standard outlines, it is necessary to measure all the walls separately.

It is desirable to display them on the plan in the form of a picture. After that, the resulting drawing must be divided into rectangles and squares and the area of \u200b\u200beach figure must be calculated on a scale. Then you need to add the area dimensions of all the obtained elements. So you will find out the surface area of the entire ceiling in a non-standard room.
If you chose a standard 50 x 50 cm tile for decoration, the area of \u200b\u200bsuch a product will be 1/4 sq. m. Accordingly, four tiles will cover 1 square. m. ceiling. To simplify the calculations, you can divide the total area of \u200b\u200bthe ceiling by the area of \u200b\u200bthe ceiling tile. As a result, you will get the amount of material needed for gluing.


Now manufacturers present models whose size varies: 40 x 40, 60 x 60, 30 x 70 cm and 30 x 60 cm. In this case, calculations should be approached with more seriousness, calculating the area of the tile to buy the right number of packages. Even after making calculations, tiles must be purchased with a margin so that it is enough to cover the entire ceiling and trim. This is especially true when you plan to place it not according to the classical scheme.
Do not forget that in the process of gluing it may break or deteriorate. You need to buy about 10% more tiles than you calculated.

pasting process
The easiest way to glue even ceilings. For this type of surface, foam or polystyrene tiles are perfect. First you need to spread the adhesive on the surface of the tile. It is necessary to follow a certain technology: glue is applied around the perimeter of the tile and diagonally. The entire surface of the tile should not be covered with glue.
Before gluing, markup is drawn to make it easier to place tiles on the ceiling. Then the tile must be applied to the place allotted for it. Having applied the tile, you need to smooth it over the entire surface with light hand movements. Then you need to wait a few seconds. The exact time depends on the type of adhesive chosen.


Further, gluing is simplified. Each next tile must be attached clearly to the edge of the element already fixed on the ceiling. If there are patterns on the surface of the plate, they must be combined and joined correctly. First you need to adjust the pattern, and only then stick the rest of the plate. The joint must be perfectly level.
The surfaces must be completely adjacent to each other, otherwise the ceiling will be uneven. Each edge must be aligned with an accuracy of 1 mm, otherwise, even due to such a small unevenness, all coatings will move, the ceiling will look bad, there will be gaps. This procedure must be repeated with all tile elements. When you get to the walls, you need to trim the extreme elements. Before trimming, it is better to try on and draw markings on the stove. You need to cut the tile evenly so that there is no gap between the outer tile and the side wall.


The minimum gap at the wall can be hidden with a ceiling plinth. If in the process of gluing tiles you notice that 1 square does not fit very evenly to another, there is a small gap between them, you need to carefully move these elements. For this, it is better to use a wooden plank. It must be strongly pressed against the free edge of the tile and smoothly (with pressure) move, removing the gap. If you start moving the tile with your hands, you will simply break the coating.
Upon completion of the laying process, you can proceed to painting the tiles, if necessary. The easiest way to cover this material is with acrylic-based water-based paint.. To qualitatively smear the tile with paint without gaps, you need to work with a foam roller.


The paintwork must be applied in 2 or 3 layers, depending on the desired saturation of the shade. In order for the paint to lay down smoothly and efficiently, you need to apply a layer of primer to the surface of the tile.
How to glue the ceiling tiles, see the next video.
Seam putty
In the process of gluing, not everyone succeeds the first time to qualitatively arrange the seams between the elements of the ceiling coverings. Often there is a gap between them. If small gaps were formed during the work, after laying the tiles they can be covered with white acrylic sealant. It must be gently squeezed into the cracks so that it fills them. After that, you need to get rid of excess glue.

Sealant is sold in the form of spray cans with an elongated nozzle. So the composition can be easily squeezed out exactly where it is needed. A thin tube easily penetrates even the thinnest cracks. To cover the seams with sealant, you must use a gun. Sealant must be distributed evenly so as not to stain the surface. This tool will not only cover the seams, but also fix the coating on the ceiling.
Some craftsmen claim that gluing tiles to whitewash is unacceptable. They indicate that the lime layer quickly peels off together with the tile after some time. They advise getting rid of the chalk before sticking. During the gluing process, it is usually difficult to cover the ceiling along the edge at the walls. It is important to ensure that the extreme rows are of the same size and run strictly parallel to the walls when it comes to classic installation.
In order for the tile to always look beautiful, you need to properly care for it. Tiled ceiling (especially embossed) accumulates a lot of dust. The surface darkens and loses its former gloss. So it is necessary to carry out dry cleaning at least once a month with a vacuum cleaner or a soft brush.
Wet cleaning should be done every two months with a mop. To clean such a ceiling, it is necessary to use only the most gentle detergents. A mild soap solution is ideal for this. At the end of wet cleaning, the ceiling must be wiped with a dry cloth to remove moisture and stains.
Perhaps there is little that causes such awe as pasting the ceiling with wallpaper. After all, the posture is uncomfortable, the hands get tired, and if you do something else wrong, then this process simply turns into a nightmare.
Listen to the tips below, and then you can understand how to wallpaper the ceiling with the least loss.
Preparatory work

All furniture during the repair must be removed from the room. If this is not possible, then we shift it to one corner and cover it with polyethylene.
You also need to consider a reliable stand with which you can reach the ceiling.
First of all, we prepare wallpaper, glue and tools - a wide brush for applying glue, a roller for processing seams, a wallpaper brush and scissors.
We clean the surface of the ceiling from old decorative materials:
- dye,
- wallpaper,
- whitewash, etc.

Cut the wallpaper to the desired length, fold with the wrong side up.
Apply glue with a wide brush first to the middle of the canvas and then gently spread it over the entire surface. Make sure that the glue layer is even.
Carefully fold the smeared canvas with an accordion, making folds about 30 cm deep. The smeared side should not come into contact with the front.
Leave the folded canvas for a few minutes to allow the glue to soak into the paper, so it will be more pliable. It is not worth delaying the time, otherwise you risk getting too soft a canvas that can tear.
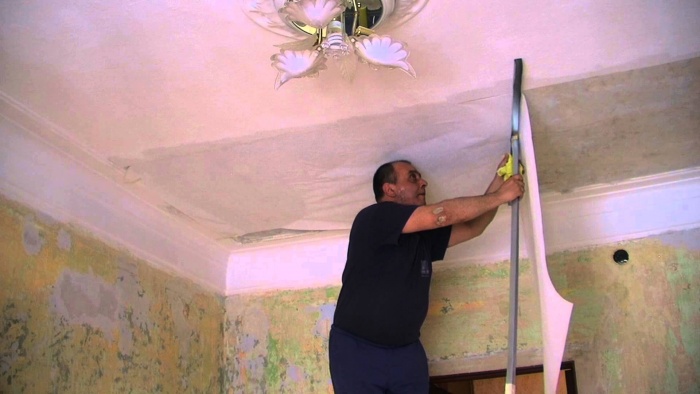
When climbing onto a stepladder or other stand, take scissors, a wallpaper brush and a seam roller with you. They should be with you to stick the wallpaper to the ceiling and smooth them well.
Pick up such work clothes, in which there are many pockets, then the roller and scissors will always be at hand.
Also take something with you to support the "accordion" to avoid tearing the canvas. It can be a broom wrapped in polyethylene, a residual wallpaper roll, a cardboard roller from under the packaging foil.
With one hand, hold the support roller and "accordion", with the other at this time, carefully apply the upper section of the canvas to the surface of the ceiling, focusing on the drawn control line.
Then firmly press this segment and smooth it with a brush from the middle to the edges. Please note that there are no wrinkles or bubbles.

At the wall, press the edge of the wallpaper with the blunt side of the scissors into the corner, so you outline the cut line. Then slightly remove the canvas from the surface of the ceiling and cut along the break you have outlined. So you will achieve a smooth, neat cut line.
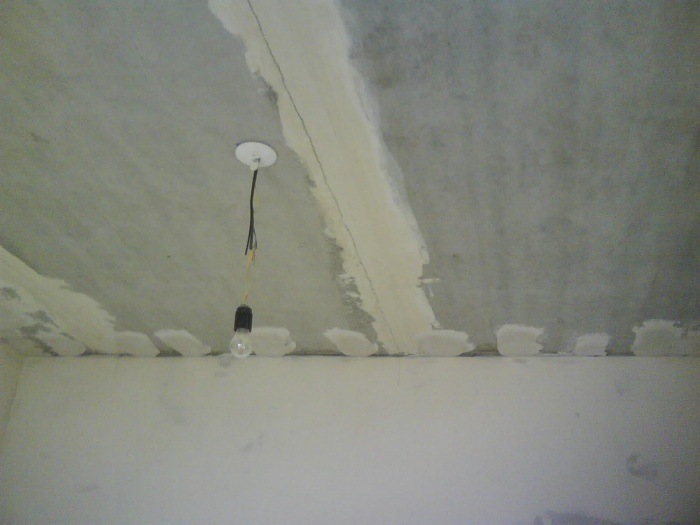
When you wallpaper the ceiling and encounter a chandelier in your path, make a cross cut in this place to avoid bumps. Later, the cap of the chandelier will close this incision.
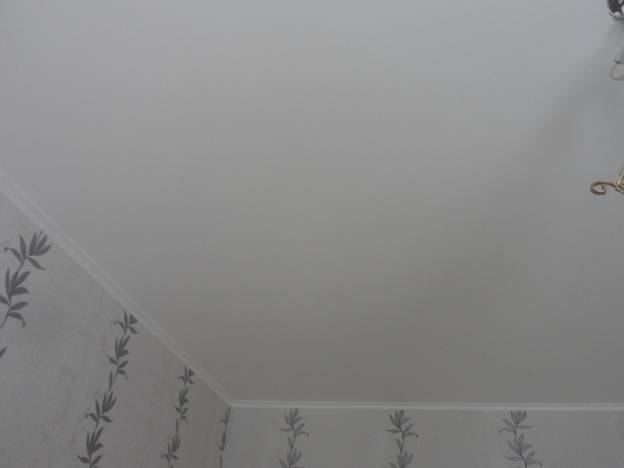
It is advisable to use wallpaper for finishing the ceiling only in panel houses, the ceilings of the rooms of which are a solid floor slab and do not have seams.
You can paste over not only panel ceilings, but also wooden and covered with plaster.
As a rule, ceilings are pasted over with white glossy or matte wallpaper, but recently wallpaper with a pattern has become widespread. They must be chosen very carefully. It is best to choose a material whose pattern differs from the pattern on the wallpaper with which the walls of the room are pasted over. Wallpaper of light tones will make the room taller, darker ones will visually reduce the room. You should not use a too bright coating with a large pattern: this will visually reduce the space, moreover, such a ceiling will hardly fit into the interior.
In the manufacture of ceiling wallpaper, special thick embossed paper is used. They are best suited for surface decoration. Such wallpapers will well hide all the flaws of your ceiling. It is best to choose a simple geometric pattern: narrow stripes of pastel colors. If you do not want to re-paste the wallpaper every time you make repairs, use special relief materials for decoration that can be painted with acrylic, latex, water-dispersion paints. Repainting can be done 4 - 6 times.
Wallpaper on the ceiling gets dirty more often than on the walls. Therefore, it is better to paste over the surface with washable non-woven wallpaper.
It is best to start repairs in the summer, when the central heating pipes are turned off. Otherwise, the areas of wallpaper located near them will dry out very quickly, their deformation and peeling off from the surface will begin. After completion of work, it is necessary to tightly close all windows and doors: the slightest draft will lead to lagging sheets. Pasting of ceilings must be carried out before repairing walls and floors. The furniture in the room is best taken out. If this is not possible, then it is covered with plastic wrap or newspaper.
Before pasting, it is necessary to treat the surface. To do this, thoroughly rinse the whitewash. Let the ceiling dry properly. Then all irregularities must be smoothed out with plaster or putty. After these materials have dried, the ceiling is primed.
If the ceilings are heavily soiled, then before washing off the whitewash, it is necessary to remove rust, soot or grease. The latter is removed with washing powder, gasoline or turpentine. Copper sulfate will help you get rid of rust (100 g of the substance is taken per 1 liter of water). The soot is washed off with a 2% hydrochloric acid solution.
Cracks in the surface of the ceiling are first expanded with a knife. Then they are covered with putty. Immediately before puttying, the surface is moistened with water. This improves the adhesion of the composition to the ceiling. The crack is filled by smoothly moving the spatula across it, and then along. After processing all the cracks, they are overwritten with the same solution. When the composition is completely dry, the surface is sanded. The surface treated in this way is covered with soil. There are a large number of different primers in stores. They are applied with a brush or roller and allowed to dry properly. Only after that you can start gluing the ceilings. It is best to use an acrylic primer: such a composition dries within 2-3 hours and is not very expensive. The consumption of the composition per 100 m2 is 10 kg.
It is necessary to dry the surface properly, otherwise the wallpaper will either peel off, or the glue (mainly for pastes made of organic material) will begin to rot. In this case, stains may appear on the glued surface, the wallpaper will begin to lag behind, and an unpleasant odor will appear. It is also not recommended to stick wallpaper on absolutely smooth (glossy) surfaces: they will not attach properly and after a while they will begin to fall behind.
If the ceiling is upholstered with sheets of fiberboard or chipboard, then the joining seams are coated with drying oil, allowed to dry and leveled with putty. After the composition dries, the surface is smoothed with sandpaper (for the same purpose, building pumice can be used). Then a layer of oil paint is applied.
To prevent the appearance of cracks on the finished surface (this applies primarily to ceilings in wooden and panel houses, where there are joints between floor elements), an already primed surface can be pasted over with a cobweb - a non-woven fabric made of fiberglass (thickness 1.5 - 2 mm). This material is quite loose, it will not allow a crack to become noticeable on a ceiling covered with wallpaper.
The web panels are glued end-to-end with the same glue as the wallpaper. Rub the material with a stiff brush. It is necessary to work with fiberglass with gloves, the dried surface is covered with a layer of oil paint: this will prevent material particles from shedding and protect you and your family from health problems: from simple irritation of the skin and mucous membranes to serious allergies. But a cobweb painted and glued with wallpaper is absolutely harmless. It is best to glue the material with compounds for vinyl wallpaper: they give the best adhesion of the cobweb to the surface of the ceiling.
It is almost impossible to get perfectly even joints of the web panels. Therefore, after the primer has dried (water-dispersion paint diluted in water in a ratio of 3:10), the seams are treated with putty and rubbed with sandpaper. After that, the ceilings are covered with the last layer of paint.
If ceiling defects cannot be smoothed out with a cobweb, we recommend using a paint grid with a mesh size of 2x2 mm. It is glued to the ceiling and, after drying, covered with a layer of putty. After drying, the composition is sanded and primed with wallpaper glue. A cobweb is glued onto the ceiling aligned in this way. This design will become a reliable guarantee against cracks in the plaster on the glued surface.
In the case of re-pasting the ceiling, it is best to remove the previous layer of paper. In the process of drying, the new coating shrinks in volume and begins to peel off the old one from the ceiling. The result of this will be the lag of the panels from the surface. Removing old paper is very simple: the wallpaper is moistened several times with hot water, the softened coating is scraped off with a spatula.
If the ceiling before pasting was painted with lime or adhesive paint, then it must be removed: wallpaper is not glued to such surfaces. This process is dusty and long. To make the surface less smooth, you can use a simpler method: glossy surfaces are rubbed with fine-grained sandpaper.
The panels must be made 15 - 20 cm longer than the ceiling. This is necessary in order to block the connection between the ceiling and the wall. If the top of the wall is decorated with a frieze or baguette, the wallpaper should be lowered onto the wall by no more than 5 cm. The cut sheets are adjusted according to the pattern (if any) and numbered in the order in which they will be glued to the surface. On one side of the roll, you need to cut the edge.
Immediately before pasting, the surface of the ceiling and the upper part of the wall should be primed with a 3% CMC solution. The resulting adhesive layer will improve the adhesion of the paper to the surface. Then coat the wallpaper with glue.
His choice must be taken responsibly. It is best to use the composition that is suitable specifically for this type of coating: for non-woven and paper wallpapers, the same composition will not work.
Usually glue is sold in dry packaging. To bring it into working condition, it must be dissolved in water. To do this, the right amount of water is poured into the bucket, with the help of a stirrer (you can use any cleaned stick or a piece of board), a small whirlpool is created, into which glue is poured in a thin stream. The composition is left until completely swollen.
After the glue has matured, it is thoroughly mixed, breaking up lumps. The result should be a homogeneous mass. If small lumps still remain, they can be removed by straining the glue through a sieve or gauze folded in two layers. How well the wallpaper will hold depends on the quality of the glue.
After the wallpaper is well saturated with glue, proceed directly to the finishing work.
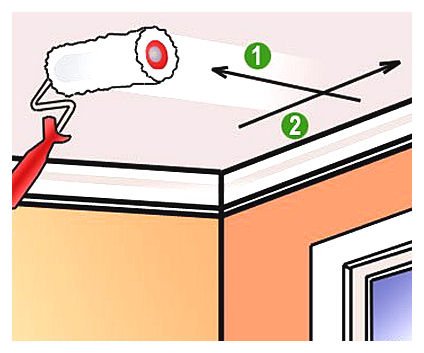
Wallpaper is pasted parallel to the shortest wall, starting from the window and gradually moving towards the door. The panels are fixed with a slight overlap of 8 - 10 cm. To make it less noticeable, it is necessary to turn the top sheet of wallpaper with the edge towards the light. Wallpaper made of thick thick paper is glued end-to-end. If the windows are made in two walls, then the wallpaper is pasted along the length of the room or from the light source that transmits more rays (usually a south-facing window).
Before gluing, it is necessary to remove the light sources, and insulate and de-energize the bare wires. Then the ceiling is marked: at a distance from opposite walls, equal to the width of the wallpaper sheet, two nails are driven in, between which a rope rubbed with colored chalk is pulled tightly, lowered down and sharply released. As a result of hitting the ceiling, a colored guide strip is formed on the surface.
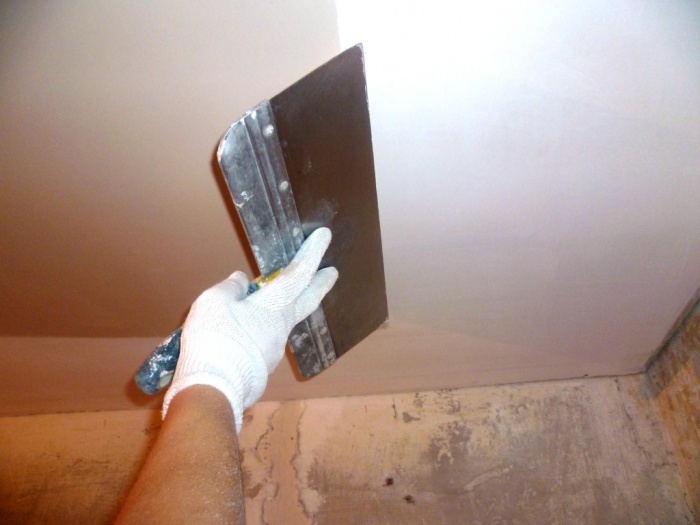
It is best to glue wallpaper together. One holds the folded cloth, and the second sticks it on the ceiling. The edge is combined with the chalk line and, gently pressing the palms against the surface, smooth it with a soft rag or brush. The sticker gradually moves towards the end of the panel, and the one holding it carefully unfolds it and monitors the coincidence of the edge and the chalk mark. After the entire sheet is glued, they pass over it again with a trowel, removing bumps and excess glue.
To ensure that the wallpaper does not peel off under the weight of its own weight, it is necessary to carefully select the glue. It is best to fix the wallpaper on a thick composition (glue is selected depending on the type of wallpaper). This ensures that the coating will last for a long time, and during the next repair there will be no problems with removing old wallpaper: just pick up the edge with a knife or spatula and pull the panel down. The remaining glue is washed off with warm water and soda.
In addition to classic paper wallpaper, you can use "liquid". The surface for their application is prepared in the same way as for attaching paper ones, but oil paint of any color is used as a primer. The coating is applied only on a well-dried surface.
They start finishing from those places where it was not possible to completely level the ceiling. First, one layer of “liquid wallpaper” is applied, then, without waiting for drying, the final finishing one. The coating is leveled in one direction with a Plexiglas trowel. Deficiencies are corrected immediately, without waiting for the surface to dry. Otherwise, the entire coating may be pulled behind the trowel.