We make an arch in the doorway ourselves
This step-by-step DIY article will show you how to build a drywall arch using a metal or wood frame. This is not such a difficult task as it might seem at first glance, and we will show it with our own example. You can build an interior arch in an apartment in any room: kitchen, living room or hallway to add originality to your home. The project can take up to two days if you have some experience in these types of work, however we can assure you that in the end the hard work will pay off.
Building an arch in a doorway is usually a one-weekend project, provided you use the right materials, tools, and techniques. The most important part is drawing the ellipse correctly, otherwise all the hard work will be in vain. Place screws on both ends of the drywall sheet and use a piece of string to guide the line. Using a longer piece of rope will increase the radius of the curve and make it steeper.
For work you will need:
Materials:
- Drywall sheets
- screws
- Metal guide profiles and racks / wooden profiles and plywood
Instruments:
- Protective gloves, goggles and breathing mask
- Roulette, square, pencil
- Electric screwdriver
- Stationery knife
- Metal shears/circular saw
Building a metal frame
First decide where to install it. In our case, we will build an arch inside the doorway. However, you can build it virtually anywhere inside your home. The next step is to measure the selected area. After that, you should begin to assemble the frame using either metal or wooden profiles. Each of the options has its own advantages: metal ones are perfectly straight and very light, while wooden ones are very durable. Use metal profiles for brick walls, and wooden profiles for wooden ones.
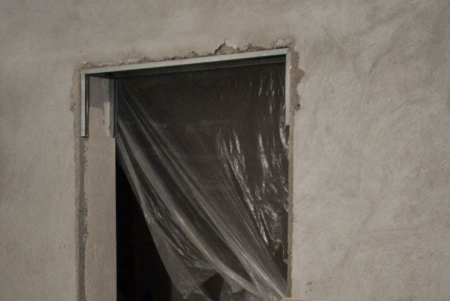
In the photo: a doorway with installed profiles
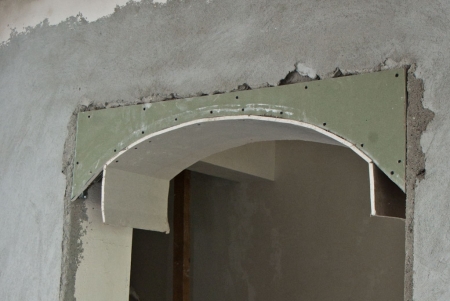
After you have drawn the arch onto the drywall sheet, cut it out using a jigsaw or saw. When performing this operation, make sure that you secure the sheet firmly, otherwise you may injure yourself or damage the material. The jigsaw blade should cut the sheet exactly along the drawn line, so be careful to get a good result.
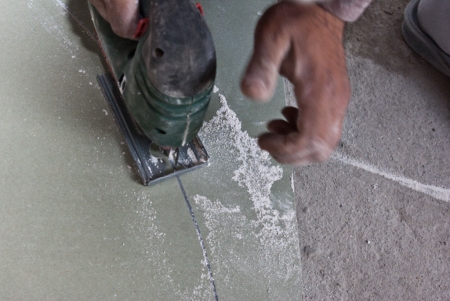
In the photo: the process of cutting an arch from a drywall sheet
In order to get the desired arch, you can make several attempts until you get the shape that suits your needs and tastes.
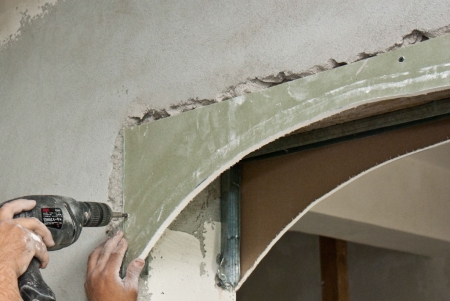
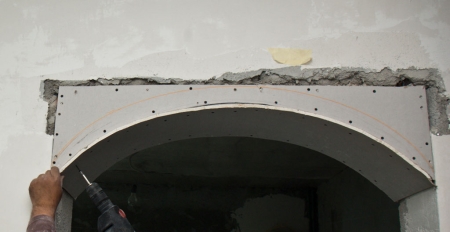
After you have fixed the metal profiles with screws, you can continue the process by installing the first sheet. To do it professionally, we recommend that you use an electric screwdriver with torque control. If you are installing 1/2" drywall then you should use 1-1/4" screws and if it is 5/8" drywall then 6 x 1-5/8" screws are best.
In the photo: installing a drywall arc plate on metal profiles
In this image you can see how you should attach the metal profiles to the concrete wall. It is necessary to drill holes with a drill, install dowels, and then screw them to the metal profiles with screws.
However, if you are installing them on wooden walls, you can only use 2” wood screws. The distance between the screws should be approximately 12 cm.
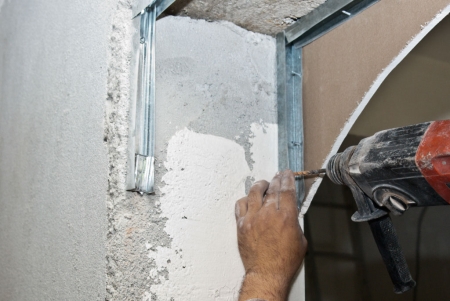
In the photo: attaching profiles to the wall
Continue by installing the second drywall arc plate in the same manner as in the previous step. Using an electric screwdriver, set the screws so that their heads are flush with the drywall surface, otherwise you will have to restore the surface with a special mixture.
Install screws along the entire frame, approximately every 15 cm, in order to firmly fix the arch.
Pictured: attaching the second arc plate
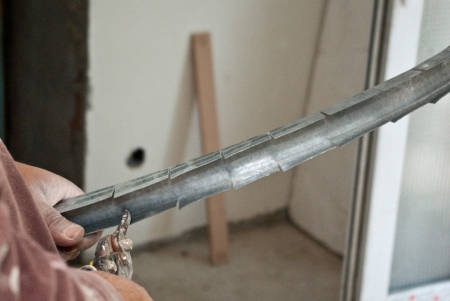
Thus, determine the dimensions of the arch, then cut a metal profile with exactly the same dimensions with scissors for metal. Remember to wear protective gloves to avoid cuts from sharp edges.
To make a curved profile, simply cut the sides every 12 cm. By doing this, it will fit any curved shape.
If you have cut the metal profile according to our recommendations, proceed to the next step. Remember to use protective gloves.
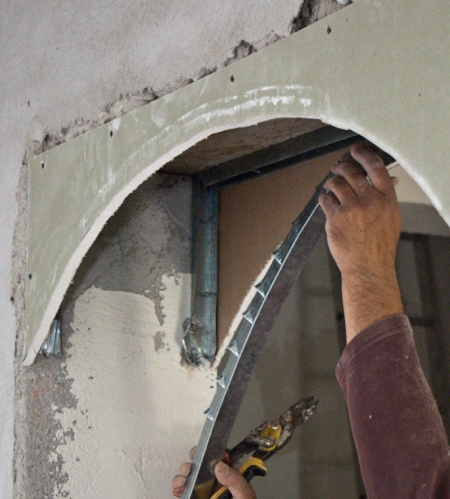
The curved profile should be installed as follows: start at one end and bend it to fit the arch. Next, attach it to the frame with screws.
After making sure that both ends of the profile are connected to the metal frame, attach the drywall arc plates to the metal guide profile with an electric screwdriver.
If you need to bend the profile more, just make more cuts on the sides.
In the photo: installation of a metal profile
The next step is very important for assembling your arch, so make sure the drywall sheet is well attached to the metal frame. Screws must be installed every 15 cm to keep the surface level.
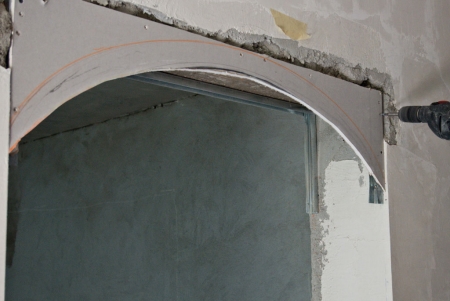
Remember that the frame is not complete until you install the perpendicular profiles that link the two curved parts of the arch. The perpendicular profile should be placed at the maximum point of both parts.

In the photo: attaching an arch to a metal frame
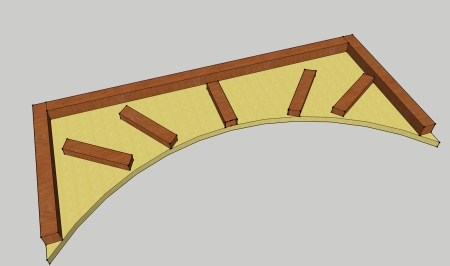
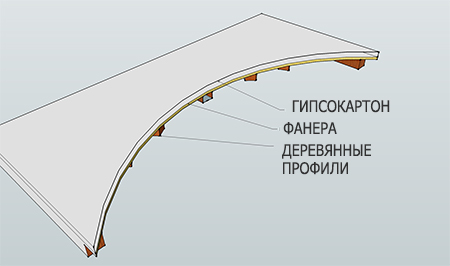
Construction of a wooden frame for the arch
First determine the dimensions of the doorway. Then subtract the drywall and plywood thicknesses (2 cm) to get the thickness of the wooden profiles. Use 1" plywood, draw an ellipse and cut with a hacksaw.
Installing the bottom cladding
Now you need to complete the project by installing the bottom cladding.
Measure the length and width of the curved arch with a tape measure. Next, cut a piece of drywall to these dimensions. After we got the rectangle, do the following: use a level and cut straight lines every 10 cm with a clerical knife to cut through a layer of paper. Having done this with the entire surface, turn it with cuts up. Use a level or T-square to make the cuts exactly perpendicular to the edges and parallel to each other.
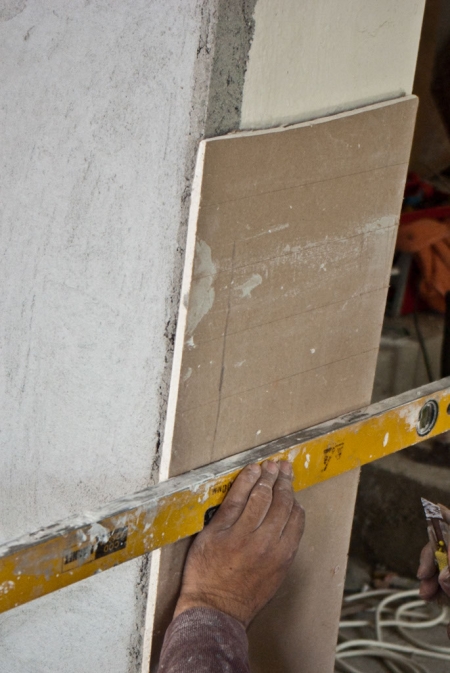
In the photo: notching drywall to create a bend
Try to use as little force as possible when bending due to the risk of damaging the sheet. Do this gradually and the drywall will take the shape of an arch.
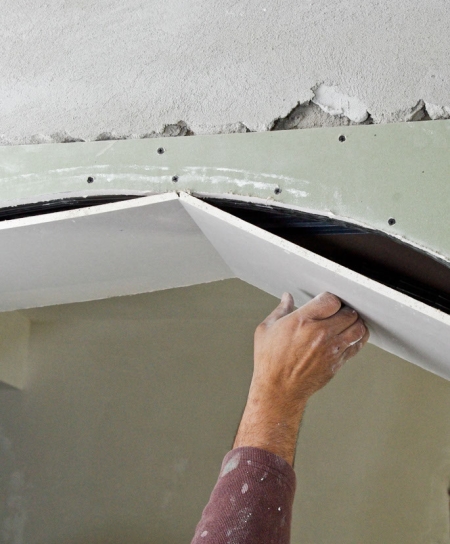
In the photo: installation of a curved sheet
The drywall sheet gets smoother as the screws are screwed in. It is important to make cuts every 10-15 cm or even closer to make the arch look good. Take your time and do everything carefully.
Drywall bending can be made easier by getting it wet, but this will only work if the arch angle is very small.
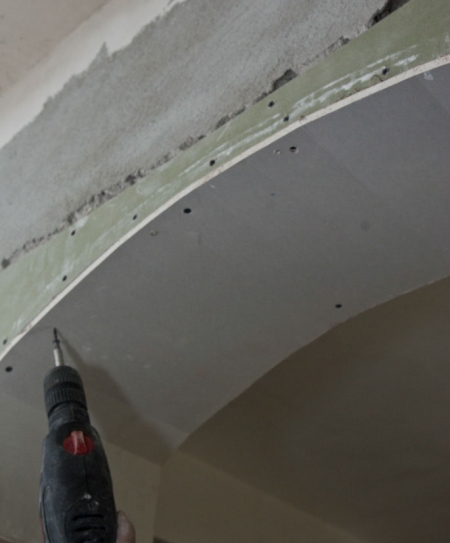
To the background: by screwing
To fix the lower part, the reverse technique is used: we start screwing with screws from the center in both directions. Make sure you work in good conditions: good lighting, ventilation, and you use safety goggles and gloves where the situation calls for it.
If you are going to install the arch where it can be exposed to water vapor, then purchase sheets of special moisture-resistant drywall (green sheets) that will counteract the damaging effects.
At the very end, pay attention to small details. Trim the edges with a utility knife.

In the photo: the excess is cut off with a sharp knife
Our arch is ready!