Do-it-yourself primer and putty of drywall for all types of wallpaper
Drywall is a versatile material, mounting which, get a flat and smooth surface. Every home master can learn how to putty plasterboard under wallpaper in order to perfectly prepare the coating for the final finish.
What caused the need for putty?
If thin wallpapers are pasted on drywall walls, then all joints and irregularities, places where self-tapping screws are screwed in will be visible at a glance. Even dense vinyl wallpapers, especially if they are made in light colors, under certain lighting will not hide the bumps and features of such a coating.
When replacing decorative finishes, sooner or later it will be necessary to remove old wallpaper. If they were glued to walls that were not covered with putty, then the drywall sheets will inevitably be damaged to such an extent that they will have to be completely replaced. It is for these two reasons that you need to cast aside doubts and completely putty the walls under the wallpaper.
Feature of drywall coatings
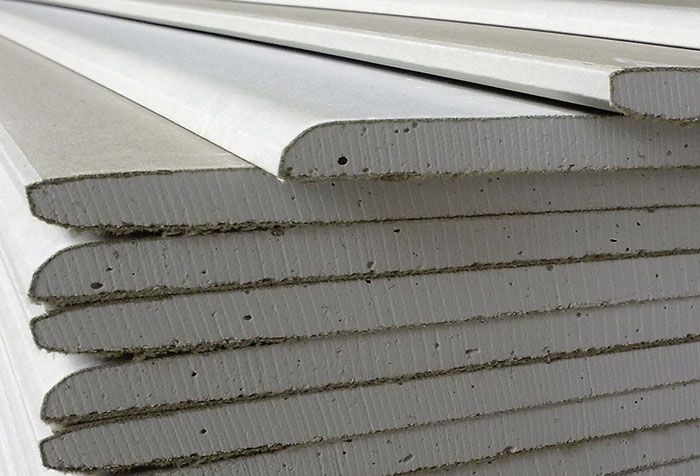
This material consists of a gypsum sheet bounded by sheets of cardboard. The dimensions of these coatings are always the same, they are 2.5 m X 1.2 m. For processing large planes, these sheets are interconnected.
The material has the following features.
- The surface of drywall coatings is smooth and even and does not require careful leveling.
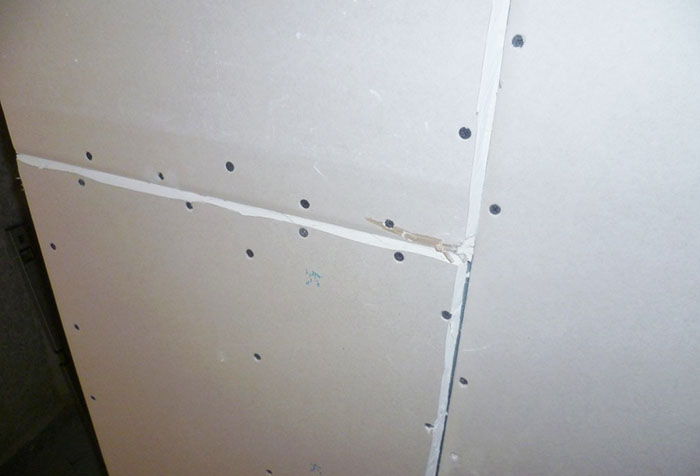
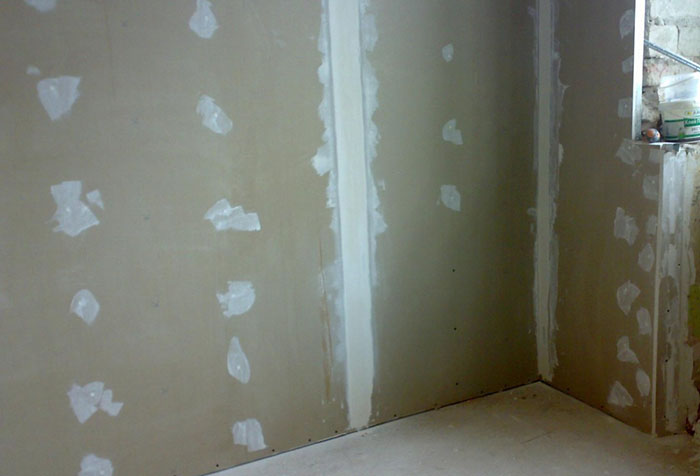
- Particular attention is paid to the joints between the sheets, which must be processed first of all, using a reinforcing mesh and special mixtures for putty.
- Installation of sheets is carried out using a large number of self-tapping screws. After they are recessed into the material, grooves remain that need to be sealed.
The choice of putty
If the home master decided to putty drywall with his own hands, he needs to choose a quality mixture. First of all, you should pay attention to the expiration date of the material and its purpose. For the treatment of internal walls, putty intended for external work is not suitable.
For some putties, the stage of infusion of a freshly prepared mixture is required. A homogeneous consistency of the mixture is achieved using a construction mixer or a special nozzle on a drill.
Features of putty mixtures should also be considered.
- Gypsum putty - afraid of fluctuations in humidity, it can crack because of this, suitable for dry rooms.
- Cement-based putty - not afraid of rising humidity, used for wall decoration in the kitchen and bathroom.
- Leveling compound - used to seal seams, dents and cracks. Due to the coarse-grained structure, it is not used as a finishing putty.
- Universal polymer putty - economical, used for rooms with any humidity, can be used for all stages of puttying, up to the finish.
Dry mixes are preferable to ready-made ones, as they can be used in small portions if necessary. When using ready-made liquid mixtures, they are collected in a separate container in the amount necessary for each specific case. At the same time, you need to carefully ensure that a large bucket of mixture purchased at the store always remains tightly closed. If the moisture from the container partially evaporates due to loss of tightness, the putty mixture will lose its plasticity.
Surface preparation for work
Before puttying drywall under the wallpaper, you need to thoroughly clean the surface of dust, check if the screws protrude above the top layer.
If you run a wide spatula over the sheet, you can easily notice defects on the plane of the sheet.
How to prepare the drywall surface?
- The protruding screws are pressed with a screwdriver, sinking them into the top layer.
- Too recessed self-tapping screws are removed and twisted in another place.
- Edges that do not have a factory chamfer are cut with their own hands at an angle of 45⁰ for better penetration of the putty into the seam.
- Peeled cardboard is cut with a sharp knife, a primer is applied to this place. .
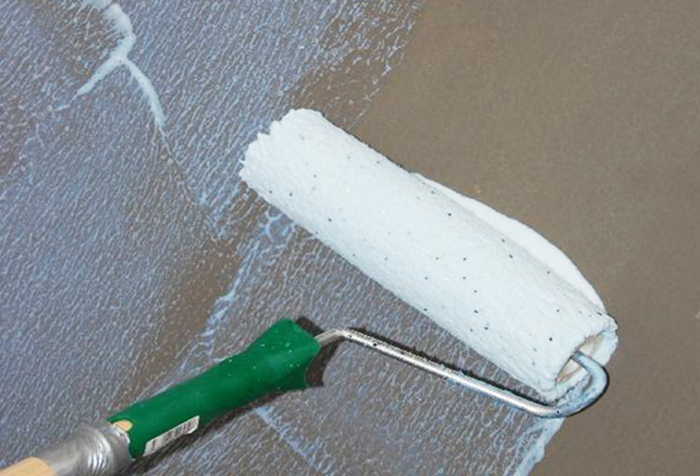
Primer application
The need for this technological stage is due to the fact that the primer reduces the consumption of subsequently applied putty. It is designed to increase the adhesion of putty to drywall. These jobs require a primer for highly absorbent surfaces.
It is a special liquid that is applied to the walls. Especially carefully the primer should impregnate the corners and joints of the surfaces. After drying, you can proceed to the main stage of puttying. If necessary, the walls can be primed again.
preliminary stage
Puttying drywall with your own hands provides for leveling the surface of the sheet, which includes operations such as:
- alignment of scratches, dents;
- sealing grooves from screws;
- putty joints and seams;
- corner patching.
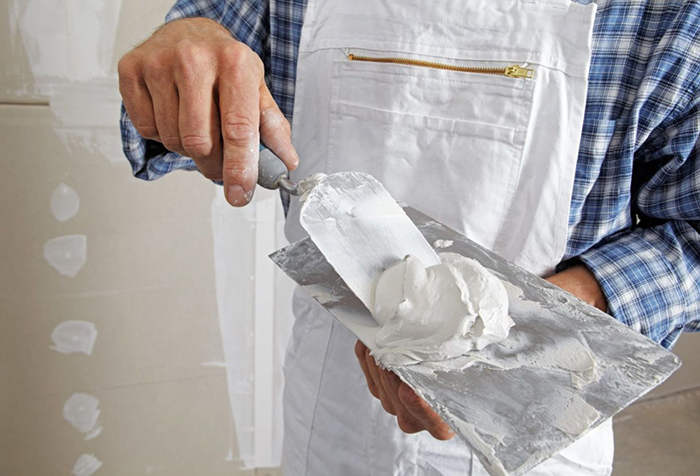
It should be noted that putty shrinks when dried, so it is applied in excess. The grooves from the screws are puttied with cross-shaped movements, which completely hides the heads of the screws in the thickness of the applied mixture.
The sealing of seams begins with the fact that reinforcing tape, the so-called serpyanka, is glued to all joints and corners. This operation is done very carefully, making sure that the groove runs exactly in the middle of the tape. After that, the actual puttying of the seam begins, it is carried out using two spatulas.
The mixture is applied from top to bottom with a narrow spatula, and it is leveled with a wide spatula, moving the spatula along the seam.
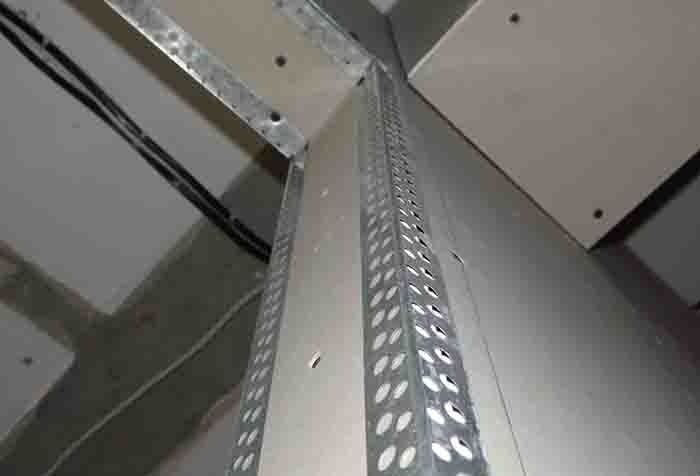
We putty the corners - a special approach
Puttying of external corners is carried out according to a special technology.
- A perforated corner for straight corners or a plastic profile for curved surfaces is applied to the place of its installation, the borders of the corner are marked with a pencil.
- According to the pencil marks on the drywall, recesses are made slightly deeper than the thickness of the corner.
- The recesses must be filled with a mixture for putty, press the profile into it a little deeper than the sheet.
- The mixture that has come out through the perforation must be leveled, more putty added and the profile completely hidden.
Internal corners are processed with a sickle. Both sides must be puttied in turn for uniform drying. After preliminary puttying, a primer is applied again to the walls rubbed with a grinding mesh.
The density of the mixture for this operation should correspond to the density of sour cream. At this stage, a finishing putty is used to obtain a flawless surface and a wide spatula. With wide, gentle movements, a layer of the mixture is applied to the walls. It should be as thin and as uniform as possible. Here you should not rush, the whole operation is carried out with great care.
If small sagging is visible on the drywall sheet, then they should be removed with sandpaper.
As soon as the layer of finishing putty is completely dry, it is cleaned of dust, and a primer is again applied to the putty wall.
If you need a flawless finish of plasterboard walls with wallpaper, you should carefully putty them in several stages. Using special mixtures, high-quality tools, following all technological operations, a home master can get an excellent result.