Do-it-yourself candlestick from a jar from baby food. Do-it-yourself candlestick from a jar Candlesticks from jars
The long-awaited long winter holidays will come very soon. A fabulous time of the year when you can meet friends and visit relatives. On a holiday, it is customary to set the table. It is very easy to give a serving a solemn look.

We will need:
- decorative pebbles (color and shape at your discretion);
- silicone glue;
- twine or ribbon;
- paraffin candle;
- glass vessel.

Sequencing:
- We wash the jar and wipe it dry thoroughly.
- In a uniform thin layer, apply glue to each pebble and glue around the neck, starting from the top row.
- Then we fix the stones in a checkerboard pattern, we do this over the entire surface of the glass jar.
- A ribbon or rope will serve as a decoration for the neck. The only thing is you just need to bandage it with any of the proposed materials.
- We insert a candle inside the vessel, after fixing it in the middle with a few drops of melted wax.
- If you want the light to be brighter, you should decorate a homemade candlestick with pebbles (by the way, pebbles, small shells and multi-colored glass fragments are suitable instead), half. Naturally, in this case, you need to glue the decor from below.

Let's fantasize a little by adding more thematic decor that matches the vegetable mood.


Do-it-yourself candlestick from a jar
In order to save time and facilitate the work, we will use a tool such as a gun for gluing objects.
We will need:
- twine;
- paper tape;
- wire;
- salt;
- tassel;
- glass jar;
- ribbon;
- sponge;
- a medium that imparts transparency to acrylic paints;
- spruce twigs, cones, berries, dry flowers.

Do you know how to do handicrafts?
Vote
Sequencing:
- We cover the surface of the table on which we will work with newspapers so as not to spoil it.
- We prepare everything you need.
- We apply a medium to the jar with a brush, giving the glass a matte shade. Leave for an hour until completely dry.

- After the time has passed, apply varnish on top, and wait until it dries.

- Wrap tape around the jar in a circle, leaving the bottom open.

- On a paper-free surface, carefully apply a layer of varnish and dip in salt as shown in the photo. You can use beads instead. Looks no worse.


- Leave the workpiece until it dries.
- We make a handle out of wire, but first we wrap the neck of the future candlestick with it.


- To give the craft an old style, we tie the circumference of the neck with a rope.
- Preheating the gun with glue sticks in advance, we fasten spruce twigs and a bow. In general, we decorate the vessel with everything that is at hand.

creative candlesticks
To implement the idea, any glass jars are suitable. The more unusual the shape, the more interesting the candle stand.


We will need:
- a bank (in this case, a small and low one is better);
- masking tape;
- pencil;
- scissors;
- golden ribbon;
- PVA glue;
- semolina;
- candle.
Sequencing:
- We draw Christmas trees and stars on adhesive tape, cut out the figures and glue them on the outside to the surface of the jar.

- Lubricate the entire circumference of the container, with the exception of the neck, with glue using a brush.
- Gently, sprinkle the workpiece with semolina on all sides and wait for it to dry completely.

- Now carefully remove the tape. As a result, the bank takes on a fabulously snowy look.

- We put the candle inside a glass vessel and cover it with small multi-colored balls.
- From the threads weave a pigtail, wrap it around the neck of the jar.
- The result is an unusually beautiful romantic candlestick from a jar.
Consider another interesting option. Even a child can cope with the decor. From an unnecessary jar, a real work of art turns out.

We will need:
- gouache;
- colored markers;
- nail polish of different shades;
- brushes;
- PVA glue.

Sequencing:
- We draw patterns on the jar with a marker, tracing the contours with black paint, and leave for half an hour until completely dry.
- We paint the space of each pattern with any colors. We leave for a few hours.
- We put a candle in the jar, when it is lit, the pattern will begin to flicker with beautiful multi-colored lights.
- If desired, the container can be filled with water up to half, so that the candle floats. Thus, the light will shimmer, filling the room with warmth.
- There is an easier option. Let's draw any patterns with markers or nail polish, corresponding to the New Year theme. Snowflakes, Christmas trees, snowmen or something else that the imagination tells. It also turns out very beautiful and festive.


Fairy deer
The main attribute of the New Year, dressed up. But decorating your home isn't just limited to her. Garlands, all kinds of luminous ribbons and, of course, candlesticks, will harmoniously complement the festive mood.

We will need:
- liter jar;
- salt;
- candle;
- PVA glue or universal;
- stencil;
- artificial snow;
- stationery knife and scissors.
Sequencing:
- We cut out the stencil very carefully (it can be easily found on the Internet).
- We coat the reverse side of the application with glue.
- We apply on a clean surface of the jar and glue.
- Before proceeding with the next steps, let the glue dry thoroughly.
- We spray the jar with artificial snow from the inside and outside.
- Pour sea salt inside (3-4 tablespoons will be enough). We try to place the crystals closer to the edges, freeing the center for the candle.
- We light it up.
Ready, it remains to enjoy the beauty, made by hand.


Turning an ordinary glass jar into a beautiful candlestick
First, we take the dimensions of the glass container and select a template based on them. Who draws well, he can depict any plot he likes.
We will need:
- unnecessary jar of glass;
- black acrylic paint;
- brushes;
- wide flat brush with elastic hairs;
- white acrylic balloon paint;
- isopropyl alcohol spray;
- cloth napkin;
- wire;
- cardboard (an empty unnecessary box will do);
- tea candle.


Sequencing:
Making a candlestick from a jar with your own hands for the New Year 2019 is not difficult at all. Detailed tutorial to help.
- The first thing we do is clean the jar from dirt and remove labels (if any).
- Degrease the glass surface with alcohol.
- Firmly press the pre-printed to the inside of the jar.
- Wrap with a napkin.
- Drawing, with a brush, circled in black.
- We paint over all the planes inside the glass vessel.
- After the first layer has dried, apply the next one.
- Let the paint dry completely.
- From wire, we make a hook for our candlestick. We wrap it tightly around the neck, bending the ends up, twisting them well together.
- We place the jar inside the cardboard box;
- Now let's create the snow effect. To do this, take a brush, dip it in white paint and hold it so that the pile is on top.
- We bend it and immediately release it. Thus creating the effect of flying snow. The main thing is that the spray evenly covers the surface of the can.
After complete drying, place in a vessel. If the container is large, you can put 2-3 pieces.
Making a beautiful candlestick from a jar with your own hands for the New Year is not difficult at all, the main thing is to want to. Video review to help.
The flame from a candle can create a soft and magical atmosphere in the room. In this light, it is very pleasant to talk and spend time in solitude. Not every person today has candles at home and beautiful candlesticks for them. But you shouldn't get upset. After all, a beautiful candlestick for the New Year can always be made with your own hands. At the same time, the most ordinary materials can be used in the work. You probably have coffee cans gathering dust in your kitchen. Such things are kept by the hostesses for no known reason. And yes, it's a shame to throw them away. Do not puzzle over what to do with the banks. Today, you can make beautiful New Year's candlesticks from them, which will become an original home decor for the New Year holidays. Therefore, in this article we will talk about how to make a New Year's jar candlestick.

How to turn a simple jar into an original candlestick
In order to make a candlestick from an ordinary jar, you need to make a template in advance. The template is cut out of paper and the drawing should be drawn on the outside of the can. In order for the template to perfectly fit the size of your jar, you need to measure the circumferences. The template you see below needs to be downloaded to your computer. But before you print it, you need to guess with its size. The picture needs to be enlarged or reduced. The cut out template should be joined together.
It is worth saying that you should place the template only on the outside of the can. It is not worth installing it inside the bank. To make a candlestick you need to prepare:
- Glass jar.
- Black paint. Ideal in this case would be acrylic, which is used for decorative work. You can also use special acrylic paint on glass.
- Small synthetic brushes in size #2 and #4.
- Wide flat brush - flute. The flute hairs should not be soft, but should have elasticity.
- White acrylic paint in a can.
- Isopropyl alcohol-sperey and dry tissue paper.
- Piece of wire. (It will be required in order to make a handle for hanging a candlestick).
- Cardboard box.
- Small candle. In this case, the candle should not stick out of the jar. An ideal option for this is tea candles.


Step-by-step instructions for creating a candlestick from a jar
New Year's candlesticks from cans with their own hands it's very easy to do. Here we will offer you step-by-step instructions and photos of such crafts. But first, everything should be told about the creation of such crafts.
- So, first of all, it is worth washing the jar with plain water and soap. Be sure to remove all labels from it.
- Wipe the outside of the jar with isopropyl alcohol. Remember that paint adheres better to a degreased surface.
- Now you should prepare the template. It should be inserted inside the jar. You need to fix the template in the bank. He must not ride inside the bank. For example, for this purpose it is worth using a string from a guitar. It will allow you to press the template tightly against the walls of the jar. You can also glue the template with small pieces of tape to the side of the jar.
- In work, you need to hold the jar with your hand. And the place where you will hold it with your hand needs to be wrapped with a napkin.
- The drawing should be outlined with black paint. Use a thin brush. If the entire design is transferred to the surface of the can, then the template can be removed from the can. Now paint over all the planes that are inside the drawing.
- It is worth saying that the first coat of paint will be uneven. And some places will shine through. But remember that this will be normal. The first coat of paint must dry. After it dries, apply the next layer. After applying the second layer, the jar should dry.
- Now it's time to make a hook for a candlestick from a glass jar. Wrap the neck of the can with the middle of the piece of wire. The wire ring should fit snugly on the neck of the jar. The ends of the wire should be bent up. They should be twisted together tightly. Their height will be 15-20 cm from the top of the candlestick.
- The jar must be placed inside the cardboard box. You need a box in order to spray artificial snow on a can. And when working, it should be used in order not to stain everything around. Spray the snow on the top third of the can.
- If another paint is used in the work, then a small amount of it should be laid out on a piece of foil. The paint from the foil should be taken with the end of the flute. In this case, the paint on the brush should not be very much. Now take the brush with one hand, and the pile should be at the top. With the help of the second hand, bend the pile away from you and immediately release. Make sure that the splashes of paint evenly fall on the surface of the can.
- When the snow dries, place a candle inside the jar. And if the jar has a decent volume, then 2-3 candles are inserted into it at once.

Finally
Now you know how to make candle holders from glass jars. Agree that they are not difficult to make. But it requires skills and the presence of a certain amount of material. Look at all the photo ideas of such flashlights that were made by other craftswomen.


The flame of a candle creates a magical, soft light that gives any room a mystical touch. They create an atmosphere of comfort, and everything looks more mysterious by candlelight!
Very often, coffee cans settle on the kitchen shelves and in the depths of the cupboards. It is not known why we keep them and why we do not dare to throw them away. This is how a few empty cans turn into a whole problem. And if there is a problem, then you need to figure out how to solve it. In fact, everything is simple. Just a few steps outlined below and there are no unnecessary cans. But by the New Year holidays, original candlesticks will appear in the house.
What to depict in a candlestick? Will the silhouette be expressive? But what about those who can't draw? You can forget all these questions, because in this article you will find a ready-made recipe for making a candlestick with your own hands along with a template.

Template for a candlestick "Town"
The template must be cut out of paper using the instructions, and draw a town on the outside of the jar. To save the template just click on the image below. The picture will open in full size, and you can save it to your computer. To change the template size, open the template file in a Word document. Measure the circumference of the can. After that, the template must be increased or reduced to the size you need right in the created document. After you cut out the template, both parts of it must be connected in one line.


Frequently asked Questions:
What size and type of jar to use?
You can take almost any glass jar. There are not many requirements for the future candlestick. The walls of the jar should be as vertical as possible and not too ribbed.
Doesn't the painted snow rub off from the candlestick when touched?
No, if you did not apply snow with gouache paints or, for example, toothpaste.
Is it possible to make the effect of painted snow inside the candlestick?
It's better not to. Most paints are flammable and there will be an open flame inside the candlestick. If there was an LED light inside, then the snow would not pose such a danger.
And the most important thing! Do not install the paper template inside the jar! It is very dangerous! The template should only be on the outside of the jar.

Materials:
- Glass jar.
- Black paint. Acrylic is best suited for decorative work. You can also use specialized acrylic paint on glass, but it needs a special thinner, and it’s difficult to work with it without certain skills.
- Small synthetic brushes #2 and #4.
- Fleutz, that is, a wide flat brush. The hairs of the flute should be sufficiently resilient and not too soft. Synthetics or dense bristles are best.
- White acrylic spray paint or the so-called Santa Snow. Santa Snow is artificial snow for decorative purposes. If spray paint is too expensive, and you don't plan to use it in the future, take acrylic in a jar or tube. I remind you that when using gouache paints, the snow will be smeared.
- Isopropyl alcohol spray and a clean cloth.
- Wire or wire hanger. They will be needed if you want to make the candlestick hanging.
- Old cardboard box.
- Small candle. The candle should not stick out of the jar. Tea lights are the best.
Instruction:


You can make several candlesticks by slightly changing the silhouette of the town and arrange them in several rooms. The feeling of a holiday will come to you as soon as the candles are lit.
A New Year's candlestick can be made in many ways. Why not add kitchen salt to the work. Fine particles will give the product a stunning shine. Due to soft lighting, the house will be filled with magic.
Advice! If there is no salt at hand, it can be replaced with semolina or rice.
Materials:
Twine;
scotch;
wire;
glue;
salt;
brush;
jar;
ribbon;
varnish;
acrylic medium;
sponge;
decorative elements: cones, berries, spruce branches.
1. Let's start making a candlestick from a jar for the New Year 2019 with our own hands. We lay out the necessary materials on the table, everything should be at hand.

2. We start by applying the medium to the jar. Set the container aside and let it dry. An hour will be enough.

3. Prepare a sponge. With its help, we apply varnish to the future candlestick. We do several layers and wait until the varnish dries.

4. Glue tape to the jar. It can be placed in any place, these areas will remain not covered with snow.

5. Paint over the remaining space with varnish, quickly sprinkle salt. Let the product dry.

6. Once all layers are dry, start decorating the candlestick. The master class will help you do the job without difficulty.

7. We take the wire, we wrap the neck of the can with it. We make a handle out of wire, attach it to the product.

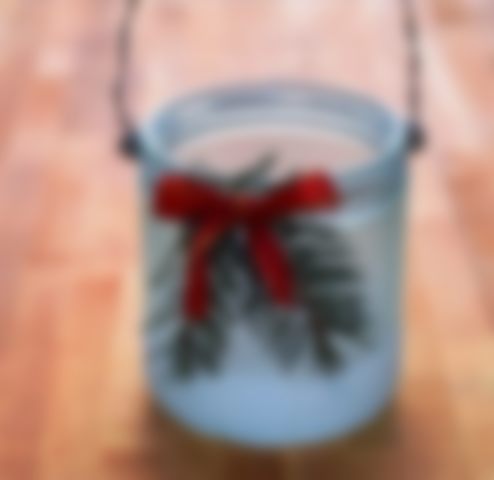
8. We wrap the candlestick on top with twine, attach spruce branches.


9. We make a bow out of the ribbon, glue it to the rope.


The candlestick is ready. Anything can be used as a decoration. It is best to involve children in the creative process. They will be happy to offer original ideas and find interesting elements for decorating the product themselves.
The candlestick looks amazing. It will fill the house with soft lighting, give the atmosphere a piece of magic.
Original souvenir

For the New Year 2019, you can make a stunning candlestick from a jar with your own hands. This will require a minimum set of materials and a little free time. Since the holiday is near, it's time to prepare for it. Why not make interesting decorations for your home.
Christmas decorations help cheer up, remind you of the upcoming celebration. Children together with their parents will take part in the creative process, get a lot of pleasure from it.
Materials:
Paper;
scissors;
banks of any size;
spray paint;
decor elements.
Execution sequence:

1. We take a sheet of paper, cut out any New Year's stencils from it. It can be Christmas trees, snowmen, Christmas decorations, snowflakes.

2. Glue the resulting pictures to the jar from the inside. We also paint the container with a spray from the inside. You can take any paint, but white and silver look the most advantageous.

3. Let the product dry. Then we remove paper stencils.

4. We decorate the souvenir at our discretion. Spruce branches, lace, ribbons, New Year boutonnieres can serve as decorative elements.
As soon as the product is decorated, put a candle-tablet on the bottom, set fire to it. The house will immediately be filled with soft light.
Note! Decorative elements must be placed slightly below the edge of the jar. Don't forget about fire safety.

The original candlestick will be a wonderful decoration in the house. In addition, it can be presented as a gift to a loved one. The recipient will appreciate the gift and find a prominent place in the house for it.
If you want to bring the New Year holidays closer, you do not need to abandon the idea. Why not give an ordinary day a piece of magic.
Candlestick with drawings
For the New Year, you can make various decorations with your own hands. In addition to the usual toys and garlands, it is worth making candlesticks from a jar. Original products attract special attention. Many needlewomen get to work and delight the whole family with amazing souvenirs.
New Year is impossible to imagine without candles. If you want to make the atmosphere festive, you do not need to abandon the idea. The creative process is very interesting, will help to spend with benefit. Even children will be happy to draw on glass and create a work of incredible beauty.
Advice! It is best to prepare a jar with a wide neck. This will allow you to easily light a candle.
Materials:
Candles-pills;
white gouache;
towel;
soap;
glass jar;
brush.
Execution sequence:
1. Let's start making a candlestick from a jar with our own hands. We put all materials on the table. This will allow you to quickly complete the work, and not be distracted by extraneous matters.

2. Prepare a glass jar. First of all, we wash it well with soap and dry it with a towel.

3. Decide on the design. We put any drawings on the bank. It can be Christmas balls, snowmen, spruce branches.

4. We remove the product to the side. We are waiting for the paint to dry. We put a candle in a jar, light it.

The souvenir is ready. In the dark, the drawings seem to come to life. Why not arrange a fairy tale for the whole family and create a magical atmosphere in the house. What's more, it has everything you need. It remains only to light a candle and enjoy the amazing spectacle.
Interesting ideas for making a candlestick
There are many ways to make a candle holder from a glass jar. It is not necessary to invent something new. Some options are so simple that even children can make products.


1. Floating candles. To get a candlestick, you need to pour water into a jar and lower a tablet candle into it. Ribbons, bright stones, spruce branches can be used as decoration.
2. Marine theme. If you like marine motifs, you can make a souvenir in this theme. It is enough to lower the candle to the bottom of the container and sprinkle it with sand. Shells, starfish, multi-colored stones should be laid out around the tablet. The final touch is the twine that needs to be wrapped around the jar. The neck should be decorated with ribbon.
3. There are many ways to decorate a souvenir beautifully. Techniques such as painting with stained glass paints and decoupage are very popular. In addition, the container should be decorated with lace, twine, bright stones. It all depends on the personal preferences of the needlewoman.


How to cut a glass bottle with a thread
Everyone knows that there are no unnecessary glass bottles. Needlewomen know that any things can be used to make original products. There are times when there was no jar or glass at hand, but you really want to create some kind of attractive composition.
It is necessary to look around the house, perhaps a glass bottle is lost somewhere. It remains only to cut it and can be used for its intended purpose. Not many people know that this does not require special tools. It is enough to prepare a regular thread and at home you can easily do the job. The photo shows a step-by-step master class.
Materials:
alcohol;
cold water;
scissors;
hollow-ware;
Glass bottle;
file;
felt-tip pen;
ordinary cotton thread;
matches.
Execution sequence:
1. Wet the thread with alcohol.

2. We mark the cut line on the bottle.

3. We wrap the thread around the bottle along the intended line.

4. We tie the thread, cut off the ends. We put a container with cold water on the table, hold a bottle horizontally above it, set fire to the thread. We constantly turn the bottle over. This will ensure uniform heating of the container.

6. As soon as the thread burns out, immediately lower the bottle into a bowl of water. From the temperature difference, the glass will crack along the line.

7. We divide the bottle into parts. We process each of them with a file.

8. As a result, we get 2 containers that we can use to create decorations.
This simple method allows you to get glasses for creativity. A little patience and free time, and you will be able to do the job without difficulty. It remains only to decorate the resulting glasses and decorate the room with their help. Even a beginner needlewoman will cope with the task and will be able to start the creative process.

New Year's decor attracts special attention. To make the atmosphere festive, you need to think through everything to the smallest detail. Original candlesticks will be a wonderful decoration of the room. Master classes with videos will help to bring any idea to life. The house will be filled with soft and subdued light, it will become more cozy and comfortable.
Currently, few people use candles for their intended purpose. Therefore, candlesticks have become rather a beautiful element of decor that complements and decorates the interior of the room. Recently, hand-made is gaining more and more popularity. It has become popular to make various crafts for the home with your own hands. And candlesticks are no exception. They are made from all kinds of materials - from twigs, tree bark, old pencils and even dough. Today we will talk about how to make a candlestick from a jar with your own hands.
Glass jar candlesticks
The easiest way to make a candlestick is from a glass jar. Any jar you like will work for this, you just need to remove the label. You can decorate the jar and put a ready-made candle there, or you can make a candle yourself by pouring wax.
homemade candle
How to make a candle yourself? It's not difficult, let's take a closer look at the whole process of making such a candle in a glass candlestick:
- First of all, prepare a glass container, remove the label.
- Prepare the wax. Cut it into pieces and place in a small saucepan.
- Put this pan on a steam bath and melt the wax, stirring it with a wooden stick.
- Put dyes and aromatic oils into the melted wax.
Important! Remember that the wax hardens quickly, so immediately pour it into the prepared glass container.
- Attach a wick to the bottom of the jar. This can be done by dropping a little melted wax on its end or using a special clip.
- Fasten the other end of the wick and carefully pour in the melted wax.
- When the wax hardens, the fixed end of the wick can be released.
Important! In the same way, you can make a striped candle of different colors. In this case, you need to fill in all the colors in turn and wait for each layer to harden.

Other glass jar candle holders
There are many different options for other glass jar candlesticks - choose which one to decorate with your own hands:
- An interesting and original New Year's candlestick can be built from a half-liter jar. To do this, you need to beautifully lay fir branches inside the jar and sprinkle them with coarse salt, which will imitate snow. Place a candle in the salt drift. The neck of the jar can be decorated with ribbon or braid. And on top of the jar, fix a couple of fir cones.
Important! For greater effect, the cones can be painted in some color, for example, gold or silver. This can be done with acrylic paints.
- Cut out any silhouette you like from masking tape. It can be a star or a heart. And then just paint the jar with gouache. You can also buy spray paint and cover the entire can. Then we remove the tape and get the original product. The border of the silhouette can be decorated with some shiny sprinkles. Insert a candle inside.
Important! If you paint with acrylics or gouache, then it is advisable to cover it with several layers of varnish on top so that the paint does not peel off.
- If you draw well, then the task is simplified - you can simply draw a beautiful drawing on the jar, and inside it you can put an LED garland instead of a candle.
- You can come up with a silhouette application that will encircle the entire jar. Silhouettes can be printed on a printer and glued to a jar using PVA glue. Then you need to cover the entire application with varnish. Draw small details with a marker, and paint the jar itself in a suitable color.
- Candlesticks decorated with semolina look very beautiful and unusual. They start from the bottom of the bank - they smear it with glue and dump it in semolina. Then they make patterns on the jar with glue and also sprinkle with semolina. When the glue dries, paint is applied and the product is dried again.
Important! There are a lot of glass jar decor options. They are crocheted with the most intricate patterns, pasted over with decorative pebbles, shells, tied with ropes, threads. There are no limits for your imagination - take materials that are more convenient for you and create!
Tin Can Candlestick
Very original products are obtained from cans. How to make a candlestick from a tin can with your own hands?
- Draw a pattern on the jar. You can print the picture and stick it with tape to the jar. From the inside, it is desirable to fill the jar with damp earth more densely.
- Using a nail and hammer, punch holes along the outline of the pattern. You can do this with a drill.
- Paint your product with spray paint. If you want a more saturated color, then apply several layers of paint.
- Place a candle inside.
Important! The larger the jar and candle, the more effective the light pattern.
Decorative candlestick from a tin can
If you want to do something unusual, then we suggest you try to make a decorative candle holder from a tin can with your own hands. To do this, you need to pick up a jar whose tin is thicker so that it subsequently holds its shape. Olive jars are best suited for these purposes.
Here is what needs to be done with her so that she takes the form of a beautiful craft:
- Cut off the top rim of the jar and remove the sticker, if any.
Important! When cutting tin, make sure that burrs do not form, they must be immediately processed with sandpaper.
- Cut a strip 3-4 mm wide from the top of the jar.
- Cut this strip into pieces of 2-2.5 cm. We will make brackets from them for connection.
- Bend at the strip an angle 3-4 mm wide. This can be done with pliers.
- Cut the jar vertically into strips 3-4 mm wide.
- Count the number of resulting strips and divide them into 6 equal parts.
Important! If it is not possible to divide exactly, then the extra strips can be cut off.
- For convenience, bend the strips down in 2 pieces.
- Turn the paired strips 90 degrees in different directions with the help of pliers.
- Then turn 3 more strips on each side.
- Collect them in a bundle. Pull and straighten.
- Take a bracket and wrap it around a bunch of strips. Pull gently and tighten with pliers.
- Collect two more bundles in this way. You should have three blanks.
- Now you need a twist tool. Hook the end of it into the bundle of your strips and twist the strip into a spiral. You need to twist in the direction from the center of the beam.
- We do the same with the other two bundles.
- There are 6 strips left in the bundle. Now you need to twist the third and fourth towards the center.
- The remaining strips must be pulled off from above and secured with a bracket. We twist the first and fourth from the center, and the second and third - to the center.
- The remaining strips are rotated with pliers by 90 degrees. Half one way, half the other.
- We divide them into three bundles, bend the central one down, tighten them with brackets.
- Those strips that are closer to the center, we connect at the top with brackets.
- From those strips that are bent down, we form the legs. To do this, we twist them in the direction from the center.
Now we need to paint our product with spray paint, and the decorative candlestick is ready.