How to make a wall-mounted clothes hanger. Do-it-yourself floor hanger: plywood, wood, pipes. Master class "Hanger made of real wood"
Do-it-yourself clothes hanger is a fruitful idea. Theater begins with a hanger; house too. In the sense of spirit, atmosphere, "energy". The reason is simple: the first thing a guest looks for is where to hang outerwear. And if the hanger is clearly home-made, but comfortable, stable and durable, a positive reputation for the owner is provided.
The second argument for making a hanger with your own hands is prosaic: purchase prices are clearly disproportionate to production costs. A homemade clothes hanger will save you quite a visible amount in the budget. It is not difficult to make it, it will take a little material, and waste from repairs will also go into business. The tool in most cases can be dispensed with by hand.
These factors are especially felt if a floor hanger fits in the hallway. In addition, it can also serve as a dryer if its design is frame, see below, because. On such hangers, it is convenient to hang clothes on hangers, and the hanger itself moves away from the wall. If the house managed to shield the dressing room, then the floor hanger is the best option. The cost of floor hangers is significantly higher than wall hangers, but there is nothing in the design that would not allow you to make a floor hanger yourself.
On the floor or on the wall?
It has already been said enough to make a choice, as long as there is enough floor space. However, let's finally compare how attractive a hanger is in a floor-type hallway:
- Clothes hung on hangers dry faster, do not stretch; the collar and lining are not torn.
- On a hanger approx. 1.5 m fits a seasonal set of clothes for the whole family, which will save on the closet and the area under it.
- A shoe rack is naturally attached to the floor hanger, which simplifies the work of equipping the hallway and saves its area.
- With correctly calculated dimensions of the hanger, neither the wall from the clothes nor the clothes against the wall are damaged.
- The mobility of the hanger does not interfere with the rearrangement of furniture; after moving the hanger, it is not necessary to seal the mounting holes in the wall.
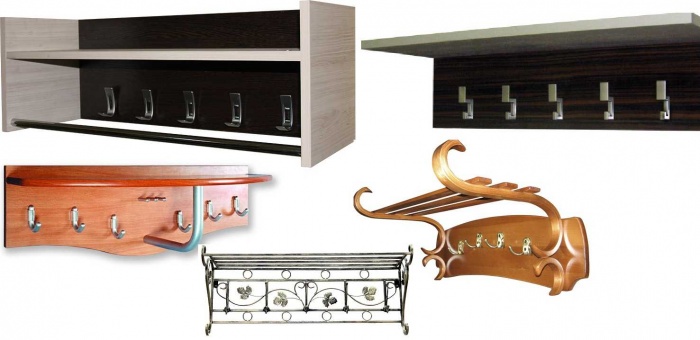
However, floor hangers are different, and not all of them are most suitable for living quarters. For example, for orders (from the old Russian “order” - office, office, office) floor lamp hangers, pos. 1-4 in the figure, it is inconvenient to hang clothes on hangers. Due to the small area of support, they are rolled, especially loaded with wet winter clothes. To emphasize the functional inferiority of the product, such hangers are called hangers, and they often go on sale under this name.

Types of floor hangers
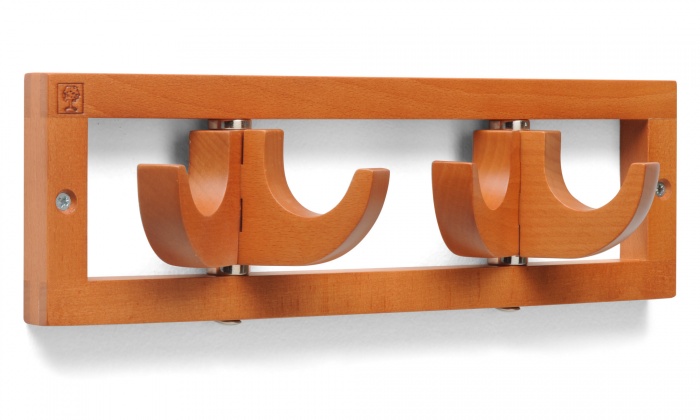
The best option is the same theatrical wardrobe frame hanger, pos. 5. In the version for residential premises, it is supplemented with shelves for hats, shoes and gloves / scarves; perhaps an additional tie rod, pos. 6. Disadvantage - the "legs" of the hanger get underfoot. In an attempt to get rid of it, hangers were invented - frames on a stand, pos. 7, but generally speaking, they fell even more than the orderly ones hung up. Another option is a hanger-frame without legs, leaning against the wall; we will remember this one. There are also folding frame hangers, but in everyday life they have almost no advantages.
If in the hallway with a place is generally tight, then a wall hanger is still more suitable. Simple wall hanger-sconce, pos. 1 in Fig., is as compact as possible, but not at all more convenient than the order, except that it does not fall from the next jacket to one side. Hanger-shelf, pos. 2 won't fall off if it's attached properly, and neither will hats/hats, but the wall and clothes rub against each other.

Types of wall hangers
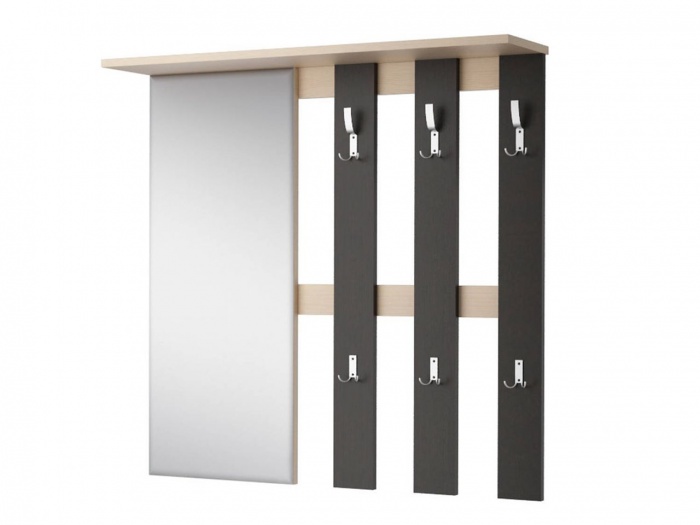
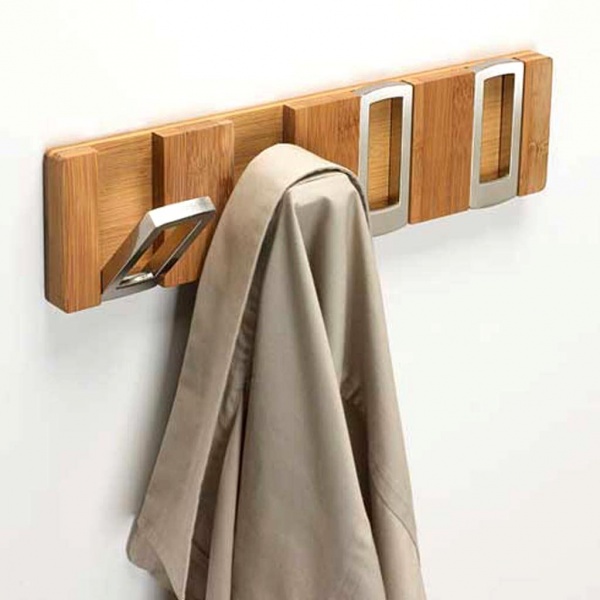
Wall hanger panel, pos. 3, saves the wall, but not the clothes. Most of all, leather things wear out on such hangers. Tanners jokingly advise: how, they say, to distinguish a sheepskin coat from full grain leather from it from reverse? The first, with everyday use of a hanger-panel, loses its appearance in 2 winters, and the second - in half a winter. Given the cost of genuine leather products, this is no good. Therefore, hangers-panels on the wall for expensive things are often supplied with soft upholstery, pos. 4. As for wall hangers with an openwork shield, pos. 5, then in this case its meaning is only decorative: it does not protect either things or walls.

Floor hangers with chest and bench
There are also floor hangers-panels with a stand, for example. in the form of a cabinet, chest or chest, pos. 1 in fig. on right. This is not the best option: someone will once put something on the lid, and with the clothes removed from the hanger it will be whisked to the floor. Much more practical are floor hangers-panels with a bench, pos. 2. A flower under the seat is a matter of taste for the owners, if only he survives there, but the shoe box or chest for accessories to care for her in the banquette drawer is the place.
Clothes and keys
Regarding hangers-panels, the amateur master has an additional opportunity, namely: to provide such a sidewall on the edge farthest from the front door. Perhaps not reaching the bottom, with a bevel or notch. The factory ones do not do this: the hanger should be designed for clothes sticking out from the side. One sidewall almost does not interfere with this, but it is not known how the hanger will stand with the buyer, and it is unprofitable to make right and left hangers.
What gives such an addition? Place for the housekeeper, invisible from the threshold. In the same place, on the side, there may be a dressing table or cabinet, but the main thing is that the master's keys will not catch the eye of a casual visitor, and they are in sight, according to criminologists, a serious factor in spontaneous illegal actions, without which, i.e. temptation, the visit of a not entirely trustworthy subject would have done well both for the owners and for him. You can, of course, make a key holder luxuriously designed and with a secret lock, but this is a lot of work and material costs. And so - a simple plank with hooks will do. Or just hooks screwed to the sidewall outside of the stowage section.
We will assume that a suitable design has already been selected, and let's take a look at how to make a hanger. Preferably wooden: the material is noble, natural, easy to process. Let's not forget other versions; more convenient in some cases. Let's start with floor hangers as the most functional.
floor standing
Lovers of crafting from the heart, having a milling tool for wood, can immediately take up the floor frame hanger with legs. Made of small-layer hardwood (oak, beech, hornbeam, walnut, birch), it looks chic, and it will take only 360 mm of the floor in width.
A suit hanger works well as a prototype, you just need to make it higher and move the trouser bar up so that you can hang coat hangers on it. Instead of a tie rod and handles, a shelf can be installed, and a shoe shelf is mounted below. Drawings of such a hanger are shown in Fig.:

Drawings of a wooden floor hanger
With the indicated other dimensions, the structural and overall width (dimensions 430 and 460 respectively) without compromising strength and stability can be increased by 1-1.4 m, i.e. the hanger will be already a family width up to more than 1.8 m.
About hooks and trempels
Bags, umbrellas, scarves are also left on the hanger, and a bachelor can also have a skirt with lingerie there. Sometimes life is life. It is also more convenient to hang clothes on hooks for a short time. Therefore, in frame hangers, sometimes runner hooks are put on the main bar (the former trouser bar in Fig; height 1360). They or hangers, depending on the need, are shifted to the side in a crowd. But the hook-runners under the fingers turn out at the most inopportune moment. In a hanger of this design and similar ones, the problem is solved simply: the main bar is for hangers, and fixed hooks are attached to the top board.
Pipes and profiles
Original hangers are obtained from round or shaped metal or plastic pipes, see fig. However, despite all the design tricks, their organic vices do not go anywhere. The same as the orderly hung. But high labor intensity is added: in order to hide the connecting nodes, you have to strain both your arms and your head.

Pipe hangers
It is better to make a square base of a floor lamp hanger from pipes. With the same withdrawn floor area, the distance between the support points increases by 1.4 times. If the base is still heavier, then the hanger up to 1.7 m high turns into a full-fledged hanger. 60 mm sewer pipes are most suitable.
A short master class in pictures on making the base of a floor hanger from pipes is shown on the next. rice. Pipe sections - 150-300 mm each, depending on how much floor can be given to the hanger. In addition to them, you will need 3 straight tees, 4 right angles and 4 plugs. Connections - on glue for propylene or PVC, depending on the pipe material. Weighting - sand or small gravel.

Making the base of the hanger from pipes
One of the comments on the original design begins with a question like this: "Why couldn't you just solder?". Judging by the fact that later in the same comment, 90 angles with a clear claim to professionalism are called bends (plumbing bends are oblique tees), another 2-3 and the same number of exclamation points suggest themselves to the question mark.
Nevertheless, the author of the product, albeit not knowing the plumbing terminology, solved the problem in a completely engineering way. The hanger does not need tight joints, and a tube of glue will cost much cheaper than renting a soldering iron for propylene. Which, moreover, you need to learn how to use, spoiling a fraction of the material. For greater reliability, you can reinforce the connections with phosphated (black) self-tapping screws: on black, their heads are not visible, and the strength of the hanger will not decrease.
Note: the pommel in the original design is also made of pipes, but, frankly, its design is not the same ... It would be better to drill inclined holes in the rack and insert some strong pins into them using the same glue; wooden, metal.
simple frame

Scheme of a simple floor-wall pipe hanger
A frame hanger made of pipes can be without legs, just leaning against the wall with an inclination. However, its slope must be negative. There must be at least 350 mm between the wall and the clothes on the hangers. If the slope of the frame is positive (the upper crossbar is adjacent to the wall), then the lower one will "leave" from the plinth by 500-600 mm. In a small hallway, this is a serious inconvenience. In addition, they will either cling to the lower crossbar with their feet and it will beat the floor, or it will have to be fixed to the floor, and this is really bad: any violation of the flooring is fraught with complex and expensive emergency repairs. Have you seen furniture for sale that needs to be screwed to the floor? Is that a special purpose, for example. rack. And then, they also try to get by with fastenings to the walls and, in extreme cases, to the ceiling.
A diagram of a frame hanger with a negative slope of pipes is shown in fig. The materials are the same: 60 mm straight sewer pipes, 90 angles and straight tees. Withdrawn usable floor area - zero. At the bottom there can be a shoe rack or a banquette. For fastening to the wall, in order not to drill a lot and do without expensive collet anchors, it is better to take a couple more tees: with their help, the holding beams - extensions are attached to the wall with a pair of self-tapping screws in dowels each.
wall
Simple hangers-panels do not require special analysis. How to make a wooden wall hanger, see for example. video.
Video: do-it-yourself wall hanger made of wood
Here we recall, firstly, the sconce hanger. Foldable, it can be very useful if a large company has gathered or the kids have returned from the yard at least squeeze it.
An example of such a structure is shown on the right in Fig. However, its creators were clearly guided by the principle: "Consumption is the basis of cash flow." The outer (folded) side of the flap bar is inactive and a locking mechanism is needed. And a separate hanger for every day.

Compact folding wall hanger
Meanwhile, folding wall hangers have been known since ancient Egypt. In the local climate, outerwear was worn occasionally, in bad weather, but after wearing it, it was necessary to dry it. It made no sense to keep a separate hanger for this in the regions where it rains and cold once a year, not every year, so they came up with the one on the right in Fig.
When folded, the compact wall hanger of the Egyptians was fixed with a cypress stick. Now, of course, you can put a ball retainer or just a hook. The main thing is that the hook hooks should be in 3/4 of the circle, then nothing will fall off them even with the bar folded back. And without need, the whole hanger looks like just a stick on the wall; you can hang bags, umbrellas, keys on hooks.
More about hooks
The original wooden hanger can be made without metal at all, not counting the fasteners. Do not rush to throw away the New Year's pine or Christmas tree (only the blanks will need to be turned upside down):
Video: original do-it-yourself wooden hanger
Best of all, such a hanger will look in the country, in a timber or frame house. Depending on the interior design - and in a city apartment. She will go to the bathhouse perfectly: the touch of steamed skin on metal is unpleasant, and to some extent even traumatic.
Hangers in the nursery
Probably, all children scatter wearable things. There is no need to especially scold them for this: without knowing chaos within reasonable limits, you will not accustom yourself to order. Who is against - answer Friday's question to Robinson Crusoe: "Why doesn't God kill the devil?"
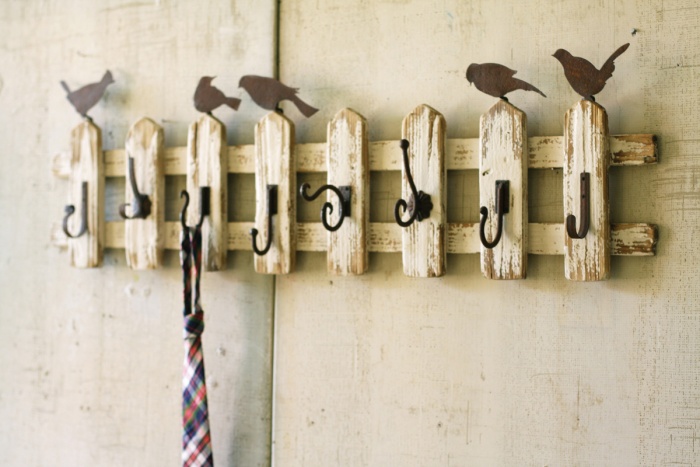
However, teaching children to handle things properly is necessary. Only a children's hanger, so as not to cause obvious psychological rejection, should look somewhat disordered. It is also highly desirable that the child associates it with a favorite game or hobby. Examples of wall hangers in the nursery of the "game / hobby" type are given in pos. 1 and 2 fig.

Baby hangers
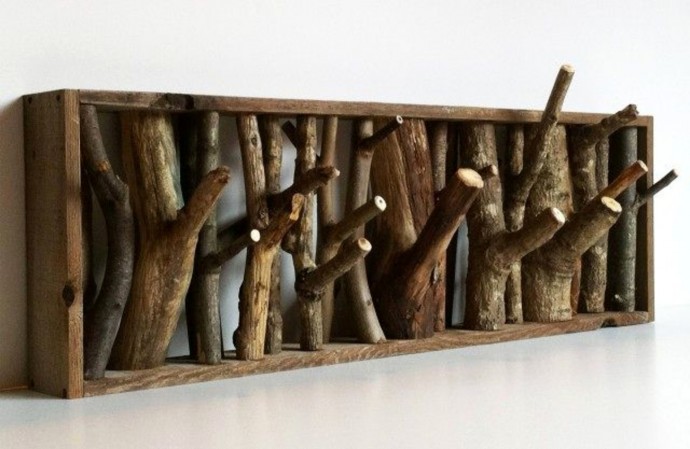
A universal method of this kind is a tree hanger, pos. 3. In the contour of a tree, as in any fractal structure, order and chaos interact and complement each other, creating a harmonious whole. Do not forget to just make the tree stronger, for example. from plywood from 12 mm, and, as it should, with a step of no more than 250-300 mm, attach to the wall with self-tapping screws from 6 mm in propylene dowels. A tree, after all, to climb on it.
Floor hangers in the nursery are undesirable for the same reason: well, they will climb anyway and crash. Therefore, if you already want a floor hanger in the nursery, you need to make one that you can’t fit on, which can be seen in pos. 4 and 5.
About cutting plywood
In any case, parents face problems that small ones don’t care about yet: material consumption and labor intensity. It is no longer easy to draw a complex contour along a grid on a solid sheet of plywood, then it must be accurately cut out, which is even more difficult. And in the end it turns out that 60% or 80% of the material went to waste, no longer suitable for anything. It is necessary, on the contrary, to make a children's tree hanger from waste. Or cut a denser whole sheet.

Assembling parts of a plywood hanger-tree
The method for this has long been known: element-by-element cutting and assembly. If the tree is plywood, for the full strength of the finished product, each part is recruited from 2 layers, leaving resp. folds and grooves, see fig. Fragments of blanks are assembled on PVA glue, wood glue or Express (liquid nails). If the assembly is on PVA, the fragments must be additionally fastened with small nails with a snake in increments of 100-150 mm with an indent from the edges of 30-40 mm.
They assemble a tree hanger on the same adhesives, but now each connection must be fastened with self-tapping wood screws with an envelope. Then the gaps and fastener heads (they must be drowned during assembly) are rubbed with putty from sawdust of the same plywood on PVA. Such a tree, even without painting, only under varnish, will look solid.
Note: just in case, we recall that before assembly, all the wooden parts of any wooden hanger must be sanded with fine sandpaper and treated with a water-polymer emulsion or PVA diluted with water three to five times. After impregnation, before further work, a technological break is made until the part is completely dry (1-3 days, depending on its size).
And one last thing about hooks
In the illustrations above, you most likely noticed curved wooden hooks and other hanger details. It is quite possible to make them at home. In production, dense, small-layer, defect-free wood or waterproof birch plywood (BS grade) is bent heated with steaming or dry, but these methods are too complicated for homework. Only bamboo is more or less simply steamed: the workpiece is boiled for half an hour or an hour in rapidly boiling water, after which it is bent by hand. In case of bending according to the template, the workpiece must be fastened to it quickly, before it has cooled down, with a wide cotton braid or a strip of natural tarpaulin.

Wood rasp
At home, it is easier to cut blanks of the required configuration from a sheet of plywood (any) or MDF of the desired thickness, or, twice or four times as many in quantity, from thin sheet material, in order to then gain as much thickness as required. Cut with a finishing allowance of approx. 1 mm. The cut blanks are tightly pulled together in a package in a carpenter's vice or in a locksmith's through gaskets made of thick plywood and processed with a rasp on wood to size, and then with a clean sandpaper. One rasp is enough, with flat and semicircular working surfaces, see fig.
The workpieces are assembled into parts in the manner described above. The end surfaces, if you need to hide the layered structure of plywood, are sealed with strips of self-adhesive film under the tree. After that, the part is varnished twice or thrice with water-based acrylic varnish; nitrolac can ruin the self-adhesive. It is not worth edging (edging) with a plastic furniture edge: you need to accurately select the groove for the edge anchor, which requires a milling machine, but on curved surfaces of large curvature and short length, the edge still does not hold well. And the details pasted over with self-adhesive, under varnish, from solid wood, even the master cabinetmaker will not immediately distinguish.
(Visited 21 674 times, 1 visits today)
A hanger in the hallway is a must. This is especially noticeable when the hallway is small in size and there is no way to install a closet in it. Now there are a lot of options for different hangers that you can choose from, but the most popular are wooden wall models of hangers in the hallway.
Hanger Selection Criteria
If you decide to purchase a clothes hanger in the hallway, and not do it yourself, you should find out about the criteria according to which this piece of furniture is selected:

First of all, a wall hanger should be as functional and practical as possible. To do this, all its components must be coated with special solutions that are designed to protect it from moisture and other influences.
Assortment of wall hangers
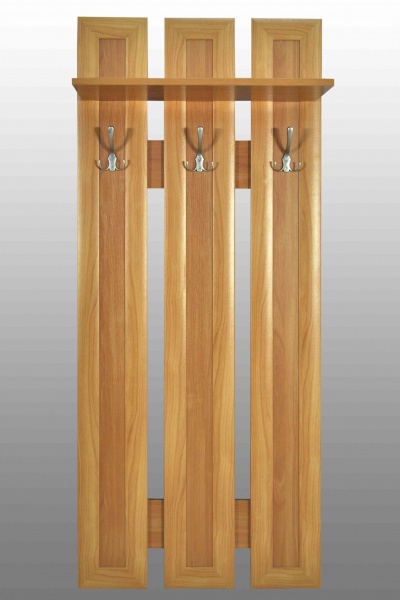
If we talk about the varieties of hangers that are mounted on the wall, then you can get confused in the proposed models. In the traditional version, this piece of furniture is a bar on which hooks are fixed. It can be positioned vertically or horizontally. The first option allows you to visually raise the ceilings in the hallway, so it is more in demand among buyers. And horizontal models are compact, and it will not be difficult to place them even in a small corridor.
Vertical hangers
This type of structure is made of laminated chipboard or wood with a length of 40 cm to 2 meters, depending on the model. The shape of this object can be any, for example, rounded, rectangular or curved.
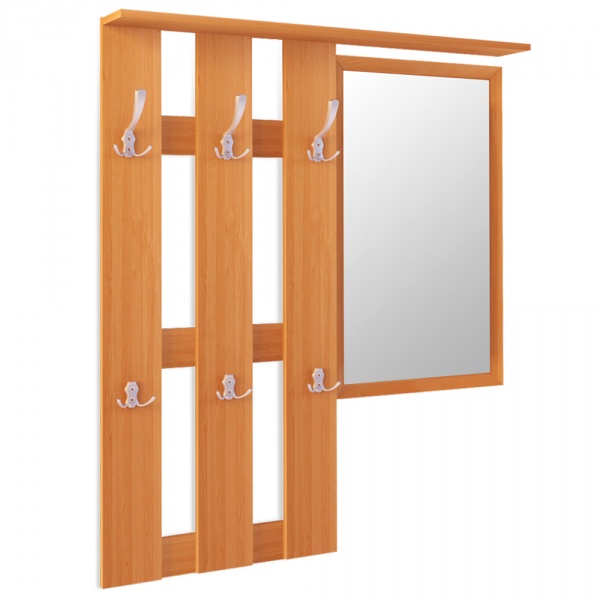
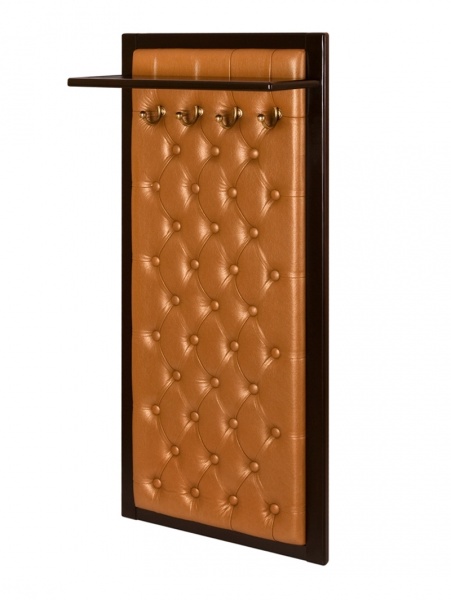
It is made from a single piece of wood, or from several lamellas, which can be equal to each other, or can be asymmetric elements. You can choose the option with a built-in mirror, and its location can be right or left. For classic interiors, designs upholstered in leatherette and having a quilted pattern are often used.
In terms of functionality, it is very important to have a shelf at the top of the hanger so that you can put hats. When choosing, be sure to pay attention to the number of hooks. They should be enough to accommodate all the necessary clothes. If you liked the model, but there are few hooks on it, then it is possible to install additional ones.
Advice! Before buying, you must carefully measure the free space that is intended for the hanger, so as not to buy a model that is not the right size.
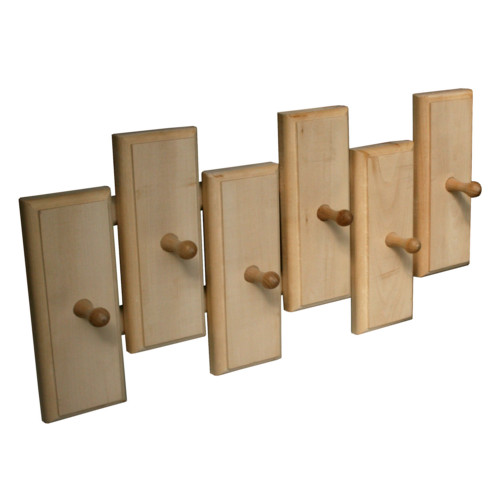
Horizontal and designer hangers
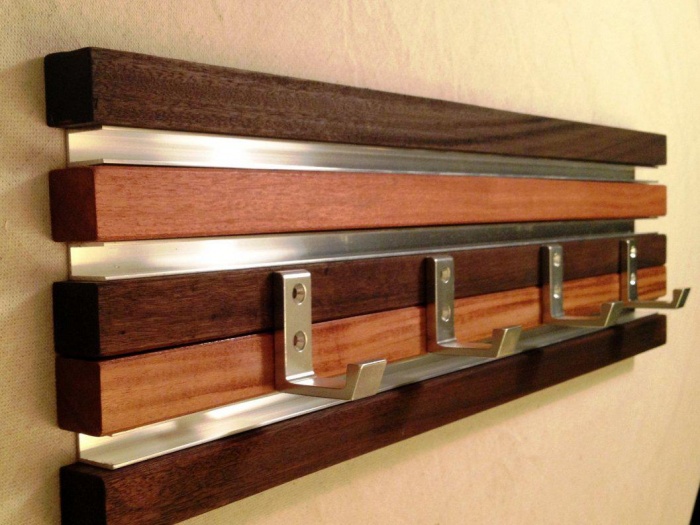
Such designs can visually increase the width of the wall. In addition, they are more compact and can be installed on a small wall. The basis of a horizontal hanger is a board with wooden or metal elements. Modern models use a combination of wood and plastic.
The imagination of designers knows no bounds, so now such designs of hangers are being created that were never even imagined before. Very interesting idea with folding hooks. Such hangers are made of wood, and can be made of metal. Their highlight is that the panel consists of many elements that, if desired, can be bent and turned into a functional hook.
For modern interiors, minimalist hangers are the best fit, which do not contain any unnecessary decorative elements in their design and are able to complement a room that is simple in design.
It is not necessary to buy an expensive design solution for the hallway, you can create a unique hanger with your own hands, the analogue of which is no longer found.
Making a wooden hanger with your own hands
If there are few materials and time, then you can create a wooden hanger according to your own ideas about this element of hallway decor. We will consider several options for making hangers with our own hands.
simple model
To make the simplest design of a wall hanger, we need:
- Material. It can be a processed board and hooks. As hooks, you can use something else, for example, knobs-buttons.
- Hacksaw
- Perforator
- Fixing tool
- Measuring instruments such as tape measure, angle and level.
- Pencil.
The simplest design is the bar with hooks. To do this, you need to take a board of the right size. The length depends on how much free space is available on the wall, and the width can be as desired by the master.
Important! The board should be free from defects and as dry as possible.
The surface of the board can be varnished or stained to make it more decorative. After drying, the required number of hooks can be screwed to the bar.
After the hanger is ready, several holes are drilled in the wall, their number depends on how long the board itself is. From the extreme hole on one side and the other, there must be indents of 5 cm. The holes are supplied with dowels, and the finished design of the hanger is attached to the wall.
Regarding hooks, we can say that everything that is at hand will do. For example, unnecessary wrenches will look original, which are first cleaned and polished. After that, they need to be bent and several holes drilled into the part, into which self-tapping screws are inserted for screwing to the bar. Instead of keys, ordinary forks also look interesting, but they must be steel, since aluminum ones are very fragile.

If possible, instead of hooks, you can use tree knots that are screwed to the bar. It is not necessary to do this in the same plane - you can arrange the hooks in a chaotic manner. This arrangement will give originality to the hanger.
More complex designs
In order for things not to get dirty on the wall and not get dirty themselves, the design of the wall hanger is being improved with their own hands. To do this, two strips are already taken, which are parallel to each other in width so that one is at the top point, and the second is at the bottom.
Between them, several planks are fixed with the help of self-tapping screws, which are twice as long, so that it is possible to qualitatively tighten the elements together. The width of the vertical parts may correspond to the width of the horizontal ones, or may be slightly less.
Additionally, it is possible to make a shelf for hats. To do this, a board with a width of 25 cm is mounted on top. It is attached to the general structure using metal corners.
Making another variety of a more complex hanger design:
- 7 pieces of bars with a cross section of 5 * 5 cm are taken. They should be about 30 cm in length.
- The boards are processed by a grinder, the corners are smoothed on them.
- The processed elements are covered with several layers of varnish.
- The bars are arranged in the shape of the letter "P" and are fixed on the wall in pre-prepared holes.
- In each plank, 2 holes are made with a pen drill. Cylindrical dowels are installed in them, painted to match the color of the hanger.
Important! The dowels are attached with PVA glue.
An interesting model of a wooden hanger is a design in the form of a tree. It is made from a large sheet of plywood, MDF or chipboard, on which the necessary outlines are applied with a marker and the part is cut out with a jigsaw. In this case, the ends must be processed and painted over or covered with an edge. The product is attached to the wall with self-tapping screws. The branches of such a hanger become like hooks.

It is not always possible and willing to install hooks on a hanger. In this case, you can mount a metal or wooden bar. It is important to remember that if the bar is too long, then it is imperative to install a jumper in the center.
You can also not spoil the wall with a mount, but create a minimalistic chrome-plated ceiling-type hanger. To do this, 2 flanges are fixed on the ceiling, into which pipe sections 90 cm long are inserted. Using the corners, we mount a horizontal tube between the previously installed sections. Thus, it turns out the ideal hanger for the trampolines.

Conclusion
A hanger in the hallway is a mandatory attribute and a functional element. What it will be depends only on the seasoned style and preferences of the owner. You can buy a ready-made design, or you can do it yourself. In any case, this piece of furniture will appeal to all family members.
You can do without a hanger in the hallway or corridor only if there is a large closet, and then not always. In private houses, it is more convenient to have "duty" clothes at hand - to jump out into the yard. Those that are mounted on the wall are more convenient: they take up less space. One thing does not please: the prices for worthy specimens are considerable. Therefore, we will tell you how a wall hanger is made with your own hands. The models are different, different techniques are used, but one thing unites them: they are easy to make, especially with detailed photos of the process and explanations. There are also diagrams and video tutorials.
From boards in the form of a tree
We need a hanger in our small hallway. I don’t want to buy the usual one in the form of a bar with hooks - I don’t really like them, and my little daughter won’t get it. Other options with a set of parallel boards are also not inspiring. There is a switch on this wall, so it won’t work without fitting, and it’s not clear what kind of look it will be. Therefore, it was decided: I make a wall hanger with my own hands in the form of a tree - a trunk, branches. It fits into the interior. I will treat the wood with stain and water-based varnish, the color should be close to the color of the front door.
So, two unedged boards 25 mm thick were bought at the sawmill. They are marked - on one trunk, on the other - branches.
We take an electric jigsaw and cut out blanks along the applied contours. Next is the turn of very dusty work - we grind the wood, at the same time adjusting the thickness of the joints with the "branches". Used a drill with a rubber nozzle and sandpaper. First large grain, then medium and small.

Sanding is a dirty business
After the result was satisfactory - it became smooth and the wood pattern showed through well - it was the turn of the stain. This is mahogany color, applied in four layers. After drying, they covered everything with a water-based varnish. Three coats were applied with breaks of three hours.

Nails 200 mm were used as hooks. They were cut to the desired length (different ones - longer for the upper part of the hanger, shorter for the bottom). The caps and the rod were polished for smoothness, and a thread was cut into the thickness of the board (25 mm) on the lower part. Holes were preliminarily made in the “branches”, “hooks” were screwed into them.

Now it remains to fix all the details on the wall. The walls are concrete, so we fix them with dowels. First we put the barrel, we drill holes through it. We set aside the wood for now, insert plastic plugs for dowels into the holes. Having put the "barrel" in place, we fasten it. Using the same technology, we fasten the "branches".

It turned out well, and the color almost exactly matches the door. The plans are to build a small shelf for shoes and bags. All costs for the manufacture of this hanger - about $ 6 for boards and $ 2 for nails, about the same amount was spent on dowels. Stain and varnish were, and consumption is small.
Simple wall hanger made of chipboard
The task is to make a cheap clothes hanger on the wall (for a rented apartment). Two boards made of laminated chipboard () called "furniture board" were bought in a hardware store. Two, because the price turned out to be low, and in the accessories department, where they were looking for hooks, they found good brackets for very little money. We use them for the second board - we will make a shelf for small things.

From the tool you will need a screwdriver or screwdriver, a drill, a set of drills. Still - a tape measure and a pencil - mark the attachment points of hooks and brackets.
After the boards were unpacked, there were spots of glue on them, some other, incomprehensible stains. All this can be eliminated with a solvent. We take a soft white (not colored) rag and wipe everything well.


Next, mark with a pencil the places for the screws. Remove hooks, drill holes. Drill - 1-2 mm smaller in diameter than the diameter of the self-tapping screw. The hole is necessary so that the work goes easier, and also so that the surface does not crack when twisting. We put the hooks in place.
It's time for the shelves. I set aside the same distances on one side and the other, attached the brackets, marked the holes for the fasteners. Drilled holes, installed brackets. All.

Now we mount it on the wall. The technique is the same, but with dowels: we apply, mark the attachment points, drill. Drill - according to the size of the dowel. We insert the plug of the dowel into the hole, put the hanger / shelf on the wall, fasten it.

This do-it-yourself wall hanger was made in two hours (together with a shelf).
Hanger with shelf
You can take the idea as a basis, use any other "hooks" and stops. This DIY wall hanger is made from two 25mm thick planed boards, two carpenter's squares and five hammers.

Wood needs to be dry, otherwise cracks may occur. Instead of squares, even triangular pieces of a similar board can be used. An important condition is the presence of a right angle. And instead of hammers, you can even fix knots or, for example, cut wooden hangers, and any hooks. This one is just a gift.


Spare parts - hammers and squares
The two boards must be the same length. An exact match is important. Having adjusted the length, we process the edges with sandpaper. There is a drill - we take a nozzle, fasten the emery and grind first with a large grain, then with a medium one. Then we start marking. First, mark where the stops will be attached. Divide the remaining distance by six, put marks - there are five of them. Just by the number of "hooks".

Ruthlessly cut off the handles on the hammers. We cut it slightly obliquely to get a slight slope.

Using a drill, make holes in the center. The drill diameter is 1-2 mm less than the fasteners used, the hole depth is not less than the length of the self-tapping screw.

Two boards must be connected at right angles. The installation step of the screws is 10-15 cm. We mark the places on the sidewall, transfer them to the end. High accuracy is required. We apply one to the other and transfer the marks with a finely sharpened pencil. We make holes according to the markup.

Drilling holes
We fold the boards at an angle of 90 °, connect them with self-tapping screws. First we twist the two extreme ones, then one in the middle, and then all the rest. The length of the self-tapping screws is at least 75 mm (triple the thickness of the board).

According to the marking, we drill holes for the hooks.

Installing the corner brackets. Since joiner's squares were used, there were no holes in them. They were drilled - two on the top and bottom on each bar. On one stop, 8 screws are obtained. We take them small - more than 20 mm, so as not to pierce the wood. Therefore, a large number of them are required.

The wooden wall hanger is ready. It remains only to paint and hang on the wall.

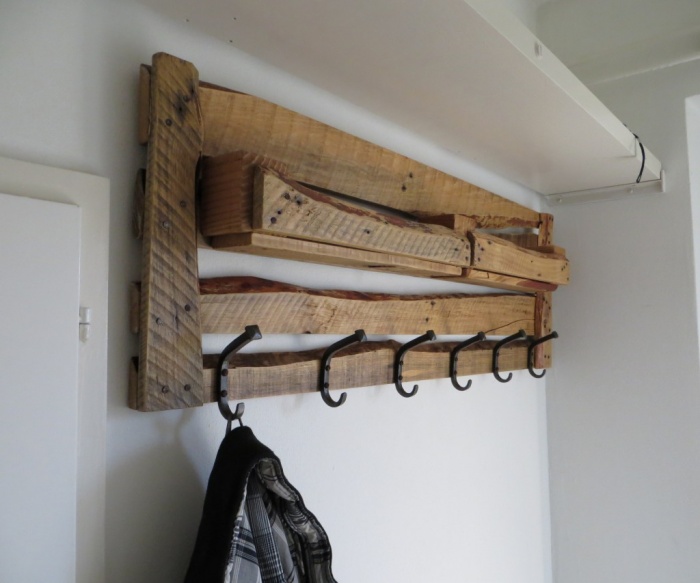
Based on this homemade hanger, other options were made.


With larger shelves
Video lessons
A few simple homemade hangers for "handy" in video format.
Drawings and ideas for DIY


Easy DIY hanger

It is the entrance hall that the guests see first. This is the face of the apartment, which characterizes the owner. For the best design of this site, you should remember about the space. A large closet in this case is not appropriate. Therefore, the actual question is how to make a hanger with your own hands.
About all the nuances of this process a little lower.

Characteristic
Placement of wall-mounted clothes hangers is possible in different places, and the hallway is no exception. It could be the kitchen or the bathroom. It is important to make this product an unusual addition to the interior. With the right approach, an ordinary hanger will become a bright accent made in the style direction you need.


The product must meet certain requirements. Stylish looks simple, lightweight, but durable design, with affordable and compact materials.

Mounting differs in the method of installation work. As you can see in the photo, hangers are distinguished by wall, ceiling, and mobile products.

Using wall structures, preference in manufacturing is given to corner structures. Designers advise to combine several types. For example, it can be a wall structure in combination with a support, for example, on the floor.


Important! Floor structures in the bathroom and kitchen are not used, as this is inappropriate. After all, hangers take up a lot of space, interfere with the rational placement of other necessary items.

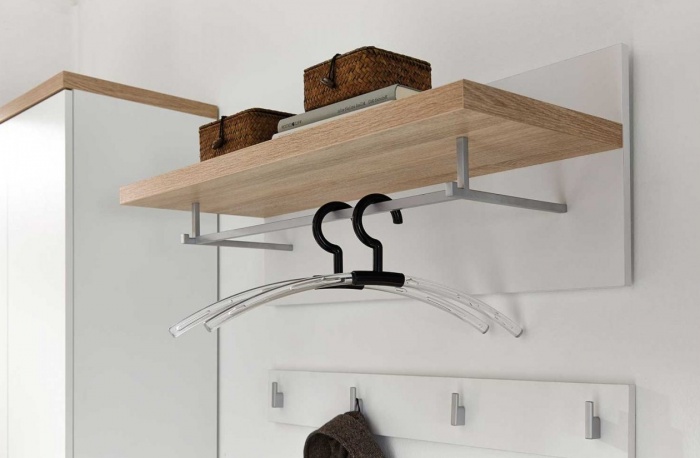
Products differ in the method of hanging. Known designs with hooks, with a bar designed for hangers. The first option will be the way out if you need to rationally place things, saving free space.


The advantage of the second option is quality. After all, you can hang things on a coat hanger without fear that it will wrinkle, lose its attractiveness.


Material selection
The most common option is to make wooden hangers. Forged designs are popular, but they do not always fit into the style composition of your interior.

Often a hanger is made of metal. Most often, hooks are fixed with glue, screws, magnets. You can use suction cups for this purpose.


It is necessary to decide for what purposes the product will be used. If you will hang outerwear, then the best option is to use self-tapping screws. After all, they will help to withstand a lot of weight.


The rest of the methods are used in the bathroom, or the kitchen. They will easily withstand towels, potholders.


The working process
It is worth considering what ideas there are on how to make a hanger. Let's consider the simplest option, which can be interpreted, combined, added in different ways.

Material should be prepared. Further, for the workflow, a jigsaw is required. For fasteners, you will need additional material, a puncher. You also need a level, corner, tape measure. For drawings, prepare a pencil, or a marker.


The simplest manufacturing option is a plank with hooks. You need to take a wooden board.

Note! For a quality product, you should carefully select a board. Its surface should be perfectly flat, without cracks, bumps. The material must be well dried. Only after following all these rules, you can start working.

You can notice a wooden plank with a sheet of chipboard, or MDF. It is important to consider the length ratio that will suit your individual needs.


There should be such a distance between the holes that the indentation is approximately 5 cm. For an even arrangement of the holes, it is necessary to use a building level. Dowels are inserted into their surface. Self-tapping screws are screwed into the base. Hooks must be attached to the bar. Depending on the fastening material, the strength of the entire structure is determined.

Instead of standard hooks, you can use several interesting variations of them. Often, old wrenches are used for these purposes. First of all, they need to be prepared for work, that is, cleaned, polished. Then they are bent, then screwed to the bar.


Steel forks are often used. They are also ideal for this purpose. Avoid choosing aluminum material as it is brittle in structure. With the right material, the teeth can be given a rather interesting shape.

Another option is wooden knots. Moreover, it is not necessary to place them exactly. Often a stave is drawn and the hooks are placed according to the position of the notes.


findings
A homemade product fits perfectly into the style direction of the room. Hangers are no exception. Such designs are quite easy to make on your own, improve the standard options, supplement them with your wishes and imagination.

Designers advise, they are not afraid to experiment, combine different methods, create something of their own. Such a thing will undoubtedly decorate your hallway, characterize you as a creative and talented person.


DIY hanger photo


Coming home, we try to quickly take off our shoes and outerwear. Simply tossing it on a chair or chest of drawers is a sure way to wrinkle your wardrobe and bring even more clutter to a small room. The problem is solved in 2 ways - by installing a closet or equipping a small hanger in the hallway, in case there is very little free space.
These small storage systems will be discussed in today's material. Today, picking up furniture for a home is not difficult, and regardless of the size of the room. But if it was not possible to decide on a suitable model, rely on your own strength, having previously prepared a sketch.
Do-it-yourself suspension manufacturing
For hospitable hosts - a product of paramount importance, it is she who is used to place things in the corridor. Traditionally, they place it in close proximity to the front door so that no one walks on the floor in dirty shoes. The variety of this furniture impresses even experienced designers. It is easy to choose a beautiful model that matches the interior. It can also be made by hand.

Wall furniture must meet 3 criteria:
- reliability;
- constructive lightness;
- convenience.
Before, it is necessary to decide in advance on its appearance and functionality, to clarify the material from which the walls are made.
In the case of drywall, wall furniture is not suitable. The best option is floor solutions. It is better to refuse from fastening to the surface of the finishing material initially, so that it does not have to be restored.
To attach products to such walls, special dowels, special tools and equipment are required. Without preparatory measures, the structure may not be able to support the weight of furniture and things, which is fraught with the fall of the structure.

In this case, floor models with a number of hooks look better. They do not fall as things are evenly distributed along the entire length. The main advantages of such products are mobility and minimum weight, with high reliability. For the hallway, the easiest way is to make a hanger with your own hands from wood, chipboard or fiberboard. The finished product is decorated with an ornament, a pattern, or simply painted with paint, opened with varnish.
Step-by-step instructions for making a wooden hanger
Natural wood traditionally holds the palm, as it is easy to give it any shape, in accordance with the prepared sketch.

The most beautiful hangers are made of wood. The structure of this wood is fragile, so when screwing the hooks, you must be extremely careful.
You must first prepare the following tools and materials:
- a set of wooden boards of suitable shape and size;
- screwdriver;
- sandpaper ("micron");
- jigsaw;
- hooks;
- hacksaw with small teeth.
Prepare wooden blanks of a suitable size. The material must be sanded. To form a perfectly smooth surface, sandpaper is passed over the wood. As for the finish, here you can be guided by your own taste - open the surface with paint, varnish or stick decorative paper on it. At the final stage, hooks are attached to the board (with a screwdriver).

wall mount
A do-it-yourself hanger in the hallway should not only be beautiful and comfortable, but also securely fixed to the wall, withstand the weight of outerwear. Experts distinguish 2 ways of fixing furniture.
- The easiest way is to drill the hanger through with self-tapping screws, thereby securing it to the wall.
- A more complicated method is to prepare 2 metal loops on the back of the hanger, and then use them to fasten the hanger.
The process is completed - the wall furniture is ready for use.

Before making a final decision on the manufacture or purchase of a clothes hanger, it is important to consider a number of nuances. First of all - the presence and area of a free zone for furniture placement. In the second - the style of the hallway and other rooms in the apartment or house. Thirdly, the height and location of the furniture.
Criteria for choosing a hanger for a corridor or hall:
- the product should visually echo or complement the main style of the room;
- for a classic interior, a wall hanger is suitable;
- decoration of minimalism will be a floor model.
Outdoor furniture is characterized by conciseness and lightness. If necessary, it can be quickly removed or moved to another place. This is one of the best options for a medium-sized hallway. Be that as it may, a hanger is an important practical attribute of any interior, regardless of size and style.

Such furniture takes up a minimum of space, but accommodates a large number of things. A separate hook is assigned for each wardrobe item, so there are no problems or inconveniences with finding the right things. Near the front door, you can organize a compact storage system in which there is a place for hats, umbrellas, and bags.
Fixing hooks and hangers
There are several basic ways of attaching hooks and hangers to the wall. You can go the path of least resistance and fix the product without special equipment. But connoisseurs of sophisticated and original solutions should think about this issue separately. In the case of wooden hangers, they are often limited to metal hooks. Such systems are attached to the wall with screws.

As for the hooks, they differ in the way they are attached:
- magnets;
- suckers;
- adhesive segments (horizontal or vertical orientation).
Their installation requires a minimum of time and practical skills, which is why they have gained immense popularity among consumers. But the elements listed above also have a significant drawback - they cannot withstand a lot of weight (it will not work to hang a sheepskin coat or a fur coat on them). Their scope is limited to headwear and light accessories.


