Big paper rose. Izolon flowers are masterpieces of building material. How can you make a rose. Method III
Good afternoon. Today I want to show you the fastest ways to make paper roses. And give ready-made schemes and templates for paper roses with your own hands. We will start with the fastest ways (which even a child can do) - that is, the lesson is suitable for kindergarten teachers, and primary school teachers. And then we will move on to more complex techniques for making paper roses. You will also find workshops on how to make large paper roses suitable for decorating holidays and wedding ceremonies.
Let's start making paper roses do it yourself. But first, let's make a small digression and see what practical application your future rose crafts will find.
paper roses
For all occasions.
Paper roses can decorate your gift wrapping. Moreover, you can make your own cardboard packaging with your own hands. Below I give a drawing of a box in the form of a piece of paper rose cream cake.

Paper roses can serve a table at a romantic dinner, anniversary, wedding.

Paper roses can become part of the festive decor at the wedding. Roses can become a bride's bouquet. Such a bouquet will be nice to keep the girlfriend who caught it.

You can give a bouquet of such roses to your relatives and friends. Wrap it in music paper and decorate with dew drops from the usual Soviet SILICATE GLUE.

You can decorate a wall in your house with them or decorate a holiday. Run a wire along the wall and tie paper roses and leaves on it.

THREE QUICK WAYS
Make a paper rose.
For those in a hurry, I put out at the very beginning of the article the three fastest ways to make a rose with your own hands from paper. These methods already have template stencils. You need to quickly circle, cut and assemble the rose.
The first way is to string layers of rose petals onto twine (or wire). Each layer is 2 petals (opposite in vector). Between them in the central round is a hole made by a hole punch.

Here is the diagram. You can place a sheet of paper directly on your monitor screen. The circuit will shine through on the surface of the sheet. Quickly outline the outlines with a pencil. Cut them out - and now you have blanks in your hands.

Now you need to do:
- 3 parts of the first size,
- 2 parts of the second size,
- 2 parts of the third size,
- and the middle part (No. 4).
I drew the middle part small, it did not fit on the diagram- you can leave it like that, but you can increase it. You can draw it yourself - in fact, it is an ordinary snail, one side of which looks like hand-drawn petals. Draw a spiral, snails, and then circle it with petal arches.
Or you can enlarge it on the screen mpa - to do this, press and hold the Ctrl key with one hand, and with the other hand turn the mouse wheel away from you (this will increase the picture a little) - achieve the desired degree of magnification - and circle this grown detail on a sheet of paper.
By the way, the details can be tinted with watercolors, walk along the edges of the petals - so that the rose has shades and halftones. This will make her look more natural.
The scheme for assembling a paper rose is shown in the photo below.

Step 1. First we string on a hole three big details- we shift from relative to each other so that the petals disperse in a circle. And we fix it with glue, glue the round middle parts of the part together.
Step 2 Then we string 2 parts of the second size- cross to cross, petals on 4 sides.
Step 5 On top of the glued rope, we lay our spiral-snail, which can be slightly twisted in our hands, wrapped so that it fits into the petal twist.
Step 6 Over this twist draw the center of the rose with a marker. Or stick bead. Or cut any paper stamen. Or roll up crumpled piece of colored paper and insert like a paper bead in the center. That is, what you have at hand, then use it.
Terry paper rose.
And you can also take any shape of the petals and also change their size to get a template for a new rose with your own hands. Here shaggy rose stencils with jagged edges of paper petals.

Lush rose with rounded petals.
Here in the picture I painted over the petals on purpose- as a hint that you can make a rose in which the color of the middle smoothly flows to the edges - from dark pink to light pink, as is the case with some varieties of natural roses.
You can increase the size of the template by pressing the Ctrl button on your keyboard and scrolling the mouse wheel away from you (or towards you to decrease it).
And then put a sheet of paper on the screen, and circle the translucent drawing with a pencil.

2 ways to make a rose
Crepe paper
Cut paper into rectangles. Then we put these rectangles on top of each other with corners (as in the figure below). Each time we put a drop of glue under the bottom - so that in this linear installation all the details stick together with each other at the corners. As a result, we got a toothed tape.
In the photo, this rose contains candy inside. But this is optional. You can use a ball of crumpled paper. And so, around this lump, we begin to wrap our gear tape. Finally got a button.
Now we need another gear tape - but already from semicircular parts. Ribbon with rounded teeth. We wrap the bud with this rounded ribbon of petals - and we get a plump lush paper rose.

Here is another quick way to make a crepe paper rose.
We fold the papers into even wide folds - so that they do not move relative to each other, we fasten them with a stapler.
We cut out a petal from this fold - large, medium, small - we get a pack of petals of each size.
We make blanks from green crepe paper.

Around the wire we make a cocoon from a strip of crepe paper. When the cocoon is plump, we start laying the petals - we spread each with glue in its lower part.
Start small, move to medium, and end with large. We get a lush paper rose from crepe corrugated paper.

As you can see, a rose is also quickly and simply obtained. A good way for those who stocked up on crepe paper.
From the manner of laying rose petals, as well as depends on their shape what kind of rose will you get. Below in the photo we see roses, also created in the same way- but they look a little different. Because the shape of the petals is different.
In nature, roses are very different - you can see that they differ in the shape of the petals. You can also create your own varieties of roses from crumpled paper. If each petal is crushed, squeezed at its top, then we get a new rosebud half-closed, rumpled terry variety.

Well, now let's move on to the painstaking techniques of creating a paper rose. There will be more complex, not so fast ways to make a paper rose. But this is only for the first time. Once you get the hang of it, you'll be able to twist these roses with your closed hands - quickly and without fuss.
paper rose
FROM A TWISTED STRIP.
If you take an ordinary DIRECT strip of paper, then it can be wrapped in a rose. Just start wrapping around the toothpick. First, we make the winding with an ordinary roll. And then we continue the winding WITH TWIST of the paper tape around itself.

That is, the tape is simply twisted - with an oblique bend. We do twists as we wind the tape around the stick.

Take right now, any unnecessary sheet of paper (draft), cut off a strip and try to twist it like this. Practice for a couple of evenings - and one day you will figure out how exactly it is BEAUTIFUL TO twist the tape - how often to turn the wrap, at what angle.
And also - in the same technique - you can also fold a rose from a straight strip of CREPE PAPER. Fold a long strip carelessly along in half. And in the same way wrap it around the base stick. It turns out lush tender paper rose.

Such roses decorate balls-trees in a pot. A foam ball is glued with crepe roses and stuck into a pin sticking out of a flower pot.

And here is a rose twisted from a red and green napkin. Fast and easy.

paper rose
SPIRAL METHOD
(and 4 varieties)
Can be taken not direct strip of paper and spiral paper strip. And then we will get a new rose model. Here's one.
But this model is complicated - it’s hard to twist and glue it here. Ordinary pva glue has nothing to cling to - although it works, you need to hold it with your hands for a long time. It is best to use glue from a hot gun in this model - then the work will go faster.

Here is a master class that shows how to make such a paper rose. Draw a snail spiral on a sheet of cardboard. Cut out. And we begin to twist around the stick. PAY ATTENTION, twisting does not start from the middle end - but from the edge.

This way to make a rose out of paper there are modifications- that is, options slightly modified. Let's look at them.
Modification of the spiral method No. 1 - PETAL.
We begin the twisting-assembly of the rose in the same way - not from the central edge of the spiral - but from the outer edge.

The arches of the petals on such a spiral rose DO NOT HAVE TO BE ROUND. You yourself can change the shape of the edge, and get new varieties of paper roses.
For example, here is a pattern with uneven Jagged edges of rose petals. Or a rose with a sharp petal.

Modification of the spiral method No. 2 - SQUARE.
And here another modification of this method make a paper rose. Here the spiral is not round - but square - and even with jagged edges. And this is how a rose comes out of it. Uneven as if alive, recently blossomed wild Rose.

Modification of the spiral method No. 3 - ADDITIONAL PETALS
And here is a spiral rose, which was glued around the edges with lush convex petals.
Step 1. Making a spiral rose. This will be the middle of our future lush rose.
Step 2. We prepare flat petals - 4 pieces of each size (small, medium, large).
Step 3. Cut each petal at the bottom. And we put the edges of the incision on top of each other, on the glue. So the petals become convex.
Step 4. Paste the rose with petals, first smaller, then larger.

Modification of the spiral method No. 4 - LACE
And instead of a spiral shape, you can take a ROUND. And also roll the round strip into a rose.
And to make it more elegant, you can take this round strip from a paper lace napkin, as in the photo below.

And you can also cut the same rose not from paper - but from felt, or even from a fluffy washcloth.

PAPER ROSES
From toilet paper rolls.
Here is a master class where a rose is made from recycled cardboard.
Step 1. A six-petal pattern is cut out of plain paper using the snowflake method. That is, we fold a square sheet as for a snowflake and cut it off in a semicircle). Unfolding we get a flower.
Step 2. We cut the toilet paper sleeves, level them on a wet towel - press, then dry
Step 3. We transfer the template to the core paper - then we fold the rose. The first layer is in a tight bud. We make other layers like lush paper rose petals.

ROSES FROM PAPER
SNOWFLAKE method.
I called this method a snowflake because the beginning of creating such a rose coincides with the beginning of cutting a snowflake out of paper. Here, too, you need to fold a sheet of paper into four, and then into a triangle. And cut out a semicircular module from it - when you unfold it, you get an octagonal flower.
Cut out 4 octahedron flowers. These will be 4 tiers of our future rose. Each tier needs to be changed.
- In the upper tier, we remove 4 petals with scissors (4 remain)
- In the second tier, remove 3 petals (5 remain)
- In the third tier, remove 2 petals (6 remain)
- In the fourth lower tier of the rose, we remove 1 petal (7 remain)
Now you need to glue these trimmed flowers into cups - for this, we put one marginal petal on the second marginal petal - on glue. We get cups - in 2 petals, in 4 petals, in 5 petals, in 6 petals.

At each cup, we bend the petals with a round pencil. We put cups on each other. At the bottom we glue a green paper bottom to them - they are attached to it with glue.
We fold the leaves into a fan. We form a flower.

And in exactly the same way, you can make a rose from the same sleeve toilet paper.

In this way, you can create any kind of paper rose. With torn petals, with round petals, with pointed ones.
Large paper rose
TECHNIQUE OF INDIVIDUAL PETALS.
You can make a large rose - where each petal will be the size of an A4 sheet. We buy colored office paper - a whole pack. Cut the petals - different sizes. We make each petal convex - for this we make an incision with scissors in its lower part - and glue the sides of the incision overlapping each other.

Then we collect color on a round paper base. We cut the folded sheet of paper into a fringe - and fold it into a roll - WE TURN A STAME OF A ROSE.

Depending on the shape of the petals, you can get different shapes of paper roses. Below you can see how your imagination can create new pink flowers.

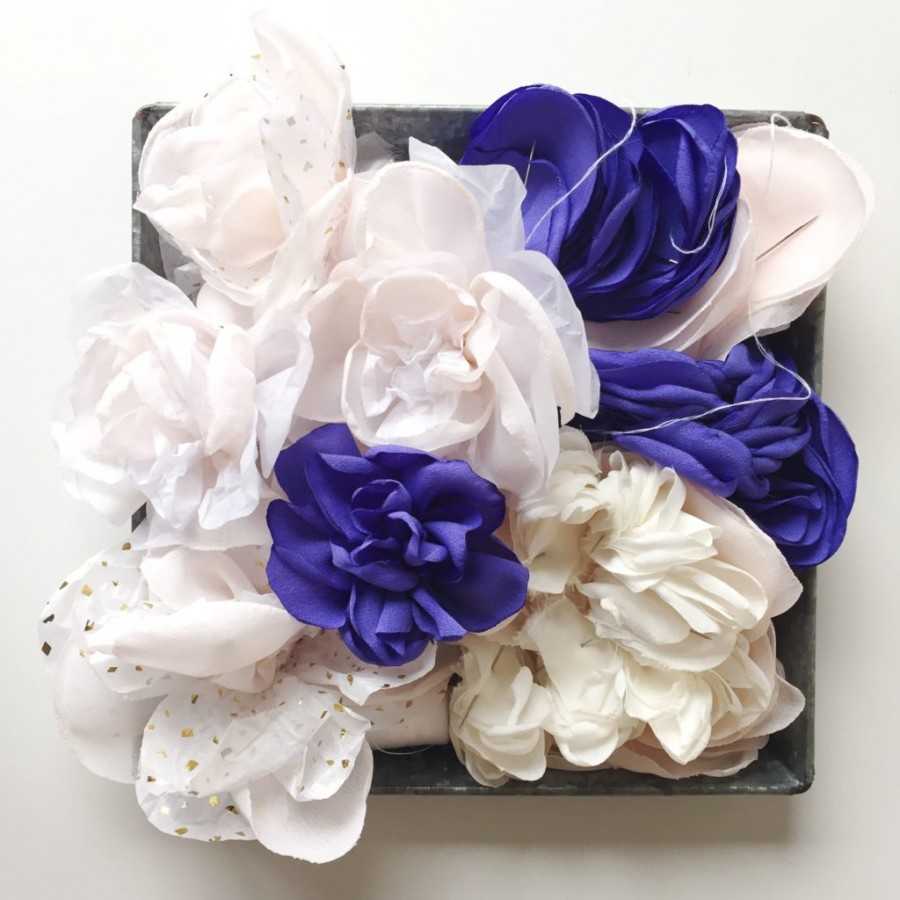
The same color of paper can create an interesting arrangement of roses if all the flowers are of different shapes and sizes.

Here are some ready-made templates for such large paper roses. YOU can come up with your own petal shapes. And look what comes out of it.


In such roaahs, it is not necessary to make a DOUBLE STAMPEN. Can do middle in the form of a spiral rose(lesson above in this article).
Or you can make the middle in the form of a DENSE BUD. Here in the master class below we see just such a rose. And you can see how exactly is such a boot assembled he is from a cruciform petal shape . Each side is a cross but rises up and crushes into a bud.

You can make a big rose for a beautiful photo portfolio. Buy a pack of pink office paper and collect your unique paper rose - so big and lush.


And from scraps of this office paper make the roses smaller. They can decorate the holiday table. Or glue the frame of the mirror. Make a decoration on a gift box. And also from such paper roses you can fold an artificial bouquet.
And no matter what shape you have leftover paper. To make such a rose, it is not necessary to take petals of a SYMMETRIC FORM. You can twist a rose from irregularly shaped petals.

Cut out three petals in the shape of a heart(these will be the edge petals). We cut each of them in the lower part - and put the cuts on top of each other overlapping - on glue.
And then we glue such convex petals to each other.

Three other petals of a semi-baranque shape- we twist into a roll - on top of each other. We glue the roll into the middle of our first three petals - using strips of paper. We get a rose.

These are the ideas for paper roses I have collected in this article. Now you have become an expert in this matter - and you perfectly understand that you can do all this with your skillful hands. So get down to business and let your world bloom with lush roses of happiness.
Good luck paper roses.
Olga Klishevskaya, specially for the site
If a did you like this article
And you want to thank our free author for this painstaking work,
then you can send any amount convenient for you
on the his personal Poison wallet - 410012568032614
It is impossible to imagine a holiday without beautiful flowers. It doesn't matter if it's a wedding, a birthday, an anniversary or a meeting of classmates. Live plants, unfortunately, quickly wither and it is difficult and expensive to take them in large quantities. It is better to make huge flowers from multi-colored corrugated paper with your own hands, ready-made crafts look realistic. They are bright, beautiful, and after the end of the general event, you can give them away to guests as original souvenirs.
Large paper roses
Decorating the hall with beautiful giant multi-colored roses is a simple matter that takes a few minutes. You can decorate them with a table, fasten to walls or ceilings.
What will be required:
- adhesive tape (preferably colored) - a roll;
- ordinary corrugated paper;
- drop-shaped template - 3;
- stencil "heart" - 8;
- sample in the form of a "leaflet" - 2;
- template in the form of "core" -1;
- pencil;
- elastic;
- special glue;
- wire;
- ready templates.
Master Class:
- Large corrugated paper roses will require special stencils that can be printed or copied from samples on the Internet.
- Petals. Carefully cut out 5-6 identical petals from a sheet of corrugated paper, circling the patterns “drop”, then “heart”.
- Leaves, cup. A sheet of green paper, cut out 3 small leaves, then a small cup of the future flower.
- Creating stems. If you are planning a giant outdoor flower, then skip the step. Wrap a piece of wire carefully with colored tape. Make sure it's tight enough.
- Formation of petals. Slowly pull the template from the center outward with your hands. So step by step you will form a cup of a petal. Turn the finished petal over and twist the edges to it using a pencil.
- Creating a button. Take the drop petal, carefully secure the edges by wrapping them around the end of the piece of floral wire using some duct tape. Wrap carefully! Fix so all the petals "drop".
- Blossoming rose. First, take the "heart", wrap it around the formed bud and secure it using duct tape. Also fix the remaining parts of the "heart" denser around the bud, moving in a clockwise direction until you get a full-fledged rose.
- Leaf attachment. Wrap each part of the piece of wire with green corrugated paper (fasten with glue). Take a leaf, also a green stem, already wrapped in ribbon. Apply them tightly and glue them. Repeat this with the rest of the green leaves.
- Adding a cup. Gently wrap the finished green cup around the base of the blooming rose. Secure with adhesive tape.
- Adding leaves. Attach each of the finished green leaves to a common flower stem. Use glue, a few paper clips, to hold the petals in place while the glue dries.
Here you have learned how to make a large crepe paper rose.
big peony
To make colorful huge flowers, it is not necessary to take corrugated paper. A normal A4 will also work. The finished flower will be more beautiful and realistic if you pick up double-sided thick colored paper.
Master Class:
Instructions for making large peonies will help even beginners to make flowers.
- Gently fold the sheet, forming an accordion.
- Fold again, in half, tie them more tightly in the middle with a thread.
- Make several similar "harmonicas".
- Connect the "accordions" by applying one layer in a ratio perpendicular to the other.
- Trim the ends and straighten them.
The size of the bud can be adjusted according to the "accordion". With ready-made flowers, you can decorate the interior of not only a festive hall, but also an ordinary room.


Huge chamomile
If you use corrugated paper, the finished chamomile will turn out to be tender and quite realistic.
Master Class:
- Making a flower begins with the formation of white main petals. Cut a strip of white corrugated paper from a roll, measuring a width of 5 cm.
- Lay out the tape, now cut into equal thin strips. Measure the width of each - 1.5-2 cm.
- Form petals from stripes.
- Stretch the middle of the resulting petals, giving them a natural convex shape.
- Take a piece of green paper and wrap it around a piece of wire. And fix the ends with glue.
- Lay out a sheet of yellow corrugated paper, mark a line there with a pencil, while stepping back a centimeter from the edge.
- Then, following the line, cut off the strip. Make shallow equal cuts along the length.
- Creating a core - wrap the workpiece around the tip of the finished stem. Glue the ends.
- Button assembly. Step by step, apply glue from below to the edge of the white petal and attach it to the finished base. Here's how to fix the rest of the petals.
- After collecting the bud, cut out small sepals. Do them with green paper. Fold a thin piece carefully several times, cut out an oblong leaf. Then lay out the tape and stretch the finished leaves on two sides. Glue the resulting sepals down at the base of the white bud. And fasten the lower part by wrapping it with a thin green strip.
- The stem and leaves are needed to create a large standing flower.
- Bend the collected snow-white chamomile petals to the sides.
- It is also easy to make a growth rose from corrugated paper, the difference is only in the shape of the paper petals and the features of the assembly.
Flowers bring positive emotions into our lives, brightening up dull everyday life. They are suitable for any style of interior. But fresh flowers are sometimes not freely available, and they fade very soon. So why not create artificial corrugated roses with your own hands? And also huge! This room design is insanely spectacular and absolutely affordable!
Unforgettable holiday, decorated with full-grown flowers
Room decoration with giant flowers, among which you feel like Thumbelina, is becoming more and more popular and widespread. Various celebrations, children's parties, themed photo shoots and even just the interior of shops are decorated with huge corrugated paper roses, foma peonies, sunflowers, poppies, etc.
Dreaming of a unique and unique wedding? Create stunning corrugated paper accessories with your own hands that your guests will remember for a long time.
Necessary tools and materials
Before you start working on a corrugated rose, you need to prepare:
- corrugated paper for a flower (preferably several, close to each other shades, for example, dark pink, pink, light pink or white, cream, very light green);
- green corrugated paper;
- balloon;
- paper napkins;
- PVA glue;
- scissors;
- green teip tape;
- wire;
- a metal-plastic tube (1.5-2 cm in diameter) about 2 m long.
- a hard spherical object, you can take the doll's head.
Making a giant corrugated rose with your own hands: a master class
The first step in our work will be preparing templates for petals of two different shapes. Cut them out of hard cardboard. Now, according to this pattern, we cut out our blanks from corrugated paper, making sure that the corrugation strips run along the petal. The leaves of the flower we have have 2 forms: drops and hearts. Drop-shaped need 8-10 pcs. (4-5 pieces each of the darkest and medium shades), with a heart - 18-20 pieces. (10 pieces of medium shade and the rest are the lightest). Let's put them aside and start building the "receptacle" of our rose.

We inflate the balloon somewhere to the size of your head. We paste over it with paper napkins using the papier-mâché technique, it is better to choose napkins to match the tone of the flower, but you can also take just white ones. We are waiting for the glue to dry. At this time, you can do the stem and leaves.
Leaves are cut out of green corrugated paper in the amount of six pieces, adhering to the natural shape. Lubricate the sheet in the middle with glue and lay the wire. We bend in half along the wire and put it under oppression. We do the same manipulations with all the leaves. After the glue dries, unfold them and wrap the wire 4-5 cm from the sheet with teip tape, twist 3 wires together and also wrap the twist with tape.
The stem of our rose will be made of a metal-plastic pipe. We wrap it with the same tape that was used in the manufacture of the leaves, attaching the cuttings in the right places. We bend the bottom into a ring for stability.
Now back to the ball. We cut the ball of napkins in half, put one half into the other and fasten them together. Let's start to give a natural shape to the corrugated rose petals. Gently stretch the edges to make waves, and form the middle by pulling the petal over the head of the doll prepared in advance.
Let's start creating an inflorescence. We glue the leaves from the center, starting with the narrowest and darkest, continuing in a circle with a slight offset relative to the previous petals and moving on to the middle ones in color. We continue, carefully filling the hemisphere. With the largest and lightest petals, we paste over the base from the outside.

From below we glue a short tube made of cardboard or metal-plastic, which is slightly wider in diameter than the stem. This is necessary so that we can attach the flower head. Paste the bottom with green paper and glue the sepals.
We put the flower on the stem, straighten all the petals and the corrugated paper growth rose is ready!
Paper flower: a quick option
But not everyone has the patience and skill to create such a complex flower. And how to make a big rose from corrugations without spending a lot of time?

There is also a much simpler and faster way. Take red corrugated paper, cut the roll in half. Expand and cut the edges on one side in the form of deep scallops. Take a thick wire or metal-plastic pipe and cover it with green tape. Now begin to wrap a strip of paper with scallops around the "stem", forming a flower. Tie with strong thread. Glue the attachment point with teip tape, adding sepals. Twist the petals with a pencil, slightly stretch in the center. That's all, it turned out to be the simplest corrugated rose to make!
Paper crafts are considered an interesting and useful activity for children and adults. A paper product can completely replace the original. First of all, this concerns the decor in the interior of the house. What can replace fresh flowers? Paper roses, made by simple and affordable means.
There are several methods for making paper flowers. Below are instructions with photos of roses from different papers.

Colored paper rose
It is easy to make a rose from colored paper. Both a child and a novice master will cope.

Would need:
- colored double-sided paper;
- pencil;
- PVA glue;
- scissors.

A square measuring 10 by 10 cm is cut out of the sheet. A spiral is drawn on one side of the square, then it is cut out along the contour. It turns out a curl, which is twisted, forming a flower bud. The remaining end is glued to the base of the rose.


A flower created in this way is suitable for a topiary or wall decoration.

Lush paper rose
To complete the craft in this way, you will need:
- colored paper for A4 printer;
- scotch;
- scissors.

Bend the sheet lengthwise into equal parts. Then each half is folded lengthwise again. Four equal strips are obtained, which are cut and glued to each other with adhesive tape.

After these manipulations, one long strip is obtained. For convenience, they take a pencil and wind a strip on it, glue the end to the base of the bud. In fact, a flower with lush petals comes out.

It remains to attach a pre-prepared stem. Having made several flowers in this way, you can get a whole bouquet of paper roses.

Corrugated Paper Rose
Corrugated paper roses look very gentle and beautiful. To make them you will need:
- corrugated paper;
- wire;
- scissors.


A strip 7 cm wide is cut out of corrugated paper. They begin to bend the edges according to the principle of twisting the pie. A strip with openwork edges should come out along one side.


Crepe paper rose
Many crafters prefer crepe paper. It is considered more pliable material. Its texture is soft and velvety. The master class below will help you figure out how to make a rose from crepe paper.

To complete you will need:
- crepe paper;
- hot glue;
- scissors.

The paper is folded into a multi-layered rectangle. In the resulting tape, two corners are bent on one side and the tape begins to twist. During this procedure, rounded bulges in the form of petals should be obtained. The end of the tape is glued to the base.


Such flower crafts are good to use as interior decoration. It is important to choose the width of the paper strip. With a strip width of 5 cm, the flower turns out to be small and neat, with 8 cm - voluminous and lush.

Large crepe paper rose
For more venerable craftsmen, a complex version of making a large rose from crepe paper is offered. The flower is assembled from individual petals.

To work, you need to prepare:
- green and red or pink crepe paper;
- ready-made patterns of petals, leaves and sepals;
- scissors;
- glue;
- stem sticks.
The paper sheet is folded several times, a template is placed on it, the details of the future flower are circled and cut out. Green tape is strung on a stick. The cut petals are glued to the stem in a circle.


In the same way, the details of the sepals are glued. For strength, the sepals and petals are fixed with tape. The skewer is glued to the middle of the sheet and bent in half. Attach to the stem with green tape.

A large rose for special occasions is ready. Corrugated paper can be used instead of crepe paper.


Rose and any paper
Using the finished template, you can make another flower product. Paper take any texture. It is necessary to prepare cut and numbered petal templates in advance. Additionally prepare:
- glue;
- scissors;
- finished stem.


To give the petals a wavy edge, it is worth smoothing them with scissors. Fold each leaf in half.

Petal No. 1 is twisted around the stem and fixed with glue. The stem is removed for now and work with the petals continues. Petals No. 2 and 3 are glued around the first petal. Then there are petals No. 4, 5, 6, 7, which are fixed on top of each other. Lastly, a three-leaf part is glued.

Having made a hole in the base of the flower, the stem is threaded. An elegant decoration is ready.

Rose from napkins
It is customary to decorate the festive table with paper napkins. To impress guests, you can easily make roses from single-layer napkins.


The napkin is completely unfolded, taking a square shape. The edge on one side is folded back by five centimeters. Roll carefully.

With one hand they hold the bent edge of the roll, with the other hand they twist it, giving it the appearance of a stem. In the middle of the stem, the lower edge of the napkin is bent. This is a leaf.

Continue to twist the stem to the end of the roll. For the stability of the product, you can spray the end of the stem with varnish.

Rose from a single-layer napkin
Another option for making flower crafts from a single-layer napkin. The flowers are small, but strongly resemble a fully opened flower. In addition to a napkin, you will need:
- scissors;
- stapler.

The napkin is folded in half several times until a small square shape is obtained. Using a stapler, fasten the workpiece in the middle.

Cut out all four corners of the square, giving it the shape of a circle. Now each layer of the napkin is folded to the middle of the circle and the edges are carefully folded over, giving a waviness to the future rose.

The little flower is ready. Blanks of this type are often used to decorate the "tree of happiness". Using wire in the form of a stem, you can make a rose standing in a vase.

Paper roses are a great addition to your home decor. Based on one of the presented ideas, you can create your own unique flower miracle. Having learned how to create flower products, the craftswoman will have no problems choosing a gift for friends and relatives.

Flowers are made not only from paper. Beautiful roses are made from fabric. Usually used satin, organza or tulle. Knitted roses look no less beautiful. By becoming a paper flower maker, you can improve your skills by taking on more complex work.

Photo roses from paper


