Homemade hanger for the hallway. How to make a floor clothes hanger with your own hands. Making a suit hanger
25.11.2016 23:54
Not every home has a place for a full-fledged dressing room or a spacious closet. And even if there are any, it does not mean that there is no problem where to put on a bathrobe or handbag - a hanger at hand will never be superfluous.
The most simple, stylish and at the same time cheap idea is to make a hanger from a tree trunk or branch with your own hands. Rustic style is very fashionable today - residents of big cities tend to bring a small piece of wildlife into their interior. And even homeowners living outside the city prefer the atmosphere of country life both outside and inside the house.
Quite a few trade furniture brands turn their design into rustic shapes and textures, so is it worth spending a decent amount to purchase a stylish piece of furniture if you can do it yourself without much effort.
Below you will see hangers created by designers as replicas, imitation natural wood trunks and hangers made from real wood.
A floor hanger made from a tree trunk in a bedroom or hallway will not only solve the problem of where to hang clothes or accessories, but will also become a nice accent in interior design.
A suitable trunk can be found in the nearest park or forest. It is enough to cut unnecessary branches with secateurs, keeping their "hooks" at the base of the trunk of the desired size. You can peel the trunk from the bark or leave it in its natural form - it all depends on the intended design.
In addition, a wooden hanger can be painted in any color in the interior tones or played in contrast.
For a floor hanger, it is enough to come up with a solid base as a weighting agent - it can be a heavy wooden cut or a support.
If you managed to find a sufficiently high trunk - the hanger can be installed in the entire height of the ceiling. Here you will need the accuracy of the calculation, but you will not need additional fasteners.
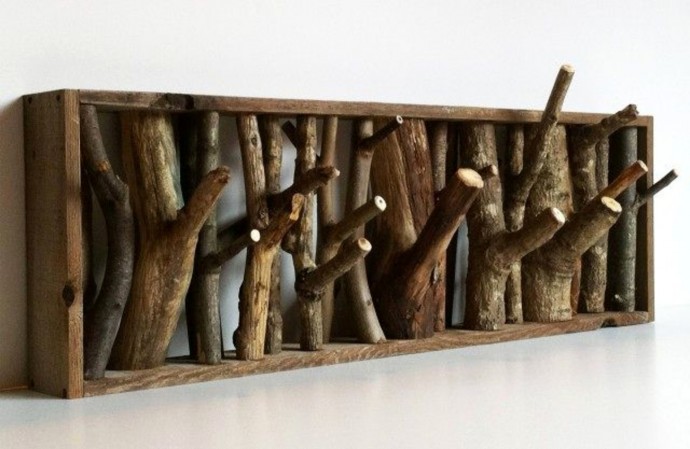
Several small cuts can be cut from a branched tree trunk. Mounted on a wall, on a board, or in an adorable frame, you get a cute and very functional multi-hook hanger. Such a suspension system does not take up space, is very convenient and at the same time has a surprisingly cute decorative effect. A hanger made of wooden hooks from a trunk will come in handy in the bathroom or in the hallway, and, of course, in the kitchen - there are always a lot of little things that need to be hung.
Another interesting way to bring a tree trunk into the decoration of your home is to hang it from the ceiling or in a window opening. And this hanging Rustic decor can serve as a support for hangers.


You can use a pretty tree branch to hold your favorite jewelry, costume jewelry, or simply decorate it with family photos, homemade hearts, pretty trinkets.

The tree trunk, branches, saw cuts and cuts are often used in the decor of Scandinavian interiors or country houses, for example, chalets - so actively use this rustic decor in the design of such interiors. Rustic accents are also added to cold industrial interiors, loft, simpunk to give the interior a little warm touch.

Below you will see many amazing examples of how to use a tree trunk in interior design and home decoration - DIY tree trunk or branch hanger! Get inspired!


Pay attention - what a zeal for nature among modern designers - we see in the decor: like wood, like moss and even dirty boots ... like)


DIY interior design ideas, interior design ideas, DIY decor ideas - BE INSPIRED!


What can be made from driftwood for the home
Shelves showcase racks from stairs

Click Class
Tell VK
A wall hanger in the hallway is an important element of storage. The layouts of many apartments have narrow corridors in which it is not always possible to place a full-fledged closet, so the owners are looking for alternative options. I want to keep the design of the apartment, comfort and ease of use.
There can be a lot of variations of hangers from the most standard and simple miniature shelves to futuristic and most unthinkable ideas.
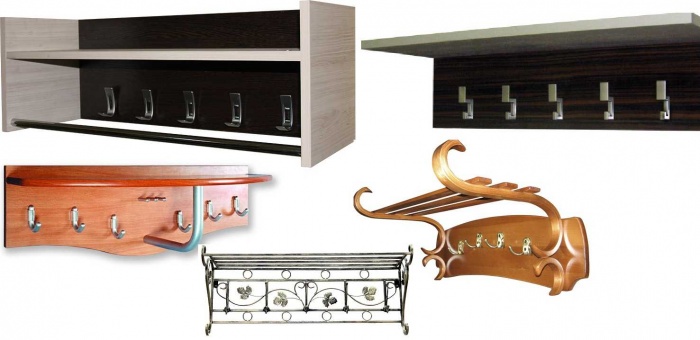
The most popular materials for making hangers are wood and metal.
Forged metal hangers amaze with their beauty and smoothness of forms. They are used in Provence and Art Deco interiors. This version of the hangers is mounted on self-tapping screws, and more often hung on them. 
This option of hangers can be attributed to horizontal. Their function is only to store outerwear. Metal hangers often have an aged look, which gives them a picturesque look.

A very interesting option is the combination of forged elements and leatherette or fabric. Looks unusual and luxurious. Such a hanger will decorate any corridor and become its highlight.

The photo shows combinations of materials: wood with fabric and metal with fabric. The functionality and originality of products is preserved. In the first version, the wood gives an array and solidity to the furniture, and in the second, metal facilitates the composition and gives grace.

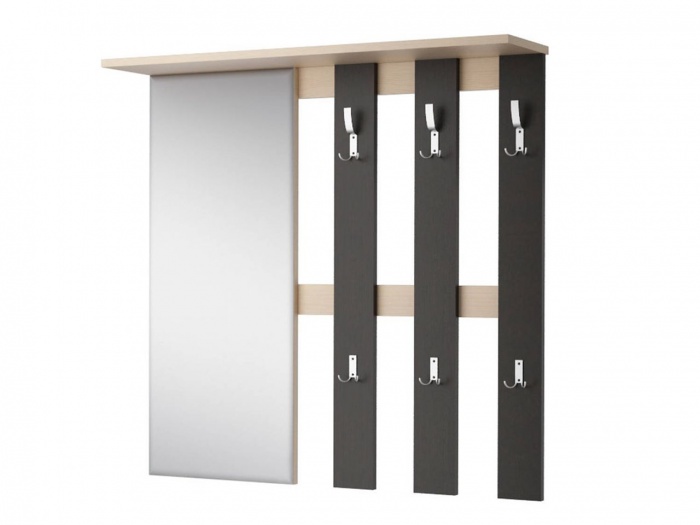
Hangers made of wood can be combined with a mirror, a shelf for shoes or for head appliances. The photo shows a very compact version of the hallway.

The hanger can have sections: for short and long top things, which helps prevent dirt on the wall.

A wooden hanger is completed with a shelf and a mirror, also a great option for small hallways.

When choosing a material, it is necessary to focus on its strength, whether the finished product will withstand heavy winter things.
For this function, you can strengthen the mount: use not only self-tapping screws, but also furniture corners.
Materials can complement each other, carrying their functions. Metal, as more durable, goes to the basis of the structure, and wood as decorative elements.

Ideas for hangers in the hallway from improvised materials
I picked up a lot of ideas when the hanger was made with soul from improvised materials. This can serve as inspiration for many families. I think that in the interior it is necessary to move away from stereotypes, because any design is unique with its non-standard solutions.
In the photo, a completely ordinary hanger from a piece of board is made in a marine style. The matching backdrop and anchor hooks add color to the entire hallway.

An interesting forged lightweight option, perhaps not entirely from improvised materials, but it has a place to be. A very functional and elegant option, it contains a stand for shoes and hats.

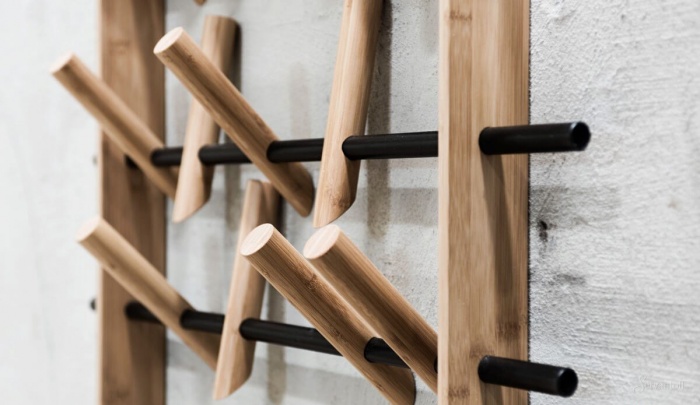
Connected in the form of rhombuses, slats with wooden hooks, it looks very eco-friendly and stylish. Placing the hooks at different heights allows you to hang a lot of things without creating an untidy pile.

Curved leaves made of thin aluminum decorate the walls in a peculiar way. And it will be very easy to make such a hanger at home. To do this, you can buy a sheet of thin aluminum in hardware stores. This material is easy to cut and quite malleable.

A pallet hanger is the most affordable and modern hallway decor option. Creates a loft atmosphere and is suitable for non-standard young people.

And, most importantly, it is completely environmentally friendly and strong material. With the help of corners and self-tapping screws, you can build both a shoe rack and a shelf. You can simply coat the pallets with varnish or stain, then a beautiful wood pattern will remain, or you can paint over with thick colored paint to match the overall tone of the interior.

For minimalistic designs, the hanger in the photo is just a godsend. Comfortable, without unnecessary details and looks very stylish. A rod is inserted inside, which allows you to make hangers out of the hanger.

I will give a small master class on making hangers from wooden coat hangers. It turns out two rows of hooks. The option is unusual, but very functional.

Having slats of different widths, you can create the simplest version of furniture by simply drilling hooks and adding crossbeams for fastening.

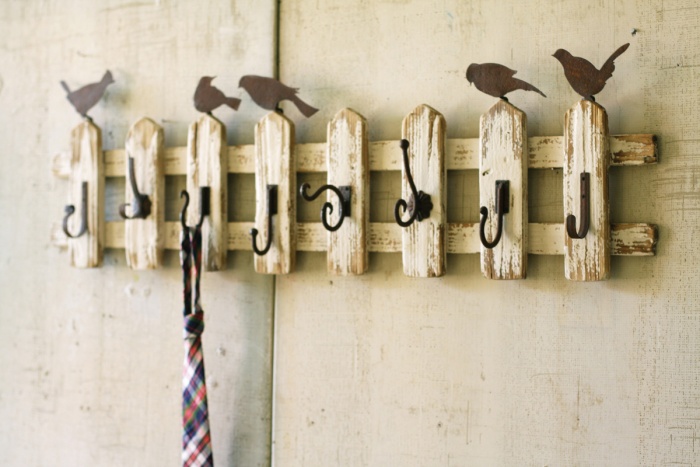
For nature lovers, images of animals and birds can be used, and an artificially aged wooden product will add history to the corridor.

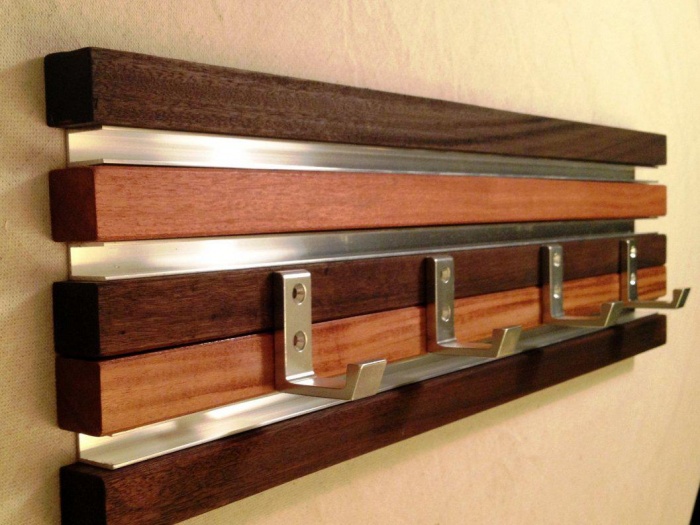
An interesting combination of two materials: wood and metal. Modern compact hanger with built-in hooks.

Many times I have come across the ideas of cutlery hooks: forks and spoons, as in the bottom photo.

An interesting option for a plastic hanger for a small family. In the summer, it can only serve as a decoration.

DIY wooden wall hanger
To make a hanger, you need to take a few boards, either ready-made or bought in a store. You can use any wood: pine, oak, birch.
We will analyze two options for hangers.
We cut out the same sidewalls, the top and the middle crossbar, to which you then need to attach the hooks.

We cut out beautiful bends on the sides and skin all the details.

We connect into a finished structure with self-tapping screws, furniture corners.

We mark places for hooks and drill them.

We check the finished product for strength and varnish it.

You can make an even simpler version of the clothes hanger.
The photo shows the diagram and dimensions of the future product.

We take purchased boards or lamellas, in this case pine wood was used.
We measure the same distance between the vertical parts and fasten the frame from the wrong side. We drill any fasteners. The shelf will be hung on self-tapping screws.

We attach hooks to the front side at the same distance from each other. And we admire the result.

This hanger model can be supplemented with a shelf, to give contrasting colors. The photo shows an option when the crossbars do not go from the wrong side, but from the front.

Tell VK
A hanger in the hallway is a must. This is especially noticeable when the hallway is small in size and there is no way to install a closet in it. Now there are a lot of options for different hangers that you can choose from, but the most popular are wooden wall models of hangers in the hallway.
Hanger Selection Criteria
If you decide to purchase a clothes hanger in the hallway, and not do it yourself, you should find out about the criteria according to which this piece of furniture is selected:
First of all, a wall hanger should be as functional and practical as possible. To do this, all its components must be coated with special solutions that are designed to protect it from moisture and other influences.
Assortment of wall hangers
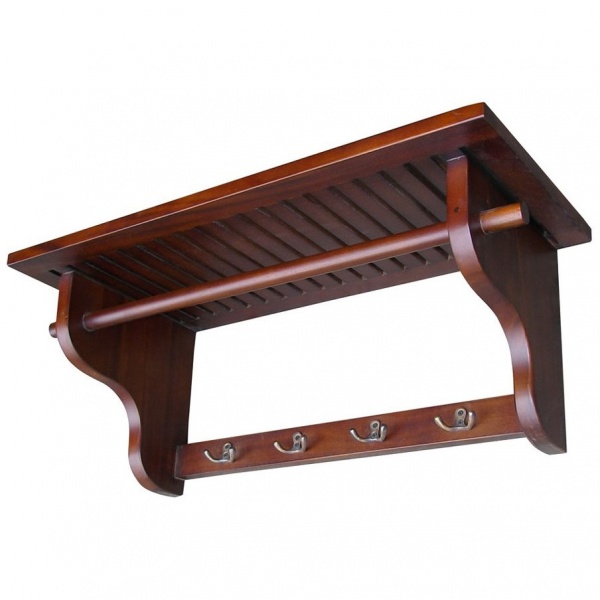
If we talk about the varieties of hangers that are mounted on the wall, then you can get confused in the proposed models. In the traditional version, this piece of furniture is a bar on which hooks are fixed. It can be positioned vertically or horizontally. The first option allows you to visually raise the ceilings in the hallway, so it is more in demand among buyers. And horizontal models are compact, and it will not be difficult to place them even in a small corridor.
Vertical hangers
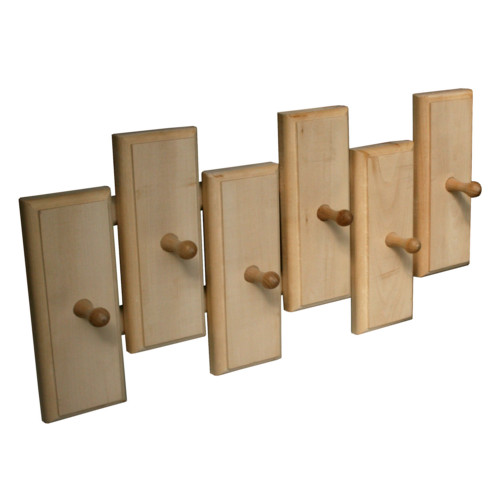
This type of structure is made of laminated chipboard or wood with a length of 40 cm to 2 meters, depending on the model. The shape of this object can be any, for example, rounded, rectangular or curved.

It is made from a single piece of wood, or from several lamellas, which can be equal to each other, or can be asymmetric elements. You can choose the option with a built-in mirror, and its location can be right or left. For classic interiors, designs upholstered in leatherette and having a quilted pattern are often used.
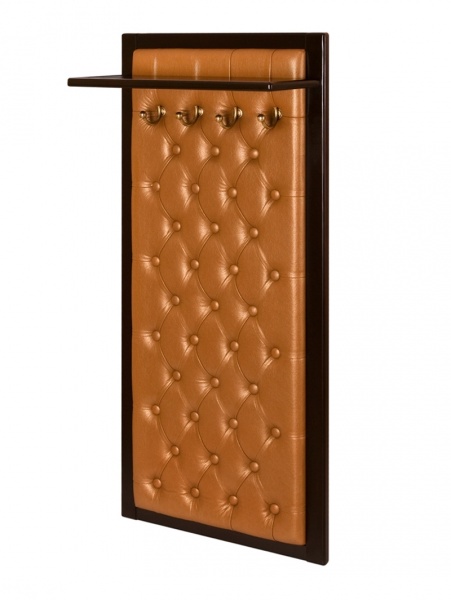
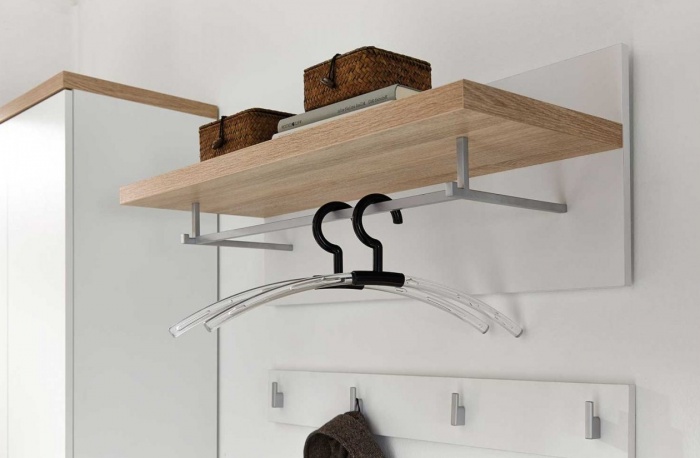
In terms of functionality, it is very important to have a shelf at the top of the hanger so that you can put hats. When choosing, be sure to pay attention to the number of hooks. They should be enough to accommodate all the necessary clothes. If you liked the model, but there are few hooks on it, then it is possible to install additional ones.
Advice! Before buying, you must carefully measure the free space that is intended for the hanger, so as not to buy a model that is not the right size.
Horizontal and designer hangers
Such designs can visually increase the width of the wall. In addition, they are more compact and can be installed on a small wall. The basis of a horizontal hanger is a board with wooden or metal elements. Modern models use a combination of wood and plastic.
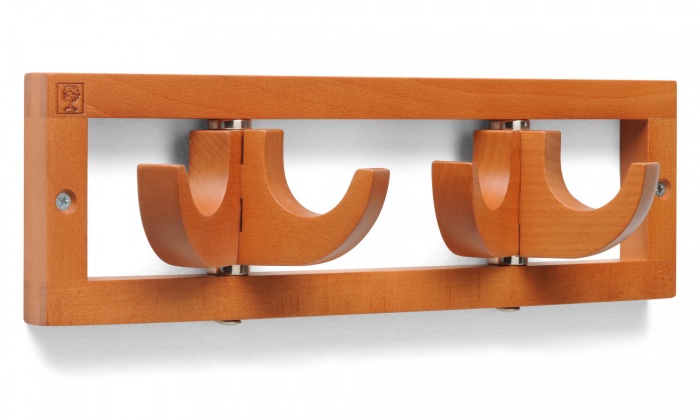
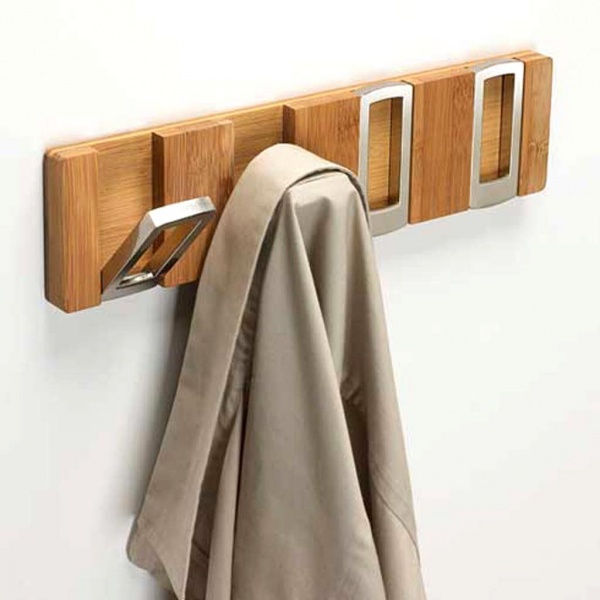
The imagination of designers knows no bounds, so now such designs of hangers are being created that were never even imagined before. Very interesting idea with folding hooks. Such hangers are made of wood, and can be made of metal. Their highlight is that the panel consists of many elements that, if desired, can be bent and turned into a functional hook.
For modern interiors, minimalist hangers are the best fit, which do not contain any unnecessary decorative elements in their design and are able to complement a room that is simple in design.
It is not necessary to buy an expensive design solution for the hallway, you can create a unique hanger with your own hands, the analogue of which is no longer found.
Making a wooden hanger with your own hands
If there are few materials and time, then you can create a wooden hanger according to your own ideas about this element of hallway decor. We will consider several options for making hangers with our own hands.
simple model
To make the simplest design of a wall hanger, we need:
- Material. It can be a processed board and hooks. As hooks, you can use something else, for example, knobs-buttons.
- Hacksaw
- Perforator
- Fixing tool
- Measuring instruments such as tape measure, angle and level.
- Pencil.
The simplest design is the bar with hooks. To do this, you need to take a board of the right size. The length depends on how much free space is available on the wall, and the width can be as desired by the master.
Important! The board should be free from defects and as dry as possible.
The surface of the board can be varnished or stained to make it more decorative. After drying, the required number of hooks can be screwed to the bar.
After the hanger is ready, several holes are drilled in the wall, their number depends on how long the board itself is. From the extreme hole on one side and the other, there must be indents of 5 cm. The holes are supplied with dowels, and the finished hanger design is attached to the wall.
Regarding hooks, we can say that everything that is at hand will do. For example, unnecessary wrenches will look original, which are first cleaned and polished. After that, they need to be bent and several holes drilled into the part, into which self-tapping screws are inserted for screwing to the bar. Instead of keys, ordinary forks also look interesting, but they must be steel, since aluminum ones are very fragile.

If possible, instead of hooks, you can use tree knots that are screwed to the bar. It is not necessary to do this in the same plane - you can arrange the hooks in a chaotic manner. This arrangement will give originality to the hanger.
More complex designs
In order for things not to get dirty on the wall and not get dirty themselves, the design of the wall hanger is being improved with their own hands. To do this, two strips are already taken, which are parallel in width to each other so that one is at the top point, and the second is at the bottom.
Between them, several planks are fixed with the help of self-tapping screws, which are twice as long, so that it is possible to qualitatively tighten the elements together. The width of the vertical parts may correspond to the width of the horizontal ones, or may be slightly less.

Additionally, it is possible to make a shelf for hats. To do this, a board with a width of 25 cm is mounted on top. It is attached to the general structure using metal corners.
Making another variety of a more complex hanger design:
- 7 pieces of bars with a cross section of 5 * 5 cm are taken. They should be about 30 cm in length.
- The boards are processed by a grinder, the corners are smoothed on them.
- The processed elements are covered with several layers of varnish.
- The bars are arranged in the shape of the letter "P" and are fixed on the wall in pre-prepared holes.
- In each plank, 2 holes are made with a pen drill. Cylindrical dowels are installed in them, painted to match the color of the hanger.
Important! The dowels are attached with PVA glue.
An interesting model of a wooden hanger is a design in the form of a tree. It is made from a large sheet of plywood, MDF or chipboard, on which the necessary outlines are applied with a marker and the part is cut out with a jigsaw. In this case, the ends must be processed and painted over or covered with an edge. The product is attached to the wall with self-tapping screws. The branches of such a hanger become like hooks.

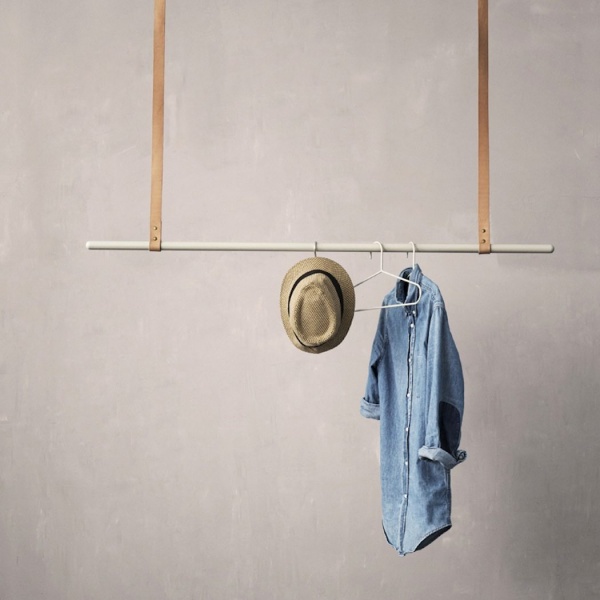
It is not always possible and willing to install hooks on a hanger. In this case, you can mount a metal or wooden bar. It is important to remember that if the bar is too long, then it is imperative to install a jumper in the center.
You can also not spoil the wall with a mount, but create a minimalistic chrome-plated ceiling-type hanger. To do this, 2 flanges are fixed on the ceiling, into which pipe sections 90 cm long are inserted. Using the corners, we mount a horizontal tube between the previously installed sections. Thus, it turns out the ideal hanger for the trampolines.
Conclusion
A hanger in the hallway is a mandatory attribute and a functional element. What it will be depends only on the seasoned style and preferences of the owner. You can buy a ready-made design, or you can do it yourself. In any case, this piece of furniture will appeal to all family members.
Ideas for making clothes hangers with your own hands: photos and drawings of hangers for the hallway. A variety of options for making homemade clothes hangers.
You can make a clothes hanger with your own hands practically from improvised materials that are lying around at home idle. Craftsmen do not cease to amaze with their ingenuity, here is a clear example of this, a home-made clothes hanger from ordinary forks.
A similar version of a hanger made of metal spoons.
Pallet clothes hanger.
Here is a clothes hanger from a pallet, and again the old pallet was used. A wooden pallet is sawn into two parts from each half of the pallet, you can make a hanger, just paint the workpiece and attach hooks to the boards with screws.
Another version of the pallet hanger, here a whole wooden pallet is used, it is sanded with sandpaper, the boards are painted in different colors and hooks are attached.
Wooden clothes hanger.
Such a hanger is more suitable for a summer house or a bathhouse; wooden knots fixed in a wooden structure are used as hooks here.
Hanger made of metal profile and bars.
The design consists of several bars and metal profiles fastened together.
Wooden hanger with your own hands.
Here a wide board with imitation of a piece of old wood is used, hooks for clothes are made of bars and fixed with screws screwed in from the back of the board.
The wood is burned with a blowtorch, which achieves the original texture of the product, the final stage is coating the hanger with a transparent varnish.
In this version, there was no carving work.
And in this design, instead of hooks for clothes, door handles are used, which can also be coated with paint.
An interesting option for hangers from boards.
Original homemade hanger in the form of a tree.
For manufacturing, thick plywood is used, the contour of the tree pattern is drawn and cut with an electric jigsaw. The design is painted and attached to the wall with dowels.
Hangers for children's clothes.
The details of the hanger are cut out of plywood with a jigsaw and painted with bright colors, so you can make a hanger in the form of animal figures.
Do-it-yourself outdoor clothes hanger.
The simplest version of a floor clothes hanger made of pipes, for manufacturing you will need a thin aluminum pipe 2–2.5 m long. The pipe must be bent, as shown in the figure, and the clothes hanger is ready.
Wall hanger made of pipes.
And this hanger consists of a picture on the wall, clothes hooks are attached with dowels directly to the wall.

There is a large number floor hangers for clothes. At home, this is a very relevant and practical furniture that fits perfectly into any interior. Such hangers can be easily moved around the apartment and room. Things in this case are much less wrinkled than in the closet. It needs a dust cover. Such a design can be made with your own hands. Let us consider in more detail the manufacturing process of various models, photos of which will also be presented in the article.
Advantages

Stylishly fits into any interior and does not take up much space.
The good thing about this is that hanging clothes does not come into contact with the wall, and this allows you to protect the wallpaper from damage. At the same time, the device can be folded, removed or rearranged at any time, which is very important in small apartments.
If it is made by hand, then the following advantages appear:
- the cost is significantly reduced;
- is in an exclusive piece of furniture;
- no need to drill holes in the wall to hang it.
Necessary materials

Consumables can be absolutely anything: from oak to metal.
How to make a stand with your own hands? First you need to decide on the material. Plywood is suitable for work, these are the most practical materials that you can easily work with. During its operation in the house, it is not exposed to moisture, which significantly increases its service life.
Working at home with plastic or metal is quite difficult, so it is better to refuse them. It is also necessary to take into account such a moment that a large load is placed on it, therefore, materials of appropriate strength are also needed, which do not allow breaking.
When purchasing plywood or wood, you need to pay attention to their quality, as the appearance of the product will depend on this. Usually, an oak structure is covered only with varnish or stain.
From plywood in the form of a tree

The process of creating a product, with its subsequent use for storing clothes.
It is not difficult to make such a product yourself and it does not take much materials and tools. This product requires two sheets of plywood measuring 70x170 cm and 18 mm thick. For work you will need:
- jigsaw;
- glue;
- sandpaper.
The manufacturing process itself does not take much time. First, on one sheet of plywood, draw the outline of the future structure. The main thing is to have a width of about 60 cm. This is necessary for stability, because if they are narrow, then it will fall if you hang heavy winter clothes on it.
In order not to draw a picture on the second sheet of plywood, it is necessary to fasten two sheets of plywood with clamps or self-tapping screws, making sure that the sheets do not move. To turn the blanks into a finished product, two cuts are made. On one blank, a slot is made from the top to the middle, and on the second from the bottom. The width of these slots should correspond to the thickness of the plywood.
On the inside, both slots should glue carefully, and then one blank is put on another. The result is a rather original thing, a photo of which can be found on the Internet. It remains only to sand and paint it. You can decorate it in different ways or simply varnish, stain or paint.
From a tree trunk

A very original solution is interior items that look like a branch or trunk with knots. Such gizmos always harmoniously fit into any room.
Good design solution- This is a stand made of natural natural material, namely from the trunk. It is very easy to do and there is no need to purchase special tools.
How to make it yourself? To do this, you first need to find a quality blank from a dry log, on which there will be no rot. The breed does not matter, but it is still better not to use conifers containing a large amount of resin. Glue is able to stand out even from a dry trunk. It is advisable to use hardwoods that have good branching so there is more room for clothing.
His you need to clear the bark, cut the lower branches to a height of one meter, and shorten the upper ones, leaving knots on which you can later hang clothes. After that, the rack is completely sanded and cleaned of bumps and dirt. If the wood is damaged by a bark beetle, then this does not hurt, because it creates an amazingly beautiful pattern that fits perfectly into the design.
Then you need to make a stand, because the tree trunk cannot stand on its own. The main thing is that the stand is massive, this makes the structure more stable. The stand itself can be of any shape: round, square, triangular.
Photo gallery


The base is attached to the stand in various ways. For example, if its lower part is rather thick, then the board can be screwed to it using self-tapping screws, the caps of which will be located below, so they will not be visible. If the bottom of the trunk is thin, then a hole is made in the stand, no larger than the diameter of the trunk itself, after which the base is fixed on the stand with glue, since this method is the most reliable.
After it is made, it must varnish to keep the natural color. But if the light system does not fit the design, then dark paint can be used.
In the form of a ladder, do it yourself

Old and unnecessary stairs can also be used and given a second life.
Highly looks original- in the form of a ladder. To make it yourself, you will need two bars 170 - 180 cm long and 5x5 cm thick. For the crossbars, you will need three smaller bars, the length of which will be equal to the width of the product. All bars must be sanded or processed with a planer.
To make the design look neat and beautiful, all the details are interconnected with spikes. After that, the product is varnished and stained. A comfortable and convenient do-it-yourself clothes rack is ready. It can be installed both in the bedroom and in the summer house.
Rustic
This design will fit well into the corridor or hallway, and you can put shoes under it. This model is not easy to make yourself. First, holes of large diameter are made in the crossed round racks. It is very difficult to drill holes in round parts with a household tool. To get around such an unpleasant nuance, you need to take square racks and use a drill to make holes in them of the desired diameter. It is best to take a metal crossbar, as it will sag. This model can be disassembled. To do this, the crossbar is removed from the holes, and the parts that make up the hanger are compactly folded.
on wheels

The wheels are very convenient and make the thing very mobile.
This design has regular hangers on top, which is very convenient for placing blouses, shirts and a jacket. Pants are more convenient to hang on the crossbars. Thanks to the wheels, it is easy to move it to another place.
To make it yourself, you will need special fasteners. Vertical posts are attached to the base with metal screws. The only difficulty is drilling holes for the screws in the uprights. The rest of the assembly is pretty simple. The disadvantage of this design is the need for disassembly during transportation. To do this, unscrew the long bolts from the vertical racks.
Thus, there are many ways to make such a clothes hanger with your own hands, the photo of which was presented in the article. This is a very simple element of the interior, for the manufacture of which you will need available material at hand. Usually, special tools are not required for work, and the result is a unique and exclusive thing.