Do-it-yourself aluminum tool box. Do-it-yourself box: a master class for making a wooden box quickly and easily. Interesting ideas for tool storage
Every man in the house (apartment) must have a screwdriver, a hammer and at least a handful of different nails. If this is a master with "golden" hands, then you need to have a whole set of different tools for which you need a convenient box.
DIY tool box
Many tools (hammer or hacksaw) cannot always be placed in standard tool storage and carrying facilities. Therefore, craftsmen prefer to make a container of the desired size with their own hands. Consider the stages of work, how to make a tool box.

Material selection
Can be used: metal or plywood. But wood is considered a classic, which has long been the basis of carpentry. Therefore, it is easier to make a wooden tool box.

Type of shell
You should think in advance and measure where the chest doors and handle options will be located. The design can be open or closed to accommodate large items. It can be a large box with cells or a designer piece of art.


Interior decoration
The model can be simple for storing various little things or multifunctional: a separate row with holes for various screwdrivers, pencils, glue, pliers, etc.

Drawers with several floors are convenient, they can be inserted into each other or pulled out. The main thing is to achieve maximum order in the arrangement of parts, so that there are nails, screws, tape measure, power tools, etc. separately.

In the manufacture of a particular model, it is necessary to take into account the operating conditions:
- storage location (apartment, basement or garage);
- humidity level;
- temperature;
- frequency of use of devices and devices (professional activity or for home use).

Tool box designs
Before buying a compact model for different tools, we list the types of designs:
- The boxes are made of solid durable materials, often rectangular. There are a couple of drawers on the side. Hinged or removable lid with lock. The model is convenient for constant movement.
- A set of boxes is a set of open trays of different sizes that are convenient for the home.
- The case is a compact, durable suitcase, conveniently wide opening, and a handle on the side is a must. Large tools will not fit.
- The organizer is a low container with many cells. Maybe a case or bedside table with cells for small things.
- The tray looks like an open box with recesses, no handle. Not convenient for transportation.
- The bag looks like a sports bag, handles. The model is roomy, but not reliable, and the fabric lets moisture through.
- The backpack is adapted for storing tools, but it is inconvenient to get them.
- The container is a compact closed product with many drawers and sections, some are removable. Transformers are especially convenient.
- The trolley is used in factories, it is a large container on wheels with a comfortable handle. Many sections, easy to move over short distances.


Tool clothes
- This is a vest with pockets where various tools are distributed.
- A belt bag is an indispensable thing when repairing.
- Apron with ties at the neck and belt with pockets.
- Folded storage pouch.

Types of Best Tool Boxes
An important role is played by the material from which the structures for storing and moving various tools are made:
Tool box on wheels
Models made of plastic (metal) with a vertical body with 2 wheels. Convenient handle and lock, the model contains many sections. The only negative is the high price.

Aluminum
Boxes made of aluminum are the most durable and reliable. Popular models of metal boxes for any tools:
- Fit 65610 - aluminum body, equipped with a handle, mobile partitions inside, weight 1.5 kg.
- Dexter is the most compact drawer for small parts.
- Wilton 16910U is a handy aluminum case with steel hinges. Weighs 3 kg, has many pockets on the lid.


car boxes
- Bawer is a universal model, mounted conveniently under the car frame. The car box is strong and reliable, made of galvanized steel, but the weight is 12.4 kg.
- KAMAZ is a simple, reliable metal construction for long-term storage of any inventory.
- I-580 is the most convenient model made of polyvinyl chloride (high-impact plastic with 3 types of steel). Weight 35 kg, capacity 90 l, reliable locks, perfectly protected from moisture.

Large capacities
- STANLEY Mobile Job Chest is the most practical, dimensions: 962:600:600 mm, made of thick plastic, amazing capacity.
- StanleyFatMax with the most thoughtful functionality. Lid with latches, inside 3 sections, there is a lower section for large tools. Handles on the sides, wheels make it a popular model.
- Peli 0450 - considered the most mobile: 3 handles and wheels with reverse. Sealed impact-resistant stainless steel case body, volumetric sections, containers are easy to insert into each other. The only negative is the large weight and volume.

For balcony
Inexpensive models are suitable for storage on the balcony:
- Fit - the case is ideal for small parts, you can change the size of the cells. Sturdy plastic latch.
- Lot-3 - affordable, inexpensive and compact, there is a pen, colored trays.
- MosPromTara for the home, no sections, but there is a lid.

Organizers are more convenient in use for ease of transfer to any place.

With combination lock
- Brauberg - used to transport valuables. A shockproof case made of steel 8 mm and plastic is made, inside 6 cells.
- Hairway - with the greatest protection (metal with plastic), locks with a code on 2 sides of the model, dimensions: 420x215x330 mm.

metal
- Intertool is a popular drawer with 5 compartments, a secure lock and a comfortable handle.
- STANLEY Expert Cantilever is practical and convenient, 5 folding compartments, protection against finger injuries, comfortable handle, but heavy.

Plastic tool boxes
- StanleyClassic made of impact-resistant plastic, comfortable design.
- Tayg is made with amazing rationality, everything is compactly placed.

Professional
Stanley is reliable and indispensable, corrosion protection, handles are equipped with soft inserts. Removable castings inside, special compartment for drills, etc.


Bosh LT-BOXX - simple in execution, but reliable. The strength of the product provides acrylonitrile butadienstrol.

Photos of the best tool boxes


A good owner will always have a whole arsenal of tools at hand: from nails and screws to pliers, a level and a set of screwdrivers, not to mention a drill, puncher and screwdriver. Very often, simple household repairs do not start in any way due to the fact that the master cannot find all the tools he needs in the apartment or garage. To prevent this from happening, all working tools must be stored in a specially designated place - a tool box.
What are the tool boxes, what requirements do they have to meet, and how to make a tool box with your own hands - this is an article about this.
Varieties of tool boxes
In fact, a tool box is a box with or without a lid, divided into several compartments of various sizes and shapes. Small drawers are designed to store fasteners, they can contain drills, tips, or other small parts. As a rule, such boxes are divided into several compartments, each of which has a separate lid. Such boxes are easy to carry, because they weigh a little.

Larger cases are needed to store and transport large tools such as hammers, saws, drills or jigsaws. Quite huge boxes will be needed to contain perforators, levels or mallets. These tool boxes are often made on wheels so that they can be moved and transported.
Professional toolboxes can differ depending on the skill of the craftsman: so a plumber needs one set of equipment, and an auto mechanic needs a completely different one. You can find such boxes in building supermarkets or in specialized stores, they are often sold complete with the tools themselves.

The cases are divided into several categories. This takes into account not only their size, but also the design, as well as the material of manufacture. Structurally, it can be:
- Open boxes with handles for large tools and easy transfer from one place to another.
- Multi-tiered boxes with many small and large compartments for complex storage of working parts and their facilitated transportation. Such a box can be thrown into the trunk of a car or carried by hand.
- Compact cases with an ergonomic handle that contain all the tools you need for small repairs or a trip to the country.
- Chests of drawers, consisting of several drawers, as a rule, are used permanently at the place of work.
- Tool belts are needed for those who work at heights or in hard-to-reach places.
- Trolleys are a kind of tool boxes on wheels, which are large in size. On such devices, very large equipment is moved, such as welding machines, drills.

Important! When choosing a box for your tools, it is better to give preference to multifunctional boxes, where each part has its own place, and small compartments are closed with lids. Otherwise, all the tools run the risk of being mixed into one heap during transportation.
What are tool boxes made of?
Cases and boxes can be made from various materials, but the main requirement for them is the same - the boxes must be light, since the tools themselves weigh quite a lot. There are a few more nuances that you need to know about those who buy a case for their arsenal of tools:
- The bottom of the box should be as thick as possible, since it is on it that the entire mass of the contents presses.
- A full box should not deform when lifted - the walls remain perpendicular to the lid and bottom. If the walls sag, this indicates that the strength of the case is insufficient for such a set of components.
- Well, if the material of the box is fire-resistant, then expensive tools will survive even during a fire.
- If there are gaps in the box, dust and construction debris will enter the box and contaminate the tools. And in this case, the contents are threatened with oxidation and rust due to high humidity.
- Durability is an important factor, because a professional box costs quite a lot, and the load on it from metal components will be significant.

Today, the most popular materials for such boxes are:


Attention! All materials must comply with special standards, because if the box breaks at the most inopportune moment, all heavy tools will fall on the feet (or on the head) of the unfortunate owner.
If you can still make a metal or wooden tool box with your own hands, then you can really only buy plastic boxes.
How to make a DIY tool box
If the owner has decided to make a box for his inventory on his own, first of all, he needs to determine the size and choose the design of the box.

To do this, you need to inspect all your tools, measuring the most dimensional elements and taking into account small things (bolts, nuts, washers, etc.). According to these parameters, the dimensions of the container itself and the internal compartments are calculated.
Tool box design
Speaking about the design of the boxes, they do not mean their shape, but the way they open and the presence of additional sections. The following designs are considered standard:
- Case - a portable rectangular box with a handle. As a rule, cases are divided into many departments, have removable partitions that allow you to independently divide the space inside the box. The weight and dimensions of such cases are usually small.
- Container - a larger box for a variety of tools. As a rule, it has the shape of a trapezoid with a rectangular bottom. Inside this box there are also partitions, and there may be separate smaller boxes (folded like a nesting doll). Sections of such a container can be pulled up and to the sides, forming a whole "trellis" with tools and fasteners. Large tool boxes of this type can be equipped with wheels, which is very convenient and practical.
- Multiboxes are arranged vertically and the drawers in them are pulled out along the guides, as in a regular chest of drawers.
With your own hands, it will be easiest to make a case for tools, because in this design there are no complex mechanisms and hinges with which additional sections come out.

Important! Although it is quite possible to build a container with boxes that fold over several floors with your own hands. To do this, each pair of "floors" should be fastened with metal brackets, providing mobility to the elements (as in the figure below).

Bringing an idea to life
If we talk about the material for self-manufacturing of the box, then, of course, the easiest way is to work with wood. For the first experience, it is better to choose inexpensive wood - a planed coniferous board is quite suitable for boxing.

The whole process of making a tool box consists of several stages:
- Make a drawing of the future boxing. To do this, use a regular drawing paper and a ruler or a professional program such as AutoCAD.
- The resulting drawing is transferred to the wood with a simple pencil or marker.
- Cut out the details along the contour using a jigsaw or saw.
- The tree is treated with antiseptics or stains to prevent it from rotting and to make it “inedible” for insects and rodents.
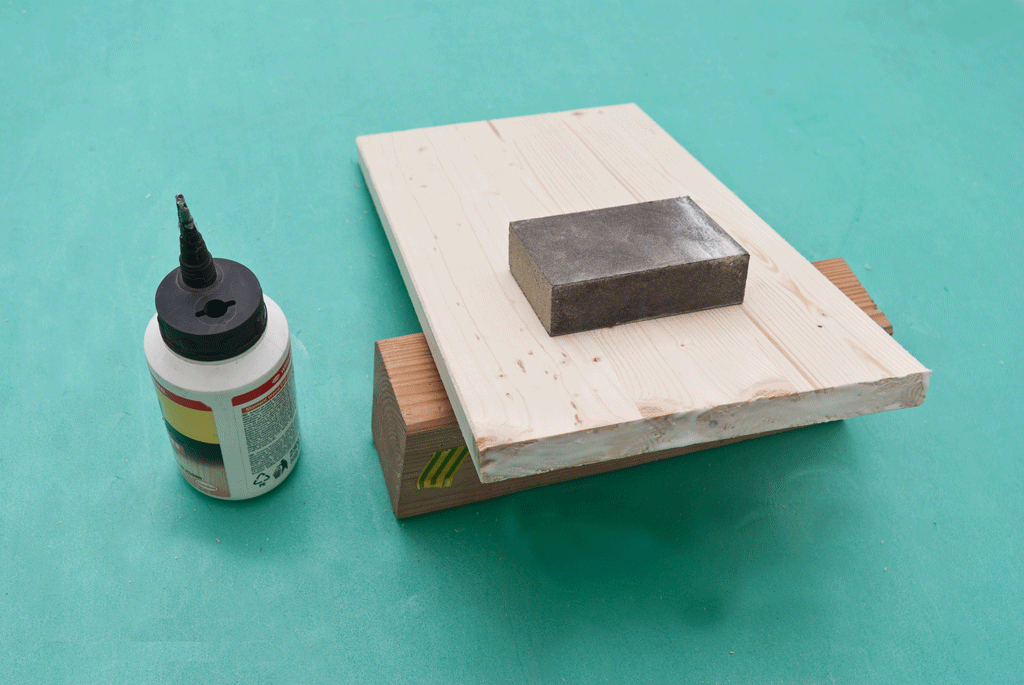
- The box is being assembled. Now all the details need to be connected into a single structure, according to the drawing. To do this, it is best to use wood glue, which is applied to the ends of the parts and pressed against each other for a few seconds.
- It is better to additionally fix the elements of the box with self-tapping screws, making sure that the wood does not crack when screwing in the fasteners.
- Install the lid using conventional hinges or another device appropriate for the type of drawer opening.
- The lid is equipped with a handle for carrying and transporting the box with tools.
- Inside the box is marked into sectors, given the diagram and drawing. Additional partitions are cut out of the board and fixed in place with glue and self-tapping screws.
- The walls, bottom and lid of the box are sanded with several types of sanding paper, then painted or coated with several layers of varnish.
The box is ready to use, it remains only to fill all its compartments with the appropriate tools and fasteners.
The simplest tool box
Beginners in carpentry are offered a simpler tool box design - a regular box with a handle, but without a lid. The advantage of such a box is that it is suitable for tools of various sizes, if desired, even a water level or a puncher can be placed here, or you can make a miniature box for an “apartment” master.
Such a box consists of only six parts:
- two long side elements;
- two short sides, the height of which should exceed the height of the long sidewalls, since the handle will be attached here;
- the bottom, which should be made from a single piece of wood, since it is the bottom that takes the load from the weight of the tools;
- a handle, the role of which can be played by a bar, plank or round segment - the choice depends on the size of the box and the estimated mass of its contents.
If desired, the design can be supplemented with internal partitions or complicate it with compartments with lids or doors.

All elements are assembled into one structure, fixed with carpentry glue, then additionally fastened with self-tapping screws. Particular attention should be paid to the fasteners of the handle - it must be strong and reliable.
You can independently assemble a tool box not only from boards, depending on the arsenal of tools, plywood, chipboard, OSB, galvanized metal or aluminum sheet can be used.

There is nothing complicated in the manufacture of such a box, and the advantages of the product are obvious: tools and fasteners will be in a certain place, at any time it is enough to get the box from the pantry or garage and make the necessary repairs.
Any owner has many different tools and fasteners. Sometimes all this is stored in a separate box, on or in, neatly folded or piled in a heap. Often, starting or, if necessary, tightening the nuts, you have to look for the right key, screwdriver or pliers for a long time. A multifunctional tool box with compartments for wrenches, drills, fasteners, etc. will help you avoid confusion. You can buy it at the store or make your own. In today's editorial review of the site, we will consider the types of boxes for what you can make and how to assemble them with your own hands.
Toolboxes differ in the material of manufacture and the type of stored items. According to the material used, they can be:
- wooden. Wood is an affordable and easy-to-work material. For the manufacture of boxing, either durable multilayer plywood with a thickness of 10, 16 or 18 mm is used. The complexity of the design depends on the wishes and skills of the master;
- metal. Steel or iron structures are quite heavy, but have strength and durability. Lighter boxes are made of aluminum;
- plastic. These boxes are lightweight, durable, comfortable and modern design.

Also, the boxes differ in the type of tool stored in them and are:
- Unprofessional. They are a multiple compartment design. For them, bags or cases of different sizes are used.
- Power tool. Special boxes used to store drills, etc. As a rule, such boxes are equipped with a large compartment for certain equipment and several small ones for additional equipment.
- Professional. Most craftsmen prefer this particular type of tool boxes, since they have separate seats for a certain type of equipment.
- Universal. Boxes of this type have a large number of compartments and are used to store a wide variety of . There are toolboxes with removable partitions, which allows you to rebuild the interior space at your own discretion.

Tool box design
Tool boxes are also divided by design. And here we mean not the shape of the box, but the opening option and the presence of auxiliary compartments. There are the following designs:
- case. It is a rectangular box with a handle. Usually they have several compartments and removable partitions, allowing you to plan the interior space at your discretion. Similar designs differ in small dimensions and weight;
- container. Sufficiently roomy box with partitions and separate containers, which are folded according to the principle of matryoshka. Sections can be laid out up and to the sides, and the box itself is often equipped with wheels for ease of transportation;
- multibox. This is a vertically arranged design in which drawers with and fasteners are put forward like in a traditional linen chest of drawers.

Tool box requirements
When choosing a tool box in a store or deciding to make it yourself, you need to take into account some of the requirements that apply to its design:
- The bottom of the box or container must be sufficiently thick and strong, since it is on it that the bulk of the contents falls.
- When the box is fully loaded and lifted, its walls should not be deformed.
- It is recommended to choose a design made of fire-resistant material.
- There should be no gaps in the box so that dust and dirt do not get inside and do not contaminate what is stored in it.

Note! If you decide to purchase a tool box in a store, then give preference to multifunctional models with separate compartments and a closed inset organizer for small parts and fasteners.
Related article:
: what must be at hand. The main differences between similar tools, advice and recommendations from experts - read in our publication.
How to make a simple open toolbox
Inexpensive wood is most often used to make a tool box, especially if this is your first time. We propose to make the simplest box without a lid. Its advantage lies in the fact that almost any size can be placed and carried in it.

To make a simple tool box, you will need a board, wood glue, self-tapping screws, or a drill and a hacksaw. The simplest box consists of:
- long walls (front and back) - 2 pcs.;
- narrow and high sidewalls (the height of the front and rear walls should be greater, since a handle will be attached to them) - 2 pcs.;
- bottom (from a thick board) - 1 pc.;
- handles (square or round bar, galvanized, chrome-plated or aluminum tube) - 1 pc.

Assemble all the parts into a single structure using wood glue and. Pay special attention to the fastening of the handle. Such a box can be supplemented with internal partitions (removable or stationary), as well as make a lid. Dimensions can be very different: it all depends on your needs and desires. Assembly photos are shown below.


Plywood tool box
First of all, you need to make a drawing and calculations, transfer them to plywood. Carefully mark up, cut out the details along the outlined contours and make grooves, thanks to which the structure will be more durable. All sections must be processed with sandpaper.

The next step is to assemble the box. Glue is used to connect the parts. First, the frame is glued together (to facilitate the work, you can use clamps or rubber rings). We make the handle from MDF and carefully process it or use it from an old case or suitcase. To keep everything in its place in the box, you can make small compartments. One part of the box is taken under the compartment for placing screwdrivers.

Related article:
: the best home appliances that any self-respecting home owner should have at hand - in our publication.
Wooden organizer with lid
This design is great for storing equipment, and is also distinguished by its strength, reliability and solid appearance. To make it you will need:
- board;
- wood glue;
- metal corner plates - 8 pcs.;
- pen;
- self-tapping screws;
- furniture hinges - 2 pcs. or piano loop;
- latches-locks - 2 pcs.;
- drill;
- clamps;
- sandpaper.
Mark the parts on the boards according to the dimensions given below.

Detailing
| Name | Drawing number and quantity |
| Main drawer | |
| Front Panel | No. 1 - 1 pc. |
| Back panel | No. 2 - 1 pc. |
| Bottom | No. 3 - 1 pc. |
| support rail | No. 5 - 2 pcs. |
| Side | No. 6 - 2 pcs. |
| Lid | |
| Top | No. 4 - 1 pc. |
| Front and back wall | No. 7 - 2 pcs. |
| Side | No. 8 - 2 pcs. |
| Removable tray | |
| Pen | No. 9 - 1 pc. |
| Bottom | No. 10 - 1 pc. |
| Long sides | No. 11 - 2 pcs. |
| Short sides | No. 12 - 2 pcs. |
| Partition | No. 13 - 2 pcs. |
Assembling the tool box
First of all, we assemble the box body and cover. To make it easier, use clamps and corner ties. The parts are connected using a special glue for carpentry. After the glue dries, we drill holes, countersink them and carry out additional fixation with self-tapping screws.

Next, in the same way we assemble a removable tray, install partitions and additionally fix everything with self-tapping screws. Inside the box body, on short walls, we install two strips, stepping back 300 mm from the top edge.


Once again we process the toolbox with fine abrasive paper to remove the slightest burrs. Coat the structure with a protective compound and allow to dry. If, after such processing, raised wood fibers are found, then it is necessary to process the box again with sandpaper and repeat the finish.

Completing the assembly, you need to connect the cover to the body using hinges and self-tapping screws. Install the handle and latches-locks, as well as protective metal lining on all corners of the box. The box is ready, and now it can be filled with the necessary equipment and fasteners.


A few words at the end
A tool box is a must-have item for any craftsman. You can buy it at any hardware store or make your own according to your needs. We hope that the examples of making tool boxes will be useful to you. If you have your own ideas, then share them in the comment form.
Hello everybody!
A toolbox today is a very indispensable thing for every owner. Most of us have a lot of different tools that we may not use very often, but nevertheless, we keep them, since not one repair can do without them. In order for the tool to be in one place, and it was convenient to transport it, we use special boxes. Often we just buy them in the nearest store, the range and variety allows us to do this. But why not make it yourself? The manufacturing process is not too complicated, anyone should be able to handle it, especially with a handmade thing, which is much more pleasant to use than a purchased option. This article will describe 4 different ways to make boxes, a photo report is attached.
Let's start making!
Manufacturing Method No. 1

We will need:
Material
Plywood;
- pine board;
- nails;
- wood glue.
Tool
- drill;
- a hammer;
- chisel;
- manual frezer;
- ruler;
- pencil;
- roulette.
The first step is to find the necessary material, plywood or trimming boards are suitable for this. Further, according to the presented drawing, it is necessary to mark up, then cut out all the details of the case. It is necessary to make special grooves into which the partition will be placed, for this we use a manual milling cutter, or another available tool.

The diagram shows the following body parts:
1 - wall (2 pcs.);
2 - sidewall (2 pcs.);
3 - bottom;
4 - groove along the thickness of the partition and a depth of 1/2–1/3 of the thickness of the material
When everything is ready, all elements of the box body should be sanded. Next, we assemble the body together, fix the parts with wood glue, and then additionally fasten with small nails.
Now we make a partition for the box, cut out a special handle, for this we use a jigsaw.

When the partition is ready, grease the grooves with wood glue and install it in its place.

Next, from the planks we make overhead handles, with the help of a planer we round the corners. Then we make tool holders from the rails, use a jigsaw, and a drill. The holes will serve for screwdrivers, and pliers, etc. will be installed in square cutouts. tool.

In order for the box not to get dirty, and to be protected from the environment, we cover the surface with varnish. As a result of the work done, we get such a homemade box.

Manufacturing method No. 2
Drawer-stool

Material
Plywood or OSB;
- wooden beam;
- self-tapping screws;
- wood glue.
Tool
Available cutting tool;
- screwdriver;
- ruler;
- pencil;
- roulette.
We take an existing sheet of plywood, make markings on it, and, according to the dimensions presented, cut out the lid (Fig. 1), then the longitudinal sides (Fig. 2) and sidewalls (Fig. 3).

Next, we take a wooden beam with a section of 40x50 mm, cut out a handle, and 4 legs with bevels at the ends at an angle of 15 °.

Next, we assemble the structure together, using self-tapping screws as fixing elements.


Parts layout:
1 - cover;
2 - tsarga;
3 - handle;
4 - leg;
5 - sidewall.
When everything is ready, use sandpaper or a grinder to round off sharp corners and clean the surface. Next, you can apply a protective coating.
The end result should be such an unusual tool box, which, if necessary, can be transformed into an ordinary stool, for this it is enough to turn it over and put it on legs, with it it will be convenient to reach the place we need, at a time when growth does not allow do it.
Manufacturing method no. 3.
Box for the young master.

Does your child love to craft? We offer to make a small box with him, where he will store his favorite tool.
To make a box with our own hands, we need the following
Material
16 mm boards;
- round wooden beam;
- self-tapping screws;
- wood glue.
Tool
Available cutting tool;
- screwdriver;
- ruler;
- pencil;
- roulette;
- clamps.
First you need to take the existing boards with a cross section of 16 mm, then we make the markup, according to the dimensions provided, after which we cut the wood into the component parts we need.

The drawing shows the following details:
1 - sidewall;
2 - bottom;
3 - handle;
4 - handle stand;
5 - holder.

Using sandpaper, we grind the surface and remove sharp corners. When everything is ready, we begin to connect all the parts together, first you need to connect the bottom and sidewalls, then we put vertical racks along the marked lines and at the same time we put a horizontal handle.
We fix everything with glue and screws. Then we install special holders for screwdrivers.

Now you can paint, choose the color and coating at your discretion.
The toolbox is ready.
Manufacturing Method No. 4

The next version of the tool box is well suited for carrying various and necessary equipment for us, its appearance will be distinguished by solidity and reliability.
To make a box with our own hands, we need the following
Material
The board is not thicker than 12 mm;
- self-tapping screws;
- joiner's glue;
- pen;
- corners 8 pcs.;
- latch 2 pcs.;
- loop 2 pcs.

Tool
Available cutting tool;
- screwdriver;
- ruler;
- pencil;
- roulette;
- clamps.
For the manufacture of the box we use such wood as: pine, linden or poplar. The most optimal thickness of the boards will be a thickness of 12 mm.

Next, we make the markup, according to the indicated dimensions in the drawings, after which we cut it into its component parts, as shown in the photo.

Full list of required parts.

In order to make sure that the wood was cut correctly, you need to put all the parts in a single box.
First, we assemble the bottom part and the lid of the box, for convenience we use clamps and corner clamps. We fix the parts together with carpentry glue.

Then, using a drill, we drill a hole for the self-tapping screws, we drill the holes.
This article is about how to make a wooden tool box. If you have a lot of tools and want to keep them organized, the best thing you can do is to create a simple wooden box. From our experience, we find them very useful as they are lightweight, durable and provide plenty of storage space for tools. Don't forget that you can adjust the size and design to suit your needs.
The main components of the toolbox are made from 20mm planks, as they have a beautiful appearance and are very durable. In addition, we recommend that you glue the joints and fasten everything with self-cuts. Try to screw in the screws as symmetrically as possible.
Upon completion of the assembly, it will be necessary to sand the entire surface of the box. Make sure all edges are smooth. Otherwise, you may injure your hands on sharp edges. Also, be sure to check that the heads of all the screws are flush with the wood surface. Get rid of dust and chips before painting.
What you need to make a wooden tool box
In order to make a wooden tool box, you will need the following:
materials
Instruments
- protective gloves, goggles;
- ruler, ;
- crayon, tape measure, level, carpenter's pencil;
- and drills.
Adviсe
- Pre-drill holes in wood components before tightening screws.
- Make a handle out of a cylindrical stick.
Time
- 1 hour
Drawer decoration
Making a simple wooden toolbox is one of those projects that can be done in less than an hour. But it can make your life easier, especially if you work with tools a lot.
Smart Tip: Before joining the parts, add some glue to the joints. Immediately remove excess adhesive with a dry cloth, otherwise it will be difficult to remove after drying.
The first step of the project is markup. As you will see in the next step of the project, we will be using 1x8 boards to make the tool box. Therefore, you should use a carpenter's pencil and square ruler to mark lines on wooden boards.

In order to get accurate cuts, we recommend using a jigsaw or a good circular saw. Make sure the saw has smooth teeth or it may tear off the edges.
Smart Tip: Also, check that the blade will pass exactly along the cut line before sawing.

In the picture, all the components needed for the box. A circular saw can make the job easier, as many of the cuts need to be made at an angle.

You must use this blueprint when crafting crate components. Make sure you double check all measurements otherwise the components may not match.

After creating the wood pieces, you need to drill holes around the edges. As you can see in the picture, you need planks on the wood block to prevent damage to the surface. Drill three holes on the bottom and two holes on the sides.
Smart Tip: If you are not experienced in woodworking, you should draw guidelines for pilot lines. Indent from the edges to prevent splitting of the wood.

If the bottom edges are not smooth, you should carefully sand them with 120 grit sandpaper before assembling.
Coat the bottom ends with wood glue to strengthen the connection. Remove excess glue with a dry cloth, otherwise you will waste time cleaning it.
Press the components firmly and leave for half an hour. If you use good glue, it will hold the joints together well.
Still, screw the self-tapping screws into the drilled holes anyway.

In order to obtain a solid construction, we recommend using self-tapping screws. Work carefully to prevent damage to wooden components.
Smart Tip: Align all parts before twisting. As you can see in the picture, the edges should be even.

After installing all the components together, the tool box should look like the one in the photo below.

Make a handle out of a cylindrical wooden rod. Handle diameter is approximately 20-25 mm.
Smart Tip: Use a ruler to cut the rod to the desired length.

Add some wood glue to both ends of the rod before pushing it back into place. Then drill a hole and screw in the screw. Hold the handle while twisting, otherwise it may move out of place.
Smart Tip: Leave about 15 mm from the top edge to the wooden handle.

Don't forget to smooth the edges of the wooden components with sandpaper.
Smart Tip: Clean the box of dust and chips before painting.

After completely sanding the entire surface of the box with sandpaper.
Smart Tip: Apply multiple coats of paint, varnish, or stain to enhance the look of the wood and protect the materials from rotting.

If you want your box to have the same dimensions as in our article, we clarify that 1 inch equals 2.54 cm.