Do-it-yourself brickwork effect. Brick wall in the interior: unusual combinations and design solutions. Prices for building levels
The cheapest way to texture finish is to imitate brickwork. It fits almost any interior style, and even an inexperienced master can handle such a texture. Therefore, now we will talk about how to create such an imitation.
Method one - wallpaper and paint
The simplest brick wall decoration is done using textured wallpaper and paint. To do this, you need to purchase wallpaper for painting (preferably from fiberglass - it gives the most interesting texture), paste over the area intended for finishing with them and take the following actions:
- We let the wall dry completely and go about our business for 2-3 days.
- We go to the store and buy thin masking tape.
- We stick strips of adhesive tape on the wallpaper, placing them parallel to the plinth with a step (distance between adjacent strips) of 6-7 centimeters. Wider is not necessary - your "brick" in this case will not look quite natural.
- We cut 7-8 centimeter strips of adhesive tape. You need a lot of them - to calculate the number of strips in one "row", you need to divide its length in centimeters by a factor of 12.5.
- We paste these strips on the wallpaper, perpendicular to the horizontal rows, placing them in 12.5 cm increments. Moreover, in the first row (from the floor or ceiling), the strip is glued at a distance of 12.5 cm from the corner. And in the second row - at a distance of 6.5 cm from the corner. So we can simulate the overlap of the vertical joint in real masonry with the top brick.
- The next step is tape. You buy water-based paint, mix brick color into it and apply it on the wall with a roller, painting over both adhesive tape and the "windows" obtained with it. After an hour, this operation will have to be repeated and the paint should be allowed to dry for 2-3 hours.
Next is the dismantling of strips of adhesive tape. They are carefully torn off, getting seams between the painted bricks. After that, you need to pick up a brush and carefully paint over this seam with another color (usually white or black). And if you accidentally paint over the edge of the brick, then you should not worry - this creates the effect of uneven edges. But streaks are categorically excluded here, so when painting the seam, the bottom row must be covered with thick cardboard.
Do-it-yourself visual imitation of a brick wall is done literally in a day. And even faster if friends or household members are involved in the process of cutting and sticking adhesive tape. Moreover, water-based paint does not smell at all. Therefore, this technology can be practiced even in the cold season, when the room cannot be ventilated.
A significant disadvantage of the technology is the lack of masonry depth. The color can be chosen with a successful shift of colors, the texture is given by the relief surface of the wallpaper, but the depth in this case cannot be obtained. Therefore, the falseness of visual imitation will be noticeable already from a meter distance. However, the simplicity and low price of such a finish cover this drawback almost completely. In addition, "bricks" can be removed from the wall along with wallpaper or painted over if it seems to you that this finishing option does not suit your home at all.
Gypsum and ceramics - presentable, but expensive
The most realistic brick look is created using gypsum or ceramic imitation of this building material. You prepare the wall, purchase finishing material of any color and texture, and prepare the adhesive. The process of pasting tiles under a brick does not differ from the technology of tiling. That is, you apply a solution to the back of the element with a notched trowel and press it against the wall. The horizontal in this case is checked by a level, the seams are indicated by inserts from trimming tiles, and every second row begins with a half of a decorative brick.

With this, an imitation of the chess structure of the masonry is achieved. In the final, the seams between the tiles are filled with cement or a special grout. Let's say right away - such an imitation of a brick wall with your own hands takes a very long time and is not always of high quality. An inexperienced master is transported for more than a day, even with a small area. However, if you know how to work with tiles, then this method of facing will not cause you any difficulties. In addition, decorative brick imitation for interior decoration is not cheap. But it can be done with your own hands, reducing the price of such a cladding by saving on materials.
To do this, you need to purchase or rent a silicone mold for casting such "bricks" and a bag of finishing plaster mixture. After that, you make a solution of medium density and pour it into the mold, pressing down with a spatula. After some time, the dried tiles are removed from the mold and glued to the surface. Self-made finishing material is no different from a store-bought counterpart, however, the speed of manual production is, as a rule, depressingly low - 10-15 tiles (and this is even at best) per day. Therefore, some home craftsmen cut out such drywall bricks, freeing it from the top paper layer after cutting.

The masonry imitated with the help of homemade bricks turns out to be surprisingly realistic. She has both texture and depth, and the color can be selected using. Factory bricks give the effect of a 100 percent real brick wall, which does not differ from real masonry either in color or in touch.
Method three - panel trim
If you don’t like masonry coloring, and you don’t build a tiled brick wall with your own hands at all due to a complete lack of experience in facing work or the incredible curvature of the surface, then panel finishing will be the best way out of this situation for you. In this case, you cut a brick out of styrofoam and glue it onto a drywall panel. After repeating these steps many times, you fix the plasterboard pasted over with imitation of bricks on the section of the wall being finished. Next, you need to fill the joints between the polymer tiles with plaster and paint the bricks in the desired color.
Wall decoration with decorative bricks on panels allows you to work with frame structures. That is, in fact, you may not have the wall itself - it is replaced by a drywall slab, which is very convenient if you are trying to finish a new interior partition or box in this way that covers engineering communications. In addition, this technology is useful during the finishing of curved walls. To make bricks from polystyrene, and even better - from extruded polystyrene foam (this is such a hard foam), you need to cut a standard slab into strips 6-7 centimeters wide, from which bricks 12.5 cm long are then cut.

The recommended plate thickness is 2 cm. If you do not plan to form a textured surface, then instead of a thick slab for wall insulation, you can take a thin tile for finishing the ceiling. Fixing the foam on drywall is done with glue or finishing plaster. You draw stripes on the surface of the base in increments of 7-8 centimeters and stick imitation bricks on them. In addition, they can be screwed to plaster with self-tapping screws 20-25 millimeters long, but in this case, try to use furniture hardware that does not rust.
Fastening drywall to the wall is carried out in a standard way - on self-tapping screws to a metal or wooden frame. The seams between the bricks are filled with ordinary mortar. For coloring, it is better to use thick water-based paint.
The main disadvantage of this option is the high flammability of the bricks. According to building codes, foam in the interior is supposed to be covered with a layer of centimeter plaster, even if this material was foamed using carbon dioxide, not air. Therefore, before making an imitation of a brick wall from polymer cubes, you need to calculate the possible risks of fire hazards. Do not use this lining near sockets, in the kitchen or in the children's room.
Stucco wall - cheap and effective
Decorative brick for interior decoration is not cheap, the foam version burns and poisons the air with harmful chemicals, the painted one does not look realistic. As a result, the picky homeowner is left with only one option - to mold an "almost brick wall" of plaster.
Moreover, the lack of experience in plastering surfaces in this case will be more of a plus than a minus, because we need not a smoothly worn wall, but a torn texture with multiple layers, cavities and other defects. And from the tools you only need wide and narrow spatulas and a screwdriver with a mixer nozzle. The very process of making a cladding in a brick format with your own hands is as follows. Clear the space under the wall. Lay old newspapers on the floor, covering a meter section. This will come in handy when you clean the floor from blots from the plaster solution.
Coat the wall section with a primer that will increase the adhesion of the surface. The very possibility of holding the plaster on the wall surface sometimes depends on whether priming was done or not. While the primer dries, you can prepare a solution for a decorative coating. To do this, take a bucket, pour 300 milliliters of water into it and pour in the dry mixture. Moreover, as a basis, it is better to choose not a finely dispersed finishing plaster, but a starting composition with a rough structure. After the mixture is poured into the water, beat the solution with a construction mixer, obtaining a plastic mass.
Next, you need to apply a 5 mm layer of plaster. To do this, take a small portion of the solution from the bucket with a narrow spatula and apply it to a wide tool; turn the wide spatula with mortar towards the wall and, laying it almost parallel to the surface, spread the plaster over the surface to be finished. Repeat this procedure until the entire area is covered with a layer of plaster. You will end up with a sloppy finished surface, which is very good. After all, we are not creating an evenly worn plane, but a texture that imitates the rough edges of a brick.
After application, the solution is allowed 30 minutes to partially dry. During this time, you must apply a masonry grid to the surface using a ruler and thread. And it’s done like this: you measure 7 centimeters from the ceiling on both sides of the wall, then your two assistants pull a thin but strong thread along these marks, and you, holding the middle of this segment, pull the thread and sharply release it, leaving it on the damp plaster well-marked furrow. After that, the procedure is repeated again. And so to the floor.
After 30-40 minutes, the plaster will dry out, but remain plastic, and you can cut horizontal grooves in its body using jointing - a masons tool that removes excess mortar from the masonry joints. It can be made from an old spoon by cutting a semicircular handle to a width of 8-10 millimeters. In addition, instead of stitching, you can use a centimeter-wide carpentry chisel. The process of selecting the groove itself is carried out as follows: press a plaster rule or a flat board against the stuffed line and draw a joint along it, pressing it into the wall. Once you've scratched through the soft finish and hit the hard surface, you can release the pressure. Just do not try to remove a layer of plaster in one pass by jointing - this way you can damage the entire texture by accidentally tearing out more mortar than necessary.

The next step is the formation of vertical seams. To do this, we need a foam brick 12.5 × 6 centimeters, which we will apply between the horizontal seams, outlining the vertical ones. At the same time, one should not forget that the vertical seam of the lower row must be blocked with a brick from the upper one. After the plaster has completely dried (after 1-2 days from the moment of application), you can clean the edges of the bricks with sandpaper, getting rounded edges, like on old masonry. Next, you have to paint the main surface and masonry seams.
As you can see, anyone who can read these instructions and hold a spatula and jointing in their hands can make an imitation of brickwork from ordinary plaster. Moreover, such a finish is carried out at the speed of coloring and gives the same reliable result as facing with decorative tiles. A wall made according to this scheme is not afraid of fire, looks very realistic and is easily removed after such a finish gets bored with the owners of the home. But before applying the decorative layer, the surface to be trimmed must be prepared.
How to prepare a wall for finishing with your own hands
If your goal is a realistic imitation of brickwork, then you cannot do without the wall preparation stage. After all, real masonry gives a flat surface (if it is built by a skilled bricklayer). And before applying the textured layer, it would be nice to trim the walls. Moreover, the lopsided plane is corrected with the help of hired specialists, and a relatively flat brick wall is done by hand. And for this you do not need to have the skills of a master plasterer - just buy a sheet of drywall and fix it to the surface using pre-drilled holes with sealing inserts and self-tapping screws.

Any decorative bricks can be glued onto the drywall surface - even an inexperienced finishing specialist will do this work. In addition, it is easy to apply plaster on it - primed drywall has very high adhesion. And perfectly even drywall will not let you make a mistake if the floor or ceiling is skewed - just put the sheet on a level and sculpt bricks on it, stepping back from the edge of the desired distance without additional checks of the horizontal and vertical of each row.
How to paint decorative bricks - different options
In conclusion of the material on the decorative wall decoration, we offer you some tips on the selection of coloring compositions. After all, unsuccessful painting will destroy the fruits of the painstaking work of even a professional finisher.
Therefore, at this stage, you should adhere to the following tips:
- Purchased brick does not need to be painted - its surface was covered with the right color at the factory. And you don’t need to repaint either - this way you will kill the planned presentability.
- A foam brick, cut from a standard sheet with your own hands, is well painted with a water-based acrylic emulsion. Solvents are basically excluded here.
- Any water-based paint is suitable for wallpaper, but the ideal option in this case is a thick composition that resembles sour cream in consistency.
- Before painting, the plaster must be primed and painted in at least two layers. In this case, at first the brush goes along the horizontal lines of the seam, and then along the vertical grooves.
- If the composition lacks density, then PVA glue can be added to the water-based paint.
Interior design is done in a variety of ways. If we consider the cheapest and most affordable technologies in terms of independent implementation, then one of the simplest and cheapest is imitation of brickwork.
This design option is applicable to almost any building, regardless of the material of the walls. How to do it yourself, without the involvement of assistants, and even more so specialists, we will figure it out in this article.
Step-by-step algorithm of actions
Wall scribing
The easiest way is along a long rail. Naturally, with exact observance of the distances between the horizontals (the bricks have the same dimensions). You can refer to the standard. The thickness of a single one is 6.5, one and a half - 8.8, double - 13.8 (cm).
Applying an imitation coating
There are many techniques, so we will limit ourselves to only the most common, based on the fact that the work is done independently.

With adhesive tape (painting tape)
Before starting work, the wall must be painted in the color that should be at the seams. Usually gray or white (or something in between). The fact is that depending on the components, their ratio in the mixture, the dried solution acquires a different shade. Further, horizontal seams are indicated (tape sticker). After that, it is easy to select individual bricks, simulating laying with a shift of products in adjacent rows (pieces of adhesive tape are attached vertically).
Peculiarity: since the tape will then have to be removed, there should be free ends, sufficient to grab them with your fingers. After that, the prepared mixture is applied to the wall.
Important: the consistency of the solution should be such that it does not flow down the wall. And the layer should be applied minimal, no more than 2 - 3 mm.
Option number 1- based on gypsum. But this material quickly hardens. Therefore, it is necessary to introduce the so-called "retarder" into the composition of the mixture. Its application leads to the fact that the layer of gypsum mortar does not harden for 20 to 40 minutes. Otherwise, it simply will not work to remove the tape to indicate the masonry seams.

Option number 2- a mixture of plaster + tile adhesive (1 to 1). In this case, only the smallest fractions of sand are used in the preparation process. This means that you will have to specially purchase it, since the usual one (from the river or from the quarry), even well-sifted, will not work.
disadvantages: With a large object, pasting the wall with adhesive tape will take a lot of time and the material itself. Too fast curing of the solution can lead to problems removing the adhesive tape from it in order to preserve the appearance of the picture.
Stenciled
The method is more complicated, since you have to prepare the grate. It is made from a sheet of plastic or rubber, knocking out rectangles in it.

In addition, it is advisable to create a template from thin rails, the undoubted advantages of which are:
- the ability to work with solutions that quickly harden, because they have time to "grab" and dry;
- a wide choice of materials and flexibility in carrying out any complex of works. The form of the design fully repeats the elements already considered;
- the ability to create a template directly on the wall and images of any shape;
- naturalness and naturalness of the appearance of the resulting brickwork.
disadvantages: a stencil needs to be made or money spent on the purchase of a finished product.

Imitation of a brick wall made of foam plastic (ceiling tiles) with your own hands
For false bricks, a flat polystyrene foam tile without a pattern is suitable. For our purposes, you can use any of its sides. The optimal size of the “stone” is 7/15 cm. If you increase the proportions, the wall will look unnatural. The process of making “stones” is simple: we squeeze them out of the ceiling tiles.
First, we will mark the polystyrene foam with allowances for the seams. Next, we push straight lines, after which we cut out the “bricks” with a paint knife. We glue the finished products with our own hands on the desired part of the wall. We use ceramic tile adhesive as a binder. There is no need to fill the seams with plaster. The gaps between the “stones” must be made quite small: 1-1.5 mm. After finishing the work on the sticker, the bricks need to be painted. We try to apply as large a layer of paint as possible into the gaps, thereby creating an imitation of brickwork.

Do-it-yourself imitation of a brick wall from plaster (tile glue)
For the manufacture of parts, any tile adhesive is used, which is sold in the form of a dry mix. It must be diluted with water to a state of very thick sour cream. It is best to use the composition of white. Then we divide the whole mass into 3 parts, in each of which we add a little paint.
It is important that the paint differs in shade in each part.
Mix the mass in each pile like dough. We will get a mass with beautiful divorces. We roll out a “pancake” from it and cut bricks of the same size. Lay them out to dry. We do this until we collect the required number of “stones”.
We stick them on the wall using the same tile adhesive. We fill the seams with a composition painted in a darker color. At the end, the surface of the wall can be covered with several layers of varnish.

How to paint false bricks?
To get a more natural shade, you should mix two types of ocher: light and red. Then add a small amount of white to them. To make the texture of the brickwork look like a real one, we use the tamping technique for applying paints.
We take a sponge and begin to apply a pre-prepared thick mixture to the wall. After that, you need liquid paint of a “burnt bone” shade. We spray it on the bricks with a regular toothbrush.

To make the decor look even more natural, we color each row in a special way.
The second can be tinted with Mars diluted with water. For the third - use sienna and white. All paints are applied using the same tamping method. Then continue to alternate shades in the same order. Upon completion of the work, it is recommended to varnish the wall in two layers. If there is a desire to get a matte surface, then lightly walk with fine sandpaper.

This type of decoration has several subtleties, because, due to its features, it can both create a special atmosphere and clutter it up.
It is worth remembering that it is not at all necessary to imitate masonry in the area of \u200b\u200ball walls, it will be enough for one surface out of four, decorated in this way. When planning actions, it is important that you imagine a complete image of your own room - and then everything will work out.
Imitation of a brick wall with your own hands - photos of real objects:

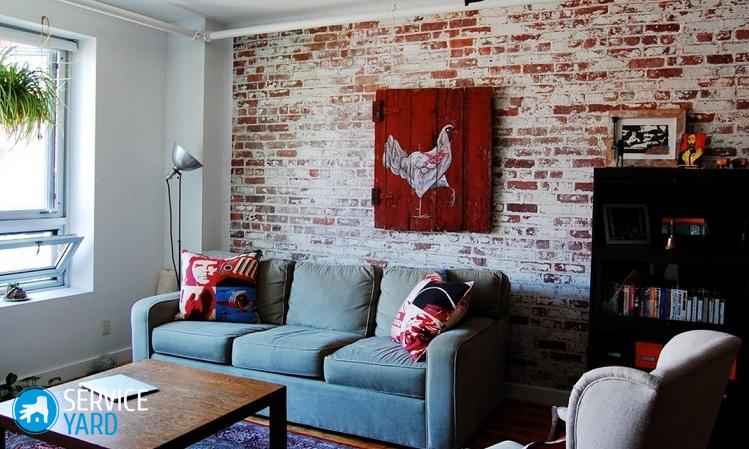
Imitation of brick in the interior of the living room

Fake brick wall in the bathroom

imitation brick wall
do-it-yourself cardboard in the bedroom

Fake brick accent wall in the hall

Imitation of aged brick
in the interior of the living room

Styrofoam false brick in the hallway

Brick loft in the interior of the living room

Imitation brick on the kitchen work wall

Figured masonry from false bricks
in the interior of the living room

Stencil false brick in the dining room

Tricolor brick wall imitation
do it yourself

Living room interior
with false brick trim: fusion of a loft with neomodern

flight of stairs,
clad in gypsum bricks

Imitation brick wall in the hallway

Fake brick accent wall in the living room

Textured decorative brick
from tile adhesive

imitation brick wall
do it yourself in the interior of the bedroom

Combination of natural and fake bricks
in the interior of the fireplace room

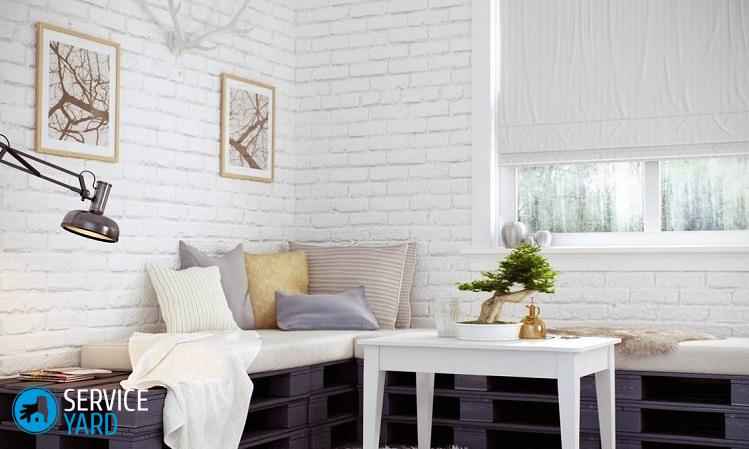
Do-it-yourself white false brick
in the office interior

Imitation of cardboard brick
on the accent wall of the attic

Ceiling tile brick
in the interior of the living room

big brick,
stencilled

Fake brick accent wall
in a minimalist room

DIY brick imitation
in the interior of a private house

Highly...
A lot of fake bricks in the interior. Clear overkill!

Imitation of brick walls
do it yourself in the interior of the hallway

Painted Styrofoam Brick
In bathroom

Stencil brick fake arch
in the interior of the living room
Every day, a brick wall is used more and more often: before, such surfaces were carefully decorated, and today, on the contrary, they are even artificially created. Moreover, not only professionals, but also ordinary people can reproduce such an imitation. All you need is a little patience, a great desire and this article, from which you will learn all the secrets of creating an imitation of a brick wall with your own hands.
Option 1 - brick wall made of cardboard.
To build it, we need:
- Ruler and pencil;
- PVA glue;
- directly sheets of cardboard - thick, as in packing boxes;
- scissors or stationery knife;
- tassel;
- varnish, paints;
- hot glue gun with rods;
- thick paper towels.
- Let's prepare the surface on which it is planned to create a false brick wall. To do this, we will clean it of old wallpaper, if any, and prime it (instead of a primer, you can use an aqueous solution of PVA glue, the ratio of water to glue is 2 to 1) or, if the wall has been painted, thoroughly wash it from dust and degrease.
- Next, you should decide on the size of the brick and which side it will lie on. There are several options for both sizes and styling methods. How exactly your wall will look like should be decided at this stage. And to make it easier to do, pay attention to the schematic drawing below, on it you will find the most popular brick sizes, and an indication of the correct name of each of its faces (the number 1 indicates the bed, 2 - spoon, 3 - poke).

Let's say you need an imitation of red brick masonry - with a spoon 228 × 65 mm.
- We take a sheet of cardboard and draw it in accordance with the given dimensions.
- When all the "bricks" are drawn, cut them out.
- Let's complicate the task in the example and assume that the brickwork should not be solid, but open a certain pattern, for example, from a calendar. Note its location on the wall. If the drawing opens partially, immediately glue it.
- We cut part of the cardboard bricks in half, they will be needed to create a chess "order".

- We start laying the "bricks" from the lower left corner with an indent of 7-10 mm. The same indentation should be done between the rows. Every second row should start with a half.
- When all the cardboards are glued, you will need to wait until the glue dries. For building PVA, it will take at least a day. Only after that you can proceed to decorating with napkins.

- We apply glue to the surface of the “bricks” with a brush, crumple the napkin in our hands until wrinkles form and apply it to the cardboard smeared with glue. From above, we again coat with glue, push through the gaps with a brush or finger, and when the entire wall has been treated in this way, leave it to dry - for a day.
- The glue has dried and hardened, which means that you can proceed to the last stage - painting with the selected color. In this example, we are creating an imitation of a “bare” brick wall, so we need a brick color, to get it we mix orange, red, black and white paints. You can apply this color with a brush, or you can use a sponge, most importantly, do not forget to smear the “seams” between the false bricks with a thin brush. Here you can also choose the color according to your preferences, but light gray looks most often and most realistically.

- To protect the surface from dust and moisture, it is additionally recommended to varnish it.
Option 2 - a brick wall made of foam.
For its arrangement you will need:
- glue;
- Styrofoam;
- plywood;
- soldering iron;
- spray paint for cars;
When everything you need is at hand, start acting in accordance with the instructions.
- Cut the styrofoam into rectangles of the same size. In our case, it will be 20x6 cm.
- In the case of arranging an interior element, coat the plywood with glue and glue “bricks” to it at the same distance from each other (gaps). If an imitation of a brick wall with your own hands is planned on the wall, then the latter must first be cleaned and primed.
- When the glue (you can use standard building PVA) dries, use a soldering iron to imitate the structure of the brick. Only work in a mask - melting foam is very toxic!
- That's practically all. It remains only to process the resulting wall with spray paint in 3 layers (each of them should dry well before being covered with the next one).

Option 3 - traced brickwork.
To simulate it, you will need:
- kitchen sponge;
- Ruler and pencil;
- paint of the desired color (in our case, it will be obtained by mixing the available 2 red and 3 dark colors).
That's the whole list.
- Cut the sponge to the desired size of the brick.
- On the wall where the imitation will be created, draw the lines along which you will work.
- Dip the sponge into the paint (or a mixture of both) and press it firmly against the wall. Do this several times until you get the desired print. Next, make a gap (indent) and repeat this paragraph again until the entire wall is covered with such “bricks”. And do not be afraid if something is not perfect - it's even more natural.

Option 4 - putty brickwork.
To recreate it you will need:
- putty directly (any, except for finishing);
- level;
- pencil;
- putty knife;
- window seal with a thickness equal to the desired seam of the false brick wall.
A furniture stapler might also come in handy (if the adhesive you choose won't hold the sealant securely), but it's not necessary.
So, the standard dimensions of a brick are 250 × 65 × 120 mm. In accordance with them, the basic marking of the surface should be carried out.
- Step back from the floor 65 mm, use a level and a pencil to mark a straight line and glue the window seal on it.
- Step back 65 mm from it again and do the same again. And so on until the entire surface of the future "brick" wall is filled with these horizontal stripes.
- Make a vertical line. To do this, step back from the lowest point (from which it doesn’t matter, unless there is a corner in your false wall, otherwise you need to start from it) 250 mm and draw a vertical line, then another 250 mm ... and so on throughout the first row. The second row and each subsequent even one should be done in the same way, only in order to get a checkerboard order, the first “brick” must be halved. After all the drawn lines, glue the sealant.
- Dilute the putty, fill it with “honeycombs” to the full thickness of the seal (it is not necessary to cover it up) and leave it to dry completely (about 24 hours).
- Peel off the seal (this is easy to do, because it does not “resist”), paint the imitation of a brick wall with your own hands in a more natural color, and after it dries, cover the seams with tile grout or cement.

Video.
A brick wall is a fashionable interior element. It looks spectacular in luxurious apartments, and in a modest small apartment. In order to create it, it is not necessary to be a professional bricklayer or finisher - in hardware stores you will find many materials that allow you to create a spectacular imitation. Now we will tell you how to make a brick wall in the interior with your own hands.
Use cases
Before you make a brick wall with your own hands, decide what kind of room you are going to finish in this way. Brick or natural stone will look good in almost any room:
- in the kitchen;
- in the living room;
- in the bedroom;
- in the hall;
- in the bathroom.
Important! Perhaps this option is not very suitable for a nursery, but it all depends on age. For a baby, a brick wall, of course, is not suitable, but in a teenager's room this method of decoration may be quite appropriate if the young owner agrees with this. In some cases, a brick partition is also suitable for a preschooler or a younger student. For example, a low border can highlight a corner for creativity or games with building materials.
Kitchen
It is not necessary to brick all the walls, although this option is also possible - for example, for a medieval or ethnic style. But in any case, you will have to combine this material with other, much more modern ones. So it is better to finish one section, focusing on it. It could be:
- dinner Zone;
- apron;
- niche;
- workshop, if any.
The materials from which the rest of the items will be made must be taken very carefully. Brick is organically combined:
- with decorative plaster;
- with a tree;
- with natural stone.
Important! A very interesting option is when one wall is brick, and the rest are upholstered with wood panels. As for plumbing equipment, in this case, a stone, stone-finished sink or shiny metal will do.

Living room
In the living room, brick or natural stone wall decoration will look good next to a real or electric fireplace. You can lay out the entire wall in this way or a separate section of it. This option is very suitable for zoning. But you need to carefully consider how you will select other zones:
- The brickwork from the side of the window will look original. It can be supplemented with cast or wooden ornaments.
- If your room is made in a medieval or neo-Gothic style, then you can lay out all the walls with bricks. But you need doors and windows that are suitable in style - white double-glazed windows and plastic doors will not look very good, in such a situation noble woods are better. In extreme cases, you can pick up plastic under the tree.
- An interesting option can give a brick partition. This is especially true for a studio apartment or a very large living room. It is better to make the partition low, it will simply mark some area. On it you can place figurines or pots with plants.
- A niche lined with brick or natural stone always looks great. This is a natural area that can be designed quite differently from the rest of the room, so in this case the brick wall is perfectly combined with almost all finishing materials.
Bedroom
In this room, you should not lay out all the walls with red brick. There are several reasons for this:
- walls that look like they have no finish make the room feel colder than it actually is;
- dark walls in many people cause an alarming and gloomy mood.
Important! If you really can’t wait to apply just such a method, construction stores are at your service, where you will always find “brick-like” wallpapers of various shades. It is better to choose those that are lighter.
Hallway
You can decorate this room with white, red, gray and whatever brick you like completely. An ideal option, no matter how you achieve the desired result. The main thing is to choose furniture that matches the style. She may be:
- from wood;
- from metal;
- with leather upholstery.
Important! Plastic cabinets and shelves are completely unsuitable for such walls. They will stand out from the general style.

Bathroom
The fashion trend is to leave brick walls in the bathroom unfinished. This is not a good idea, besides, only the inhabitants of brick houses can afford it. In all other cases, it is better to choose a tile or wallpaper with the appropriate pattern. If you like brick walls in the interior - how to make them not look like an eyesore? As in all other rooms, choose the right finishing materials and equipment:
- As in the case of the kitchen, plumbing fixtures under natural stone are preferable - marble or granite, for example. Manufacturers now offer a lot of options - you will find bathtubs, toilets, and sinks.
- Wooden or metal cabinets are more suitable, and it is better to build in appliances. However, on sale you can find washing machines that will not stand out from the “brick” style.
There are many application options:
- you can finish all the walls, and even make an “apron” over the bathroom from decorative bricks, and not from tiles, as is usually done;
- you can finish one wall - for example, the one where the mirror hangs (it is better if it is “antique”;
- if the bathroom is combined, you can make a low brick partition between the bathroom and the toilet, and in a large room with several sinks, separating the wash area;
- if you chose the Provencal style, you can leave the brick in the corner near the imitation window, or vice versa, near the door.
Advantages and disadvantages
Like any material, brick has its undoubted advantages:
- you can save a lot on finishing;
- the material is easy to work with;
- all other objects are very clearly visible;
- brick provides good sound insulation;
- brick is resistant to moisture;
- the wall "breathes".
Important! For finishing the brick wall does not need to be further leveled. This material perfectly hides small and even not very small surface imperfections.
As for the interior itself, against such a background, all other objects stand out brightly, it is they, and not the wall, that attract attention. Finishing bricks provide excellent sound insulation - however, not all materials with which you can make a “brick” wall have this quality.
A Few Disadvantages
Any interesting idea turns out to be not as attractive as it seemed at the very beginning, because any material has its own characteristics and disadvantages. What are the "pitfalls" in the decision to make a brick wall in the interior with your own hands?
- real brick perfectly accumulates dust that clogs into the seams;
- the room seems smaller than it is;
- red brick absorbs a lot of light.
Of course, dust will not accumulate if you use wallpaper instead of natural brick. As for the size of the room and light, the same laws apply here as for other finishing materials: dark walls reduce the space and make the room darker, light walls do the opposite. All this should be taken into account when designing the interior.
Dealing with styles
A brick wall in an apartment - how to make it look good and not stand out from the interior? Of course, first you need to decide on the style itself. This finish option is hardly suitable for Classic or Baroque. But in many cases, a brick wall is simply necessary if the room is decorated in such styles:
- Romanticism;
- Gothic or Neo-Gothic;
- Minimalism;
- Ethno;
- Scandinavian;
- Pop Art.
Romanticism
The interior in a romantic style is characterized by mystery and some kind of reticence, leaving room for imagination. Natural materials, including brick, are most suitable for this.
Important! The brick wall will be complemented by decorative plants in forged flowerpots, ceramic panels, porcelain plates.
Gothic
A gothic-style room will take you back several centuries. Brick or stone walls are common in this area. They are combined with rough wooden or metal furniture, embroidered panels or carpets made using the tapestry technique.
Important! In general, draperies should be given special attention in this case. Tapestry on the wall may not be enough. We need heavy curtains and a carpet on the floor. By the way, the floor itself can be finished “under the stone”.
Minimalism
A very popular now design option that does not require much effort. The main thing is that there should be as few objects in the room as possible, as well as decorations.
Important! A brick wall can be without any decorative panels, planters and hangers at all. She is good on her own.
Ethno
Natural materials are an indispensable element of ethnic style:
- In this case, “under the brick”, for example, you can finish the lower part of the wall or even lay a border around the entire perimeter. The top is best done under a tree - from natural panels or wallpaper of the appropriate type. It will give the impression that the house is wooden, but stands on a stone foundation.
- Furniture is better rustic - from unpainted material without polishing.
- Covers and curtains sewn from shreds, homespun rugs on the floor, folk toys as decorations, ceramic and wooden utensils are suitable.
Scandinavian
Conciseness and spaciousness - this is the motto of the Scandinavian style. This is something between Ethnic and Minimalism, but more modern. Brick is better to finish one wall or even part of it, the rest - from almost any material, plain or with a small, inconspicuous pattern. Furniture should be light and elegant, and as for household appliances, it can be anything.
Pop Art
Rough brick wall with posters or graffiti on it. The original way of solving the interior, now quite popular. The furniture is ultra-modern, as are the decorations. Any household appliances, plastic utensils and abstract paintings and figurines.
Brick wall decoration
There are several ways to make a brick wall in the house. Cement mortar is not always needed. There are four main options:
- the brick from which the wall is composed;
- decorative brick;
- wallpaper with the appropriate pattern;
- decorative tiles.
natural brick
The first method is possible, of course, only in brick houses. You don't need much effort to do this, just remove the entire finish and clean the wall properly. In a panel house, you will have to lay an additional layer, that is, reduce the space.
The main drawback is that the brick will be the same color as the house is made of, and when you remove the finish, surprises can await you. For example, there are cases when part of the wall is made of red brick, and part is made of white. This, of course, can be played.
The processing method will be as follows:
- Using acid-containing solutions (sold in hardware stores), clean the wall of salts and cement residues.
- Wash it off with water.
- Sand the surface with sandpaper.
- Fill the seams with putty.
- You can cover the wall with water-based varnish.
Brick wallpaper
The easiest way to make a “white brick” wall in an apartment is to paste over the selected surface with wallpaper with the appropriate pattern. By the way, wallpaper can be not only white, but also gray and red. Work with them in the same way as with all other wallpapers.
Clinker tiles
It is narrow stripes. They are glued in rows. You can originally finish the tile joints - a complete imitation of brickwork is created.
Finishing brick
If you are thinking about how to make a white brick wall in the interior with your own hands, pay attention to the finishing brick. It comes in different colors. In addition, you can find different types of it:
- matte;
- artificially aged;
- glazed.
Important! Such a brick is much thinner than usual. They put it on a special glue.
What tools are needed?
To finish the wall with decorative bricks, you will need some tools:
- metal square;
- building level;
- roulette;
- putty knife;
- bucket;
- a hammer;
- lighthouses.
Wall preparation
You need to prepare the wall in the same way as for any other finish:
- Remove the remains of the old finish, removing all fragments if possible.
- Repair irregularities - putty is used for this.
- Let the wall dry.
- Smooth out irregularities.
- Apply a layer of primer - it will provide better adhesion of the finish to the wall.
- Dry the surface.
Facing
Clinker tiles and decorative bricks are glued with special glue. It happens like this:
- Scrub the part that will be adjacent to the wall with a wire brush to ensure a better grip.
- Apply glue to the same side according to the instructions.
- Glue the strips on the bottom row.
- Check the process with a level.
- Attach a long and even block of wood to a row of strips and gently hit in several places with a hammer.
Gypsum brick
A “brick” wall can be made from gypsum plaster. The wall is prepared in the same way as for another finish, that is, they clean it, close up defects and grind it. Next, a layer of soil is applied. After that, the sequence of work will be as follows:
- Markup in progress.
- Lighthouses are being set up.
- Masking tape is glued to the junction of future “bricks” - first with horizontal, and then with vertical overlapping strips.
- A solution is made from tile adhesive and plaster in a ratio of 1: 1.
- The solution is applied to the wall in a thick layer (it can be done in several steps) - where the adhesive tape is pasted, there will be seams.
- The tape is removed.
- With a chisel or spatula, each fragment is shaped into a brick.
- The wall can be painted or varnished.
Important! Tape must be removed before the wall is dry!
footage
In this article, we have offered you some ideas on how to make a brick wall in the interior with your own hands. As you can see, there are a lot of solutions and this trend is in fashion. Which option to give preference to - now think for yourself, based on how much you are willing to allocate time, effort and money for this. Happy repair!
Decorating living rooms with natural materials is a good tradition in interior design. Brick joined the long-loved stone, forged metal, wood (from the middle of the 20th century). Having become a successful mainstream in the furnishing of living spaces, this material gives the premises an individual aesthetic. The seeming deliberate rudeness of the brickwork in the interior emphasizes the originality of the room, its figurative contrast and immediately attracts attention - involuntarily there is a desire to touch with a hand.
White brick in the interior gives the room a special aesthetic.The white brick wall favorably sets off the elements of the room's decoration: furniture, textiles, decor. Against its background, color accents sound in a new way and textural nuances in the interior of each room are revealed. Moreover, this is not only an affordable way of original decoration, but also the possibility of creative use of various functional structures:
protrusions;
arched recesses.
 Decor elements on the background of a white brick wall will look new
 Style secrets
Brickwork is a hallmark of various styles.

characteristic pastel colors;
Provencal textiles;
other decorative elements.

ecodesign elements;
natural materials;
pastel colors;
the minimum amount of decor;
white as a base (in northern countries there is so little sun, so a light background is out of competition).
 Using decorative bricks, you can create an accent wall
 Rules for the use of masonry in the interior
Rule #1
Don't be afraid to experiment!
Rule #2
Be guided by a sense of proportion and knowledge of style.
Rule #3
Deciding to experiment, use brick trim in reasonable proportions, highlighting it:
fireplace zone (or hearth zone);
individual architectural elements: niches, columns, arches, partitions;
accent wall.
By abusing white brick wall decoration, you can get an uncomfortable cold atmosphere instead of the expected stylish sophistication.
 With this solution, you can highlight specific areas in the interior
 What are we going to make bricks from?
There is a large selection of materials for decorative masonry (or its imitation). Differing in appearance, texture, price segment, they will be able to satisfy any consumer demand.

drawing a masonry joint on fresh plaster that retains the shape and dimensions of the brick;
applying a plaster / putty mortar through a stencil imitating a brick texture;
having previously glued the plane with masking tape (duct tape) along the lines of the jointing masonry joints, putty is applied to the marked area (a continuous layer of the required thickness); the electrical tape (adhesive tape) is removed along with part of the mortar, exposing the natural masonry joint and creating a natural look of brick imitation.
When choosing a material for finishing, the main criterion (after aesthetic and financial) is its functional purpose for a certain type of room. So, in a small hallway, textured wallpaper with imitation is best suited, and easy-to-clean white clinker tiles as a kitchen apron.
 For different rooms you need to select the material individually
 White design secrets
Living room
In the case of a non-standard layout of the room and mindful of using only one plane with a brick surface, try to make it the most bizarre-shaped wall (with ledges, niches, recesses). In this case, laying under white brick will adequately emphasize its individuality. If the shape of the living room is standard-rectangular, then the main element of the decor will help determine the “necessary” surface: it will be located on it.
The recreation area will also be located along such a wall. If there is a fireplace in the living room, then there is no question of choosing a surface for decoration, since the hearth and fireplace area is always distinguished by masonry elements.
 Brick wall for the living room will be a great solution
 Bedroom
The white brick wall in the bedroom is a great design solution. The seemingly rough white brick accentuates the comfort and softness of textiles: blankets and pillows. Against its background, decorative elements will successfully appear: panels, paintings, mirrors, wall lamps.
The advantage of the zone to be decorated is that, for all the “flatness” of a pure, white, “sterile-medical” color, such a surface is not uniform, but embossed and textured.
 White brick wall in the bedroom is a great design solution
 Kitchen
The design of the masonry of its interior is used for the following purposes.
Installation of a kitchen apron.
The main requirement (in addition to design aesthetics) is increased functionality, its moisture and heat resistance. Therefore, white clinker tiles are an excellent choice for the kitchen.
Kitchen zoning.
Highlighting the dining area, the white background of the wall will favorably emphasize the bright colors of individual decorative elements.
Installation of a bar counter or kitchen island (if the area allows).
 When choosing a decorative brick in the kitchen, it is worth considering all the nuances of the room.
 Summing up
Giving the design a special originality and exquisite charm, the use of a white brick wall in the interior of the room still has some drawbacks. Of the minuses, it is worth noting:
the relative high cost of the material;
laborious installation;
reduction in the space of rooms with some types of such finishes.
 Such material is durable and is combined with all interior styles.
 And yet there are much more undeniable advantages. Colored and white brick:
durable;
compatible with many styles in the interior;
especially durable;
resistant to moisture and temperature fluctuations;
goes well with wood, metal, glass.
When applying this type of decoration in the interior, you should remember the dimensions of the room and achieve harmonious interaction with the rest of the design elements.
Video: DIY brick wall in the interior