Without holes and nails: we hang pictures without damaging the walls. Methods for attaching pictures without drilling on the wall: how to fix or hang a picture of different sizes on holders without nails Hooks on the wall without drilling repair school
Very often, after you have made repairs, you want to supplement the overall design with some kind of painting or photograph. But, unfortunately, all plans are overshadowed by the fact that you have to drill a hole in the wall with new wallpaper. Therefore, so that you can enjoy the works of art in your home every day, while not having to ruin the new wall decoration, we will tell you how to hang photo frames on the wall without using a drill.
Sending nails to retirement
Today, there are quite simple and effective ways, thanks to which you can hang a picture, photograph or favorite poster, without drilling the “ill-fated” holes in the wall. We bring to your attention the most popular of them.
Paper clip or clothes hook
This method is best suited for walls with wallpaper. In order to secure the paperclip, you should:
- Make a small horizontal incision at the place of the future fastening.
- Next, fill this place with superglue and place a paper clip or clothes hook there.
- Cover the place of the incision with wallpaper.
Button
This method is very similar to the previous one due to the fact that the base is also “hidden under the wallpaper”, and the protruding part serves as a carnation on which the picture is attached.

Spider Hook
You can purchase this type of fastening at hardware stores. It got its name due to the fact that it has four sharp ends, which are easily attached to the wall, while leaving no traces on it.
Important! This is a very reliable mount, as it can withstand a frame or a picture weighing up to 2 kilograms.
Needle
Another very simple but effective way to hang photo frames on the wall. Since the needle is made of steel, it holds the frame well. Its essence is to simply stick a sewing needle into the wall.
Another option is to break off her ear, and use pliers to drive her into the wall surface. This way you will get a tiny hole that will not be noticeable.
Double-sided tape
This method is best used for walls made of drywall or decorated with thin paper wallpaper. All you need to do is stick tape on the edges of the frame and attach it to the wall. This is a great option for sticking a photo with a frame on the wall if there is no loop.
Important! A huge disadvantage of this method is that the tape can leave traces behind. To prevent this from happening, when taking a picture or photograph, it should be held at an angle of 90 degrees with respect to the wall.
Liquid Nails
How to fix a frame with liquid nails? This is a special adhesive that firmly and reliably connects surfaces:
- You just need to apply them on the back of the frame in small dots, the size of a pea.
- After that, the picture is pressed against the surface of the wall and hold for about 5-6 minutes.
Important! If the product is heavy, then “liquid nails” should be applied to the entire surface in stripes.

polymer adhesive
The advantage of this method is that, unlike other adhesive mixtures, it does not leave greasy marks on the surface. As for the gluing process, it is the same as with “liquid nails”.
Important! In the case of polymer glue, the picture after gluing to the wall should be supported with something and left for a day.
wine stopper
To do this, the wine cork is cut into small circles, and then glued to the wall with quick-drying glue. Next, a carnation is squeezed into this cork, on which it will be possible to hang a photo frame.
Molding or ceiling plinth
This method is suitable for those who want to hang a large number of paintings and photographs on the wall. To do this, you need to glue the molding to the wall surface. A strong fishing line is attached to it, on which it will already be possible to hang pictures.
Modern fastening systems
Hanging photo frames on the walls of your home without drilling is not a problem now and there are many ways. New items in the field of construction work and interior design appear almost daily. This applies even to such trifles as attaching paintings and photographs. To date, the most popular are adhesive fasteners for Command pictures. This is a specially designed Velcro, on which pictures are attached, while leaving no marks on the wall.
Important! These fasteners are suitable for perfectly flat, non-textured surfaces.
The main advantages over nails:
- They do not require titanic physical effort to attach, so even a child can hang a photo frame with the help of fasteners.
- Due to the fact that they do not leave marks on the wall, you can move a picture or other decorative item around the entire perimeter of the room.
- The removal process from the wall takes a matter of seconds.
Important! These fasteners cannot be used in the following cases:
- On delicate and very thin wallpapers. This is due to the fact that the paper simply cannot support the weight of the painting.
- On vinyl wallpaper.
- Above the head of the bed.
- It is not recommended to cling expensive or antique items to them.
It should also be taken into account that the quality of fastening deteriorates significantly even at extreme temperatures.
Types of fasteners
Depending on the color of the walls and frames, there are white and black fasteners. Regarding the dimensions and the required number of sets, you should weigh the product. After that, with the help of a special table, the store employees will help you choose exactly those fasteners that fit your decorative elements.

How to glue picture fasteners?
- To begin with, the wall and the back of the frame must be cleaned and degreased with alcohol.
- Separate the strips from each other along the perforation line.
- Two strips should be connected with Velcro inward, firmly pressing against each other. If you do it right, you will hear a characteristic click.
- Remove the protective strip on one side, position the clasp on the back of the frame.
Important! In order for the paintings to hold firmly and securely on the wall, you should, depending on the weight, purchase one or more sets and arrange them as follows:
- One pack. It can be attached to the top center of the frame.
- Two sets. They should also be fixed at the top of the frame, only in different corners.
- Four sets. The first two sets should be positioned as described in the previous paragraph, and the bottom two should be approximately ⅔ of the frame from the top.
- Remove the remaining protective strips and secure the frame to the wall. Press it for 30-60 seconds.
- Next, remove the frame from the wall. This must be done by lifting it from the bottom up.
- Press the fasteners with your thumbs for 30-60 seconds.
- Leave the strip on for 1 hour. During this time, it should stick well, after which you can hang the frame on the wall.
Removing the frame without traces
These fasteners are made in such a way that you can change the placement of pictures. In order to remove the frame carefully - so that there are no marks left on the surface, you should follow these steps:
- Remove the picture by pulling the bottom part upwards.
Important! Do not pull the strip towards you, as it may tear.
- Slowly pull the tab down along the wall. Do this until it peels off the surface.
Non-standard ways of fastening frames
In addition to standard and modern, there are also quite original methods of attaching frames, which are not inferior to the previous ones in strength, while they can significantly complement and bring bright accents to the overall design.
original rail
This design consists of one main element - rails from the curtain rod. Movable hooks are used as additional elements. A nylon thread of the required length is attached to them, at the end of which you can fasten any decorative element.
Important! The advantage of this method is that you can, if desired, swap pictures in places, while adjusting their height.
Whiteboard use
This is a rather bold decision, which consists in placing images in such a way as to demonstrate some kind of sequence, cycle or chronology. In this case, the picture on the board can be fixed in absolutely any way.
Important! When choosing this method of fastening, it should be borne in mind that the board should differ significantly from the overall color scheme of the interior.
satin ribbon
In this case, the tape is folded in half and fastened with fasteners or “liquid nails” to the wall. Two hooks should be attached to the back of the frames so that they can be hung on a tape. The length of the tape should be chosen, depending on the future number of compositions that will be involved.
How can you place frames on the wall?
In addition to strong fastening, the arrangement of paintings and photographs on the wall is of great importance in shaping the overall interior design. To date, the most popular are the following methods.
Important! Depending on the size of the frames, their content and the overall picture on the wall will depend.
Single horizontal line
This option is most appropriate to use for rooms with high ceilings and regular geometric shapes.
Important! In a horizontal arrangement, it is best to use frames of the same size.
Rows of frames
This method involves the presence of a large number of small frames of the same size placed in several rows. For example, several lines of elements are located at the same distance from each other, thus visually forming a kind of framed wall carpet.
Important! In this version, multi-colored frames will look very interesting.
Chaos and order
A bright accent on the wall will be the uneven distribution of frames of different sizes and colors. Despite the fact that “chaos” is created, you need to carefully consider where which picture or photograph will hang.
Important! In this design method, you should clearly limit the place where the frames will be placed.

Composition with painting
If you already have a large-sized reproduction, but when placed on the surface of the wall, the picture is smeared and lost in the general atmosphere of the interior, you can additionally draw attention to it by making a competent accent. A great option is to hang additional frames on the wall around the reproduction. To do this, you should consider the style, storyline and color scheme of the canvas.
Corner frames
In order to decorate the corners, while not spending a lot of physical effort and money, you can use frames. Thus, such a “boring” corner will acquire a bright accent and “play” in a completely new way.
Home interiors can be diversified with interesting design techniques. Many people like it when interesting and original paintings hang on the walls at home. They make the interior even more beautiful, thereby creating a special mood. Many of you would like to know what ways you can hang a picture on the wall, right? There are a considerable number of them. Get to know each of them individually.
How to hang a picture on the wall: classic ways to hang pictures on different walls
Often, paintings are hung easily and simply, for example, in a wall-mounted screw or on a nail. But the walls are different, so you have to modify this generally accepted method.
Wooden walls
This material is very comfortable. It allows you to attach the canvas without any difficulties. Using a hammer, an ordinary nail is hammered at the required height, and the picture is hung on it.
Concrete walls
This surface is durable. To fix the pictures on it you need to use a drill. Using this tool, a hole of the required diameter is drilled in the marked place. A plastic dowel of a suitable size is inserted into this hole, into which a hook or screw is screwed. Then the picture is hung on it.


Brick walls
This material is strong but brittle. A different approach is needed here. You can also drill holes in brick walls and fix nails, screws, hooks of the required size in them. But this must be done with some foresight. Having drilled a hole, you need to pour a solution of cement there, which holds together and prevents the occurrence of cracks in this material. Only after that the hook is inserted.


Plasterboard walls
This material is not resistant to loads, therefore, only light canvases can be placed on it. In order for the picture to be firmly and securely held on the drywall wall, a dowel called a “butterfly” is inserted into the hole. Its struts do not allow the mount to fall out.

How to hang a picture on the wall without drilling the walls
How to hang pictures if you don't want to drill through the walls? We suggest using one of the following methods:
- A small painting can be attached to the wall with double-sided acrylic foam tape. One side of the adhesive tape is glued to the canvas, and the other side is glued to a pre-prepared plane. There shouldn't be a big load. There is also a drawback in such a fastening: it is not durable and visible residues remain after fastening with adhesive tape.
- Hooks for outfits and special mounts for Velcro-based paintings are attached in the same way as in the previous method, only the canvas is hung on a hook.
- A picture is also hung on a plasterboard wall with the help of pins, paper clips, wound under the wallpaper and fixed with PVA, Moment glue. For a concrete wall, this method is also suitable, but the picture should be small.
- "Liquid nails" - this is the name of a special glue that holds pictures well. Therefore, they are used to fasten the canvas and hook. With the help of them, the canvas lasts for a long time, because if it is torn off, it means ruining both the picture and the wall. Large paintings are hung using this method, as well as decoration in the kitchen and in the bathroom.
- Fast drying adhesives are also used in the following method. A small piece of wine cork, about 1 cm thick, must be glued to the cleaned wall. Then, as soon as the glue dries, a screw or nail is fixed into the cork, on which the picture is hung.
- There are also nails with infusible metal hooks. They are provided for various walls, they drive in well, leaving no traces. Such nails can hold a heavy load.


How to hang a picture on the wall with a ceiling plinth
Another way is to mount to the ceiling. Glue a molding to the ceiling or wall, to which you can hang a strong, but thin and transparent fishing line, and then hang the canvas on it.


Thus, we have proposed the most popular methods for attaching paintings to the wall. Use one of them and you will be satisfied. And if you have a good imagination, you can come up with many other interesting options. Good luck!
We will send the material to you by e-mail
More recently, the main requirement for the design of your own house or apartment was limited only to properly selected wallpapers: color, pattern, texture. Today, designer accessories have entered our lives as an integral part of the interior of residential premises. One of them that has become very popular today is modular paintings. In this article we will talk about them and how to properly hang a modular picture on the wall using different technologies.
Modular painting on the wall
This is a composition consisting of several elements, which depict a part of a drawing or a fragment of one common canvas. When the parts are joined, a general plan is formed, so it is very important to correctly arrange the modules by comparing them with each other.

The number of modules must be at least two. By the number of elements, modular paintings are called differently:
- a picture consisting of two elements is called diptych;
- in three parts - triptych;
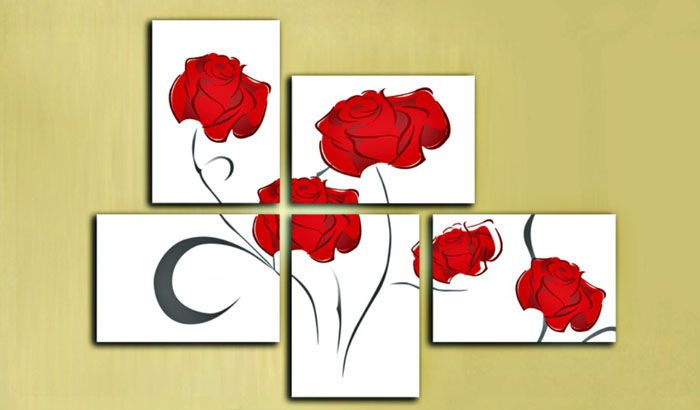
- out of five penaptych;
- more than five elements polyptych.
However, a large number does not always mean a larger size of the picture. Elements can be of small width, which makes it possible to more effectively display a piece of the overall picture on them, writing small details on it.

This is where you can end the conversation about the modular paintings themselves and go directly to the main topic of the article - how to hang modular paintings on the wall.
How to hang pictures on the wall
Let's start with the fact that modular elements are pieces of one large canvas. They are a purely structurally separate picture that can be hung in any convenient way. The main requirement is the strength of the fastener, which would allow it to withstand the weight of the object being hung. The second requirement is the exact location of the modules among themselves and in the required plane. For example, in the photo below you can see that the parts of one whole are not located on the same level. So this dimensional arrangement on the wall must be precisely determined.
There is no point in considering the first two, these are ordinary fasteners that have been used for a long time. They can be classified as classic fasteners. But with others it is necessary to understand thoroughly.

Liquid Nails
This adhesive composition is known as strong and reliable. But when using it, care must be taken to ensure that the surface of the wall is very even. The thing is that the rest of the fasteners can smooth out some of the unevenness of the plane. The adhesive composition is applied in a thin layer, in addition, the paintings are pressed tightly against the wall. This means that surface irregularities will immediately be transferred to the mounted modules in the form of distortions that will be visible to the naked eye.
As for the process itself, depending on the size and weight of the picture, liquid nails are applied either to the entire perimeter of the frame on the reverse side, or in sections.

After that, it is applied to the wall along the marked area and pressed with hands. Within a few minutes, the element can be moved, leveling. It should be noted that in this way it is possible to install paintings in any intended premises, because the adhesive composition does not change its strength properties either under the influence of temperature changes or changes in humidity. So the pictures in the kitchen or in the bathroom, glued with liquid nails, will hang for more than one year.
This fastening material appeared on the market relatively recently, but many home craftsmen have rightfully rated it as one of the most reliable and easy to use. In principle, this is a fabric base treated on both sides with an adhesive composition. From above, the adhesive tape is closed on both sides with a protective polymer film. You remove the last one, apply the strip to the required place, and it is immediately firmly attached to it.
It is on this quality of adhesive tape that the method of its use for hanging modular pictures is based. How it's done:
- The sticky material is cut into several pieces up to 10 cm long.
- A protective film is removed from one side.
- The adhesive tape is pressed with the adhesive side to the frame of the picture.
- So all segments are established, evenly spaced from each other. Be sure to install at the corners of the object.
- The top protective films are removed.
- The module is pressed in place of its installation.

Expert point of view
Dmitry Kholodok
Technical director of the repair and construction company "ILASSTROY"
Ask a Question“Regardless of the texture of the wall (drywall, plaster, wallpaper with different surfaces, etc.), double-sided tape is easily attached to it. Therefore, it is not necessary to do additional manipulations related to increasing the adhesion of the wall plane.

Velcro
These fasteners are called the "Command" system. In their use, they resemble double-sided tape, but only these are two parts, each of which has one side - this is a sticky adhesive, and the opposite is Velcro. That is, one of them is attached to the wall, the second - to the picture. Then the latter is applied to the wall so that both parts of the Velcro are joined to each other.

The most unique thing about this whole variant is that the Velcro is also easy to separate from each other. Of course, when connected, they firmly hold the picture on the wall. But not very much effort allows you to separate them. So, if I may say so, this is a reusable fastener.We add that you can install ordinary plastic hooks on Velcro, which come complete with fasteners, and modules are already hung on them. Also a simple option with the ability to take a picture.

There is exactly the same fastening system, which is called "Kreps". How to use it, you can see in the video below.
Hook-spider for pictures
This fastener got its name from its resemblance to a spider. This is a plastic hook, in the design of which there are two or four carnations sticking out in the form of insect legs. Carnations are made of durable steel, their ends are sharp, so with the help of a hammer they are driven into almost any building material. The main requirement for the latter is strength in the sense that it does not crumble under the influence of shock loads.

Using spider hooks is simple:
- Pull the cloves towards the front of the fastener.
- Put it at the place of installation.
- The legs are hammered with a hammer to the plane of the hook.
- If it is necessary to remove the fastener, it is simply pulled out of the wall with pliers. 2-4 small holes will remain on the surface, which are easy to disguise.

Smart retainer
These are polyurethane rectangles that are easily attached to any surface. These are reusable products that, after dismantling, you just need to rinse with warm water, and they are ready for use again.
To understand what we are talking about, we suggest watching the video below.
Video: how to hang modular paintings and other household items on the wall
What else can you hang a modular picture on
Another rather interesting option is a hanging system for paintings and photographs. In fact, this is a rail (wooden, metal or plastic) that is attached to the wall under the ceiling. Vertical rods are fixed on it, to which the modules of the picture themselves must be attached. In this case, the parts can be moved along the rods, lowering or raising.
Threads with hooks at the ends can be used as guides. This is a more complex design, because it has a built-in mechanism by which the elements of the modular web are lowered and raised.

How much do they cost and where can I buy mounts for modular paintings
Today, all of the above fasteners are not in short supply. They are traded by both ordinary construction stores and Internet services. Let's just denote their average prices across the country.

How to hang a picture on a concrete wall
The last question of the article concerns the most common wall, or rather, the material from which it is made. Concrete is the most durable of all wall materials. Previously, in order to hang a picture, you had to drill it, hammer in dowels or wooden "chops", and only then screw screws into them. It is reliable in terms of withstanding heavy loads, but it is long and dusty, and the process itself cannot be called simple.
Therefore, all the fasteners that were described above can be used for concrete walls. The main thing for the first is a clean and even surface.

So, in this article we have analyzed the question of how to hang a modular picture, regardless of whether it includes five segments, two or ten. If you have any questions, leave them in the comments. Our editors will definitely answer them.

Save Time: Featured Articles Every Week by Mail
If you need to know how to hang a picture without nails, there are several approaches you can take. To fix the picture, you can use all kinds of materials, and most importantly, you will not violate the integrity of the wall with nails.
How can I mount a picture using improvised means?
Mounting paintings and photographs using improvised means can only be carried out if their weight is insignificant. You can use the following materials:
- Double-sided tape;
- adhesive hook;
- spider hook;
- sewing needle.
The use of double-sided adhesive tape is very relevant for drywall walls, since it is not worth violating their integrity without extreme necessity. This can lead to the fact that the wall begins to collapse and require urgent repairs. It is necessary to choose adhesive tape based on fabric, since it is more reliable. It is required to stick a few pieces of adhesive tape on the picture, and then stick it to the wall. If you paste it correctly and remove it correctly, neither the wallpaper nor the paint on the wall will be damaged.
An adhesive hook is much easier to use, you just need to glue it to the wall and then hang the picture. Such a hook can withstand a weight of up to one kilogram, and it is very easy to hide it behind a small piece of matching wallpaper.
A spider hook is used if you want to hang a picture on the wall without wallpaper. After such a hook is removed, four small holes remain, to eliminate which it is enough to rub the wall a little with a cloth.
The sewing needle should be used in the following way. Remove the eye with pliers, and drive the needle into the wall with a sharp end. There will be no traces after dismantling, and such a needle can withstand considerable weight.
How to hang a picture on the wall using professional tools?
There are some tools that you can use when installing a painting without the help of nails. These funds include:
- liquid Nails;
- polymer-based adhesive;
- foam tape.
You can use liquid nails if you need to firmly connect the surface of the modular picture with an uneven wall surface. This method can be used even in the bedroom, since liquid nails are very powerful and will not allow the picture to fall. Also with this tool you can hang a work of art in the kitchen, preventing it from falling under the influence of heat and dampness.
Polymer adhesive is a fairly common solution for installing a modular picture without nails, since it does not leave greasy marks on surfaces. They need to glue either the perimeter of the picture if it is heavy, or several sections if its weight is insignificant. After that, it is worth firmly attaching the frame to the wall and leave it for a while, preferably overnight, propped up with a mop.
Scotch tape will not adhere to textured wallpaper, since it is not glued to the picture frame, but directly to the wall. It is necessary to mark the future location of the picture and stick strips of adhesive tape around its perimeter, then remove the protective coating and press the picture.
What subtleties do you need to know in order to hang a picture on the wall correctly?
The result of high quality installation will achieve the following factors:
- accounting for the type of wall covering;
- smooth installation of the picture;
- taking into account the weight of the picture.
It is necessary to take into account what the wall covering is, since in some cases it is not possible to use certain methods of mounting a picture without nails. For example, foam tape does not hold on textured wallpaper; it is not advisable to use a spider hook on wallpaper.
Also during the installation process, you need to make sure that you are attaching the work of art correctly. To do this, it is best to ask another person to look at the painting and determine if it is level.
Also, hanging a picture correctly without nails will not work if you do not take into account its weight. Some mounting methods are not designed for heavy weight, so you can damage not only the wall, wallpaper, but also the work of art itself, which will cause additional financial costs.
If you have a good repair at home, and you don’t want to accidentally ruin something by hanging pictures yourself - call the performer from the Yuda platform, he will quickly and accurately complete the task.