Bathroom restoration. Do-it-yourself cast-iron bath repair. Repair of a cast-iron bathtub with enamel: subtleties and nuances
Many apartments still have old bathtubs. We do not change them for many reasons, but one of the main ones is financial costs. In this article, we will look at several ways that will allow you to restore the original appearance of the bath while saving on the work of dismantling and installing the bathroom.
Over the years, the bath may lose its original luster, become rough and have scratches from various objects. Rust spots often appear on old bathtubs, which significantly spoil the interior of your home.
Buying a new bathtub can be the way to go, but a complete replacement often requires remodeling the entire bathroom, which is time and money.
Ways to restore the bath
In order to save money and time, it is worth considering restoring bathtubs on your own.
To date, the most popular are the three main methods for restoring the coating of old bathtubs:
- Bulk acrylic method - a pre-prepared bath surface is poured with a two-component composition based on acrylic and a hardener. In this way, you can not only update the coating, but also hide some flaws in the form of irregularities.
To be applied by pouring the surface, starting from the top, without using a brush.
In general, there are several types of acrylic for bathtubs - liquid acrylic, self-leveling glass and acrylic coating, they all have some differences, but in general, the application technology is the same for everyone. - Enameling - this method already uses enamel, preferably with a hardener, but unlike acrylic, it is applied with a brush. It is more difficult to make a surface without smudges than acrylic, but it is more profitable at a cost.
- The use of acrylic liners - this method does not require liquid work, except for cleaning the bath itself. It is considered the fastest and not easily soiled of the rest.
Each of these methods differs in the process and cost, but they are all similar in that after the work, according to all the rules, you will have a bath as if only from a store.
In addition, doing the restoration with your own hands, you will save the family budget, you will be completely sure that everything is done according to the rules and gain invaluable experience in self-repairing your apartment.
Preparing the bath for restoration
Whether you decide to restore your bathtub with liquid acrylic, enamel, or using a liner, you need to carefully prepare the surface.
All preparation work is carried out in order to increase the adhesion (adhesion) of the old surface with the new material. Because the more responsibly you approach the cleaning stage, the better the finish coating you will get.
To clean the surface of the bath from the old coating, you will need:
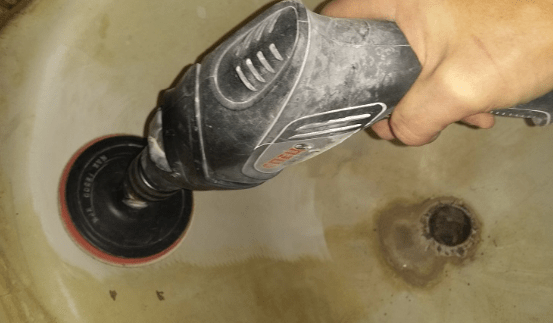
- an electric drill with a nozzle in the form of a metal brush or a grinding wheel (as an option, use a grinder with nozzles, but it will be safer to work with a drill);
- if there is no electric drill, then coarse-grained sandpaper (it is better to add more abrasive powder);
- respirator with goggles;
- vacuum cleaner or broom;
- degreaser;
- rust converter, if there is at least a small spot of rust that has appeared, then it is necessary.
Removal of the old coating is carried out in the following sequence:
Enamel restoration
The oldest of all the rest, since the baths were enameled at the factory, the enamel coating was restored. That's just plain enamel is not suitable for this. A special enamel for baths is used, which does not contain harmful substances released during heating.
Enamel is applied in several layers, sometimes their number reaches 4, for a more thorough removal of all defects in the bath.
Advantages of this method:
- One of the cheapest.
- It is not necessary to carry out dismantling work, it can be used even if the edges of the bathtub are recessed into the tiles, only drains will need to be removed.
- Suitable for the restoration of both cast iron and thin iron.
Disadvantages:
- Short service life of the coating compared to other restorations.
- Enamels turn yellow over time.
- Hardened enamel can chip off from strong blows.
- A long process of solidification and rejection (the bath can be used no earlier than after 5-6 days).
- Up to 3-4 coats may be required to cover uneven tubs, but is not guaranteed to be ideal.
The amount you will spend using this method depends on the material you will be using and the size of your tub. Material for a standard bath up to 1.5 m. will take from 2000 rubles. (Russian manufacturers), up to 4000 rubles. (foreign companies).
Application process
Some masters do not dismantle drains during coating, this is not correct, why do you need the additional cost of replacing the siphon and the difficulty of cleaning pipes from paint? Therefore, dismantle the drain and place an unnecessary basin or jar under the hole where the remnants will drain. Lay several layers of newspaper along the edges of the bathtub on the floor; washing the floor from paint is an extremely unpleasant and long procedure.
- It is better to apply enamel on a heated surface, so while you are warming up the bath, prepare the material, mix the enamel with the hardener in the indicated proportions.
Any working composition has its own working time for application, consider this when preparing the material. It is better to break the composition into 2 parts and mix them in stages so that the enamel does not have time to harden in the container while you apply the first layer.
Advice: it is best to use hard flute (flat) brushes at least 70 mm wide with natural bristles for application. When applying, carefully monitor the fallen hairs, remove them immediately, it is convenient to do this with a clerical knife.
- Place, for convenience, a container of paint at the bottom of the tub. With a brush, carefully work the edges of the tub with a thin layer. This layer acts as a primer and fills the small dimples of the surface.
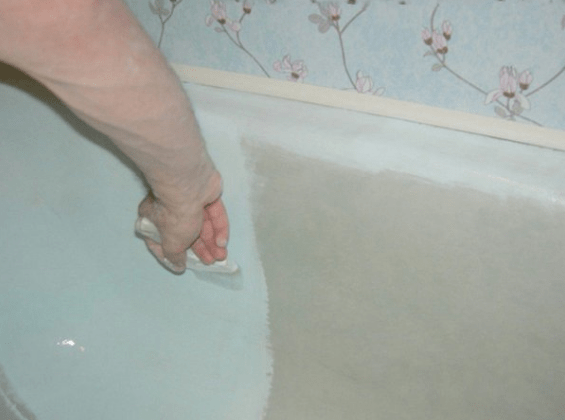
- After processing the edges, we begin to apply paint to the sides of the bath. We dip the brush into the container and draw a strip from the top edge to the bottom, then stretch the strip in transverse directions, thus applying a uniform layer of small thickness. We process the entire bath around the perimeter.
- The next step is to carefully process the bottom of the bath, paying special attention to the installation site of the drain.
- Then we apply the second layer in the same sequence as the first, without waiting for the paint to dry (this is the wet-on-wet method). We rub this layer also carefully so that smudges do not form.
- We dilute the rest of the paint and apply the last layer of enamel in the same sequence - from top to bottom, then stretch the paint evenly from the strip to the sides, and again several times from top to bottom in the stretched area.
- Control the layer of enamel, too thick a layer will definitely leak. The control is carried out with a brush, if it glides too easily, then the layer is thick, disperse it with a brush from top to bottom.
- Pour the rest of the paint into the bath and spread it evenly over the bottom with a brush.
- After applying the last layer, wait 10-15 minutes and check the entire surface for smudges. Smudges are smeared with a brush, but only with movements from the bottom up. Periodically check the bath a few more times until the enamel has set enough to not leak.
- Rinse all paint off all tools and leave the bath to dry for 4-6 days. In no case do not start using the bathroom earlier, you will nullify all your work.
Do not attach the siphon to the drain until the enamel is completely dry, otherwise the siphon bowl will stick tightly and the next time it is repaired or replaced, you will damage the enamel when removing the bowl.
Also, be sure to trim the drops of enamel on the outside of the drain hole, otherwise the siphon will not fit tightly and the bath will leak.
Restoration by poured acrylic
This type of restoration differs from enameling in the method of application, it does not require the use of a brush, acrylic is applied by pouring over the surface.
A rubber or metal spatula can be used to spread the acrylic evenly over the surface of the tub.
Pros and cons of this method
Advantages:
- Drying time of the coating - the bath can be used after 1.5-5 days.
- Unlike the liner, there is no adhesive gap between the acrylic and the bath, which significantly increases the strength of the coating.
- Acrylic does not turn yellow over time and is resistant to various acidic environments.
- Suitable for the restoration of cast iron and iron bathtubs.
- Long service life of the coating (with proper application and care up to 10-15 years)
Disadvantages:
- Acrylic is afraid of high temperatures, it starts to melt from 160 degrees, of course we don’t wash ourselves in such boiling water, but there are cases when acrylic was deformed by exposure to boiling water from a tap (this is more likely true for acrylic coating fakes).
- Acrylic care requires the use of special detergents.
- The mechanical brittleness of acrylic can lead to cracks when heavy objects are dropped into the tub.
In terms of financial costs, it does not differ much from enamelling; you will spend from 3,000 to 5,000 rubles on the restoration of a bathtub.
Application process
- Protect the surrounding space from possible contamination with acrylic, lay several layers of newspapers or films on the floor, cover the walls along the edges of the bathtub with masking tape, be sure to remove the siphon. If you still have a Soviet metal harness installed, but dismantle it completely and later replace it with modern removable ones.
Moisture can accumulate at the joints between the wall and the bathroom, use a hair dryer to expel water from all the cracks so that it does not spoil the coating.
Substitute an unnecessary container under the drain hole to collect the leaking acrylic. - Pour the hardener into a container with acrylic and mix thoroughly, poorly mixed acrylic with hardener can cause yellow spots in the future, so pay special attention to this step.
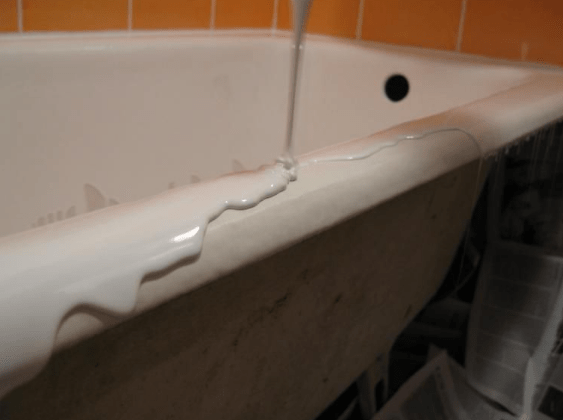
- Using a cut bottle or plastic cup, pour the acrylic onto the sides of the tub, starting at the farthest corner from you, so that it flows down freely.
- We pour acrylic around the entire perimeter of the bath, trying to avoid large accumulations of it in one place.
- The joint with the wall can be corrected with a spatula.
- When you have spilled all the edges, pour the side opposite from you, and then the one closest to you.
- With a rubber spatula, spread the acrylic over the entire surface of the sides, do not be afraid to lift the acrylic to the top, it flows perfectly.
- When the entire surface of the bath is filled with acrylic, carefully inspect it for bubbles, remove the existing bubbles by bursting them with the tip of a metal spatula or using a brush for this (small grooves from the brush should be tightened due to the fluidity of the acrylic).
- With a metal spatula, work the entire bottom of the tub in a Z-shape to densify the acrylic.
- Use a spatula to collect drops on the edge of the tub.
- Leave the coating to dry for at least 2 days.
Advice: when the entire surface is ready, it can be leveled with a hair dryer, only using cold air!
In the video you can clearly see the process of working with bulk acrylic.
Restoration with acrylic liners
This method appeared even earlier than the previous one, its essence lies in the fact that an insert is selected into the bath, which most accurately repeats the shape of the bath. that liner is attached to a special glue.
Pros and cons of this method
Advantages:
- The strength of the acrylic liner.
- Does not yellow over time.
- The surface does not require leveling, it is initially perfectly flat.
- Availability of various shades.
Disadvantages:
- Not suitable for installation in iron and thin cast iron baths due to the tendency to bend.
- Due to the presence of a glue line, the acrylic insert can move away over time under the influence of variable loads.
- It cannot be installed in a bath, the edges of which are covered with tiles; it will be necessary to carry out dismantling work.
- The presence of irregularities on the bath can be a weak point for the liner.
Insert installation process

Finally, the glue will grab no earlier than 10 days, at that time try to exclude excessive pressure on the edges of the bath, otherwise the liner may be deformed or warped. But you can safely take a bath these days, only carefully.
Be sure to watch the video, which clearly shows the process of installing an acrylic liner in the bath.
If you have any questions or wishes, you can ask them in the comments below.
Tsugunov Anton Valerievich
Reading time: 4 minutes
Over time, any plumbing wears out and loses its original appearance. Rust, chips, scratches, cracks, loss of gloss and whiteness are the inevitable consequences of daily use and improper care. Do-it-yourself bath restoration can restore a decent look to old plumbing. In order for the renovation of the bathtub to take place with the least cost and effort, you need to have a good understanding of the algorithm of this procedure at home, understand how to restore the bathtub, how to paint the bathtub inside, what products to choose.
There are three ways to restore a bathtub on your own. Depending on its initial state, you can choose one of them:
- Enamelling.
- Restoration with liquid acrylic.
- Insert installation.
Bathtub enameling
Enameling a bath with your own hands is a feasible procedure for any owner. To understand how to restore the enamel of the bath, you need to pay attention to the condition of the container.
Repairing a cast-iron or steel bath with enamel is justified if there are no deep chips and cracks. Otherwise, the enamel, even applied in 2-4 layers, will not hide serious damage.
How to restore a cast-iron bath yourself at home? When choosing how to paint the bath inside, preference should be given to high-quality epoxy enamel from trusted manufacturers, guided by the following criteria:
- The choice of enamel application method: brush, roller, aerosol or bulk method. The most acceptable are the application with a brush or bulk, since the roller can give an unnecessary porous texture, and aerosol spraying can be used only in case of repair of individual areas.
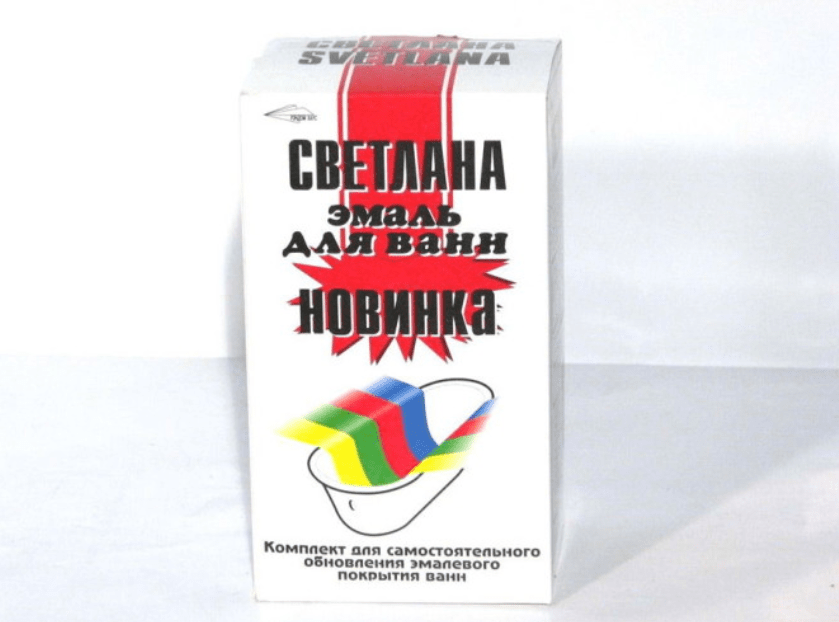
- Completeness of a set for restoration of a covering. It is convenient to purchase a kit, which includes everything you need for repairs - enamel, auxiliary components, application tools and compositions for preparing the bath.
Important! High-quality epoxy enamel, due to its thick consistency, is able to create a smooth, even surface and repair small chips. But it should be understood that self-repairing a bathtub at home is inferior to the industrial method of applying enamel: there may be a change in the color of the new enamel, increased vulnerability to bumps and chips, and restrictions on care products.
Self-enamelling of the bath takes place in two stages: preparatory work and enameling.
Enamel application
How to restore the enamel of the bath, it becomes clearer after reading the instructions for the purchased composition for enameling. The important points here are:
- Composition preparation. Following the instructions, prepare the enamel by combining the active ingredient and the hardener in the required proportions.
- Coating with the first layer of enamel. Cover the surface with a thin layer of enamel using a hard wide brush, starting from the top, gradually descending deep into the bowl. You can especially carefully walk along the bottom of the bath and the drain as the most worn out places.
- Application of the second layer of enamel. A new enamel layer is applied after some time specified in the instructions. After that, it can be left to dry for 15 minutes.
- Leak correction. All detected smudges of enamel must be smeared with a brush, moving up and down and from side to side. This must be done quickly before the enamel dries.
- Re-enamelling. To achieve a more reliable result, increase the strength of the enamel and protect against new chips, a cast-iron or metal container can be painted over with one or two more layers of enamel.
And how to restore the enamel of the bath, if the chips are deep? It is necessary to repair chips with putty, polish and degrease. All chips and cracks must be carefully repaired:
- using sandpaper soaked in water, polish the edges of the chip;
- degrease cracks with a solvent or white spirit;
- dry the surface;
- apply enamel.
After enamelling, the bath should dry for 7-8 days. Proper bathroom care should exclude the use of abrasive detergents.
Restoration with liquid acrylic
Repairing a bathtub with liquid acrylic is an easier process at home than enamelling. Acrylic is resistant to chemical and mechanical stress, unpretentious in work. With the help of liquid acrylic, you can get a beautiful smooth surface that is resistant to temperature extremes and hard water.
Due to the way the acrylic is applied, this method is sometimes referred to as a "fill bath". A do-it-yourself bulk bath is a suitable economical way to update cast iron products.
Acrylic brand "Stakryl" is often used - a two-component high-density enamel, including a base and a hardener.
Do-it-yourself acrylic bath coating consists of the following steps:
- Surface preparation. This process is similar to preparing for enameling: you need to clean the bath from the old coating, degrease, repair cracks.
- Acrylic application. Having combined the components according to the instructions, acrylic is poured from a convenient container in a thin stream onto the side of the bathtub, pushing it under the edge of the tile. The acrylic layer should be approximately 4-6 mm and flow down to the middle of the container. Moving along the side, you need to pour acrylic evenly. After applying acrylic along the outer edge, continue to pour it into the middle of the container, gradually narrowing the circles and moving in a spiral. The rest of the mixture flows into the prepared container through the drain.
- Drying. Liquid acrylic can dry from 6 to 24 hours. But still it is better not to rush to immediately use the updated bathroom, but to wait a few days.
Restoration with acrylic inlay
The third way to repair is to install an insert or "bath in a bath". It is impossible to make an insert at home, it is made industrially and is an insert that repeats the shape of the bath itself. This is an easy and quick way to renovate a bathtub yourself. But it also has disadvantages:
- Installation requires the removal of the bottom row of tiles to secure the bead of the insert.
- The impossibility of repeating the exact shape of a cast-iron bathtub with an insert. This is due to the fact that cast iron is a complex material for molding and has various depressions and protrusions, which, when the liner is installed, provoke the formation of voids. All this negatively affects the quality of the new bath.

11099 0 2
How to update a cast-iron bathtub - 3 different ways for a home master
Ancient wisdom says that only change is eternal in this world. A cast-iron bath is a reliable and durable thing, but even it sooner or later loses its attractiveness. This happened with my bathroom, at one point I discovered that the yellowish coating and stains were no longer washed, naturally the question arose whether to buy a new one or restore the old one. In this article I will talk about the difficulties associated with buying a bathtub and how to restore a cast-iron bathtub, both independently and at home.
Is it worth buying a new bath?
At first glance, the answer is obvious, every new thing is always better than the old one. But not everything is so simple, in the case of a cast-iron bath, a lot of pitfalls can come up. When the first euphoria from the temptation to “give people money and forget about the problem” passed, I began to reason logically:
- Of course, the first thing you remember is the price of the issue. I have a capital still Soviet cast-iron bath. I don’t want to change it to enameled thin iron, which will make noise for the whole house or plastic of dubious quality. And imported goods of equal quality are now expensive;
- But even if I decide to fork out for high-quality cast-iron plumbing, such a bath weighs at least 100 kg, therefore, I will have to hire movers and pay them for careful delivery. Asking friends and "pulling" yourself is not an option, you can break it on the way. And such a delivery is not cheap;

- My bathroom is lined with normal tiles, everything is done beautifully, and if you dismantle the old one and put a new one in its place, all this repair will practically have to be done again. This work is not only hard, but also quite costly financially, plus somehow I don’t feel like delivering dirt in the apartment again;
- And finally, the last argument that pushed me to restore the cast-iron bath at home was a long-standing surprise from the builders. The fact is that the good builders first installed the bath, and then mounted the door hatch, apparently the one that was available. As a result, it is impossible to take out the old plumbing without dismantling the loot, it simply does not pass through the dimensions.

As you understand, arguing in this way, I decided to do the repair of a cast-iron bath with my own hands.
Methods for restoring a cast-iron bath
With the purchase, the issue was closed, now it remains to decide how to update this legacy of the Soviet past on your own. Fortunately, among my friends there was one specialist with the necessary qualifications, he then advised me in all details on how to repair a cast-iron bath in three possible ways, and now I will tell you about these recipes.
Preparatory stage
I decided to single out the preparation of the bathroom for restoration in a separate chapter because this instruction is suitable for all three methods of restoration. And whatever you choose, do-it-yourself repairs in any case begin with careful preparation.

Some sources say that it is not always necessary to dismantle the drain and overflow during restoration work. So, I can tell you with confidence, the siphon must be removed before work. Moreover, I advise in general to replace it with a new one. After all, the price of siphons for the bathroom is now quite acceptable.
- The old enamel, although it has lost its attractiveness, still remains quite smooth, respectively, any coating on it will be taken badly. Therefore, we need to clean it up so that it becomes rough and adhesion increases. Most often, emery and some kind of abrasive powder are used for this. Personally, I used dry oxalic acid instead of an abrasive. A little water is added to the powder, a gruel is made and applied to the entire inner surface. After 15–20 minutes, the enamel is additionally processed with emery;

Tip: factory enamel is a strong thing and you can rub it with sandpaper by hand for a long time. For these purposes, it is better to purchase a nozzle on a drill. Moreover, you need to work with a drill, the grinder has too high speed and without experience you can completely clean off the enamel, and this is highly undesirable.
- Now all this must be thoroughly washed off. In order to completely remove the oxalic acid, I had to draw hot water into the bath, and then wash the entire surface under pressure;
- If there are chips on the surface and with traces of rust, they will have to be puttied. But first you need to remove the rust. There are now special modifiers for this, the instructions for them may differ, so read before use.
When the rust is removed, the traces of the modifier are also washed off. Putty is used bodywork, you can find it at any car market. The composition is applied with a soft rubber spatula, after which you need to wait until the putty sets well and sand it to perfect condition;

- Preparation ends with degreasing the enamel with any alcohol solution or acetone.
Method number 1. Using enamel
Now on sale there are two-component enamels in cans and aerosol cans. So we are only interested in two-component compositions. Whatever they tell you about aerosol cans, this paint lasts no more than a year, I don’t know why, but it’s true.
- If we have already decided to repair with our own hands, it is better to immediately purchase a repair kit. In addition to the enamel itself, this set includes all the necessary related materials. That is, special primer, lint-free wipes, and so on. It will be much easier to work with him. Keep in mind that enamel is not included in some types of repair kits, it is purchased separately;

- Primer is applied to the surface first. After applying the primer and drying, the entire surface will need to be wiped again with lint-free napkins. Then you can proceed to cover the bath with the first layer of enamel. Of course, it is better to use an airbrush for these purposes, but not everyone has such equipment, so most home craftsmen use a regular brush;
- The enamel is applied in a minimum of 2 and a maximum of 4 layers. But the break between layers should be at least 1 hour, respectively, all work, together with preparation, stretches for the whole day;
- When the paint is done, the final layer will need to be coated with gloss. This is done simply, an hour after application, the enamel is wiped with a solvent and left to dry. The paint itself dries in a day, but it will be possible to use the bathroom only after a week.

Please note that the enamel is two-component, that is, if you connect the components, the paint will be in working condition for a short period of time, then it will simply harden. Therefore, you need to dilute for 1 layer of staining.
To be honest, this enamel is not very popular. Of all the pluses, there is only an affordable price. Everything else is just cons. So manufacturers promise that this enamel will last at least 5 years, but in reality its maximum is about 3-4 years.
Those who understand at least a little about paints know that enamels are perhaps the most pungent-smelling compositions. A protective mask is indispensable here, you will have to work in a respirator or even a gas mask. If we add to this the obligatory week of drying, then the failure of this method becomes obvious.

When I spoke with an experienced master, he told me that enameling is most often used when an apartment is being prepared for sale and it needs to be polished. Or when the apartment is rented and the person is not going to stay in it for a long time.
Method number 2. Coating with liquid acrylic
Updating the bath with liquid acrylic is considered the best option. Among professionals, this composition is called "stakril". Application technology here will be simpler:
- The first step, as usual, is preparation, that is, cleaning, rinsing, degreasing, drying. Further on a dry surface, starting from the sides, acrylic is poured slowly and evenly. No brushes, rollers or swabs are used here. Acrylic mass flows down by itself;
- Under the drain hole you will need to substitute a container for excess paint. When the board is filled, you can move on to the middle belt and so on until the bath is completely covered. The acrylic mass is quite thick composition and at the finish the thickness of such a coating will be about 5 - 7 mm;

- That's basically the whole process. When the tub is covered, it is left to dry completely. Stacryl dries on average 3-4 days. The drying time in this case depends on the quality of the material and, of course, on the manufacturer.
The advantages of such a coating are much greater than in the case of enamel. In particular, manufacturers promise that the bath will last at least 15 years. Experienced masters say about ten years, which you will agree is quite decent.
In time, such an arrangement will take 2 - 3 hours, and this, together with preparation. And importantly, the composition dries much faster than enamel. Plus stakryl does not have a suffocating smell.

There is only one minus of such a coating, and that one is quite controversial. Stakryl costs an order of magnitude more expensive than good enamel. But if you think about it and calculate, then the final amount of costs will be less. Indeed, within 10 years, while the glass will have a decent appearance, the enamel will have to be changed at least three times.
Method number 3. Bath in the bath
To be honest, I liked this method the most. The point is that you mount a thin and durable plastic liner of the same dimensions on top of your old cast-iron bathtub.

- Naturally, it all starts with the acquisition of this same insert. The fact is that the baths only seem to be the same in appearance, their parameters may differ. Therefore, before going to the store, you will need to describe and sketch all the dimensions as accurately and in detail as possible. Fortunately, now there are photos and videos in the phone, so it will not be superfluous to take a picture and shoot it on video;
- When the liner is selected, of course, the first thing to do is to try it on. The “trough” itself should fit tightly, but freely. In no case should you crush it, so that the tab does not burst. Remember that this is not cast iron, but only plastic. By the way, on the first fitting, the tab may not go all the way, it will interfere with the overlap along the edge. In this case, the excess will need to be noted and carefully cut off with a grinder;

- Now that the plastic layer is clearly fitted, you will need to make holes for the drain and overflow. If you mark the drain hole, as a rule, you can from below, then the overflow is often moved close to the wall and you need to mark it, as they say by eye. Before drilling, the drain and overflow holes are liberally lubricated with some kind of dye, I personally lubricated with ordinary toothpaste. After that, the form is inserted and holes are marked according to the imprinted dye;
- There are two ways to cut holes. The easiest way is to use a round serrated crown of the appropriate diameter. But it is good when the markup is clear and you are absolutely sure of its accuracy. I did it differently. The edges of the markings were blurred, and drilling by eye, in this case, is extremely risky. Therefore, I first drilled an approximately suitable hole of a smaller diameter. And after that, I brought it manually to the desired shape using a round file. Do not worry, the plastic is cut off easily, the main thing is to act carefully and not take too much;
- Simply inserting an insert is not enough. It will need to be securely glued and additionally smeared with all problem areas with a waterproof sealant. Otherwise, sooner or later mold will settle in a wet bathroom between plastic and enamel;

- Special foam is used for gluing, although this special foam, which is offered to buy with the liner, is very similar to ordinary mounting foam. Therefore, I suspect that this is just a publicity stunt. As I said, in addition to foam, you will need a sealant, it, like foam, is sold in tubes and fits a standard construction gun;
- The sealant is thickly smeared around the drain and overflow, in a continuous layer at a distance of 100 - 150 mm. It's not worth saving here. The foam must be applied in a thick grid and very quickly. You have no more than 5 minutes for this. After that, the liner is inserted and tightly pressed against the walls of the base;
- Squeezed out excess sealant is immediately removed and mounted with overflow. The bath can be used in a day, but so that the liner does not open with foam, it should be filled with water. The next day, you will need to cut off the dried excess foam and that's it.

Conclusion
Which way to choose to decide, of course, you. Personally, I preferred the insert, of course it is at least 2 times more expensive than enamel, but everything is fast, beautiful and will last about 15 years. The photo and video in this article clearly shows the installation process. If you have any questions, write them in the comments, I will try to help.
We tell you how to update an old bath at no extra cost.
The easiest way to get a new white bathtub is to throw out the old one and buy a new one. But it is expensive and unreasonable. It is cheaper and more correct to update an old bath, especially since all the methods that we offer are affordable, quite simple and easy to implement at home.
Why do-it-yourself bathroom renovation?
Enamel restoration or a complete restoration of an old bathtub will be much cheaper than buying, shipping and installing a new one and disposing of the old one. We do not argue - this is not the easiest job, but it is quite within the power of an unprepared person. The main thing is not to rush and do exactly according to the instructions, then everything will definitely work out.  If you are afraid of spoiling something, call the experts. Finding such masters is not a problem: websites and newspapers are full of ads. In addition, probably someone from your acquaintances has already done a similar procedure. But remember: to the cost of consumables that we calculated for each option, the cost of the master's working time will be added. For example, one of the companies offers a bathtub restoration service for only 4500 rubles. It seems to be a small overpayment for the saved time and quality. But this price does not include preparatory work: cleaning the bathtub, dismantling and re-installing the drain, removing paint and enamel, and a bunch of little things. In total - about 8000 rubles. There is a difference.
Method number 1. Restoration of the bath using bleaching and polishing

If the enamel of a cast-iron or steel bath does not have large visible cracks or chips and has simply darkened or turned yellow, we restore whiteness and smoothness by polishing and bleaching. The procedure is simple and safe for enamel: the coating of a good bath can be polished several times. It changes its color because microcracks appear on its surface. As a result, dirt and other deposits accumulate there - we will fight them.

In the hardware store we buy a cleaning bleach for the bath. In any supermarket you will find a dozen items. You can also use folk remedies: vinegar, chlorine bleach, car cleaner. You will also need a rotary or vibration type grinder. Rent it from friends or buy it - a useful thing, it will come in handy on the farm.
2. Whitening

First, thoroughly wash the bath with detergent and scouring powder, remove all dirt with a sponge or a stiff brush. Then apply a bleaching agent to the clean surface of the bath. After the time specified in the instructions, rinse off the bleach with plenty of water. If acid is used as a bleach, add soda to the water: alkali neutralizes the acid (chemistry, grade 7). Repeat the treatment in those places where darkening or yellowness remains.1.
3. Polishing

Before you start polishing, try bleaching and polishing some of the most heavily soiled areas. If visible cracks remain, it means that the enamel coating has worn out, restoration or even its replacement is needed. If everything went well, great. Start polishing with coarse emery, then medium, and finish with polishing paste. The products that are used to polish cars are perfect.
Pros and cons of bleaching and polishing

The main advantage of this method is its low cost: a grinder will cost you from 500 to 2500 rubles, a bleaching agent - about 500, sandpaper - 200 rubles per pack. Total: 1200 - 1500 rubles, if you buy the cheapest grinder. In terms of time, you can meet in one day: the bath will be ready for use on the same evening. Unfortunately, polishing will last for a year or two, no more: the enamel layer becomes thinner, but the temperature and mechanical effects remain the same. Then - just a replacement.
Method number 2. Restoration of a bathtub with bulk acrylic

Renovating a bathtub with acrylic is a little more expensive and takes longer. It is necessary to peel off the old enamel from the bath and apply a new coating based on acrylic resin.
1. Preparation of the necessary materials

Arm yourself with a grinder with a coarse abrasive, a drill with a metal brush, or ordinary coarse sandpaper. You will also need putty for metal. Where to buy? Any hardware store. In the same place, buy a special bulk composition for bathtubs based on acrylic resin. For example, "Stakryl" or "Liquid acrylic".
2. Removal of old enamel and surface preparation

First, carefully remove all old enamel. It will be noisy and long. Then rinse the bath with a degreaser and dry thoroughly. Large irregularities and roughness (and they will certainly be) close up with a putty for metal already familiar to you.
Next, disconnect the bathtub from all plumbing: remove the mixer if it interferes with the process, and be sure to disconnect the drain. Place a container under the drain hole - excess of the finished mixture will drain there. Prepare composition. To do this, mix liquid acrylic with a hardener in the proportion indicated in the instructions, and mix well. The mixture should be viscous and fluid.
3. Filling the bathtub with acrylic
 Gently and evenly pour the composition onto the edges of the tub so that it flows down to the bottom of the tub. No need to correct or "help" the composition - it will drain to the bottom and leave a coating of the desired thickness. Please note that a Creel coating is applied in one or more layers. Before applying the next layer, let the previous one dry properly (at least a day).
Leave the updated bath alone for a few days: the acrylic composition needs 3 to 5 days to completely dry. If you covered the bath in several layers - wait at least a week.
Pros and cons of using acrylic

We have good news for you: the service life of a new self-leveling enamel (subject to careful maintenance) is up to 5 years. Then the procedure will need to be repeated. However, this method will cost a little more than the previous one: a grinder costs from 500 to 1200 rubles, liquid acrylic for a 1.7 m bath - about 2000 rubles (for one layer of coating), detergent - about 200 rubles, putty for metal - 700 Total: 3400 rubles (with the most inexpensive grinder). Another minus is that you have to spend more time. The whole process will take two to three days: a day to clean off the old enamel, wash and putty, and a day or two to pour and dry the mixture. The bathroom can only be used after 5 days.
Method number 3. Restoration of the bath using an insert

And finally, the most expensive and most effective way to update a bath is an acrylic liner. The principle is clear already from the name: an acrylic liner is installed in the old bathtub in size. It is not necessary to remove the old enamel. Something to remove and remove, of course, will have to. But first things first.
1. Preparation of the necessary materials

You will need bath detergent, mounting foam to fix it, waterproofing sealant and the liner itself.
2. Surface preparation

Rinse and degrease the inside of the tub thoroughly and allow it to dry thoroughly. Next, remove the decorative screen or false panels and carefully remove the row of tiles that are in contact with the tub.
3. Installing the liner

First, apply a fixing composition to the inner surfaces of the old bathtub - a two-component mounting foam. Insert the finished liner into the tub. After that, treat the joints with mounting foam or waterproofing sealant. Replace the tiles and false panels.
In principle, you can use the bath immediately, but it is better to pour water into it and leave it for a day. Under the weight, the liner will “sit down” and take the shape of an old bathtub.
Pros and cons of using an insert

The main plus of this method is that a bathtub with an acrylic liner will last at least 15 years. But there are also disadvantages: ready-made liners are sold only for baths of standard sizes. For a non-standard bath, you will have to make it to order, and this is more expensive, you know. The high cost is also not encouraging: a standard 1.5-meter acrylic liner costs about 4,000 rubles, a 1.7-meter one - from 4,800 and more. Mounting foam for fixing will cost about 300 rubles. Silicone sealant for joints - about 200. Bath detergent - 200. In total, according to the most conservative estimates, it will turn out to be about 5,000 rubles.

- Enamelled steel and cast iron bathtubs, as well as bathtubs with acrylic coating, wash with hot water using detergent or laundry soap.Wipe the bathtub dry: the water contains impurities that are deposited on the walls of the bathtub and eat into the enamel. Remember the scale in the kettle - these are the very deposits. In order not to damage the enamel or acrylic coating, do not use metal sponges and abrasive powders to clean the bathtub. Give preference to brushes made of plastic or natural bristles. Means like "Komet" or "Domestos" contain aggressive substances that can corrode the enamel. Use them as little as possible, and only for the toughest stains. Do not use them to clean acrylic bathtubs - special products are sold for them.Do not put objects in the bathtub that can scratch the enamel or acrylic coating: stools, metal buckets and basins. Be careful not to drop heavy objects into the tub that could chip the enamel or damage the acrylic.
Over time, during operation, the bath fails. In particular, this applies to Soviet-made cast-iron bathtubs. But what to do? Buy a new one or repair a cast-iron bath yourself? Of course, it is up to you to decide, but it is worth noting that buying a new bathtub is quite expensive, so we recommend doing repairs. But before that, you need to study all its features.
Methods for repairing a cast iron bath
Considering the options for repairing the bath, only two can be distinguished:
- Enamel application. Which, in turn, can be divided into the device of enamel and the application of liquid acrylic.
- Acrylic liner.
Each of these options has features that must be considered when carrying out work. Let's look at each repair method in more detail.
Enameling
The first way is . Note that it is available for use only when the bath itself is intact, and you are only embarrassed by its appearance (which has pretty much deteriorated over many years of operation).
Restoration work of this type is divided into several stages:
- Enamel selection.
- Bath surface preparation.
- Coating.
In order to perform all the work qualitatively, it is necessary to study the features of each of the stages.
The choice of enamel for the bath
The first, and very important, is the choice of enamel, which will later be applied to the surface. Accordingly, to choose, you need to know several features:
- The coating can be applied in several ways: with a brush or roller, as well as in the form of an aerosol. Note that aerosol application is not suitable for a full-fledged restoration.
- Also, bath enamel should be presented as a set with all the components necessary for work.
- For two-component formulations, a hardener is required, which is selected in accordance with the shade.
And let's look at the most suitable compositions for such work:
Any of the presented types, which are most popular today, is suitable for work.
Now that the material is selected, you can proceed directly to the execution of work.
Foundation preparation
Before you start directly applying the composition to the surface of the bath, you must carefully prepare it. The preparation itself is carried out as follows:
Upon completion of the preparation, you can proceed directly to the application of enamel, and it will differ depending on the choice made. Namely, ordinary enamel and liquid acrylic are applied in different ways. We will analyze each of them in some more detail.
Enamel application
Upon completion of the preparation, we proceed to repair the bath using enameling, which is performed as follows:
Allow the tub to dry completely when finished. It is recommended to use it no earlier than 2-3 days after applying the composition.
- The process of restoration or repair of a cast-iron bath using this method lasts about 4 hours. It begins after the replacement of the enamel is completed.
- The method is the application of an additional (fourth) layer of enamel on the surface of the bathroom.
- If a new coating has been applied before, then it should dry completely, after which an additional layer is applied.
When performing reinforcement, it is worth considering some features:
- After applying the last layer, the enamel should dry well.
- The bathroom cannot be used for three days.
- Such repair of a cast-iron bath can be carried out independently, taking into account the detailed instructions for the enamel jar.
- You can also use the services of a restoration company. However, there are some nuances here.
- You must take into account the fact that such enamel has a service life of one and a half years.
- Such a bath should be used with care. Since the enamel is scratched, you need to wash it only with soft rags and gels.
- After a year and a half, a new repair will be required.
But nevertheless, although the method is short-term, it is not expensive. In this way, you can maintain an attractive appearance of the bathroom for many years, and prevent it from rusting and completely deteriorating.
liquid acrylic
And the second way to restore cast-iron plumbing is the application of liquid acrylic. The whole process is carried out in accordance with the technology:
Acrylic liner
Another way to repair a cast-iron bath is
- When the base of the bathtub is in poor condition, and it is impossible to do just by replacing the enamel.
- In cases where there is a desire to give a new look to your old plumbing.
- In addition, it is actively used for the "reconstruction" of the bath. As you know, metal transmits and absorbs heat very well. And usually in any metal and cast iron products, the water cools down very quickly, preventing you from enjoying it. That's when the acrylic liner comes to the rescue.
In addition, it is worth noting a number of advantages of such a solution:
- The insert is wear resistant.
- Pretty durable.
- During operation does not change color and its properties.
- It has sufficient moisture resistance.
- Easy to maintain and operate.
- In addition, it has a smooth coating, due to which it repels dirt.
- Immune to household dyes, as well as household chemicals.
- It heats up fairly quickly and cools down slowly.
But let's take a look directly at how the repair process itself goes:

Important! When buying an acrylic liner, be sure to ask for a quality certificate for it. Also, check its integrity at the place of purchase.
Conclusion
As you may have noticed, there are not so many ways to restore and repair a cast-iron bath, and at the same time they are as simple as possible, therefore it is possible to do all the work yourself (even without someone's help). We also recommend that you watch a few videos that will clearly show all the repair methods, and you will once again see how easy it is to do it yourself.