Do-it-yourself powerful LED lamp - development, installation. How to make a simple LED lamp with your own hands Homemade lamps with your own hands
Handmade items fill the house with special warmth and comfort. Plus, they are exclusive. We offer an overview of lamps that will completely change the atmosphere in the room, turning into an object of envy from the groans of friends and relatives. Moreover, they are made from everyday items that are usually thrown away.


A cardboard bag for juices or other drinks is a common thing in most homes. Most of the time it gets thrown away. But the Malay designer Edward Chu spent a lot of time to cut them into hundreds of strips and build amazing lamps from them without a drop of glue, a simple origami principle.

Yaroslav Olenev proposed to make lamps from disposable plastic spoons and became the winner in the nomination "Ecology and Design" from the magazine "Future Now".

No less original application was found by Natalie Simpson for ordinary wooden hangers. But they look amazing in the form of a chandelier.
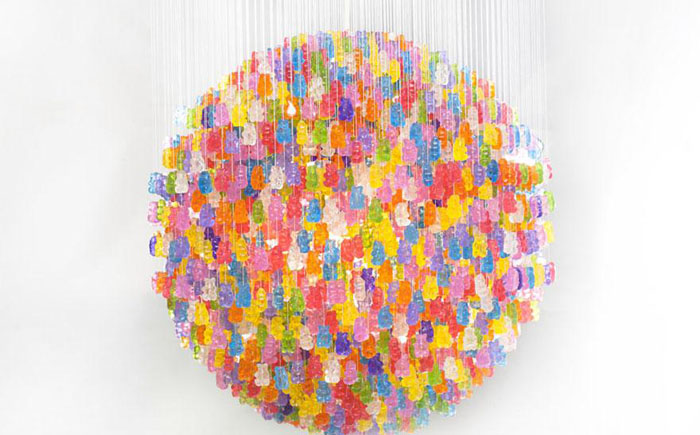

Kevin Chempeny must be given credit, not everyone has the strength and patience to string 14 thousand bears to get a chandelier.

Tira Hilden and Pio Diaz have their own vision on the problem of housing lighting. Thanks to their lamps, the room becomes like a forest. All walls come to life and turn into trees.

Talented welder Matt Ludwig was also an excellent designer. For JJ's Red Hots restaurant, he made an incredibly original chandelier from an old drum set.

Texan artists Joe O'Connell and Blessing Hancock made stunning lamps from old bike parts and hung them in a tunnel under the highway.

It will probably be difficult to find a more original chandelier than a pumpkin from a Polish artist. It carves stunning patterns on the peel that do not repeat.

Felt hat lampshades from Jeeves & Wooster look original and stylish.

Once Heather Jennings saw an amazing Rhododendron chandelier in the store, only it cost more than $ 800. Then the designer decided that she could do just as well with her own hands. To do this, she needed paper molds for cupcakes.
11. Chandelier in the kitchen

A chandelier made of ordinary metal tetrahedral graters will look incredibly beautiful.

Still fresh in my memory are vases and candy bowls made from openwork napkins. Now it's time to knit chandeliers.

Fansois Lego offers a strange option, he believes that the best way to store cutlery is a chandelier.

A large cloud is cut out of wood, but the rest and the switch are made of cardboard.

A few globes can make a wonderful cascading chandelier, a great way to light up a flight of stairs.
I work in Kharkiv, away from the cedar office and, accordingly, away from all equipment, lights, cameras, stabilizers and drones. With the advent of the cold season, it becomes more and more difficult to shoot outdoors, which means that you need to move indoors. And today I will tell you how I made a homemade softbox with my own hands specifically for this purpose.
Target
In my case, the goal was quite simple: to make a convenient lighting device for photography and video shooting at home. Of course, it would probably be easier to go to the store and buy a couple of softboxes, but, firstly, it would cost a pretty decent amount, and, secondly, it would take away the opportunity to make something with your own hands and remove the very DIY magic.
So the main criteria for what should happen in the end were as follows:
- budget, but without much fanaticism
- enough power
- foldable design for easy storage
- placement versatility
Previously, I made a small light fixture from a desk lamp on a clothespin, two wire hangers, a few A4 sheets, foil, a stapler, and duct tape. And, of course, a powerful fluorescent lamp was used, which I once grabbed for some action. My "Light Mark I" served me for quite a long time, but time has shown that the design of the lamp has the ability to break, and, moreover, ordinary paper cannot provide sufficient rigidity for a reflective design.
Another significant disadvantage of the first incarnation was incompatibility. Although the Light Mark I turned out to be quite compact, it was rather problematic to store it, especially given the fragility of the design. So now he has come to a rather deplorable state, although he is still quite functional. In the new version, I tried to take into account all the mistakes and not repeat them again.

Sources
To make the body of my future softbox, I decided to use the most common cardboard box. In my case, its dimensions were 40 x 35 x 28.5 cm. You can buy such a box at the nearest post office or any other place where something is packed. Pleasure, by the way, is quite inexpensive.
Prototype
Naturally, before doing anything with the box, I had to develop a prototype. I worked with the most common A4 sheets, so the scale was approximately 1:5.

I want to say that if you were once told that geometry is not useful in life, then here is a refutation of this dubious thesis. So if you have heard this, you can find your math teacher and, highlighting everything with a softbox, laugh in her face.

Satisfied with the prototype, I moved on to cutting out a full size copy from the box. In order for the structure to be easily folded, fixed and split, I added small square protrusions, with the help of which the fastening will be carried out. But more on that later.

After the main parts were cut out, it turned out something like this. Everything is adding up, which means you can move on to the next phase of the Light Mark II project.
In order to make everything easy to assemble and disassemble, I decided to use the most common Velcro. You can buy it at any fabric store that sells accessories. A meter with a large margin was enough for me, and I paid about $0.50 for it.

As it turned out, the square protrusions were not enough to firmly hold the structure, so two additional Velcro were needed for each of the joints. The protrusions can also be used as a mount for a suspension or just to hold on comfortably.

The lamp itself, which in my case is a clip-on base purchased for about $4 from a local hardware store, is also attached to the inner wall with Velcro. To do this, a small area of cardboard remnants was glued to the lamp using hot glue.
When the whole structure folded and unfolded successfully, it was time to apply a reflective layer. For him, I used the most ordinary food foil and PVA glue. Having smeared the glue evenly with a brush, I laid out pre-cut pieces of foil on all internal surfaces, smoothed them out and let them dry. The result is quite impressive.

As a final touch, I attached a wire to each of the parts of the lid, “covering” it with a layer of reinforced tape. This allowed them to be fixed in any position, if necessary. And as a diffuser, I use white baking paper, which can be found in any supermarket. So far, I'm still thinking about how to make a better mount for her.

Outcome
As a result, I got a fairly powerful lighting fixture. All my requirements were met. It develops, it is budgetary, it is, as it is now fashionable to say, modular. His work suits me more than completely.
My plan is to blow out the Mark II Light with black paint on the outside to make it look more professional, remake the Mark I Light, and also do the Mark III Light, which I will also talk about.
If you find an error, please highlight a piece of text and click Ctrl+Enter.
In this article, we offer step-by-step master classes on how to make do-it-yourself table lamps from improvised means that are always in the house. It would seem at first glance ordinary and unnecessary things, but you can make original and designer lamps for your desktop from them.
The most popular and simple improvised materials are: glass bottles and jars, cardboard and paper, plastic vessels, water pipes and cement. How to make lamps out of this we will show and tell in this article.
With a simple and elegant copper table lamp, you can decorate any corner of your home with your own hands. It will perfectly fit modern interior from loft style to rustic. Prostate and conciseness - this is the main trump card of this table lamp.

For this you need tools:
- Roulette, marker
- Pipe cutter and washcloth
- Wire stripping and stripping tool
- Pliers and a thin flat head screwdriver
- crosshead screwdriver

M materials:
- Copper pipes
- Acetone and super glue
- Copper corners 90 °, 7 pcs.
- electrical wire
- Plug and Electro chuck
- Switch and light bulb
Table lamp assembly technique
To get started, take a tape measure, a marker, a pipe cutter, a rag, copper pipes and acetone.
Marking and cutting tubes
- Use a measuring tape and a marker to mark where you will cut the copper pipes.
- Do this carefully, accurately measuring every millimeter, because if the details are different, then in the end result they will not be as large as they should be.

- Point the pipe cutter and adjust the diameter of the pipe with the nut. Watch the copper tube, gradually readjust diameter with nut, so that the closure goes on until the pipe is cut.
- After, with acetone and a rag, you can wipe the markings from the pipe.

TIP: Our parts have: 3 cuts of 15 cm, 1 cut of 20 cm, 1 cut of 45 cm, 1 cut of 25 cm. We used 12 tubes. When designing your luminaire, please note that the size of the copper cubits will be added.
While the cable is inside, we connect the parts
Insert the pieces together and glue with super glue. In order to avoid problems in the future, it is better to glue each part and put it together.

Despite the instantaneous effect of the adhesive, it is preferable to wait a few minutes before proceeding to make sure the pieces are glued perfectly.

Tip: It will be more convenient to apply glue if you use a brush. If you want the lid to be at the very top, install it first. So the first part will be ready, and the cable will go in the other direction.
Instruments:
- Wire stripping and stripping tool
- incisors
- thin flat screwdriver
- crosshead screwdriver
Materials:
- fork
- electro chuck
- switch
- Copper pipes
- electrical wire
 Install electrical system
- Open the faceplate of the cover and start by stripping the insulation. Connect ground (blue) and live (brown, gray or black) with the two screws you find inside.
- Repeat the same process in the plug and switch.
- In the switch you will find two pairs of small screws, a cable that you must cut to the height you want the switch to be and connect to the appropriate sockets by going inside the small screws.
- All you have to do is screw in the light bulb to make your copper table lamp.

Finally, put the lamp in a corner or place you like, and you will see how it will become a wonderful addition to your interior, illuminating the space!

Master class: Table lampfrom paper
When I first saw the Robert Delta table lamp, it was love at first sight! The shape is amazing, it comes in a variety of bright colors, just the way I like it. Recently I thought, since the accessories were amazingly durable, why not use them for the lamp?

Here are all the materials used:
- old lantern or lamp kit
- template and thick cardboard or paper, you can take polypropylene sheets
- glue and putty
- sanding block (medium + fine)
- wood block (add weight to base)
Instruments:
- artistic ribbons
- metal ruler / xacto knife
- drill (can optionally replace xacto knife)
Lamp manufacturing technology
- First, print the pattern (6 of each triangle) (1 of each hexagon).
- Cut out the shapes so that they fit snugly on the board. Then use glue to attach the pieces to the back of the mat.
- Using a metal ruler and a Xacto knife on a cutting board, cut through each shape.
- Put them together.


- Next, glue the bottom (shapes 2 + 4) to the base (shape 6). The triangles fit together nicely and if you did everything right, they will just fall into place.

Then use small pieces of art tape to stick them together and wait for the glue to dry completely.
TIP: Use super glue, it dries instantly (we used Aleene). Apply glue lightly, and wipe off excess.

- After gluing the bottom half (forms 2 + 4 to the base, form 6 turn upside down (open end down), place the square on a flat surface and let it dry overnight, this will help preserve its area.
- The next day, start working on the top of the lamp. Glue the 1 + 3 shape, leaving a little hole to insert the lamp inside. The top one (form 5) was glued along with the art tape, but it is not glued to the form 1 + 3 yet.
- Then reinforce the seams with glue from the inside.
Then start working on the base of the lamp.
The level at the bottom of the lamp needs to be made a little larger, so cut a few 1×4 pieces to raise it a bit. Additional weight will also be added, which will give it more stability. Use screws to attach 1×4 to existing metal base. (We swapped the existing stem with one from another lamp to get it to the correct height).

Next, drill a hole for the cord and insert the plastic sleeve from the old lamp. The lamp should be disassembled, and pull the cord and wire through the threaded rod of the hole in the new base. Glue it in the center inside the lamp.


At the top (form 5), mark the center and drill a hole for the center rod. Then glue it in place.

- After applying the adhesive, wipe off excess and, if necessary, lightly and apply a second coat after sanding.
- Medium-grit putty and fine sandpaper, finish with a sanding block. At this point, you will notice its strong base.


When you've finished removing the dust, apply paint! To cover the top of the threaded rod, use the top of an old lamp - it just slides over the rod. Then return back to the nest!
Everything, a handmade table lamp is ready.


Bottle table lamp


Tin lamp
Such a lamp is perfect for a home desktop, both for a student and a schoolboy. Boys will especially appreciate it, it looks more like a transformer and a robot from the future. You can paint or decorate the jar itself with paper, thread, or make it more embossed. How right.


Table lamp made of plastic bottles
Plastic bottles can always be found on the farm, so decorating an old table lamp is not difficult. Usually, when restoring old lamps, the bases are left and plastic is used for the lampshade. The lampshade mount is usually used the old one. When working with plastic bottles, remember that cutting them is easier. paper cutter or construction knife. Glue is used for rubber or special for plastic.


Table lamp made of branches and cuts
Wood in the interior is always a classic - it is always fashionable and relevant. By decorating a table lamp with a cut of wood or an old driftwood with your own hands, you will get a designer item that simply has no price.
- To do this, we need to pick up any piece of wood we like, process it properly namely, dry it, apply impregnation from pests and cover it with varnish.
- The second stage is to mount the top from the old floor lamp into the base. If this is not the case, it does not matter, in stores everything for light usually sells bases for lampshades.


Other original ideas
The basis for a table lamp, in principle, can serve as any object that you do not need: these are children's toys, sewing machines, unnecessary socks, and so on. Experiment and create beauty!


An LED is a semiconductor device that converts electrical current into light. One 220 volt LED lamp saves a huge amount of electricity. Savings come out 2 times more than a fluorescent lamp and 10 times than an incandescent lamp. If you use parts from a burned-out lamp to make such a lamp, you can significantly reduce costs. Do-it-yourself LED lamp can be assembled quite simply. But do not forget that for this you must have the appropriate qualifications, as you will have to work with high voltage.
Benefits of LEDs
Nowadays, you can find a huge number of types of chandeliers with LED lamps in stores. They have different advantages and disadvantages. Modernization of energy saving lamps allows you to take advantage of all the benefits of fluorescent light. This applies to the most common fixtures with an E 27 base. And the old representatives of this family were endowed with an unpleasant flicker. Fluorescent light sources are truly a miracle. Compared to them, incandescent lamps are losing ground very much. Their high power consumption and low light output are not offset by their high color rendering index.
Durability is their main advantage. It is mechanically strong and reliable.. It is known that its life can reach up to 100,000 hours. And they are also considered environmentally friendly light sources, unlike fluorescent lamps, which, in turn, contain mercury. But as you know, fluorescent lamps have some disadvantages:
- The vapors contained in the tubes are quite poisonous.
- Due to frequent switching on and off, they can quickly fail.
- The design itself requires a certain amount of recycling.

In order to remove this small minus and turn it into a good plus, you can build a lamp from an LED strip with your own hands. In this way, the cost of the light source can be reduced. It will be much lower than that of luminescent counterparts . Also, this lamp will have several advantages:
- Lamp life will be a record 100,000 hours, but only if properly assembled.
- The cost of a homemade device is no higher than that of a fluorescent lamp.
- The watt/lumen efficiency is far superior to all analogues.
But there is also one drawback - this product does not have a warranty. It must be compensated by the skill of the electrician and the exact observance of the instructions.
Homemade lamps
To create a lamp with your own hands, there are a huge number of ways. Using an old base from a burned-out fluorescent lamp is the most common method. Such resources are available in every home, so there will be no problems finding them. And you will also need:

In some schemes, one or two items from this list may not be useful. However, in others, on the contrary, new links in the chain may be needed, for example: drivers or electrolytes. In each specific case, you need make a list of required materials.
How to make a DIY LED lamp
 To proceed with the installation of the lamp, it is necessary to prepare two damaged fluorescent lamps with a power of 13 W and a length of half a meter. There is no point in buying new ones, it is best to find broken old ones. But they must be checked for cracks and chips.
Next, in the store you need to purchase an LED strip. This must be approached responsibly, as the choice is very large. Ribbons with natural or pure white light work best. Since they do not change the shades of surrounding objects and are super-bright. Usually in these tapes the LEDs are assembled in groups of three. The power of one group is 14 watts, and the voltage is 12 volts per meter tape.
After that, you need to disassemble the fluorescent lamps into their component parts. It is necessary to act very carefully - do not damage the wires and do not break the tube, as in this case toxic fumes will escape. All extracted entrails should not be thrown away. They may come in handy later. Next, you need to cut the tape into sections of 3 diodes. After that, it is worth getting expensive and unnecessary converters. Large, sturdy scissors or wire cutters are best for cutting the tape.
 As a result, there should be 22 groups 3 leds or 66 leds, which must be connected in parallel along the entire length. To convert alternating current to direct current, it is necessary to increase the standard voltage of 220 volts to 250 in the electrical network. This is due to the straightening process. The next step is to figure out the number of LED sections. To do this, you need to divide 250 volts by 12 volts (voltage for 1 group of 3 pcs.). Having received as a result 20.8 (3), you need to round up - you get 21 groups. It is best to add another group, as the total number of LEDs will be divided into two lamps. And dividing an even number is much easier.
Next, you need a DC rectifier, which can be found in the extracted insides of a fluorescent lamp. Using wire cutters, we remove the capacitor from the common converter circuit. It is quite easy to perform this action, since it is separate from the diodes, you just have to break off the board.
 Using superglue and soldering, it is necessary to assemble the entire structure. You should not try to fit all 22 sections into one lamp. As mentioned above, you need to find 2 half-meter lamps, since it is simply impossible to place all the LEDs in one. You do not need to rely on the self-adhesive layer, which is located on the back of the tape. He won't be able to last long. Therefore, to fix the LEDs, it is better to use superglue or liquid nails.
Summing up, you can make out all the advantages of the assembled product. The amount of light from the resulting lamps is 1.5 times greater than that of analogues. But the power consumption is much less than that of fluorescent lamps. The service life of this light source will be about 10 times longer. And also one of the advantages - is the direction of the light. It is directed strictly downward and does not have the ability to dissipate. Therefore, it will be best used at the desktop or in the kitchen. However, the emitted light is not high brightness, but has low power consumption.
Constant use of the lamp in the on state will consume only 4 kW of energy per year. The cost of electricity consumed per year can be compared with the cost of a ticket in public transport. Therefore, such light sources are often used where constant illumination is required, for example:
- The street.
- Corridor.
- Utility room.
- Emergency lighting.
Simple LED light bulb
There is another way to create a lamp. A table lamp, chandelier or lantern needs an E14 or E27 socket. Accordingly, the diodes used and the circuit will be different. Compact fluorescent lamps are now common . For installation you will need one burned out cartridge, as well as a modified list of materials. Necessary:

Let's move on to creating an LED module with our own hands. First you need to disassemble the old lamp. In fluorescent lamps, the base is attached to a plate with tubes and secured with latches. The plinth can be detached quite simply. It is necessary, having found places with latches, pry them with a screwdriver. You need to do everything quite carefully so as not to damage the tubes. When opening, it is necessary to ensure that the electrical wiring that leads to the base remains intact.
From the upper part with gas discharge tubes, you need to make a plate to which the LEDs will be attached. To do this, disconnect the bulb tubes. The rest of the plate has 6 holes. In order for the LEDs to fit tightly in it, you need to make a cardboard or plastic “bottom” that will also isolate the LEDs. You need to use NK6 LEDs, they are multi-chip (6 crystals per diode) with parallel connection.
Because of this, the light source is ultra-bright at minimum power. In the cover you need to make 2 holes for each LED. Holes should be pierced carefully and evenly so that their location matches each other and the intended pattern. If you use a piece of plastic as a “bottom”, then the LEDs will be fixed firmly. But in the case of using a piece of cardboard, you will need to glue the base with LEDs using superglue or liquid nails.
 Since the light bulb will be used on a 220 volt network, an RLD2-1 driver is required. You can connect 3 diodes of 1 watt to it. For this lamp, it took 6 LEDs with a power of 0.5 watts. From this it follows that the connection circuit will be formed from two parts connected in series from three LEDs connected in parallel.
Before proceeding with the assembly, you need to isolate the driver and the board from each other. To do this, you can use a piece of cardboard or plastic. This will avoid a short circuit in the future. There is no need to worry about overheating, as the lamp does not heat up at all. It remains to assemble the design and test it in action. The white light makes the bulb appear much brighter. The luminous flux of the assembled lamp is 100-120 lumens. This may be enough to illuminate a small room (corridor or utility room).
Types of fixtures
Lamps on LEDs can be divided into two groups: indicator (LED) - are used as indicators, because they are low-power and dim. The green lights on the router are indicator LEDs. Such diodes are also on the TV. Their application is quite varied. For example:
- Car dashboard lighting.
- Various electronic devices.
- Illumination of computer displays.
 Their colors have a huge variety: yellow, green, red, purple, blue, white and even ultraviolet. It is worth remembering that the color of the LED does not depend on the color of the plastic. It is determined by the type of semiconductor material from which it is made. In most cases, you need to turn it on to know the color, as they are made of colorless plastic.
A lighting design is used to illuminate something. It differs in its power and brightness. It also has a very reduced price, so it is often used in domestic and industrial lighting. This type of lighting is considered productive, environmentally friendly and cheap. To date, the level of development of technology can allow the production of lamps with a high level of light output per 1 watt.
For most photographers, the question of how to create high-quality studio light is relevant. Since it is often not enough from the window, and stationary lamps do not give the desired result. Studio light can be made by hand. Simplicity and low budget remain an important factor.
Home photo studio
Most often, this is a huge amount of expensive equipment in a large room. However, if you wish, you can assemble your own portable set of studio lights, spending a minimum of money on it.
This requires the following equipment: a camera (with a lens), synchronizers, flashes and holders for them, batteries, stands, umbrellas, softboxes, modifiers, backgrounds and, of course, bags to carry and store the entire tool.
What is studio lighting like?
The role of lighting in the world of photography is invaluable. With it, you can convey mood, depth, emotions. The key light is considered the most powerful source in the studio. You should not use it alone, as the contrast is too high, and half of the object is in the dark. You can correct the situation with fill light. This will make the shadows smoother, they will not be so conspicuous.
To get a more perfect picture, you need to add backlight. It will give visibility, the object will be visually separated from the background. Place it behind the model.
There are also such types of studio light as pulsed and constant. Let's consider each of them.
Light pulse
Such a source gives much more power than a constant one. Even if you compare them in terms of cost, size, and other parameters. Why is this happening? Because constant illumination, while the shutter is open, must reflect photons from objects in the lens all the time. And pulsed studio light accumulates enough energy in a short time and instantly releases it in large quantities. That will make it easy to surpass the sun. Since the photo needs a brief moment.
If you need a lot of energy to work - this is the best option. A source of pulsed light can illuminate the room as on a sunny clear day. At the same time, it will weigh only 100 grams and fit freely in your hand. It is more convenient to use pulsed light when shooting outdoors. Of course, fluorescent lamp tubes do not fold very compactly, and it is necessary to protect them from shock. The power source is conventional batteries.

Flashes and pilots emit pulsed light. A synchronizer connects them with the camera. There is only one drawback - the release of a large amount of heat. The result is a huge energy consumption.
light constant
The main sources are LED and halogen lamps. They do not communicate with the camera, which is very convenient to use. Despite the fact that pulsed, at first glance, surpasses the studio light constant, the latter has its own advantages. Using such lighting, the photographer will see what his camera sees. There are no restrictions on the use of light modifiers. Because there is little heat. Even without taking a frame, you can see the result by simply moving the light.

Working with him is a pleasure. No need to use a flash meter, shoot in manual mode. You just need to switch settings until you get the desired result, adjust the camera's ISO and aperture. Constant light is ideal for learning. Like him and models. She will not be disturbed by sharp flashes, she will only have to get used to very bright lighting.
DIY studio light
The most common attachment for lighting fixtures is the softbox. You can make it yourself. For this you will need:
- cardboard box;
- whatman;
- foil;
- halogen spotlight;
- lining translucent fabric;
- slats;
- knitting needles;
- glue;
- scissors;
- wire;
- nuts;
- hairpins;
- clothespins stationery.
A softbox consists of a frame that can be made from any (square or rectangular) cardboard box. On the one hand, it is necessary to cut off the cover so that it is open. Then we make a reflective layer. To do this, glue the inside of the box with white paper or foil. We will make a diffuser screen from a translucent light fabric, sealing the open side with it. The softbox has a two-layer cover: external (black) and internal (metallized reflective).
On the opposite side of the screen, it is necessary to make a hole for the lighting device, which is used as a halogen spotlight. It is attached with wire.

If you need a large softbox for work, then its frame can be made of wooden slats and wire knitting needles. It should be noted that the frame on which the screen is mounted must be much larger than for a spotlight. The finished frame is covered with a cover. It can be made in two layers. So, it is easier to put on the frame, but it requires a lot of time. Separately, we fit the walls using stationery clothespins, different in size.
The softbox is attached to or the leg of the lamp. It is very important to turn it on only during shooting. Since the surface is very hot. Homemade studio light is ready.
Power and quality of different types of light
For lovers of bright shots with shallow sharpness and an open aperture, constant lighting is ideal. Although it has little power. For food, still life, produce, and static subjects in general, it's best to use pulsed light.

As for quality, opinions on this matter are very subjective. However, constant light is more pleasant and soft.
Work principles
A photographer in a home studio should have everything necessary for shooting. This is it, the background, lighting fixtures, reflectors, attachments. But this is not enough. It is also very important to know how to work with studio lighting, how to set it up correctly.
Main attributes:
- beauty dish;
- reflector;
- umbrella;
- softbox;
- reflectors;
- color filters;
- tube;
- honeycombs.
Using a backlight reflector will help illuminate the background evenly. Gives harsh shadows, directional hard light. placed in front of the object being photographed. It gives a soft directional (concentrated) light, which is complemented by diffused light. For this, a softbox and an umbrella are used. You can install a lamp behind it (in the light) or use it as a reflector thanks to the white fabric on the inner surface.
Today, the most popular attachment among photographers is the softbox. The light is diffused and beautiful. Masters use octoboxes (large octagonal) and stripboxes (long rectangular). It all depends on the size, shape, distance to the object. For a group shot, octoboxes are used, for portrait shots, in full height - a stripbox.

Photoreflectors are needed to change direction and color. They are also indispensable for studios with a single source. Spot (tube) is rarely used by photographers, as it is able to illuminate only a small detail.
Color filters change the color of studio lighting. They are installed on the source, directed to the background, and this is how a photo in a halo is obtained. The color of the skin does not change. Honeycombs are used to simulate sunlight.
Monoblocks, generators serve photographers as sources of constant light. Experienced craftsmen choose generators. Although they are more expensive, they are easier to work with.
Synchronization and methods of its implementation
Today in stores you can buy a set of pulsed light. It includes:
- rack;
- lamp;
- umbrellas;
- color filters.
The inconvenience is that you need to synchronize and connect to the camera. Otherwise, the flash simply will not work.
Synchronization can be done in three ways.
- Transmitter (IR trigger).
- Radio synchronizer.
- Sync cable.
The IR trigger is a small box. Attaches to the camera where the flash would normally be. It operates on the following principle: inside the monoblock there is a “trap” that captures impulses, which makes it clear to the flash: “It’s time to work.” The disadvantage is that the infrared beam must be in the visibility of the device, like the remote control and the TV. Because of the inconvenience, this method is rarely used.
More practical to use radio synchronizer. Removes from any place where the signal has reached. The principle of operation is the same as that of the transmitter, but it is based on radio waves.
An extremely inconvenient way for a photographer is a sync cable. Since the light source and the camera are connected by a wire that will constantly get under the feet of the master.
Having decided on the synchronization, you need to set up the flash. It switches to manual mode. The power is decreasing. We do the same with the camera. The exposure of the frame is determined by the histogram or flash meter.