Reinstall windows from usb drive. Installing the Windows operating system on a computer via a USB flash drive. How to install Windows from a flash drive
Without an operating system, a personal computer is nothing more than a set of components assembled in a system unit case. To make these components interact with each other, the user must install an operating system on the computer.
An operating system (OS) is software that helps the user interact with a computer through a user-friendly graphical interface. The OS package includes many programs such as Internet Explorer, Notepad and Paint, Explorer, etc. The same familiar Windows interface is nothing more than a separate application.
When purchasing a personal computer, the buyer must be prepared for the fact that the software will have to pay extra separately. Thus, on a computer or laptop, you will have to install both third-party applications (most of them are free) and the operating system itself, which, unfortunately, is paid. However, there are also free alternatives, for example, any edition of Linux.
In the vast majority of cases, users choose Windows, because this system is the most popular among software developers, and is also the most user-friendly and intuitive.
Selecting media for the operating system
When purchasing a computer for private use, a person may well install a trial version of the system or download an activated OS from any.
Most often, the operating system is distributed as an image. To install Windows on a computer, you must place the image on any media that is supported by the . And after that, from this media, install Windows on the computer's hard drive. The most common media are DVDs and flash drives.
Unfortunately, most builds of Windows come with an integrated set of applications and updates. Thus, the file size increases to several , and therefore, the image simply does not fit on an optical disc.
The way out of this situation is to place the Windows installation distribution on a flash drive, or as it is commonly called a flash drive. As a carrier, you can use both a full-fledged flash drive and a MicroSD memory card installed in the card reader.
If the laptop has a built-in card reader, a person may well use this device.
Program for placing a Windows distribution on a USB flash drive
To install the operating system from a USB flash drive, there are many applications. Unfortunately, most of them are too complicated for the average user, moreover, some of the programs work exclusively with a certain version of the system.
One of the best solutions is to use the UltraISO program, because this application allows you to place a distribution kit for both Windows and any other OS on a USB flash drive. In addition, even a novice user can work with UltraISO, this does not require any special skills.
First, you need to find a suitable size flash drive, then connect it to your computer and run UltraISO. If there is some useful information on the media, it must be transferred to other means of storing information, because after the copying process is completed, all data on the device will be lost.
The UltraISO interface may seem rather complicated, because this program is a real universal combine that works with images. If desired, using this application, you can even mount images.
To write Windows to a USB flash drive, you need to go to the section " File», « Open” and select the required image file through the explorer.

After opening the file, its contents will be displayed on the left side of the window.

To write information to a flash drive, you need to go to the "" section and run the tool " ».

In chapter " disk drive", the user selects the drive connected to the computer and presses the " Recording". All other settings should be left unchanged.

At the end of the process, the drive is removed from the computer and can be used to install the OS on any other device.
The process of installing Windows from a flash drive is not that complicated, and yet, this topic requires separate consideration. In general terms, the user connects the flash drive to the computer and immediately at the moment of turning it on, calls up the BIOS boot menu, in which the USB drive is selected as the boot source.

Depending on the manufacturer of the motherboard, the boot menu is called up by pressing the F11, F2, ESC, DEL, F8, F9, F12, F10 buttons. Here it is necessary to clarify in the documentation for the motherboard.
The further installation process is no different from installing Windows using an optical disc. You just need to follow the instructions of the Windows setup wizard on the monitor.
Summing up, it should be noted that flash drives are not just crowding out other drives from the market. These devices can act both as optical discs and permanent memory of mobile gadgets.
The write speed and reusability make flash drives more cost-effective than any other storage medium.
Share.You don't need to buy a disc and drive to install Windows 7, as you can install the operating system from a USB flash drive.
Inexperienced users are baffled by the question - how to install Windows 7 from a USB flash drive. Not everyone knows how to install from a disk, and even less knows how to install from USB. In fact, there is nothing complicated, it is important to clearly follow the installation instructions and not violate the sequence of steps. Let's immediately determine that you need a USB Flash or an external hard drive with a capacity of at least 4 GB. The file system in which the media is formatted does not matter. In addition, you can even burn the image to an SD card or an external device, such as an MP3 player, which is recognized as a flash drive in the computer.
Installation sequence
If you install the OS on a blank disk, then you do not need to care about its contents. If you reinstall the OS, then remember that the drive on which you install the system will be completely formatted, which means that all data from the drive will be deleted. Therefore, the very first step you need to think about what files to save. Next, follow the following instructions:
- Download OS;
- Create installation media;
- Change the BIOS settings;
- We start the computer from an external device;
- Follow the instructions for installing the OS;
- Install drivers and update the installed OS;
These 6 steps are the same for all versions of the operating system, the scheme also works for other versions of the OS, including Windows Vista or Windows 8.
Where to download OS
You need to download not just the system files, you need an ISO image suitable for writing to a USB flash drive. You can download on this . Already at this stage, you need to decide which version of the OS you need. The question is not only whether you will use the "Home" or "Professional" version, but also whether it will be 32 or 64 bits. After you decide on the OS version, download it to your hard drive.
How to write an OS to a flash drive
If you just write the distribution to USB, then you will not be able to run the OS from it, nor run the installation from the USB flash drive. To create bootable media, you need to use specialized software. One of the best programs for creating . Consider the creation of this utility as an example. First of all, we open our ISO image of Windows 7 inside UltraISO:

You need to choose not only the drive, but also the recording method. We select USB-HDD +, you do not need to touch other settings.

How to start the installation through the BIOS
After you have created a USB flash drive with the seven, you need to boot the computer from it. To do this, you need to reboot it and, during system startup, enter the BIOS and specify the startup sequence. Depending on the BIOS version, the input is available using the F2, Del, Esc keys, but there may be other keys. Inside the BIOS, you need to find the BOOT tab, where you specify the startup order. Your media must already be in the device, otherwise you will not be able to specify it to start when you start the PC. The boot sequence should be something like this:

After making changes to the BIOS, they must be saved and exited. Next, the system will automatically reboot and boot from USB.
Installation
After the start, you will begin the installation of the system itself. If you downloaded the Russian version, then the entire installation will be accompanied by Russian instructions and recommendations. It is enough to follow the instructions that appear on the screen, and after 20-30 minutes the operating system will be installed on your computer. If you have any questions, please see the instructions:
Do not forget that the hard drive where you install the OS will be formatted. This means that all data on the drive where the new system is installed will be deleted. Therefore, you need to take care of saving them in advance.
Customization and updates
After installing Windows 7 on your computer, it's too early to relax. Next, you have to configure the system, and then install all the necessary drivers. For configuration and drivers, you can use the following programs:
- driver pack solution;
The first program will optimize the system. The second program will automatically install all the necessary drivers. During setup, be sure to create a backup of the OS, as well as the first restore point, which will come in handy in the future if you have any problems, for example, you run into errors.
Why do I need to install an operating system from a USB flash drive?
After all, for this from time immemorial there are installation disks.
The fact is that in some models it is simply missing or broken, and you need to reinstall the operating system.
And carrying (and storing) a flash drive is much more convenient than a CD-RW.
The installation process itself, if you understand the issue, is not so complicated.
It can be divided into several stages:
- Copy operating system to flash drive
- Prepare your computer for installation
- Set BIOS to Boot
- Install operating system
Of course, if you are on “you” with a computer, then you can cope with the task if you spend some time clarifying some points of the process on the Internet.

If knowledge on this topic is not enough, then this article will help you choose the right vector of work, and direct your energy and desire to do everything yourself in the right direction.
So, let's go through each point in more detail.
How to copy the Windows operating system to a USB flash drive

As it becomes clear from the title, the first thing you will need to do is copy something somewhere. This something is an image of the necessary operating system. Somewhere - our, in the future, installation flash drive.
To copy we need:
- flash drive with 4 GB or more. It all depends on which OS you want to download and then install on your laptop or computer.
- image burning program (WinToFlash, WinSetupFromUSB), which can be downloaded from the Internet.
- the image of the operating system.
You can buy a new flash drive or use an existing one.
Programs for installation
We download the program for recording the image from the Internet (there will be no problems with this item - you can find anything on the network)
We download the image of the operating system from a more or less normal torrent tracker.
Be sure to remember exactly where the image is saved on the computer: the name of the disk, the name of the folder.
For this purpose, you can create a special folder NOT on the desktop and NOT on drive C. You will find out why later.
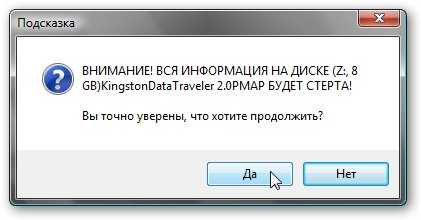
Tip: before starting work, transfer the information from the USB flash drive (if it is not new) that you are going to use to another medium! Since, in the process of transferring the operating system to a USB flash drive, all information on it will be erased forever.
We download the program. For example, WinToFlash.
After the program is downloaded, run it.
In the window that opens, select the OS that we need to copy from the list.

In the window that opens, specify the path to the image of the operating system (the one that we remembered in the previous paragraph).
That is, from the drop-down list, select the drive, folder and the file itself.
And in the next drop-down line - to the media on which this image will be stored, that is, a flash drive.
We boldly press the "Run" button and wait while the process of formatting the flash drive and rewriting files from the computer to it is in progress.
The first step is done - we have a flash drive with which you can install the operating system.
There is another option for creating an operating system image - an image directly of your OS.
To do this, go to the "Control Panel" item through the "Start" button. Select the "Backup and Restore" section.

In the window that appears on the left, we are looking for the item "Creating a system image".

After clicking, a window will open in which we need to choose where the image of our operating system will be saved.
It is better not to save on your hard drive, but to use a removable hard drive for this purpose.
To do this, select in the drop-down list of the item "Hard disk" the media to which the image will be copied.

After that, the program will prompt you to select the disks from which the image will be copied.
In this case, we are interested in system disks. Put a check in front of "With (system)" and "Reserved by the system (system)". It is from them that information will be archived.
In the next window that appears, you will need to confirm the archiving.
In it you will also see the amount of memory that the image will take, as well as the disks that were selected.
Making archiving
If you have no objections at this stage, then you can start the process by clicking the "Archive" button in the lower right corner of the monitor.
The duration will depend on the amount of information being archived. But the ability of your computer will play an important role.
If the machine slows down during operation, then it will not fly during archiving.
After the end of this process, the system will specify whether you want to write the received archive to a removable disk. Given that you just saved the data there, we refuse this offer.
At the moment you are the proud owner of a backup recorded on a removable disk. Yes, the name of the created archive is Windows Image Backup.
Preparing your computer for reinstallation
The operating system of a computer is the main part of the system software.
The OS is responsible for managing your computer's resources. Failure of the operating system leads to the failure of the entire PC.
It sounds serious, but this does not mean that the reinstallation process itself is so complicated and incomprehensible.
All computer preparation, by and large, comes down to copying the files you need from drive C to another drive, for example, D or any removable media.
Perhaps these are necessary programs, network card drivers, important files saved on the C drive.
At this stage, it is better not to be lazy and look through all the files of the C drive.
This is necessary so that later you do not grab your head and do not waste time restoring some important, but not saved document.
Tip: it is initially undesirable to store any files that are not involved in the operation of the system on the system drive C. If the download of files initially occurs in the “Downloads” (or “Download”) folder on drive C (Fig. 4), then they are all the same it is better to transfer to another disk. Don't litter the C drive.
After everything you need has been successfully duplicated on another disk, the contents of the system disk have been checked again, you can proceed to the next step.
BIOS setup for OS boot
First, let's find out what a BIOS is. BIOS are microprograms that are responsible for managing the settings of the components of the system unit, as well as loading the operating system.
The BIOS is located on the motherboard, which controls the operation of all computer components and is responsible for their correct interaction during operation.
Tip: the mouse does not work in the BIOS, so we do not torture it to no avail, but use the arrow keys, ENTER, or read the "Help" section in the same BIOS.
You can enter the BIOS while the computer is booting during startup or reboot.
To do this, during boot, when a black screen appears on the monitor with white letters and a logo in the upper right corner of the screen, press the Delete key, or ESC, or F2.
The system itself will tell you which key to press. The hint will be written in white letters on a black screen at the bottom or in the center, depending on the brand (Fig. 5).
Entering the BIOS, you need to find and enter the menu section Bootable Device Priority or menu item BOOT. Options for the appearance of the BIOS window are different .

In the Bootable Device Priority folder, select the CD-ROM Boot Priority or JetFlashTranced or USB-HDD item. Depending on the manufacturer, the BIOS menu may look different.
If these options do not match the options of your BIOS, then we navigate the menu, relying on our knowledge of English and intuition.
In order not to get stuck at this stage, you can, before you start installing Windows on your laptop or computer, study the principle of your BIOS on the Internet.
There is a lot of information on the web, both textual and video.
After spending relatively little time and digging through several specialized sites, you can get information that will allow you to complete the reinstallation process without any problems.
By selecting the desired item, which will tell the computer that the next boot will occur not from the hard disk, but from USB, you can exit the BIOS, saving all changes.
Installing an operating system from a flash drive
Provided that all the previous steps are performed correctly, the following window will appear on the monitor during the reboot.
Or as in Figure 14:
We press, as requested, any key (Press any key ...).

A Windows installation window appears, where, for starters, they are asked to select a language, country, and time format.
Since the installation is what this whole process was started for, we press it without hesitation.
In the list that appears, select the version of the operating system that we need.
But there is one point. You must select the OS version for which you have a key.
The key is a set of characters on a small piece of paper, which must be attached to the bottom of the laptop or the case of the computer's system unit.
Therefore, before starting the installation, you must find this sheet and rewrite the key.
It will be inconvenient somehow at this stage of the installation to turn the laptop or move the processor.
After choosing the operating system to download, we agree in the next window with the license terms (without agreeing to these very conditions, the system will not allow you to continue installing the OS from a USB flash drive) and in the next window select the type of installation.
Click on Complete Installation.
The next window will prompt us to select the partition where the Windows operating system will be installed from the USB flash drive.

From the existing list, select the item whose type is called "System".
And click "Disk Setup". Several items will appear at the bottom of the window.
Of these, select "Format". When choosing this item, we agree with the warning about the possibility of losing files or programs from the system disk.

We agree without hesitation! After all, before reinstalling the operating system, we copied everything you need to a safe place. From there, everything important can be restored in the new OS.
After the system disk is formatted, click the "Next" button at the bottom of the window. And we humbly wait while the installation is in progress.
The system will then prompt you to enter your username and computer name.
You will be given the opportunity to set a password and enter a hint for it, just in case.
Then you may just need the same key that was recommended above to be written off from the sticker on the computer case.
This is followed by the choice of security mode, time and date. Probably, if you have the necessary driver in the system, you will be prompted to select the type of network connection.
If this item did not appear during the installation process, then the drivers for the network connection will have to be installed separately.
This is where the installation of the operating system from a USB flash drive ends.
Now you can begin to fill the brand new system with the necessary (and not so) programs and drivers.
And finally: you must definitely return to the BIOS and return the settings from the “USB” item to the “Hard disk” item.
You don't want to force your computer to search for a USB flash drive again and again when it boots up, do you?
So, Windows is installed. What conclusions can be drawn after going through the process of self-installing the OS from a USB flash drive?
Conclusion: the time spent once in the future is compensated by savings on maintaining your own computer.
We will keep silent about the knowledge gained in the process of reinstalling the operating system. Knowledge is power.
Do you have a laptop, personal computer or tablet - in a word, a device on which you want to install Windows via a USB flash drive? Do you often have to reinstall the OS and do not want to use fragile and bulky drives?
If yes, then this guide is for you. Carefully read the instructions below, and you will definitely succeed!
It can also be said that a disk image is the same CD/DVD disk that does not have its own material shell.
Step 1. If you own an official copy of Windows, you can create a bootable USB drive from the Windows Installer supplied on the DVD, or you can use the official ISO file that can be downloaded from the company's website. You can also purchase an ISO distribution from other sources (download from any torrent tracker). In the last two cases, skip the subsequent paragraphs of this section.
Step 2. There are many free solutions available on the Internet, one of which is the ImgBurn program - one of the most popular utilities.

Step 3 Insert the operating system disc into the DVD drive. Open the program and click on the "Copy to Image" or "Create Image" tab (the inscription may differ in different versions of the program). When prompted, select the DVD drive as the source.

Step 4 Save the ISO file. Choose an easy-to-remember name and location for the file. Make sure you have enough free space to save the file. An ISO file is essentially an exact copy of a bootable DVD.

Part 2: Create a Bootable USB Flash Drive
Step 1. Insert your flash drive into the appropriate slot on your computer. To successfully copy a disk image (ISO) file, the media size must be at least 4 GB.
Note! When creating, all original data will be erased - create a backup in case you have important information.

Step 2 Download Windows 7 USB/DVD Download Tool from the official Windows website. Despite the name, the utility works with other versions of the OS.

Step 3 Specify the path to the ISO file - the location where you saved it at the last stage of creation.

Step 4 Click on the "USB Device" button. The program can also create a boot disk, to do this, click on the "Disc" button.

Step 5 Wait for the download to complete. The program will prepare the drive, then download the ISO file to it. Depending on the speed of your device, the copying process takes up to 15 minutes.

Part 3 System preparation
- Insert the USB drive into your computer. Press the power button or restart your computer. During the reboot, press the so-called "Setup key" - a key combination that is shown on the first screens of the system boot. Usually, this combination is on the same screen that displays the manufacturer's logo. The key varies from computer to computer, but will be on the screen anyway. After clicking, you will go to the BIOS menu.

Table of hotkeys depending on the PC model at the time of the start of the download

- Click on the Boot Menu tab. Each BIOS is different, but they all have this tab. You will see the order in which the computer searches for a bootable operating system. Typically, computers do this from the hard drive first, so the OS boots automatically.

- Once you get to the "Boot Menu", you will need to switch the order so that your USB drive is at the very top of the list. Again, exactly how this list looks will vary depending on the make and model of the device. Perhaps you will see the name of your drive, or perhaps just the inscription "Removable Device" or "USB". To change the order, use the "+" and "-" keys - up and down, respectively.

- After, save the changes and exit the BIOS. The key to this action is usually the F10 key. The computer will reboot from the USB drive.

Part 4: Installing Windows
Step 1. To start the installer initialization, press any key. In the event that you do nothing, the computer will automatically start loading the already installed operating system and you will have to restart the system again.

Step 2 After pressing the key, the system will start downloading data for installing the operating system. On slow devices, this process can take up to several minutes.

Step 3 Follow the installer's instructions. Once the installation is complete, the system will reboot.

Congratulations! You have installed Windows! Now you have a flash drive with which you can. Most new computers support installation from flash drives, use the special BIOS boot item as shown above.
Video - How to reinstall Windows from a USB flash drive via BIOS
Almost all modern portable computers (except Apple) use the operating system from Microsoft. Sometimes a situation arises in which it is necessary to reinstall the OS, so it will be useful to know how to reinstall Windows 7 on a laptop, netbook. You can use several options for launching the program.
How to reinstall Windows 7 on a laptop using built-in tools
A situation arises when there is a need to reinstall windows 7, but there is neither a licensed dvd at hand, nor a flash drive to which you can copy the system files. On all laptops, whether it's Acer (Acer), Asus (Asus) or Lenovo, you can start restoring or installing the OS using a disk image. It can be created in advance or found on the Internet, but it must be stored on a computer, and the laptop itself must be turned on.
Reinstalling windows 7 on a laptop requires special programs that can recognize images, these include:
- Diamond Tools;
- UltraISO.
To do this, mount the image into this program, run the file with the .exe extension. If windows is simply archived, then you should not unpack it. Open the vault with winrar or winzip, find the same .exe executable again. After clicking on it, the standard process of reinstalling the operating system will begin.
How to reinstall Windows 7 from a flash drive or disk
In cases where the laptop cannot boot the OS on its own, you should use another computer to create the installation media. Before installing Windows on a laptop from a USB flash drive, you need to find the image and prepare the drive for writing files. If you have a licensed DVD, the process is much easier, but there is an option that allows you to create it yourself.
Preliminary preparation of software for OS installation
To make bootable media from a DVD or flash drive, it is not enough just to copy files or an image to it. To do this, prepare the necessary version of Windows itself, use utilities to make an installation cd or USB flash drive. For the whole process you will need:
- The Windows 7 program itself.
- DVD or flash drive at least 4 GB.
- ImgBurn utility or Windows 7 USB-DVD Download Tool.
Create a bootable flash drive or disk
If you have a dvd-rom, reinstalling windows 7 on a laptop can be done through it. You will need a Windows image and the ImgBurn utility, which can be easily found on the Internet. The creation process is as follows:
- Insert blank dvd.
- Launch the ImgBurn program.
- In the window, select "Browse" and specify the path to the OS image.
- Do not set the maximum speed for recording, it is better to choose the minimum.
- After recording, a window will appear, you must click "OK" and the finished disk will jump out of the device itself.

Many models of modern laptops and netbooks no longer use cd-rom, so it's useful to be able to reinstall windows 7 on a laptop using a usb flash drive. The process for creating installation media is as follows:
- Insert the drive.
- Launch the Windows 7 USB-DVD Download Tool.
- In the window, select the path to the system image file.
- Next, the program will prompt you to select from the menu what you want to create: dvd or USB Device. Choose the second one.
- Specify the path to the drive.
- The utility will warn you that all data from the media will be lost. Agree and the creation of the installation flash drive will start.
BIOS setup
To restore or reinstall windows 7 on a laptop, you need to change some settings in the BIOS. To get started, restart your computer, at the initial boot screen, press "del" (works for most models, but sometimes F8 works). The mouse does not work in this system, so all actions should be performed with the arrows on the keyboard. When entering the BIOS, do the following:
- In the "Boot" section, find the "Boot Device Priority" section. This setting will specify where to start the system from.
- In the menu, make sure that USB DEVICE is first in the list in order if you are using a USB flash drive or your CD-Rom if it is a disk.
- Press F10, confirm if you want to save changes.
Installing Windows 7
After all the above steps, the installation will begin. The developers have tried to make sure that the user does not experience inconvenience and the whole process occurs as automatically as possible. A person will be offered several parameters that he must determine on his own, but there are no difficulties with them. The entire installation, the search for drivers for the motherboard, the processor will be performed independently by the system, they are sewn into the OS and will be immediately installed with it on the hard drive. When reinstalling, the laptop must be connected to power.
Installing Windows 7 from a disk or removable drive has one algorithm. The user will need to follow these steps:
- Wait until the program copies all the necessary files. How long it takes depends on the configuration of the PC.
- Next, a license agreement will appear, be sure to confirm it.
- In the next window, you will be prompted to choose to restore the system or perform a complete reinstallation. It is worth choosing the second option.
- At the next stage, you need to select the partition on which the OS will be installed. As a rule, choose section C, all personal data will be deleted from it.
- Confirm the choice, then the process of reinstalling the system will begin.
- During the reinstallation, the computer will restart several times, after the first time, you must remove the bootable media, and then reinsert it.
- At the end, there will be several parameters that need to be set: the time zone, if desired, set a password for the account, enter the license key.
- The utility will carry out all other actions on its own.

OS setup
All further setup of windows 7 is that you need to install additional drivers, as a rule, they are included with the computer. Please note that all programs that were previously installed will not work. When reinstalling, you can leave all drives intact, except for drive C, this will allow you to save some of the data, but if you wish, you can format the entire hard drive completely. This is true if the cause of the problem is viruses, malware that could not be found and removed.
Video instruction: how to install Windows 7 on a laptop