Installation of false ceilings. Do-it-yourself suspended ceiling: we make an Armstrong suspended ceiling according to the instructions. Raster or cassette ceilings
Rack structures on the ceiling are used to decorate various premises, both residential and public. The kitchen is no exception. The popularity of this material is due to its durability, moisture resistance, low weight of the structure, ease of installation and ease of maintenance. If you have minimal construction skills and the necessary set of tools, you can install a slatted ceiling with your own hands.
Such a ceiling is not at all difficult to make.
Rack ceiling design
This is a type of suspended ceiling. The design consists of aluminum, plastic or steel panels and a special system for fixing rails to the wall. The panels are made of steel, aluminum or plastic tape with a thickness of 0.4 to 0.7 mm, a width of 50 to 300 mm and a length of up to 6 m.
They begin to be installed last: when the flooring has already been completed and the plastered walls have dried.
Varieties of rails

Reiki (panels) can be selected for every taste
The surface is matte or glossy, smooth or perforated, and can imitate leather or wood in texture. The shape of the panels can be rectangular or rounded, and a great variety of colors and shades are offered. Reiki can be placed along or across, as well as diagonally. This will help to visually enlarge or reduce the room. So, if it is long, narrow, it is better to place it horizontally (across) the ceiling. Otherwise, the room will seem even longer.
Ceiling structures of this type are distinguished by interfluve joints, of which there are several varieties. With an open joint, gaps about 1.5 cm wide remain. In this case, the installation is completed by attaching the decorative profile to these gaps. If the joint is closed, the slats go behind each other. Another variety is a joint without gaps, when they are installed close to each other.
What is a suspension system
It consists of a universal carrier rail (other names are comb, stringer, traverse), adjustable suspension and an angular profile. The tire is a bar made of galvanized steel with grooves where the rails are installed and fastened there (snap into place). The suspension consists of a bracket and a rod. The bracket is attached to the bus, and the rod is attached to the main ceiling. The distance to the suspension system is usually 5-12 cm. You can determine this distance yourself, it will depend on the availability of communications and your personal preferences.
Do-it-yourself rack ceiling installation: a step-by-step guide
If you have never watched how editing is done, the video should come in handy:
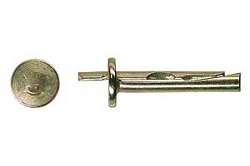
To work, you will need the following tools: a puncher, a drill, metal shears, a building level, a tape measure, a ruler, a marker, a sharp knife, self-tapping screws and dowels.

Mounting diagram
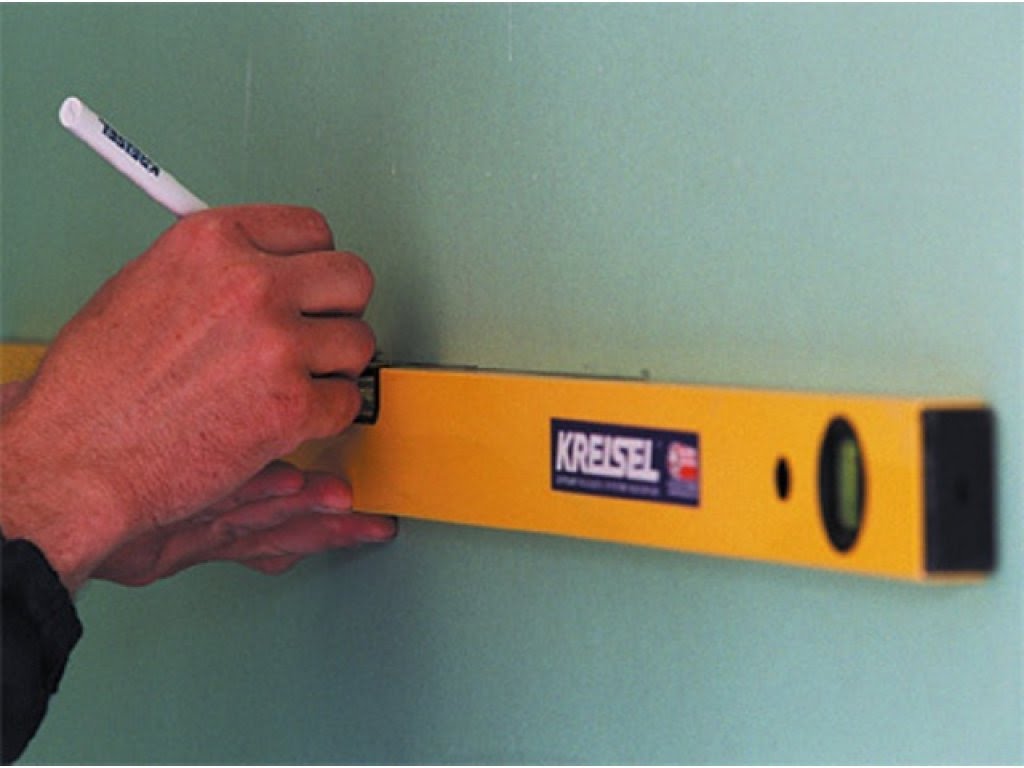
Step one: installing guides around the perimeter of the room
First, mark the starting point with a marker. The distance must be at least 5 cm from the existing one. Using the building level, transfer this mark around the perimeter of the room (step up to 1 m). Draw a line. Measure the length of the wall according to the marks made and cut off the necessary piece of the corner profile. The standard profile length is three meters. It is cut with scissors for metal.
Attach the guide profile to the wall along the drawn line and drill a hole with a drill. Screw in the screw with the dowel. Having fixed the entire profile in increments of 50-60 cm, check its evenness with a level. At the inner corners, the profile should be fastened end-to-end, and at the outer corners - at an angle of 45 degrees.
Step two: installing hangers
Tire attachment points must be marked with a tape measure. Make the first mark at a distance of 30-40 cm from the wall, the next should be 90-100 cm parallel to each other. Fix the hangers with screws with dowels, pre-drilling holes with a drill. Check the position of the hangers by level.
Step Three: Attaching the Support Rails

Tires - the basis of the design
It is better that the distance between the traverses does not exceed 1-1.2 m. Install the tires perpendicular to the rails on the same level with the profile nailed around the perimeter. Screw them to the hangers with a screwdriver. It is very important at this stage to avoid errors in order to mount an even structure. After all, the appearance of the entire ceiling depends on its evenness.
With a short distance, the tire can be mounted not on suspensions, but directly on the base.
The distance between the profile and the tire is 1 cm. If it turned out to be shorter than necessary, it can be extended. To do this, the suspension is fixed at the very beginning of the next traverse. The second traverse is screwed end-to-end with the first.
Step Four: Installing the Ceiling

Rail installation
Release the slats from the protective film and cut to fit the room. The length should be 0.3-0.5 cm less than the distance between opposite walls. They are carefully inserted into the guides and snapped along the entire length onto the clamps of the traverse. Each subsequent one is installed next to the previous one. The height of the tires, if necessary, can be adjusted by changing the screwing depth of self-tapping screws (if the tire is fixed to the ceiling) or adjustable hangers. If the last rail does not fit in width, it must be cut. To do this, mark the required distance along the entire length of the panel and draw a line with a knife along the ruler. Bend and unbend until it breaks. If the length is large, it is better to make transverse cuts and break off each part separately. After installing the cut panel, secure it with wooden spacers or profile pieces.
Don't forget the plinth. This is a decorative element that will give a complete and neat look and hide the gaps between the structure and the walls. If the kitchen has uneven walls, choose a wide plinth, it will make the design visually smoother.

Looks modern, original and stylish
Caring for these ceilings is very easy. They are made of plastic or metal are not afraid of water, so they can be washed with a sponge dipped in soapy water.
The aluminum version is not afraid of changes in temperature and humidity, so it is an ideal choice for the kitchen. Its installation is quite simple, does not require surface preparation, hides the flaws of the existing ceiling, looks very aesthetically pleasing.
When choosing an option from rails for the kitchen, it is better to give preference to high-quality hangers with a protective film. It protects against dirt and moisture, low and high temperatures and various contaminants. If properly installed, it will retain its appearance for a long time. Many men even like the setup. They compare this activity to assembling a constructor.
Photo design examples

A classic example for the kitchen will harmoniously fit into the interior, made in any style.

A color example allows you to achieve an unusual visual effect.

Duplex can also be used for zoning a room

Duplex looks especially impressive

By installing rails in different directions, you can visually divide the room into several zones

Spot lighting - the most common option
The ceiling made of rails can be not only straight, but also curved. In this case, it can be used to hide height differences on the ceiling.

Curvilinear, on the other hand, allows you to hide unsuccessful layout features or external communication elements

The curvilinear system, lighting features and well-chosen colors have turned the view into a very important decorative element.

Original ideas can be realized by combining different finishing materials.
How to level the old concrete ceiling and hide its other flaws? The answer is simple - you can make a false ceiling. The design and installation work is quite complicated, but provided that you know exactly how to do everything and what such a design consists of, you will succeed.
What is a false ceiling?
Based on the name, you can immediately understand that a suspended ceiling is a special structure that is attached to the ceiling and performs various functions, mainly decorative, of course. Such a ceiling has good soundproofing and insulating properties, and is also able to change the appearance of the main ceiling beyond recognition.


When installing a suspended ceiling, a special system of suspensions and profiles is used, which are attached to the base ceiling. Then, a material is installed on the mounted structure, which will serve as a new ceiling. Repair specialists use, as a rule, drywall for these purposes.


On a note! Suspended ceiling is actually different. It can be rack, cassette, lattice. These types of ceilings are also called modular. However, the article will focus on the usual drywall coating - this type is also known as solid. The ceiling, which is installed without the use of suspensions, is called hemmed.
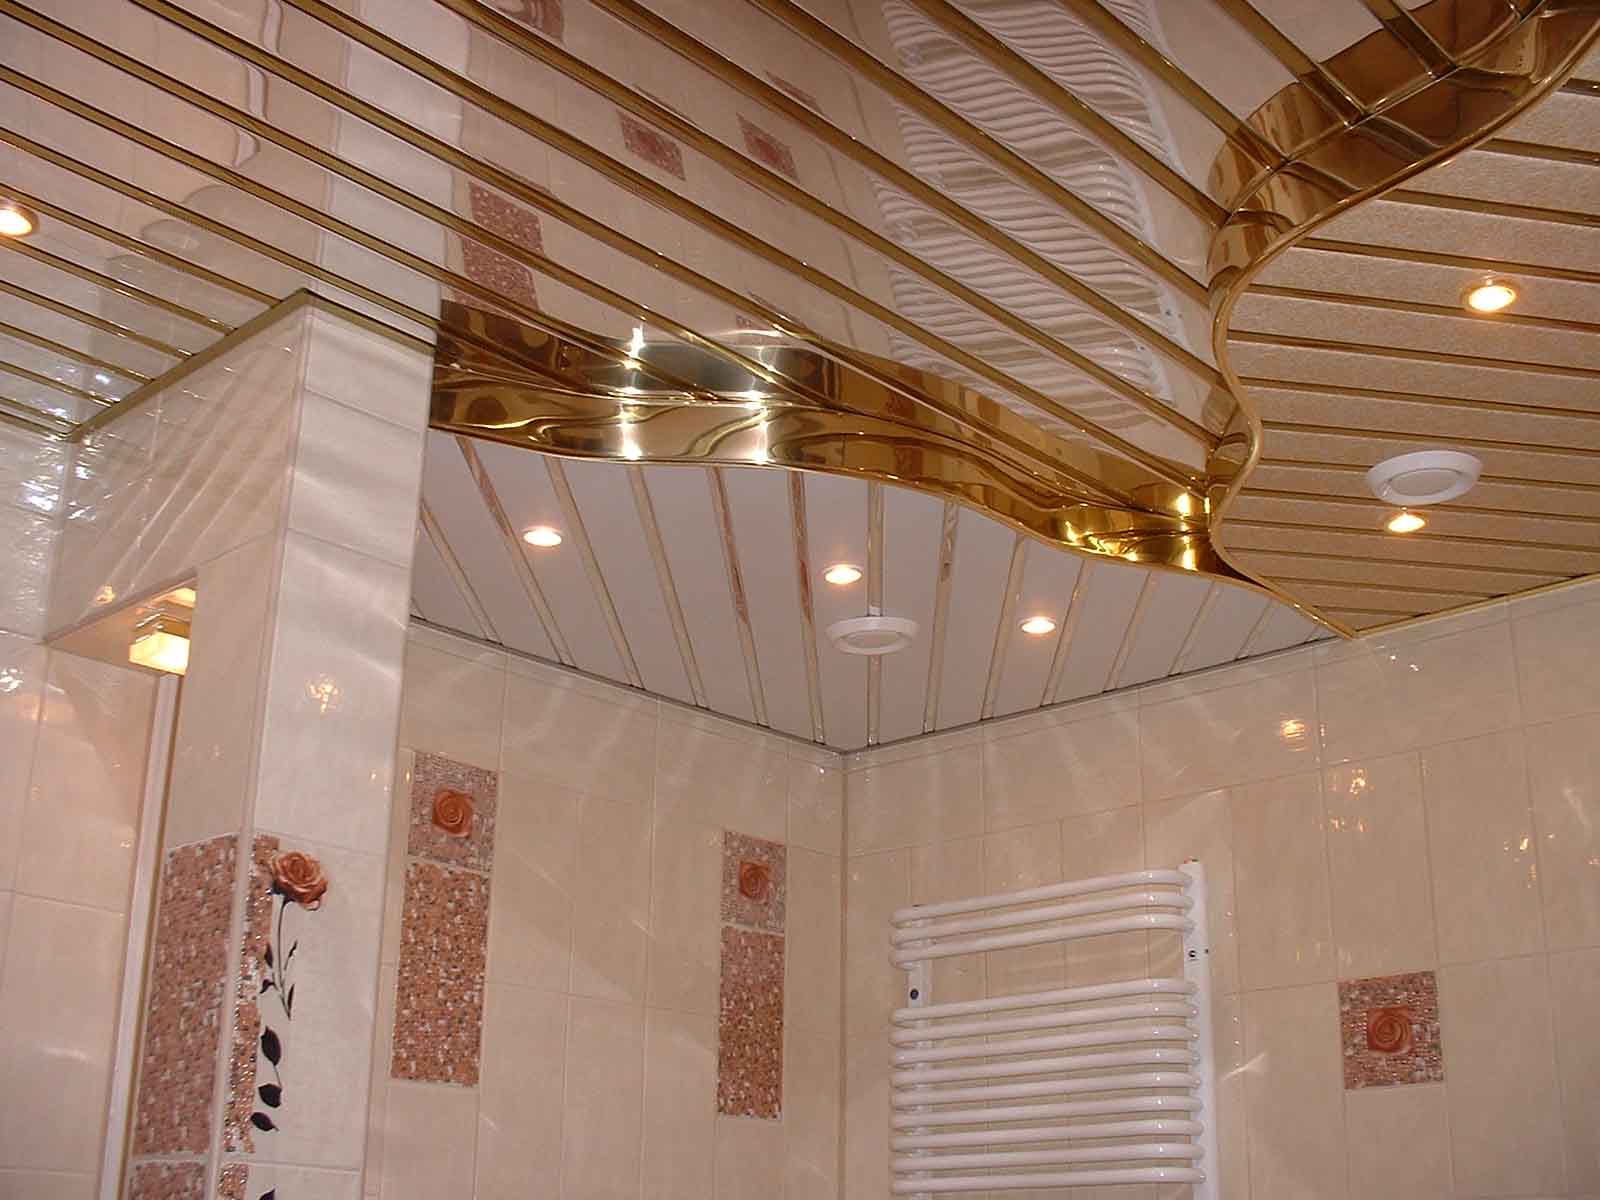
Slatted false ceiling in the bathroom

Advantages and disadvantages
Suspended ceiling has a lot of advantages - they are much more than disadvantages.
The advantages of suspended ceiling coating include:
- the ability to hide the flaws of the main ceiling (spots, cracks, cracks, steps, etc.);
- beautiful appearance - such a ceiling changes the whole room beyond recognition;
- the ability to implement various design ideas up to the installation of complex structures;
- convenient installation of lighting (as well as the ability to install fixtures in accordance with the design plan);
- excellent sound and heat insulation characteristics,
- ease of care - dust is enough to brush off with a dry cloth;
- a large selection of surface finishes;
- the ability to hide electrical wiring and other communications inside the ceiling.

But there are a few downsides to suspended ceilings that are worth mentioning so you know what you're dealing with.
These include:
- reducing the height of the ceiling by installing a suspended structure (minimum 7-8 cm);
- duration of installation (depending on the complexity of the design, installation may take more than one day);
- rather high cost of finishing;
- the need to create a special hatch so that it is possible to get close to the communications carried out in the ceiling (if any);
- low moisture resistance of drywall, due to which it is not suitable for finishing rooms with high humidity (such as a bathroom, sauna, swimming pool, bathhouse, etc.).

Calculation of components, tools, materials
To make a false ceiling in your home, you will need materials for making the frame, drywall and finishing material, which will give a beautiful appearance to the new coating.
Before starting work, you should decide which frame to choose. It comes in two types - metal and wood. For the manufacture of the second option, bars will be required, which will need to be attached to the main ceiling with suspensions. In the first option, as you might guess, metal profiles are used.


On a note! There are two types of ceiling frame elements - these are load-bearing and main profiles or bars. If in the metal version only load-bearing elements can be used, then when working with a wooden frame, both main and load-bearing elements are used. Note that the manufacture of a metal frame is still more often performed using the main profiles.

Metal profiles are made of galvanized steel and are named PP 60/27 and PNP 28/27. You may also come across profiles called CD and UD - these are their foreign markings.

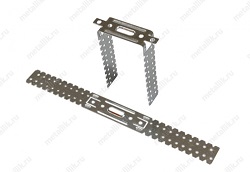
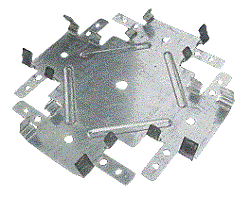
Also, for mounting the frame, you will need fasteners - special suspensions for ceilings, dowel-nails and anchors, "crabs" connectors for connecting jumpers, two types of self-tapping screws ("kids" with a gimlet for metal and special ones for drywall).


Photo of the "crab" for the plasterboard ceiling frame
The main finishing element is drywall, which can be of several types:
- GKL - standard;
- GVKL - it is able to resist moisture;
- GKLO - refractory, fiberglass is used in the manufacture;
- GKVLO - combines the properties of resistance to fire and moisture;
- GVLV - drywall of the highest quality, it is also called a super sheet.


As a rule, due to its price, optimal weight, and also due to the lack of special fire requirements in residential premises, standard plasterboard plasterboard is usually used for ceiling installation.

They usually take a sheet, the parameters of which are as follows:
- thickness - 9.5 mm;
- width - 600-1200 mm;
- length - 1500-2500 mm.
To calculate the number of sheets per room, it is best to use online calculators, but you can calculate this number yourself. Knowing the area of \u200b\u200bthe ceiling, as well as the dimensions of the drywall, this is quite simple to do in accordance with the detailed diagram of the entire ceiling structure.

Attention! Drywall constructions have a decent weight. 1 square meter of this structure weighs about 13-15 kg. Therefore, it is better to work together with an assistant.
Another nuisance that is associated with the severity of the drywall construction is the cracking of the places where the seams will pass. You will not be able to install a one-piece structure at once, again, because of its weight. Therefore, during finishing, you need to carefully monitor how the work is going.

In addition to materials, for the installation of suspended ceilings you will need the following tools:
- screwdriver;
- perforator;
- roulette;
- laser level;
- ladder;
- simple pencil for marking.

You may also need spotlights, a chandelier and other lighting elements. It is worth remembering that the installation of electrical wiring should be carried out before you proceed with the sheathing of the frame.
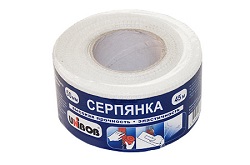
For external decoration of a suspended ceiling, you must purchase:
- primer;
- putty;
- putty knife;
- sickle ribbon.

Table. Approximate consumption of the amount of materials per 1 square meter of suspended ceiling.
| Material | Consumption |
|---|---|
| 1 sq.m. |
| 1 PC. |
| 2.9 m |
| around the perimeter |
| around the perimeter |
| 1 pc. |
| 1 PC. |
| 2 pcs. |
| 2 pcs. |
| 0.2-0.5 pcs. |
| 2 pcs. per 1 m profile PP 28/27 |
| 23 pcs. |
| around the perimeter |
| 1.2 m |


On a note! Be sure to draw up a detailed plan for installing a drywall ceiling. It will facilitate the understanding of the work process, as well as help to calculate the required number of components and materials for the structure.

Plasterboard ceiling scheme - calculation of materials
Installation of a single-level ceiling: step by step instructions
After all the necessary materials have been purchased, you can proceed with the installation work on installing a false ceiling. First, remove all pieces of furniture from the room that may interfere. After that, proceed to the preparatory work - marking the ceiling and walls and installing the main elements.

Step 1. Measure the height of each corner in the room with a tape measure. This way you will find the lowest corner in the room. This is where you start working.

Step 2 Make marks on the walls at a distance of 5-8 cm. Remember that the first option should be chosen if you do not have additional lamps. If you decide to install spot, then leave more space between the main and future ceilings.
Step 3 Take a level and use it to find points in other corners on the same level. Make appropriate marks.

Step 4 Mark the entire perimeter of the room, connecting the dots with perfectly straight lines.
Advice! Use painter's line to mark.


Now proceed to the installation of the frame.
Step 5 Take PP 28/27 or UD profiles and reinforce them along the drawn line. This is done as follows: place the profile above the lower border to the line, make marks on the walls through the holes in it. Drill holes in the walls.

Attention! Usually the profiles have holes for fasteners at the edges, but if they are missing, drill them yourself at a distance of 10 cm from the end of the product.
Step 6 Glue the profiles with sealing tape and screw them to the wall with dowel-nails.


Step 7 Suspensions are attached in increments of about 40 cm, which is why draw lines on the ceiling at a distance of 40 cm from each other.

Step 8 Approximately every 2.5 m you will make jumpers on the ceiling. Based on this, expect that the step between the suspensions will be 50 cm.
Attention! Attach the first row of hangers close to the wall (25 cm) for structural reliability. And the second row is at a distance of 75 cm. Then keep a step of 60 cm.
Step 9 To correctly drill holes in the right places, apply hangers at the marked points, make new marks and then prepare places for the anchors. Strengthen the suspensions and bend their ends well so that there is no "free play". Hangers should no longer sag, so as not to spoil the rest of the work.

Step 10 Start installing profiles on the ceiling. Depending on the size of the room, they may need to be lengthened or shortened.

The length can be increased by connecting two parts with a special extension cord. Please note that the profile joints should not subsequently be at the same level and far from the suspension.
And their total length should be 1-2 cm shorter than the length of the ceiling. Start the installation of each profile from the corners - screw it to the hangers and rails using self-tapping screws. Then fasten the middle.

Step 11 Having fixed two profiles in a row, go to the other side of the room and do the same work. Then attach the center ones.

Step 12 Install jumpers with "crabs" and self-tapping screws. They are fixed every 2.5 m - where the joints of drywall sheets will be obtained.


Step 13 The most long-awaited stage is the fastening of the drywall itself. Cut the edges of the sheets with a knife at a slight angle - this way you will improve the result of puttying. Where the end is pasted over, nothing needs to be cut off.


Step 14 Start fastening the sheet from the corner of the room. In this case, the distance between the sheet and the wall should be 0.5 cm. Fasten the drywall to the profiles with self-tapping screws in increments of 20 cm. On adjacent sheets, they are screwed “in a run”. Hats must be recessed into drywall, i.e. e. should not stick out. By the way, do not install GKL sheets at the same level - they must be fastened with offset seams. Joints of plates should not be located near the corners.
Self-tapping screw must be recessed inside
Video - How to make a suspended plasterboard ceiling
Surface finish
The false ceiling is also good because it allows you to use a variety of finishes. It can be trimmed, etc. But before that, the remaining seams must be sealed. After treating them with a primer and waiting for it to dry, seal all seams, joints, holes from self-tapping screws with a strong putty.

After waiting for the putty to dry, glue all the seams and joints with a sickle, and then coat them again. The widest seams between drywall sheets must be filled with putty material and wait for it to dry completely. It is possible that during the work on sealing the drywall on the ceiling, you will find any damage - for example, a torn paper layer that exposed the core of the sheet. Such problem areas should be eliminated in advance. You can, for example, apply a sickle and apply an even layer of putty on top.
For joints, it is better to leave the rounded edges of the sheets. In principle, this moment has already been thought out by manufacturers - the edges of the sheets have a rounded shape, due to which the putty will fill the seams to the maximum. The sickle tape and putty layer must be applied at the level of the drywall sheet. For what? The fact is that the edges of the drywall have a narrowed thickness so that the tape can be drowned under the level of the surface of the sheets.
How to properly seal the seams of drywall sheets, the edges of which are cut off on their own? First of all, it is necessary to chamfer, that is, plan the cut edge of the sheet with a special planer or knife at an angle of 45 °. As a result, a wedge-shaped groove is formed at the junction of two sheets, in which the serpentine tape is easily “drowned” and the putty material is reliably grasped.

Then, having puttied the entire surface of the usual one, apply a finishing putty on it. The ceiling is ready.
Video - Putty plasterboard ceiling
And finally - a few tips that will simplify the installation of a false ceiling with your own hands.
- Choose only high-quality materials for work. Remember that you create a ceiling for more than one year, so it should serve you for a very long time.
- Do not forget about the scheme and markup. Take your time: it's better to spend some time on planning and accurate calculations than constantly pausing work in order to buy something or re-measure something.
- Work with GKL only in a dry room.
- Don't forget to constantly use the level.
- Use mineral wool for soundproofing. She can fill the frame before the final sheathing.
- Before starting work, let the drywall rest in a horizontal position.

In this way, following the instructions, you can create a false ceiling with your own hands. The work at first glance seems extremely complicated, however, if you look, it is easy to understand that in fact everything is quite simple.
Do-it-yourself repairs allow you not only to save money, but also to get real satisfaction. It's always nice to know that you can do without someone else's help to make your home beautiful and cozy.
From this article you will learn how to install a false ceiling with your own hands - detailed instructions will help you understand this process in detail.
The frames of all suspended structures are mounted using the same technology. Some differences are related to the type of suspended ceiling. It can be rack or modular.
Attention. Plasterboard ceilings also belong to suspended ceilings, but we will not talk about them in this article, since the technology for their installation and finishing has already been described in other site materials.
Installation of modular false ceilings
Frame installation
- Do-it-yourself installation of a false ceiling begins with the installation of a wall corner profile. It is attached around the entire perimeter of the room to the walls according to pre-made markings. The marking line is applied using a laser or water level, and the distance from it to the lowest point of the base ceiling must be no less than the height of the fittings of recessed fixtures.
Fastening is carried out using anchors, expansion dowels or self-tapping screws - depending on the material of the walls.Mounting step 40-50 cm.

Advice. Before fixing the corner profile, make sure that there is no electrical wiring in the wall at the point of attachment. If you hit it with a self-tapping screw, the damage will have to be repaired.
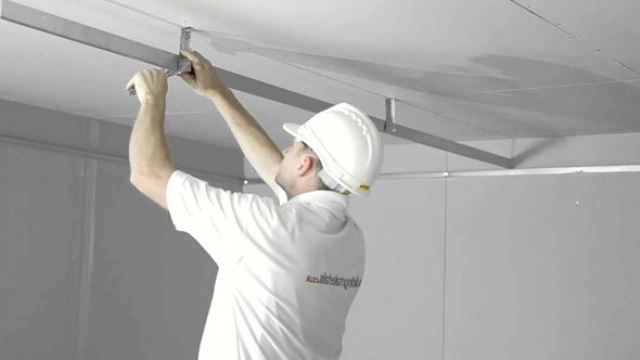
- Then the carrier rails are installed. For Armstrong modular ceilings, such rails have length 3.7 m. If this length is not enough, the slats are easily interconnected with a special lock.

The slats are mounted either parallel to one of the walls, or at any angle to it - it depends on the chosen direction of the cladding. The distance between them must be equal to or a multiple of the dimensions of the facing modules. Most often they are a square of 60x60 cm. In this case, the carrier rails are mounted in increments of 120 cm.
- Reiki with their ends are inserted into the wall corner profile, and so that they do not sag, they should be suspended from the main ceiling on spring suspensions. They are a design of two rods and a spring clip. One rod with an eyelet at the end is attached to the ceiling with an expansion dowel, and a carrier rail is hung on the hook of the second rod. It has special holes for the hook. After that, using a spring clip, you can adjust the distance between the rail and the main ceiling, and fix the rods in the desired position.

Attention! The distance from the wall to the first hanger should be at least 60 cm, the distance between the hangers should be at least 120 cm.
- A further technology for installing suspended ceilings is to create a frame mesh, in each cell of which the cladding panel will be nested. To do this, transverse rails 120 cm long are mounted perpendicular to the carrier rails. The step between them is 60 cm. Then the resulting rectangles120x60cm are divided in half by short slats 60 cm long.

Installation of fixtures and cladding
For modular ceilings, special raster lamps, the dimensions of which correspond to the dimensions of standard facing modules. They are mounted before installing the false ceiling, so that nothing interferes with connecting the fixtures to the power supply.

Finally, cladding panels are inserted into cells free from luminaires. And this is where the installation of a suspended ceiling with your own hands ends.
Installation of slatted suspended ceilings
Do-it-yourself slatted ceilings are even easier to mount than modular ones, since the frame for them consists only of load-bearing rails without transverse inserts. But first things first.
Frame installation
- As in the previous case, we start with the installation of the wall corner. It will determine the height of the future ceiling and become that decorative element that will hide the ugly joint between the slats and walls around the entire perimeter. Such corners are available in different colors, they can be matched to the color of the rails or made contrasting.
- Before installing false ceilings, determine the direction in which the rails will be laid. After that, in a perpendicular direction, install the guide rails at the level specified by the wall corners. They are called traverses or stringers and are a metal profile in the form of a comb. Each manufacturer produces traverses designed for mounting one specific type of rails.
- Mounting traverses to the ceiling carried out in the same way as fastening the carrier rails of modular ceilings - using spring suspensions. The step between them is no more than 120 cm.

Advice. If the height of the room is not high enough, the traverses can be mounted directly to the main ceiling - without the use of hangers. Leveling the frame according to the level in this case is carried out using linings.
Ceiling cladding with slats
Measure the distance between opposite walls and use hacksaws for metal cut the straps to length. Their edges are laid on the shelves of the wall corners, and along the length of the slats they simply snap into place on the protrusions of the traverses.
Holes for built-in lights are cut into the rails using special drill bits. You can see how this happens by watching the video posted on this page.

Installation of rails on the finished frame
If you chose an open-type rack ceiling, then narrow gaps will remain between adjacent rails. They can be left open if you want to improve ceiling ventilation, or closed with special inserts - slotted profiles. They are installed in the same way as the main panels - by pressing the insert in the area of its intersection with the traverse.
Conclusion
Now you have a clear idea of how to install false ceilings, so you can safely do this business yourself. We advise you to start installation from the most open section of the ceiling, visible from the door.
Today, more and more often, false ceilings of various types and their various materials appear in apartments and houses. The advantages of such structures can be called short terms and relative ease of installation. If the art of surfaces is far from accessible to everyone, then any homeowner who knows how to use a drill, a jigsaw and a screwdriver can probably make an even installation of the frame and installation of certain panels on it. Of course, there are also suspended ceilings, the installation of which is best left to specialists, since the technology for their installation will require certain qualifications. Such ceilings include, for example, their stretch version.

Do-it-yourself suspended ceiling can be made from drywall, slabs made from various materials, wooden lining, etc. To make a decision on the right choice of design for its independent execution, it is worth considering them in more detail.
As a rule, most suspended ceilings are mounted on a frame made of wooden bars or metal profiles. This design becomes the basis for attaching the selected skin to it.
Metal elements are also used for stretch surfaces, but this type of design is fundamentally different from other ceilings.
The Armstrong suspended ceiling systems stand somewhat apart, which have become quite popular due to their aesthetic appearance and the ability to easily repair, quickly replacing, if necessary, the required number of damaged panels.
Suspended plasterboard ceiling
Drywall is an environmentally friendly building material that does not emit absolutely no harmful fumes into the environment. According to this parameter, it is ideal for finishing almost any surface in residential premises.

Due to the fact that several types of this material are produced, it can be used not only in rooms with normal conditions, but also in rooms where humidity exceeds the norm, for example, in a bathroom, in a kitchen, etc. In addition, there are varieties of this material that can be used for ceilings and from high temperatures that inevitably occur, for example, when melting a fireplace or stove.
Each of the types of drywall has its own marking and a certain tinting of the outer cardboard surface:
| Marking | Standard sheet size, mm | Coating color | Marking color | Appearance |
|---|---|---|---|---|
| GKL (normal) | 1200×2500 thickness 6; 9.5; 12.5mm | Grey | Blue |  |
| GKLV (moisture resistant) | 1200×2500 thickness 6; 9.5; 12.5mm | Green | Blue |  |
| GKLO (fire resistant) | 1200×2500; 1200×2600 thickness 9.5; 12.5mm | Pink or gray | Red |  |
| GKLVO (fire-resistant and moisture-resistant) | 1200×2500 thickness 9.5; 12.5mm | Grey-green | Red |  |
Suspended stretch ceilings
Stretch ceilings can completely change and visually expand the space. They can be absolutely white, solid color, have a regular or spatial pattern, which, for example, imitates the vault of heaven with floating clouds or tree crowns.
Stretch ceilings can be made of fiberglass, knitted polyester impregnated with polyurethane, or PVC film.
The installation of the canvas takes place on special aluminum profiles fixed on the walls, or on an installed frame, if the ceiling is planned to be combined. In the latter case, the overall structure may consist of several materials, such as plasterboard along the edges of the ceiling and a tensile structure in the middle.

Combined ceiling with stretch and plasterboard sections
This type of ceiling has many advantages, which include moisture resistance, aesthetic appearance, good adaptation to any interior, durability without loss of decorative qualities. However, the installation of such original systems should still be carried out by specialists with relevant experience and special equipment.
Raster or cassette ceilings
Raster or cassette ceilings are called ceilings, consisting of a metal frame suspended on brackets to the ceiling, forming cells of the required size. into which finished panels of the correct form are then laid. Panel dimensions are different, but in the vast majority of models standard blocks of 600 × 600 or 600 × 1200 mm are used.

This type of suspended ceilings also includes the Armstrong systems, which are often used for finishing offices, public buildings, etc. However, they are widely used in private construction. It is the Armstrong suspension system that the further presentation will be devoted to.
Prices for popular types of plastic ceiling panels
Plastic ceiling panels
Suspended ceiling system "Armstrong"
This ceiling system was developed by the British company Armstrong during the period of the construction boom, when it became necessary to quickly design ceilings in sales areas with very large areas. In addition to the speed of installation, such structures were subject to the requirements of aesthetics, accuracy and, together with themes - restraint decorating design. As a result of the implementation of these conditions, a design was born, which is now used all over the world, and not only in offices and halls of shopping centers, but also for decorating ceilings in residential premises.

Initially, the Armstrong system was developed for the quick finishing of large areas of shopping malls.
Today, the name of these ceilings has become a household name for all suspension systems of this type, using light square-shaped slabs.
Panels installed in this system can be made of glass fiber reinforced gypsum, mineral fiber, acrylic or silicate transparent or frosted glass.
Some of the ceiling panels are at the same time a kind of lamps, as they are equipped with glass illuminated by lamps installed in the interceiling space, or they have their own built-in lighting devices.

Another option to make the room as bright as possible is on the main whitewashed ceiling, and then mounting a suspended decorative surface from frosted glass panels. Glass at this arrangement will work like lenses, as a result of which you can get a soft diffused light that will not leave even the corners of the room dark.
The most popular in everyday construction practice are gypsum fiber slabs with a porous surface. Most often, it is they who make out most of the ceiling area, and lighting panels are mounted between them.
It should be noted that the developers for the manufacture of system panels provided for environmentally friendly, does not emit harmful fumes, easy to massthe material that does not weigh down the suspended structure and at the same time gives the ceiling a strict, neat look.

The porous surface of the Armstrong panel
If desired, after a while the plates can be temporarily removed and painted in a different color scheme. And, the process of such toning can be carried out on the street or on the balcony, without polluting the floor surface of the apartment and without bringing the smell of paint into the living quarters. This possibility exists due to the fact that the panels can be easily dismantled, and after processing they can be easily put into place.
In addition, the panels, unlike polystyrene foam boards, are absolutely non-flammable, do not produce smoke and do not contribute to the spread of fire when a fire occurs next to them. This makes the room completely fireproof from the ceiling.
Ceiling construction
The principle of mounting the Armstrong system, consisting of guides of various types, is approximately the same. The suspended structure is assembled from the following elements:

An approximate diagram of the design of the false ceiling "Armstrong"
- Plates laid in the structure, from which the decorative ceiling surface is formed. Produced in sizes 600 × 600 and 600 × 1200 mm, indicated on the diagram pos. 1. Rectangular slabs are less popular than square slabs, although the frame and their laying is much faster due to the smaller number of suspended structure elements used.
- T-shaped frame profiles are usually marked T15 or T24 - depending on the width of their transverse flange in millimeters:
— Longitudinal load-bearing profiles, which are the main structural elements, are produced up to 3600 mm long. In the diagram they are shown pos. 3 and 4.
- Cross jumpers installed between the supporting profiles. They are produced in standard sizes of 600 and 1200 mm. On the diagram - pos. 2.
- Corner profiles fixed to the wall and supporting the edges of the profiles and panels along the perimeter of the room. They have a shelf size of 19 × 24 mm, length - up to 3000 mm. These elements are indicated in the diagram pos. 6 and 8.
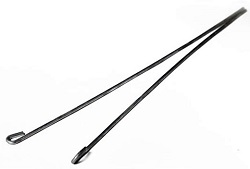
To hold the entire structure in suspension at the required general level, special elements are used - suspensions. Most often, in ordinary construction practice, knitting needles with a spring-loaded “butterfly” lock are used. With the help of these elements, the suspension system can be lowered from the main ceiling to the required distance. One cannot but agree that this — fairly simple way display the ideal horizontal ceiling surface.
Such a suspension usually consists of three elements:
- A knitting needle equipped with an eyelet at one end, in the diagram - pos. 5 B. The eyelet is intended for hanging on an element fixed in the main ceiling, pos. 7.
- A spoke having a hook at one end, on which the frame profiles will be hooked - pos. 5a.
- Spring type "butterfly", pos. 5 helps to regulate the relative position of the two spokes relative to each other. "Butterflies" can be of several types.
However, you should be aware that spring-loaded hangers - "butterflies" - this is not the only way to fasten the frame. The Armstrong system can be divided into several varieties, which differ in the design of suspension mounts. All of them are accurately calculated by the manufacturer, taking into account the surface on which the frame will be hung. And, both the simplest methods are used in the form of tying on a wire, and quite complex ones, in which the height of the suspension is adjusted by a screw method, giving high installation accuracy.
| Suspension type | Limits of regulation | Setting accuracy | Note | |
|---|---|---|---|---|
| Wire | 30 kg | up to 5000 mm | ± 2 mm | Do not use in high wind conditions |
| L-profile | 30 kg | up to 3000 mm | ± 2 mm | Used when creating rigid vertical links |
| 45 kg | up to 1000 mm | ±0.5mm | Especially recommended for the installation of metal cassette ceilings "Armstrong Orcal" | |
| 25 kg | 165÷980 mm | ± 1 mm | ||
| 25 kg | up to 2000 mm | ± 1 mm | ||
| Nonius hook | 15 kg | 300÷800 mm | ±0.5mm |
Manufacturers of the Armstrong system have also developed recommendations for the use of various fasteners for installing suspensions on certain floor surfaces. This point is also important to consider when choosing and purchasing the necessary components.
| ceiling material | Type of suspension system | |||||
|---|---|---|---|---|---|---|
| Wire | L-profile | Threaded rod + adapter | Two-spoke hook with spring lock | Single-spoke hook with spring lock | Nonius hook | |
| Reinforced concrete | Hanging hook Hilti HA-8 | Anchor Hilti DBZ 6S | Spacer Hilti HKD S M 6×30 | Hanging hook Hilti HA-8 | Hanging hook Hilti HA-8 | Anchor Hilti DBZ 6S |
| metal beam | - | - | Threaded pin Hilti X-EM 6-20-12 mit | - | - | - |
| Decking | - | - | Anchor MF-SKD | - | - | Anchor MF-SKD |
| wooden floor | wood screws | |||||
| hollow block | Anchor dowel Hilti HHD-S | Anchor dowel Hilti HHD-S | Umbrella dowel | Anchor dowel Hilti HHD-S | - | Anchor dowel Hilti HHD-S |
| prestressed concrete | Spacer sleeve HKD S M 6×30 | Spacer sleeve HKD S M 6×30 | - | Spacer sleeve HKD S M 6×30 | Spacer sleeve HKD S M 6×30 | |
| foam concrete | - | - | Spacer sleeve HKD S M 6×30 | - | - | - |
Tools and materials for mounting the Armstrong system
To install the false ceiling of the Armstrong system, you will need to prepare some tools that will help you quickly get the job done:

- Electric drill with impact function or rotary hammer. If the structure will be mounted on a concrete ceiling and walls, then this tool is indispensable.
- Shurupov rt for screwing in fixing screws.
- A hammer.
- Metal scissors.
- Electric jigsaw for trimming edge boards. Many plates can be cut with an ordinary sharp construction knife.
- Pliers.
- Marking cord, simple pencil or marker.
- Building level, building corner with a ruler, tape measure or folding rule and a 1000 mm ruler.
From the materials you need to prepare the following elements, purchased according to the dimensions taken from the ceiling surface:
Corner profile, which will be installed on the walls around the entire perimeter of the room.

Bearing profiles, which will be suspended from the ceiling, and with their edges resting on the corner profiles. To calculate their number, the width of the room is divided into strips of 600 mm and two corner profiles are subtracted from the resulting result, since they will perform the same function. For example, the width is 3000 mm, so 3000 : 600 = 5 — 2 = 3 pcs. It turns out that with this size of the room, between the corner rails on the walls, you need to install three middle T-shaped load-bearing profiles.

600 mm T-shaped rails - jumpers. Their number for laying between two load-bearing profiles is calculated in the same way as for longitudinal solid elements, but since there will be five such gaps in this case, it means that the resulting number must be multiplied by this figure. For example, the length of a room is 5400 mm, it must be divided by 600, it turns out 9–2 (corner rails) \u003d 7 × 5 (rows) \u003d 35 pcs.

Ceiling two-piece suspension with a clamping spring. These items will require 1 pc. per 1 sq.m .. Therefore, you need to find out the area of \u200b\u200bthe room, rounded up to a whole number.
Example: for a room measuring 3 × 5.4 m you will need:
- angular profile 16.8 m;
- carrier rails 3 pcs. 5.4 mm in size; Since they are produced with a length of 3.6 m, they will have to be made from two component parts.
- jumpers with a size of 600 mm - 35 pcs.;
- hangers - 16 pcs. and the same number of ceiling mounts, which are selected depending on the material of the ceiling.
Drawing up an installation diagram
It should be noted that the supporting T-shaped profile is installed in the middle of the width of the false ceiling - this should predetermine the location of the jumpers. This is done because it is extremely rare that the ceiling will be completely assembled from solid slabs, and it is better to place narrower frame cells at the edges of the room.

Sometimes they do it this way - they place the carrier profiles in increments of 1200 mm, then connect them with jumpers of 1200 mm, between which the shortest ones are already installed - 600 mm each.
On the diagram:
1 - bearing profiles;
2 - jumpers 1200 mm long;
3 - jumpers 600 mm long.
When making a drawing, the dimensions of the ceiling are transferred to the sheet in the appropriate scale (optimally - 1:10). Then apply the center lines, vertical and horizontal. Further, segments corresponding to the size of the plates are already measured from the center, and the entire plane is drawn into squares. Such visibility will help to correctly determine the profiles used, and their number, and with the exact location. It is possible that it would be more reasonable from the point of view of aesthetics or economy of materials to slightly shift the lines so that not the profiles but the centers of the rows of panels are located along the axes.
It is recommended that all calculations be carried out accurately and in millimeters, then you can get the desired size of the cells, which will be located at the edges of the structure. The material should be purchased with a margin of 10-15% - such foresight will help to avoid problems with its shortage in the process of work.
Surface marking
In order for the frame to be installed efficiently, before installing it, it is necessary to accurately mark the ceiling and walls. Although the profiles will not be fixed to the main surface of the ceiling, marking lines should be present on it, since it will be easy to navigate along them, placing the carrier rails and jumpers.
It should also be noted here that the suspended ceiling can be located at least 150 mm from the main ceiling - this must be taken into account when choosing this system for interior decoration. This distance will be needed for communications and installation of lighting fixtures. In addition, insulating and soundproofing material can also be placed in this cavity.
Marking can be carried out in a modern way, using a laser tracer-level. However, not everyone has the opportunity to purchase such a tool, so it is worth considering the traditional way of marking work.
- The first step is to determine the distance that the suspended ceiling will be lowered. To do this, from the junction of the ceiling and the wall, using a building corner with a ruler, the required distance is measured in the place where the ceiling surface is visually located the lowest (in most cases, the floor slab may not be located strictly horizontally, and its surface is not always flat).
- Then, this mark must be transferred around the entire perimeter of the room, at least three risks on each wall. You can, of course, use a long building level, for example, in combination with a rule. However, it is still easy to make a mistake with this approach, and as a result, the lines drawn on the walls will not converge at one point. Therefore, it is optimal to mark up using a water level - so the possibility of an error will be excluded.
- Then, a marking colored cord is taken, stretched, aligned at the two extreme points on the wall, and a straight line is beaten off on the surface. The third point, in the center of the wall, will serve as a control. This procedure is best done together, with an assistant. If it is carried out by one master, then one end of the cord will first have to be fixed on the wall at one of the extreme points, and then stretched and beaten.

- Next, you need to mark the surface of the ceiling. If an accurate drawing is made, then the distances from the walls to the nearest longitudinal and transverse lines will be exactly known, and it remains to make marks and punch the lines with a cord. In the event that the installation of panels is supposed to be from the exact geometric center of the room, then the center lines are first beaten off.

- Then, segments of 600 mm are marked in all directions, and colored stripes are also beaten off along them. As a result, the ceiling must be “lined” into a regular cage with sides of 600 mm squares.
Laying communications
After marking, proceed to the next stage of work.
Since all communications can be hidden above the surface of the suspended ceiling, which are most often electrical wiring for various purposes, this must be done before installation work begins.
In the event that it is planned to “embed” lighting fixtures with significant weight into the ceiling structure, it must be taken into account that the type of system suspension that can withstand the increased load should be chosen. So, most often for ordinary ceilings, suspensions are used that can withstand a force of only 6 ÷ 6.5 kg per square meter, but there is a type of fastener designed for more significant loads, up to 10 and more kg / m².
Frame installation
Having completed all the preparatory work, you can proceed to the installation of the frame. And they start it by fixing on the walls, along the marked horizontal lines, an angular profile around the entire perimeter of the room.
- If the walls are concrete, then the corners are fixed on them with dowels with a diameter of 6 mm. To do this, holes are drilled through the metal of the corner with a pitch of 300 ÷ 350 mm, into which a dowel is inserted and hammered.

- On wooden walls, the corner is fixed with self-tapping screws 25 ÷ 30 mm long, 4 ÷ 5 mm in diameter.
- If a false ceiling is mounted in a room with walls being prepared for sheathing drywall sheets, the distance to which it will be lowered from the floor level must be foreseen in advance, before installing the GKL on the crate. In this case, an additional profile or a wooden beam is mounted in the crate under the drywall in the place where the wall corner for the suspended structure will be fixed.
- In the corners of the profile shelves can be stacked one on the to another, or their protruding parts are cut off at an angle of 45 degrees.
Installation of hangers
- Further, along the ceiling marked lines, suspensions are fixed with dowels or self-tapping screws. Their placement is carried out in increments of one suspension per square meter.

- In the places of the planned installation of panel panels, it is recommended to put, for insurance, additional suspensions at the corners of the square.

- If the suspension spokes turned out to be longer than the distance between the two ceilings, then they are cut off, for example, using a grinder.

- When installing hangers, it is recommended to orient their lower hooks immediately in one direction - this will facilitate the installation of guides.
Support profiles
- The next step is the installation of carrier profiles. With their edges they should lie on the corners fixed on the wall. However, the corners are only a guide, but do not play a bearing role in this case. Each of the profiles has special round holes through which they are immediately put on the hanger hooks.

- Bearing profiles are mounted at a distance set by a pre-drawn drawing, 600 or 1200 mm from each other. It is difficult to make a mistake in this matter - for this it will be enough to navigate on the ceiling lines and suspensions already located along them.
- The overall "reach" of the suspension must be fine-tuned, that is. pull up or lower a little lower, so that the transverse profile shelf lies on the wall corners without clearance, but not resting on it with effort. Control during work is carried out using the building level - with the correct marking in this position, the profile should take a perfectly horizontal position.

- In order for the profiles to hold well on the hanger hooks, the latter need to be squeezed a little with pliers.
Having finished the installation of the longitudinal bearing rails, they proceed to the installation of crossbars (lintels) between them.
Jumper setting
- Jumpers are installed between the supporting profiles with a step of 600 mm. At both ends of the transverse elements there are narrowed perforated "lugs-locks" with rounded corners.

- They are inserted into the slots located on the supporting profiles. Some craftsmen bend these parts of the jumpers, pressing them against the carrier rail, then the structure becomes more rigid. However, this is not at all necessary, since the latches securely fix the elements to each other, and after the entire frame is fully assembled, the required rigidity will be fully observed.

- The slotted holes are wide enough so that they can be inserted into the "ears" from two jumpers, which are installed between two adjacent load-bearing profiles and are, in aggregate, a continuation of the common transverse line of the structure.

Panel mounting
- After the installation of the frame is completed, the next step is the installation of lighting panels or slabs with spotlights built into them.

Panel - LED-lamp
There are panels that resemble a screen covered with frosted glass. They are specially designed for installation in Armstrong systems, therefore they have the appropriate dimensions - 600 × 600 mm. Powerful LEDs installed in such a panel give a fairly bright soft light, and for a small room one such LED lamp is enough to create almost daylight diffused lighting.
- The lighting device, after installing the corresponding panel, is connected to the electrical cable, which is connected to the place of its installation in advance, using special terminals or blocks.
- Further, the installation is carried out, starting with solid ceiling tiles. They fit into the cells of the frame, and, since the panels are light, it is extremely easy to mount them. These elements do not require any additional fastening - they simply fit on the inner shelves of the longitudinal and transverse profiles.

If the cells of the structure extreme to the wall have a smaller width, then the plates must be adjusted for them.
The material from which the panels are made is easy to cut with an ordinary hacksaw, but first you need to take the correct dimensions from a narrow cell and transfer them to the plate. Then, a straight cut line is drawn and the excess part is cut off (or even cut off with a sharp construction knife).
In fact, after laying all the fragments along the walls, the installation of the Armstrong ceiling can be considered completed. No additional finishing operations are required.
It should be noted that the simplest frame scheme for this type of ceiling was considered above. In addition to it, there are others, for example, when the plates are laid diagonally in the room, or in even rows, but with the cells shifted relative to each other - the design of the guides allows this.
Ceilings of the Armstrong system open up great opportunities in interior design. They can be painted in different colors, applied to them with the selected pattern, and also laid out in the desired order. They can be mounted in the form of stripes of different colors or in a checkerboard pattern, and well-chosen light panels will add exclusivity and aesthetics to the overall style of the interior of the room.
And at the end of the topic - visual Video instruction for the installation of the cassette ceiling "Armstrong".
Video: how to properly mount the Armstrong false ceiling
Combined from plasterboard and panels
Today we have to figure out how to mount a false ceiling. We will look at two popular, affordable and practical solutions - drywall and plastic wall panels. So, go!
About materials
First, we should decide on the choice of one or another material. Both solutions, which we are going to get acquainted with, have a number of common and individual features.
General features
Like any other, constructions made of plasterboard and plastic panels allow:
- Hide any defects and irregularities of the overlap;

- Concealed wiring, ventilation or any other engineering networks;
- Do without the preparation of the surface of the overlap (cleaning of old coatings, grinding, etc.);
However: in damp rooms it is worth treating the floor surface with an antiseptic primer. It will prevent the appearance of mold in conditions of limited ventilation.

- In both cases, on a crate or frame made of galvanized U-shaped profile. The installation of plasterboard and panels on a bar is practiced, but in vain: the hygroscopicity of wood often leads to warping of the ceiling frame during seasonal changes in humidity.
Differences
They relate to the performance properties of the two materials.
(including green, moisture resistant) does not tolerate direct contact with water. Gypsum is gypsum: moisture makes it loose. That is why GKL should not be used in a bathroom or toilet, which are periodically flooded by neighbors.

After the Flood: GKL needs repair
PVC wall panels, on the other hand, have hygroscopicity tending to zero and will not suffer even when immersed in water for a long time. After the next flood, you only have to wipe it off the drips.
With heat resistance, the picture is reversed: GCR, without any negative consequences, tolerates heating up to 100-120 degrees. PVC at this temperature undergoes thermal decomposition, releasing hydrogen chloride with an extremely pungent odor.
Practical consequence: recessed lamps with halogens and incandescent bulbs with a power of over 40 W should not be installed in a plastic ceiling. LED and fluorescent lamps can be mounted without power restrictions.

Finally, GKL in combination with gypsum putty allows you to create structures with complex curved surfaces, arches and vaults. Honeycomb panels with limited flexibility do not provide such an opportunity.

Frame with curvilinear transition between levels
frame
Do-it-yourself installation begins with the assembly of the frame.
For this we need:
| Image | Description |
|
|
Profile CD (ceiling, 60*27 mm). In the domestic naming system, it appears under the name PP. It is from it that the horizontal crate of a single-level ceiling will consist; it is also used for the manufacture of racks of ceiling boxes and transitions between levels. |
|
|
Profile UD (ceiling guide, 27 * 28) is also known as PNP. Its task is to ensure the fastening of the horizontal lathing to the walls, as well as the racks to the floor surface. |
|
|
The crate with a significant span between the walls should be kept not only on the wall rails. Its additional fastening to the ceiling will provide direct ceiling suspensions. |
|
|
Dowel-nails will allow you to securely and with minimal time to fix wall guides. The most popular fastener sizes are 6*60 and 6*40 mm. |
|
|
Wedge anchors will perform the same functions when installing guides for a box or transition between levels, as well as suspensions. Unlike dowel-nails, they perfectly hold in the hollow core slab and do not threaten the collapse of the ceiling in case of fire. |
|
|
Self-tapping screws for sheet metal will connect the profiles to each other. Their optimal length is 9 mm. The presence of drills and press washers is welcome. |


What is the procedure for installing a false ceiling at the frame assembly stage?
single level
- Mark the line along which you will attach the guide ceiling profiles to the walls. Marking is carried out by level (better - by laser or water) using a masking cord or a ruler with a pencil;

Hint: the minimum distance from the marking line to the lower overlap point is equal to the thickness of the profiles - 27 millimeters. This distance is often increased for the sake of placing lamps, air ducts, air conditioning lines, etc. in the ceiling.
- Butt-joint or with a small overlap, fasten UD profiles according to the marking with a fastening pitch of 500 mm;

- Mark the position of the ceiling profiles of the crate with a step between them of exactly 600 mm for drywall and 500-600 mm for panels;
- Fix the suspensions with anchors along the marking lines applied to the surface of the overlap. The step between them is 600 mm for gypsum boards and up to 800 mm for lighter panels;

- Cut the CD profiles to length, insert them into the UD profiles on the walls, and pull each profile to the ceiling with straight hangers folded and interlocked with each other;
- Pull one or two laces across the crate at the level of the bottom of the guides. Release the profiles one by one from the suspensions, align them with the cords and fix them by screwing the suspensions to the side walls. The part of the ears protruding beyond the plane of the crate is bent upwards;

- Finally, connect the CD and UD profiles with self-tapping screws.
box
It is believed that seeing once is better than hearing a hundred times. We will not argue with the obvious, and we will bring to your attention several designs of ceiling box frames with our comments on them.
sheathing
How to mount a suspended ceiling on a finished frame? The answer quite predictably depends on the material you choose.
GKL
The installation scheme for a false ceiling made of gypsum plasterboard is not difficult. The full-length sheet is positioned so that its edges are in the middle of the batten profiles, and screwed with 25 mm self-tapping screws to all profiles overlapping them.

The heads of the self-tapping screws must be recessed without breaking through the cardboard shell. Fastener pitch - 15-20 cm.
There are several ways to cut off additional sheets:
- Hacksaw (both designed for plasterboard and ordinary, garden);

- Electric jigsaw;
- Finally, most often the GKL is broken along pre-made incisions. This method is good because it gives a minimum amount of dust.

After filing the ceiling, the seams are puttied with gypsum universal or finishing putty with mandatory reinforcement. Serpyanka (self-adhesive fiberglass mesh) is used for flat seams and internal corners, and a reinforcing profile is used for external corners.
And primed for painting; wall junctions are usually finished with foam or polyurethane foam baguette.

Panels
The instructions for installing a false ceiling will also not amaze you with its complexity. In addition to the panels themselves, for filing the ceiling, we will need self-tapping screws with press washers already familiar to us, rubber liquid nails (the more common acrylic ones do not adhere well to smooth surfaces), as well as a starting profile for panels.

Here is the technology for installing a false ceiling:
- Attach the skirting board to the framing rails along the two longer walls of the room and one short wall. It can be fixed with both self-tapping screws and mounting glue;
- Cut the panel so that it is two centimeters shorter than the distance between the long walls;
Tip: The best tool for cutting PVC honeycomb panels is a grinder with an abrasive cutting wheel. It does not leave chips, notches and burrs.

- Insert its end into one of the side plinths, then insert the other end into the plinth on the opposite wall to a depth of one centimeter. Now each end of the panel is inserted into the grooves of the plinth by 10 mm, which, taking into account the 20 mm width of the baguette shelf, is quite enough for reliable fixation;
- Move the panel by inserting it into the groove of the third plinth;
- Screw the lug of the panel lock to each purlin profile;

- In the same way, install all panels except the last one;
- The last design is cut in width so that it is a centimeter narrower than the distance from the penultimate panel to the wall. Then a plinth strip with a shelf trimmed to a centimeter width is put on it. The panel is inserted into the lock of the previous one and pressed from the wall with a spatula, after which the plinth is glued with liquid nails to the guide profile.

Fixtures
Installation of luminaires in a false ceiling in both cases is carried out in the same way: luminaires with spring clips are inserted into a pre-cut hole.

How to cut it?
- For GKL it is most convenient to use a crown;

- Before attaching the sheet to the ceiling, the cutout can be made with an electric jigsaw or a narrow saw;
- A hole in an already fixed sheet can be drilled in a circle and cut with a sharp knife;
- The honeycomb panel is also cut out with a clerical knife without much effort.

Conclusion
As you can see, all stages of work are quite within the power of a beginner. You can get more information from the video on installing suspended ceilings attached to the article. Good luck!