Mortar for laying tiles on the floor. Cement adhesive for tiles. Laying ceramic tiles on a dry mix
Tile adhesive is available in a wide range, and it is not at all easy for a novice master to make a choice. But a properly selected composition is a guarantee that the tile will not move under loads, and the coating will last more than one year.
Which glue is best for ceramic tiles, and which for stone? What is more profitable - ready-mixed or dry? Is it worth buying expensive glue and what can you save on? These questions concern everyone who decides to make the cladding on their own for the first time. Consider how to choose an adhesive for floor tiles in order to get a high-quality and durable coating.
Depending on the form of release, tile adhesive is divided into three groups - dry mixes, two-component mixes and pasty formulations ready for use.
Dry mixes
This group includes powdered mixtures based on cement, which are mixed with water immediately before application. The glue is made on gray and white cement, and in addition to the binder contains various additives to improve the quality of the material. For floor tiles, mainly glue on gray cement is used (white is intended for transparent tiles and mosaics, therefore it is more suitable for walls).

Adhesive solutions on cement are divided into thick-layer and thin-layer, depending on the composition of the components and the grain size of the filler. The first type allows you to lay the tiles on the base with a height difference of up to 30 mm, thereby simplifying the preparation of the floor. But at the same time, a thick layer gives strong shrinkage and requires more time to dry, and also increases material consumption.

Tile adhesive highly elastic white, thick build: 3-10 mm
Thin-layer mixtures can be applied to the floor, the differences of which do not exceed 10 mm. They are much less prone to shrinkage, dry faster, and are characterized by low consumption.

Two-component mixtures
These compositions have an epoxy-polyurethane base and are characterized by higher performance compared to cementitious adhesives. Prepare the solution immediately before application by mixing the base composition with the hardener. Such adhesives are distinguished by the absence of shrinkage, elasticity, low specific gravity, and water resistance. They are resistant to vibrations and deformations, they are better than others for floors subjected to heavy loads.

It takes about 20 minutes for the mortar to set, and complete drying takes place in a few hours, which can significantly reduce the repair time. The quality of gluing directly depends on the observance of the correct proportions when mixing the components.
Ready mixes
This group includes water-dispersion compositions made on an acrylic, latex and polyvinyl acetate basis. The adhesive solution is mixed at the factory and goes on sale in a hermetically sealed container. Before applying the adhesive, it only needs to be mixed. Ready-made solutions have a thick consistency, do not spread, perfectly hold tiles of any weight and size.

The advantage of such compositions is the saving of time during laying, since there is no need to be distracted by mixing the solution. In addition, dispersion adhesive has excellent adhesive properties, strength, no pungent odor and toxic impurities. After hardening, the adhesive layer is sufficiently resistant to vibrations, static and dynamic loads, which ensures a long service life of the cladding.
According to their characteristics, adhesive compositions are also divided into several types:
- universal- the most popular type used for interior and exterior cladding. It is affordable, easy to apply, provides reliable adhesion of the tile to the base. Such glue is intended for standard tiles ranging in size from 10x10 cm to 30x30 cm;
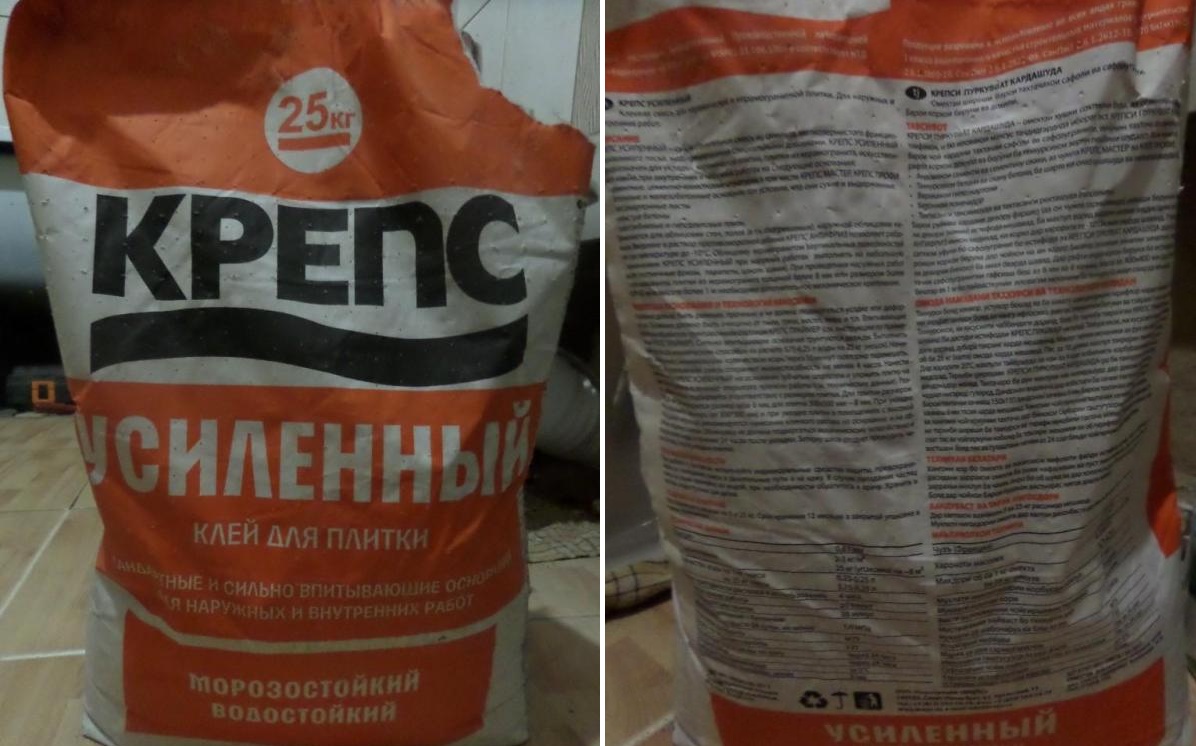
- reinforced- contains special additives to increase adhesion and strength of the adhesive layer. It is used when laying large tiles, porcelain stoneware and natural stone. After curing, such an adhesive is immune to static and dynamic loads, therefore it is best suited for rooms with heavy traffic;
- moisture resistant- contains special hydrophobic additives that provide resistance to wet vapors and direct exposure to water. Such glue is used when facing bathrooms, showers, kitchens, pools. Many manufacturers add antifungal additives to the glue, so that mold does not start in the tile joints.

Special formulations are also available, for example, white cement adhesive for transparent cladding, adhesive for exterior decoration, adhesive for underfloor heating.

Prices for tile adhesive "Cerezit"
tile adhesive ceresite
Basic requirements for tile adhesive
Regardless of the composition and form of release, tile adhesive must comply with accepted standards and meet the basic requirements:
- it must have high plasticity and easily lay down on the work surface;
- have good adhesive properties and securely fasten the cladding to the base;
- the glue should not shrink much (ideally, this figure should be zero);
- the viability of the solution and the adjustment time must be long enough so that the master has the opportunity to qualitatively fit all the elements and eliminate masonry defects.

These conditions apply directly to the solution, but there are also requirements related to the cured adhesive layer:
- resistance to deformation, that is, the strength of the adhesive in compression and shear;
- resistance to temperature extremes;
- resistance to high humidity.

On the packaging of the adhesive, the main characteristics of the composition are indicated: its strength, specific gravity, pot life and complete drying time, and the degree of resistance to various types of influences. So before buying, you should carefully read the indicators of the glue - this will allow you to choose the best option for the mixture for specific conditions.
How to calculate consumption
The consumption of a dry mix depends on several factors at once:
- adhesive layer thickness- the thicker the glue is applied, the more it will be needed;
- floor quality- on a flat, slightly absorbent surface, much less adhesive is required than on porous substrates with drops of up to 10-15 mm;
- consistency and chemical composition of the adhesive- the thicker the solution, the more it is consumed. Synthetic-based mixtures have better adhesive properties and perfectly hold the tiles even with a thin layer of application, so their consumption is lower than that of conventional cement adhesive;
- type of tile- for small tiles, the minimum thickness of the adhesive layer is sufficient, for large-format tiles, the application thickness increases to 10-12 mm. The same applies to the density of the material - tiles with a porous structure require more glue than dense porcelain stoneware.

![]()


The professionalism of the master also plays a role, because it is very difficult for a beginner to correctly lay the tiles on a thin layer the first time, a lot of mortar is spent on correcting mistakes.


The consumption of the mixture per square meter is indicated on the packaging (minimum and maximum value), and all that remains to be done is to multiply it by the total floor area. For calculations, it is better to take the maximum value, and the resulting volume must be increased by another 10-15%.

The best brands of tile adhesive
In order not to make a mistake in choosing, it is worth purchasing products from popular manufacturers that fully meet the specified requirements, in contrast to cheap artisanal mixtures. The leaders in this area are the companies "Ceresit" and "Knauf": under the brands of the same name, entire lines of tile adhesives and repair compounds are produced in a wide price range. Here you can easily pick up glue for all types of tiles, natural stone, porcelain stoneware, waterproof and frost-resistant compositions, mixtures for laying tiles on a warm floor.
Adhesives "Osnovit", "Eunice", "Prospectors" are in high demand. Even the simplest cement compositions are distinguished by their adhesion strength and durability, are easy to apply, and have a long setting period. Among the reinforced types of glue, Plitonit stands out with its characteristics - mixtures of this brand are excellent for floors in high-traffic areas.
| Name of glue | Main characteristics |
|---|---|
| The adhesive has enhanced adhesion strength, resistance to moisture and sudden temperature changes, suitable for facing underfloor heating. It is used for laying tiles from 30x30 cm to 60x60 cm. It can even out height differences on the work surface up to 15 mm. The average consumption is 1.4 kg / m2, the pot life of the mixture is 180 minutes |
| A versatile formula that's great for beginners. The mixture is very plastic, easily distributed over the surface, firmly seizes with the base. The viability of the solution lasts 120 minutes, the adjustment time is about 20 minutes. Apply glue with a layer of 2 to 10 mm, the consumption is 2.7 kg / m2 |
| Waterproof composition for ceramic tiles and porcelain stoneware up to 60x60 cm in size. Suitable for all surfaces, it is plastic and easy to apply. The maximum allowable layer thickness is 10 mm. The solution remains viable for 4 hours, the consumption of the dry mixture is from 1.7 to 4.3 kg/m2 |
| The composition is suitable for tiles and porcelain tiles of any format, can be used in unheated rooms, at normal and high humidity. It is applied in a layer up to 15 mm thick, the consumption is from 3 to 5 kg/m2. The solution remains viable for 240 minutes, the adjustment time is about 10 minutes |
| Ready mix with extended adjustment time. Suitable for ceramic tiles of any format, can be used in bathrooms, kitchens, bathrooms. Consumption per m2 is from 1.5 to 4 kg. |
| Ready heat-resistant adhesive mixture. Possesses the increased moisture resistance, is suitable for all types of a floor tile, a natural stone, agglomerates. The maximum application thickness is 4 mm, the complete drying time is up to 120 hours. Consumption is from 0.5 to 1 kg per m2 |


It should be immediately taken into account that it is advisable to use expensive compositions under specific operating conditions for which these adhesives are intended. For example, on bases subject to vibrations, shrinkage, high dynamic loads, it is worth using two-component adhesives, strong and elastic. When facing the floor in the bathroom, washing, pool bowl, waterproof mixtures are required, and in unheated rooms - frost-resistant.

If the bathroom is tiled, it is worth taking glue with increased moisture resistance

It is also justified to use special adhesives when it is necessary to lay tiles not on a concrete floor or screed, but on a wooden or stone floor.

For an ordinary apartment, it is best to use simple cement adhesives: they perfectly withstand household loads, small changes in humidity and temperature, and are suitable for tiles of any type and format. You can take a cement composition with improved characteristics - thanks to various additives, such mixtures are more waterproof and elastic, and at a price not much more expensive.

Now with regard to ready-made and dry adhesives. Ready mixes are not intended for storage, so they need to be worked out at a time. They are applied in a thin layer, which means that the surface must be carefully leveled in advance. On the practical side, it is advisable to choose such compositions for small rooms, where the glue consumption will be low. The advantages of ready-made mixtures include quick drying, excellent adhesion in thin-layer application and saving time on lining.

Dry glue is cheaper and can be used as needed, the main thing is to close the bag tightly so that the mixture does not become damp.

Using cement adhesive, you can even out small differences in the floor and reduce the cost of a leveling screed. The main problem for beginners is the preparation of the correct consistency of glue, because if you just add or pour water a little, the glue will no longer be so strong. But if you strictly follow the instructions, where all the necessary proportions are exactly indicated, then it is not at all difficult to achieve the desired result. So from the practical side, it is still more profitable to choose dry mixes for floor tiles.

How to prepare glue for work
Not only the quality of adhesion of the tile to the base depends on the correct mixing, but also the ease of working with the mortar. Too thick, as well as too liquid, the composition is difficult to distribute evenly, it takes more time to finish. To dilute the dry mix, you will need:
- two containers - empty and with clean water at room temperature;
- a bag of dry tile adhesive;
- drill with mixer attachment.
Step 1. Part of the water is poured into an empty container, approximately 2/3 of the norm.

Step 2 Pour dry glue from the bag into the water, measuring the right amount.

Advice. The dry composition is always poured into water, and not vice versa. This contributes to better mixing, no dry lumps remain at the bottom, and less dust is formed.
Step 3 Insert the mixer into the container and mix at low speed for about a minute.

Step 4 If the mixture turns out to be too thick, it is taken in lumps, water is added in small portions and mixed each time until the solution reaches the desired consistency.
Step 5 Leave the glue to swell for 10 minutes and mix for the last time. The solution must be absolutely homogeneous, plastic, moderately thick.


How to glue tiles to the floor


The cladding process requires diligence and accuracy, because the slightest defects are perfectly visible on the tiled surface, especially if the tile is of the correct shape and plain. Consider how to glue the tiles to the floor in order to get a quality coating.
Step 1. The surface of the floor must be well cleaned - scrape off dirt, stains of paint, putty, vacuum.


Step 3 Draw a straight line from the center of the doorway to the opposite wall.

Step 4 The first row of tiles is laid out along the line on a dry floor, observing the width of the seams.


Step 5 A second marking line is drawn along the outer edge of the last tile - perpendicular to the first. From the point of intersection of the lines and laying will be carried out.

Step 6 The adhesive solution is prepared according to the manufacturer's instructions.
Step 7 Apply glue with a trowel along the marking lines with a width slightly greater than the width of the tile.

Step 8 The adhesive layer is leveled, after which it is carried out with a notched trowel, forming a relief.

Advice. If the tile is large-format, a thin adhesive layer is also applied to its back side. For standard tiles, an additional layer of adhesive is not needed.

Step 9 Take the first tile and lay it on the glue so that its sides exactly match the marking lines. A wooden block is laid on top and knocked out with a rubber mallet so that the tile lies more evenly.


Step 10 Insert crosses for seams on the sides and continue laying the first row, controlling the location of the tiles with the rule and level.

Step 11 After completing the first row, proceed to the next. In the process of work, it is very important to observe the width of the seams and do not forget to control the plane.

Step 12 When cutting tiles, it is necessary to mark the cut line with a pencil, having previously measured the desired distance. It is most convenient to cut the material with a tile cutter, manual or electric.

Cutting with a manual tile cutter

Advice. If you need a curly cutout, first it is marked with a pencil on the surface of the tile, and then the part that is to be cut is divided into squares. After making cuts along the lines, excess fragments are removed, and uneven edges are broken off with pliers.


The remaining pieces are broken off with pliers or wire cutters.
Step 13 A ceramic plinth is fixed along the perimeter of the room, placing crosses for seams from below.


Step 14 One day after facing, grouting is performed. The mixture is applied across the joints, carefully filling all the irregularities. Once the grout has set, wipe the floor with a damp, clean sponge. The plaque remaining after drying is removed with a dry cloth.


Cleaning tiles with a rag


You decided to save on flooring, but you do not know how to lay tiles on the floor? No problem! Tiling the floor with tiles is a very real task that you can handle. All you need is to learn a little theory, and put it into practice as carefully as possible.
What do you need from the materials and tools? There is nothing complicated here: stock up on cement mortar, sieve, gypsum mortar, liquid cement milk, a damp rag and a 3% hydrochloric acid solution.
How to lay tiles on the floor correctly
The first step is to prepare the cement mortar. Cement is mixed with sand in a ratio of 1 to 5.
If the tile is laid on a flat concrete floor, no special preparation for tiling is required. Concrete slabs should be wetted, and using a notched trowel, apply special tile adhesive on top (how to prepare it is indicated on the bag itself), the thickness of which should be at least 3 mm. It should be noted that the application of the solution to the surface of the tile is not required.
Prepare a mortar for tiles on the floor
Tile adhesive can be replaced with a solution that includes cement, sand in equal proportions and PVA glue 200 - 300 grams per ten liter bucket of the finished solution. The applied layer must also be three millimeters. If the floor surface is uneven, a thicker layer should be laid, from 10 to 15 mm.

Marking for laying tiles
If you are laying tiles in a small room, for example, a bath, then in the corners you can make lighthouses according to the level - by laying tiles on gypsum mortar in all four corners (between the tiles laid in the corners should be perfectly level), we will put rules on them and check the plane of the entire floor.

First, the first slab should be laid, determining its clearly horizontal position by the rule and level, then the second slab is laid (on the left or right side of the previous one). In the same way, the installation of the third and fourth tiles of the sink is being carried out.

When the installation of the lighthouse tiles in the right places is completed, we should start laying the rest of the tiles, while each tile should be carefully upset with a rubber mallet or other object that does not damage its surface, to the level that we need.

To check the level, a rule and a level are used. After the laying of the Second row of tiles is completed, you need to remove the beacons, remove the gypsum mortar from below and lay the tiles with cement mortar.
Grouting tiles
The layer of cement mortar that will be squeezed out when laying the tiles should be removed, and a day or three after laying the tiles, you need to start preparing liquid cement milk and pour it over the floor surface, thereby completely filling the entire space between the tiles, this is the easiest and fastest way grouting seams.

After another day or two, using a rag moistened with water, you should wipe the tile, washing off the remnants of sand and cement from the floor, leaving only the grout inside the joints. If you were unable to wipe off all the dirt with a damp cloth, a 3% hydrochloric acid solution that you treat the floor with will easily cope with this problem. The acid should be washed off with water after a few minutes.
It will be possible to start fully using the floor in a week.
A necessary tool for laying tiles on the floor
- Level
- rule
- Roulette
- Buckets
- Master OK
- notched trowel
- Mixer (nozzle on a drill for mixing the solution)
- Tile cutter or grinder with stone disc
- Round drill bit for holes in tiles
- Chopping thread
- rubber mallet
- Cross inserts between tiles (3mm)

Instructions: how to lay tiles in the bathroom on the floor
Not everyone knows how to lay tiles in the bathroom on the floor. There are many different nuances associated with the tile itself, materials, and, most importantly, with the environment, since the bathroom is a place where constant humidity reigns. So, let's try to understand the nuances of this process.

To begin with, the following should be noted: do not use wall tiles when laying the floor. There is an opinion that this is not important, but this is a mistake.
- First, floor tiles are difficult to slip on, and this is the most important factor in the bathroom, as it will keep you healthy.
- Secondly, floor tiles can withstand higher power loads. In addition, it should be noted that floor tiles are divided into so-called strength classes - the first, least durable, is designed specifically for the bathroom, and the most durable, fourth class, is used to lay the floor in public places.
Step by step instructions for laying tiles
Now that everything is clear with the choice of tiles, you can begin to gradually carry out the work related to its laying.


The tiling is finished, now you can admire the appearance of your bathroom floor, which was made not by anyone, but by yourself!
Grouting ceramic tiles video
What is the most painstaking part of the tiling process? That's right - grouting ceramic tiles. The video of this process will be presented to you, since it is this work that can be considered filigree in tiling. Why is that? Yes, because the visual beauty of the tile coating depends on this.
Grouting should begin by carefully cleaning the space between the tiles. Cleaning the tile itself is also essential to avoid mixing dirt, cement and grout.
Now let's move on to preparing the grout. You should take a clean container and dilute the grout mixture in it in a small amount. After that, dry grout is added and water is added, everything is mixed again. This mixture should be thicker than sour cream, but less thick than cottage cheese.

It is better not to interfere with a large amount of grout, for the reason that the finished grout must be used in 20 minutes, after which it will harden. Mixing of the hardened composition with fresh or dilution with water is prohibited. The finished grout is pushed into the seams with a rubber spatula. It is necessary to achieve a dense filling of all cracks with grout. Excess grout is immediately removed and used to fill other seams.
There is a wide variety of pre-mixed grouts on the market today. They are ready to use as soon as you open the jar. The next step is to wipe the seams with a foam sponge. The sponge should be rinsed regularly and squeezed hard, because excess water can wash out the fresh solution.

This stage is marked by the final formation of seams. After all joints have been sealed, but not less than 120 minutes later, wipe all tiles and joints using a clean, dry cloth. The grout can be easily removed from slippery tiles and will remain only in place of the seams.
Tiles are the best material for bathroom cladding, where there is always high humidity and temperature. But in order for the finish to be strong and durable, you need to choose the right composition for fixing the tiles. Once it was “planted” on an ordinary solution of cement with sand, and real craftsmen added PVA glue there for strength. True, such a mixture still did not provide good adhesion, so the tile often lagged behind.
Today, kneading the solution yourself, accurately calculating the proportions, is not at all necessary - there are special compounds that ensure the reliability of the finish. They also include fractionated sand and cement, and in addition, special modified additives - thanks to their characteristics, tiles can last for years. The range of such mixtures on the market is very large, so those who are going to tile the bathroom need to know some product selection criteria.
There are several criteria to consider when choosing a tile fixing mix.
- The basis on which the tiles will be laid: old tiles, drywall, concrete, plaster, etc. Particular attention should be paid to features such as underfloor heating and thin walls that are subject to increased vibration - in this case, you need to think carefully about the choice of glue, otherwise the tile will quickly fall off.
Ceramic tile base - tips and tricks
- The area of one tile and the size of the entire surface that will need to be faced. It is better to lay a large-sized tile on glue with increased adhesive characteristics - the weight of such a tile is much greater than that of a regular tile, so it can not only fall off, but immediately “float” along the wall surface.
- Dry or ready-mix: Most often, consumers choose dry formulations, since wet formulations are more expensive, and in addition, the latter can only be laid on a perfectly smooth surface.
- Cement-based mixtures dry out faster, that is, it is better to work with them with some experience, as well as at moderate air temperatures.
- If the cement mixture contains a large amount of plasticizers, it will dry out much faster.
- Plasticizers in the composition of the adhesive are necessary if the tile will be laid on the floor, since in this case the coating must withstand sufficiently large loads.
- If the person who will be laying the tiles is not very experienced, it is better to choose mixtures that do not dry too quickly, as the installer will need a certain amount of time to level each unit well. In this case, one-component adhesive (for example, dispersion), sold in the form of a paste, can be called the best option.
- Two-component mixtures must be made independently, but at the same time they are considered the most reliable or durable.
- If the question arises of using a universal adhesive or a specialized one, it is recommended to give preference to the second option. Universal adhesive can be safely used in the simplest cases, that is, when laying ordinary ceramic tiles on a flat cement or concrete base. In addition, it is better to use a separate type of adhesive for walls and a separate one for the floor - this approach not only saves money, but also increases the reliability of the finish (the floor covering is usually subjected to high loads, and also suffers more from moisture).
Tile adhesive K-11 "Universal"
- Product shelf life. Even for the sake of economy, you should not buy glue that has expired, broken packaging, or one that has been stored in improper conditions (at high or low temperatures, high humidity, etc.). Such mixtures lose their qualities, so the tile will not hold well and will eventually fall off or crack.
In addition, when buying glue for laying tiles, it is important to consider the type of mixture, since the final result, that is, the strength of the future coating, depends on this.
Types of tile adhesive
There are not so many types of adhesive mixtures for tiles (unlike brands and manufacturers): these are cement, dispersion, elastic and epoxy mixtures, however, each of them has its own characteristics and characteristics.
cement mixtures
As the name implies, these mixtures include cement. They are considered one of the cheapest on the market and are sold in the form of powders that need to be diluted with water, and sometimes other components (liquid latex, resin, etc.) are added. In the first case, the mixtures are called modified, since all the necessary ingredients are added already at the production stage.
What you need to know about the choice of cement mixtures? Packages of such products may be marked "thin-layer tile adhesive" or "thick-layer tile adhesive". The first option is suitable when the tiles are laid on a flat surface with differences of no more than 10 mm. But thick-layer mixtures are used when the walls or floor are uneven, with large gaps or cracks.
knauf tile adhesive
Dispersion mixtures
Dispersion solutions have increased adhesion, therefore they are excellent for working with complex surfaces, as well as with those that do not absorb various substances very well: drywall, painted surfaces, old tiling. But for concrete bases, it is better to choose another option. They are mixtures of acrylic with binders and artificial resins.
Such products are sold ready-made, in sealed plastic containers, and cost a little more than cement ones, but at the same time they have a number of valuable advantages:
- do not require self-preparation of the mixture, that is, they allow you to avoid mistakes when observing proportions and save time;
- work is carried out without excess dirt and dust;
- a sufficiently large "setting" interval, so that individual tiles can be well aligned.
Elastic blends
This type of adhesive mixture is the best option for laying tiles on surfaces that are completely devoid of the ability to absorb moisture, as well as on moving bases. They are often used for facing underfloor heating, as the adhesive withstands the expansion and contraction of surfaces due to high temperatures.
Epoxy mixtures
Epoxy glue is the least commonly used for laying tiles in residential areas, since, firstly, it is quite expensive, and, secondly, it requires some experience. In addition, there are some conditions that must be observed during operation: maintaining a certain temperature regime, strict adherence to proportions, etc. Most often, epoxy mixtures are used for lining saunas, swimming pools and other similar premises, as they allow laying tiles on any surface, including metal. After hardening, they become absolutely waterproof, and also resistant to acids and chemical solutions.
Ceresit CM 74. Technical information. Download file
How to choose glue for different types of tiles?
A variety of different types and colors of tiles today also exists a lot, and this is another criterion for choosing an adhesive mixture. The simplest and most affordable option is gray glue, which is suitable for porcelain stoneware and ordinary ceramic tiles.
If the bathroom is planned to be lined with glass mosaic or marble, it is recommended to choose white mixes. Contrary to popular belief, it does not have the best performance, but marble can absorb adhesive and subsequently change its color. When using white glue, the lining darkens much less, which means it will look much better.
But the composition for the mosaic should have a fairly fine grain size, since this material is laid on a thin layer of glue, and for a better appearance, this layer should be compressed even more.
The most common and high-quality (according to consumer reviews) brands of adhesive mixtures for tiles include:
- Ceresit (Ceresit);
- Knauf (Knauf);
- Kerakoll (Kerakoll);
- Sopro (Sopro);
- Litokol (Litokol).
How to calculate glue consumption?
Glue consumption is usually indicated in the instructions for a specific product, but in reality it is not so easy to calculate it. The amount of mixture that will have to be spent on laying tiles is influenced by a number of factors and conditions.
- Glue type. All of the above adhesive mixtures and their varieties have different characteristics: some are thicker, while others are more liquid. For example, the consumption of cement-based adhesive, which is diluted with water, is from 1 to 1.9 kg per square meter.
- Tile features. The porcelain stoneware surface absorbs the least amount of glue, glazed tiles absorb a little more, and the facing material called cotto and handmade tiles absorb the maximum amount.
- Surface to be tiled. The ideal surface for tiling should be absolutely even and smooth - in this case, a minimum amount of glue is needed. In addition, the surface of the base on which it is planned to lay the tiles has a different ability to absorb moisture: the higher the porosity of the material, the more it absorbs the adhesive mixture.
- Weather. The optimum temperature at which tiles can be laid is from 18 to 25 degrees. If the room is too hot, then the moisture from the solution will evaporate too quickly, and the consumption of the mixture will increase. At sub-zero temperatures, it is not recommended to veneer surfaces at all, since the adhesive may lose its characteristics.
- Technique of work and qualification of the stacker. The amount of adhesive mixture consumed is largely influenced by the laying technology, the experience of the master (a person with the appropriate skills and qualifications will use less glue than a beginner) and even the type of spatula with which the work will be performed. Skilled installers claim that the best way to lay mortar is with a V-shaped tool, followed by a U-trowel in terms of economy. But most often spatulas with square teeth are used for work, which, in turn, come in different shapes. The required size of the teeth of the tool must be selected depending on the size of the tile - accordingly, the consumption of glue in each individual case will be different.
Glue consumption
| The size of one side of the tile, see. | Spatula tooth size, mm. | Recommended consumption of glue, kg/sq.m. |
|---|---|---|
| Less than 5 | 3 | 1,9 |
| 5 to 10 | 4 | 2,5 |
| 10 to 20 | 6 | 3,8 |
| 20 to 30 | 8 | 5 |
| 30 to 40 | 10 | 6,3 |
| 40 | 12 | 7,8 |
However, there is one caveat here - when using this table, you need to take into account the characteristics of the surface. If the base is uneven, it makes sense to slightly adjust the above parameters: for example, when laying tiles 30 by 30 on a surface with a lot of cracks and potholes, it is better to take a spatula with teeth not 8, but 10 mm. In addition, the tool must be held in a certain way: an angle that is as close to perpendicular as possible will allow you to create a thicker layer of glue.
There are three options for calculating the amount of glue required for wall and floor cladding, from which you should choose the best option in a particular case.
Option number 1. This solution is suitable for those who already have experience with a mixture of a particular brand. To calculate the consumption of glue, you can look at the instructions or go to the company's official page and use a special calculator: enter data on the size of the consumable, the surface area to be coated, and the type of adhesive mixture.
Option number 2. This option allows you to calculate the amount of cement-based adhesive - it is not very accurate, but will give at least some point of reference for inexperienced installers.
Initial data: weight of the ready-to-use adhesive mixture, tile dimensions, layer thickness, conditions (temperature, base surface) that are most favorable for tiling. For example, the weight of the adhesive is 1.5 kg, the size of the tiles is 30 by 30, the standard layer thickness is 4 mm. It is necessary to multiply 1.5 by 4, the result will be 6 kg - this will be the required consumption of glue per square meter. Accordingly, under other conditions and parameters, the amount of the mixture may increase or decrease.
Option number 3. It allows you to find out how much glue is needed for a particular type of tile - it is best if the material is already available. Half the thickness of one tile in millimeters must be multiplied by the average consumption of a particular brand of glue (you can find it out from the instructions or on the manufacturer's website), but the result can be very approximate.
Step by step instructions for laying tiles
Today, when it is very easy to prepare tile laying mixes, it is quite possible to lay tiles with your own hands even without experience and relevant knowledge. However, in order for the tiled surface to turn out to be even and attractive, you must clearly follow the appropriate instructions.
Stage one. Tile preparation
- the length of one row does not always coincide with the total length of the tiles (especially where there are niches, sinks, pipes, etc.), it will need to be cut - this is done using a tile cutter or glass cutter;
- after determining the required number of tiles, it is recommended to add 10-15% to them - in case any tiles are damaged, for future repairs or in case of defective products.
Before starting work, it is necessary to determine the technique for performing the work and draw up a laying scheme (especially if you plan to lay out any pattern or ornament). If you need to tile the walls, work starts from the far lower corner, but in the case of flooring, the cladding options can be different (from the middle, from the walls, from the corner).
Stage two. Foundation preparation
This is one of the key points on which the final result largely depends. Skilled craftsmen divide surfaces into simple and complex: the first type includes smooth surfaces that practically do not absorb glue, and the second - uneven, with serious differences, as well as those made of porous materials. Accordingly, the preparation of the base for the tile depends on its type and features.
uneven surface
Laying tiles on an uneven surface is the most expensive, sometimes not only in the amount of adhesive, but also in future repairs if the work is done incorrectly. Before proceeding with the cladding, you need to inspect the base well, remove the old finish from it and clean the problem areas - for example, if there are pieces of concrete or brick on the wall that can fall off along with the tile, it is recommended to remove it and close the holes with putty.
As soon as it dries, the surface must be well cleaned of dirt and dust. After that, treat the surface with a primer (the choice of brand depends on the adhesive for the tiles) and make markings.
An important point: if the wall is very uneven, a thick layer of glue will have to be applied to some areas, because of which the tile may slide even before the mortar “grabs”. In this case, you should use a rail that will hold the tiles in place - it is screwed with screws in the place where the bottom row will be.
Concrete
If the concrete base is even, then laying the tiles will be a fairly simple process - you need to clean it well, put a primer, and then go directly to the cladding.
Dye
It is best to remove old paint from walls, even if it is a laborious and time-consuming process. Today, there are many solutions that allow you to get rid of the finish - just treat the wall with them, and then remove the paint with a spatula, scraper or building hair dryer. If the surface is painted, as they say, in good conscience, that is, it holds very firmly, there is an alternative option - to make notches with an ax with an interval of 2 cm.
Plaster
It is possible to lay tiles on plaster only under the following conditions: it is applied with high quality, with preliminary cleaning of surfaces and primer coating, laid at least two weeks before the start of work, and the height difference does not exceed 3 mm.
Old plaster that has partially crumbled or is crumbling is best cleaned off.
Drywall
The main problem with tiling drywall walls is that the sheets can warp and the tiles fall off. To prevent such a defect, it is recommended to strengthen the surface - for this, special guide strips are used, which are stuffed at intervals of 40 cm (if the drywall is too thin, the distance can be reduced).
For similar purposes, a polypropylene mesh is used, which is glued to sheets or fastened with staples, and some craftsmen use both strips and mesh for reliability. Another option is to install another layer of drywall.
Important: you need to apply a primer on a drywall wall in two layers, and each of them should be allowed to dry for 40-60 minutes.
Old tile
As with old paint and plaster, old wall tiles are best removed. This is not the most technically difficult, but laborious and noisy process, for which you will need a small hatchet with a wide blade, or a hammer with a chisel (sometimes a hammer drill is used). You need to beat off the tile, starting from the top row and gradually going down. Sometimes the first tile has to be completely broken, after which the work will go easier - you just need to drive the hatchet blade or chisel between the tile and the glue, and then try to separate the tiles from the wall with strong but gentle blows.
If for any reason it is impossible to dismantle the old tile, a new tile is placed on top of such a finish. In order for the lining to hold firmly and reliably, a number of conditions must be met. First of all, carefully tap each tile: if the sound is deaf, it will hold well, and if it is sonorous, it is better to dismantle it. Before starting work, treat the surface well with a special primer, and use only elastic adhesive with a high degree of adhesion to fix the tiles so that the adhesion strength is as high as possible. If you use a hard mixture, the new lining will crack over time.
Wood and plywood
Laying tiles on a wooden surface is a rather difficult, but doable task. The first option for performing work is the installation of drywall boards on top of a wooden covering, after which the surface is prepared as described above.
The second method consists of several stages: first, the tree is treated with antiseptic compounds to avoid rotting. Next, ruberoid or roofing felt is laid on it so that the base does not crack and warp, after which the walls are sheathed with wooden slats, a plaster mesh is attached to the frame, cement mortar is applied and the entire structure is plastered (the layer of plaster should not exceed 20 mm). After complete drying, you can start tiling.
Video - Screed on a wooden surface
Video - Bathroom in a wooden house
As a base for tiling walls, it is not recommended to use gas and foam concrete bases, as well as chipboard. Aerated concrete and foam concrete are too porous, loose surfaces that need to be treated with expensive waterproof compounds, and the finish will hold very poorly even when using an expensive adhesive. If there is no other alternative, prefinished plywood sheets should be laid on the base. Chipboards also require careful processing, so finishing this material with tiles is not economically feasible.
Stage three. Preparation of the adhesive mixture
The first thing to remember when preparing the glue is that the rest of the mixture will have to be thrown away, as it will harden and will not be usable. That is, in order to save money, it is necessary to correctly calculate the amount of glue that will be required for work. If powdered adhesive is used, it should be diluted with water, sometimes with the addition of other components. On average, the proportions are as follows: 25 kg of the mixture per 5.5-6 liters of water (more precisely, you can see it on the package). Mix the solution manually or mechanically, vigorously enough for at least 5 minutes, until a homogeneous creamy mass is obtained.
Applying adhesive to the wall
It is not necessary to apply the mortar to the tiles, but some types of tiles (for example, bicottura) are recommended to be moistened with water before laying. Seams 2-3 mm thick are left between the tiles - so that they are the same and even, you can use forming crosses.
If the tile needs to be cut, then this is done as follows: it must be laid on a flat surface, mark the place of the cut, run a glass cutter or tile cutter over it, then gently hit it flat on the floor. The tile should split at the cut point.
After laying each unit, it must be pressed with your hands or with some object and remove the remnants of the mortar until it has hardened. After finishing work with five rows of tiles, you need to take an hour break so that the glue grabs well and the lower rows do not slide down under the weight of the upper rows.
Performing work, you should regularly check the evenness of laying with a level. In order for the tile to be laid as evenly as possible, it is best to initially mark the zero level and mark it using the building level. After the surface is completely lined, you need to wait until the glue hardens well (usually it takes about 24 hours).
Mistake in laying tiles - uneven seam
Stage five. Filling joints with grout
Grout for joints can also be purchased at any store and prepared as follows: pour the mixture into a bucket of water in the proportions indicated in the instructions, mix well, let it brew for 5-10 minutes and mix again. Next, fill the seams with the mixture with a rubber spatula, wait 25-30 minutes and remove the excess mortar with a sponge. Grouting plays a special role - it not only gives the surface an aesthetic appearance, but also allows you to mask laying defects.
Tile grouting and technique, steps 5-8
Facing a bathroom with ceramic tiles is not an easy and rather time-consuming task. However, with the right choice of adhesive mixture and following the step-by-step instructions for work, the tile will hold firmly and reliably, and the appearance of the room will please the eye for a long time.
Video - How to choose an adhesive for ordinary tiles, porcelain tiles, natural stone or mosaics?
This "aged" technology of laying tiles on the floor has several advantages. There is no need for fine preparation of the floor covering for laying tiles with special leveling of the surface. It is enough to keep the general horizontal. In addition, expensive adhesive mixtures are not used here, and cement mortar is used to lay tiles on the floor. This method of laying tiles is best suited for relatively large
secondary premises where it is not required to withstand design solutions, and it is not necessary to seal tile joints with colored compounds.
In this technology, both pure cement and its mixture with sand in a one-to-one ratio can be used. In any case, before starting work, the cement mixture must be sieved through a fine sieve.
Before the mass laying of tiles on the floor, beacons are placed. They are placed in the center at the corners of the room, and if the room is large, then along the walls and along the center lines. The lighthouse is actually the same tile, only laid on a gypsum mortar so that it can be easily removed later. The first beacon sets the overall level of the floor, so it must be placed especially carefully in the highest place. Further, using the level, the remaining beacons are set, strictly in a horizontal plane with the starting point (beacon).
The concrete base is filled with water, and covered with a sand-cement mixture. A liquid solution is formed on the floor, in which the tiles will be laid. The sufficient thickness of the layer of the resulting mortar is at least 3 mm, and in case of irregularities, the cement-sand mixture can be added up to 30 mm. The tile itself is not lubricated with mortar before laying on the floor. 
The tile is laid in a row between the beacons, while it is pressed into the solution, and its position is controlled by the rule and the level. After that, the beacons in the row are removed, and mortar tiles are laid in their place. The squeezed solution is immediately removed and used elsewhere.
The laid tiles are allowed to fix for at least one day. After that, to fill the tile joints, a liquid solution is poured onto the floor, which fills these joints.
After 2 - 3 days, the remaining cement from the tile is wiped off with a rag soaked in a 3% hydrochloric acid solution, which is washed off with water after a few minutes. 
Of course, this technology does not correspond to modern ideas about laying tiles on the floor. The strength, durability, and water resistance of such a tiled flooring is in doubt. But the technology of laying tiles on a cement-sand mortar immediately over large areas has its advantages - low cost and high speed of work.
The operation of the floor can begin no earlier than 7 days after laying the tiles.
Before any finishing work, it is necessary to determine with what composition the ceramic tile will be molded to the base. Therefore, it is important to know how to prepare a solution for laying tiles?
There are two options: a cement-adhesive mixture is used as a lining layer, or modern dry admixtures with modified various additives.
cement-adhesive mixture
For cladding and for laying floors, the cement mortar is prepared in the same way. We recommend mixing mortars using coarse-grained washed sand and cement of at least version 300. The ratio of cement and sand particles in the final composition is necessary: 1:5 with cement of version 300-400; somewhere 1:6 with cement version 500-600.
To keep the tile stronger, you can mix 1/25 of the PVA glue in the cement mortar prepared for work, the glue will improve the contact of the ceramic tile with the wall and floor, as a result.
Mortars and mixtures for tiles - types, compositions, mixing rules and the best manufacturers
The sand needs to be dry, or it will be very difficult to sow it through a fine sieve. It is imperative to sift the sand, otherwise unnecessary particles will remain.: pieces of shells and small pebbles, pieces of clay mass. They will interfere with the installation and if our tile is tapped to fix it properly, it will simply crack.
Cement is better to take fresh. When saved, every month it loses about 5% of its active ability (quality) and in a year - about 40%, in two - up to 50%. So, when purchasing, carefully look at the date of preparation indicated on the bag. If you did not find the date on the bag or the cement is sold in bulk, you can find out its quality yourself.
How to know the quality of cement: Take a piece of cement and squeeze it firmly. If it freely wakes up through your fingers, then it is fresh, and if it takes the form of a lump, the cement is old.
Cement mortar for floor and wall cladding
The solution is made as follows. Mix one part of cement and about 3-6 parts of sand (depending on the brand of cement). Then add water, and mix the composition again until it acquires the consistency of a pasty mass. If the specifics of the cladding force you to lay ceramic tiles on a thin layer of mortar, it must be made slightly liquid. To apply a thicker layer of the solution, the impurity must be kneaded thicker. For better bonding of ceramic tiles to the wall, PVA glue can be poured into the cement mortar.
Dry mix mortar
An alternative to our cement-adhesive admixture can be modern dry mixes. Previously, tilers were forced to prepare the mortar themselves. Its composition was prepared just before the beginning of the cladding, measuring the elements "by eye".

Important: The quality of self-prepared glue is directly dependent on the professional qualities of a specialist: it turned out to control the dosage - your tile will hold tight for many decades; poured a little sand or cement mortar - you will do the repair again in a year.
Special dry tile adhesive will help us defeat all these troubles of cement mortar. Approximately ten years ago, these dry construction impurities only began to appear. The main product range was offered by Western firms, but soon it was supplemented by domestic brands.
Today, on the shelves of building supermarkets, dry mixes, mainly glue for ceramics, of imported production are available in equal proportions. The buyer has plenty of choice. Dry mixes differ from each other in properties, the percentage of various additives and of course the price.
Note: the more expensive, the better, not always true.
The classic solution of cement and sand can be equated to modern dry mixes, only within the limits of environmental cleanliness.
Varieties of solutions
The process of preparing cement mortar
The proportions of the components in the solution
Mixing mortar components
Calculation of the volume of mortar for screed
Filling the screed
Padding
Installation of beacons
Pouring screed
The most important step in creating floors in a house or apartment is considered to be pouring the screed. The article will discuss how to make the most popular cement-sand mortar, apply it correctly and get a high-quality base.
Varieties of solutions
Many users make mistakes in the process of creating a screed, not only in the technology of the procedure. It is also very important not to make a mistake when choosing a floor grout, since there are various types of mixtures with their own advantages and disadvantages. The quality of the screed should not be neglected, since although this layer is not visible in the photo, it performs the most important function.
Usually cement or gypsum creates a binding effect in such mixtures. They are filled with sand, both fine and coarse-grained, or with polymers or minerals, which significantly improve the characteristics of the screed. The solution is ready when diluted with a certain amount of water.
Each type of solution has its own individual characteristics:
- cement-based mixtures universal, because they have increased resistance to a variety of types of negative impacts. The disadvantage is that the created base shrinks some time after pouring. It is possible to avoid the formation of cracks only with the ideal mixing of the solution and the laying of a reinforcing mesh of reinforcement into it;
- mortars on gypsum(anhydride mixtures) are very easy to apply and they come to their final state after 1-2 days. Such a screed does not shrink and can be poured in a very thin layer. Gypsum does not tolerate high humidity.
Compositions of both gypsum and cement are sold already in the form of a ready-mix, supplemented with various modified materials that facilitate the mixing process, increase the fluidity of the mortar and make it easier to lay. Due to such mixtures, the rough surface is leveled very simply, and the shrinkage of the created screed is minimal. But the finished mixture costs several times more than the one that is prepared on its own.
The process of preparing cement mortar
Consider the components that make up the concrete screed and the features of their use:
- sand- must be perfectly clean and dry without pebbles and small debris;
- cement- it is best to purchase a brand of at least 400, but this value may decrease during storage. Accordingly, only fresh material should be used;
- plasticizers- it is worth adding in larger quantities to achieve maximum efficiency of the solution;
- polymer fiber- a special substance that replaces the reinforcement of the screed, increasing its characteristics.
The proportions of the components in the solution
It is important to observe the proportions of cement and sand for the screed, which are based on the brand of cement used (for more details: "How to calculate the cement for the screed correctly - examples"). The brand of mortar can also be determined based on what kind of cement was used.
For example, when using cement of the 600th brand, one should mix 1 part of cement and 3 parts of sand, and in this case a solution will be obtained - M300. Already the brand of mortar for the M150 screed is obtained in the same proportion, but using cement of the 400th brand, below which it is not recommended to fall, because. the resulting screed will have characteristics below those required for the efficient operation of the floors.
Regardless of what ratio of cement and sand for the screed was chosen, fiber is added at 1 gram for every kilogram of cement.
Mixing mortar components
When a cement screed is mixed, the proportions must be observed, but you should not forget about the process technology:
- to begin with, the dry components are combined: cement, sand, fiber. The optimal mixture implies the use of cement of the 400th grade and sand in a ratio of 1: 3. At the same time, fiber is added, as already mentioned, 1 gram for every kilogram of cement. Thus, for 50 kilograms of cement, 150 kilograms of sand and 50 grams of fiber are needed;
- separately it is worth preparing a container for the preparation of plasticizers before they are included in the solution. As for plasticizers, regardless of the chosen proportion of concrete for screed, they are added at about 3.8 grams per kilogram of cement. Water must be added 3 times less than cement is used. Thus, the previously selected ratio will have 190 grams of plasticizer and 5.6 liters of water, of which 0.6 grams interacts directly with plasticizers;
- further steps are standard: a dry mixture is added to the liquid part and mixed evenly until a homogeneous composition without lumps is obtained. When working, it is better to use a special construction mixer or a drill with a special nozzle, which will allow you to achieve the most correct consistency of the solution.
The end result should be a viscous compound that is a little more difficult to pour, but it allows you to create a high-quality screed. A perfectly flat, crack-free surface can only be created if the screed is regularly wetted during the drying period.
Calculation of the volume of mortar for screed
Regardless of which brand of floor screed solution is used, the calculation of its required volume is as follows:
- in fact, the mathematics is not complicated: the area of the covered surface of the subfloor is multiplied by the estimated thickness of the screed;
- having received the required volume of the solution, you can begin to calculate the required amount of sand and cement. It is these components that are important, because the rest are presented in very small numbers. It is worth remembering that the ratio of these materials is 1: 3. It can be assumed that a cubic meter of cement by weight is approximately equal to 1300 kilograms.
Filling the screed
Work is carried out in several stages:
- priming the subfloor;
- installation of lighthouses;
- solution pouring.
Padding
Before choosing the proportions of cement and sand for floor screed, it is best to complete the primer application step. This solution is intended in order to increase the adhesion of the screed to the base and eliminate the minimum unevenness of the surface of the subfloor.
It is desirable to treat a porous subfloor with a primer (viscous composition), and apply the composition on dense surfaces without diluting it first. All details about the characteristics and values of the soil mixture can be studied on the packaging.
Installation of beacons
An important task when pouring the screed is to maintain a perfectly even level of its surface. It can only be observed if special beacons are installed.
Mortar for laying tiles on the floor: the subtleties and nuances of manufacturing
It is necessary to put them on the same level, controlling the process with the help of the building level.
The installation process is simple:
- as fastening, small slides of gypsum mortar are used, laid along a pre-marked beacon installation line;
- a wooden or aluminum bar is laid on this line, representing the same lighthouse;
- with the help of the level, the correspondence of the height of each beacon is checked.
The distance between the beacons in this case should be no more than 2 meters and exactly less than the length of the level used (rule). As soon as the slides of the solution harden, you can start pouring the solution.
Pouring screed
The screed is applied in strips, which simplifies the process and increases the productivity of the worker. The strips are limited to beacons, and the solution does not spread over the entire surface of the room. In fact, the lighthouses in this case are formwork. It is important to choose such a ratio of the mortar for the screed so that the thickness of the poured layer corresponds to the height of the installed beacons.
The solution is poured clearly between the beacons and leveled using the same rail that was used as a level to level them. As soon as the screed dries up on one of the strips, the beacons limiting it are removed, and the work can be transferred to the next section.
Any depressions or bumps on the surface of the poured screed can be identified by the resulting "cement laitance" or light spots. You can eliminate such defects by additionally applying a small amount of the solution and leveling it.
A high-quality screed can be obtained only after good drying. The maximum strength of the base will be obtained in about a month. It is important to regularly wet the surface of the screed to dry it more evenly.
Approximately 8 hours after completion of the work, a polymer layer should be applied to protect the screed from cracking, which cannot be avoided due to uneven drying. If in the future it is planned to lay the top layer of the coating on top of the screed, then the polymer can be considered a primer. If not, then a well-made screed will not look very good in the photo and during a visual inspection, but its main functions will be performed perfectly.
Outcome
The article describes in detail how to prepare a screed solution and apply it in such a way that the screed is of high quality, reliable and lasts for many years. For many years, you can use the screed under any type of floor covering.