Drilling holes in ceramics. How to drill a hole in fragile ceramic tiles. What are drills for tiles and tiles
There are many reasons to make a hole in a ceramic tile:
- it is necessary to lay a water pipe;
- install an outlet
- hang a shelf on the wall;
- cut in the towel warmer.
Drilling a hole is not a problem, but the fact that the tile can crack or split during the drilling process causes some trouble. Setting themselves the task of how to properly drill a tile so as not to damage its integrity, professionals and craftsmen have tried many ways.
What tools are needed for drilling ceramic tiles
- Electric drill, drilling is carried out at minimum speed.

- Cordless screwdriver, with a maximum number of revolutions of 800-1000.

screwdriver
- Corded screwdriver with low speed.
- A hand drill is used for drilling small hole diameters up to 12mm.

What to do so that the tile does not crack when drilling
Ceramic tile is considered a very practical and versatile material for finishing many rooms. It is perfect for the interior of every room, whether it be a kitchen, bathroom or even a hallway. Almost everyone will be able to lay tiles on their own at home, this process is not complicated. However, after that it will be necessary to install floor plumbing and drill holes in the tile for communications. You need to know how to implement this so that the tile does not crack.
- When calculating the place where the holes in the tile will be drilled, it is necessary to step back from the edge of the ceramic tile by more than 15 millimeters. In this case, the risk of cracking will be minimal.

- Before drilling a hole in the tile, you can soak the tile for 30-60 minutes in water. This will help reduce the possibility of chipping or cracking.
- The drilling site can simply be moistened with water, thanks to this precaution, splitting of the tile or replacement of a piece of facing masonry can be avoided.
- The best option would be to make a hole in the seams between the tiles. In this case, the risk of cracking ceramic tiles is minimal. But this way is not always possible.
Drilling ceramic tiles for dowels
Drilling features
How to drill a hole in a tile? Such a question arises when it is necessary to hang any cabinets, lamps, on a tiled wall.
If the tile in which the drilling will be made splits or cracks, the whole sector will have to be changed.
If you need to drill a hole in the tile, you will have to use a few tricks.
Before drilling tiles, it is important to consider two not very pleasant points:
- the surface of the tile is very slippery and will constantly slide off;
- drills for brick and concrete are not suitable for tiles, because they split it.
The first problem is solved simply: you need to take masking tape and stick it to the surface of the tile so that the drill does not fidget.

What to drill?
How to drill a hole in a tile and how can it be done? To do this, you need to take a drill, in which the edge of the cutting part is much harder than the surface of ceramic tiles.
So what kind of drills do you need?
- Diamond Drill. Drilling tiles with such a drill is the most expensive and effective way.
Not everyone can afford to buy such drills in order to make a couple of holes. It makes sense to purchase diamond-tipped drills if you need to professionally renovate apartments, then it will pay for itself quickly enough.

- Drill bit with pobedite tip. Drilling a tile with such a drill will cost much less, since this drill is cheaper than a diamond one. It can be bought in a specialized store or in the market.

- Special drills and glasses. They can be useful in everyday life, if finances allow, then you can purchase.
The sequence of steps for drilling a hole for a dowel
- Place a piece of masking tape where the hole will be drilled.
- Mark with a cross the point where you want to drill.
- Insert the desired drill (winning, diamond or special) into the puncher or drill.
- At low speeds, drill a hole in the tile.
- After the tile is drilled, it is necessary to replace the drill with a regular one for concrete. The size will depend on the size of the dowel.
Tip: to make the hole the right depth, you can use a special limiter or simply stick a small piece of electrical tape on the drill, while marking the desired depth.
- Drill the hole to the end, remove the drill.
- Blow out the hole to remove concrete crumbs and dust.
- Insert the dowel into the hole, while it should enter the tile by a few millimeters.
Important: this method makes it possible to drill a hole up to a maximum of 15 mm in diameter.

Drilling tiles for a socket or pipe
How to drill tiles, what tools can be used for this?
Drilling with a hammer drill with a diamond-coated bit
The cost of diamond-coated crowns depends directly on their quality, but it is still an expensive pleasure..
Tip: you can use a crown with special victorious teeth, which should be enough for 15-30 holes.
Drilling tiles:
- Before drilling a tile, it must be laid on a flat, not very hard surface (wooden can be).
- On the front side of the tile, mark the place for drilling.
- Using a puncher, drill a hole of the desired size.
This method is the fastest and safest.

Drilling with a drill with a diamond crown
How to drill a tile?
You need to do the following:
- Mark the location for the hole.
- Drill the drill from the front side of the tile, without applying too much pressure on the drill.
- If the diamond-coated crown is in good condition, a hole of the required diameter can be made in two to five minutes.

Drilling with a circular drill for tiles - "ballerina"
How to drill a tile if you need to drill a hole of a non-standard size?
- Set the desired hole diameter (for example, if it is 5 cm, then the distance between the drills must be set to 2.5 cm, respectively).
- Mark the drilling site.
- Start drilling tiles.
Tip: you need to drill the tile with a ballerina at low speeds, holding the tile tightly so that the fragments of the tile that can fly out from under the drill do no harm, you must also use safety glasses.
Tip: in the process of drilling with a drill, you can’t swing, you can use a special tripod for a drill.

Drilling with a drill with a drill bit fitted with a diamond tip
This method can be used when it is not possible to purchase a crown.
How to drill tiles?
- On the front side of the tile, mark the diameter of the desired hole. If it is a switch or socket, then you can take a box of a certain size, attach it to the tile and circle it with a pencil.
If the hole is for a water pipe, then you can use a compass. - Drill a drill around the entire contour of the hole so that the edge protrudes beyond the intended line by 1-2 mm at least (up to 20 holes 4-6 mm in diameter).
- Carefully pry out the core.
- The teeth that remain must be broken out with wire cutters or pliers.
- Sand the cut surface.
This method is the longest and requires a lot of patience and skill.

Drilling with a tungsten core drill with a center drill
This method is suitable when the tiles have already been laid.
- So that the crown does not slip or move during the drilling process, it is advisable to use a special template with the desired hole diameter.
- Attach the template to the wall.
- Press with a drill with a crown and make a hole.
Drilling ceramic tiles is a rather difficult task for many, because they do not know how and with what to drill tiles.
Most often, you have to drill a tile already laid on a wall or floor, so you have to be careful not to damage the entire masonry. The main thing is to select the right drill, which is better than the others for the intended purposes.
In the process of repairing a kitchen, bathroom, bathroom and other utility rooms, the question often arises of how to drill a hole in a tile. Of course, this must be done in such a way that it does not burst and does not lose its external attractiveness.
At first glance, it may seem that everything is simple, but it is not so at all. Tiles are quite slippery and brittle, so if you're not a professional builder, drilling tiles can be a real challenge. So how to drill a tile without loss?
In fact, everything is not as difficult as it might seem at first. You just need to listen to some tips:
- First of all, choose the right tool. It should fit comfortably in your hand. You need to hold it firmly and confidently.
- The working speed of the selected tool should not exceed 1000, and even better 800 rpm.
- Hold the drill or screwdriver in one position, do not push or change the angle of inclination. This can lead to the appearance of a "cobweb".
- If you need to drill a hole at the junction of two tiles, use an extremely thin drill, even if it is not "tiled", but in concrete.
- If possible, retreat at least 1.5 cm from the edge of the tile, the corners and edges of the tile are very fragile.
- It is best to drill holes before laying tiles on the wall. Soak the material in water for at least 40 minutes. So the tile will become more viscous, and there will be no cracks.
- If you don't know how to drill through a tile so it doesn't crack and you've never done it, it's best to practice on the bits you don't need beforehand. So you can feel the tool and understand how hard you need to press on the drill.
Choosing a tool
So, how to drill First you need to choose the drill itself. The model should not be either high-speed or shock, because you need to work with very fragile material.

Suitable for tiling:
- a conventional electric drill turned on at the lowest speed;
- low-speed screwdriver connected to a power outlet;
- cordless screwdriver with a rotation speed of not more than 800 rpm;
- hand drill.
Some details of work
To understand how to drill a tile, you need to consider some subtleties:
- In no case do not allow the drill or the tile itself to overheat, otherwise the entire top layer will be covered with a “cobweb” and the material will crack.
- To cool the work surface, regularly wet the drilling site with cold water.
- Try to correctly determine the force of pressure. If you press too lightly on the drill, the hole will not work. If squeezed, the tile will crack.
- When in a tile, never use the reverse mode. Only slow clockwise rotation of the drill is allowed.
- Be especially careful at the joints. There, the tile does not have a protective coating and crumbles easily.
Choosing drills
The science of how to drill a hole in a tile is not too complicated, but it has its own peculiarities. For example, the right drill.

If you are at least a little familiar with construction work, then you know that drills are different: for wood, concrete, metal, and so on. So "tiled" drills have their own characteristics. The process here is based on the friction of abrasives. So for drilling tile or porcelain tiles, you will need a Pobedite or diamond drill. Most often they are in the form of a crown or an arrowhead.
If you are not too tight on funds, then it is better to give preference to diamond-coated consumables. They are, of course, more expensive, but they do better with ceramics. Pobedite spear drills are also designed to work with tiles. Due to the shape of the tip and the special angle of the cutting edge, the contact surface is significantly reduced. You will have to make less effort, which means that the tile will not crack.
Drilling all the way
- Before drilling into the tile, seal the intended work area with several layers. This will prevent the tool from slipping and slightly strengthen the edges of the potential hole. You can also use electrical tape or regular medical plaster.
- Mark with a bright marker.
- Insert a special "tiled" drill and set the drill to the lowest number of revolutions.
- If the device has an impact mode, be sure to turn it off. Failure to comply with this condition will necessarily lead to a split of the tile.

In cases where it is necessary to drill a deep hole in the wall along with the tile, the work is carried out in two stages. First drill the tile itself. Then they change the drill to a thinner one and continue to “gnaw” the wall itself to the desired depth. This is done in order not to damage the fragile edges of the tile during the drilling of concrete.
How to make a large hole
And or a tile, if you need to start a pipe or insert a socket? For such work, there are also special devices:
- circular drill - "ballerina";
- crown with abrasive edge.
The ideal option in this case is a special diamond-coated bit on the cutting edge. It is quite expensive, and if you are not a professional builder, it does not make much sense to buy one. In order to make just a few holes, a more budget option is also suitable - a crown with victorious teeth. This consumable has several disadvantages:
- one piece is enough to drill about 20 holes, after which the fixture can be safely thrown away;
- no matter how carefully you try to act, the edges of the hole will never be perfectly even, they will definitely remain chipped.
There are also advantages to the victorious crown:
- low cost;
- there are many diameter options, up to 15 cm.

There is another option, how to drill a tile, if you need to cut a hole of a significant diameter. This is the so-called ballerina drill. It is a construction in the form of a spear, in the tail section of which there is a special bracket. Another one is inserted into the latter - a “tiled” drill. If you have ever seen a compass, you will easily understand what's what. Such a device is inexpensive and quite suitable for home work. However, there is a slight nuance here. To work with tiles, try to choose such a “ballerina”, the central drill of which has the shape of a hexagon, and not a spear. This design is more stable.
Drilling tiles with a drill bit
- Determine the location of the future hole and seal the surface with masking tape.
- If you are not too confident in your abilities, you can make a plywood stencil and press it firmly against the wall in the right place.
- Install the hole saw of the required diameter and start drilling at the lowest possible speed.
- Try to keep the tool perpendicular to the wall. So the crown can evenly “bite” into the tile along the entire circumference of the cut.
- If you are using a diamond-tipped bit, the RPM can be slightly increased. And to avoid excessive heating of the surface, pour water over it while drilling.

The "wet" method of drilling is generally much more preferable. Especially if the tile has a glossy glass coating. In this case, any drill will last much longer, and the risk of overheating and splitting the tile is minimized.
Working as a ballerina
In order to use the ballerina drill, you need to correctly set the dimensions. Please note that between the side and central drills, you need to set not the diameter, but the radius of the future hole.
Set the main hex drill to the center and start work at low speed. Try to hold the drill firmly and evenly, otherwise it will come off and you will not be able to achieve the desired result. One of the advantages of the "ballerina" is that it can be used to drill a hole with a diameter much larger than 15 cm. But a larger crown simply does not exist.

Conclusion
At the end of our conversation, let's remember once again how to drill a tile so that it does not crack and spoil the impression of a brand new repair:
- Be sure to wet the work area with water, for example, from a spray bottle. This way you can avoid overheating.
- Try not to place holes along the edge of the tile, this creates an additional load.
- If you need to get deep holes, change the drill to a thinner one after you have gone through the thickness of the tile. This will protect the edges of the hole from damage.
- When drilling, be sure to use only low speed and do not push the drill too hard.
- Try to use only special drills for work. Believe me, they are much cheaper than replacing a cracked tile.
Ceramic tile is an excellent finishing material that is widely used in private construction and when carrying out repairs in apartments. Durability, water resistance, high hygiene, practicality, ease of maintenance, relatively low price and plus all this - excellent decorative effect make the tile an almost indispensable material for kitchens, baths, bathrooms, for finishing entrance groups - porches, verandas, hallways, etc. P .

Learning is quite affordable for the average owner of a house or apartment: a little diligence, diligence - and experience will come very quickly. But it is equally important to know how to drill through tiles. Holes, one way or another, will be needed, for example, for hanging furniture, interior accessories, for wiring pipes or other communications, for mounting sockets and switches, and for other needs. It's okay - we will learn to drill ceramics.
What you need to drill ceramic tiles
What, in fact, is the essence of the whole problem of drilling ceramics? The features of the technological process for the production of tiles - high-temperature firing, the high density of the material and its surface strength (especially if there is a glazing layer) have, in addition to obvious advantages, a logically consequential disadvantage. Ceramic products are distinguished by fragility, the absence of any kind of plasticity, and the tile, with careless handling, cutting or drilling, can easily crack, chip, or even fall apart into several fragments.

In addition, the material itself, during processing, has a very strong abrasive effect on cutting tools, and ordinary drills will become dull in a matter of seconds.
Conclusions - for drilling it is impossible to apply excessive load, vibration action, a large number of revolutions of the tool. And, accordingly, the drills themselves must be made of high-strength materials that can pass through a dense structure, and have an appropriate configuration or sharpening.
So, what you may need to drill tiles:
| Picture | Short description |
|---|---|
 | Electric drill. The main condition for it is the mandatory presence of smooth speed control. |
 | A high-quality screwdriver with a powerful autonomous power source may well be enough. |
 | No need to write off the already forgotten hand drills. For drilling small holes, such a tool will be quite enough, and adjusting the speed of rotation is generally not a problem. By the way, sometimes even a regular brace can come in handy. |
 | Standard carbide-tipped drills. Frankly, not the best choice - this sharpening option will create difficulties when passing through the most durable top layer of tiles. Rather, they will be needed to deepen into the thickness of the wall after the holes in the tile are made with other drills. More designed for shock-rotational action. |
 | Special spear-shaped drills for working with tiles. Very convenient when making holes of small diameter (for example, for dowel fastenings). They may have a conventional cylindrical shank for clamping in a drill chuck. There are also drills with a hexagon, the size of standard bits - it is convenient to work with them when using a screwdriver. Typically, these drills are enough for a couple of dozen holes in a regular tile. It is more difficult with porcelain stoneware - they cannot overpower more than two or three holes. |
 | Special tungsten carbide drills with one-sided sharp-angled sharpening. Well "bite" into the tile, easily pass the outer, most dense layer. Similar drills from a good manufacturer will work a lot. |
 | Special core drills with diamond or corundum coating. They already belong to the category of professional tools, they are able to cope with both tiles and porcelain stoneware. They are a hollow tube, which facilitates the drilling process - there is a free outlet for waste. Most often produced for large diameter holes. |
 | Similar to those already mentioned - crown drills with tungsten carbide coating. They can be used not only for ceramic tiles, but also for natural materials - marble, granite, etc. Usually they are sold in sets for a number of diameters, that is, they are purchased more often by professionals who are constantly faced with such a technological operation. |
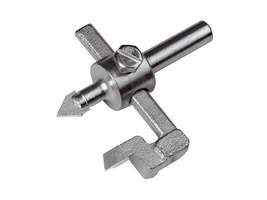 | For one-time work, if it is necessary to make holes of large diameter, it will be more profitable to purchase a special drill - a "ballerina". It is inexpensive, but allows you to completely cope with the task in the range of diameters from about 30 to 90 mm. The design is simple - a central drill (usually spear-shaped) and a carbide-tipped leg located parallel to it. the leg outreach can change - this is how the desired hole radius is set. |
 | Some models of tile cutters are equipped with a built-in manual "compass" - a device that allows you to cut a hole in the tile without resorting to other tools. The scheme is similar to the "ballerina", and the rotation is transmitted manually, using a handle. |
 | For the convenience of work, for precise drilling of even holes, special devices can be used - conductors. They are attached to the surface, usually with suction cups, and do not allow the drill to go to the side, which is especially important when starting drilling. |
 | When drilling some types of tiles, the tool quickly becomes hot, and the quality of work decreases. We have to resort to artificial cooling with water. To do this, use special superchargers that supply water under low pressure to the cutting site. |
After you have decided on the tool, you can proceed to practical work.
Prices for the popular line of electric drills
Electric drill
First, a few general tips:
- If possible (there are fragments of unnecessary tiles), then it makes sense to start with a little training. When everything starts to turn out, it will be possible to proceed to the execution of the desired task.
- It is very important to make accurate markup. You can, of course, apply the future drilling point with a pencil or marker directly to the surface of the tile. However, firstly, not every pencil will leave a trace on a tile (especially on a glazed one). Secondly, this mark is very easy to smear with an awkward movement. A very simple way seems to be optimal - the area of \u200b\u200bthe hole is sealed with a piece of ordinary masking tape, and after that you can already mark up - everything will be perfectly visible.

The positive "influence" of adhesive tape is not limited to this. Practice shows that it is much easier to start drilling this way - the sharply sharpened edge of the drill will not slip from the intended point. This is much better than trying to core the center. When working with a core (let it be a hardened dowel-nail or a sharp needle file), there is always a chance of damaging the surface of the tile or even allowing a chip (crack).
- Never use high speed when drilling tiles. Speed range - from 100 to 400 rpm. It is difficult to specify the exact value - it depends on the type of drill, and on its diameter, and on the thickness and material of manufacture of the tile itself. But in practice, the required frequency is very quickly found empirically.
- It is necessary to take it as a rule - if a drill is used that has an impact function, then it is imperative to check that this option is disabled before starting work.
- If a tile that has not yet been laid is being drilled, then it is necessary to prepare a comfortable workplace for work. The surface must be flat, stable and not vibrate. From below, material should be laid that will not become an obstacle to the drill - it can be wood, plywood, or even an unnecessary piece of drywall.

It is imperative to check that there are no solid fragments left on the desktop that will prevent the tile from firmly adhering to the surface.
- The cutting tool can get very hot during operation, and overheating of the drilling site often leads to cracks in the tile. This means that excessive efforts should not be applied - it is better to give a little more time to get the hole. It is fashionable to periodically cool the drill itself, lowering it, for example, into engine oil. Sometimes, when working on horizontal surfaces, they resort to “local cooling” - an annular shaft is fashioned from plasticine around the intended center of the hole, and the resulting “ container" is filled with water.
If the hole is drilled on, then you need to be extremely careful with the oil setting of the drill - drops of oil can get into the grout, and you will have to suffer a lot to get rid of such spots.
Sometimes you have to resort to the forced supply of coolant. Many professionals have a special tool for this purpose - usually a pressure vessel in which excess pressure is created by a hand pump, and a special jig that centers the drill and ensures the flow of fluid into the drilling area.

- The drill should always be perpendicular to the surface of the tile - if there are no special holding devices, then you will need to constantly monitor this yourself.

- Drilling ceramics (especially when making holes of large diameter) can be accompanied by the scattering of microscopic, but very sharp fragments. We should not forget about this - it is necessary take action to protect the hands and especially the eyes.
Now that the basic concepts have been outlined, we can proceed to consider the most typical ceramic tile drillings - small holes for dowels, and large diameter holes - for laying communications and installing plumbing, sockets or switches
Drilling small diameter holes
A typical situation is when you need to hang some piece of furniture, a mirror, a towel rack, a cabinet or a shelf, or another bathroom or kitchen accessory on the wall. In this case, driven plastic dowels are usually used, with a diameter of up to 12 mm. The situation is considered when work is carried out on an already tiled wall, the glue under which is completely frozen.
First of all, you need to determine the location of the hole. The fact is that it is desirable that it be located no closer than 15 mm from the edge of the tile. Otherwise, it is very likely that either the drill will slip into the seam between the tiles, or the edge from overheating or vibration during drilling will simply crack or even break off.

- After marking, it is necessary to insert a drill of the desired diameter into the drill chuck. We proceed from the dimensions of the dowels being prepared for installation - the hole in the tile should be 1 ÷ 2 mm wider than the diameter of the dowel plug.
- The drill is installed in the intended center (adhesive tape should not allow the tip to slip), and then drilling begins at low speeds. The most difficult thing is to go through the top layer of tiles - further drilling will go "more fun".
- As soon as the thickness of the tile has been passed, and the drill has reached the wall, it is removed - it makes no sense to blunt an expensive tool. An ordinary drill is taken for perforating walls, with a diameter exactly corresponding to the size of the dowel.
- The drill should pass freely through the hole in the tile, and then you can continue drilling in the wall itself to the required depth. Of course, this is done very carefully so that the edges of the hole in the tile are not damaged by accidental distortion, since a long drill may have a slight “beat”.
- Then it remains only to put the dowel into the hole made and carefully hammer it. Remember, an awkward movement can ruin all the work done - from an accidental blow to the surface, the tile can crack.
- After that, nothing should prevent screwing in a hook, self-tapping screw, or other fastener.
Drilling large diameter holes
Holes of large diameter (from 20 mm and above) are most often drilled in tiles even before laying it on the walls or. Careful marking is carried out with the definition of centers, and the tiles are laid on a workbench.
Here, the drilling technology may vary somewhat - it largely depends on the type of drill used.
1. If a “ballerina” is used, then for a start it is advisable to go through the tile in the center with a drill of small diameter (about 3 ÷ 4 mm) - this will greatly simplify the further process.
When installing the ballerina's movable leg, do not forget that in this way we set the radius, that is, half the diameter - do not make a mistake here. After setting the desired radius, the locking screw is firmly tightened, with force so that the movable leg does not move under the influence of vibration and centrifugal force.

The process of drilling tiles "ballerina"
When drilling, small revolutions are maintained, the position of the drill is perpendicular to the surface and not too large, but constant, uniform downward pressure. With excessive force, the drill can jam, and it will be extremely difficult to keep the tile on the surface of the workbench. The sharp cutting edge of the tool should do its job.
Care must be taken to maintain the same depth cutting along the entire length of the resulting circle.

Sometimes there is a need to somewhat “earn” the edges of the resulting hole
Sometimes the edges of the hole will require a little refinement - this can be done with pliers, and then sanded with sandpaper.
When drilling with a ballerina, extra care should be taken - it is an eccentric in itself, so the process may be accompanied by increased vibration. For greater safety, it is recommended to use a "ballerina" with a protective plastic casing.

Drill-“ballerina” with safety cover
2. If the master has diamond, corundum or tungsten carbide crown drills, the process is simplified.
Such drills can have their own shank for fixing in the drill chuck, or be a collapsible design with a replaceable crown for several diameters.

Please note - the photo shows crowns with a central pilot drill. Working with them should not be particularly difficult - the center is set at the intended point, and then drilling is performed with a little pressure at low speeds. The holes usually come out very regular, with smooth, unrefined edges.

However, you can find crowns that do not have a central drill - this is especially true for small diameter tools.
How to center them, how to correctly set the center of the drilled hole? For this, the already mentioned devices are used - conductors. Often they are even sold in one set with drills.

A convenient set - bits with a conductor that can be connected to forced cooling
The conductor is attached to the wall (usually on a suction cup) so that the hole of the desired diameter on it is located exactly above the intended center. After that, it will be simply impossible to make a mistake - drilling will take place exactly where necessary.

There are also "light versions" of such a device - templates that are applied or glued with tape to the wall in the right place, and then a hole is drilled. Convenience, of course, in this case is less, but the accuracy will be observed. By and large, such a template is necessary only until the moment when the crown does not deepen slightly into the surface of the tile. By the way, some craftsmen, saving money, cut out such patterns for themselves from a regular sheet of 10 mm plywood.
3. Finally, we can mention the most "folk" way of making holes of large diameter in ceramic tiles. They resort to it when there is no way to find a suitable drill.

The point is that a series of holes of small diameter are drilled along the intended circle. Then it will be necessary to carefully break out the central fragment, and then refine the resulting opening to the required round shape - with files, needle files or sandpaper.
You can’t call this method quick and easy, but nevertheless, it has the right to exist.
And at the end of the article - a visual lesson on how to drill tiles from a professional:
Video: several options for drilling ceramic tiles
After the main stages of repair in the bathroom or in the kitchen are behind, it remains to arrange the furniture, strengthen the hooks for towels, soap dishes, shelves and more. This is where the question arises: how to drill ceramic tiles? It is important that it does not split. Moreover, it is often necessary to make several holes in one tile. In order not to spoil the facing material, before starting work, study the following recommendations.
Depending on the hardness of the tile, drilling can be done using:
- perforator with drilling mode "without impact";
- electric drill;
- hand drill (for small holes);
- cordless or corded screwdriver.
How to drill a tile so that it does not split: basic rules
- You should try to avoid drilling holes near the edge of the tile. It is necessary to retreat at least 15 mm.
- If the tile is not yet glued, it is soaked in water for 30 minutes. This makes the material softer and reduces the risk of splitting.
- It is recommended to periodically moisten the tile fixed on the wall or on the floor when drilling with water. This prevents the formation of chips.
- If possible, the hole should be placed between the tiles. This makes drilling easier and safer.
Some Tile Drilling Tricks
How to drill tiles on the wall without fear of ruining it? This question is especially relevant if there are no tiles to replace. At the very beginning of drilling, difficulties already arise that must be taken into account:
- from a glossy surface, the drill slides to the side even with light pressure on the tool;
- the front side of the tile is usually harder and more durable;
- conventional drills for concrete and brick are not suitable for work;
- ceramics have poor bending strength, which increases the risk of splitting when pressed with a tool.
To reduce the risk, you should use some tricks.
- The glossy surface at the drilling point must be scratched with a punch or other sharp instrument. If the outer smooth layer of the tile is broken, the drill will not slip.
- Tape or masking tape is glued crosswise to the drilling site. This method will help to avoid the "fidgeting" of the instrument.
- If you need a large diameter hole (10 - 15 mm), you need to start working with a smaller diameter drill, and then change it to the appropriate one.
What kind of drill to drill tiles
The main requirement for a drill is that its cutting part must be harder than ceramics. The following drills meet this requirement.
- Diamond coated: they are relatively expensive and therefore not the best choice for a one-time job.
- Specialized drills for glass and tiles.
- With a winning tip: these drills are cheap, they are recommended to be purchased by all home craftsmen.
a - diamond-coated drill; b - drill with a victorious soldering; c - diamond-coated crown; g - drill for concrete and brick.
How to drill tiles: work technology
- Mark the location of the hole to be drilled with a marker.
- Stick a piece of masking tape on the marked place.
- Having lubricated the drill shank with grease or any other grease, insert it into the drill (perforator) chuck.
- In the "drilling without impact" mode, we start drilling at low speeds, gradually increasing the pressure on the tool. The drill cannot be "pumped" from side to side. It is advisable to use a special tripod.
- After the tile has been drilled, it is recommended to replace the drill and continue drilling in the “hammer” mode.
- After removing the drill, clean the hole by blowing (using a vacuum cleaner).
Important: so that the depth of the hole is not excessive, you need to use a limiter or put a mark on the drill with a bold marker.
Drilling large diameter holes
How to drill tiles in a bathroom or kitchen to install an outlet? It should be noted that this work is carried out after electrical work, which means that you will have to drill tiles that have not yet been glued. We perform the work in this sequence.
- The center of the hole should be marked with a marker after accurately determining its location: the installation location of the outlet should be projected onto the surface of the tile. It is important that it be closer to its center (especially if the tile is small).
- The center of the hole is sealed with a piece of masking tape.
- A diamond-coated crown is installed in a drill.
- We install the centering drill in the intended place and start drilling at low speeds (without impact), gradually increasing them.
Important: the tile must lie on a flat, stable surface (for example, on a chipboard board). The edge of the tile during drilling must be held to prevent the latter from turning.
What should I do if abrasive coated crowns are not available? You can replace it with a crown with carbide teeth. There is another way to get large holes: we mark the place where the hole is drilled, and then use the following technology.
- Along the marked circle, with a thin drill with a victorious soldering (or diamond coating), as many holes as possible (30-40 pieces) are drilled around the circumference.
- A string with an abrasive tungsten coating is inserted into one of the drilled holes and installed in the holders of the jigsaw.
- Make a cut along the circumference, connecting the holes.
- Disassemble the jigsaw, remove the string.
- The edges of the hole are processed (if necessary) with a file.
For ease of drilling, you can use a special template
We drill a tile with a ballerina
In the event that the location of communications is already known, technological holes can be drilled with a special device - a ballerina. Outwardly, it resembles a compass: a special point is used for installation in the center, and the distance from it to the cutter determines the diameter of the hole.
A feature of the ballerina is the ability to adjust to obtain the required hole diameter. But after drilling, the edges need to be “finished”. They will be smoother if the drill is fixed strictly perpendicular to the tile and the tool does not deviate during the drilling process.
With the help of a ballerina, holes are drilled for attaching a heated towel rail, for installing faucets and for internal sockets. The relatively low cost and versatility of the ballerina makes it convenient for domestic use.How to drill porcelain tiles
To drill this hard ceramic material, use:
- diamond crowns with galvanic coating (enough for about 5 holes);
- sintered diamond ring drills.
The latter are used for processing natural stones and concrete. Such drills serve for many years, but are relatively expensive.
The technology of drilling porcelain stoneware is as follows.
- The tile to be processed is laid on a flat, not too hard surface.
- The tile is drilled without impact at a low (medium) speed and exclusively from the front side in order to avoid the appearance of chips that spoil the appearance of the material.
- The drill is oriented strictly perpendicular to the tile.
- The cutting edge of the drill is cooled with water directly during operation. This can be done with a dampened sponge or a bottle with holes in the lid.
- The hole can be deepened by 2/3 of the thickness of the tile, after which the extra fragment is discarded.
- Chips on the back side do not need to be processed: after laying porcelain stoneware, they will not be noticeable.
In conclusion, about how to drill tiles (video with expert explanations).
At a certain stage in the renovation process in the bathroom, toilet or kitchen, it inevitably becomes necessary to drill technological holes in ceramic tiles.
Regardless of the cost of the tile, you don’t want to violate the beauty and evenness of the finish, but at the same time you need to hang a shelf or install an outlet.
The ideal option is to drill holes in the tile before installation, but this procedure is not always possible. Let's look at how to drill tiles glued to the wall, avoiding the risk of cracking and chipping.
Difficulties in working with ceramic tiles
 Tiles can crack when drilled
 A tile is one of the most durable finishing materials. It is resistant to aggressive environments, withstands operation in high humidity conditions, has a hard and often slippery surface. The tile successfully withstands constant physical pressure, while the material is quite fragile to fracture.
All these properties create certain difficulties in working with tiles. The glossy surface of the tile also creates additional problems: the drill can slip and scratch the surface of the material, and if voids in the adhesive solution were allowed during the laying of the tile, then such a tile will probably crack when drilling.
To make holes in the tiles, it is necessary to use nozzles made of a material that is more durable than ceramic tiles. You need to know the technology of working with tiles, follow some rules and use the right tool.
Tool
To drill a hole in a tiled wall, several tools are suitable:
- mechanical or hand drill;
- electric drill with the ability to adjust the number of revolutions;
- screwdriver with speed mode selection function.
 It is important that the drill has the ability to adjust the number of revolutions
 You can use a hammer drill, provided that the tool has a function to turn off the impact mode. Especially since it can come in handy for drilling a hole in a concrete or brick wall behind tiles.
Depending on the modification of the selected tool, an adapter may be required.
It is fundamentally important that the working tool has the ability to work at low speeds, because it is worth starting drilling from a low mode, increasing the speed to 200 rpm.
To make a couple of holes, a hand drill is ideal: you can control the pressure, and the tool will not vibrate.
Nozzles and drills
After you have decided on the tool, you need to choose a drill or nozzle. The choice depends on the size of the required hole and the number of drilling points. You should not use ordinary concrete drills: ruin the tile and the drill, and the result will be deplorable. 
Possible types of drills and nozzles for working with tiles
| Device type | Nozzle material | Recommendations for use |
|---|---|---|
| drill | will win | The most budget option. Suitable for working on a couple of holes. |
| crown | will win | Can be used for drilling holes with a maximum diameter of 150 mm. 1 nozzle is designed for a maximum of 20 drillings. |
| Spear-shaped (feather-shaped) drill | Wolfram carbide | Suitable for drilling a small number of holes. More expensive than victorious, but somewhat more effective. |
| drill | Diamond coating | Expensive tool. The hardness of the tip material exceeds the strength of the tile surface. It is convenient in work with any type of a tile. |
| crown | Diamond coating | Speeds up the work process. Drilling should be as accurate as possible, starting at low speeds. |
| ballerina | It consists of a central pulley, a pilot drill, a transverse rod and a carbide tooth cutter. | Ability to drill holes of various diameters. The cutter is set according to the size of the radius of the required hole. |
Drilling technology
Having prepared the necessary tools and nozzles, you can proceed directly to the drilling process.  The sequence of actions, regardless of the diameter of the hole, is the same:

If a power tool is used for drilling, then it is necessary to monitor the level of heating of the drill. If you smell smoke, stop work and let the drill cool down. The drill overheats from increased friction, which means that the load is too high, and the tool cannot cope. In this case, the efficiency of work is quite small. For more information on how to carefully make holes in the tile, see this video:
Before you start working on ceramic tiles, soberly assess your skills and abilities. Drilling a hole in a tile is not difficult, but if the walls are lined with expensive material, it may be best to hire a professional who is guaranteed not to ruin the finish and does a quality job.