DIY LED tree. LED trees - a new type of festive lighting How to make a light tree with your own hands
You are absolutely in vain to remove a luminous garland after the winter holidays. There are many interesting ways to decorate your home interior with it.
1. Lay a garland around the mirror office of some interesting shape.

2. Wrap paper lanterns with a garland around the branch and hang over the bed.
3. Create a drop down light by decorating the garland with large bulbs.

4. Create an original tree from a garland.


Draw a contour on the wall, drive in carnations around the perimeter and wrap a luminous garland around them. As easy as pie!
5. Attach photos to the glowing garland with clothespins.


6. Create your own canvas with a pattern of glowing lights.


7. Thread the garland into flower baskets or put it right there.

8. Fill wine bottles with lights to effectively illuminate them from the inside.

9. Create an angel wreath from paper napkins.

Using wire cutters, form a round holder for snowflakes and wrap it with an electric garland with small bulbs. Then glue decorative snowflakes onto the holder.


10. Or use napkins to make a wedding wreath.

Just make small holes in the napkins and thread the lights through them.
11. Cover disposable cardboard cups with fancy paper, this will help create interesting light shades with the help of an LED string.
12. Crochet a glowing rug with a rope and a garland.

13. Decorate your Christmas garland with tulle bows.

14. To create a festive mood, decorate the garland with old decorations.

15. Create colorful twine balls and decorate them with a glowing garland.
16. Make flaming snowflakes out of store-bought flower holders.

17. Tie rope with a garland for a nautical room decor.

18. Create a network of glowing garlands in the bedroom.

19. Hang air clouds with hanging luminous garland.


Pictured is a 2D version of the cloud.
20. You can also use egg cartons to create the effect of flowers.

21. Write a letter-by-letter message on pendant lights.
Make letters by punching holes in the paper.
22. Create a romantic headboard.

Knock down a simple wooden frame and add traverses. Drill small holes and insert sockets at the bottom of each niche. Paint the frame and screw it to the wall. Fill each niche with a garland and connect it to the outlets. Cut transparent panels from polycarbonate sheets and attach them to the frame with fasteners.
23. Use glitter wrapping paper to create giant glowing candies.
 Required materials and tools:
- disposable plastic container with lid;
- electric garland;
- scissors;
- wire or pipe cleaners;
- wire cutters;
- multi-colored wrapping paper;
- scotch.
Preparation method:
- Cut off a piece of wrapping paper measuring 45x45 cm from the roll.
- Wrap the garland with wrapping paper. Remember to leave both ends of the garland outside in order to connect it to the network and connect the element with other candies.
- Put the wrapped garland in a plastic container and close it. Wrap the container in wrapping paper and secure with tape.
- Use brushes or wire to shape the garland container into a candy shape.
- Decorate the entire garland in this way, leaving free space between the links (20-40 cm).
- Connect the finished bunch of candies to the network.

24. Insert flashlights into tiny canning jars.

Take special covers with a hole for the garland. Close each jar with a lid and insert a light bulb from the garland into it.


25. Insert an LED string into an old toy.
 You will need:
- old toy (made of cotton fabric);
- PVA glue;
- tassel;
- scissors;
- threads;
- light garland.


26. Write a light message.


27. Arrange the luminous garland in waves.

28. Cut out black cat shapes to make this cute garland.

29. Wrap the garland around the wire wreath.

Probably one of the easiest options for creating homemade wreaths.
30. Light up the canopy over the bed with a garland.

31. Cut the paper into strips to make the same fringed lanterns.

32. Use foil from a cupcake pan to decorate your garland.

This is a great idea for any party.
33. Make sparkling decorations with mirrors and lights.
 Take:
Take:
- brushed aluminum bar;
- hooks for hanging;
- garland with mirror pendants;
- electric garland.
Instruction:
- Attach the bar to the wall with two hooks.
- Hang a mirror garland on the rod. To enhance the visual effect, you can cut some of the threads with pendants so that the finished curtain is of different lengths.
- Behind the pendants, stretch a light garland and plug it into an outlet.

34. Use twigs to create a rustic chandelier.

This idea can easily be implemented with a luminous garland.
Take:- dry branches;
- hemp twine;
- stain (optional to darken the color of the wood);
- wood color paint;
- lampholders with a removable cardboard cover for painting;
- plastic ties;
- glue gun;
- electric cable in black and white;
- black electrical wire with plug;
- branch clamps "nuts".

35. Make a garland of geometric lanterns.

You can make your own lanterns from black wire or natural straw.
Take:You can add unusual lighting to your home or festively decorate a hall for a celebration with the help of LED trees and bushes. Such an unusual decoration will be a worthy replacement for the usual artificial flowers and other decorations. In addition, it will become an additional source of lighting and will look good both in the daytime and in the evening.
LED trees will delight everyone with their radiance and transform the space. These trees can be used both outdoors and indoors. Such trees are often used in landscape designs as decoration and additional lighting.
Of course, the LED tree, designed by professional designers and mass-produced in the factory, looks very different. And you can install it on the day of purchase. But after all, this time the main thing for us is to realize our creative impulse and make such a lamp with our own hands.
Making an LED Tree
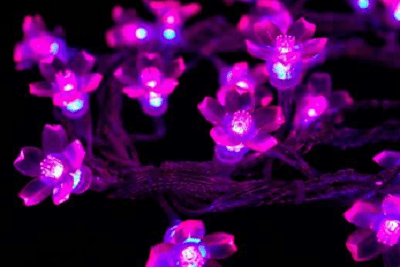 This article is intended for those who are thinking about testing themselves and devoting a few weeks to the mystery of scientific and technical creativity. Creating an LED sakura tree is a difficult process that involves working through every detail. The luminous crown of a tree is created from a set of LED petals, which are securely attached to the wires of the tree, and the frame is made of metal.
The whole process of creating a luminous tree with your own hands can be divided into stages:
- We draw a diagram. We make a sketch of the future tree on a piece of paper and designate its height, the number of branches, diodes.
- We make a stem. To create it, you can use a metal-plastic plumbing or other pipe. We measure and cut the required length.
- We create a framework. From the wire we cut the required number of branches of different sizes. We bend them with the letter "G" to make it more convenient to attach them to the trunk. We fasten small branches to large ones with black or brown electrical tape, and then tightly fasten the resulting branches to the trunk with adhesive material.
- Let's take LEDs. At this point, we will need a soldering iron to solder the resistors to the LED. Make sure that all diodes are soldered only to the long leg of the resistor, or only to the short leg of the resistor.
- Insulation. Coinciding in color with electrical tape, the insulating tube must have a diameter sufficient for the passage of the diode. This tube must be cut in such a way that the soldering point and the resistor itself are hidden from the audience, but at the same time leave a place for connecting to the power wire. Put the tubes on the diode bulbs and heat with a lighter so that the insulation braids the parts.
- Mounting LEDs. Tape each LED on small twigs to wires of the appropriate polarity and wrap with electrical tape. Wiring from small branches must be connected to the wiring of large ones (one wire per branch). As a result, the resulting bundle of wires should be divided into plus and minus. Ready bundles of wires can be immediately put along the trunk and soldered to the main wire.
- Branch decoration. You can decorate the branches with leaves and flowers cut out of plastic. All branches of the tree must be wrapped with electrical tape, bringing its appearance closer to natural.
- Installation. For the base for the LED tree, you can use a large pot or other container. After choosing the base and installing the tree, it can be connected to a power source.
The main advantage of such trees is the economical consumption of electricity. In addition, this design has a long service life and is quite easy to install, and small diode bulbs are not afraid of moisture and direct sunlight.
Glow in the dark bushes and trees are a new fashion trend in lighting technology. Such lamps not only fulfill their main function - they illuminate the streets at night, but also decorate the city, emphasizing the features of the general atmosphere and setting the necessary accents.
Luminous trees for the street - "useful" splendor
LED trees can be installed almost everywhere, but most often such unusual lamps flaunt at the entrance to a cafe, shopping center, restaurant, cinema, boutique, etc. So they become the very attractive highlight that lures visitors to these cultural places. Luminous shrubs and trees are very similar to real ones, they completely imitate the shape of their prototype plant. The metal branches of the LED miracle are covered with artificial bark, life-sized plastic or silicone leaves and flowers are attached to them. Small single-color or colored LEDs crown the whole structure. Such ornamental trees can be powered by the network, but more often they are equipped with an autonomous power supply, which somewhat increases the cost of the structure. You can, of course, just decorate an ordinary tree with an LED garland (for example, you can use solar-powered street garlands), but the effect will not be good enough. What are the benefits of using LED trees?


Advantages: Durability, these lighting fixtures last at least five years; Artificial trees do not require maintenance, which is so necessary for real ones; A small amount of electricity consumed, even to illuminate the largest giants, a maximum of 700 W of energy is required; Easy to install, here you can easily do without the help of specialists; The design is resistant to low temperatures, high humidity and dust; If one or more LEDs burn out, the rest of the lamp continues to burn, while the LEDs are easily replaced with new ones; Properly selected bushes and trees can favorably emphasize the design of the landscape, become part of the overall decor.

These exotic trees are usually made to be at least 2 meters tall and can be dyed any color. Simpler models are made in such a way that the trunk smoothly turns into sprawling branches and its structure and color are identical to the crown. In more expensive palms, the texture and color of the pillar is close to natural wood, and the leaves completely repeat the shape of the real ones. Among themselves, such lamps can also differ in the number of branches, the thickness of the trunk, the presence or absence of artificial nuts or fruits. Palm trees are most popular in sanatoriums, boarding houses, hotels and other recreational areas, because they successfully create an atmosphere of sultry fun and freshness of the sea breeze. The average price of luminous palm trees is 50-160 thousand rubles.
Willow
Weeping willow, glowing in the dark, gives lovers the opportunity to enjoy a date under a spreading tree at any time of the day, without taking their eyes off each other. This wonderful lantern is able to give a park or square an extraordinary romantic atmosphere, illuminating long alleys and cozy benches. Here, flexible long branches are attached to the massive trunk, dotted with small leaves-plafonds, glowing white or any other color of the rainbow. Prices for willows range from 16,000 to 50,000 rubles.

Fruit trees
In order for spring to bloom 24 hours a day and 365 days a year, it is enough to install street LED fruit trees in the garden, in the country house or just somewhere on the street. Peaches, apple trees, cherries, apricots, pears will delight others with their lush flowering shades of lilac, white or pink. On such trees, flowers and fruits are made in full size and look like inflorescences and fruits of real plants, like twin brothers. The cost of such lamps depends on the selected tree, its size and number of branches. This is 12-80 thousand rubles.

Glowing Maple
Maple Stars glowing in the dark can be found not only in the sky, but also on the LED maple, illuminating the square or park. Five-pointed silicone or plastic leaves of different sizes on mighty branches are a good solution for decorating a public place, and the paths can be seen and the view is pleasant. The price range of maples is 15-50 thousand rubles.

Sakura
This tree can be placed in a special category, since it is sakura that is especially popular. Such trees are especially beautiful, they are able to turn a simple everyday environment into a fairy-tale kingdom. The branches of these trees are covered with either special high-strength plastic or aluminum alloy, and are designed in such a way that they are very reminiscent of the real ones. The lantern is strewn with large silicone flowers and leaves, while their density and shape seem to be copied from real Japanese sakura. Although such trees are made in small sizes, they give no less light than tall palm trees and branchy willows. The color scheme of the cherry blossom LEDs is very soft and delicate in gold, white, pink and purple tones. Such oriental beauties cost from 5 to 80 thousand rubles. Fairly high prices for luminous trees are largely due to the price of LED street lighting lamps (more details here), which are used in their manufacture.

How to make a glowing tree for the street with your own hands

1) Draw a detailed diagram. Draw a sketch of the future tree on a sheet of paper on a scale, marking its height, the length of the branches, the number of luminous elements on each of them, and other necessary dimensions with numbers.
2) We measure the trunk. Cut off a part of the required height from a metal-plastic plumbing or any other pipe - this will be a tree trunk.
3) We make a frame. From the wire, cut the required number of medium branches and many smaller branches. Bend them into an "L" shape so they can be easily taped to the base. Using black or brown electrical tape, fasten small branches to medium ones, then tape the latter to the trunk with the same adhesive material.
4) Let's move on to the LEDs. Using a soldering iron, solder the resistors to the LED. Keep in mind that the latter have two legs - one is longer, the other is shorter. Make sure that all LEDs are soldered either only to the extended, or only to the shortened contacts of the resistor.
5) Isolate the LEDs. Take an insulating tube, the color of which matches the shade of the electrical tape, and the diameter is sufficient for the LED to easily fit inside it. Cut the tube, taking into account that the soldering point and the resistor itself should be hidden from the observer, but at the same time it is necessary to leave a place for connecting to the power wire. Put the tubes on the LED bulbs and lightly heat with a lighter so that the insulation completely wraps around the parts.
6) We fix the LEDs. Attach each of the LEDs on small branches to the wires, respectively, of polarity and wrap with insulating tape. Now connect the wiring from small branches to the wires of medium ones, one wire per branch. We connect the bundle of wires received again so that all the pluses are together, and the minuses, respectively, are connected exclusively to each other. The resulting bundles can be immediately soldered to the main wire and run along the trunk, or you can first thread the wires from each branch into holes pre-drilled in the pipe, connect them together and solder to the main wire so that it is subsequently located inside the pipe. Do not forget to observe the polarity, and then insulate all bare conductors.
7) We decorate the branches. With the help of leaves and flowers cut out of plastic, decorate the resulting tree, carefully wrap all the branches with electrical tape, bringing the appearance of the lamp tree as close as possible to the natural one.
8) Install. The basis for the resulting tree is a barrel, a large pot, a container hidden in the ground, etc. Install your luminous structure in it and connect it to a power source
Such a tree will delight you especially, like everything that is done with your own hands. You can make a lot of useful things for your site, such as DIY birdhouses.
A DIY LED tree is a great opportunity to create a fairy forest yourself, guided only by your own imagination and imagination. At the same time, it also saves money. But if you are not very “friends” with a soldering iron or do not have free time, the best way out is to purchase a ready-made representative of the LED flora.
With a few measurements and a simple plan, you can turn your yard into a magical winter wonderland by decorating your trees with garlands! In addition, you can decorate the house with a Christmas tree, perfectly complemented by bright light bulbs!
Here's what you'll learn in this helpful guide:
- How to decorate tree trunks and branches with garlands
- How to decorate evergreen trees
- How to highlight bushes and fences
- How to decorate a Christmas tree at home
- Outdoor decorations for trees
 How to do it: Trunks and branches
If you are interested in how to decorate trees with Christmas garlands, use the tips below.
Measure the girth of the tree trunk, as well as the girth and number of branches you want to decorate. Determine how far apart you need between the bulbs on the filament, as well as how far apart you plan to place each turn of the garland.
When decorating trunks and branches, the most popular distance between lamps is 15 cm with a distance between turns of 5-8 cm. To calculate the total length of the garland you need, divide the height by the desired distance between the turns and multiply the resulting value by the girth.
Example: we have a trunk 1.2 m long and 60 cm in girth, and we plan to wrap four thick branches, each of which is about a meter long and 15 cm in girth. To calculate how long we need a garland, we use the following equation:
1.2 m stem / 7.5 cm distance = 16 x 60 cm girth = 9.6 m garland
1 m branch / 7.5 cm distance = 13 x 15 cm girth = about 2 m garland per branch
The total length of the garland will be approximately 17-18 m per trunk and 4 branches.
When decorating trees, the available power should also be taken into account. If you use ordinary mini-garlands, you can connect up to 10 threads per 100 light bulbs in one line, which will be 420 watts. If you use professional options, you can connect up to 6 threads per 100 bulbs together. LED decorations allow you to connect up to 43 threads at the same time, or 210 watts, so there are no particular problems with them regarding the simultaneous connection of a huge number of light bulbs. The transition to economical LED garlands allows you to include the maximum number of decorations.
The best way to style branches
Trees decorated with purple and orange garlands for Halloween.
 Most trees should be decorated with garlands along the trunk and 1-1.2 m along the branches. It is not necessary to decorate each branch, it is better to choose those on which the light bulbs can be placed most evenly and neatly. It is best to decorate the trees together, rolling the garland into a neat ball. The following steps will help you decorate your tree as easily as possible:
- Start winding the first strand of the garland at the base of the tree. Make sure the plug is at ground level so that it can be plugged into the power cord.
- Starting from the connector, systematically wrap the tree with a string of light bulbs, connecting the plug of one garland into the connector of the next.
- Roll the garland tightly to prevent it from sliding down the trunk. If necessary, you can secure dangling wires or areas you're not sure about with plastic zip ties.
- Increase the vertical distance between the threads on the branches in places where the garland will be wound in the usual and reverse direction.
- Try to wind the garland threads closer to the tree to prevent them from being damaged by wind and bad weather.
DIY: Decorating Tree Trunks and Branches
The tutorial shown in the following images uses one LED garland for 70 bulbs, which is wrapped around a trunk 1.2 meters high and 30 cm in girth, as well as two branches. We recommend winding decorations more tightly and making more branches.
Step 1. Roll the garland into a ball to make it easier to wind, connect the plug to the power source at the base of the tree.

Step 2. Wind the thread up the barrel, leaving room for you to wind it in the opposite direction (if you like).

Step 3. Wrap the garlands in the usual and reverse direction along the length of the main branches

Step 4. Wind the garlands in the opposite direction along the trunk, securing the plug at the end

Dress up evergreen trees
 Evergreen trees keep their canopy intact throughout the winter and include spruces, pines, firs and other species. Using the recommended number of garlands, you will be able to determine how many strands of decorations you need, as well as what size lamps should be. Check the bulbs before installation, especially if you are going to decorate large trees, as it will be almost impossible to fix the breakage after you have installed all the garlands. You may also need tees and extensions to connect your decorations to a higher tree.
- Calculate how much power you need for the lights and make sure you don't exceed the limits
- For decoration of large evergreen trees and pines, C7 and C9 bulbs are most often used.
- Randomly twist the garlands so that the bulbs light up in different places, remaining invisible and without disturbing the appearance of the tree.
- By decorating the crowns of large trees, you will create bright lighting without the need to wind the garland to the very top of the tree.
- Use extension cords to reach high parts of the tree
Garlands for bushes and fences
 To quickly and neatly decorate bushes and fences, use mesh garlands. If you prefer to decorate bushes and fences with ordinary tree garlands, follow the basic rules:
- Hang them randomly
- When designing long fences, place the power source in the center of the fence, and stretch the filaments of the bulbs to the left and right
- Attach garland strings to the outside of the bushes, covering the top and ¾ of the length of the bush from top to bottom.
- Leave about 30 cm of ground clearance so that the jewelry does not end up in water or snow
How to decorate a Christmas tree with garlands
 When decorating a Christmas tree that will stand in the house, the main effect to be achieved is to keep the wires as invisible as possible. If you wrap a garland of a branch, instead of just hanging it outside, you get a beautiful and evenly diffused backlight.
- If you decorate Christmas trees with a garland with mini-bulbs with a distance of 20 cm, the wires can be wound more tightly around the branches.
- Start at the base, leaving the end long enough for the plug to reach the outlet.
- Wind the cord in both directions along the length of the branch, moving along the branches as close to the trunk as possible, and not leading the cord to the outside of the branches
- When the garland reaches the top of the tree, start winding it in the opposite direction, leaving a slot at the top to install a decorative tip.
Now you know how to decorate both street trees and a home Christmas tree with New Year's garlands. You can complement the decoration with light figures from duralight.

What are glowing trees for? Luminous suit with your own hands. The LED tree "Sakura" consists of a frame and an LED garland with nozzles in the form of leaves and flowers. There are several ways to make a glowing tree with your own hands, just like the trees themselves look different. Several ways to make beautiful LED trees with your own hands at home at minimal cost.
In this article, we will look at the process of making LED trees at home. There are 2 main ways to make LED trees. A tree made in this way cannot be made large enough. The standard length of the garland does not allow placing LEDs on all the "branches" of the tree. Therefore, we recommend using this method for making miniature trees. Next, we make a tree trunk.

After that, we make the main branches, for this we take the wire and cut it 50 cm long. of which 45 cm is the main part of the branch, and 5 cm will be on the bend to fix the branch on the tree trunk. We bend 5 cm on each main branch and attach it to the tree trunk, we do it evenly over the entire diameter of the trunk.
After that, you will get the number of pluses and minuses equal to the number of tree branches. It remains only to wrap each branch with black electrical tape, decorate with decorative flowers and connect the tree to a power source. How to put a do-it-yourself rear-view parking camera on a VAZ 2112. Step-by-step video instruction. Head units for Android and Windows.
Video tutorial on how to install a navigator on a radio (head unit) with a Windows operating system with your own hands. Video instruction for connecting DIP LEDs to a circuit with your own hands. Video lesson. How to connect flexible LED neon quickly and easily with your own hands. In this issue we will tell you why it is needed, what it consists of and how to use it.
LED bushes and trees
Flexible neon in outdoor advertising. A step-by-step video tutorial on how to easily make an incredibly beautiful luminous neon costume with your own hands. Step-by-step video tutorial on how to make beautiful retro flexible neon letters with your own hands. Today we will learn how to connect candles without batteries from a 12 volt power supply with our own hands.

We thought a lot about how great it would be to find such a garland, and in the end, she found us herself. Welcome! A small video tutorial on how to make beautiful Christmas wreaths with battery-powered garlands with your own hands. We offer to start the new year with an unusual, original handmade Christmas tree.
The desire to decorate your house or apartment is familiar to all happy owners of real estate, as well as to those who have to live in a rented room. Glowing trees made of polymeric materials and equipped with a large number of small LED bulbs can be attributed to such useful decorations.

Decorative luminous tree on LEDs
Depending on the purpose of the lamp and the style of the room or landscape, there are trees completely without decor. Street lamps are mounted on the site or mounted on living growing trees. Some of these fixtures can be purchased in a completely finished form, others need to be assembled and connected.
LED trees - a new type of festive lighting
Of course, in order to get a complete picture, illustrating the equipment of an interior or landscape with a bright LED tree, one cannot do without indicating the prices for such devices.

Glowing trees for the street - a fairy tale with your own hands
LED strip for decorating growing trees (5m) - from 5 to 18 euros (depending on the frequency of placing lamps on the strip). Solder your own electronic design using separate LED bulbs, wires and insulation. Here, creativity is manifested in the choice of colors for the future tree and in the unique combination of ready-made elements.

One of the main advantages of LED garlands and lamps is their resistance to mechanical damage and exposure to aggressive weather factors. Bright LED trees were created for such connoisseurs of beauty in the environment and setting.
Imitating the shape of a tree or a bush, a frame made of a special light-alloy material, which is enclosed in a plastic shell. Decorative elements, which are LED garlands with silicone nozzles stylized as leaves and flowers.

Glowing trees: price and equipment
Twisted with a large number of sparkling light bulbs, LED trees are very similar to real ones. The alley of luminous trees seems to be calling to a fairy tale, causing delight, surprise and anticipation of a miracle even among adults. If you install a luminous tree in your office or store, it will surely increase the accommodating of customers and the willingness of buyers to make a purchase. LED trees are very popular as a New Year's decoration for an apartment, house or garden. They give a great mood to everyone who looks at them.
Creating an LED tree at home
Decorative luminous trees are not afraid of frost or heat, they are not afraid of rain, dew, hoarfrost. Even if one or more elements fail, the structure will not stop shining. It is better to decorate a large area with a tree a few meters high, of impressive size, which includes a huge number of LED bulbs.
Brightness and power of LEDs. The method of fixing the tree at the installation site. A variety of colors and crown shapes of LED trees creates a lot of opportunities to draw attention to the building, territory, interior. If you want to decorate your office for a holiday quickly and in an original way, decorate a garden or attract visitors to a store or entertainment center, there is no better option than LED trees.
With even minimal knowledge in the field of electronics, you can quickly make a luminous tree with your own hands. With a simple method of making an LED tree with your own hands, they use a ready-made garland, but making a tree by connecting the LEDs into a circuit on your own is somewhat more difficult.