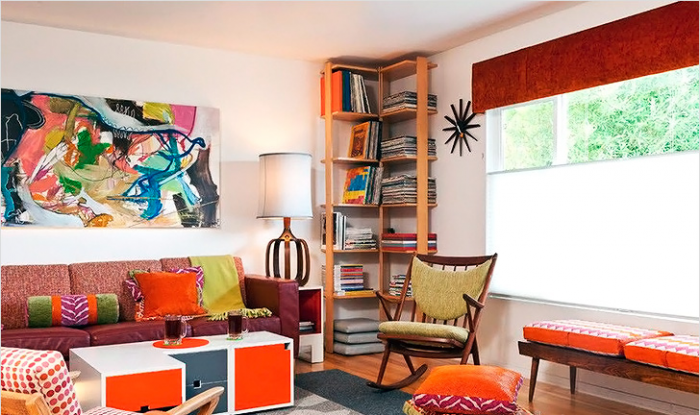
Do-it-yourself corner shelves on the wall. Corner shelf on the wall - how to do it right. Corner shelf - how to make it yourself
In order to rationally use the space in small rooms, there is one pretty good option - a wall-mounted corner shelf. The possibilities of its application are very wide. For example, such shelves are often used for icons, books, various awards, and so on. Don't forget about the kitchen. Here such a shelf can be installed under a small TV. In addition, in the bathroom or bath, it allows you to store bath accessories. This option is advantageous in the first place by the opportunity to save space. Corner shelves for shoes are also quite popular.
As you can see, the use of such furniture can be found in any room. The easiest way, of course, is to buy a corner shelf in a store, especially since there will be no problems with the choice. However, there is an alternative option - to make it yourself, from plywood, fiberboard, or even from improvised materials. Such work does not require any special knowledge and skills. The main thing is just to want and, of course, to clearly understand what exactly you need.
Corner shelf - how to make it yourself
 So, let's take a closer look at what are the possible options here. First of all, we need to decide on the material. Corner shelves can be made from:
- plywood;
- drywall;
- window sill profiles;
- glass.
In the latter case, trimming of the material is best done in the workshop. After all, it is very difficult to do it yourself without the lack of appropriate skills. You will also need to purchase special holders. It is preliminary recommended to draw a drawing of the shelf, according to which you will then begin to carry out the installation. The assembly itself will not cause much trouble, because the material is already cut. Holders are attached to the wall with self-tapping screws. Don't forget that the shelf needs to be level, so you'll need a level.
Quite often, plywood, MDF or chipboard is used to make a corner shelf at home. You can fix them in different ways - landing on a longitudinal or fixed in the grooves of the transverse base. The first option is simpler, since there is no need to drill walls.
First of all, we draw a drawing with exact dimensions. Next, we need to cut the shelf itself from the selected material. To do this, draw a circle on its surface and divide it into 4 equal parts. Here you will need a compass, a ruler and a simple  pencil. Next, cut out each of these 4 parts with a hacksaw or jigsaw.
After that, you need to take the base rail and mark it. In particular, you must specify the size of the groove, as well as the location of the shelves. The most optimal cutting depth is approximately to the middle of the rail, no more. Next, we outline the area that we will cut out on the shelf itself - this is done at the base corner. It should be noted that its area should correspond to the width and depth of the groove we made earlier in the rail. Sawing both in the first and in the second case, it is better to do it with a saw with fine teeth. We check how the shelf fits into the grooves of the base, and if necessary, eliminate the flaws.
Next, we need to fix the rail on the wall. This is done with glue. After that, it is better to secure the rail with tape and wait about an hour. We need the glue to hold securely. During this time, you can do the grinding of the shelf itself. Here we need to make a small digression. If you are using untreated wood, then immediately before installation, all parts of the shelf must be coated with paint or varnish and wait until they  dry. After that, you can already start installation. In this design, the shelf is simply inserted into the rail. No additional fixing is needed here.
If you chose the option with a transverse base, then the sequence of actions when assembling the shelf will be somewhat different. In particular, first of all it will be necessary to make grooves, and only after that you should start working on the main element. So, we take 2 bars, the length of which corresponds to the size of the sides of the future shelf. They need to cut grooves of the width we need. The easiest way to do this is with a circular saw.
Next, we need to fix these elements on the wall using self-tapping screws. After that, we measure the angle and transfer the obtained values directly to the material. On its surface, we need to accurately draw the outline of the future shelf and cut out each element. The edges are decorated with a special tape. In fact, we have already reached the finish line. It remains only to insert the finished shelf into the grooves.
A fairly popular material for the manufacture of corner shelves is a PVC window sill profile. You should immediately warn that in this case it is necessary that the angle be really right, that is, exactly 90 degrees. The thing is that it is quite difficult to adjust this material to uneven walls. If the angle is straight, then you will not have any problems with the manufacture of the corner shelf from the window sill profile.
We mark the prepared material and cut it out along the drawn contours. In this case, it is best to use a hacksaw. Next, we strengthen the rigidity of the edge of the workpiece by gluing a wooden lath matched to the size with pre-drilled holes for self-tapping screws. Here you can use any adhesive suitable for connecting these two materials. By the way, you can fix the shelf on the wall both with the help of self-tapping screws and on coal mounts. Which option to choose - decide for yourself.
We still have one more unsolved problem. After all, one end of the corner shelf remains open and spoils the whole appearance. The problem is solved simply - with the help of a cable channel of the appropriate thickness, mounted on glue. It should also be noted that our shelf will be white. Of course, this is a kind of universal option. However, many people want some other color schemes. This is where a special self-adhesive film will help us. There are any colors on sale, so you can easily fit the shelf into the interior of the room.
The corners in the room almost always remain unoccupied, but meanwhile there is enough space there to accommodate a small shelf, shelving or suspension. From a design point of view, the corner arrangement offers some advantage, because such a wall articulation expands the possibilities of using various configurations of structures and the fasteners used. If you compare ordinary and corner shelves, you can immediately notice how much more diverse and attractive the latter look. Let's try to decorate your house with such a corner shelf.
The most popular materials for making shelves are wood, furniture board, MDF, laminated chipboard, etc. Sometimes shelves are made from improvised means - laminate, plastic or even drywall. We will not change traditions and take furniture plates as raw materials. To work, you will need a jigsaw, a drill, various fasteners, a tape measure and a pencil. First you need to make a sketch of the future shelf for clarity of work processes.

The shelf will be about 70 cm high with three sections. It will be fastened through the vertical elements with the help of dowel-nails, and the parts will be connected to each other by confirmations.

The first thing to do is mark all the details on the plate. Usually this is done with a pencil, but if the plate has a dark surface, then the pencil mark will not be noticeable, in which case you can use a knife. It is necessary with his blade, without pressing hard, to draw along the line of the cut, after which a thin, white, noticeable line will appear, along which it will be easy to cut.

To cut out the elements of the shelf, you can use an electric jigsaw. The saw blade should be fine-toothed and designed for woodworking. The sawing speed regulator on the jigsaw must be set to the minimum value, and the mode selection knob must be set to "0". To facilitate the assembly of the shelf, it is necessary to number the parts on the drawing, and then put down the corresponding values on the structural elements themselves.

After all the details are cut out, you need to drill holes in them for connecting with confirmations. It's much easier to do it consistently. First you need to make holes in the shelf, and then drill through these holes corresponding to them in the supporting element. If there is no special drill for confirmations, then it is necessary to use 3 ordinary drills with different diameters - for the screw part, thickening and head of the euro screw.


Immediately at this stage, you can make holes for attaching the shelf to the wall. It will be fastened with dowel-nails 6x80 mm through the supporting elements. All holes must be countersunk to ensure that the nail head is flush with the surface.

When all the details are cut out, you can start decorating the edges. First, we clean all the edges of dust and sawdust formed during sawing. Then we apply an edge tape to the ends and, using a heated iron (it is advisable to take an old, unused one), glue it to open surfaces.
This trimming tape is produced in a standard width of 1.8 mm, and the thickness of the furniture plate is only 1.5 cm, so part of the tape remains redundant and must be removed. We cut off the excess part of the edge with a regular wallpaper knife.


We clean the resulting edge with fine-grained sandpaper. You can close the ends by any other available method, for example, use a decorative cord, braid, special paper or cardboard.
Now you need to assemble the shelf. The assembly is carried out in accordance with the numbered scheme. We use a hex wrench to tighten the confirmations.
We try on the assembled structure in the place intended for it and mark the attachment points on the wall. For drilling in concrete or stone walls, we use a drill with a pobedite tip. On the drill tip, you can pre-mark the drilling depth required for the prepared dowel. So that the dust generated during drilling does not scatter, you can stick a paper "pocket" on the wall under the place of work.


After drilling is completed, you need to insert the dowels into the holes and, through the corresponding elements of the shelf, fix it with screw nails, drowning the hats. This can be done with a hammer or a regular Phillips screwdriver.


You can decorate the open caps of the fasteners with the help of special plastic plugs of a suitable color.
Perhaps such a shelf will turn out to be too simple in appearance, but we made it from materials that often gather dust in our pantry or live out their lives in the country. The design can be changed at your discretion, for example, to make the supporting elements longer and then the shelves can be used as bookshelves. Or choose a different shape of the end pieces, in which case the shelf will acquire additional decorative effect. In any case, a hand-made item will serve as an example of the individual skill of the owners of the house.

A photo
Corner shelves save space, so this design solution is a godsend for small areas. A similar piece of furniture can be made independently, because this does not require special knowledge, expensive equipment and a lot of time.
Corner shelf drawing.
The choice of material and tools for the shelf
Do-it-yourself corner shelf can be made from various materials. Consumers very often make a choice in favor of chipboard, MDF or plywood. Another option may be window profiles, as well as glass.
The choice of tools depends on the material from which you need to create a shelf with your own hands.
So, for wooden models it is worth having:
- electric jigsaw;
- hacksaw;
- a saw with fine teeth;
- drill;
- glue;
- a rail for creating compasses and compasses with a large radius;
- wooden lath for the base of the structure.

Diagram of a wooden corner wall shelf.
If the corner shelf will be made from a window sill profile, then you should purchase the following tools:
- drill;
- hacksaw;
- level;
- self-tapping screws;
- rail to reinforce the rigidity of the edge;
- glue "Moment";
- cable channels.
The least number of tools is required when you need to make a glass corner shelf:
- a set of holders for glass shelves (there are already self-tapping screws and dowels here);
- level;
- drill.
When all the materials and tools for the work are collected, you can begin to create shelves.
How to make a corner shelf
Creating a shelf and its installation is a fairly quick process. Therefore, in a few hours (or less), you can easily transform the room, which can not be compared with the time spent when you need to create a closet. You can make the shelves correctly with the help of step-by-step instructions.
glass shelf

Diagram of a corner glass shelf.
To make such a shelf, you need to follow these steps:
- A shelf template is created from cardboard.
- Cutting and processing glass can be done both at home and in a special workshop. But it is the pros who will do all the work at a high level, and the consumer will have the opportunity to choose the most suitable material.
- Holders are being purchased.
- Next, you need to put the shelf on one of the holders, attach it to the wall and use a pencil to outline the upper limit of its attachment.
- The first holder is attached, for this, the self-tapping screws and dowels included in the kit are used.
- The glass is inserted into the first holder, fixed and put on the second. Use a level to level the shelf. Mark the drilling locations with a pencil.
- The second holder is mounted.
Here is a simple way to make glass shelves at home.
Shelf from window sill profile
The shelf can be given any shape, but you should always remember about the right angle of the base, which will be attached to the wall.

Corner shelf from window sill profile.
In order to build a shelf, follow the instructions:
- The material is marked.
- Using a hacksaw, a shelf is cut.
- Further, with the help of a special rail, which coincides with the profile in thickness and length, the frame is reinforced. To do this, put this material on the glue "Moment" and fix it to the edge of the profile.
- Holes are drilled in the already glued rail.
- Self-tapping screws are driven into the wall under the holes already drilled in the shelf. During operation, a level is used.
- The open ends of the structure are hidden behind cable channels selected by thickness. They are stuck on with glue.
- The shelf is fixed on self-tapping screws.
You can change the color of this design using various adhesive films, matched to the interior.
Thus, an ordinary profile will easily turn into marble.
Chipboard shelf (plywood, MDF)
The fastening of such shelves is done in several ways. The first consists in fitting onto a longitudinal base rail, the second in fixing it in the grooves of the transverse base.

Scheme for the manufacture of shelves from chipboard.
The first method is good because there is no need to drill either tiles or walls:
- A shelf is cut out of chipboard. To do this, using a compass, you need to draw a circle, divide it into 4 parts and cut each with a jigsaw or a hacksaw.
- On the base rail, the locations of the shelves and the size of the required groove are marked. The blanks are applied to the rail, and their width is fixed.
- With a fine-toothed saw, cuts are made to the depth of the middle of the rail, and an unnecessary element is removed with a knife.
- On the shelf at the base corner, a section is planned that needs to be cut out. In terms of area, it is equal to the depth and width of the groove in the rail.
- With a fine-toothed saw, according to the marked markings, you need to make a cut and remove an unnecessary element.
- Next, the shelves are polished, and entry into the grooves is checked.
- Using glue, the rail must be fixed to the wall, secured with tape and left for at least an hour.
- Shelves are inserted into the already fixed rail without any other fixation.
In such a simple way, you can make shelving for the living room, bathroom, kitchen, etc.
To make a shelf in the second way, you must first make grooves, and only then take on the main element:
- In two bars, along the length equal to the size of the sides of the shelf, with the help of a circular saw, grooves of the required width are formed.
- These elements are attached to the wall using self-tapping screws or dowels. It is necessary to ensure that their hats are completely recessed.
- The angle is carefully measured. The measurements are transferred to the material, where the contour of the shelf is drawn.
- Using a jigsaw or file, an element is cut out.
- A special tape is used to decorate the edges.
- When the shelf is completely ready, it is inserted into the grooves.
Just a few hours, and a beautiful decor element is already in place!
Creating a shelf with his own hands, the master takes into account everything: his ideas, the interior, the features of the corner, where this item will be located.


In any room there is a free corner in which you can place a shelf. It will not only become a design element, but also create additional space for storing books, toys, small kitchen utensils, etc.
A suitable option can be selected in the store or ordered. But it’s better not to spend money, since it’s not difficult to make corner shelves with your own hands no worse than factory ones.

Shelf materials
Before starting work, you should decide on the material in accordance with the conditions and interior of the room. Corner shelves are made from the following materials:
- Solid wood or boards. Scraps remaining after repair will do.
- Chipboard and MDF boards. Suitable-sized pieces can be purchased inexpensively on the market.
- Multilayer plywood.
- Glass at least 5 mm thick.
- Plastic.
- window sill profile.
- Metal.


The first 3 options are the most popular, so every home master will have the right tool to work with them.

However, there will be no difficulty with others if special operations (for example, curly cutting of glass) are ordered in the workshop.

Living room shelves
Wall corner shelves for this room are usually made of wood or its substitutes (plywood, chipboard, MDF). A circle of the required size is drawn on the material with a compass, then it is divided into 4 equal parts, which are cut with a hacksaw.

To get smooth edges, it is better to use a jigsaw. All 4 sectors can be used to create a multi-tiered shelf. You can just saw off the right size corner from the material, but then the leading edge will not be semicircular.

For installation in a corner, it is necessary to make rails with grooves. They are fixed on the wall with glue, dowels or screws. Then a shelf is inserted into the grooves without additional fastening. Its edges are closed with a decorative tape.

The rectangular shelf looks original in the form of a snake, the tiers of which are alternately mounted on adjacent walls.


kitchen shelves
They are allowed to be made from various materials, but wood or fiberboard is traditionally chosen. Unlike shelves for the living room, these have an elongated rectangular shape with curly sidewalls, located at an angle on adjacent walls. You can come up with the shape of the sidewalls yourself or look on the Internet.

Do-it-yourself corner shelf for the kitchen from fiberboard or MDF is made in the following sequence:
- After measuring the free space, a drawing is drawn up.
- The sidewalls are sawn with an electric jigsaw. The places of chips are cleaned with sandpaper. Sections are pasted over with a decorative tape.
- Then cut horizontal rectangular crossbars that will connect the sidewalls. The outer sections are rounded and pasted over with tape.
- Before assembly, in the sidewalls located closer to the corner, through cuts are made according to the size of the upper crossbars.
- On the sidewalls, at the attachment points with the crossbars, you need to drill a pair of holes for furniture screws.
- Prepared parts are fastened with screws. Lastly, the upper crossbar is inserted into the slot, fixing it with screws on the outer sidewall.
- The finished bunk shelf is mounted on the wall using hangers purchased in a store or on the market.


Iconostasis shelf
According to tradition, such a single-tier shelf is placed in the eastern corner of the house. For its manufacture, an array of wood or a wide board is selected.

If the corner shelf for icons is not decorated with carvings, then the process of its manufacture does not differ from the shelf for the living room. But unlike it, a cornice in the form of a narrow bar should be installed on the front. It is often made curly.

The cornice is attached to the shelf with dowels (wooden pins). Under them, holes are drilled in a triangle with a depth of 2-3 cm. After installation, they should protrude outward by 1 cm. Having drilled holes on the eaves, it is fixed on the dowels with glue.

Bathroom corner shelf
The bathroom is a room with high humidity, so the corner shelf made of wood will not last long. But glass and plastic will be just right.

When measuring, keep in mind that the angle may not be straight. Therefore, you should make a template out of cardboard and cut out a shelf on it.

In the case of using glass, it is better to contact the workshop, where any shape will be quickly cut out of it. For fixing the shelf, special holders are ideal, which are sold complete with dowels and self-tapping screws. They are mounted on the walls and glass is inserted.


Metal book shelf
An original corner shelf from pieces of water pipes can be made with minimal locksmith skills. In shape, it looks like a snake, the bends of which alternately enter adjacent walls.

Fragments of pipes of the required length are connected with corner fittings and welded. In the absence of welding, fastening is carried out using screws screwed into the joints of fittings with pipes. The finished structure is painted and fastened at the lower and upper points to the dowels driven into the wall.

In the manufacture of drywall corner shelves and a profile for a window sill, they must be reinforced with wooden slats, metal profiles, and corners, depending on the expected load. Self-adhesive film is used for finishing.

A frame is required for mounting. You can come up with design and design options yourself. For inspiration, it is useful to look at photos of do-it-yourself corner shelves on the Internet.

Photo of a beautiful do-it-yourself corner shelf


The problem of free space is always relevant, especially for small apartments. What if you want to place your favorite books or children's crafts? Help out the corner shelves.
Almost always in the apartment there is an unoccupied free corner in which a rack or a small shelf will be perfectly located. This will free up some space and also add a new decorative element.
Materials for the manufacture of shelves
Today it is difficult to find a house or apartment in which there are no shelves. They are convenient to lay out personal hygiene items in the bathroom, arrange books, flowers, kitchen utensils or small crafts and knick-knacks. The angular position provides great opportunities for design imagination when creating various configurations of shelves.
Corner shelves due to the design are able to save the space of the apartment and at the same time aesthetically decorate the corners.
Today it is possible to choose a corner shelf on the wall for any room. Specialized stores are ready to offer a wide range of shapes and designs from various materials. But the cost of such shelves is not always suitable for each of the potential buyers.
Traditionally and classically, the wall made of wood simply looks. It can be done in a minimalist style, but still remain attractive.