Structural plastering techniques. Decorative plaster for interior wall decoration: relief design technology. Structural mixture application
Are you tired of the standard commonly used coatings for finishing various surfaces? Do you want your home to look trendy, stylish and modern? Then structural plaster will come to your aid.
This coating can imitate natural stone (torn, marble, sandstone), brickwork, mahogany, expensive fabric. We will tell you about the types of structural plaster, how to prepare it and apply it with your own hands in this article.


Types of coatings with a pronounced relief
Structural plaster is a heterogeneous composition of a granular nature, containing various fillers (quartz sand, mica, stone chips, wood fibers). It is used to give the surface a decorative look.

Thanks to various technologies for applying a structural coating, it harmoniously looks in the interior of any room.
A plaster mass is made on the basis of a cement-lime composition, synthetic components, silicates. In appearance, the structural coating is a white plastic mass. The mixture is applied to the walls with a layer of a certain thickness, and then processed with special tools until the required pattern is formed.

Examples of wall relief - the technology of applying the solution is different
Structural plaster for facades - moisture and weather-resistant coating, resistant to abrasion, designed specifically for decorating the outer walls of a building, plinth. It is made on the basis of dispersion, silicone resins, silicates, or mineral additives. The coating can be applied to brick, aerated concrete, concrete, plaster with a brush, spatula, roller. Its varieties are mineral plaster, "bark beetle", "crocodile", "lamb".
On a note: high-quality structural plaster for outdoor use retains its decorative and protective properties for up to 10 years.
Decorative structural plaster for building decoration from the outside does not fade, and the color of the coating can be changed over time
Structural plaster for interior work - a thin-layer coating that is applied to brick, concrete, wooden walls, drywall. It allows the walls to "breathe", can be cleaned and washed, and is unpretentious in maintenance.
Modern decorative mixtures are able to imitate almost any coating, ranging from tree bark to snake skin, silk cloth, torn stone, marble (Venetian). More about how silk plaster is applied - instructions:
Making a solution with your own hands
A mixture that can be used to decorate walls, a ceiling, is sold ready-made, or you can cook it yourself. How is structural plaster made?
At home, you yourself can prepare a mixture for textured finishes from simple building materials. For this you need:
- 6 kg of dry putty;
- 200 g of glue;
- 2 liters of water.
First, putty and water are mixed. Then glue is poured into the solution, mixed and applied to the surface. A pronounced surface texture will be obtained due to the addition of a certain fraction of a filler to the mixture. To imitate sandstone, a grain of 0.3 mm is used, the pattern of wild stone is recreated using a filler with a fraction of 1.5 mm. For bark beetle plaster, grains of 2 mm are used, and to create the effect of tree bark - 3 mm.
Important: the ratio of filler to binder (gypsum, glue) - 3:1.
An easy way to create a relief using a structural decorative plaster roller
Ways to create a decorative relief
The method of applying structural plaster depends on its type and the desired effect. To work, you will need the following devices:
- a tank for diluting the mixture;
- trowel, trowel, scraper;
- spatulas of different types;
- mixer.
Instructions on how to apply "bark beetle", do-it-yourself structural plaster - video:
Spray method
Plastering is carried out with a broom and a stick. In one hand they hold a broom, and in the other - a stick. The tip of the broom is dipped into the solution, and then it is hit on the stick so that the spray hits the wall. Spraying is performed in 2 layers.

An example of how to make a “fur coat” structure with an ordinary broom
Creating a relief with a trowel
First, a continuous base layer of plaster is applied over the entire surface. When it dries, they begin to apply the second layer, immediately shaping the patterns, drawing the trowel in different directions. An example of how to apply structural plaster in the video:
Creating structure with a brush
The freshly applied layer of plaster is carried out with a metal brush, forming thin chaotic lines. When the coating dries, small particles are removed from it with a soft brush.
On a note: this structure is otherwise called "bouffant".
A simple technique for creating a "bouffant" relief - do-it-yourself structural plaster, photo
Stamping with a roller
Another way to get an interesting structure is to use a relief roller. It can be sold with a ready-made applied pattern, or you can create the texture yourself.
Idea: if you wrap the roller with thick threads, when applied, the plaster will imitate grass stalks.Technology of structural plaster relief "grass" using a roller:
There are many ways to apply relief. Would you like to learn more about how structural plaster is applied? Video tutorials will help you with this:
All types of decorative are divided into 2 main groups: materials that create a smooth surface - for example, and embossed coatings. It is in the latter case that some confusion is created.
Features and concept
These include all materials that have a heterogeneous composition and create some kind of relief on the surface. Moreover, which is already somewhat arbitrary, this category includes both plasters that form a relief due to the filler, and materials where the relief occurs when exposed to special tools.
In practice, we are talking about relief plasters with different fractions.
- Fine textured- include filler granules of the minimum size - from 0 to 0.5 mm. Such a thin filler itself forms a structure known as “sand”, for example, and differs from a real smooth one only in the dullness of the coating.
- Small textured- with a grain size of up to 1.5 mm create a granular surface. Here the relief is not only palpable, but visible.
- Medium and large- with a grain size of up to 5 mm, are pronounced relief materials, where a peculiar pattern is obtained due to the movement of filler particles.
Fillers
It is clear that for different materials it is necessary to use different fillers. And if synthetic granules are most often used for the texture above a fine filler, then delicate materials are used as a fine fraction:
- mica - provides not so much a microrelief as a slight shimmer;
- the finest grinding - this is the basis of the famous "sands";
- cellulose fibers - with a special application method, they allow you to get the effect of a "canvas";
- - natural or artificial origin, give the plaster layer the shine and smoothness of real silk wallpaper;
- shell fragments - create a very characteristic interesting coating.
Most often used as a material to create a relief surface, patterns or even images. The fact is that such compositions retain their plasticity much longer compared to plaster for smooth coatings: they smooth the coating only after 2 hours.
Decorative structural plaster in the interior (photo)

Varieties
The fine-textured part of decorative plaster is classified, as well as all decorative plasters in general - by the type of binder.
- Mineral- that is, those for which the base is . Here, only mica and other similar materials can be filler. Cotton or silk fibers cement will simply corrode. Such a composition is used infrequently, since it is more difficult to tint: only dyes of mineral origin can be added.
At home, very often they use it as a base. Such plaster is suitable only for the interior and only in rooms with low and normal humidity. As a rule, it is quite suitable for living rooms.
- Acrylic- a binder that allows any dye and any filler. Its cost is slightly higher than mineral, but still affordable. And coupled with a variety of solid components and colors makes the material the most popular today.
- Silicone- the most expensive option, because, along with the advantages of acrylic, it is devoid of some of its shortcomings. In particular, it is vapor permeable and much more durable. In addition, it is characterized by excellent adhesion: even old walls can be plastered with it.
- silicate- based on sodium and potassium silicates, very durable and resistant to mechanical damage. Requires pre-treatment of the surface with any composition that includes quartz.
There are mixtures based on aqueous solvents and organic.
- The latter is very rarely used for indoor work: as a rule, it has a persistent unpleasant odor and forms toxic substances when dried.
- Water ones are deprived of such a disadvantage and are quite safe.
Read below about how structural plaster is made for interior and exterior use.
The following video reveals the secrets of making structural plaster with your own hands:
How to prepare a mortar for structural plaster
Basic Rules
At home, you can only get or plaster. Since neither acrylic nor silicone resins are commercially available, other types of fine textured material are not available.
The principle of creating plaster is the same: a mixture is selected - you can even use ready-made putty without additives, plasticizer and filler.
- The plasticizer can be ordinary PVA glue or tile glue.
- The filler can be finely ground sand and mica. For fine-textured plaster, marble flour is suitable, but the surface will turn out to be more granular. It is less suitable for the formation of a convex ornament or image. In the mixture, the proportion of filler should not exceed 70% by weight.
- A frequent component of the binder is lime dough. It is prepared in this way: lime is diluted with water in proportions of 3: 1 and left for a day for proofing.
Recipes
Gypsum-lime
 – only for dry rooms:
- dry gypsum - 10 kg;
- lime dough - 30 kg;
- the coloring pigment is mineral, like minium, ultramarine, manganese peroxide.
Water is added to the composition so much to get a pasty consistency. The mineral filler is added by weight.
Sand-cement
The sand-cement mixture already includes sand. To make the composition decorative, use colored finely ground sand:
- - 20 kg;
- Portland cement white - 10 kg;
- sand - 20 kg;
- – 5% by weight.
This mixture can be used for finishing wet rooms.
With plasticizer
If it is supposed to create a complex texture, that is, you need to work with plaster for a long time, then it is better to prepare a solution with a plasticizer, for example:
- - 50 kg;
- tile adhesive - 10 kg;
- universal dry mix rotband - 0.5 kg.
Water is added until a creamy consistency is obtained. If mica or marble flour is mixed in, then a little more water will be required.
Gypsum plastic plaster is even easier to make:
- gypsum dry mix - 6 kg,
- PVA glue - 200 g,
- water - 2 l.
Here, glue and gypsum are mixed separately: PVA with 0.5 l, and dry gypsum with 1.5 l, and then combined.
In the described recipes, the coloring pigment is not indicated due to some limited palette of mineral dyes. Such coatings are easier to paint after drying, while the pattern can be emphasized with a different shade.
Coating
By itself, the scheme does not differ from the application of conventional plaster: surface preparation, application of the mixture and leveling. The whole secret is in the last stage, when special techniques are used instead of primitive alignment.
Decorating tool
There are 3 main groups of tools for decorating plaster.
rollers
 The most popular and diverse is the roller for structural plaster. With it, you can get not only the texture, but also a completely harmonious and bright pattern.
Roller - a cylinder with a coating on the handle, can be made of:
- plastic is the cheapest;
- silicone;
- metal - designed for a large amount of work;
- rubber - the most popular option;
- leather and wooden rollers are also found, but much less frequently.
The cylinder can be covered with foam rubber or fabric.
The surface can reproduce any texture - from a wood pattern to crocodile skin, and any pattern, but with one condition: the pattern must be closed on the surface of the cylinder.
The decorative possibilities of the roller are extremely rich:
- imitation of fur or pile - the famous velor, velvet walls, creates a roller with pile. The shorter it is, the more even the surface is obtained;
- to create a three-dimensional convex ornament, a roller with a pattern pressed inward is used;
- to obtain an extruded pattern - the same skin, you need a convex image on the cylinder;
- a covering of crinkled fabric or leather creates an imitation of marble;
- to obtain the effect of a wild stone, a nozzle with depressed loops is used.
You need to work with a roller carefully, so that each next “row” of the pattern lies butt-to-back with the previous one. Movement is strictly horizontal or vertical.
stencils
In appearance, it most closely resembles a rubber mat, usually rectangular in shape. Usually the pattern here is convex, that is, a depressed structure will turn out on the surface. Sizes may vary.
The rug is pressed against the plastered area 15-20 minutes after application, and after the composition dries, the coating is polished.
Stamps
Something between a roller and a stencil: a convex-shaped platform on the handle, which must be pressed against the surface and slightly rolled. It is difficult to obtain a real pattern with its help.
A stamp is used when they want to create a texture, a bright surface - a woody pattern, snake skin.
Knowing how to make structural plaster with your own hands, it is important to remember how to apply it, which this video will tell about:
Application technology
How to handle working tools is described above: the main thing here is to ensure the continuity of the drawing and prevent overlapping structures. But if there are no special devices, you can get an interesting structural surface in another way.
- "Antique"- for such a coating, a large sheet of tissue paper, and preferably newspapers, is compressed in different directions, then applied to the plastered area and smoothed. The folds are imprinted on the wall, forming the most whimsical contours. It is necessary to plaster for 1 time over a not too large area. The edges of the paper, when applied, should slightly go over the already created pattern.
- Chipped stone effect, can be created by wrapping a regular paint roller in a crumpled bag. The more convex folds it forms, the more convincing the imitation will be.
- tree drawing obtained by winding a thick, harsh thread and a slightly denser cord around the roller. In this case, the movements should be accurate, only in one direction.
- Geometrically uniform pattern can be created by securing a thick cord: several turns at the same distance from each other. A few chaotic turns, on the contrary, create the structure of an old cracked tree.
Read below about the price of the material and ready-made mixtures of structural plaster.
Popular brands
 Fine-textured plasters are very popular in interiors: here a large texture often looks rough. Compositions are produced both in the form of a ready-to-use solution, and in the form of a dry mixture.
- Alpina - matte and glossy plasters with a water-repellent effect. The maximum flow rate is 0.33 sq.m./l. White plaster goes on sale, tinted according to the proposed ColorExpress system. Regular packing - 16 kg. The cost of plastering is from 1370 to 1890 rubles.
- Ceresit can rightly be called the most famous company in Russia, offering a variety of finishing materials. Ceresit presents compositions on any binder and with a wide variety of fillers. The cost depends on the composition of the Ceresit structural plaster: for example, acrylic plaster is estimated at 800–910 rubles. for the packaging of the finished composition. The cost of mineral in the form of a dry mix varies from 209 to 410 rubles. for 25 kg. The price of silicate plaster (finished) - from 1410 rubles. and silicone - from 1667 p.
- The Modellierputz brand of the joint venture Germany-Russia, in the production of structural plaster is known to no lesser extent. The company produces decorative compositions for both internal and external works. Packing - 18–20 kg. The basic color is white, tinting is possible according to the DEKART Color system, as well as according to the RAL, Monicolor, Colortrend, NCS catalogs. The cost of the material ranges from 1320 to 1820 rubles. for packing.
- Caparol, a colored striped elephant, has long been recognizable on the Russian market. The cost of plaster compositions depends on the filler and binder: silicate mixtures have the most affordable cost - from 2300 rubles. per package, acrylic ones are more expensive - from 2960 r, silicone - from 4100 r. The weight of one package of the finished product is 25 kg.
- BauMit - manufactures all types of decorative plasters, although, of course, the main range is a variety of acrylic mixtures. Their cost ranges from 1815 p. for a package of 25 kg, up to 2750 r - this is how much silicone-silicate plaster costs, which is distinguished by its exceptional resistance to weather factors.
Fine-textured plasters are the most favorable material for creating a unique interior decoration. Plasticity, ease of application and unlimited design freedom attracts both designers and builders.
The following video will tell you more about Rollputz Structural Plaster:
Structural plasters are made on the basis of cement, lime, potassium silicate or latex. They are viscous mixtures in which there are various fillers: crumbs of different types of natural stone or wood fibers. As a solvent for such substances, ordinary water or a solvent is used. Structural plaster for interior use should be water-based, as it is completely safe for health and does not require time to weather.
Structural plasters are divided into types depending on the size of the filler grains:
- Fine-grained mixture - grains up to 1.5 mm.
- Medium-grained - the size ranges from 1.5 to 2 mm.
- Coarse-grained - from 2 to 3 mm.
Also, these mixtures differ in the type of filler and binder. As for the color scheme, they are all made in white, so colors are used for tinting.
 Structural plasters are divided into types according to grain size
 Advantages and disadvantages
If we talk about the positive aspects of this finishing material, then the following stand out:
- Versatility. Mixtures can be applied to internal or external surfaces made of bricks, various types and grades of concrete, wood, drywall, and so on.
- Strength. The coating resists various mechanical influences well.
- Ease of maintenance. Once dry and hardened, the surfaces can be washed with warm water and non-aggressive detergents.
- Temperature Range. Structural plasters withstand temperatures from -50 to +75 ⁰С.
- Plastic. Thanks to this feature, it is easy to work with the material, and it is also possible to create relief patterns on the surface.
- Porous structure. The presence of pores in dried surfaces provides ventilation for walls and ceilings, which significantly increases their service life.
- No need for thorough preparation. Such mixtures perfectly mask cracks, potholes, swelling and other small defects.
The main disadvantage is the need to add color. In addition, some types of structural plasters are subject to vibration and ultraviolet rays.
Application area
Mixtures with large fraction fillers are most often used for finishing plinths and facades of buildings or individual parts of indoor surfaces as design solutions. For the main work indoors, solutions with a fine fraction filler are used.
Silicate materials are well suited for concrete or shell walls, latex materials can be applied to any surface, provided that they have not been previously treated with a dispersion or water-based primer. Mineral mixtures are suitable for walls finished with plasters containing sand. Silicone compounds are versatile, so they can be applied to all types of surfaces inside and outside the home.
 Structural material is used for interior and exterior work
Which plaster to choose
The main performance indicators of this material depend on the type of binder on the basis of which it was made. Therefore, when choosing structural plaster, it is important first of all to pay attention to this point.
mineral
They are mixtures of Portland cement and lime. Supplied dry in paper bags, and diluted with plain water. This material does not emit toxic substances, and also has good ventilation. A few more benefits:
- The plaster does not burn and does not support combustion.
- It is relatively inexpensive.
- Pathogenic fungi and mold do not live on such a coating.

The main disadvantage is the difficulty in work. The material must be thoroughly mixed, so you will have to purchase an electric drill with a mixer nozzle. The coating requires finishing and poorly resists mechanical damage. The service life is only 10 years.
Acrylic
As the name implies, the main component in such mixtures is acrylic resin. Supplied ready-made in plastic containers of various sizes.
Advantages:
- resistance to mechanical stress;
- no need for pre-priming;
- elasticity;
- health safety.
 Acrylic decorative plaster
 Disadvantages: poor resistance to ultraviolet rays and a tendency to accumulate static electricity, which causes a lot of dust to settle on the surface.
The average service life is approximately 15 years.
Silicone
Such plasters are made on the basis of polymer compounds. The most commonly used aqueous emulsion of potassium and sodium silicates. Supplied ready-made in plastic containers of various sizes.
The positives are:
- a large margin of safety;
- good ventilation;
- resistance to water and ultraviolet rays;
- long service life - up to 25 years.

The disadvantage is the high cost. In addition, such mixtures have their own specific and not very pleasant smell.
Important! You need to work with silicone plaster quickly, because it dries quickly. If you apply it to individual fragments of the wall, then after drying, their boundaries will be clearly visible.
Step-by-step instructions for applying structural plaster
To carry out this operation, you will need the following tools:
- a container for preparing the mixture;
- trowel, trowel, scraper;
- wide and narrow spatulas made of rubber and stainless steel;
- brushes, rollers, brushes, combs;
- ladder and scaffolding;
- electric drill and nozzle-mixer;
- surface cleaning tools.
 Material Tools
 From the materials you will need the mixture itself, water for dilution, putty for sealing cracks, masking tape, plastic wrap and a primer.
Decorative structural plaster is applied in several stages:
- Surface preparation. The old coating and all fasteners are removed from the walls. Then check the evenness of the surfaces with a level. If necessary, the walls are leveled and all defects are sealed with putty. Then the floor and furniture surfaces are covered with plastic wrap, and the ceiling area near the walls is sealed with masking tape. At the end, the surface is treated with a primer and allowed to dry.
- . The solution is collected on a spatula and applied to the wall, after which it is stretched over the surface with a trowel. A narrow spatula is used to form corners. Usually the mixtures dry out in a day, and it will take about 7 days to gain strength.
- Final stage. In the end, you need to treat the wall with wax, if we are talking about internal surfaces, or with varnish for facades and plinth.
 Stages of wall preparation and application of decorative composition
 Basic application techniques
There are several techniques with which you can create various relief patterns:
- spray. For this method you will need a broom and a stick. The broom is moistened in the solution, after which it is brought closer to the wall. A broom is hit with a stick, as a result of which the solution falls on the treated surface in small drops (see photo). The procedure is repeated 2 times with an interval of 8-10 hours.
 Structural plaster application technique - spray
 - First of all, according to the usual method, a starting one is applied and left for a day to dry. After that, a second layer is applied with a spatula and stretched. Until he had time to grab, arbitrary lines are drawn with a trowel, forming a future pattern.
 Using a trowel to create a relief pattern
 - Using a brush. It is necessary to repeat all the procedures that are listed in the previous method, only the pattern is applied not with a trowel, but with a brush with stiff bristles. After drying, the surface is treated with a soft brush.
 Creating a relief pattern with a stiff brush
 - Roller stamping. To do this, you can use conventional paint, structural, rubber and foam rollers. The tool is used to process fresh plaster, and leave it to dry. To imitate grass stalks, it is necessary to wrap a regular roller with a thread and pass it over the surface.
 Structural roller for drawing a pattern on plaster
 Preparation of structural plaster
Do-it-yourself structural plaster is prepared from the following ingredients:
- 6 kg of dry putty;
- 200 g of glue;
- filler in the form of stone chips or flour, wood fiber (it is not necessary to add them, you can be content with those that are in dry putty).
- 2 liters of water.
The first step is to mix the putty with water, then add glue to the mixture and mix thoroughly. At the end, fillers are added, depending on their fraction, different patterns are obtained, for example, 0.3 mm grains are needed to simulate sandstone, and 3 mm to create the effect of tree bark.
What the market offers
At the moment, the most popular plasters on the market are the following:
- "Stone". The material is produced in Russia. With it, you can create a surface that resembles natural stone, limestone, and so on. Can be applied to concrete, drywall, wood and starting plaster. The coating dries in a day, and the full set of strength occurs in 10-14 days, depending on the humidity of the air.

- "Bark beetle" ("Ceresit" ST 64). Marble chips are used as a filler. After drying, furrows form on the surface, imitating the results of the activity of the bark beetle. The material can be used on external and internal surfaces. Drying takes 24 hours, and curing takes 5-7 days.
 "Bark beetle" ("Ceresit" ST 64)
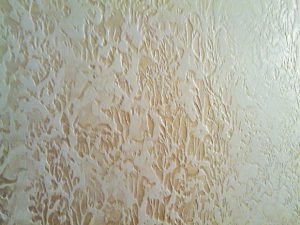
 - "Wet Silk" (VGT). This plaster, after drying, imitates the texture of the fabric. It is used only on internal surfaces made of concrete or drywall. Requires adding color. Resists water well.
 "Wet Silk" (VGT)
 - "Travertine" ("Derufa".). After drying, this material becomes similar to lime rock. Made from acrylic resin. The main advantage is a large margin of safety. Dries in 9 hours, hardens in 3 days.
 "Travertine" ("Derufa")
 - Encausto Fiorentino. This is a representative of the so-called Venetian plasters. After drying, it imitates the color and texture of marble. Can be used on all types of interior and exterior surfaces. It dries pretty quickly - in about 2-3 hours, and after a day you can touch it.
 "Encausto Fiorentino"
 - "Decor" ("AliMix"). It is made on a cement base and is supplied as a dry powder in paper bags. Can be used for interior and exterior decoration. Seizes in 2-3 hours, dries in a day.
 "Decor" ("AliMix")
 - "Alpina Strukturpulz K15 Lamb" ("Alpina"). Scope - external and internal surfaces of concrete and brick. Can be applied over old paint.
 "Alpina Strukturpulz K15 Lamb" ("Alpina")
Plastering with structural solutions is a simple procedure that you can do yourself, saving on the services of specialists. The main thing is to follow the above instructions and the manufacturer's advice.
Structural plaster is decorative and is widely used in wall decoration to improve their appearance. It is a plaster mass containing additives in the form of various granules - small pebbles, pieces of quartz, wood, mica, etc.
By applying this kind of coating, it is possible to imitate granite, marble, structural fabrics, ornamental wood, snakeskin, torn stone and other materials.
The plaster mass can be fine-grained and coarse-grained. And if the plane covered with fine-grained plaster looks even, then the same surface, when using large granules, acquires a pronounced texture. Therefore, a coarse-grained mixture is more often used for decorative facades, and a fine-grained mixture is used for interior spaces.
But it should be noted that in many respects the appearance of the treated plane also depends on what tools (rollers, spatulas, sprayers) are used to apply decorative plaster. Depends on the appearance of the layer and on the method of its application. As a result, you can achieve a result that can perfectly fit into the interior, decorated in any style, combined with any design.
Structural plaster - a coating that can imitate granite, marble, fabrics, rare woods, snakeskin, torn stone and other materials. With minimal skills, anyone can apply such a coating to the walls and achieve the desired effect.
Why structural plaster?
We will try to help those who decide the question - is it worth using structural plaster for finishing. First of all, it should be noted that its undoubted advantages are enviable plasticity and ductility when processed with any tools. It is also important that this kind of mixture does not have to be diluted - you can buy them ready-made and packaged in containers of 15-25 liters.
This list of advantages of this building material is not exhausted. Let's continue this list:
- structural plaster can be used for any finish - both external and internal;
- it can be applied to virtually any surface, perfectly masking defects;
- it is a strong, durable, impact and scratch resistant, waterproof coating that is easy to clean;
- microporous surface allows the walls to breathe;
- the plasticity of such decorative plaster allows you to create any desired relief on the surface;
- it can withstand large temperature fluctuations;
- during cosmetic repairs, plaster can be easily repainted;
- if you use stencils and rollers, then you can get any pattern on a plastered wall.

It should be mentioned that decorative plaster also has disadvantages:
- the coating is quite heavy - 1 m2 requires from 2.5 to 4.5 kg of solution;
- the coating after application is a monolith, therefore, before applying a new coating, the old surface will have to be thoroughly leveled.
Application of the working layer
Do-it-yourself structural plaster on the wall is most often applied in stages. These steps are discussed in more detail below.
Stage one - preparation of the treated surface
First of all, you should clean the walls by removing old paint and wallpaper from them. At the same time, it is not at all necessary to achieve impeccable smoothness - the applied layer will level the wall and smooth out the defects present on it. It is only required to ensure that there are no clearly pronounced pits and bumps, and the prepared surface is strong, visually even and dry.
Significant defects should be leveled, and deep cracks and holes should be puttied. Thanks to this, later, not only the process of applying decorative plaster to the walls will be facilitated, but also its consumption will be significantly reduced. Before proceeding to the next step, the applied leveling layer should be dried well.
Stage two - applying a primer
After the leveling layer is completely dry, a layer of liquid primer is applied to it. For its application, paint rollers or brushes are usually used. Penetrating into microscopic cracks, the applied primer will reliably protect the wall from swelling, moisture and fungus, which will later provide more reliable adhesion of the plaster to the base.
It is better to use a deep penetration primer, which especially improves this adhesion. For wood, a special mineral primer is required, for all other surfaces, an ordinary primer can be used. For safety net, after complete drying of the primer, it is desirable to apply an additional primer layer. If rollers are used, the joints between the base sheets made of chipboard, drywall, etc. will be significantly strengthened.

It is desirable that the primer and structural plaster be from the same manufacturer. For complete drying of the applied primer, you need at least a day. After it dries, you can begin the process of applying plaster.
Stage three - applying structural plaster
If not a ready-made solution is purchased, but a dry mixture, then it should be mixed with water in the indicated proportion and mixed thoroughly. It is better to use a drill with a nozzle or a construction mixer. The plaster should ripen for about ten minutes, after which it should be mixed again.
Due to the plasticity of the solution, various tools can be used for its application - rollers, spatulas, brushes, combs, stamps. Fine-grained plaster is conveniently applied with a sprayer. It is better to start from the top of the walls.
The first layer of the solution is applied to the prepared surface by spraying. The layer is leveled, corners and cornices are straightened. A covering layer is applied to the set spray, which, after leveling, must be allowed to set, but not completely.
A final layer of decorative plaster is applied on top of the covering. To obtain a special pattern, structural rollers, brushes, notched trowels, and sponges are used. Rollers are especially convenient as they provide a great variety and repeatability of applied patterns. After the coating has completely cured, sand the combs, remove dust and dirt with a damp sponge, and then dry thoroughly.
Structural plasters are now widely used for cladding interior and exterior walls. Why? They are durable and attractive, the technique of working with it is simple and, if desired, do-it-yourself structural plaster is applied.
Material Features
The basis of the material is mineral or polymeric binders and various aggregates - sand, granules, crumbs, flour, natural and synthetic fibers.
Classification
The texture of the surface depends on the fractionation of the filler. Sandstone imitation creates a grain size of 0.3 mm, the texture of the raw stone is obtained using plaster with grains of 1.5 mm. implies the use of a filler with a size of at least 2 mm, and if you want to achieve the effect of a tree bark, you will need a material with a filler size of 3 mm.
Both smooth and rough. Under smooth wall cladding, you need to prepare more carefully, since it cannot completely hide surface defects.

In the photo, various textures of plaster
Advantages
Structural plaster cladding has a number of significant advantages over traditional types of coatings.
- It is applied on all types of surfaces: brick, stone, concrete, drywall, wood, metal.
- Hides surface imperfections.
- It has significant resistance to mechanical types of damage: shock, scratches, chips.
- Waterproof. walls are easy to clean without loss of appearance and strength. In this case, you can use any household chemicals that do not contain a solvent.
- Withstands temperature extremes from -50 ° C to +75 ° C, this significantly expands the scope of this.
- Has high rates of plasticity and elasticity. Therefore, textures of any complexity can be recreated on the surfaces of walls, ceilings, columns.
- The lining is microporous. Due to this, structural plasters breathe, which favorably affects the microclimate of the interior of buildings.
- It has a significant service life.
- Can be freely repainted during cosmetic repairs.
Application technology

A thin layer of coating can be applied with a trowel (price - from 150 rubles)
At the first stage, the surface is cleaned of contaminants, potholes and cracks are sealed. It is not necessary to achieve an absolutely flat plane; structural plasters mask small flaws well.
Work instructions:
Preparation of walls for, unlike other types of decorative coatings, does not require surface puttying. It is important that they are strong, visually even and dry.
The cleaned walls are primed. Do not spare deep penetration soil, it improves the adhesion of the cladding to the base. For all walls, in addition to wooden ones, ordinary soil is used. Wood requires a special mineral primer.
For safety, you can use an additional layer of primer paint. It is applied after the soil has completely dried. The paint will strengthen the butt joints characteristic of sheet bases - drywall, OSB, chipboard.
Prepare the plaster mix. Mix the dry mixture with water in the proportion indicated by the manufacturer in the instructions. Stir the mortar with a construction mixer or a drill with a nozzle, let the plaster stand for 10 minutes and mix again.
Start the main work from the ceiling or the top of the walls, if structural coating is not provided on the ceiling.
Apply the first layer of the mixture by spraying. Smooth it out, carefully work out the corners and cornices. After the spray has set, apply a second layer - a covering coat. Flatten it and let it grab, but not completely. The third step is to grind the plaster.
In the described sequence, recesses, niches. On the bottom of the walls, the cladding is applied last.
If it is planned to arrange a thin layer of coating, work with a spatula or trowel. The movements must be performed in cross directions, the ridges that protrude from under the tool will form a pattern.
Dry the plastered surfaces for 6-8 hours. It will take 24-48 hours for the coating to fully cure. After that, sand the combs, remove dust and dirt with a dampened sponge.
Important Points
In most cases, structural plasters are sold unpainted - white. The color of the coating can be given in two ways. Get a dye (preferably from the same manufacturer as the plasters), add to the mixture and mix well.
The technology also allows the painting of surfaces after the hardening of the facing layer. To get color transitions, rub the dye with a rubber sponge. If you want to create the effect of an old coating, you can imitate scuffs with a slightly damp sponge made of foam rubber. When the painted surfaces are completely dry, they must be treated with protective wax.
Important! Structural plasters are difficult to remove from all types of surfaces, so you need to seal all areas adjacent to the workplace with masking tape and plastic wrap.
Pay close attention to the processing of external corners. Apply the plaster first on both sides of the corner, then finish it with an angle trowel or by installing an external metal profile.
A slightly set coating can be given a different . What is good about structural plaster - its application technology allows you to get a wide variety of effects and textures. You can roll it with relief rollers, smooth it with a notched trowel, create circular and curvilinear patterns using sponges, washcloths, pieces of polyethylene, brushes.
Summing up
We hope our material was useful to you. It remains for us to wish you good luck and invite you to watch the video in this article.