Stained glass with your own hands. Stained glass on glass with your own hands: how to make stained glass on glass, step by step instructions. So how to make a stained glass window at home with your own hands
The name "stained glass" came to us from Latin. This concept denotes a structural construction, a transparent or translucent texture, imitating a special ornament or plot. The singularity of the stained glass composition lies in the skillful and successful combination of light rays and the glass surface. These components, in alliance with a significant third - color - create real masterpieces of art.
Stained glass as an element of decor
Stained-glass windows in the interior, first of all, are an element of decor. Their direct purpose is the refraction of light streams and the transformation of the area inside the room. The active development and use of stained glass art falls on the period of the Middle Ages. Unfortunately, where and when the first stained glass composition was first produced is not known. To this day, information has been preserved that even the ancient Romans tried to use blown and cast glass in architecture.
In today's interior decoration, stained glass is back in fashion. Of course, the idea of decorating a room in this way rightfully belongs to ancient architects, but thanks to innovations in modern technologies, stained glass windows have improved and entered a new round of renovation and improvement.

Stained glass is considered to be not only a decorative element, but also a central element of the interior. You can admire them at different times of the day, regardless of the angle at which the sun's rays hit the structure. Based on this, it becomes clear that the stained glass composition will look appropriate in the hall, and in the kitchen and even in the bathroom.
Stained glass windows in the interior
Those who dare to decorate at least one of the rooms with a stained glass composition are guaranteed to receive a unique transformation of the room, as well as color lightness and originality. Designers advise to make a stained-glass window exactly in the style in which the entire room is decorated. Thus, the design will be unified, holistic and harmonious.

The most commonly used stained glass style is classical. Its main characteristics are naturalness, sophistication, simplicity and uniqueness. This style is considered relatively low budget, which is quite relevant today. The main attraction of stained glass classics is symmetry. The depicted theme can be completely different from natural landscapes to geometric bodies. Such compositions are mainly performed either in dark or pastel colors. Most often they are used in the design of screens, window openings, partitions.
No less popular style - stained glass neogothic. The idea of the style is as follows: in a room with a large area - a rather dense filling of window openings with a stained-glass composition, and in a room of not large sizes - the base of a transparent or colorless material was supplemented with colored blotches.

With the advent of the twentieth century, a style was formed and strengthened modern. Its main features are smooth transitions, intricate fancy patterns, soft lines and patterns imitating plants. The color scheme of the style welcomes all soft undertones. The Art Nouveau style is distinguished by its extravagance and sophistication. Modern stained-glass windows are perfectly combined with almost all types of interiors.
The creation of stained-glass windows today is carried out through the use of various technologies. Unfortunately, some of them are quite complex and require not only the skill and experience of the artist, but also the use of special equipment. At home, you can not use such techniques. And now it's time to find out what are the features of creating stained-glass windows of different types.
Classic or soldered stained glass windows

Work begins with the manufacture of a sketch, then, in accordance with each line, a metal profile is laid, into which the prepared glass fragments are inserted. At the joints, the connection is made by soldering. Then the stained-glass window is painted.
The profile can be copper, brass or lead, its cross section is similar to the letter H. Fragments cut from colored glass are inserted into the grooves of the H-shaped profile. You can use glass with a thickness of not more than 4 mm. The profile structure is rather rigid and does not allow curved contours to be attached to images. Another disadvantage of this technology is the relatively large width of the profile (up to 6 mm). which does not allow you to make the seams elegant.
The quality of the light transmission characteristics of such a stained-glass window depends on the glasses that are used in the manufacture, the best manufacturers today are: Wissmach, Spectrum, Glashutte Lamberts, Armstrong, the glasses produced by these companies are colored in bulk, they never fade.
It is rational to use the classical stained glass technique in the manufacture of large stained glass paintings.
Tiffany

Tiffany stained glass windows are considered the most beautiful, but their manufacture is somewhat complicated. They are realistic and very similar to paintings; colored glass fragments of different sizes and shapes, including concave and convex, are used in their manufacture. The assembly of such stained-glass windows is carried out exclusively by hand, i. each work can be considered the author's.

Work begins with the creation of a sketch, breaking it into fragments. Next, structural details are cut out of glass, turned to the desired shape and dimensions, the fragments are connected by soldering an adhesive copper tape with lead-tin solder into which each of the prepared fragments is wrapped. Guide profiles when creating a stained glass window in this technique are not required.

The use of a copper base for attaching fragments allows you to create convex and voluminous images.

Tiffany stained glass windows will not suffer from sudden changes in temperature, regardless of the fact that they consist of separate fragments, their strength is no less than products made from a single glass sheet. It is possible to make such stained-glass windows with your own hands, provided that you have the appropriate materials and tools, artistic taste and imagination, and the ability to work with great care.
fusing

The process of creating a stained-glass window using the Fusing technique is very complicated, it consists in sintering art compositions made up of glass fragments at very high temperatures. Although this technique has been used as far back as the construction of the Egyptian pyramids, it is relatively recent in modern industry.

Like the techniques described above, it requires creating a sketch, cutting glass fragments, assembling them on an even glass base using fixing glue, sintering in ovens at temperatures from +650 to +900 C. From above, the assembled picture is closed with a second base glass, thus forming a semblance of a sandwich . The glass sintering process is multi-stage, first the glasses are slowly heated, then they are kept at the fusion temperature for some time, and they are quickly cooled.
Fusing stained-glass windows are multi-layered and embossed, they are made without metal broaches. Of course, it is impossible to use this technique at home.
Cast stained glass

A fairly complex technique that involves hand blowing or molding each of the glass modules, giving them a special surface texture that can effectively refract light rays. The thickness of each of the fragments can vary between 5-30 mm. Connect the glass modules with metal fittings and cement.
Faceted stained glass windows

A special place among the stained-glass windows is occupied by those made using facet technique. They are extremely attractive and original, they look appropriate in luxurious interiors, emphasizing their features and the high level of prosperity of the owners of the house. Glasses for such a stained-glass window are processed in a certain way - a chamfer (facet) is removed along the edge of each, which significantly increases the refractive properties of the material. Specially cut, ground and polished glasses can also be used. Only thick, heavy glasses are used in the work, respectively, and the frame for them is required to be especially strong. To connect the prepared glasses, a rigid metal profile is used: brass or copper. After assembling the stained glass window, it is patinated, giving it the appearance of aged bronze, silver, gold or brass. In such a frame, light-refracting glasses look like real gems.
Smalt
The original old technology, which consists in assembling pictures from glass fragments and metal oxides, followed by firing them in furnaces for a long period.

The resulting material has high strength qualities, an attractive appearance, reminiscent of a glass mosaic. Smalt strikes the imagination with the depth and richness of shades, a special deep light, the ability to look completely different when illuminated by different light sources.
Filled stained glass

This technique is quite in demand and available for execution. Of course, in order to create an interesting stained glass, the performer will need to have some experience and talent as a make-up artist. In appearance, the flooded stained-glass window resembles one created using the Tiffany technique. After creating a sketch in full size, its contour lines are transferred to the degreased surface of the glass base, using polymer paint for this, an imitation of a metal broach is obtained. After the contour lines have completely dried, the resulting cells are filled with paints or varnishes of the appropriate colors. The drying of the stained-glass window is carried out during the day.

The stained-glass window manufacturing technology allows the use of partial automation of the process, in particular:
- computer drawing,
- drawing a contour using programmed equipment.
Stencils for stained glass windows can be used in a variety of ways, they are easy to find ready-made on the Internet. Stained-glass windows made using poured technology are quite durable, they do not lose quality when exposed to the environment, they are safe and environmentally friendly.
Film stained glass

The most budget technique for making stained glass can be called film. Of course, a drawing created in this way on a glass sheet can be conditionally attributed to stained-glass windows, because. its creation consists in applying a special colored film on the glass surface, in accordance with the selected sketch of the drawing, and then fixing it along the contours with a lead or tin border.
Such stained-glass windows have a flat, smooth surface - the basis for their manufacture is sheet glass. They are easy to maintain, light weight and safe to use.
The stained glass film for the manufacture of such a stained glass window is made of lavsan, the procedure for manufacturing a film stained glass window is as follows:
- sketching in full size,
- transferring the pattern to the surface of the glass,
- strip line laying,
- filling the formed fragments with lavsan film.
The use of solid glass allows you to create film stained-glass windows of large sizes.
Painted stained glass

They can be made using any technique, the main condition is the application of paints on most stained-glass windows. As an additional decor, such stained-glass windows involve the use of glass that has been folded or cut. A stained-glass window will be considered painted even if only one whole stained-glass window is painted.
Other types of stained glass technique

You can find in the interiors and such stained-glass windows as:
- Silhouette, which are assembled using round disk elements, the free spaces between them are filled with concave glass, and all fragments are connected by a brass or lead frame.
- Sandblasting, made of mirror cloth or colorless glass, with a matte pattern applied using a special sandblasting device, having an interesting look and ideally fitting into a classic interior.
- patterned, assembled from glasses folded into patterns, one-color, often consisting of textured glass oriented in different directions.
- Mosaic made of glass, it cannot be used as a light-transmitting material in window or door openings, but its preservation of the properties of translucent glass allows it to be used as a facing material, usually it is used to create panels, multi-colored ornaments that fill the entire room with sun glare.
- Mosaic stained glass windows, assembled from multi-colored glasses with the help of lead threads, are characterized by a repeating pattern, perfectly serve as a background, but can be used as an independent decor item.
Photo printing

This variety appeared quite recently, but with its help, designers managed to significantly expand their possibilities for interior design. Photo printing involves drawing a picture on glass in different ways:
- straight - the pattern can be printed on a solid base,
- film - first, the pattern is printed on film, then glued to the glass surface
- triplex - the pattern is applied to the film and lies between the surfaces of two glasses.

Attractive moments of photo printing are:
- the ability to copy a classic stained glass window,
- production speed,
- affordable price.
Collage

The technique of making collage stained glass is based on the use of modern equipment, but is somewhat consonant with the Tiffany technique. After developing a sketch, blanks of the required sizes and shades are prepared, they are connected with a polymer solution, using ordinary glass as a base.
Such stained-glass windows differ in the absence of clear lines, smooth color transitions, transparency and lightness. They look natural in any interior, and the unique technology allows you to reproduce any complex images in glass.
Combined stained glass

They are the most versatile, in their manufacture the master himself decides which particular techniques and styles can be used in the manufacture of a glass picture, while the unusual use of traditional techniques is not forbidden. Due to the uniqueness of the principles of their manufacture, combined stained-glass windows make it possible to achieve a special expressiveness of works, a uniqueness that is difficult to obtain within any individual style. This peculiar technique allows you to create the effect of a three-dimensional image, surprising with a special depth and volume.
After reviewing the description and watching the video recommendations, we learned how to make a stained glass window. Of course, to get a real work of art, you will need to make a lot of effort, diligence and imagination.
Stained glass windows for many centuries make people admire their indescribable beauty. Despite the fact that the origins of this type of art lie in the mists of time, even today it has not lost its relevance and relevance. This is quite logically explained by the fact that such a decor, with a beautiful and neat design, can bring to any room not only comfort and homely warmth, but also a special originality of interior design.

Do-it-yourself stained glass on glass can be created even by a novice master, provided, of course, that a technique available for execution is chosen, of which there are a lot in stained glass art. Nowadays, in specialized stores and art salons, you can find everything you need to make stained-glass windows using modern simplified techniques, which are much easier to perform, unlike classical technology. This became possible thanks to modern developments and special materials that are able to very reliably imitate the "classics".
A variety of stained glass styles and techniques accumulated gradually, taking into account the secrets of the old masters and new established practices. Many are still used today, and they must be considered before deciding which option is best suited not only in terms of the pattern, but also in terms of the complexity of the technological process itself.
To make a stained glass window, you can choose drawings in various styles, both “covered with noble antiquity” and ultra-modern. Do not lose popularity compositions in the Gothic, ancient Egyptian, Indian styles. Find their supporters abstract, modern, art deco styles, and others corresponding to different eras and cultures, trends in art.

Each of the existing styles is capable of displaying the commitment of the owner of an apartment or house to a particular era with its plot, shapes and color scheme. All styles of stained glass windows have their own requirements and canons that should be observed in their execution.
For a long time, the style with classic drawings was considered ideal, where the choice of subjects and materials was limited. In connection with the development of art and with the advent of new techniques, the possibilities for making stained glass windows have expanded significantly. Therefore, instead of the calm plots of the classics, expressive colors and drawings of modernity and abstraction began to be used more and more actively.

Quite often, masters in their works use several styles and techniques that can enliven and complement each other, which helps to organically fit the stained-glass windows into the overall decor of the house.
Sometimes a stained-glass window for a separate room is chosen as setting the style for the entire interior, while the rest of the items in the room are only its addition and frame. Thus, the stained glass picture becomes the center of the interior.
If the plans of the residents of the house include decorating rooms in different styles, then stained-glass windows are able to combine them into one composition. Glass paintings that adorn the windows can create an amazing special atmosphere of color and light, which will change depending on the intensity of natural light. In addition, false windows with artificial lighting, which are often installed in bathrooms or on interfloor stairwells, can also be decorated with stained glass.

However, before choosing a style of stained glass, you need to decide on the technique in which it will be performed.
stained glass techniques
As mentioned above, there are many techniques for making stained glass windows, but a few of them can be called the main ones:
classical technique
The classical stained glass technique has been known since the Middle Ages. The paintings made according to it consist of fragments of glass having different shades and set in metal frames.

In terms of manufacturing, this option can be called the most difficult, and usually it is trusted to perform only by experienced professional craftsmen. To make such a picture, you will need a large number of different tools designed for cutting and processing glass, welding or spidering metal frames, as well as a well-lit, spacious separate workplace. All this is worth acquiring and equipping only if you plan to practice this art professionally, since a special tool is not cheap. Yes, and work skills, to be honest, are also required at a very high level.
English or film technique
The film or English technique consists in applying a special self-adhesive film of various colors to the glass, according to a pre-prepared pattern.

Stained glass window made in film technique
Each of the fragments in such a stained-glass window, after gluing them, is framed with a lead tape. If the glass with this stained-glass window is installed in, then the lead tape is glued on both sides. Lead tape does not require soldering, its cut ends are overlapped and rolled.
The advantage of the film technology lies in the fact that all work is carried out on solid glass, which does not require cutting into separate fragments and their complex processing.
In addition, a stained glass window in the English technique can be made much faster than a classic one, and even a novice master can make it on his own with a careful approach.
"Fusing"
"Fusing" cannot be called a new technique for making stained glass paintings, since it has been used since glass began to be produced, of course, having undergone significant improvements over the past time.

Very beautiful and original stained-glass windows made using the "fusing" technology
The name of the technique "fusing" comes from the English word "fusion", which translates as a mixture or alloy. It is this process that occurs with glass during the manufacture of a stained glass window using a similar method. At home, it will not work to make a stained glass window using this technique, since its manufacture requires special equipment for melting glass, which can only be provided at very high temperatures.
A stained-glass window made in this way has no seams and does not require the use of metal frames.
The process of creating a stained glass picture is as follows:
- On transparent glass of the required size, laid on a prepared sheet with a pattern, a mosaic of pieces of colored glass is laid out on a special glue.
- Further, this workpiece is sent to a special furnace, where the process of sintering individual glass fragments takes place between themselves and with the base on which they are laid out.
The fusing technology consists in the gradual heating of the mosaic and its languishing at a temperature of 800 degrees - this is the level necessary for melting and sintering individual pieces of glass together. Melting takes place under strict control, since the moment of readiness of the product must not be missed, otherwise the process of changing the structure of the material will begin - devitrification, in which the glass crystallizes.
- When the structure of the stained-glass window becomes homogeneous, the stained-glass window must be cooled.
- Then another annealing is carried out, that is, the glass is heated and then cooled.
- "Fusing" includes not only melting and sintering, but also glass processing techniques during these processes. In addition, if the desired result is not achieved, then post-forming is performed, which consists in one more heating and giving the stained-glass window a convex or curvilinear shape.
Upon completion of the work, a glass picture is obtained, made of glass of different shades, reliably and hermetically soldered together. This technique is used for the manufacture of stained-glass windows, performed in various styles, as it gives almost unlimited possibilities in creating paintings of any subject.
"Tiffany"
The tiffany stained glass technique is carried out in a way that is somewhat similar to the classical one. In order to make a picture in this technique, a full-size template is prepared in two copies, one of which is cut into separate fragments, on which pieces of glass of different colors will be cut.

In many ways repeating the "classics" technique "tiffany"
The edges of the pieces of glass are processed and polished to smoothness. Then, each of the elements of the stained-glass window is bordered with a copper tape, the ends of which are soldered together. In the next step, the framed fragments are interconnected according to the pattern using tin soldering, carried out with a powerful soldering iron.
Unlike the classical one, the tiffany technique uses only copper tape, which is much more flexible and stable than the lead profile and more easily yields to a given deformation, with subsequent retention of the shape, which allows it to border even small stained glass details. Thanks to this, the tiffany technique is used not only for stained glass windows, but also for the manufacture of a wide variety of interior elements, for example, lampshades for table lamps and chandeliers.

Table lamp shade made using the tiffany technique
All parts “dressed” in a copper frame, after soldering the ends of the profile, before joining into a common composition, are rolled with a roller, during which the tape compresses the glass fragment.
Video: the master's work on a stained glass window using the Tiffany technique
Sandblasting technology
Sandblasted stained-glass windows are made using special equipment that delivers a jet of air with sand under high pressure.

The creation of pivotal paintings using this technique is carried out as follows:
- A transparent sheet of glass is prepared, on the surface of which a pattern stencil is superimposed and fixed.
- The open areas of the stencil are processed with sand supplied in a thin jet under high pressure. The surface from such exposure loses its transparency and becomes matte.
- After completion of the work, the stencil is removed from the glass, and an exquisite air pattern remains on the surface.
This type of stained-glass window does not require the installation of frames and complex curly cutting of glass, as well as gluing the film. But, as already mentioned, a prerequisite is the availability of special equipment. If desired, of course, you can replace the sand stream with sandpaper, but in this case you will have to make it from thin metal, since cardboard is a fragile material, it will begin to wear out and will not allow you to reproduce an accurate drawing. In addition, manual work will take a lot of time, and the quality and depth of drawing will still not be the same.
Cast technique
This infrequently used stained glass technique can be called one of the most difficult, since each of the mosaic fragments is hand-blown or cast from colored glass. In the process of such piece production, glass fragments are given a special designed texture, which contributes to certain optical effects, the play of refraction of light rays, which creates the effect of pronounced three-dimensionality. Then the fragments are assembled into a single picture using mortars and metal reinforcement.

Stained glass window made in cast technique
It is very problematic to make a stained glass window using this technique at home, since, in addition to equipment, very specific technological skills in glass processing are needed here. As a rule, such stained-glass windows are author's works of art, and they are practically not used in the practice of private housing construction.
Etching technique
The technique of creating a relief pattern on glass by etching involves the use of hydrofluoric acid, which has the ability to act destructively on the main component of the glass mass - silicon dioxide.

When acid is applied to glass, its layers begin to break down. In order for the substance to melt only those areas of the glass sheet that are needed, a stencil is applied from an acid-resistant material. Stencils allow you to create clear single-layer or multi-layer patterns on a glass surface, with a pronounced relief of various depths. The more layers in the relief, the more voluminous it is. In this case, the acid is applied to different parts of the picture as many times as the number of layers suggests the selected pattern. A single-layer stained-glass window is performed in one step, and in this case, the application of acid simply clouded the glass, making it dull and rough.
To take on your own, without having practice, for such work is not worth it. Working with such a strong acid requires extreme caution, as you can easily skin or mucous membranes. All operations are carried out in special protective equipment, in a well-ventilated non-residential area, equipped accordingly.
Painted stained glass
The stained glass technique is good because it can imitate any other method of making a glass mosaic picture.

One of the most accessible techniques is glass painting.
The process of working on it includes several stages:
- Making a drawing and preparing glass of the desired size.
- The glass is laid on the table on top of the spread pattern of the stained-glass window.
- According to the drawing, a contour is applied to the glass with the paint of the selected shade. Usually black is chosen, as it perfectly highlights the elements of the picture. After completing this step, the paint should be allowed to dry well.
- The circled fragments of the stained glass window are painted with stained glass paints.
How to independently create a stained glass picture using this technique will be shown below in the instruction table. In the meantime, we can say that this is one of the most accessible technologies at home, and you can even involve a child in making such a painting - it will be very interesting for him. And the costs, in comparison with all other techniques, are minimal.
Contour filling technology
The pouring technique, as well as the painted one, can imitate any method of making a stained glass window, and with it you can make a picture in a variety of styles. This technology is also great for beginners who decide to decorate their home with stained glass windows. In order to reproduce any image on glass, it is necessary to prepare a drawing and stained glass paints, which are usually available in tubes with a special spout - for ease of application and distribution of the composition over the surface.

Pattern made in the technique of contour filling
The first thing to do is to transfer the outline of the drawing to the glass using the tracing method. Before carrying out the following work, it is necessary to wait until the paint of the contour is completely dry.
After that, the space inside the contour is filled with paint of the desired color. If necessary, it is distributed with a brush. The paint is poured in a sufficiently thick 1 ÷ 1.5 mm, even layer, and as it dries, it should give a smooth surface without artistic strokes. If, according to the drawing, individual fragments of the stained-glass window need to be given volume with the help of color, then it is necessary to prepare in advance the paint of different shades, which is poured onto the glass, according to the sample of the drawing.
It should be noted that there are other techniques for making stained glass windows. Many of them include two or even more basic technologies of ways, so they can be safely called combined. For example, to simplify the painted or flood method, color film is used instead of paints. That is, at first, according to the drawing, a film is glued onto the glass, between the fragments of which a gap of 3 ÷ 5 mm is left. Then this gap is filled with black stained glass paint, which creates a border for individual fragments of the overall mosaic.
Check out, as well as photos and videos in a special publication on our portal.
Stained glass styles
Stained-glass windows can be made in various styles, but when choosing a pattern according to this criterion, one should, of course, rely on the design of the entire interior in order to create a harmonious combination of all elements.
Stained glass styles can have many subspecies, and because of this, it is sometimes even quite difficult to determine the most correct classification of the pattern. In this case, it is recommended to rely on the features of the images, colors and canonical characteristics.
antique style
The ancient style is based on the ancient Greek and Roman beginning. The uniqueness and harmony of the elements of these trends have not lost popularity in our time, and, in addition, many details of later styles were borrowed precisely from the antique.

Stained glass windows made in this style usually consist of numerous fragments and can be made using any of the techniques described above. If a decision is made to adhere to a certain direction, then an important condition is the observance of the characteristic features inherent in this particular style:
- The drawing should resemble an antique mosaic containing Greek ornamental elements - these are drawings of amphoras, nymphs, columns, landscapes with architectural structures that have details typical for buildings of that time - colonnades, porticos, triangular pediments, etc.
- Quite often, in the manufacture of stained-glass windows of this style, mixed techniques are used, using not only glass fragments, but also film, ceramics, metal and mother-of-pearl.
- Antique motifs are used in stained-glass windows installed in the form of false windows in the bathroom, when decorating interior glass, and, of course, for window openings with natural illumination.
ancient egyptian style
This interior and stained glass style has never gone out of fashion since Napoleon brought it to European culture after his campaign in Egypt. The stained-glass window in the ancient Egyptian style has not undergone any special changes since that time, retaining the geometry of the pattern and warm colors.

- Characteristic colors of the ancient Egyptian style are warm ocher, sandy, coral, orange and yellow hues, which go well with brown, deep blue ultramarine, cobalt, khaki and grass green, especially when they have a black frame.
- This style uses traditional ancient Egyptian ornaments, scenes from the life of the pharaohs, images of sacred animals, as well as famous hieroglyphs.
- For a stained-glass window of this direction, filler, "tiffany", "fusing", film, as well as classical techniques are suitable.
Egyptian style stained glass is commonly used in bathrooms, balconies or kitchens, and rarely used in living rooms or bedrooms due to the sheer amount of detail.
Gothick style
The Gothic style originated in Western Europe during the Middle Ages, and actively developed in the XII ÷ XV centuries. Over time, it became more complex, enriched with a variety of elements and shades.

"Cold" Gothic style
- At the initial stage of the emergence of the style, stained glass windows depicted mainly paintings with religious motifs, and later figures of symbolic animals, jousting tournaments, and hunting scenes began to appear.
- Gothic stained glass has deep rich hues such as dark green, burgundy, ultramarine, magenta, violet and black.
- Fragments of the painting are framed with gold, patina or blackened copper, with everything that can emphasize that this element of the interior belongs to Gothic motifs.
- The most optimal techniques for stained glass in the Gothic style are flood, painting, tiffany, classic, film, and also combined.
It must be said that for an ordinary apartment this style of interior design will be gloomy and will not bring comfort and warmth to the house, since it can rather be attributed to the cold monumental direction in art. The Gothic style is more suited to the large reception halls and high ceilings of Catholic churches.
Indian style
Indian stained glass originated many centuries ago as a window decoration for wealthy houses in India. In the future, like many other styles, it was enriched and somewhat diluted with plots and motifs from other countries, but on the whole it retained its originality.

- The Indian style is distinguished by the brightness of colors that cheer up - these are orange-red, bright yellow and green, light blue and other shades that seem to be illuminated from the outside by the sun. Stained glass windows may contain a large amount of gilding.
- Indian stained-glass windows include images of deities against the background of the water surface, and lush plant or mountain landscapes. The most popular element of Indian floral ornament is the so-called paisley - "cucumber", which is present in almost any picture of this style.

Classics of Indian-style ornaments - paisley or, in other words, "cucumber"
- For the execution of this stained-glass window, the tiffany technique, classical, painting and pouring, is used.
Modern style
Art Nouveau became firmly in vogue after the art exhibition held in Paris in 1900, and, probably, has forever entrenched itself among the most popular styles, both in art and in architectural design.

The main idea of this style is the primacy of form, that is, the postulate “form is more important than content” is taken as a basis.
- Art Nouveau style is distinguished by smooth lines, lightness, sophistication and sophistication. It can be a marine or plant theme, as well as the direction of light romance.
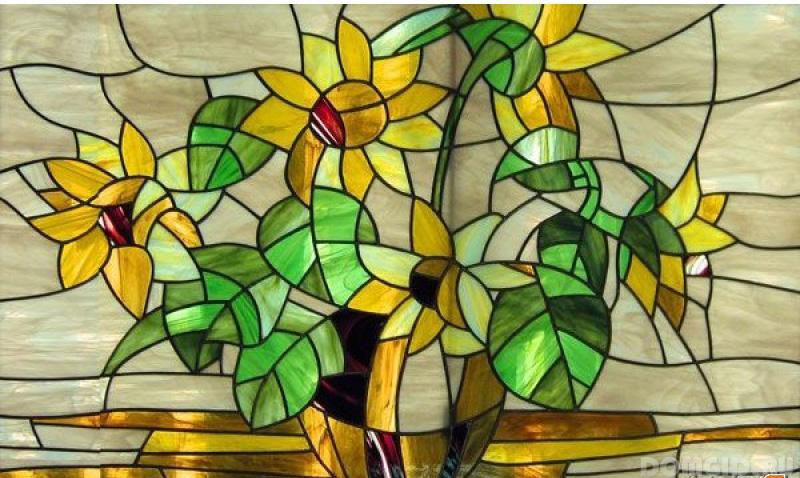
Stained-glass windows made in the Art Nouveau style quite often feature wrought-iron lattices entwined with dense green vegetation interspersed with flowers, or flowerpots with bouquets of unusual shapes installed in them.
- Stained-glass windows of this style are made in pastel soothing colors, and therefore fit perfectly into any interior solution, becoming its center and creating an atmosphere of warmth and comfort in the room.
- The stained-glass window can be made in the technique of "tiffany", pouring, film or painting.
art deco style
Over time, complex intricate weaves of plants, forged lattices, various scenes from the life of knights and religious themes have been replaced by simpler forms of modern styles. One of them, which many liked, is the art deco style.

Art Deco - the predominance of large details and the symmetry of the pattern
This direction appeared in the 20s of the last century, and was especially popular until the 60s. Today, the art deco style is also quite often used in the design of modern apartments and houses.
- Drawings of this stained glass style are distinguished by the symmetry of the arrangement of elements, the clarity of lines and pure colors, perfectly matched to each other, as well as a repeating pattern.
- The art deco style is performed in any of the above techniques, since the drawing usually consists of large fragments that can be cut out of glass or film, and also etched with a special acid or filled with paint.
Stained glass in abstract style
Abstractionism, as a recognized style, appeared in 1910, after the watercolors of French artists presented at the exhibition. Over time, he entered the European fashion, and they began to use it for the manufacture of various elements for decorating the interior, including stained-glass windows.

The abstract style can be chosen for various interior solutions, as several areas of stained glass art have merged in it.
- Abstractionism is distinguished by the numerous regular and irregular fragments, the brightness and richness of colors, which give expression to the entire room where the artistic panel is located.
- Stained glass in an abstract style is made using the technique of painting, fusing, film and pouring.
Having chosen a technique suitable for execution, it is quite possible to make a stained-glass window of this style on your own - there are simply no limits for imagination here.
Children's stained glass
The most interesting and touching can be called children's stained glass style. A variety of themes and motifs of children's motifs gives great scope for the imagination of parents, and it is quite possible to involve children in the process of sketch preparation. Most often, such stained-glass windows depict heroes of favorite fairy tales and cartoons, as well as stylized animals.

- Children's stained glass should have clear forms so that the child can immediately see what is depicted on it. It is necessary to think over the drawing so that it consists of smooth lines that can make the picture soft and calm, but at the same time bright and eye-catching.
- The stained-glass window can be placed on a clock or a mirror built into the closet, but you should not do it on the window, especially if the apartment is located above the first floor. The window is a zone of increased danger, and the child will even unconsciously reach for a beautiful bright image.

- In addition, for security reasons, you need to carefully consider the technique for performing the picture. It should not consist of individual glass fragments, even if they are very well bonded to each other. Sharp relief protrusions must be completely excluded.
The picture should not be boring and uninteresting. For children's stained-glass windows, film, flood and painted techniques are well suited, and even better if the picture is applied to safe synthetic glass.
Find out how in a special publication of our portal.
Making a stained glass window with your own hands
The simplest of all the techniques for making stained glass at home, which are available for beginners to master, are painted and film. It is these techniques that will be discussed in more detail.
Creating a stained glass window using glass painting technique
| Illustration | |
|---|---|
 | The first step is to measure the glass on which the stained glass will be applied. According to these dimensions, you need to choose the finished drawing you like, or, with sufficient experience, do it yourself. If the finished drawing is taken from the Internet, then it is printed on ordinary A-4 sheets in any graphics editor using the multi-page printing function (for this, for example, the Publisher application included in the MS Office package is great). Then the fragments are joined and glued along the lines with adhesive tape to recreate a single pattern. |
 | In this case, the drawing is done independently, by hand. At the same time, it is important to ensure that each of its details is well highlighted, the boundaries are drawn. |
 | The glass is ideally laid on the finished sketch, onto which the entire drawing will be transferred. Glass must be thoroughly degreased with alcohol or ammonia solutions. |
 | After cleaning the glass surface, the applied compositions are carefully wiped off, since the “working platform” should not only be free of greasy spots, but also be completely dry. |
 | In the next step, all the contours of the picture are outlined on the glass according to the template laid under it. These borders are usually applied with black paint, as it highlights all the fragments well and makes the final drawing clearer. For stained glass, as mentioned above, special stained glass paints are used. The applied contour must dry completely, otherwise you can spoil all the work done by accidentally smearing the paint during further operations. |
 | After the borders have dried, they proceed to coloring the finished drawing. This process can be compared to a children's coloring book, where each of the elements must acquire its own color. This stage of stained glass manufacturing must be approached creatively, but also with the utmost care. Such toning is usually applied with thin brushes - previously applied and dried out borders will not allow the paint to spread. |
 | Colors should be as pure as possible, bright, be sure to harmonize with each other. If it is supposed to give the drawing a special picturesqueness, then darker or lighter shades are best applied later, after the primary, basic colors have dried. Otherwise, dirt may turn out, and all work will go down the drain. |
 | The finished stained-glass window should look aesthetically pleasing and neat, as well as harmonize well with the interior style. Glass decorated in this way can be carefully inserted into the frame, for example, of an interior door, or used to decorate furniture doors. |
Creation of a stained-glass window in film technique
This stained glass technique involves the use of film and lead tape. Usually, stylized drawings with clear shapes are chosen for film technology - art deco style. With a careful approach, such a stained-glass window is probably even easier to perform than using paints.
| Illustration | Brief description of the operation to be performed |
|---|---|
 | Most often, a drawing for stained glass in this technique is printed on a printer using the already mentioned graphic applications. So you can get accurate and clear lines and shapes of all, even the smallest fragments. If the work is being done for the first time, you should not take a too complex drawing with intricate elements. The lines of the drawing should have a width of about 4÷4.5 mm. |
 | After printing the drawing on sheets, they are carefully glued together. All lines must match perfectly, as the aesthetics of the final result depends on this. |
 | The next step, the glass prepared to size must be thoroughly cleaned of dust and dirt, degreased from the side with which it will be superimposed on the pattern. Then, the glass is wiped dry. |
 | Dry glass is laid on a prefabricated sheet with a pattern. It is important to immediately achieve the necessary evenness of the stack stacking relative to the graphic drawing, so that the work does not go skewed relative to the “canvas”. It is desirable to ensure that the glass is securely fixed so that there is no accidental shift during further operations. It is recommended to use small pieces of thin double-sided tape for this (shown by arrows), placing them in those places where they will not interfere with the pattern of the stained-glass window. |
 | For work, you need to prepare such special tools as a roller, a squeegee with a felt lining, a narrow knife with removable blades, a clamp, scissors, metal rulers of different lengths. From the materials you will need a stained glass self-adhesive film of different colors and a special lead self-adhesive stained glass tape of a suitable shade. |
 | The glass laid on the drawing must once again be well degreased from the outside, with an alcohol solution, and then wiped dry with clean microfiber, which is guaranteed not to leave small fibers on the surface. |
 | Next, work begins with the film. Experts recommend using high-quality English-made RegaLead film for installation, but it is several times more expensive than products from other companies. Inexpensive films can be unstable to ultraviolet rays, so they can burn out very quickly if the stained glass window is on the sunny side. |
 | The film is cut for each element separately according to its size. Here, of course, the best option would be to organize the illumination of the desktop from below. If this is not possible, then you will have to measure each fragment with a ruler and adjust it in place. |
 | The film is measured and cut out a little larger than a fragment of the picture, and its edges are corrected after gluing. |
 | Before gluing each fragment, the place where it will be applied is thoroughly wiped (degreased) and dried with a microfiber cloth. |
 | Further, if the fragment is a strip, then the substrate is removed from the cut piece of film, from one of its edges. The edge of the part is fixed on the glass, smoothing with a squeegee with a felt nozzle. The other edge of the fragment is stretched, which makes it possible to place it exactly along the lines of the picture. |
 | Then, with a clear and quick movement, the film strip is pressed against the glass with a squeegee. This operation must be carried out quickly so that even the slightest dust does not have time to get on the glass surface, otherwise the effect of accuracy may be irretrievably lost. Excess film along the edges of the glass is cut off with a sharp knife. The adhesive on the back of the film sets almost immediately, but not fully, so it is possible to correct irregularities if they are accidentally created. |
 | This photo shows two parallel strips pasted on glass well. One of them is already exactly, along the ruler, cut off, and the second has just been pasted, and its edges have not yet been processed. |
 | The film should be on the black stripe by 1.5÷2 mm. A long ruler is laid exactly along this line, a sharp knife is drawn along it, and the excess part of the film is carefully removed. Later in the course of work, the black lines of the drawing will be covered with lead tape, which is pasted last. |
 | In the event that a speck of dust nevertheless got under the film, then it must be tried to remove it. To do this, the edge of the fragment is carefully lifted, peeled off from the glass, and with the tip of the knife, carefully, so as not to damage the material, remove a speck of dust. It is strictly forbidden to carry out this operation with your fingers, since the prints from them will certainly remain on the adhesive layer of the film, and will be clearly visible through the light. After removing a speck of dust, the film is again stretched and pressed with a squeegee. |
 | This illustration shows well two finished fragments of the future stained glass. |
 | Further, work continues on the same principle. If the drawing element has a curvilinear configuration, then its correction is carried out on the spot. |
 | To do this, a larger fragment of the film is cut out, and after gluing, excess sections are carefully cut off from it exactly along the black lines of the picture. Here, of course, “fullness of the hand” is very important, so that the manipulations of the knife are carefully verified, and the edges turn out to be even, exactly according to the pattern. |
 | If there are several small fragments of different colors in the conceived drawing in the neighborhood, then you can do it in two ways. In the first case, the entire multi-colored zone is covered with a film of the same color, and then extra fragments are cut out. So you can significantly win in the speed of stained glass production, but lose in material consumption. |
 | You can do it differently, in a more professional way, when each fragment of the pattern is covered with a separate piece of film and cut out separately. Material savings are achieved here, but the work, especially in the absence of experience, will take longer, and in addition, there is a high probability of making a mistake. Therefore, if the second method of operation is chosen, fragments of a slightly larger film are glued onto individual elements. |
 | Cuts are also made along the black lines of the template pattern. In no case should overlaps of films of adjacent fragments remain, since with increasing temperature the material tends to expand, and in the absence of a gap between the individual elements of the mosaic pattern, deformation may appear on the surface. And over time, the film will begin to flake off the glass altogether. Therefore, a gap of 1.5 ÷ 2 mm should remain between the fragments. |
 | The remaining parts of the pattern are cut out and fixed on the glass using the same technique. |
 | In the illustration, you can clearly see how elements with complex patterns are glued. |
 | When all the color fragments are filled with the film, they proceed to sticking the lead tape. This material for framing can be of different colors - a ribbon is produced for gold, silver, copper with a variety of intermediate shades. Lead tape can be matte or glossy, it is plastic, as it consists of 98÷99% pure lead, so it easily takes any given shape, and it is very comfortable to work with it. The lower part of this stained glass material is also covered with a special adhesive, which has excellent adhesion to glass. |
 | Each fragment of the stained-glass window is framed with a ribbon. When joining several lines of the tape at one point, the edges must be overlapped, that is, if the cuts go to the edge of the entire composition, then they overlap with a segment framing the entire edge. In the middle part of the pattern, the edges of the tape should also overlap each other. After gluing, the tape is carefully rolled on top with a roller. |
 | The straight lines of the stained-glass window, framed with lead tape, must be leveled with a ruler and a squeegee - this process must be carried out immediately, while the glue is not yet dry. |
 | A simple way to align straight lines allows you to make them perfectly even. To do this, a ruler is applied to the strip of glued tape, set exactly according to the template, and then an angle or edge of the squeegee is drawn between the ruler and the tape, which will finally install the tape in a given place. |
 | As mentioned above, each of the edges of the tape must overlap with the next glued segment. For example, if a round zone with fragments is pasted over, then for this a whole piece is taken and, after laying out the circle, one edge of the tape is superimposed on the other, and then rolled with a roller. The cut edges must be closed so that during cleaning you do not accidentally touch or peel off any of them. Therefore, it is recommended to carefully consider in advance which of the fragments, where and when to glue. It is necessary to try to plan the sequence of gluing in such a way that at the end of the work, only one open edge of the tape remains. |
 | After that, the entire glued tape is rolled with a roller. |
 | Next, using a special clamp, which is usually included in the accessories for creating stained glass windows, you need to go through all the joints, pressing the strips of tape together. This is done to avoid the formation of cracks with the subsequent ingress of moisture or detergents into them during operation. |
 | The tape is pressed on both sides of the joint, which, by the way, gives the overall composition the naturalness of a real stained-glass window - a visual effect of a “forged joint” is obtained. Full sealing of joints and overlaps will ensure the longest possible service life of the created stained-glass window. |
 | After that, the stained-glass window should be carefully treated with a detergent, but it should not be applied to the glass with a finished pattern, but to a microfiber cloth. The stained-glass window is wiped very carefully, in the direction only along the lead tapes, in order to avoid their shift, since the glue has not yet completely polymerized. |
 | Further, from under the glass, you can remove the pattern-pattern. |
 | The finished stained glass should have straight lines and be very neat. Only in this case, it will look spectacular and become a full-fledged decoration of the room, an eye-catching center of interior design. |
If one of the simple techniques is chosen for manufacturing, then they can be mastered quickly enough. However, before starting to make a final stained-glass window, you need to practice a little in order to at least “fill your hand” a little. Perhaps this creative process will be able to captivate someone so much that after completing one picture on glass, the novice master will want to do this business professionally.
The art of making stained glass has been known since ancient times. Such pleasure is very expensive. Those stained-glass windows, photos of which can be found on the Internet, are made by experienced craftsmen using unique technologies and materials. But, do-it-yourself stained-glass windows or their imitation can be made at home.
A stained glass window on a window or door creates an image flavor of the authentic design of the room. To create a stained glass picture, choose the sketch that suits your taste and the available technology. Stained glass pattern can be anything: geometric pattern, flowers, ornament, birds or animals.
Types and choice of stained glass technology

- Filled stained-glass windows are made by applying paints to glass. For contour lines, special paint is used in tubes with a tip adapted for drawing lines. It can be purchased at any art store. After the contour lines have dried, the free gaps are filled with multi-colored dyes for glass, a more liquid consistency.
- Film stained glass is the simplest and most inexpensive way of stained glass on glass. A translucent self-adhesive multi-colored film is cut out according to patterns and glued to the glass. It turns out a kind of application. To imitate a full-fledged stained-glass window, the seams are decorated with self-adhesive lead or bronze flexible tape.
- The stained glass window, according to the Tiffany method, is closest to the real stained glass window. It is made from pieces of colored and transparent glass. You need some skills in working with a glass cutter and the ability to solder.
Stained glass window manufacturing

- The sketch of the drawing is made with a pencil and is drawn with a marker on a sheet of paper corresponding to the format of the processed glass. Choose colors for filled sectors and designate them. Degrease the treated glass and dry it. Put the sketch on the table, and glass on top of it.
- Contour lines are easiest to apply with embossed thick paint. Tubes of special paint are equipped with nozzles for lines of various thicknesses. They are produced in different colors, including imitating metals. Let the paint dry.
- You can make wire aluminum stained glass windows. To do this, take an aluminum wire with a diameter of 1.6 mm, bend it along the contour lines and grease with PVA emulsion. Lay on the glass and press down with a weight. Drying time is an hour and a half.
- Prepare the aniline color. Dilute it with distilled water and filter through cheesecloth. The consistency of the paints should be like thick sour cream. Paint should be applied progressively with a clean brush. If the saturation of the area is weak, let it dry and paint over again.
- After the paints have dried, turn the glass over to the other side and decorate the places where the aluminum wire is glued with a self-adhesive metallized tape. Open the front side for reliability and aesthetic appearance with a transparent varnish.
Technique for making film stained glass

- You will need a lot of scraps of translucent colored or multi-colored self-adhesive film. A sketch of a stained-glass window can be made on paper and then transferred to glass. Putting the sketch under the glass, transfer the contour lines to it with a marker or watercolors.
- Carefully paste the details of the picture cut out according to the templates onto a fat-free plane. Smooth air bubbles gently to the edges with your fingers or a roller. Poke small bubbles that cannot be removed with a thin needle and carefully squeeze with your fingers until the swelling is completely eliminated.
- To create a relief contour, a self-adhesive lead tape is used. Joints and joints are processed with a soldering iron.
Tiffany stained glass technology

- For such stained-glass windows, you will need a set of multi-colored glasses, preferably of the same thickness. The ability to cut glass in a curved pattern and solder tin will also come in handy. When sketching a pattern for a Tiffany stained glass window, keep in mind that the abundance of "T" - shaped intersections of the seams of the contour, contributes to the strength of the stained glass structure.
- On thick paper, draw a sketch of the stained glass window. Cut it into individual template fragments with scissors. The table is covered with a soft cloth, a template is placed on it, and colored glass is placed on top. Glass cutter, it is better to use bulk. Smoothly, with light pressure, make a line along the contour and beat with a glass cutter until a crack appears on the glass. Use pliers to remove excess pieces of glass. Internal arcs can be done in stages. Deviation from the contour line, permissible within 4 mm. The edge should be processed with a grinder and a fine-grained file - chamfer along the edges.
- Each fragment of a stained glass panel is wrapped with foil. Folia is a thin copper foil. A foil is applied from the end part with a small but uniform launch onto the plane on both sides. The details of the stained-glass window begin to be laid out on a plywood sheet from the top corner to the sides and down. Parts of the stained-glass panel are fixed with small carnations.
- The space between the seams is treated with flux, degreased and prepared for soldering. The flux removes oxides from the copper foil and aids in the ductile application of the tin solder. You can treat the surface with soldering fat or mix it with soldering acid. For the manufacture of Tiffany stained glass, tin solder POS - 61 is suitable.
- The tip of the tin wire is applied to the groove between the glass parts and filled with molten tin solder using a heated soldering iron. Adjust the height of the seam yourself, but try not to overheat or stain the glass. Soldering is done on both sides.
- Areas close to the perimeter do not need to be soldered, leave room for the frame. Select a U - shaped tin profile corresponding to the thickness of the glass, cut frame rails from it with angles at the edges at 45 °. Taking the stained glass panel into the frame, the connection at the corners, carefully solder with a thin seam.
The stained-glass window is cleaned of visible defects, the seams are corrected with fine sandpaper, and washed with soapy water. After drying, it can be installed on a door or window.
How to make a stained glass window with your own hands: 3 common waysStained-glass windows are a special decor that enriches and increases the value of the interior, making it original and sublime. However, the interior is made expensive not only by the highly artistic stained glass products, but also by their considerable cost. And this is quite justified, because stained glass is a painstaking creative work, art, and skill in such a matter is highly valued. In this case, reasonable questions arise whether it is possible to master this craft on your own and how to make a stained glass window with your own hands.
Photo 1 - Classic stained glass Peacock
Do-it-yourself stained-glass windows - where to start?
Do-it-yourself stained-glass windows, of course, begin with a great desire, and if closer to the point, with the development of a sketch. If we talk about classical techniques and their imitations, then the sketches should be:
- full size stained glass on paper and cardboard;
- with clearly traced contours of details, breaking the pattern into separate figures;
- on cardboard indicating the color and material of each fragment;
- for typesetting stained-glass windows - possibly with indication of the direction of glass fibers and numbering of parts.
In theory, this may seem complicated, but in practice everything is simpler: the appearance of a complete stained-glass window is similar to a coloring book for children, on separate parts of which numbers, arrows or other necessary symbols are drawn, which makes it easier to assemble the stained-glass window. Depending on the complexity of the pattern and the stained glass technique, more or less of them will be required.
Advice. To save time and effort on developing a sketch and stencil, you can download and print a ready-made stencil for stained glass. You will need a disappearing marker to transfer the design to the glass.

Figure 1 - Scheme of a type-setting stained-glass window with notes
Stained glass technology
The manufacturing technology is selected, among other things, on the basis of what will be the stained-glass object: whether it is planned to have a stained-glass window on a window or on a door, on a mirror or on a vase, or perhaps it will be stained-glass lamps or glass paintings. Each individual case will have its own manufacturing and installation features that make a certain technology a priority.
The following three techniques are most suitable for the production of stained glass at home:
- type-setting stained-glass window Tiffany;
- film false stained glass;
- contour stained-glass window.
They do not require specific expensive equipment, such as a fusing oven, or a well-equipped workshop in connection with working with chemicals, abrasives and harmful fumes, such as glass matting or stained glass in the classic lead-solder technique.
The Tiffany theme essentially combines all three methods, since film and flooded stained-glass windows are ways to imitate classical techniques.

Photo 2 - An example of a finished Tiffany stained glass window from Scottish Stained Glass
How to make stained glass Tiffany
In short: according to the finished sketch, templates of parts are cut out of cardboard, they are circled on glass, the parts are cut out with a glass cutter, polished, each element is wrapped around the perimeter with copper foil, all parts are laid out in a single pattern, the position of the edge elements is fixed with carnations, the foil at the joints is treated with flux, soldering is carried out with tin solder on one, and then on the other side of the product, the stained-glass window is inserted into the frame of the metal profile and soldered to it.
At each stage of creating a stained glass window, a lot of nuances should be taken into account:
- details with several sharp corners (N-shaped smalts) or intricate S-shaped curves are not desirable in the drawing: soft bends of curved lines are best;
- it will be cheaper not sheet glass for stained-glass windows, but cullet glass; glass cutting should be done with a diamond glass cutter, having previously trained on ordinary glass; for curvilinear figures, it is necessary to perform auxiliary cuts along the tangent;
- the manufacture of parts and their placement in the drawing is carried out simultaneously: each part, starting from the upper corner, is cut out, polished, applied to the drawing, wrapped in foil, again applied to the drawing and, after verification, fixed in the appropriate place; it is more convenient to assemble a stained-glass window on a surface illuminated from below;
- for soldering, you need a 100-watt soldering iron with a nickel-plated tip and low-melting tin solder without rosin; so that the glass does not crack, you should not solder too large areas at a time, you need to let the stained glass cool down, etc.

Photo 3 - Fragment of handmade film stained-glass window from the Ecowindow company
Do-it-yourself stained-glass windows, master class:
How to make film stained glass
Making a film stained glass window is a simpler task than assembling a Tiffany stained glass window.
- Glass is cleaned; according to the sketch placed under it, contour lines are laid out with a lead tape. The ends of each line should overlap with the next piece of tape. When all the contours are pasted over, the tape is rolled with a roller;
- The glass is turned over, wiped; elements from the film are cut out along the contours formed by the lead tape, glued to this reverse side and also rolled with a separate film roller;
- The joints of the films are glued with lead tape, repeating the contours of the tape on the first side, and rolled with a roller; the finished stained-glass window is wiped with detergent.
To decorate a false stained-glass window, you can use real glass parts that are seated on a special glue.

Photo 4 - Contour stained-glass windows and glass painting
How to make a stained glass window
A stained-glass window requires a polymer contour and stained-glass acrylic lacquer or special paint.
- A sketch is drawn or printed, which is placed under transparent glass or transferred with a disappearing marker to a matte or mirror base;
- The glass surface is cleaned and degreased;
- A polymer contour is applied according to the drawing, forming closed areas;
- After the contour has dried, each element is carefully poured with liquid paint.
You need to apply a drop of paint near the contour, without touching it. The paint should not be smeared, it should spread naturally, so that the result is a beautiful stained glass window playing with light.
DIY stained glass, video:
Many people think that decorating a room with their own hands, stained glass paints is difficult. In fact, the lesson can become an exciting game for both adults and children. The main thing is not to be afraid to fantasize and not give up, making the first mistakes. If you are used to doing everything with your own hands, then stained glass will not cause you much trouble.
Types of stained glass
Before we start creating stained glass windows with our own hands, let's look at the main types of stained glass art and technology.
fusing
One of the most difficult techniques for creating stained glass windows is fusing. The stained-glass window is made of solid glass with colored elements applied to it. There is no fastening metal thread between the fragments, and the finished canvas is calcined in a red-hot oven for several hours.
The details of these stained-glass windows can have clear boundaries, can merge and overlap each other, or can take on textured outlines. It all depends on the idea of the master and on the temperature of the melting furnace. Stained-glass windows are created in production; it is difficult to repeat the technique at home.

Fish. Glass. Fusing. Master Elena Yaroshenko
Of course, it will be difficult to repeat the fusing technique with a small child, but with an older child, you can sign up for a stained glass master class. Impressions from a non-standard lesson will remain for many years.

Master Lilia Gorbach
Tiffany
In stained-glass windows created using the Tiffany technology, working with glass involves bonding individual parts with a metal strip and soldering. Bizarre shapes, intricate plots and bright colors are the main component of any product in the tiffany technique. From a lamp, and a lampshade by a table lamp, to a doll house - all this can be decorated with Tiffany stained glass technique.
Creating stained glass windows using the Tiffany technique with your own hands can cause the following difficulties:
- glass will have to be cut into small parts and sanded edges;
- a metal thread does not always lend itself to soldering the first time;
- It is strongly not recommended to master this technique with a child.

Vera Yurieva, St. Petersburg

“Fairy”, Stained glass in Tiffany technique. Master Olga Lisitsyna, Voronezh region.


Lamp made of colored glass and glass drops in the Tiffany technique.
Master Nadya Bezrukova, Samara
Film stained glass windows
Stained-glass windows made in the English technique, which involves assembling a picture on glass from parts of a self-adhesive film, are gaining particular popularity. For this stained glass window with your own hands you will need:
- self-adhesive stained glass film of different colors;
- self-adhesive lead tape;
- rubber roller;
- paint knife;
- glass.
This technique can be mastered with older children, having previously instructed how to work with materials.

The essence of the English method is to transfer the outline of the picture onto the glass. The blank can be printed from templates posted on the Internet, or you can create it yourself. First, we apply a contour to the glass with a black marker, then we glue it along the contour with a lead self-adhesive and turn the glass over. We paste a colored stained glass film and apply the second contour of the lead tape. It remains to fix the lead contour with a rubber roller.

Film stained glass on the cabinet door. Workshop “Miracle of Glass”
Stained glass films can be monochromatic and multi-color, smooth and with embossed effects, interspersed with particles of various shapes and shades.

Painting on glass with stained glass paints
The most affordable way to create stained glass windows with your own hands is stained glass paints. This version of the stained glass will appeal to both adults and children. It is based on: drawing the outline and drawing of the future stained-glass window with special paints.
A picture created with stained glass paints must dry completely after being made, therefore, after applying a contour or picture, the product will have to be left alone for at least 24 hours.
But you can paint with stained glass paints with a child of different ages. The younger ones can copy the contours through the film - the basis, the older ones transfer the drawing directly onto the glass.

Interior plate with stained glass painting in African style.
3dogsdesign workshop, St. Petersburg

Flashlight with stained glass painting.
Decorator Maria Nett, Chelyabinsk

Painting with stained glass paints.
Maria Kirillova, Nizhny Novgorod
Technique for creating stained-glass windows according to your own sketch
If you are seriously thinking about creating a stained glass window with your own hands, using stained glass paints, do not rush to master windows and glazed doors. First, you should try to draw a stained-glass window on a small area. For example, decorate a night light or a vase, a glass plate or a mug.
stained glass paints
To create stained-glass windows with your own hands, you need to decide which paints you prefer to use. All paints for stained glass can be divided into fired and non-fired. Fired allow you to calcinate the finished product in the furnace, that is, to extend the life of the finished stained glass window.
But, despite the obvious plus of the fired materials, such stained glass paints have drawbacks. Firstly, after firing the product, the paint becomes matte, losing its former brightness. Secondly, some shades after annealing may change their color. Turbidity may appear.
Unfired paints do not have such features. The finished product has bright, rich colors, smooth, glossy structure. The only “but” is that you will have to wash this product manually using mild detergents.

Paints and contours for glass without firing Idea
Contours for stained glass paints are sold in special tubes. Very often, beginners buy a black outline. It is not right. Working with a black outline is more difficult than it seems at first glance. Lines can be unreasonably wide, and contours can be conspicuous. Overshadowing the whole picture.
A beginner in stained glass decoration and decor is better to use the contours of silver or white colors. Do not be afraid, at first the line will be larger than you planned, but with experience you will understand how to extrude the contour paint of the desired width.
So that the tip of the nozzle does not dry out and does not become overgrown with paint residues, always place a damp sponge next to the product, on which you will wipe off all excess.
Stages of work
Before working with glass, it must be rid of dirt and excess grease. To do this, wash the base under running water with detergent.
Now for the sketch. If you do not want to repeat replicated pictures and dream of creating something unusual, then the drawing can be done using special programs or in simple Paint, which is on every computer.
Having created and printed a sketch, we proceed to transfer it to a glass product. If this is a night light for decor, then we carefully set the sheet with the pattern inside the glass lampshade, fix it with adhesive tape.

Now we take a black marker for working on glass (its outline is erased very easily), and we draw the outlines of the picture on our lampshade. The next step: apply the stained glass contour and leave the product to dry.

In creating stained glass windows with your own hands, it is important to work correctly with stained glass paints. Before use, each tube must be shaken, but not shaken, so as not to raise a bunch of bubbles.

Stained glass paints are applied in a thick layer on every detail of the picture. Allow each side to dry completely. The finished product can be opened with acrylic varnish to fix the parts, or it can be calcined in an oven. In the second case, pay attention to the heat resistance of the base glass.

Stained glass paints as fun for a kid
In order not to go broke on expensive stained glass paints, you can invent fun for the baby yourself. To do this, take a tube of PVA glue and several bags of food coloring. Mix the dye with glue until you get a homogeneous, thick mass.
Under the containers, you can use empty gouache tubes, or baby food jars. Such material is ideal for work even for a small child.

The next step is to apply the pattern to the film. Do-it-yourself stained glass paints are applied to a file sheet containing the desired picture. A child over three years of age will cope with tracing the contour and applying a pattern according to the template under the film. The kid needs to be given space for creativity.
After complete drying, the film with the painting is separated from the template and glued onto the glass.

My daughter loves to draw the sun and flowers, houses and little men. If earlier her art forced me to wash off the paint from the windows for hours, now the acrylic pictures are easily attached to the glass. They are also easy to remove, which is great!

This is how interesting, friendly and creative we create stained-glass windows with our own hands with stained-glass paints, which is what we wish you too!