Do-it-yourself gold digger. Powerful do-it-yourself Pirat metal detector. Metal detector from improvised means
Everyone can assemble such a device, even those who are completely far from electronics, you just need to solder all the details as in the diagram. The metal detector consists of two microcircuits. They do not require any firmware or programming.
Power supply 12 volts, can be from AA batteries but better than a 12v battery (small)
The coil is wound on a 190mm mandrel and contains 25 turns of PEV 0.5 wire
Characteristics:
- Current consumption 30-40 mA
- Reacts to all metals No discrimination
- Sensitivity 25 mm coin - 20 cm
- Large metal objects - 150 cm
- All details are not expensive and easily accessible.
List of required parts:
1) Soldering iron
2) Textolite
3) Wires
4) Drill bit 1mm
Here is a list of required parts

The scheme of the metal detector itself

The circuit uses 2 microcircuits (NE555 and K157UD2). They are quite common. K157UD2 - you can pick it out of the old equipment, which I successfully did


Capacitors 100nF must be taken film, like this, we take the voltage as little as possible

Print out the board sketch on plain paper

Cut out a piece of textolite under its size.

Apply tightly and with a sharp object push through the places of future holes

Here's how it should turn out.

Next, take any drill or drilling machine and drill holes


After drilling, you need to draw tracks. You can do this through, or just paint them with Nitro varnish with a simple brush. The tracks should turn out exactly the same as on the paper template. And we charge a fee.

In the places marked in red, we put jumpers:


Next, just solder all the components in place.
For K157UD2, it is better to put an adapter socket.


To wind the search coil, you need a copper wire with a diameter of 0.5-0.7 mm

If there is none, you can use another. I did not have enough copper varnished wire. I took an old network cable.

Took off the shell. There were enough wires. Two cores were enough for me, they also wound the coil.


According to the scheme, the coil is 19 cm in diameter and contains 25 turns. I note right away that the coil must be made of such a diameter based on what you will be looking for. The larger the coil, the deeper the search, but a large coil does not see small details well. The small coil sees small details well, but the depth is not great. I immediately wound myself three coils 23cm (25 turns), 15cm (17 turns) and 10cm (13-15 turns). If you need to dig up scrap metal, then we put a large one, if you look for small things on the beach, then the coil is smaller, well, you'll figure it out yourself.
We wind the coil on anything of a suitable diameter and wrap it tightly with electrical tape so that the turns are tightly next to each other.


The coil should be as flat as possible. The speaker took the first one that came across.
Now we connect everything and try the circuit for performance.
After applying power, you need to wait 15-20 seconds until the circuit warms up. We put the coil away from any metal, it is best to hang it in the air. After we start twisting the 100K variable resistor until clicks appear. As soon as the clicks appear, twist in the opposite direction, as soon as the clicks disappear, that's enough. After that, we also adjust the 10K resistor.
At the expense of the K157UD2 chip. In addition to the one I dug out, I asked a neighbor for 1 more and bought two at the radio market. I inserted the purchased microcircuits, turned on the device, but it refused to work. I racked my brains for a long time, until I just put another microcircuit (the one that I soldered). And everything immediately worked. So that's what a transitional socket is for, in order to pick up a live microcircuit and do not suffer with soldering and soldering.
Purchased chips
Among amateur radio designs, developments that help detect metal objects hidden in the ground are of particular interest. Especially if the latter are small in size, lie at a considerable depth and are, moreover, non-ferromagnets.
Good-quality electrical circuits of such devices, called metal detectors by analogy with well-known military developments, and descriptions of fully functional designs have been published in various technical
Editions, but they are often designed for trained, experienced do-it-yourselfers who have a good material base, scarce parts.
But the design we propose can be completely repeated, made even by a beginner. Moreover, the necessary parts (including a 1 MHz quartz resonator) will be quite affordable to purchase. And what about the sensitivity of the assembled metal detector... It can be judged at least by the fact that with the help of the proposed device it is easy to find, for example, a copper coin with a diameter of 20 mm and a thickness of 1.5 mm at a depth of 0.9 m.
Operating principle
It is based on comparing two frequencies. One of them is standard, and the other is changing. Moreover, its deviations depend on the appearance of metal objects in the field of a highly sensitive search coil. In modern metal detectors, to which the design under consideration can quite reasonably be attributed, the reference oscillator operates at a frequency that differs by an order of magnitude from that which occurs in the field of the search coil. In our case, the reference generator (see circuit diagram) is implemented on two logic elements ZI-NOT integrated DD2. Its frequency is stabilized and is determined by a ZQ1 quartz resonator (1 MHz). The generator with a variable frequency is made on the first two elements of the IC DD1. The oscillatory circuit here is formed by the search coil L1, capacitors C2 and C3, as well as the varicap VD1. And for tuning to a frequency of 100 kHz, the potentiometer R2 is used, which sets the required voltage to the varicap VD1.
Fig.1. Schematic diagram of a highly sensitive homemade metal detector.
As buffer signal amplifiers, logic elements DD1.3 and DD2.3 are used, working on a mixer DD1.4. The indicator is a high-resistance telephone capsule BF1. And the capacitor C10 is used as a shunt for the high-frequency component coming from the mixer.
The printed circuit board configuration is shown in the corresponding illustration. And the layout of the radio elements on the side opposite to the printed conductors is given here in a different color.

Fig.2. The printed circuit board of a homemade metal detector, indicating the location of the elements.
The metal detector is powered by a 9 V DC source. And since high stabilization is not necessary here, a Krona battery is used. Capacitors C8 and C9 successfully work as a filter.
The search coil requires special precision and attention in manufacturing. It is wound on a vinyl tube with an outer diameter of 15 mm and an inner diameter of 10 mm, bent in the shape of a circle 0 200 mm. The coil contains 100 turns of PEV-0.27 wire. When the winding is done, it is wrapped with aluminum foil to create an electrostatic shield (reducing the effect of capacitance between the coil and ground). It is important to prevent electrical contact between the winding wire and the sharp edges of the foil. In particular, “twisting obliquely” will help here. And to protect the aluminum coating itself from mechanical damage, the coil is additionally wrapped with an insulating bandage tape.
The diameter of the coil may be different. But the smaller it is, the higher the sensitivity of the entire device, but the search area for hidden metal objects narrows. With an increase in the diameter of the coil, the effect is reversed.
Work with a metal detector as follows. Having placed the search coil in close proximity to the earth's surface, tune the generator with potentiometer R2. And so that the sound is not heard in the telephone capsule. When the coil moves above the surface of the earth (almost close to the latter), the cherished place is found - by the appearance of sound in the telephone capsule.
When using the device discussed above to find objects hidden in the ground of archaeological and national cultural value, prior permission is required from the relevant authorities.
To date, there are many different ideas that allow you to make a metal detector with your own hands at home. Some of them require certain skills in working with radio and electrical devices, and some do not require any knowledge in this area to create. Further, readers of "" will be provided with several interesting and at the same time simple schemes for creating a homemade metal detector!
Idea number 1 - Drives in motion!
Surely you have already seen or heard that the simplest metal detector can be made by yourself using a CD and DVD disc, as shown in the photo. The scheme is quite simple and does not require any professional tool or skills.
All you need to prepare is:
- disks (it is better to use double-sided ones, because in this case it will turn out to make the device more sensitive);
- headphones;
- calculator (can be the cheapest and easiest);
- battery "Krona";
- insulating tape;
- glue.
Step-by-step instructions for assembling a metal detector from discs and a calculator are as follows:
- We cut off the headphone plug and strip the insulation on two wires (we expose the cores by 5-10 mm).
- We divide each stripped wire into 2 identical parts (in the end, four parts should be obtained)
- We attach one contact from different groups to each of the disks (if the media is one-sided, the fastening must be done to the writing side). We fix the wires with glue.
- We fix the wires on the surface of the carrier with electrical tape.
- We connect the remaining two wires to the plus and minus of the battery, after which we carefully isolate the bare contacts with electrical tape.
- We take a calculator, turn it on and attach it to the disk (which is CD) with electrical tape.
- We put a DVD disk on top of the calculator and connect both media with electrical tape.
- We fix the battery on the surface of the DVD using electrical tape.
- We are testing a homemade metal detector made from improvised means.
You can also make a small handle to make it convenient to use the device. Most often, this version of a home-made metal detector is used to search for objects in a small radius (for example, in order to find a profile at). To search for coins and non-ferrous metals, such a homemade product, of course, is not suitable, but it can still come in handy for the home.
Video instructions for assembling a metal detector from discs
Idea number 2 - Use the radio
Another version of a simple, but no less functional metal detector can be assembled using the following available tools:
- CD box;
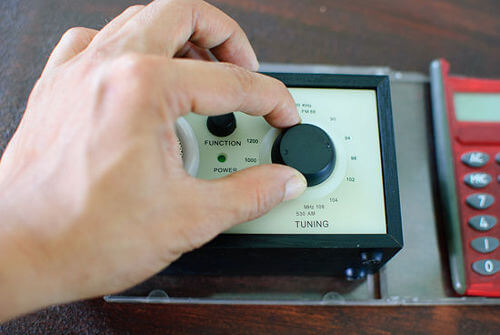
- a radio receiver that operates in the AM band;
- calculator;
- Double-sided tape.
A detailed description of how to quickly, simply and easily make a metal detector from a radio:
- On the inner walls of the box we attach the calculator and the receiver using double-sided tape.
- We turn on both devices, and we tune the radio receiver to the maximum frequency (at the same time, so that there is no noise from radio stations).
- We close the box and slowly open it until a more or less clear sound appears. In this position, a homemade metal detector is set to search.
As you can see, you can make a homemade product in no longer than 5 minutes. This option is suitable for electric kettles, because. here you can do without drawings and you don’t need to connect any microcircuits.
You can additionally make a handle to facilitate the process of use. With the help of such a homemade product, you can check the wall before, otherwise, when chasing, you will fall into the old wiring!
An Object Lesson on Making a Good Radio Metal Detector
Here, in fact, there are those methods that are most reasonable to use to make a metal detector at home with your own hands. As for the soldering of a more complex model, like a butterfly or a terminator, this is up to you. On the one hand, you can save at least 5,000 rubles (the cost of a budget model of the device), but on the other hand, the reviews of many homemade lovers indicate that such devices rarely work as we would like.
Even the most serious and respectable citizens, at the word "treasure" experience a slight excitement. We literally walk through treasures, of which there are immeasurably many in our land.
But how do you look under the soil layer to know exactly where to dig?
Professional treasure hunters use expensive equipment, the purchase of which can pay off after one successful find. Archaeologists, builders, geologists, members of search societies - use the equipment provided by the organization in which they work.
But what about novice treasure hunters on a limited budget? You can make a metal detector at home with your own hands.
To understand the subject, consider the design and principle of operation of the device
Popular metal detectors work using the properties of electromagnetic induction. Main components:
- transmitter - generator of electromagnetic oscillations
- transmitting coil, receiving coil (in some models, the coils are combined for compactness)
- electromagnetic wave receiver
- decoder that separates the useful signal from the general background
- signaling device (indicator).

The generator, with the help of a transmitting coil, creates an electromagnetic field (EMF) around it with specified characteristics. The receiver scans the environment and compares the field performance with the reference. If there are no changes, nothing happens in the scheme.
- When a conductor (any metal) enters the zone of action of the field, the base EMF induces Foucault currents in it. These eddy currents create their own electromagnetic field of the object. The receiver determines the distortion of the base EMF and gives a signal to the indicator (sound or visual notification).
- If the object under test is not metallic, but has ferromagnetic properties, it shields the underlying EMF, also causing distortion.
Important! There is an erroneous opinion that the soil in which searches are made should not be electrically conductive.
This is not true. The main thing is that the electromagnetic or ferromagnetic properties of the medium and search objects should be different from each other.
That is, against the background of certain characteristics of the EMF formed by the search environment, the field of individual objects will stand out.
Many people unreasonably believe that homemade metal detectors are inferior in many respects to factory-made branded samples.
But in fact, structures that are correctly assembled with their own hands, at times, turn out to be not only better, but also cheaper than “factory” competitors.
Worth knowing: most treasure hunters and local historians, in order to save money, try to choose the cheapest options. As a result, they either assemble metal detectors themselves or purchase home-made custom devices.
Beginners, as well as people who are not versed in electronics, at first are frightened by the abundance of not only special terminology, but also various formulas and schemes. However, if you delve a little, then everything immediately becomes clear, even with the knowledge gained in school lessons in physics.
Therefore, it is worth, first of all, to disassemble the principle of operation of a metal detector, what it is and how it can be assembled independently at home.
How does it work
The principle of operation of this device is to use an electromagnetic field. It is created by the transmitter coil and after a collision with an object that conducts current (and this is most metals), eddy currents are created that introduce distortion into the EPM of the coil.
In cases where the object is not electrically conductive, but has its own magnetic field, the interference created by it will also be caught by shielding.
After this, changes in the electromagnetic field are sent directly to the control unit, which emits a special sound signal to notify about the discovery of a person, and in more expensive models displays data on the display.
It is worth analyzing how such devices are created following the example of a Pirate-type metal detector.

Metal detector "Pirate"
We make a printed circuit board with our own hands
First you need to create a printed circuit board, where all the nodes of the metal detector will be located in the future. The method of laser-ironing technology or simply LUT is best suited.
To do this, it will be necessary to perform the manufacturing steps in the following sequence:
- First, using only a laser printer, it is necessary to print the appropriate diagram created through the Sprint-Layout program. It is best to use light weight photo paper for this.
- We prepare the workpiece from textolite, first we sand it, after which we clean it with a solution. It should have dimensions of 84x31.
- Now on top of the blank we put photo paper with the diagram on the front side on which it was printed. We cover it with an A4 sheet and begin to iron it with a hot iron in order to transfer the marking scheme to the textolite.
- After fixing the circuit from the toner, we place it all in water, where we carefully remove the paper with our fingers.
- Further, if there are smeared areas, we correct them with a regular needle.
- Now the board must be put for several hours in a solution of copper sulfate (ferric chloride can also be used).
- The toner can be removed without any problem with any solvent, such as acetone.
- We drill holes to accommodate structural elements in the future (the drill must be very thin).
- The last stage is to lude the tracks of the board. To do this, a special solution "LTI-120" is smeared on the surface, which needs to be smeared with soldering iron solder.
Installing elements on the board
 This stage of creating a metal detector consists in mounting all the elements on the created board:
- The main microcircuit is the domestic KR1006VI1 or its foreign analogue NE555. Please note that before mounting under it, you need to solder the jumper.
- Next, a two-channel amplifier K157UD2 is installed. It can be bought or taken from Soviet tape recorders.
- After that, 2 SMD capacitors are mounted, as well as one resistor of the MLT C2-23 type.
- Now you need to solder two transistors. One must be NPN structures and the other PNP. It is advisable to use BC557 and BC547. However, analogs are also suitable. As a field effect transistor, it is recommended to take the IRF-740 or other options with similar characteristics.
- The capacitors are installed last. They should be taken with a minimum TKE indicator, which will increase the thermal stability of the entire structure.
Note: the hardest thing will be to get the K157UD2 amplifier from this circuit. The reason is that this is already an old chip. That is why you can try to find similar modern options with similar parameters.

The creation of a homemade coil is carried out on a frame with a diameter of 20 cm. The total number of turns should be approximately 25 pcs. This indicator assumes that a PEV wire is used, which has a diameter of 0.5 mm.
However, there is a certain feature. The total number of turns can be changed up or down. To find the best option, you need to take a coin to check in which case there will be the largest distance of its “catching”.
Other elements
A signal speaker can be used taken from a portable radio. It is important that it has a resistance of 8 ohms (it is possible to use Chinese variants).

To carry out the adjustment, you will need two potentiometer models of different power: the first is 10 kOhm, and the second is already 100 kOhm. To minimize the effect of interference (it will be difficult to completely eliminate them), it is recommended to use a shielded wire that will connect the circuit and the coil. The power source of the metal detector must be at least 12V.

 When the whole structure is tested for operability, it is necessary to make a frame for the future metal detector. However, here you can give only some recommendations, because everyone will create it from the items at hand:
- to make the bar more convenient, it is worth buying 5 meters of an ordinary PVC pipe (which are used in plumbing), as well as several jumpers. At its upper end, it is worth installing a special palm rest to make it more comfortable to hold. For the board, you can find any box of the appropriate size that needs to be fixed on the rod;
- to power the system, you can use a battery from a conventional screwdriver. Its advantages are light weight and large capacity;
- when creating the body and structure, please note that they should not contain any extra metal elements. The reason is that they significantly distort the resulting electromagnetic field of the future device.
Checking a metal detector
 First of all, you need to adjust the sensitivity using the potentiometers. The threshold will be uniform, while not very frequent, crackling.
So, he will have to “find” a five-ruble coin from a distance of approximately 30 cm, but if the coin has dimensions like the Soviet ruble, then already somewhere from 40 cm. He will “see” large and bulky metal from a distance of more than a meter.
Such a device will not be able to search for small objects at a considerable depth. In addition, he will not be able to distinguish the size and type of metal found. That is why, while searching for coins, it will be possible to stumble upon ordinary nails.
This model of a homemade metal detector is suitable for people who are just starting to learn the basics of treasure hunting or do not have the necessary funds to purchase an expensive device.
Their this video You will learn how to make a homemade metal detector: