Open curtains for the kitchen on massive branches. Do-it-yourself curtain patterns for the kitchen - useful tips
Sewing curtains with your own hands in the kitchen is not an easy task, but it is quite doable. As with anything, the first thing you need to do is prepare well.
Think through all the details, subject to certain rules.
- Kitchen curtains should be combined in style and color scheme with the rest of the interior (see also). Plain curtains are suitable for a room with colored wallpaper. If the walls are painted in one color, you can choose curtains with a pattern.
- For a small, not very bright kitchen, it is better to choose light, light curtains.
- By choosing the right style of curtains, you can visually change the space, make adjustments to the layout of the room, and the like.
- In general, sewing curtains with your own hands is an important and responsible job.
Curtain making process
First of all, you need to decide on the design of the curtains. Then choose fabrics, cornice and, if any, decorative elements. At the same time, it is necessary to take into account general style kitchen interior.
What should you consider before starting work?
First of all, check what kind of hanging rods you have at home, or rather, what kind of handles on the material, be it: frogs, hooks, or maybe just a round stick to which you strung the curtain? This will depend on how you make the fixation, but don't worry - it will just be different cuts made with scissors. Because we're here to make it quick and easy!
Other important aspect is the exact measurement of the window. Be sure to put a few inches long on top and about 4 inches wide on both sides, one piece of curtain. This will be important from an aesthetic point of view of the fabric. For the convenience and pleasure of work, let's prepare a suitable and convenient workplace. Ideally if you are going to big table or at the end of the floor where you can freely distribute the material. You can buy it from a popular furniture chain for little money.
For direct work, you will need sewing machine, needles with threads, pattern, scissors for cutting.
After you have clearly imagined how the curtains will look, you need to sketch them on paper. Or you can take a finished pattern in a specialized magazine.
You will also need to take measurements of the window, taking into account the design features of future curtains. Then you buy fabric, cut it, and start sewing curtains.
The material used on our curtains should not be too thick. If we choose this, we will have difficulty pressing the belt enough on both sides of the fabric. However, if you are looking for a thicker material, you can add a second strip to the body, which will help seal the intended uneven edge firmly. However, this is due to a loss in the width of the material, so let's also think about this when measuring fabric. Lighter curtains, for example, more decorative than functional, are ideal for this type of method.
Pressing the strap on the wrap
The selected material in the store, cut to length or width by hand with scissors, is not suitable for hanging. This is where the idea of the harness came from, which, when high temperature glued to the edge of the material. First we measure the width of the tongue, then we iron the iron so that the material is bent and we have our finished folded "edge". Then we will place the belt along the entire length, then apply damp cloth and ironing with an iron. This is how we do it all the time, making sure the belt sticks together.
The following video shows how to cut and sew curtains yourself
Sewing curtains without a pattern
If you chose a simple curtain design, you can do without a pattern. After taking measurements of the window (length and width), taking into account the length of the curtains, you need to calculate how much fabric you will need.
Before cutting, it is advisable to wet and iron the fabric so that there is no problem with shrinkage.
How to attach curtain to curtain?
It's a tedious and demanding job, but it will pay off! When we do the above step, we only press the edge at the top of the curtain and make two straight cuts with scissors next to each other at a distance of one centimeter and repeat the entire width of the curtain at equal intervals, depending on the number of hooks we have. Ideally, if it's an even number. The screen will then be symmetrically positioned. If we have frogs we don't make any holes and we just stick to the same compressed edge.
Now you can proceed directly to cutting:
- It is most convenient to cut curtains on the floor. you lay out the fabric front side up.
- Define the bottom edge and align it. To do this, draw a perpendicular to the side edge of the fabric. Then, along this line, align the bottom with scissors.
- The next step, measure the required length of the curtain, draw a perpendicular to the side edge and cut the fabric.
- The second curtain is cut out in the same way. If the fabric is with a pattern, you need to take this into account and dock it.
After cutting, the panels are hemmed from below. A ribbon with loops for the eaves is sewn to the top.
If we want to hang the curtain on a stick, the first way is to stick the strip and the top of the curtain and cut the material vertically, 2 centimeters below the top edge. Don't cut holes in a circle because it won't pass the exam! Simply cut a straight line into the material with scissors or sharp knife. Through such holes we alternate the material on the bar. Another idea is to attach the strap to the curtain cushioning to leave room for the tape in the pocket. So the veil just rolls over the curtain.
But think about it if the strap that the found material sticks on will support the weight of the material and won't ooze over time! Then the curtain falls from the curtain! Our model opens with model. In a very pleasant case, professional functions and accessories were closed. Let's start with 60 stitches that will satisfy even demanding and demanding users. There is also an automatic thread cutting function, such as the end of a stitch. In the set we find many interesting additions, among other things. seam sewing, overlock stitching or sewing and decorative stitches, as well as a table that expands working area and hard suitcase.
Advice!
Prepared in this way, straight curtains can be decorated with tassels, braid or lace for decoration.
What length of curtains to choose
Depending on the style and design of the curtains, there are three basic lengths that are most commonly used in the kitchen.
The diagram shows examples:
A - length to the windowsill;
True, this is not a typical sewing machine, but the overlocker will be a great addition to every studio - both hobby and professional. This is a 3 or 4 thread overlocker that is sure to please even the most demanding tailor. In addition, we can sew stretch materials, silk, knitwear and even wool blankets, thanks to regulated transport.
The hands of the users were handed out. smooth adjustment of the length and width of the line, the ability to adjust the cutting width of the sewing material and the production of a seam roller without changing the line. The color-coded threading system guarantees quick and easy changeover.
B - 15 cm below the windowsill;
C - length to floor level.
Note!
The main point when sewing curtains is to decide on the length and, depending on this, carefully calculate the amount of fabric.
The kitchen window can be of various sizes. Despite this, most often chosen short curtains, about 10-20 cm below the windowsill. This is done so that the window sill space can be used.
This time, Brother's proposal. Equipped with 70 programmed stitches and the ability to work without using a foot starter. The maker is equipped with up to 7 machine guns and 3 eyelet holes, and the set includes several legs, a chisel, 4 spools, a double needle, a case and many other accessories. Everything was closed in a beautiful beautiful building.
Brother offers many interesting proposals, another. The most important functions are built-in 40 stitches, automatic threaded thread, quick loading of the lower thread in the cylinder, adjustable stitch length and width, free lever, manual speed controller and five automatic holes. All closed in tasteful and modern accommodation.
To sew curtains for the kitchen with your own hands, patterns are not always necessary. The simplest option is an even panel of light and transparent fabrics. It can be a veil, cambric, muslin, cotton. Via special tape such curtains are draped and hung on a wooden or metal cornice.
Straight curtains made of dense and opaque fabrics are often decorated with decorative elements such as a ribbon or a border.
Our resume is extremely closed interesting device unknown company. is an multifunction device with computer control, which will attract primarily advanced and demanding users. The equipment is equipped with 200 sewing programs, buttons for easier work, a set of stands and a table to increase the field. There was a smooth adjustment of the length up to 5 mm and the stitch width up to 7 mm. Particular attention should be paid to the mentioned table, which greatly increases the working area, allowing the use of large fabrics such as curtains, curtains, blankets, etc.
Features of cutting curtains in different styles
Curtains sewn using the patchwork technique (from flaps) are perfect for this. If you are fond of needlework, you probably have a lot of colorful remnants of fabrics. These flaps are washed and ironed, then cut out with a stencil, and sewn together. For such curtains, fabrics of the same type are preferable.
A patchwork pattern is usually made up of identical parts. It can be squares, rectangles and other shapes. For strength, the panels sewn in this way are fixed to the lining. Cords, ribbons or braid can also be used as decoration for such curtains.
In a simple cut. Such a pattern of curtains for the kitchen with your own hands is possible even for beginners. You will need a bright, thin fabric, such as nylon or nylon, and a metal cornice with a beautiful tip (arrow, cone, etc.).
The highlight of Art Nouveau curtains is asymmetry and elegant draperies. The airy fabric can simply be thrown over the cornice and wrapped around it. Or a direct light curtain can be pulled together with a decorative cord or tape at the level of the window sill and fixed to the wall using a special holder.
Curtains for classical cuisine have more complex structure. They consist of thick curtains, tulle and lambrequin. The main thing in tailoring classic curtains is to think over everything well and make the right pattern.
The price of such curtains will be quite high. But in the end you will create a work of art.
The diagram below shows a pattern classic curtains. You can take your measurements and cut the curtains by analogy.
The use of lambrequin in the design of curtains
Lambrequin is a separate decorative element curtains, which are located at the top, under the cornice. It can be part of complex layered curtains or used as a standalone curtain..
In the Art Nouveau style, the lambrequin most often reproduces the form interesting element furniture. For country style, ruffles, bows, frills and ties will be appropriate.
To decorate a small window in the kitchen, you can sew and hang only a lambrequin. It is best to make it flat and with a small amount of folds. Since there is more dirt in the kitchen and it is more difficult to remove them.
Instructions for creating lambrequins in the kitchen:
- To choose the most suitable lambrequin for your window, you can take a tracing paper, draw a sketch on it and attach it to the window. This will help you choose best option.
- To cut a lambrequin, you need to mark the pattern from the center so that everything turns out uniform. Do not forget to also add to the workpiece the width of the cornice on both sides and 3 cm per allowance.
- Flat pelmet is very easy to hang. To do this, you can use a finished cornice, or a regular board, upholstered in fabric. It is fixed on special corners and should protrude beyond the borders of the window by 5-7 cm. You can fix the lambrequin on a Velcro tape.
- Finishing a flat lambrequin can be very diverse - from decorative braid to romantic frills.
- For sewing you will need - a pattern, a gasket with an adhesive base, fabric, cardboard and sewing tools.
- First, you cut out a blank of a lambrequin from an adhesive strip without any allowances for seams. Fold the fabric in half facing inward, apply a gasket and glue it with an iron. Then measure 1.5 cm for allowances and cut out.
- The next step is to machine stitch all sides, leaving a straight top edge. Notch allowances in the corners, cut close to the seam and turn inside out.
- Cut out a rapport from cardboard or a solid figured edge of a lambrequin. Insert this detail into the lambrequin and iron it. Trim the top hem. The edge is tucked inward by 1.5 cm and sewn with a blind seam.
- Sew one piece of Velcro to the lambrequin, the second to the cornice. On a lambrequin, smooth the corners under the eaves.
Conclusion
Any hostess with certain skills can sew curtains for the kitchen on her own. Such creative work will bring great joy and satisfaction!
Window decoration in the kitchen - not like that simple task. It is necessary to think not only about the beauty of the curtains, but also about the convenience of their use. We have to take into account the length, width and matter. It is absolutely not necessary to spend a lot of money on ordering in an atelier or adjusting to size. purchased item, you can easily sew curtains for the kitchen with your own hands.
A variety of types of window draperies for the kitchen room is dictated by the specifics of the room. If the area is small, then it is better not to hang long curtains, because they will get dirty and interfere with cooking. Constant airing, the use of grease, soot, possible splashes of sauces and much more will become an obstacle to hanging expensive curtains. They will often need to be washed or dry-cleaned. What to do? AT this moment many models of curtains were invented specifically for the kitchen.
- Curtain-arch. Perfect for a small room too. It is sewn from a single piece of fabric, shortened in the center and elongated at the edges. Such a curtain has its advantages: an open window sill for using the workspace, the ability not to close the battery. In addition, it visually enlarges the room. But there are also disadvantages: it cannot be used near the stove, as it is a fire hazard, it does not protect from sunlight.


- Roman curtain. This model has been used for many centuries. Its principle resembles blinds, and the advantages are obvious: it requires a minimum of canvas, as it is cut out exactly along the window opening, various opening mechanisms make the process mechanized, does not interfere with the workflow, and it can be used in any interior and in combination with other types of curtains.


- Cafe curtains. They are popular in rooms of any size. Short, neat, usually in pleasant light colors, these curtains have earned their rightful niche. The disadvantage is that they are not suitable for every interior. Having learned how to make them, you can sew similar ones for a summer residence or a country house.


![]()


- Classic. Plain curtain in any suitable fabric allowable length. Such products look exactly classic, for which they got their name.


- Rolled ones are somewhat reminiscent of Roman ones, but their principle is still different. Opening-closing occurs with the help of a roller, fixed in the box at the top. These are modern and comfortable curtains that can be used in any room and combined with other models.


Requirements for the material are dictated by the purpose of the room. If the window is located next to the stove, then light curtains made of gas, synthetic and other fire hazardous types of material cannot be used. Do not use expensive curtain fabric on cafe curtains - it will look ridiculous. In addition, expensive fabric will quickly become unusable from frequent washing. It is better to use natural materials: linen, cotton. For Roman and roller blinds, you can buy any material suitable for the interior. In general, curtains for the kitchen can be made from anything, even knitted and filament. Bamboo and paper curtains are popular. Some use Japanese sliding curtains or just hang blinds.
How to sew curtains with your own hands
If you have already decided on the model, then it's time to take measurements. Measurement methods are different in the case of sewing classic or roll options. Let's start with the most difficult measurements. The photo shows how and what needs to be measured. Let's give some clarifications. Ceiling height is required to calculate the length of the product. You need to know the distance from the ceiling to the window in order to properly hang the cornice. The depth of the window sill and battery is very important so as not to make a mistake with the size of the brackets on the eaves. Then the curtain will hang freely and will not go around the protruding parts. And finally, the width of the window is important in determining the length of the cornice. The walls need to be measured if you are going to drape the entire wall. True, in kitchen area this is done extremely rarely, since any free space for furniture and other items.
Attention! All measurements are made with a tape measure of at least 3 meters in length to avoid errors during docking.

Measurements required for tailoring classic curtains
For roller blinds and Roman blinds, we make slightly different measurements. The exact size of the window is very important here. The diagram gives a complete picture of how to do this.

Measurements for roller blinds and roman blinds
Pattern of curtains in the kitchen
Sew kitchen curtains DIY is not so difficult, but you need to start with a pattern. To begin with, consider the construction of a drawing of a curtain-arch. Another name for this curtain is "Cat's House" for its cozy and slightly rustic look. 2016-2017 marked the peak of country style fashion, and therefore we should not miss such a model.

Several options for patterns of kitchen "arches"
The “Cat House” model has been very popular for many years and is good because the choice of fabric for it has no limits: in a flower or plain fabrics, in stripes, a combination of several types of fabrics - everything will work!

Pattern and photo examples of "Arched" curtains
If you decide to make a Roman blind, then the following drawing will help you do this. The main thing here is to observe the technology and the sewing process.

Roman blind scheme
If you have the opportunity to drape a window opening with a classic curtain, then you will need a fabric that forms soft folds.

Curtain drawing
Lambrequin "Bell" is often used in kitchen area instead of main curtains or in combination with classic models.

Pattern lambrequin "Bell"
"Imperial" - will blend well into classic interior kitchens. Such a curtain drapes the window beautifully and is not a hindrance during cooking.

Drawing of the "Imperial curtain"
A drawing of a classic curtain will help you make a curtain on a drawstring or on grommets. You just need to change the type of attachment.

Classic curtain pattern
Procedure
If you would like to sew simple model, then you can do without a pattern. The cutting of the fabric is carried out in accordance with the measurements: from the cornice to the desired length and width in accordance with the size of the window opening. Don't forget to allow for seam allowances and half the width for soft folds!
Attention! The width of the product should not be equal to the width of the window opening!
- Open the canvases. Before proceeding with any cut, whether simple curtain or a designer model, it is necessary to iron the matter. This must be done especially carefully, since any fold can skew. It is necessary to start work with the layout. If you have two canvases, then align the drawing, its direction, and only after that start measuring the length and width.
- Processing of side seams and a bottom. Seams are hemmed in two ways: with preliminary ironing and basting, as well as hem with safety pins. In any case, a basting is necessary - the length is too long to rely on the eye. The side seams are processed with a hem of 1 cm. The bottom of the curtain is folded over by 5-10 cm, while the line takes place along the lower and upper edges of the hem. You can strengthen the bottom seam with an adhesive base or dublerin.
Important! Do not forget to match the thread to the color of the material!

Product hem
- Sew on the top of the product curtain tape and hang the curtain.

Sewing curtain tape
Sewing curtains in a rustic style
And now let's look at how sewing a simple curtain differs from country-style curtains. First of all, it is the choice of fabric and accessories. Rustic style implies light, colored matter. It is better to take linen or cotton of the appropriate colors. You will need braid, curtain tape and duct tape for gaskets or dublerin.

Two designs in rustic style
After cutting the main canvases, it is necessary to cut the lambrequin, which in this case looks like a cut one and a half times the width of the window. We process the side seams and the bottom according to the same principle as in the previous description. But the upper part is done in a different way. In the first case, we see a lambrequin, dressed directly on a curtain stick. This can be done in three ways: by simply bending the fabric to the diameter of the stick, sewing in the drawstring, or simply threading the curtain stick through the holes of the curtain tape as in the photo.

Threading a curtain stick into a curtain tape
In the second photo we see overhead "loops" for attaching to the eaves. Their tailoring is easy. Cut out 6 pieces of fabric measuring 8x16 cm, taking into account the hem of 1 cm on each side. With the help of an iron, an adhesive fabric base is applied to the wrong side to strengthen future “loops”. The edges are folded over adhesive base, are ironed and detached.
The only negative in these curtains is the presence of two cornices, the upper and the middle of the window opening. These curtains will look great not only in the kitchen, but also in the country, and making them is not difficult. In the country, sew something similar from the remnants of different fabrics. Then beautiful decoration the window will cost you absolutely free.
What to hang curtains on
In previous chapters, we have already described fastening with curtain tape. But this method is not always suitable. Some curtains are threaded through the curtain through special holes - grommets. Many people wonder if they can be attached to curtains at home. There is a definite answer to this question - yes, it is quite possible to make an exclusive curtain with your own hands. True, there is a small condition - fastening the eyelets requires care and utmost accuracy: ugly or incorrectly set, they will not decorate, but will spoil the product. You can't do this kind of work.
![]()
Variety of grommet rings
We start with the purchase. Eyelets come in plastic, wood and metal in all shapes and sizes. The most optimal are plastic round ones. They win over other easy fasteners and beneficial use: curtains with such fasteners can be safely washed. We select the size based on 1.5-2 cm more than the diameter of the eaves.
Now for them you need to mark places on the curtain: every 18-20 cm. To top part the curtains did not sag, but looked tough, doublerin was glued into the hem. The further process is the following:
- We apply the grommet ring to the mark and draw it along the inner circle.
- Cut out the excess fabric with a sharp knife or scissors.
- We put one part of the eyelet under the material, and the other on top and fasten both parts until it clicks.
Attention! Some types of eyelets are attached using special devices. When buying, you must ask the seller a question!

Eyelet fastening with a clamp
How to sew on hooks
Among the wide variety of fastening methods, hooks occupy a special place. They are comfortable, suitable for both string curtain systems and models with furrows.

Types of plastic hooks
The advantages of hooks are obvious: they are very cheap, so you can not be afraid of breakage or loss, they are convenient and easy to attach to the curtain. Hooks have not been sewn for a long time, now they are threaded into the loops of the curtain tape, and with the base into the furrow or onto the string of the eaves.

Attaching hooks to curtains
How to hang curtains on rings
Rings are a beautiful and comfortable mount. Despite the diversity modern ways, rings remain in demand and do not go out of fashion. But you can attach rings to curtains, not only by sewing or tying them tightly to the fabric. Today, the rings are connected to hooks or clips, which is much more convenient, because in this case you will not be forced to remove the curtain rod to wash the curtain.
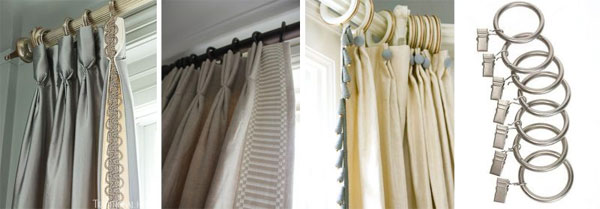
Ring fastening
Any housewife can make curtains for the kitchen with her own hands, the main thing is to choose the level of complexity, model and methods of fastening. Any thing done by yourself is not only a cost saving, but also an opportunity to be proud of a unique product that no one else has.