Hidden door hinges: how to choose and install correctly. The process of installing hinges on the door
Next milestone after purchasing the door and accessories, this is a check of the integrity of the product upon delivery. Reputable organizations accept complaints about the quality of doors before installation begins.
How to install door hinges with your own hands
What does it mean? On the appointed day of delivery, it arrives at your doorstep vehicle with your order. You go down to the car and present documents on payment. In response, the driver opens the body doors, points to your doors and slips a paper where you need to sign that you accept the goods and have no complaints about the quality.
And here it is a dilemma - the doors and the box with platbands are packed and in order to at least inspect them, it is necessary to remove the protection. If this is done in the car (although it will still not be possible to inspect it normally there), it is very inconvenient to lift the unpacked door into the apartment.
The door leaf must not be placed on the floor without a gasket and must generally be carried and handled like glass. What to do? The driver is waiting for a signature, you are thinking - suddenly having signed and getting to the apartment, you will find, for example, a scratch? How to prove that it was not you who, when exiting the elevator, spoiled such beautiful (in the recent past) doors?
There is only one solution, this is to negotiate everything directly in the store and, in extreme cases, order delivery to the apartment, where, in the presence of forwarders, carefully examine and only then sign for the delivery and the absence of claims.

Before starting the installation of the hinges, carefully inspect the door. Even the largest and most famous organizations do not accept claims after the installation has begun.
We put the door horizontally on some kind of protective material (in my case, the substrate) linoleum or cardboard removed from the package. We prepare the tool, where the main actor is a chisel. The operation is responsible, so be sure to correct the chisel (grind to the sharpness of a razor blade). Then paste paper tape in place of the hinges.


We mark 200 mm. from the bottom and 200 mm. from the top of the door. These points are the marks for the beginning of the loops. There is a deviation from this rule, which consists in shifting the top loop up by about 50 mm. With this option, the platband covering the top (part of the box above the door) visually adds height to the entire structure and the offset hinge looks like it is standing at the same distance as the bottom one.
These subtleties can be neglected and loops can be placed at the same distance from the edge of the canvas at a practice-proven value of 20 centimeters. We apply the loop to the mark, align it, focusing on the edge of the plate (it must exactly match the edge of the door) and prick the centers of the two holes with an awl.
Next, we take two self-tapping screws 25 * 3.5 mm for wood or metal (no difference) and fasten the loop, making sure that there is no displacement. That's right, not “draw the outline of the loop with a pencil” !!!
We do not touch the self-tapping screws included in the hinge kit - they are screwed in once when everything is prepared. It is quite difficult to tighten the self-tapping screws the first time without shifting the loop, but out of four holes, fix the loop in at least two, in the end it will work. After making sure that the loop is holding firmly, we take a knife with a new blade and cut through the contour of the loop at a slight inclination. Without much fanaticism, since it is enough for us to cut through the veneer or lamination.

Installing hinges using this technique will allow you to do all the work accurately and accurately.
Next, unscrew the screws and remove the loop. The adhesive tape remaining outside the loop can be left for now. With a chisel, we begin to select a tree to a depth equal to the thickness of the loop. Let's not rush! If you spend an hour and a half on cutting one sample and do it well, it's a hundred times better than ruining the product in 10 minutes.


- What are door hinges?
- List of required tools
- How to properly install hinges?
- Process details
- What is the easiest way to choose a place for inserting loops?
- Butterfly loops - convenient and simple!
- Door adjustment
If you decide on their own to install interior door structures in your apartment (or house), then installing hinges on the door will be a relevant issue. Indeed, for most people, this stage of work becomes an insurmountable problem on the way to the implementation of the tasks. You will learn how to properly install door canopies here.
Often construction stores offer to purchase interior door structures without hinges. They must be purchased separately, although it is worth knowing which door is supposed to be mounted and what are its dimensions.
What are door hinges?
There are three types of door hinges:
- left;
- rights;
- universal.

In order to decide on necessary option hinges on the door, it is necessary to carry out the following manipulations:
- Go to the doorway where the interior structure will be mounted.
- It is necessary to stand on the side where the door will open by moving towards you. Most people, deluded, stand on the side where the door opens from itself. It's not worth doing that. After all, you will get the wrong type of loops as a result.
- We mentally open the door for ourselves. If this happens to the right side, then the loops should be bought right. If to the left, then, accordingly, the type of loops is left. It's all very simple and elementary. Just don't get confused.
Back to index
List of required tools
- chisel;
- a hammer;
- screwdriver.

These are the most important tools that cannot be dispensed with during the process of installing a hinge on a door. But, of course, it would be good to also prepare additional tools, namely:
- drill;
- thin drills;
- screwdriver;
- cutter;
- awl.
The presence of such auxiliary equipment will greatly facilitate your work.
Back to index
How to properly install hinges?
There is no fundamental difference where, first of all, it is better to embed the hinges in the door frame or in the design of the door itself. Although the installation process is recommended to start with the door when it is made of solid wood and has small knots.
To begin with, it is worth deciding on the place where the loops will be attached. And only then we accept optimal solution by finding the area on the door where the hinges will be located in the box.
Experts recommend stepping back from the edge door structure 15-25 cm - this will be the place of the first tie-in. It is worth paying special attention to how the hinges are embedded on other doors in the house, especially if they are located next to each other, so that there is not much difference. Perfect option- 20 cm from the edge of the door. If it turns out that there is a knot in this place, then it is better to retreat a little. After all, there are no strict regulations in the process of performing such work, and therefore you can easily change the distance of the tie-in.
To begin with, it is recommended to take measurements along the upper and lower edges of the door structure. At the same time, it is worth leaving marks with chalk or pencil. Pay close attention to where the top and bottom of the interior structure that you decide to install yourself are, and on which side the glass is located, if it is present on the door.
Each individual loop during the marking process must be applied in such a way that its hinges come out with front side doors.

In this case, the front side is considered to be the side where the entire structure will open. It is recommended to mark the loops in two ways.
In the first case, it is necessary to apply exactly the loop to the selected place, and then circle it with a perfectly sharpened pencil. In this case, the edges of the hinge and the door structure must be exactly and parallel to each other.
In the second case, it is necessary to screw the loop with screws, and then cut the contour with a cutter or draw marks with an ordinary pencil. In this case, it is enough to tighten only two screws. But it is worthwhile to understand that in this case the hinge may go a little to the side, so you need to be extremely careful and most accurate so that the door does not then stand askew.
Back to index
Process details

It is recommended to tighten the screw exactly in the center. And for this it is better to pre-mark with a pencil and an awl. After all, this is the only way to avoid retracting the loop during the tightening process. After the markup is done, it is worth cutting the contour with a cutter to the thickness of the loop used. And only then proceed to get a flat platform with a chisel.
If desired, the contour can be punched using a chisel. To do this, it is recommended to put the tool in required space and light blows on it with a hammer to knock out the contour. Special attention it is worth paying attention to the fact that for a purchased door structure, most often in the process misuse the chisel outline obscures the plane of the door.
And according to the rules, the chisel should be located so that this contour goes inward. This part will be selected in the future to obtain the most even and beautiful edge at the loop.
Correctly embedded hinges on the door must be located on the same level. In the case when you observe a slight protrusion of a separate part of the loop, it is necessary to slightly deepen the entire surface of the site. In this case, it is important not to overdo it, since the recess should be uniform. And it’s very simple to check how well you did on your own on the door.
To do this, you need to take a ruler and attach it to the surface of the loop. If it turns out that the loop protrudes somewhat, then in the future you will have a huge gap between interior design and a door frame, and on the other side the door may not close. Whereas a deep-seated hinge will cause tremendous pressure on the door frame and further pulling of the hinges.
In order to eliminate the consequences obtained, it is recommended for the first case to unscrew the loop and seat it deeper. And for the second - calculate the required height of the gasket to raise the loop to the desired level. This pad is most often made from rigid cardboard, but you can also make it from other materials that you have. It is necessary to lay such a gasket directly under the loop. In this case, no fixation is necessary, the loop twisted on top will already hold it tightly.
The loop- a device with which the door leaf is attached to the frame. Loops are screw-in and hinged, detachable and one-piece, left and right.
Detachable loop- you can remove the door from it without unscrewing the hinges.
One-piece (universal) loop- the one that will have to be unscrewed before removing the door.
Wings- small plates with holes on the sides of the hinge, with which it is attached to the door.
Door leaf- so the sellers call the door itself.
door frame- door frame
Europorch- protrusions on the ends of the door.
Remember how Mitrofanushka from Fonvizin's play "Undergrowth" answered the teacher's question: "Is the door a noun or an adjective?" This negligent student said that, they say, the door that has been standing by the closet for the sixth week and has not yet been hung is “a noun”. And the door attached to its place is an adjective. From a scientific point of view, this is, of course, complete nonsense. But in a certain sense, there is a healthy grain here. In fact, without hinges, the door is really only a semi-finished product. It is with the help of hinges that the door leaf is attached to the frame and begins to work: open and close.
The variety of models and “styles” of loops that exist today causes a slight shock: “Why so many? It would seem that whichever you choose, any one will do. In fact, before buying hinges, you need to understand for which door you need them. Otherwise, you simply cannot hang the door.
What are loops made of?
First, there are brass hinges. Metal (usually various zinc or steel alloys) is brass-plated on top so that the hinge does not rust and its parts slide better. Often the hinges are enameled different colors or other compositions that imitate bronze, gold, chrome.
Secondly, there are hinges made entirely of brass. They are much more common: this material is plastic, easy to process. They can also be polished or chrome plated.
And the third, the most expensive and high-quality, are steel. The fact is that brass is softer than steel, and over time it begins to wear out slightly and grind off slightly. Steel hinges are almost eternal.
According to the method of fastening, the hinges can be divided into two large groups: screw-in and hinged.
The screw-in loop is fastened with threaded pins. It looks like two small cylinders with screws on the sides. First, one of these cylinders is screwed into the door, the other into the door frame, then the cylinders are mounted one on top of the other.
This design is mainly used for light interior doors(20–50 kg).
Universal loop
Hinged hinges are attached using small plates with holes on the sides - wings: one wing is screwed to the canvas, the other to the box. Hinged loops are divided into universal and non-universal, and the latter are also left and right. Which one to choose?
Let me explain: universal loop suitable for almost any door, no matter which way it opens - outward or inward. But these loops are not detachable. For example, if you need to bring a bulky thing into the room - a wardrobe or a sofa, then it is possible to remove the door only by unscrewing all the hinges from it.
Therefore, for lovers of permutations in the apartment, I would advise you to opt for left or right hinges. They, unlike universal ones, are detachable. If necessary, the door is raised and removed from the hinges. In this they are similar to screw-in. The only catch is that before buying, you should decide which way the door will open. How to do it? Stand in front of the proposed door so that it opens "on you." If you want the loops to be located along right hand, - you need right loops, if on the left - left. Here good example: look at the scheme of the Swedish company ASSA. All clear? Although ... wait to draw conclusions.

A diagram that will help determine which hinges you need - left or right.
It turns out that such a classification of loops into left and right is accepted only in some countries, for example, in Russia and Sweden. And, for example, in Spain, Italy, Israel - everything is exactly the opposite. Where we have a left loop, they have a right loop. Therefore, in order not to rack your brains, draw an apartment plan with open doors. Guided by this scheme, sales assistants will select the necessary hinges (or doors with hinges) from those that they have.

Scheme of a non-universal loop, opening the door only in a certain direction (left or right, inward or outward)
And further: part of the loop, fixed on the canvas and having a pin, is called “boy” (“dad”), and the other, which is screwed to the door and placed on the first one, is called “girl” (“mother”). Moreover, no one gets confused in this terminology, all countries and manufacturers have adopted precisely such definitions.
Another one important detail: to improve sound and heat insulation, you can buy doors with a euro-porch, or "quarter". That is, the end of the door is not even, but with a ledge. On the door frame under this protrusion, in turn, a notch is made. Therefore, when the door is closed, there is no gap between it and the box, and therefore there are no drafts.
But, as a rule, you cannot put an ordinary hinge on such a door: the porch will interfere. For this, either screw-in or special hinges for doors with a “quarter” are used, the wing of which is curved under these ledges. Such loops also happen, as a rule, left and right.
Wandering around the shops, I saw an unusual loop round shape. As experts explained to me, this is a patented innovation Italian company"Baraus" (Barausse). The fact is that in this case the hinge is not attached to the side end of the door, but from above. Such a hinge is easily outweighed, and you can easily change the side of the door, like a refrigerator. This, you see, is very convenient: it is problematic to rearrange an ordinary hinge screwed to a door to another place - there will be traces of screws. However, there is one “but” here: such hinges are not sold separately, but are only supplied complete with doors from the Baraus factory.
Those who have bought new doors at least once know for sure that a lot of doors are now sold complete with hinges, locks and handles. On the one hand, this is good. No need to worry that some unfortunate craftsman will screw the hinges in the wrong direction, or scratch the door leaf.
On the other hand, this still limits the freedom of choice and makes you take the purchase of loops more seriously. But if you already have a door and you just want to change the fittings, there is nowhere to go: you have to go shopping.
Of course you can new door put on the old hinges, but if you have enough money for the door, do not be greedy, the price of the hinge is incomparably less than the price of the door.

1.
The door with a European lock (or "quarter") is fixed with screw hinges. As the name implies, these hinges are screwed into the jamb and into the door leaf.
2.
A special curved hinge is another option for quarter doors.
3.
Hinge of the Italian company Barausse, with which you can change the side of the door.
4.
This is what a Barausse hinge looks like on a door.
It is extremely difficult to ruin a loop unless it is a cheap, home-made iron loop. However, if your child is happy to use the door instead of the swing, then in this case the inner pin of the hinge may bend. And screw-in hinges are also fraught with some danger: when they are screwed into a fairly thin door leaf with a European lock, they can split it.
Many people know that some hinges begin to creak disgustingly over time. What to do? If the loop creaks, it can be lubricated with oil. However, this procedure will not solve the problem permanently. Usually the creaking is caused by the friction of the hinge parts, which means that the hinge is destroyed and sooner or later it will have to be changed.
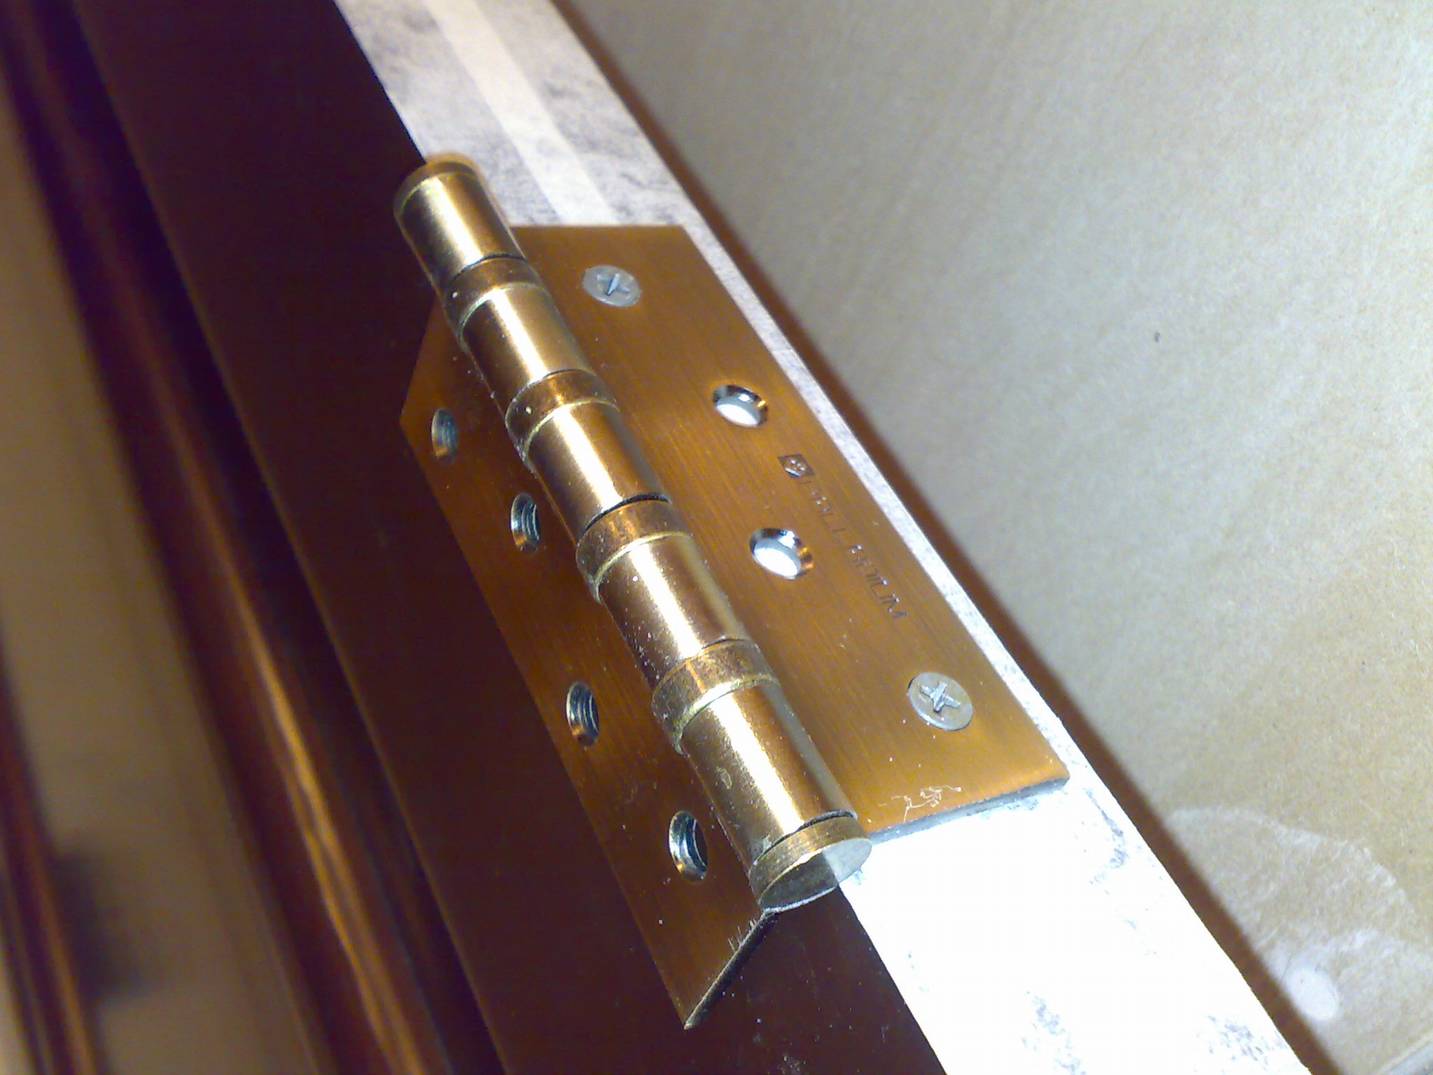
Having closely taken up the loops, I naturally began to pay attention to them. Wherever I have been, wherever I have come, I immediately begin to look at the door. So, one day I noticed that the hinges, on the wing of which, for example, there are four holes, are screwed on with only two screws. “How so,” I thought, “in theory, if the manufacturer made four holes, then four screws should enter them. And in general, does it matter how many screws the hinges should be screwed on?”
I have asked this seemingly "minor" question to many door installers. Their answer was unequivocal and unanimous: so that the hinge does not warp and the door does not loosen, the number of screws must strictly correspond to the number of wing holes.
Conclusion. long and reliable performance hinges largely depend on how correctly it was chosen and placed on the door. Qualified sellers can (and should) help with this. Therefore, it is best to draw a plan of the apartment with open doors before you go to the store - and the seller will help you choose the right hinges (or doors with hinges).
What should be hinges for entrance doors?

To front door could not be removed invented loops with anti-removal mechanism
Hinges for entrance doors are different from interior doors large sizes. Entrance doors are usually heavier (80 – 150 kg) and stronger.
In addition, manufacturers of accessories for entrance doors have figured out how to secure the apartment from uninvited guests: so that the front door cannot be removed from its hinges, firms produce hinges with an anti-removal mechanism. On one wing there is a depression, on the other - a ledge. At closed door the wings are combined, the protrusion enters the depression and does not allow the door to be lifted.
How to choose the right accessories?
Tips from ASSA

First of all, you need to know the weight door leaf. And when buying loops, be sure to consult how many pieces you need to buy. All manufacturers have graphs of the dependence of the quantity, material and type of hinge on the weight of the door.
In addition, decide which hinges you need: right, left or universal.
How to determine the price? The price range for hinges is quite large. It depends on the size of the loop, the material from which it is made, on the place where you buy, and ranges from $0.28 to $70.
By the way, according to many experts, it is better to buy a door fully equipped with fittings so as not to suffer when deciding which hinge is needed, how much the door weighs, and how many hinges and what size they are needed.
Opinion of a specialist of the Swedish company ASSA
ASSA has been manufacturing hinges for over 100 years. During this time, accumulated vast experience in the installation of loops. How are they different from all others? Firstly, the hinges of this company are made of steel. Advice from the firm: office doors steel hinges should be installed, since such doors are opened and closed very often, which means that the hinges wear out much faster.
The location of the hinge is also important: the heavier the door, the more carefully it must be fixed. Therefore, the following types of hinge installations are offered.

1. For standard door:
three loops (two above, one below).
2. For light doors: three loops equidistant from each other.
3. For heavy doors: two loops at the bottom and at the top.
4. For high doors over 2100 mm: four loops.
5. Usually accepted arrangement of loops. The graph shows the doors of what weight and what width can be hung on two hinges.
Olga Ovchinnikova