Masters of wood carving painting panels. Wooden panel from a saw cut of a tree. How to make a carved panel for a bath with your own hands.
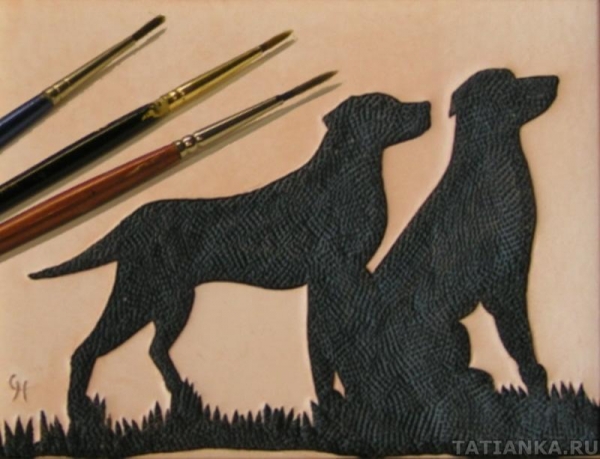
A small master class on creating decorative panel from a tree on a wall, pictures. Anyone can complete it - a very simple project that does not require wood carving skills or the presence artistic training. All you need is a linden board, a knife, or rather a chisel-corner, punches for chasing, brushes, paints or stain, as well as a frame of a suitable size:> 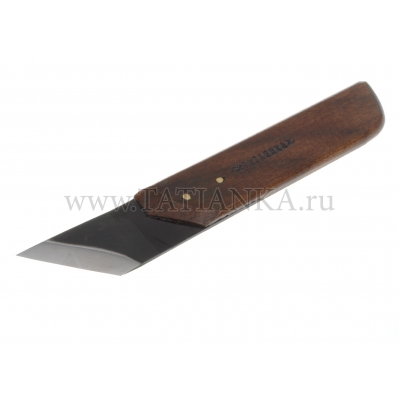
The oil also gives a sheen to the wood, which helps the observer. sunlight easier to recognize the object. But carvers avoid using glossy varnish because it creates an overly bright surface that irritates the eye and confuses the image. Wood products are often finished with a layer of wax that protects the wood and gives off a soft glow.
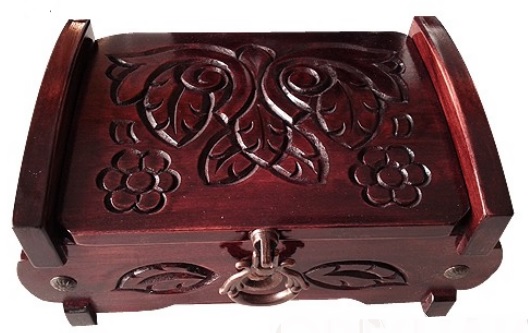
You can see several carved souvenirs. Among them are boxes and all-encompassing, as well as iconic icons, perfect for a gift. loved one or to decorate your own home. For wine lovers and others alcoholic beverages we expect a wide range of different colors and sizes. Hunting fans can hang their trophies on some of our beautiful, themed carvings and tailored to the needs of the most discerning hunter.


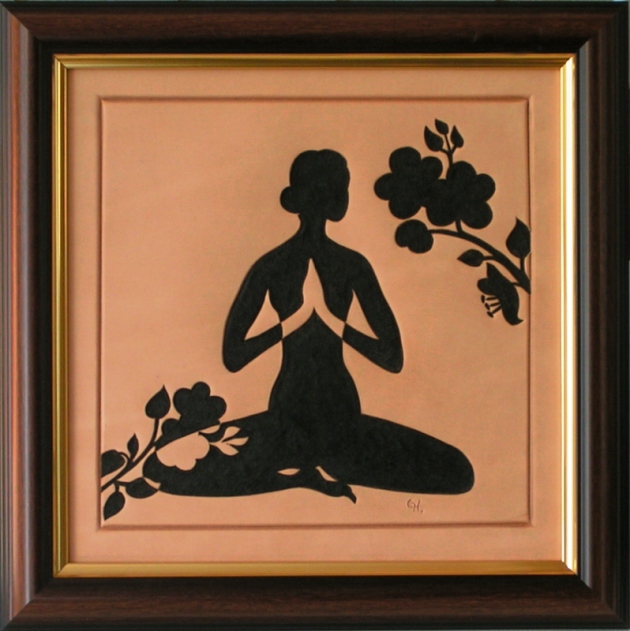
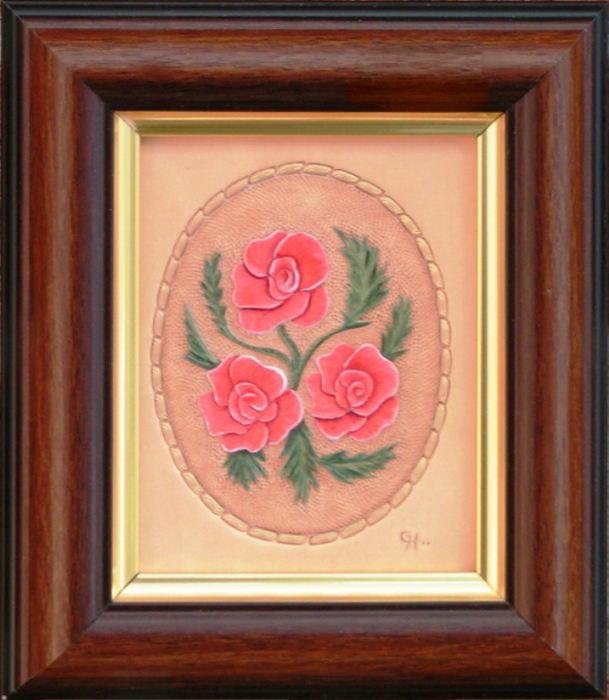
The original master class did not use wood, but leather. But the technique is the same, so I'll tell you from the point of view of woodworking, but you can also use leather. The above tool is also suitable for its processing.
The most used material in carvings is linden. It is a very soft, smooth and well defined wood. Hardwood hardness table. Softwoods are not suitable for fine carving, are very easy to split, and have jagged hardwoods, alternating between soft and hard years. In addition, they have a high resin content. These properties are not suitable for finer sculptural work, but they can be used attractively for surface treatment. By using sculpture to highlight the painting, tanning and brushing, you will get plastic structure.
Another small addition. Why even make pictures like this? Out of interest, as a gift, just for the purpose of creating an interior item, and also, importantly, for kids - different textures stimulate the development of fine motor skills and tactile sensations in babies, while there are no small parts. But in this case, it is better not to paint the product.
Creating a panel "tree"
But carpenters are most commonly used. 


Carvers usually work with dry material, with the exception of large sculptures. wet work has the advantage that the wood is soft and bites, but finished work then dries and cracks, in part it can prevent deep cuts in the wood mass, it must be resolved stress fracture then less. Drying should be as slow as possible, but small cracks will be created. Once dry, the cutouts can be laid with the same wood, the cracks can be laid or they can be pulled.
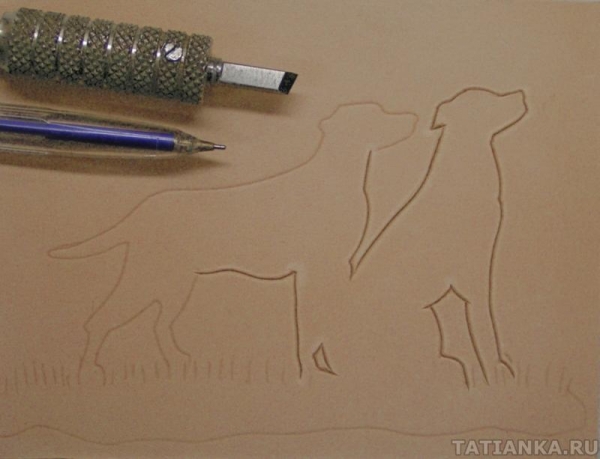
Create an outline
First, select a pattern for your product. It can be anything, but it is better without small and thin parts (otherwise the punch will not fit), and with internal contours and parts that can then be left smooth or textured using punches various shapes to get different relief.
Transfer the contour through the tracing paper to the board, then cut this contour with a knife (at a right angle without undercut) or with a corner chisel. Work with both hands. It is better to use a chisel, as it will better highlight the outline of the pattern and then it will be easier for you to stay within it during chasing.
On the other hand, the dry material no longer cracks, it is suitable for work where details and smooth surfaces. For proper drying material, it is necessary to choose a tree as straight as possible, without branching. Catch in the winter when there is no sap in the tree, and immediately process the forest after felling. Most perfect option- cut material on the boards, it is best to dry. For small quantities, you can only cut the material or split the wedges in half, which allows you to create stresses that occur during drying, and the material no longer cracks.
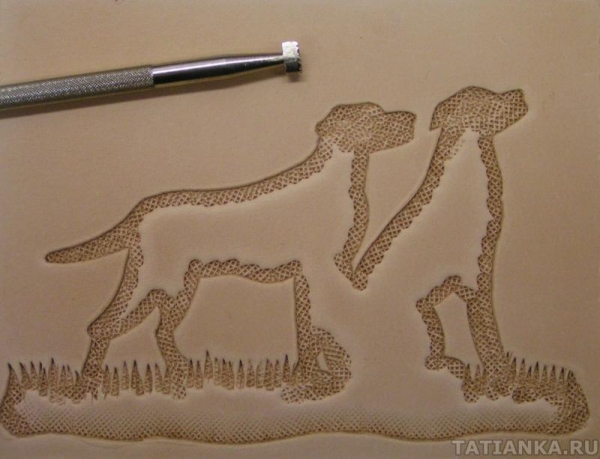
Texture
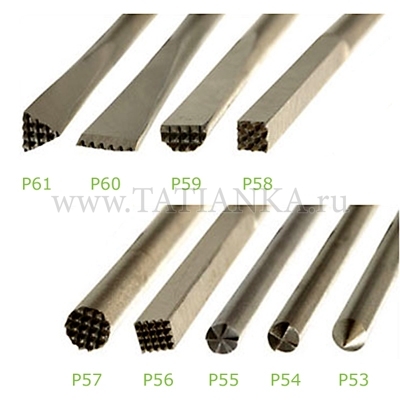
With the help of embossing punches, deepen the inside of the pattern. Place the punch with the relief head vertically on the board and hit it evenly with a mallet (hammer). The blows must be uniform, because the depth changes depending on the force of the blow. You can hit the punch several times, adjusting the relief and, accordingly, getting a pale or well-defined pattern. You can first practice on a separate board or reverse side this one. You can use punches of different textures.
If you want to cut out the entire chest, you can reattach it after it dries. Large sculptures are now also made on glued boards, the material is then completely free from stains, cracks, and in any size, there is little loss of material, however, requires machine preparation.
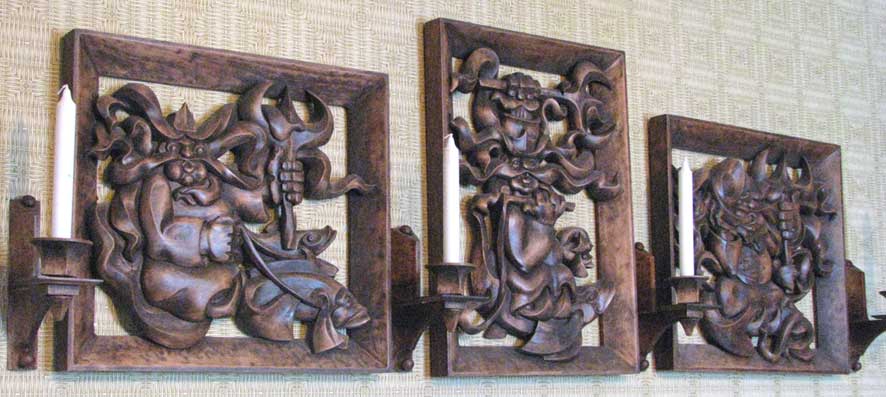
How to decorate rooms with carved wood panels
The longer you dry the pieces of material, the less material you lose, but large chests are still misused. Correct move drying affects the type of wood, but also environment and drying time: properly dried for at least three years in an environment where there is a project that is not under direct sunlight and rain. You can build a shelter in the garden, half of the trunks fold back and stretch thin strips. The bark is easiest to remove right away, but the wood dries out faster.
Artistic chasing on wood with your own hands. Chasing tool. Punches.

Artistic chasing on wood with your own hands. Chasing tool. Punches.
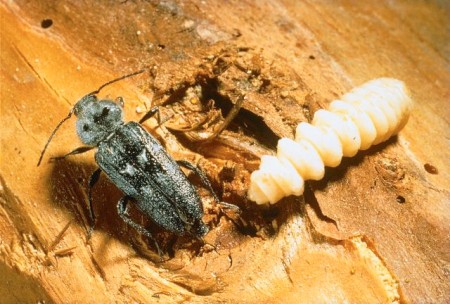
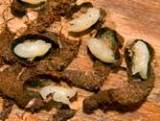
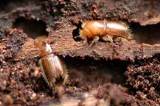
If you leave the bark, there is a risk of trapping it or the insects underneath. Usually there is a bark beetle, it is not a big problem but if you don't know what wood dust poured from the material, and not from the bark beetle. Choose how wet you want to dry. If you dry in an environment where you have problems with mold or wood-destroying insects, you should fill the wood with some protection equipment immediately. Check the drying process at least 4 times a year.


Wood is hygroscopic, that is, it works constantly, absorbs moisture and reacts to temperature, and a well-dried material does not undergo rapid changes, it cracks. That's why you can't bring dry wood from the garden to a heated panel. The quality of the material is characterized by the correct drying process, cutting time.
Artistic chasing on wood with your own hands. Chasing tool. Punches.
woodwork finishing
Now you can paint the silhouette, although without painting, in my opinion, the product looks better. The most commonly used for this purpose acrylic paints, but you can take a stain - it will look more attractive.
About the traditional production of gingerbread. If you are interested in making gingerbread, we recommend the site. You will find beautiful new and historical forms. Woods with a fine texture, hard: pear, plum, cherry are used for production, because more soft materials can't handle such fine details. Oil molds were made from materials conifers, for example, also made of beech. Most chisels need to be ground into a half shell instead of a vertical one for this decorative technique.
In our workshop we work 99% with carving. Working with knife threads requires a different holding technique and is suitable for conditions where you cannot clamp the material. It has fewer options cut, and even knife products have different shaping. The old masters who unraveled the Bethlehem figurines under their hands must have been studying their art for many years. On the other hand, with carved chisels, the work is easier and more efficient, and you have more options for shaping the material.
Artistic chasing on wood with your own hands. Chasing tool. Punches.
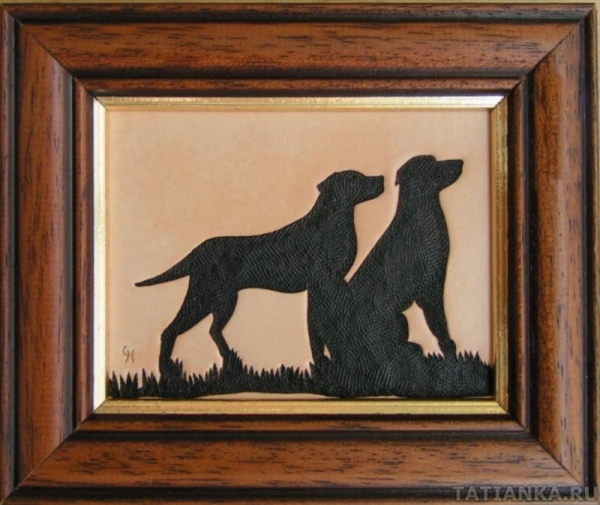
framing
Almost any picture framed will look more solid, attractive and more complete than without a frame.
Artistic chasing on wood with your own hands. Chasing tool. Punches.
All types of available wood are used - from soft to hard-to-reach sandalwood. All surface treatments are used, from lacquered to inlaid to natural wax. Their art, traditions and experience are usually inherited from generation to generation. Over the centuries, individual carving styles and techniques, as well as artistic expressions, have also been created that distinguish local regions from each other. But they did not want to buy local figurines and statues of gods and mythical heroes, as well as local oriental furniture, which was unusual and uncomfortable for them.
This lesson can be seen as a workout. By learning how to work with punches, you will be able to shape the background in your wood carvings, which is what punches are most often used for.
2.
3.
As a result of the desire of the colonists, not only purely utilitarian furniture, Colonial, but also recently adapted locally carved oriental furniture in the style of Victorian and Georgian furniture. They convinced them that different types wood have different colour, structure and art which they also use when trying to make a particular item and it is not always necessary to overlay a surface natural wood layer of color. Instead of carving that time, more preferred, thinner, more carefully carved carvings that are more appealing to European sentiment.
4.
5.
6.
7.
It combines the beauty of oriental decoration with traditional European functionality and aesthetics. This style, proven over the centuries, has yet to be said by modern users. It is oriental, traditional and modern. The joinery is produced and then carved, traditionally handcrafted in small family workshops. Every detail is original and reflects the quality of the carvings of the old masters over the centuries. Every detail is original not only because of its production handmade, but also because motif, design and carving are never the same in two parts.
8.
9.
10.
11.
Finally, the surface is treated natural wax. The wood is hard, strong, it is relatively dry, and it does not crack it properly, it does not crack it, it is not very susceptible, and its strength is not very difficult. The color, texture, pattern and wood sheen are unique.
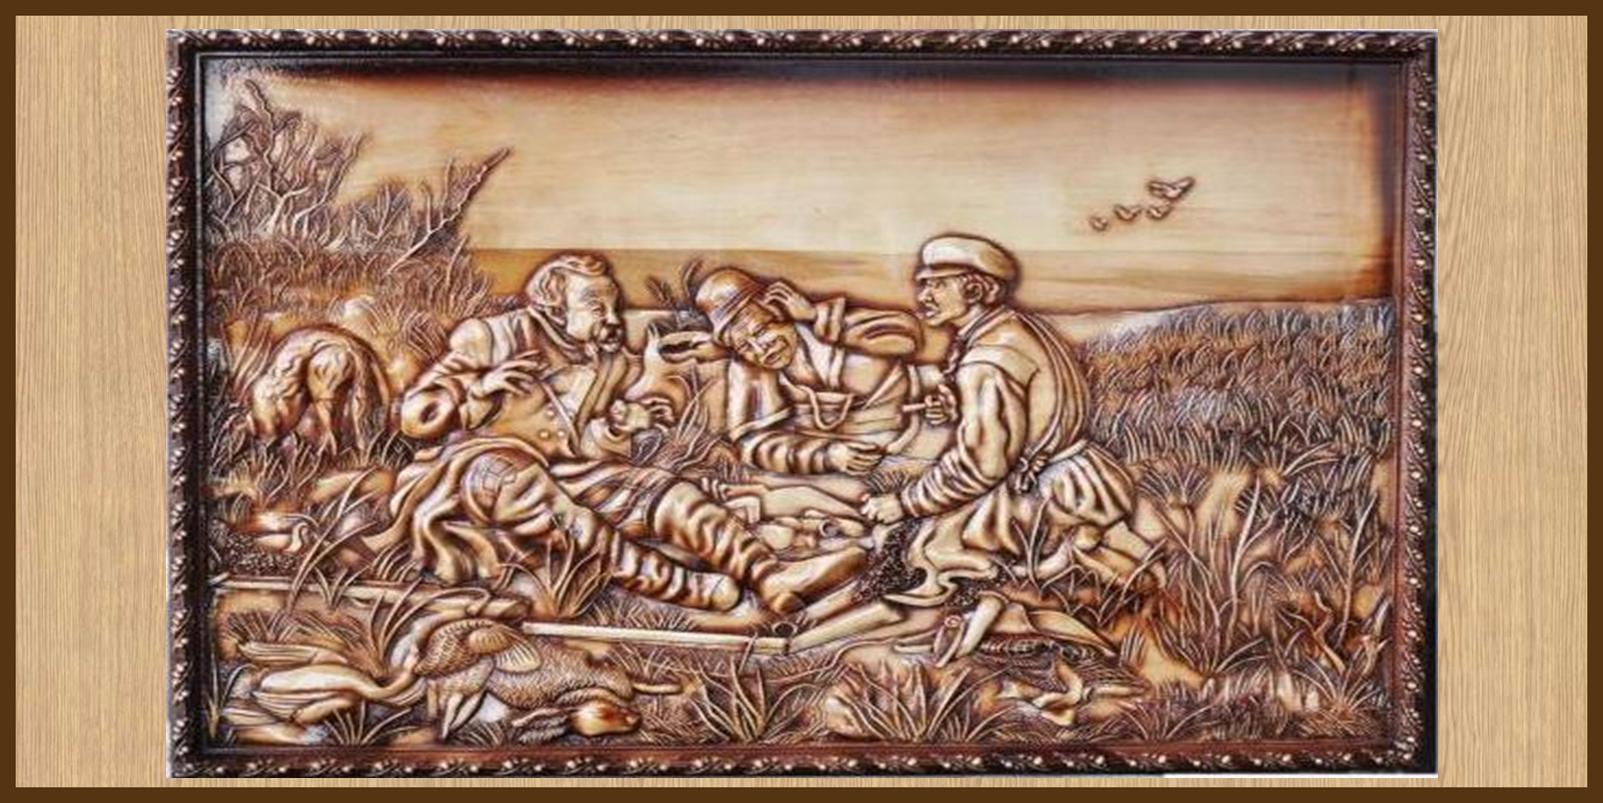
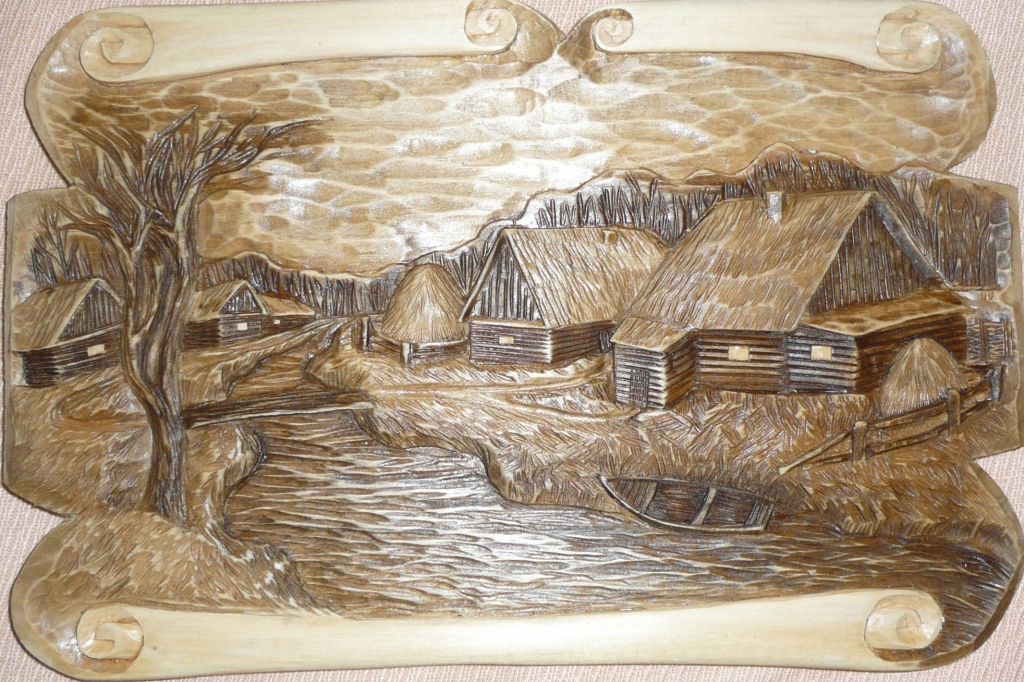
Wood from the trunk and root system is used for carving. This type of carving is often done on screens, rear seat backs, tables and tabletops, etc. this type of carving is often done on decorative wall panels. The motivation here is often the complex jungle landscape.
12.
13.
When you want to refresh the interior of the room and no special ideas come up, then there is an opportunity to purchase or make carved. Such a masterpiece will delight you long years. It will help you realize almost any creative fantasy. The main thing is to stock up on patience and the necessary materials.
So, if a decision is made to make a panel of wood, then you need to carefully consider the pattern, its size and how it will fit into the design. It all depends on functional purpose premises. Consider all the nuances.
Do-it-yourself carved wood panel: manufacturing steps
Do-it-yourself carved wood panel is an interesting and creative process which is suitable for almost everyone. The main thing that novice masters need to learn is the correct choice of pattern. For the first work, it is better to prefer a simple pattern that will be easy to perform.
So, let's look at the main steps:
- First you need to sketch a drawing on paper, and then copy it onto a flat surface. wooden surface required size.
- Using a special knife, we begin to cut out the details of the future crafts.
- Then we cover ready product stain and clean with sandpaper.
So, with the help of simple manipulations, it is possible to get an original wooden panel that can be hung in any room. Of course, for beginners, there are difficulties with cutting out details, which is why you should give preference to simple and light patterns. It is also recommended to use a knife with one-sided sharpening.
It is very important in the process of work to protect the fingers from possible paresis.
So, the wooden panel is ready - it's time to hang it on the wall and enjoy the result of your creativity.
The advantages of carved wood panels
Carved wood panel - great addition to any interior. It can be purchased ready-made or ordered, and it is possible to do it yourself.
Work done together brings people together, so psychologists recommend making panels with children.
The process itself is very exciting and interesting, but for beginners it is time consuming. However, it's worth it wooden crafts will please your eye for more than one year. This is the main advantage of this product.
Carved panels and carved decor: stepping pictures of wood
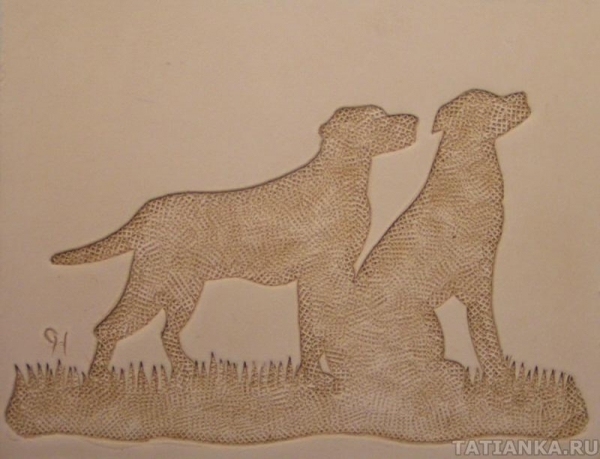
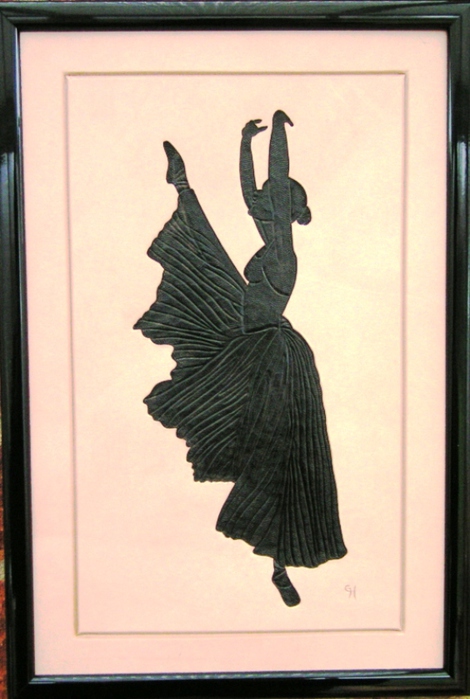
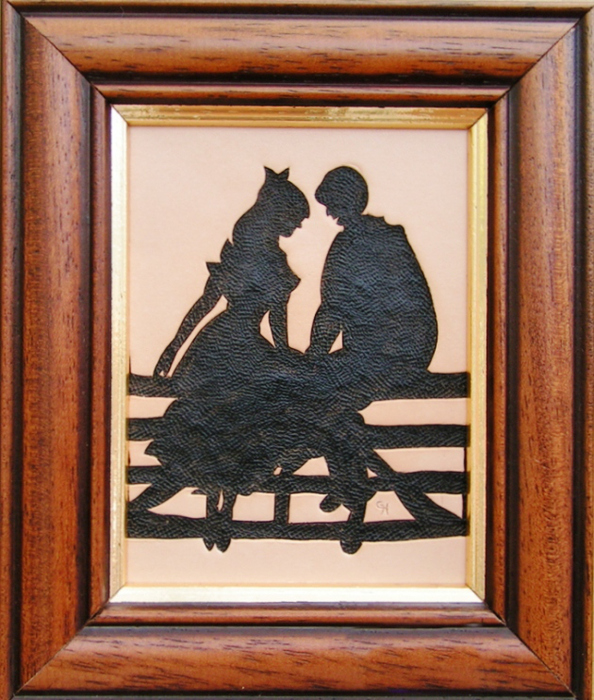
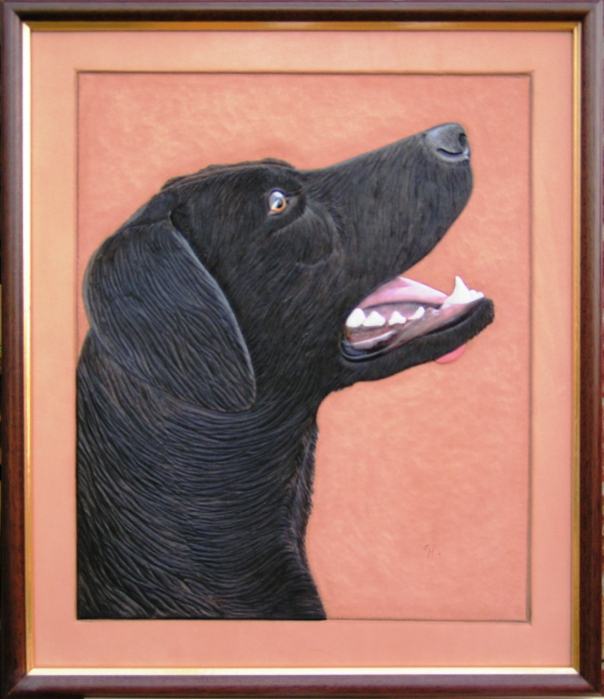
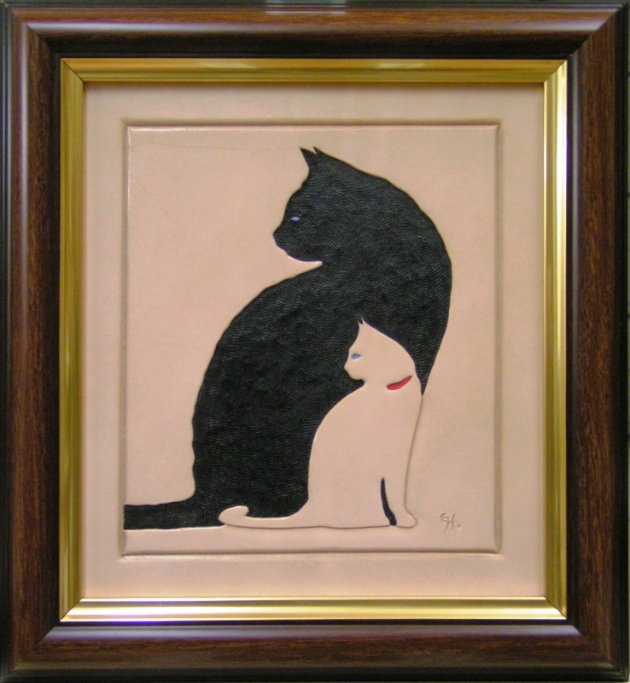
Carved panels, carved decor and wood paintings are very popular. Buying finished products is much easier, but making such a masterpiece yourself is much more interesting. You can depict anything, and even the flags of countries such as Russia, Indonesia, China and many others. These can be animals, people, insects, celestial bodies, nature, etc. You can do whatever you see fit.
To do this, you will need the following materials and tools:
- Knife for cutting wood.
- Board of the right size.
- A sheet of paper with a finished sketch of the future product.
- Pencil.
- Stain.
- We take a board and draw the selected pattern on it.
- Then, with the help of a knife, we pass along the contour of the picture.
- When we walked around the edges, we move on to the internal details.
- If this is a figure, then it can be either left on the background of the board or cut out.
- Then, using a brush, coat the finished product with stain.
Action algorithm
After completing all the steps, the panel must be left to dry, and you can safely hang it in any corner of your home.
Original carved wall panel
You can make a carved panel on the wall yourself with the help of the necessary tools at hand, following just a few simple rules.

When choosing a picture, you should consider the design of the room in which the picture will be located.
A ship can be considered a universal option. It is a symbol of success, prosperity and it will fit into almost any interior. However, any ideas can be implemented, as long as they are within their power, since it will be difficult for beginners to perform complex patterns.
So, the basic rules that you should rely on when making panels:
- The board must be absolutely flat, without cracks and necessarily polished.
- When copying a drawing on a board, it is desirable to outline the outline very clearly. This will make the job easier later on.
- In order to cut the edges of the workpiece, it is more convenient to use a special machine from the network. However, if there is none, you can use a regular wood knife.
Beginners also need to remember that all wood carving tools are very sharp and the risk of injury is high. After the picture is ready, it can be sanded, stained or painted.
Carved panels in the bath: options for blanks
You can make a carved panel in the bath with your own hands, following the instructions described above. Since many rooms of this purpose are made of wood, the carved picture will fit into it in the best way.

Optionally, you can choose sea style or any other to your taste. You can depict celestial bodies, silhouettes, fairy-tale characters and much more.
First you can see the images in the photo. However, it is worth remembering that only solid wood should be used for carving, since it is not afraid of any high temperatures, no fluctuations in humidity.
The most common materials for panels in the bath
- Pine.
- Alder.
- Birch.

For such a product, a combination of several breeds can also be used. It can also be assembled from a variety of saw cuts. The finished craft must be varnished. A carved blank for a bath will not only great decoration, but will also cheer up its visitors.
DIY wood carving (video)
All those who decide to make a panel should take into account all listed rules. At the same time, one should not expect excellent result from the first time, as the work is very painstaking and time-consuming, especially for beginners. But a handmade thing will please its creator and bring a lot of creativity to any room.