How to make the surface even. We build with our own hands: how to make concrete smooth. How to get a smooth papier-mâché surface
Ways to align the inner and outer corners. Application of material and tools. Calculation of an even angle, ways to determine the angle by 90 degrees.
How to straighten the corner of a wall
A flat surface is a sign of the quality work of plasterers and fillers.
Can be glued on various wallpapers, paint, panel or ceramic. If there are no workers, how to level the corner of the wall, make the surface even, smooth?
Drawing 90-degree angles requires materials, tools, and certain skills.
Why is it necessary to level the corner of the wall
Smooth wall joints in the room - a neat appearance. If curved walls can be hidden behind wallpaper and paintings, then the corners will make the room untidy.
Another disadvantage of the curvature of the master is the difficulty of installing tiles, wallpapering, and another finish. To align the joints of the walls, you need to work hard, however, in the future this will affect appearance and neatness.
How to align the inner corners of the walls in the room with your own hands
 To align the internal joints, it is necessary to carry out preparatory work.
- The cleaned surface from tiles or wallpaper is checked for voids under the plaster. It is necessary to tap the adjacent walls from the ceiling to the bottom. In the event of a change in sound (empty), it is better to roll the plaster. Otherwise, it may itself fall off along with the finish coat. Another sign of emptiness are small cracks running horizontally to the floor.
- After the collapsed coating, remove all debris. It's a dusty job, but it won't interfere with later work.
- Everything is cleaned from dust and small pebbles with a dry brush. To reduce dust, you can spray the place with water from a sprayer.
- Next, the surface is coated with a primer, preferably 2 times.
- A plumb line is lowered from the ceiling to the floor to determine the curvature. When large deviations are found the best option is drywall. Otherwise plaster layer will have to be applied several times, each dried layer is primed.
The inner corner can be leveled in several ways. In addition to drywall, conventional gypsum or cement plaster, beacons, corner spatulas.
How to level previously plastered walls in an apartment
 If the wall is curved, then leveling the seam will be a waste of work. Curved plastered walls should be identified by the percentage of curvature. This can be done with a level, a plumb line, a rule. The walls are aligned in a circle.
For leveling walls, materials are applicable:
- Drywall. At large differences apply frame metal base. If the walls have a slight curvature, then the GKL is glued to the surface.
- Chipboard. Applicable plates for leveling not very curved surfaces.
- Panels. Aligning the walls, apply frame base.
Depending on the room, humidity and temperature changes, the desired material is selected.
How to display a 90 degree angle on walls
When self-plastering walls and leveling joints, a plaster corner profile is used. It can be metal or plastic. On the sides of the corner there is a reinforced mesh. The profile is imposed on wet plaster and with the help of the level expose it. Reinforced mesh covered with plaster.
And also the docking surface can be made even with an angled spatula. It has a perfectly flat shape. With no effort, it creates a 90-degree wall joint.

It is difficult to bring out 90 degrees on your own. This is possible only with small differences, where putty is applicable.
What materials are used to level wood?
 The wooden surface also needs pretreatment followed by alignment. align wooden surface You can use materials:
- Drywall. For installation, you must first measure the degree of curvature, and then make measurements and calculate materials. The frame base is created from wooden slats or metal profiles. For strong frame make transverse stiffeners. GCR fastening in the corners is carried out using several technologies. The joints of the walls are smooth at 90 degrees.
- Chipboard. They are also attached to a frame base made of wood. All elements are treated with drying oil or antiseptic agents.
- Plywood 6-9 mm. It should be processed. The material is mainly used for leveling surfaces in the garage, pantry, country house. For fastening, a wooden frame is also created.
After that, the created surface with even corners is puttied, primed and covered finishing material- wallpaper, paint, tiles.
As well as walls and their joints wooden house level with materials:
- putty - a layer of the superimposed mixture of 2 mm. Before applying putty, it is necessary to process the walls;
- cement mortars - they are applied to a rough surface or they are pre-stuffed with shingles or a large mesh;
- use of corners. If the walls are even or have small differences, metal or plastic corners. In this case, after a second layer of putty, the angle is 90 degrees.
Cement mortar shrinks. When applying a thick layer, make sure that the created plane does not flow down.
How to make even the outer corners of the walls
 Curved outer corners are the result of the hasty work of the builders. To align them, you must first determine the degree of curvature. Another reason for alignment is frequent impacts with sharp and heavy objects.
For alignment, materials and tools will be used. A level is also required.
What will be required
For work, you will need a perforated corner, putty or plaster mix based on gypsum, primer, regular and angled trowels.
It is not difficult to carry out the work if everything you need is “at hand”. Even the most curved docking surface is created at 90 degrees without much effort and time.
How to align wall corners at 90 degrees with a corner
 The outer corner is easier to level than the inner. For this, a perforated metal corner is used.
- First, the surface is cleaned and coated with a primer.
- After reveal the degree of curvature.
- A plaster or putty gypsum mortar is applied to the corner on both sides.
- It is pressed into it and leveled with a corner level.
- Give time for the solution to solidify. All excess weight is removed. The sides are leveled with a spatula.
- After drying sandpaper must be removed and thin layer apply the solution again. At the same time, the work is done carefully so that there are no tubercles.
The final step is sanding with sandpaper and coating with a primer for finishing.
The perforated corner will not only level the 90-degree angle, but also protect the surface from impacts.
How to set a 90 degree angle when plastering walls
If the angle has a large percentage of curvature, then a different method is used. A beacon is set up on the wall from the junction on the opposite side. From him to the side is alignment. Thus, equalize the adjacent wall. Smooth walls form an angle of 90 degrees. The final leveling is done with an angled spatula.
Ways to check the 90 degree angle between the walls inside and outside
 There are several ways to check how flat the corner is. So:
- A square is the easiest way.
- The second way is to create a corner from a profile. Measure 30.60.90 cm from the corner along one wall. The length of one side of the profile will be 90. Set aside 30.60.90.120 cm on the adjacent wall on the other side. The length of the second side of the profile corner will be 120 cm. From one point where postponed 90 to another point 120 there should be a distance of 150 cm. The sides of the profile are connected with screws at 90 degrees. The edges are connected with another piece of profile equal to 150 cm. This corner is measured inner corner in the room in several places.
- The outer corner is measured in the same way, only all marks are marked on the floor. I.e. From outer corner on the floor, you need to retreat a length multiple of 4. Let's say 1.6 meters. It is laid along one wall. Further, along the other wall, 1.2 meters should be set aside. There must be a distance of 2 meters between the end points. If so, then the angle is 90 degrees. If not, then alignment should be applied.
Before you start leveling the joints of the walls, you need to find out how much they have a deviation, curvature. DL leveling is used as drywall, plywood, and ordinary putty, and perforated corners. To derive an exact beautiful angle, you need to stock up on materials, tools and a little mathematical knowledge - the Pythagorean theorem.
Useful video
, arises before the masters who plan to equip their possessions with small architectural forms. During construction, you can use ready mixes from the manufacturer or knead concrete at home on one's own. In order to finished construction was strong, even and durable, you need to properly maintain all the proportions and technology of preparing the solution.
For various conditions exploitation concrete structures you need to purchase ingredients with certain characteristics. The service life of molded products will be affected by material characteristics such as frost resistance, filter coefficient and abrasion resistance. Indicators such as water resistance, strength and uniformity are determined by the type of fillers that are added to the mixture when it is kneaded. Knowing how to make concrete with your own hands, you can make structures of any size and level of complexity from it. Modern technologies allow even a novice builder make your own concrete with any technical specifications. Consider, how to make strong concrete with a smooth surface and high aesthetic performance.
How to prepare a concrete solution yourself
The purposes of using concrete are very different. The most durable concrete is used for arranging foundations and load-bearing structures under heavy load. Coarse-cell concrete has a low density and weight. The concrete grade 200 used for its manufacture is not very durable. The filtration in such a material is much higher, which makes it unstable to moisture. However, this type of concrete is winter, since if it gets wet, the water has room to expand when it freezes without destroying the structure of the material. The main question that builders have to solve: how to waterproof concrete. This is especially true when buildings with basements in wet ground or monolithic are being erected. Here the filtration of the material should be completely absent.
To obtain the desired result, it is necessary to study the reasons for the appearance of pores in concrete through which moisture enters the structure.
The following factors influence the decrease in the density of hardened concrete:
- insufficient reinforcement of the form, which caused the appearance of cracks;
- poor mixing of the mixture, as a result of which the hydration reaction was not complete;
- use of low quality cement;
- adding excess water to the solution;
- poor sealing, due to which a lot of air bubbles remain in the material.
In order for the solution to turn out to be of high quality, it is necessary to observe the proportions when mixing the solution. If you choose the optimal ratio of sand, crushed stone and cement, then this will make it possible to manufacture structures with high operational characteristics. Even when using cement grade 300, high water resistance of finished products can be achieved.

The solution is made using a concrete mixer in the following sequence:
1. Sand and cement are poured into its neck. Depending on the set construction goal, their proportions can vary between 2.5-4:1. The mixture mixes well.
2. Water is added. The best option is the correspondence of its quantity to the volume of cement. The solution is stirred until homogeneous. If colored concrete is being prepared, then a dye is added to it.
3. Crushed stone falls asleep. It is preliminarily cleaned from earth and clay. This is necessary to achieve the purity of the solution. After prolonged stirring, the solution is poured into the mold.
To prevent concrete from cracking from frost in winter, special waterproofing additives are added to it. After the concrete is poured into the formwork, it is necessary to take measures for its uniform shrinkage. To do this, its surface is regularly wetted and covered with a cloth or cellophane.
How to achieve a perfectly flat surface

A smooth concrete surface is necessary in cases where it will not be covered finishing. This process begins immediately after the mortar is poured into the formwork and compacted. Removal of air bubbles avoids the formation of traces on the surface from their release and makes the concrete more durable.
Typically primary leveling is done manually using beacons and hand tools. Beacons serve to maintain a given level and as guides for the rule. The solution is applied between the beacons and distributed over the entire volume of the form with wide movements with slight vibration. Excess material is pulled together by the rule. You can buy a rule or make it yourself, use improvised materials. Your tool will come in handy for future work.
A good help for smoothing the solution are ironing machines. They have a perfectly flat glossy surface. When the trowel moves along the solution, the crushed stone is lowered from its surface. This allows you to achieve an almost perfectly flat surface without depressions and protrusions. Strokers are produced equipped with a motor or driven by muscle power.
After the concrete is leveled with a trowel, it is left alone for a day. During this time, the solution thickens, but retains some pliability. At this stage, it is adjusted with special devices. They cut off all protrusions at a given level, filling potholes and depressions with the removed substance. Such equipment is quite expensive and is purchased only by large industrial companies.

You can also level concrete manually if you know how to properly work with a spatula and other finishing tools. A smooth surface is created by applying materials to concrete that cover all irregularities and roughness. The easiest and cheapest way is to use bulk cement. It is poured onto concrete a few hours after pouring. Absorbing moisture from the solution, the cement becomes liquid. It spreads evenly over the surface. wide spatula or a rule.
How to improve the quality of concrete
Today, there are many ways to make durable waterproof concrete without spending extra money on expensive brands of cement and crushed granite. For this, various plasticizers are used, both factory-made and our own production.
Made with my own hands a solution with plasticizers allows you to solve the following problems:
- facilitate the process of laying concrete in forms;
- prevent the solution from disintegrating into its constituent fractions;
- increase the temperature range of material use;
- to give concrete hydrophobic properties;
- improve the plasticity of finished products;
- reduce the time for the mortar to adhere to embedded parts;
- accelerate or increase the hardening time;
- do concrete lightweight and porous.

If you know how to make plasticizer for concrete with your own hands, then you can avoid additional costs for the purchase of branded drugs. As additives to the solution, you can use substances such as washing powder for automatic machines, stationery glue, liquid soap or slaked lime. When choosing detergents it should be borne in mind that they form abundant foam when mixed.
Add plasticizers after mixing sand and cement. If this is done at the end of kneading, then most of the additives will go to enveloping the filler, which will not allow to achieve the desired effect. The proportions for each filler should vary between 0.2-3% of the total volume of the mixture.
Another way to improve the quality of concrete is to apply polymer impregnations to its surface. Work must be carried out on fully cured concrete. Polyurethane impregnation is applied to the surface in accordance with the instructions. After complete solidification polymer coating it is leveled and polished. The applied layer is plastic and completely sealed.
How to color concrete

There are two ways to make colored concrete. The first is to add a dye to the mixture at the stage of its preparation. Ready solution will have the same color and shade throughout its volume. Abrasion will not affect the quality of its surface in any way. This method is used for the manufacture of structures with a high throughput load. Typically colored concrete is used to create platforms, walkways and fabrication paving slabs. When choosing a dye, it should be borne in mind that it should not impair the strength finished product and be resistant to the hydration process. The second method involves applying the pigment to the finished surface. Dyes are dissolved in polymer impregnations and applied to concrete. This ensures a strong and hermetic adhesion of the dye to the base.
2. Preparation of surfaces for leveling.
3. Methods for leveling surfaces.
4. Plastering walls.
5. Video.
A rare living space boasts perfectly even walls that were originally. This moment can negate all the efforts, aesthetics and reliability of the coating. Therefore, the first thing is to do everything as it should be, without neglecting this stage.
1. How to understand that the walls are uneven?
Clarity will bring one of the ways with the use of tools. As a rule, there are not so many of them: plumb lines, building levels and rules.
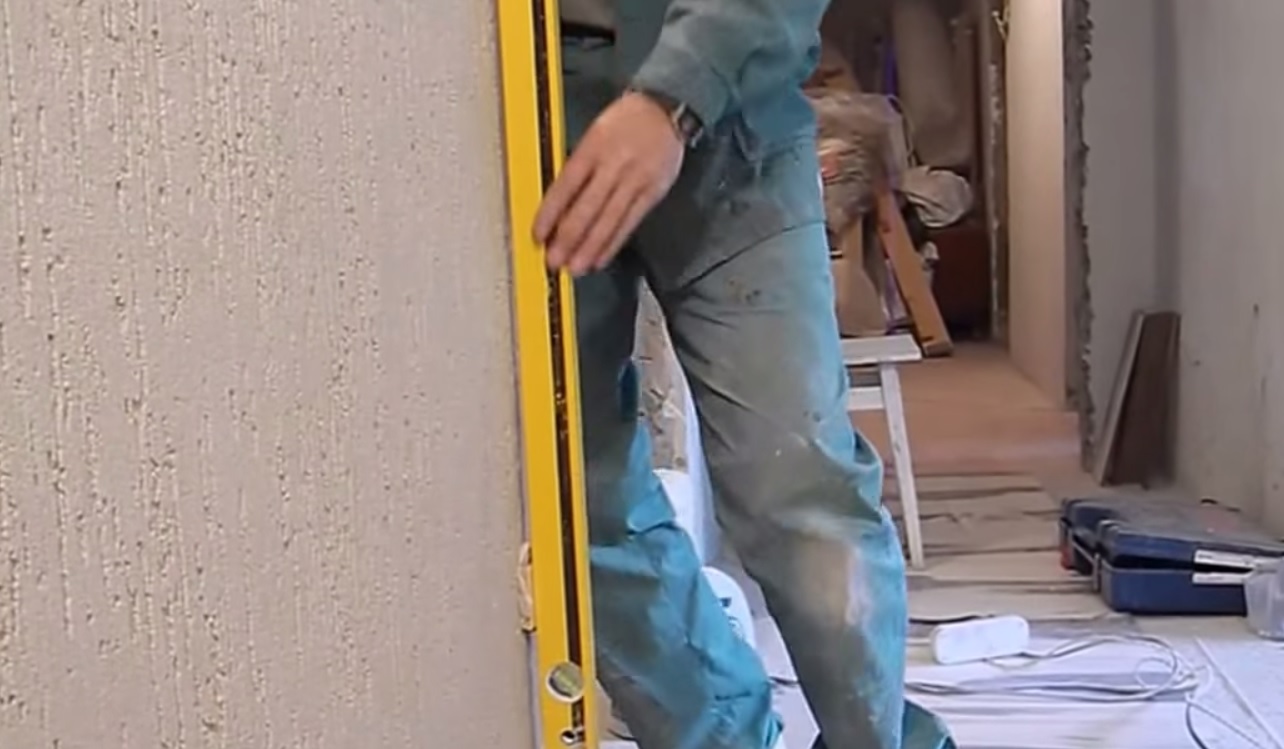
Leading in demand - building rule and levels. Generally, optimal parameters- two or two and a half meters. In this case, they are the most functional: it is required that the tool vertically rise to almost the entire height of the wall, and also that it can be easily rotated diagonally. As a rule, if it is not in the home "arsenal", a perfectly flat rail can be used. But it should not be too thin, bending when force is applied, otherwise accurate measurements will not work. It will be enough of its size in the section of 20 × 50 mm. A rail, level or rule is applied to the wall surface vertically, horizontally and diagonally. Track the dimensions of the gaps formed between the wall and the tool, which will show the degree of surface roughness.

Another simple and affordable way check the verticality of the wall, which does not require expensive tools - use a plumb line. Even if the farm does not have such a device, it is easy to quickly make it yourself. This will require a thin but strong cord about three meters long, as well as a load weighing 150 ÷ 200 grams, best of all - a balanced, symmetrical shape. It is not difficult to use a plumb line: for this, a nail is driven into the wall, under the ceiling, stepping back from the joint 25 ÷ 30 mm, onto which the cord is fixed, and the load tied to it freely falls vertically along the wall. The load should hang freely, not reaching the floor by 10÷15 mm. When the load settles down and does not move, you can see how distorted the surface is - measure the gaps at various points along the height - and compare the results.

In addition to the evenness of the walls, it is necessary to check their perpendicularity, that is, the corners of the room must be straight. A building square will help in determining this parameter, which is applied in several places along the entire height of the joint and make the necessary marks. True, the square must be quite large in order to accurately identify possible deviations. If there is no large square, then it is better to apply the Egyptian triangle rule. To do this, two legs, multiples of 3 and 4, are laid off from the corner along the walls, and the hypotenuse should be a multiple of 5. For example, 1.5 m (0.5 × 3) is measured along one wall, and 2 m (0.5 × 4), and the distance between these points in a straight line should be 2.5 m (0.5 × 5). If this is not the case, then the angle is clearly different from the right one, and it is necessary to look for the cause and a way to eliminate it.

Probably the most optimal and accurate option is to use laser level(laser plane builder). This device sets perpendicular vertical planes, projects lines in space, along which, by simple measurements with comparisons of the gaps, it is easy to identify the uneven surfaces of the walls, their correspondence to the vertical plane and mutual perpendicularity. Having determined the deviations of the walls from the required plane, the location of irregularities - depressions or bulges, they immediately evaluate their approximate height or depth. - In the case when surface defects or deviations from the vertical plane are 8 ÷ 15 mm or more, the walls will have to be leveled by plastering on beacons or by installing drywall sheets. - If the differences do not exceed 5 ÷ 8 mm, then you can fix the surface by applying a thin layer of plaster or putty mortar.

2. Surface preparation for leveling
In order to understand what stages the work on leveling the walls consists of, it is worth considering these processes in more detail. However, before moving on to brief description each of the alignment methods, a few words should be said about the preparatory measures common to all technologies. Preparatory stage it can be difficult and tiring, but you should not brush it aside, as this is the guarantee of the quality of the leveled surface and its operational durability. It is especially necessary to carefully approach the preparation of walls for plastering, but drywall also requires its own special approach. So, the preparation of walls for further alignment includes several important operations, which include the following:
The first step of the wall must be completely cleared of decorative coating, if it is present on surfaces, it is removed old paint or wallpaper. These processes are made different ways which are detailed in a separate article.

After the walls are cleared of old finish, the plaster layer will open, which requires the most thorough examination. Such a revision is necessary, since cracks could appear on it during operation, or delamination, partial or complete, is not excluded. Depending on the degree of damage to the old plaster layer, it will have to be removed completely or a proper repair should be made. If this layer has enough greater thickness, poor-quality material is used for it, and its surface is uneven, then it is better to get rid of it completely. If the wall has large protrusions, they will have to be knocked down, and small bulges should be sanded or brushed off with a metal brush.
If “wet” work is supposed to be on the wall, then to ensure electrical safety, the room will most likely have to be de-energized. Usually, in such cases, it is planned to replace sockets and switches, which means that the old ones must be dismantled and then the bare wires insulated.
After cleaning or repairing the surface of the wall, it must be primed several times - this is to strengthen and dedust the surface and to create conditions for reliable adhesion between the surface and the new leveling mortar.
After the final drying of the primer, you can proceed to the application of putty, plaster, or to the installation of special beacon profiles, along which the surfaces will be leveled.

If you plan to level with plaster wooden walls, then they are cleaned of dust and primed with an antiseptic primer for wood. After that, the dried walls are sheathed with wooden slats - shingles, which will create a good adhesion of mortar and wood.
3. Methods for leveling surfaces
The choice of how to level the walls directly depends on their condition, that is, whether they have significant curvature, or just need to eliminate a slight surface relief that can appear through layers of paint or. In fact, there are not so many technological methods wall alignment. They have been used for more than a decade, but with the advent of new building materials- are constantly being improved. So, the alignment of the walls is carried out in the following ways:
Plastering, that is, applying a special leveling layer to the surface mortar. In turn, this method can be divided into two types - this is the alignment of the walls along the beacons and without their use.

Mounting drywall sheets, setting the desired evenness of the wall surface (often also called "dry plaster"). This alignment option is also divided into two different approaches- this is the fastening of sheets on the frame, or frameless fastening of GVL directly to the wall.
Leveling the walls with putty This method of bringing the surface in order is used in combination with the other two mentioned above, or independently. If the walls have a smooth surface, without major geometric distortions, but there are small irregularities on it, then it is putty that will help to bring them to perfect smoothness.
4. Plastering walls
A few words about leveling solutions Currently in construction stores a very wide range of ready-made building mixtures for plaster work. They can be on different bases.
Plasters on cement base used for outdoor work, as well as for rooms with increased level humidity;

Gypsum mixtures are suitable for walls made of almost any material, but their scope is limited only to interior decoration. However, many master finishers and homeowners prefer to prepare their own plaster mortars. And the basis for this, in addition to cement or gypsum, can also be lime or clay. Lime and cement-lime mortars have proven themselves for external and interior decoration, and clay-based plasters are seen as generally inexpensive (in the presence of free raw materials) and are suitable for leveling wooden, clay or brick walls.
5. Video
As an example, I will show how I paint a wooden surface.
In this case, this is a plywood blank - the basis for the clock. I will paint it.
For work you will also need:
- white acrylic paint(I always use OLIMP paint, brand - BETA, latex paint, matte),
- synthetic brush (preferably flat and wide),
- foam roller (usual construction, small, made of fine-meshed foam rubber).
Let's get to work:
1. Before I start, I will show you the paint that I use. You see it in the photo - acrylic paint company OLIMP, brand - BETA, latex paint, matte.
I've tried several similar colors, but this one is my favorite. It is very durable, elastic, does not get dirty after drying, easily skinned if necessary, easy to apply and very difficult to wash off with water! And this is also important. Products covered with this paint can remain even without a varnish coating and nothing will happen to them.
You can use whatever paint you like best.
The choice of paint does not affect the process itself. The main thing in it is HOW to apply paint so that it is even.

2. My workpiece is quite large (about 40 cm in diameter), so I took a wide synthetic brush, because.need to work FAST- the paint dries quickly, and this cannot be allowed at this step! Apply paint with a wide brushbold strokes, chaotic.
Our task is to paint over the entire surface with such strokes, and do it as quickly as possible,until the paint sets. Below I show the stages of this painting.


4. Now we take a foam roller -necessarily DRY! In no case should it be wet, otherwise water bubbles will form and the desired effect will not work. With this roller, we begin to quickly roll out the entire surface. Need to rideat first with a little pressure, and at the end - barely pressingon the roller handle.
It should roll on the surface, as if by itself, we only guide it with our hands. With the first passes, you disperse the paint over the surface, and at the end, the roller simply levels the surface and leaves behind very small dots - traces of foam rubber.
The lighter you press on it, the smaller these marks will be.
Be sure to go through all the edges of the surface and make sure that the paint rolls out in a thin, even layer. Excess paint will take over the roller. And for this it must be dry.
Wet or damp foam rubber would make puddles and water bubbles on the surface of the paint, and large ones. And we don't need this at all.


5. This is how the surface should turn out. As you can see, there is not a single brush mark or anything similar on it. Everything is smooth and in small pimples.
Leave the workpiece - let the paint dry. This process can be speeded up with a hot hair dryer. With a hair dryer, this paint dries quickly - about 2-3 minutes is enough.
6. We place the tools with which we painted the surface: a brush - in a jar of water (we just lower it and that’s it, you don’t need to rinse it there until it’s clean), a roller - in plastic bag and tie it well so that air does not pass through.
All this is done so that they do not dry out.
There is no need to wash them now, we will still apply a second layer with them. But you can’t leave it in the air either - the paint will dry out. By the way, if the package is tied up well, then in this form the roller can lie for several days. I usually do this if I do some kind of multi-day work.
7. The paint is dry. The surface brightened and became whiter.
8. We take out the brush from the water, dip it into the paint and again paint the entire surface, as we did for the first time. Everything is exactly the same.
This time we do it againFASTER. The second layer of paint, in contact with the first (it draws moisture from fresh paint), dries even faster. If somewhere the paint dried up while you were painting another area, paint over this piece again - all the paint should remain wet.

9. And again we take the roller in our hands, and we pass it over the entire surface, first with pressure, and at the end, barely touching, very gently, so that the roller leaves even and small marks - pimples.


10. Let the surface dry completely.
The result is such a smooth, slightly pimply surface. Then you can either decorate it - stick a printout or a napkin on it, or, if you like perfectly smooth surfaces, you can walk on itfine sandpaper(zero or close to zero) and level to perfect smoothness.
This is who you like.
Personally, I love rough surfaces, and then I work with the surface that is obtained after painting.
In exactly the same way, I paint other products - caskets (wood), trays (wood or plastic), watering cans (metal), bottles (glass), vases (ceramics) and so on. Two coats of paint is enough. I rarely put on a 3rd coat.
That's the whole secret of my flat surface.
I hope it will help you in your work, and your products will be perfectly even!
Papier-mache in art, needlework is used as a material for making sculptures, puppets, fruit bowls, dolls and other items. You can make the most different crafts for the interior. The surface of papier-mâché is easily dyed in desired color also it can be decorated.
How to make paper mache products
To prepare a mass of papier-mâché, you will need unnecessary newspapers or other paper, glue, water. Glue mixed with water in a ratio of 2/1. Newspapers should be cut into strips two centimeters wide or torn into small pieces. Connect newspapers and adhesive solution, mix until smooth with a spoon or bristle brush.
If you use stationery glue to make the material, keep in mind that difficulties may lie in wait for you when painting the molded product. The paint may refuse to adhere to the surface. It is best to prime the product with art white or paint before painting. acrylic primer and then paint over.
Some products look better with a smooth surface. When pasting the form with strips of paper, it is not always possible to achieve perfect smoothness. But the procedure for leveling the surface is not as complicated as it might seem - you just need to be patient with it.
How to get a smooth papier-mâché surface
First you need to align the most noticeable pits by gluing small pieces of paper there. Do this until the surface looks more or less even. The product must be dried, after which the surface is treated with a fine-grained sandpaper. Perform the processing in circular light movements, pressing should be as light as possible. Remove paper fibers periodically with a rag. Coat the treated surface thickly with glue and dry well to upper layer became stronger. This procedure can be repeated several times to increase the strength of the top layer. After that, you can start painting, inlaying or decorating the surface in another way.
For minor roughness, cover the surface with several layers of PVA glue or use an aerosol varnish for cars.
If you want to paint the product, after the staining procedure is over, it is better to coat the surface with varnish in two or three layers. Varnish is suitable for both nitro and furniture, just make sure that the paint does not “float”. The product processed in this way will turn out smooth and shiny.