How to grout the seams on the floor tiles. Cleaning the tile surface after work. Grouting tiles with epoxy-based compounds.
Tiles are great finishing material, which has a number of undeniable advantages and an aesthetic appearance, which is quite easy to spoil with untreated sloppy seams.
That is why after laying ceramic tiles the joints are putty, which masks all the visible defects with a quality work done.
This procedure must be approached with all seriousness, since poorly performed work not only does not eliminate defects, but also adds new ones, completely ruining the impression of the finish.
There are cement, epoxy and polymer grouts. Each of them has advantages, disadvantages and characteristic features.
What is used to grout and seal the seams between tiles?
Cement
Cement is the most popular for grouting. Their advantage lies in the relatively easy preparation:
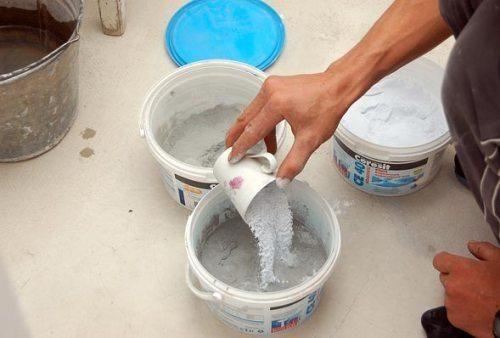
- Water is poured into the container, after which the dry mixture is poured with constant stirring.
- When the mass becomes homogeneous, it is kept for up to 5 minutes and mixed again.
After applying the cement grout, the surface of the tile should dry for 20 to 30 minutes. Then on the tile will appear white coating, which is cleaned with a damp foam grater.
Work with a wet grater must be carried out diagonally. After 3 - 4 hours, the surface should be walked with a damp cloth.
Cement grouts can be used for both enameled and uncoated tiles. However, the use of cement-based grout for marble and sensitive glazed tiles is not recommended.
Colour cement grout- white or gray, it is compatible with cement-sand mortars.
Epoxy
 The advantage of epoxy grouts is that they are not affected by acids and alkalis.
Such mixtures are easily correlated with water and dirt, and can be used even in places characterized by exposure to aggressive chemical acids and high hygienic requirements.
To obtain such grouts, two components are mixed: epoxy resin and hardener. As the latter, sand, previously painted in the desired color, can serve.
Epoxy grout should be removed no more than a day later, otherwise it will not be possible to wash it off. In this case, it is necessary to use special cleaners.
Polymer
Polymer grout has a number of advantages, among which it should be noted:
- easy flush,
- reduced shrinkage of seams,
- hardening process independent of temperature,
- water-repellent and dirt-repellent surface,
- plastic solution,
- frost resistance,
- flexibility, hardening without cracks.
Despite the above advantages, polymer grout is less durable than epoxy grout.
To increase the strength of polymer-based grout, liquid polymers are often added to it. It can be any color.
Grout pencil
 Refresh seams tiles You can use a special pencil - a marker.
It contains in its composition special solution, capable of destroying the fungus and preventing its occurrence.
Training
Before grouting the joints of the floor tiles, rinse them thoroughly with cleaning agents so that they are free of dirt.
Using epoxy grout it is necessary to fence off the room with a film to avoid the penetration of dust.
If ceramic glazed tiles were used, grouting can be started immediately. If the tile is not glazed, then before grouting it is necessary to moisten the side and top surface of each tile.
But it is worth monitoring this process, since excessive moisture can cause the formation of cracks in the grout, which is typical for a cement mixture.
Before grouting, you should also wash the surface of the tile with soap or cleaning products. During the process, the mixtures stick to the tiles, so after grouting the surface is cleaned again.
You should also take care of your health: the grouting process is quite dusty, so it requires the use of a respirator.
Carrying out work
After preparing the surface, you can safely proceed to the preparation of the mixture. As a rule, half a kilogram of grout is enough to carry out the work. The mixture is diluted in a small amount of water using a paint mixer.
When the mixture has the consistency of sour cream, you must wait 5 minutes and mix thoroughly again, after which the grout will be ready for use.
Grouting methods and process
Grouting can be done with:
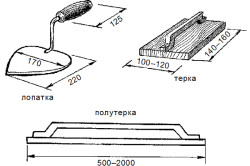
- spatula
- special bag.
How to seal the seams between tiles?
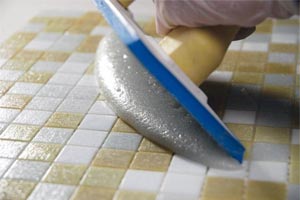
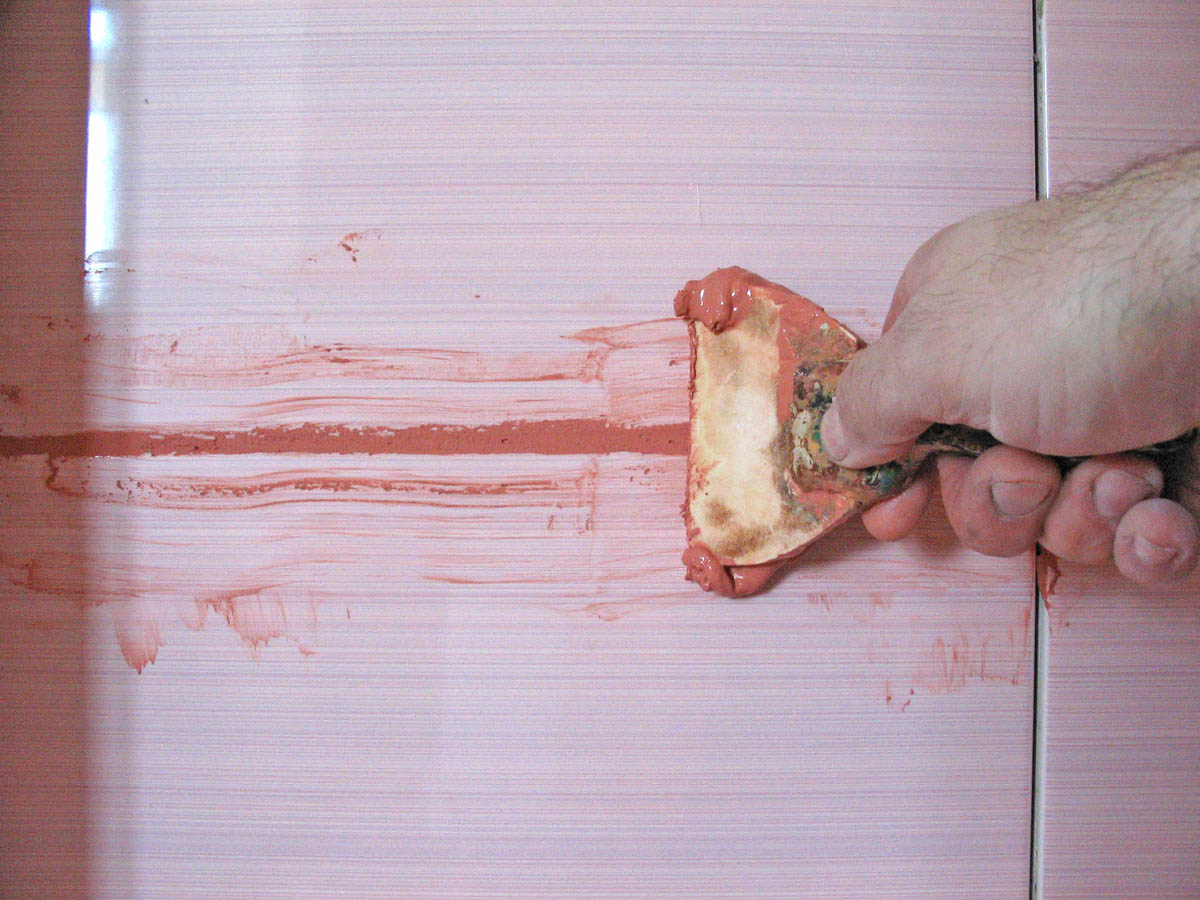
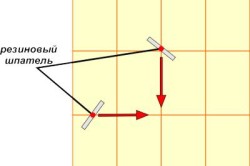
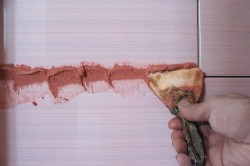
The first method is used most often. Apply a special solution rubber spatula for grouting tiles, you need to use force, pressing it between the tiles. The quality of the seam depends on the density and force of applying the solution.
Do not be afraid to stain the tile, it will still be washed off later. The remains of the mixture should immediately be removed with a spatula and used for the untreated surface.
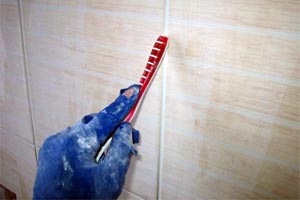
Grouting tiles should take no more than 10 - 20 minutes. The composition is applied to the tile diagonally, at an angle of 30 degrees. After this process, you should wipe the seams with a foam rubber cloth, which must be rinsed often and squeezed hard.
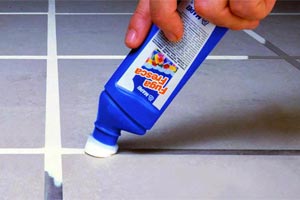
The use of a grout bag is used for a surface that will be difficult to clean after work. The bag acts like a confectionery bag. A tip is fixed at its end, the width of which is approximately equal to the width of the seam.
When working with a trowel bag, place the tip at the beginning of the seam and move it along the edge as it fills. With a trowel bag, first fill all the horizontal seams, after which they proceed to the vertical ones.
Stitching
 Jointing is done to lower the level of grouting of the joint relative to the surface of the tile, this is done for the aesthetic beauty of the work performed or if the joint is subject to coloring.
Jointing can be done with a special spatula, the end of a toothbrush, a rubber grater or a wooden pointed wedge.
Removing excess grout
For dry removal of excess grout, a grater is required. It should be held almost at a right angle, and moved diagonally relative to the seam.
After applying dry removal of excess, you need to proceed to wet removal. Before starting it, it should take from 5 to 20 minutes for the seams to completely harden.
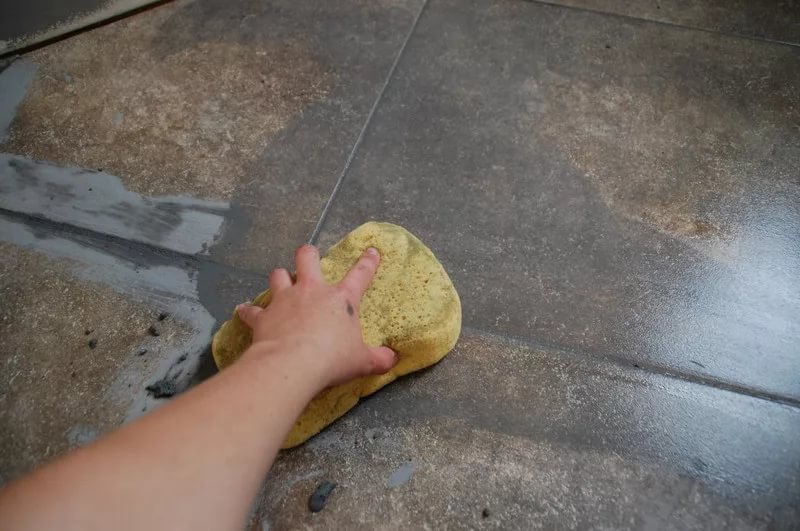
After this time, it is necessary to wipe the surface with a damp sponge.
Special cleaners should be used in cases where epoxy grout has been used.
Visual video instruction
The video shows the grouting of ceramic tiles using cement grout as the most common example.
protective layer
Seam protection is the final step in grout processing. Tile grout varnish makes joints moisture-resistant, resistant to cracks, and also permanently fixes the color of the grout, making it glossy and saturated.
Such varnishes provide protection against the occurrence of fungus and do not allow grease and dirt to be absorbed into the grout.
Special impregnations for tile joints are already used for dried grout, ensuring its moisture resistance.
Why is a sealant needed?
Sealant is used to increase the moisture resistance of tile grouting, as well as to prevent mold-forming dirt from getting into the joints and under the tile.
Grout prices
| Name | Type | Weight, kg | price, rub. |
| LITOCHROM | Cement | 2 | 130 |
| Ceresit | Cement | 2 | 114 |
| LITOCHROM STARLIKE | Epoxy | 2,5 | 2570 |
| Starlike NIGHT VISION | Additive for epoxy grout | 0,4 | 6400 |
Also, when grouting, do not forget about the choice of glue that will be combined with the grout and the choice of the necessary tools.
Ceramic tile is definitely an excellent and practical floor covering. It is especially good in rooms exposed to moisture, and places characterized by high traffic. That is why such floors are most popular in many offices and institutions. Our apartments are no exception. Tiles on the floor today can be found not only in bathrooms and kitchens and hallways, but sometimes even in living rooms. Fortunately, on the construction market you can find an extensive range of this material, sometimes capable of imitating almost any surface. True, this flooring will be beautiful only if it can be correctly and accurately laid. And an important role in this procedure is played by the final stage - grouting the tiles on the floor. It is on how correctly this is done that the visual effect produced by the coating will depend.
How do they rub the seams between how correctly and why do you need to do this at all? We will answer all these questions in our review.
What are seams and why overwrite them
During the master, special crosses are laid between the elements, which contribute to the formation of seams - the same distances between each tile. And they are needed in order to, firstly, facing material the end result was neat and tidy. In addition, laying is not always carried out on a solid foundation; sometimes there is a floor under the tile, which can be subject to shrinkage processes. And if you do not leave these small distances, then ceramic coating may simply crack under the influence of the movements of the same concrete slab. However, if the joints are left unfilled, then over time they will simply become clogged with dirt, which is unlikely to contribute to a favorable impression of the floor. And in those rooms where there is moisture, mold will begin to form in the seams. And so that such problems do not arise, the seam between the tiles is filled with special mixtures - grouts. 
What are grouts
Before looking for information about what is right on the floor, you need to familiarize yourself with the types of this very grout. Professionals also call it a fugue. The fact is that not every material presented in stores is suitable for a particular room. All grout compositions are divided into types. There are quite a few of them, but it is enough for a non-professional to know only that there are fugues made on the basis of cement, made on the basis of epoxy resin and combined, which are called epoxy-cement.
The former belong to the category of the simplest and are suitable for use only in those rooms in which there is practically no humidity. If we take into account the fact that it is almost impossible not to wash the floors, then this option can not be considered at all. That is, grouting ceramic tiles on the floor with a cement fugue is undesirable.
Epoxy grouts are the highest quality and are suitable for any coating in any room, as they have high strength characteristics and are moisture resistant. However, they have one significant drawback. They are quite expensive. In addition, they are suitable for filling joints with a width of at least four millimeters, and it is quite difficult for a non-professional to work with them. So home master it is recommended to pay attention to the intermediate option, which is ideal for flooring not only in the living areas of apartments, but also in bathrooms and kitchens. Simply put, cement-epoxy fugue is considered for the home universal option, since you can rub the seams on the tiles on the floor with it in almost any room. 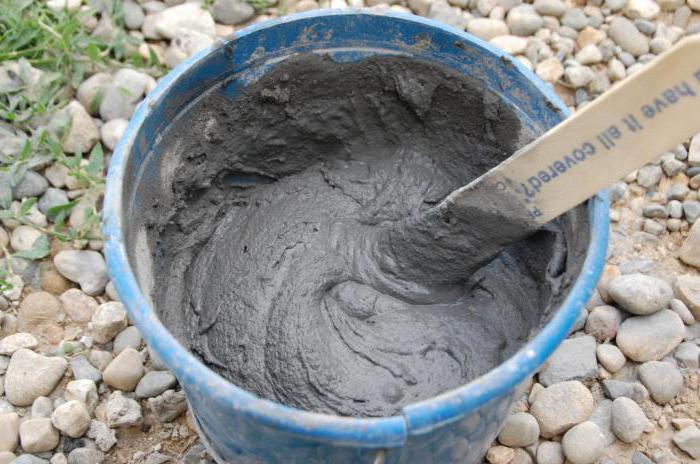
How to choose "your" grout
First of all, you need to read what is written on the package. The manufacturer must indicate there optimal width seams, in which it is rational to use one or another fugue. Accordingly, you need to know your own dimensions. There are also universal grouts. They can be applied to flooring, the width of the seams of which is from two to twenty-two millimeters.
Then, choosing desired composition pay attention to its color. The palette of shades in the store is presented in large assortment However, you still need to know some basic rules. For example, the fact that contrasting grout can only be used if you are sure that your tile is laid perfectly. Usually, the best option is to choose a tone that is as close as possible to the color of the tile. If the latter has a pattern of a different shade, then you can take a fugue of the same color as him.
Process steps
Before grouting the seams on the tiles on the floor, you must first wait a day after. This time can just be spent on buying a fugue and the necessary tools. The process of grouting itself consists of several stages. These are: ground preparation, breeding grout composition(unless, of course, you have already purchased it in ready-made, which, by the way, is quite expensive), applying the solution to the seams, removing excess and final cleaning. 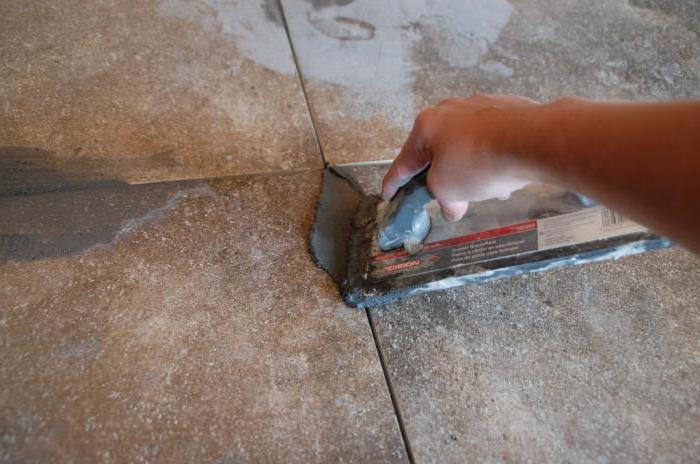
What will the master need to have for the grouting procedure
Special equipment and tools are not required, however, some set will still have to be prepared. Naturally, the trowel itself must already be purchased directly. By the way, it can be in the form of a powder, or it can be sold already ready for use. In principle, the second option is better in every way, since it is much easier to rub the seams on the tiles on the floor with such a composition, if only because it already has the desired consistency. To achieve the latter is not quite a skillful master, who carries out this procedure for the first time, with self-kneading, it is quite difficult the first time.
However, such a fugue also has its drawbacks. And the main one among them, in addition to the cost mentioned above, is that such a grout is not subject to long-term storage. That is, the remains of an expensive mixture, most likely, will have to be thrown away. So experts recommend that novice craftsmen still purchase dry grouts. And since such a thing, it is required to have on hand in this case also a container for breeding. You will also need a trowel, a special spatula (rubber), a foam rubber sponge and clean rags, a bucket for water, gloves and an abrasive grater.
Training
The tiled floor must be carefully cleaned of tile adhesive, if any, as well as dirt and dust. It also does not hurt to walk first with a vacuum cleaner, and then with a brush along the seams. Then you need to take a sponge and moisten them with plenty of water. After that, you can start breeding grout. 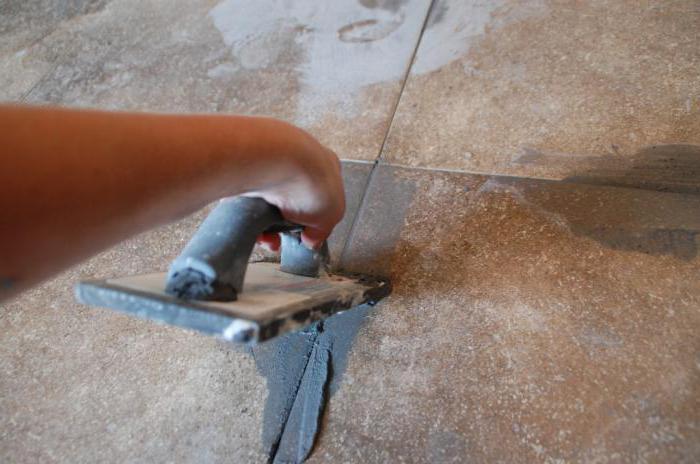
How to breed fugu
First, experts recommend carefully reading the instructions. Despite the fact that the grout dilution procedure is, in principle, the same, each manufacturer may still have its own nuances. Therefore, do not be lazy and carefully study what is written on the label. Then take three-quarters of the water from the rate indicated on the package and pour the puffer into it. Mix everything thoroughly. And then slowly add water until the solution reaches the desired consistency. After 10 minutes you can start working. It is necessary to grout only with gloves, since the mixture is quite capable of corroding the skin of the hands with prolonged contact.
Advice from experts! Since the novice master does not yet have the necessary skills, and the grout dries out within just a few hours, it is better not to dilute the entire mixture at once. Divide the contents of the package into two parts. And work out one first, and then the other. As for the amount of water needed for kneading, it must also be divided by half.
We rub the seams of the tiles on the floor
The most common is the method using a rubber spatula. Since it will not be necessary to work immediately on the entire territory, but to process tiles literally per square meter, experts recommend moistening a couple of “squares” with water again immediately before the process itself. In general, professionals process 2-3 square meters. m in twenty minutes. A novice master will not be able to achieve such a speed, but this is not so important. The main thing here is accuracy and careful observance of technology. Well, the fact that you finish the work an hour or two later, special significance does not have.

So, how to properly grout tiles? Apply a puffer to the rubber spatula and begin to fill the seams with diagonal movements. And do not just smear on top, but try to press the composition, as it were, so that it fills the seam completely. Remove excess with the same spatula. At the same time, make sure that the filled joint coincides in level with the level of the tile. That is, if there are any recesses or voids, be sure to immediately add a fugue there. Since you need to grout the tiles on the floor in stages, work this way for about half an hour. After that, proceed to cleaning the jointed area.
To do this, arm yourself with a bucket of water and a sponge. Constantly wetting it and squeezing it well, go through the foam rubber over the entire surface, making movements in a circle. Your goal is to remove excess from the tile itself and the seams. If stains remain on the tile - this is not a problem. They will be removed during the final cleaning process. Now the main thing is not to leave pieces of dried fugue on ceramics. It won't be easy to remove it later. After you have processed one area, proceed to the next. And so on until all the seams are worn.
Finishing
After a day, you can begin to correct. It may well be that in some places the seams are not uniform enough. That is, there are surpluses. In this case, experts recommend taking either an abrasive sponge or a grater and go through all the seams with them, holding the tool at one angle. Simply put, polish them. After that, you need to clean it with a vacuum cleaner, and then again take up wet cleaning. That is, thoroughly rinse the seams and tiles with a foam rubber sponge, periodically changing dirty water. After the floor dries, stains may remain on it. Experts recommend in this case not to wash it a hundred times, but simply carefully wipe it with a dry cloth. On this, the procedure can be considered completed.
How to grout tiles in the bathroom on the floor
Just like in any other room. Except that in this case, experts recommend adding another step - covering the joints with sealant. After all, the bathroom, like no other, is exposed to moisture. And quite often the seams on the floor, and even on the walls, turn black from mold. And to prevent this from happening, buy a special sealant. It represents a liquid. It should be applied three days after grouting (you need to let the fugue dry). Take a thin brush for drawing and gently coat the seams with it.
Conclusion
We tried to tell as much as possible in detail about how to overwrite the tiles on the floor. And at the same time shared secrets experienced craftsmen and provided expert advice. We hope that now you will not have any difficulties with grouting tile joints.
Get after repair not only quality, but also pleasant appearance surfaces finished with ceramics - an understandable desire of apartment owners. Not only the appearance and overall aesthetics of the room, but also the service life of the coating as a whole will depend on how to grout the seams on the tiles on the floor. Therefore, it is worthwhile to approach the choice of the type of joint filler and the processing method with attention to all details.
The suture filler plays several roles.
- Protects the base of the coating (adhesive composition) from destruction due to moisture.
- Grout for floor tiles does not allow the accumulation of debris.
- Joint filler, matched to the color of the surface, in contrast, corresponding to the surrounding walls - will allow you to achieve the desired aesthetics.
- Grout for floor tiles, as well as for wall tiles, is used as a damper. During seasonal fluctuations in temperature, the pavement configuration changes, including the spacing between individual paving elements.
- The joint compound has a partial vapor permeability. Moisture can circulate naturally.
- Grout for tiles on the floor in the bathroom plays the role of an anti-fungal and anti-mold agent.
You can continue the list. For example, mention that floor tile grout plays the role of an effective connector, improving the overall distribution of mass on the surface when walking. But it is already clear that you need to rub the seams carefully and correctly, guaranteeing a good result.
Grout types
According to the type of the main component, the joint filler is divided into several classes. Properly selected grouting tiles on the floor or on the walls will create a wear-resistant and durable filling that will last as long as the main coating. According to the type of main ingredient, the compositions are divided into:
- cement based on Portland cement. The mixture is very common, within the class there are grouts with the addition various components, which give the seams moisture resistance, special strength or increase the degree of viscosity;
- choosing silicone grout tile joints on the floor or walls, it is possible to guarantee water protection and complete neutralization of vapor penetration. This is especially important in bathrooms and toilets, as well as rooms with high humidity;
- epoxy compounds have complex characteristics. The created seam is durable, has low moisture permeability, fungus and mold do not multiply in it - a good option For bathroom. Grouting epoxy floor tiles will last a long time, as the composition forms a strong, crack-resistant structure.
- Latex composition is used very often. According to its main characteristics, it is similar to a cement-containing mixture, however, it is plastic and easier to work with. In addition, latex grout for floor tiles or other surfaces comes in a variety of colors.
Tools you need for the job
Considering the question of how to grout tiles on a floor or wall, it is worth dwelling in detail on the tools used. Their choice depends on the final result and its quality.
For quick and convenient work on filling the joints between tiles on a horizontal or vertical surface, you will need:
- stitching tool. It can be a plastic or wooden stick, sharpened on one side;
- a container or container for mixing the mortar, of a small volume - we will stop later why the composition for grouting between tiles on the floor or wall is prepared in small portions;
- rubber spatula, the size is selected based on the geometry ceramic elements: the smaller the dimensions, the more modest the spatula width should be;
- large foam sponge, brush;
- large bucket for water;
- construction mortar mixer or drill with an appropriate nozzle.
From extremely useful tools you can note the bag for processing seams. According to its device, it is easy to understand how to grout tiles on a floor or wall quickly and efficiently. The bag looks like a cooking syringe. It has a spout and a container for the solution.
The process of filling the seams looks like this:
- the spout is placed in the gap between the tiles and is pressed with force;
- by squeezing the bag, the solution is squeezed out;
- by moving the spout, you can quickly go through the seams, acting with good speed.
The order of how to grout the seams on a tile on a floor or wall using a bag is as follows: first the horizontal lines are passed, then the vertical ones. When extruding, excess solution is inevitably formed. Grouting floor tiles or wall covering it will pass faster if you let the mixture set for 30 minutes - then the partially hardened composition is more accurately removed.
How to prepare a mixture
After considering how to choose a grout for certain conditions, you can go to the question of its preparation. You will need to follow a few rules:
- It is not necessary to prepare a large portion of the solution - it seizes quickly enough both inside the seams and in the container. Remove excess and clean the surface of the coating before the grout hardens.
- Thorough mixing allows you to get a plastic and easy-to-use mass. But it is necessary to ensure that there are no air bubbles in the solution.
Based on the basic rules, we will formulate a procedure for how to use grout for tiles. He is like this:
- a little poured into the container ready mix from the package;
- using a construction mixer or drill nozzle, adding water - knead the solution;
- during this treatment, air enters the composition. Therefore, you need to pause about 5-8 minutes between adding a portion of water and kneading to get rid of them.
The process continues until the mixture becomes a little thicker than sour cream, but does not crumble into lumps, like cottage cheese. With fully manual mixing, pauses for settling of the solution can be omitted. In this case, you will have to ensure that the mixture is uniform both in color and consistency.
Surface preparation
It is important not only to know how to use tile grout, but also how to prepare the base, since the durability of the seam and its appearance depend on this. Before starting work, you will need:
- carefully clean the space between the tiles from mortar, debris, form cracks of uniform depth;
- treat the future seam with an antifungal agent;
- wet the seam with water in depth, with a small amount of liquid.
The last step is worth talking about in more detail. Ceramic tiles with matte surface has the ability to draw moisture from the grout solution. This can lead to cracking and chipping.
Therefore, when working with glazed ceramics, it is enough to moisten the seam with a small amount of water, and in the case of matte tiles, it will be necessary to treat with a brush and a spray gun not only the gap, but also the side of the laying element, capturing the front surface.
To Work with matte tiles you need to quickly, so as not to allow the solution to dry out. In the course of work, parts of the seams of the processed styling, if necessary, are additionally sprayed from the spray gun. If it is seen that the solution dries very quickly, it is also sprayed with a small amount of water to achieve partial solidification within 30 minutes.
Seam filling
Consider how to use tile grout for its intended purpose. The technology for filling seams looks like this:
- if the laying of small tiles is being processed, it is more convenient to work with a rubber spatula. They pick up a small amount of putty and force it into the seam until it is filled;
- when working on laying of large tiles, for example, on the floor, you can use a construction trowel, plastic or wooden. A lot of mortar is immediately collected on it, it is pressed with force into the seam remaining on the tool - it is moved to the edge and the process is repeated in the next section. You need to move the trowel at an angle of 30 degrees relative to the direction of the gap.
In the course of work, the grout may sag inside the seam. Then the process of indenting the solution is repeated and this is done until the composition confidently fills the gap between the tiles.
A separate note on the volume of processing. For one stage it is recommended to overwrite no more than 1-2 square meters area. This ensures that the putty does not have time to set and that the seams can be carefully and accurately processed.
Weld surface formation
There is a common proverb: repairmen are divided into only two types, some make a seam with flat surface almost flush with the tile, the second ones create a grout with a concave bottom, the rest of the divisions are contrived. Let's see how to get the job done both ways.
- To make a seam with a flat surface, use a foam sponge. The first pass with plywood, a board, a flat-pointed plastic or wooden stick removes excess grout. The second - with foam rubber evenly deepen the seam, leaving it even. Such work requires skill - the solution accumulates on the sponge and makes it difficult to control the quality of processing.
- To make a seam with a concave surface, it is convenient to use a piece of cable insulation with a diameter close to or greater than the width of the gap. They are carried out along the putty line, pressing the trace. Then, with a sponge, remove excess solution on the sides. This technique allows even with little skill to get a good result.
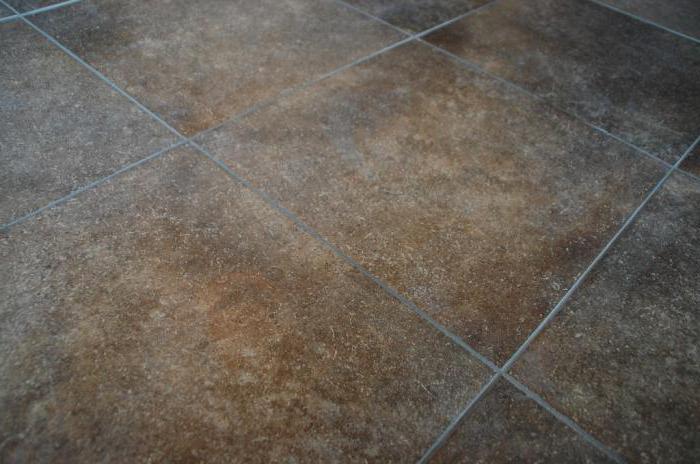
The main requirement is that the surface of the tile should be higher than that of the grout layer. Different seam configurations allow, among other things, to form and complement the overall aesthetics of the coating.
Surface cleaning
There are opinions that it is necessary to clean the tiles after a day from the moment of grouting. In this case, it is advised to use solvents, mustard powder, polishing nozzles on a drill. These are understandable requirements, since in 24 hours the solution will completely harden and it will be extremely difficult to remove it.
Tiles can be cleaned after 2-3 hours after grouting. You need to work carefully, without much pressure and excessive moisture. In this case, clean soft rags and sponges are used, which must be constantly rinsed and squeezed strongly. After the tile has been cleaned, the joints are sprayed with an extremely small amount of water, from a spray bottle, from a great distance.
Once again it is worth emphasizing: if the tile is cleaned a couple of hours after grouting, it is highly recommended not to put pressure on a partially hardened joint. You can damage its surface. Also - it is important not to use a lot of moisture so that the solution does not drip.
Another tip is performed the next day. It is necessary to carefully examine the condition of the seams and, if necessary, repeat the grouting process. Or - just treat them with an antifungal agent. There are no comments to the quality that can be achieved with attention to detail.
Video how to choose a grout, cook and what tool you need:
Do you know how to grout tiles correctly? What tools to use? How to breed?
Let's look for answers to the questions in order.
Preliminary application of the fugue
List of tools
- rubber spatula
- Construction bag
- piece of cable
- Capacity
Surface preparation
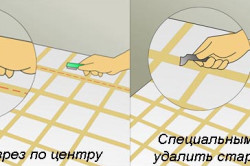
Before grouting tiles, prepare the surface. To do this, you need to clean the seams of debris: mortar residues, crosses.
Important! It is necessary to start grouting tiles only after at least 24 hours after laying the tiles.
Some manufacturers claim that their crosses do not need to be removed to regulate the seams between the tiles. However, our experts assure that if you do not want the reveal to be two shades lighter in these places than in all areas, then this element should still be removed.
Seam jointing
Before grouting the tiles, of course, you need to dilute the mixture itself.
Pressing the mixture into the seams
Advice! You need to dilute a small amount, not the whole package!
Of course, if you need to grout, then use a larger container than for grouting tiles on the walls.
Why? We explain!
It is best to rub the tiles on the walls with a small rubber spatula, with which the mixture is applied directly to the seams. But in order to rub the tiles on the floor, especially with large volumes, they often use a tool that resembles a “grater” for smoothing concrete surface. Gathering a sufficiently large amount of the mixture on this spatula, the grout is applied to the tile itself, moving diagonally.
Important! At one time, it follows an area of 1-2 squares, more at a time is not recommended, since the mixture itself can seize, and then it will no longer be possible to carry out a high-quality jointing.
However, the method using the above grater is a bit of poor quality, it is suitable, say, for the work of a master, but when you do everything with your own hands, it is better to use a rubber spatula in your apartment.
Why? We explain!
When applying grout into the joints with a rubber spatula, you will apply sufficient force to press the mixture. This effort is necessary so that there are no voids during filling, only then the grout will fully justify its protective functions. Seam protection - milestone laying the tiles.
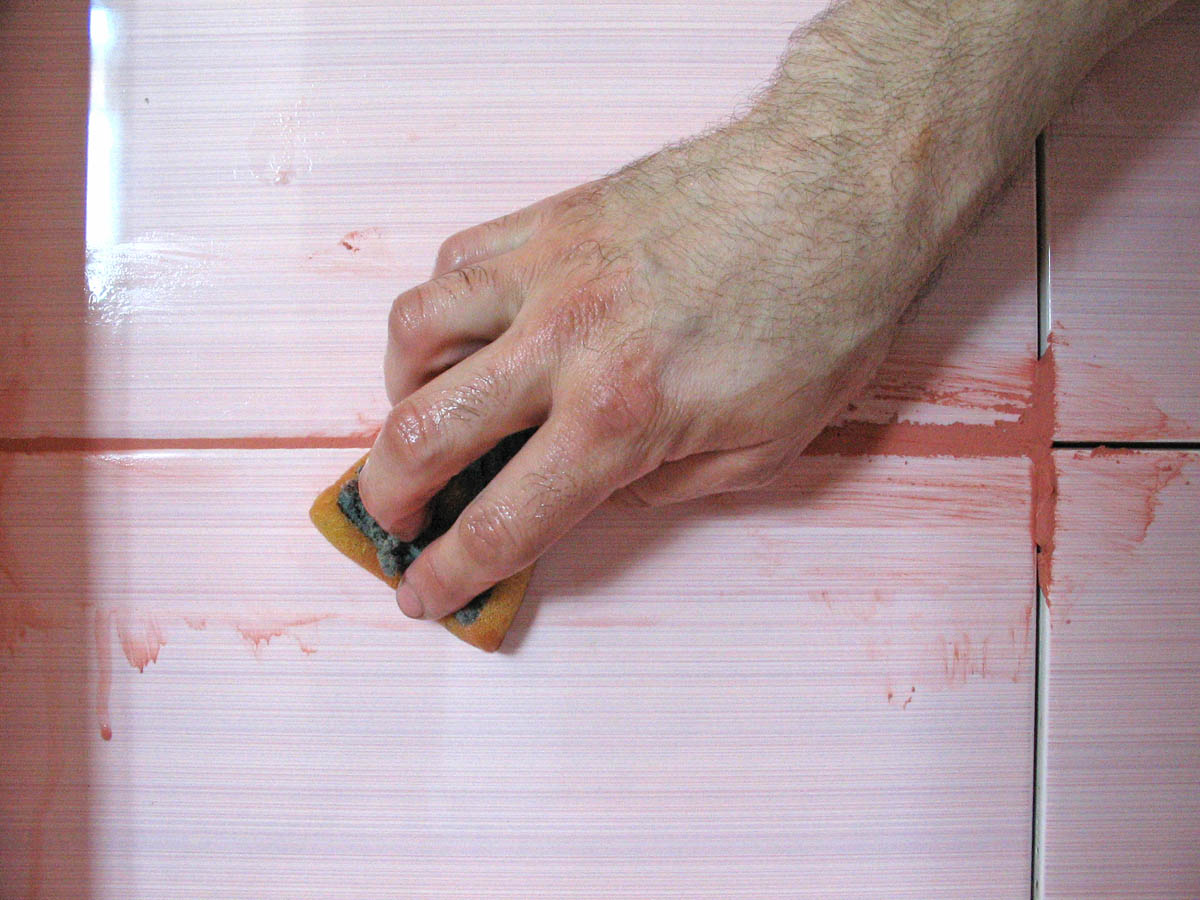
Remove excess mixture with a sponge
If the reveal is applied correctly, this will help you avoid many problems in the future. The grout itself does not let water in, and therefore, the solution on which the tile is laid will not be exposed to the destructive action of moisture.
Also, if you decide to rub the tiles on the street, say, on the terrace or in the gazebo, we recommend using mixtures for outdoor work. And here grouting tiles is a must!
If moisture in the warm season gets into unprotected seams and seeps under the tiles, then be prepared to completely shift the floor next year. Why? Yes, because in winter time moisture will turn into ice, which, as is known from the lessons of physics, not only has a much larger volume than water, but is also completely incompressible.
And in the end, the tile that was laid on the street without grout will simply either “tear” from the inside or fall off.
Another way to grout tiles is to use a construction cone. The construction cone in its function resembles an ordinary baker's bag, inside of which the cream is placed and, squeezing out, put it on the cake.

We clean the tiles
The principle of operation is similar here, a grout mixture is placed inside the cone, which, under pressure, will be distributed along the seams.
Stitching
So, grouting tiles is not so difficult. The next step is stitching.
For jointing, some masters go through the seams with a piece of cable of a suitable diameter, while excess grout will protrude onto the very surface of the tile, and all seams will be neat, equally filled.
However, this stage is not at all necessary, so it will only be your decision to overwrite the tiles in this way.
Tile cleaning
After you have completed the grouting and grouting, you should immediately start cleaning.
Why do we recommend doing it right away? Until the fugue has finally seized, cleaning the tile will not be as problematic as upon completion of the process. Moreover, if your tile has a porous, corrugated surface, remove the excess mixture immediately, just when you start to grout the tile.
Use clean rags, a sponge for cleaning - after all, if you have a fugue light shades, there will be a possibility that you are still on initial stage, on cleaning after repair, unwittingly, pollute it.
So, you have learned not only to grout the tiles, but also to embroider the seams, which is why, without putting things off indefinitely, get to work!
- About grouting ceramic tiles: recommendations
After the tile is laid on the floor, another problem arises, which is associated with grouting the joints on it. It is necessary to overwrite the seams, otherwise various defects will remain on the surface. In the case of high-quality work, you can forget about all the irregularities. However, the tile must be rubbed as carefully as possible. Otherwise, there is a very high probability that even more defects will appear on the surface than it was originally.
Be sure to overwrite the seams, otherwise defects will remain on the tile.
It is worth talking in more detail about how to grout the seams after finishing work related to laying tiles. After all, not everyone knows how to overwrite tiles. In addition, the market has great amount various mixtures that are used specifically for these purposes. Everything will be detailed here. Including how to dilute the grout, how to grout tile seams and so on. But you need to start in order.
Product options and features
Currently, in order to process the seams on the tile, a wide variety of materials are used. However, it should be said right away that they are all made on two types of bases - epoxy and cement. Both types are often used in certain situations.
Working with the cement system is quite simple. It should be applied to the tile, and then wait a bit until a characteristic white coating appears. After that, you need to take a rag and clean it from the surface of the tile. The result should be a fairly flat surface.
Epoxy grout is becoming more and more popular every day. Now it is used by many to process tile seams. It is not afraid of aggressive environments, so it can be used even in places where dirt and high humidity. It is also worth mentioning that epoxy mixtures consist of two components. Here quartz filler and epoxy resin are mixed. These materials form a fairly high-quality consistency.
Back to index
Now it’s worth talking in more detail directly about the process of grouting ceramic tiles. It is quite simple, but some nuances must be observed in order for the surface to turn out to be of really high quality.
Of course, you first need to clean the surface of particles of tile adhesive. There may be quite a lot of them left on the surface after the work related to the laying of tiles.
Next, you have to breed grout mixture. You can do this in any bucket. In this case, the density of the grout should be as described on its packaging. In most cases, it can be compared with steep sour cream. Do not dilute a large amount of grout at once. It hardens fairly quickly. It takes her twenty minutes to do this.
Next, it is worth pouring the entire mixture onto the surface. The grout itself cannot be evenly distributed over it. She needs a little help. A rubber spatula is ideal for this purpose. In order for the seam to turn out to be of high quality, it is necessary to press as hard as possible on the spatula during the grouting process. You shouldn't be afraid of it.
Basically, the process of applying grout to a tile is the same for all surfaces. If a lot of grout residue is released, then it can be collected with the same rubber spatula and applied to not yet treated areas of the floor. Apply the mixture diagonally. In this case, the spatula must be held at an angle of approximately thirty degrees. Do not forget that the duration of work with each new batch of grout should not be more than 20 minutes, since the mixture then begins to harden.
The grout mixture is applied with a spatula.
If everything is done according to technology, then the seam should be located slightly below the level of the tile itself. After finishing work, wipe all seams with a dry cloth. All grout residues are removed from the tile surface by polishing. At the same time, the composition that remained in the seams continues to harden.
Grouting seams is a rather laborious process. Sometimes the help of a master is required to cope with this difficult task. It is worth remembering that the larger the seam surface of a tile, the more likely it is that it will collapse before the end of its service life.
In some cases, the size of the seam may be minimal.
The easiest way to achieve this is when it comes to working with square tiles. When it comes to working with rectangular tiles, then seams up to 15 mm in size can form here. You shouldn't be afraid of this. The main thing is to make their processing as high as possible.
Very small joints are also not recommended, as it will be very difficult to fill them with grout. Previously, people used the same cement mortar, as for the main works. Today on the market there are a huge number of the most variety of materials under the tile, so it is much easier and more convenient to use them.
Back to index
Surface cleaning after work
After grouting is done, it is necessary to remove its remnants from the surface of the tile. For these purposes, a wide variety of substances are used. Today in specialized stores you can buy similar ones. Those who want to save money on this process should pay attention to folk remedies seam cleaning.
Currently quite commonly used ammonia, table vinegar, lemon acid etc. They dissolve in water in a certain proportion, and then applied to the surface of the tile. In some cases, even the most common toothpaste. All these substances can replace the most powerful chemical compositions that the industry offers us.
To eliminate excess grout, it is necessary to moisten a cloth a little, and then use it to wipe the places where the composition was applied. This method can remove the main layer from the surface of the tile (tile).
Then you can go the other way. To clean the surface, you can use the most ordinary mop. It must be thoroughly moistened in the solution, and then in the usual way wash the floor. After this procedure, the floor should dry well. Only after that you can start moving on it.
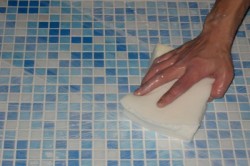
To remove excess grout, it is necessary to moisten a cloth, and then use it to wipe the places where the composition was applied.
In some cases, you can use a steam cleaner to remove grout residue from the tile surface. He treats the surface with hot steam. Thus, absolutely no dirt remains on it. If something remains, then the mixture can be removed with a regular rag, thoroughly dipped in water.
Thus, now everyone knows how grouting is done after the tiles are laid on the floor. As you can see, there is nothing complicated in this process. The most important thing is to follow the instructions that were presented above. This is the only way to do the job with the highest quality and avoid various defects after its implementation.
Do not forget that the surface must be prepared before work. If necessary, remove all construction debris from it. Also a mandatory item of work is the removal of grout residues from the surface of the tile. How this is done has been described above. Now everyone knows how to grout the seams with their own hands. This material will be useful not only for amateurs, but also for professionals working in this direction.