How to renew the grout joints of a facing tile. Jointing of the cladding or how to grout the seams on the tiles with your own hands
After, you should give it an aesthetic appearance. To do this, you need to know how to choose grout mixture, how to grout the seams on the tile, and what materials and tools will be required for this.
Choice of grout
Grout is a colored mixture on a polymer or cement base. It is used not only to give the laid tile an aesthetic appearance, but also to protect it from moisture and the appearance of fungus.
In addition to dry mixes, filling can be used silicone sealant(most often used in problem areas with large quantity moisture) or ready mix, which does not need to be diluted with water (they have a fairly high cost).
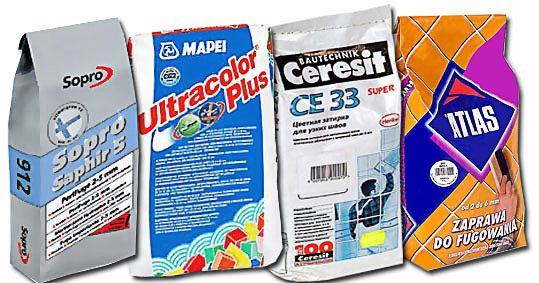
There are two main types of grouts on the market - cement and epoxy.
Cement-based grouts, the main component of which is Portland cement, are diluted with water or latex. After dilution, the mixture acquires an elastic consistency and easily fits into the seams.
Peculiarities:
- suitable for tile joints With minimum width(up to 5 mm.);
– easy to apply and clean from the surface without using special means;
- resistant to abrasion
- a wide range of colors.
Sand is sometimes added to cement grouts. Such a mixture is already used for joints more than 5 mm. If the sand has a coarse grain size, then the elasticity of the mixture decreases.
Grout for ceramic tiles with the addition of sand has its drawbacks. Due to the fact that the sand does not allow the mixture to give rich shades, most often it has a gray or White color. In addition, having a specific structure, it can damage the glazed tile - scratch it.
Important! When working with sand grouts, in order to avoid damage to the tiles, it is recommended to use a latex additive instead of water, which increases the elasticity of the mixture.
Grout for tiles in the bathroom should have waterproof properties. Especially for such premises, there are quick-drying water-repellent compositions.
Epoxy grouts
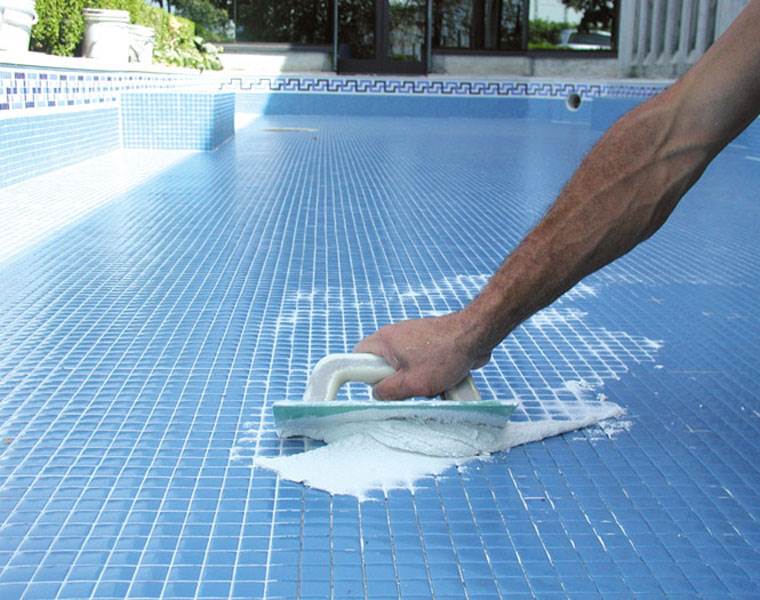
Grouts on epoxy based, besides epoxy resin, contain a hardener in the composition, which gives them a special resistance. Most often they are used for premises with high traffic - in commercial premises, public swimming pools, etc.
Peculiarities:
- viscous consistency, which does not allow filling joints up to 6 mm wide;
- fast setting and a rather laborious process of removing excess from the surface;
- limited color range;
– large package weight – not less than 5 kg;
- service life - up to 50 years.
Application epoxy grout requires experience and quickness, since after drying it is very difficult to remove.
Due to its characteristics, it has a higher cost (compared to cement) and is used mainly in enterprises.
Choice of grout color
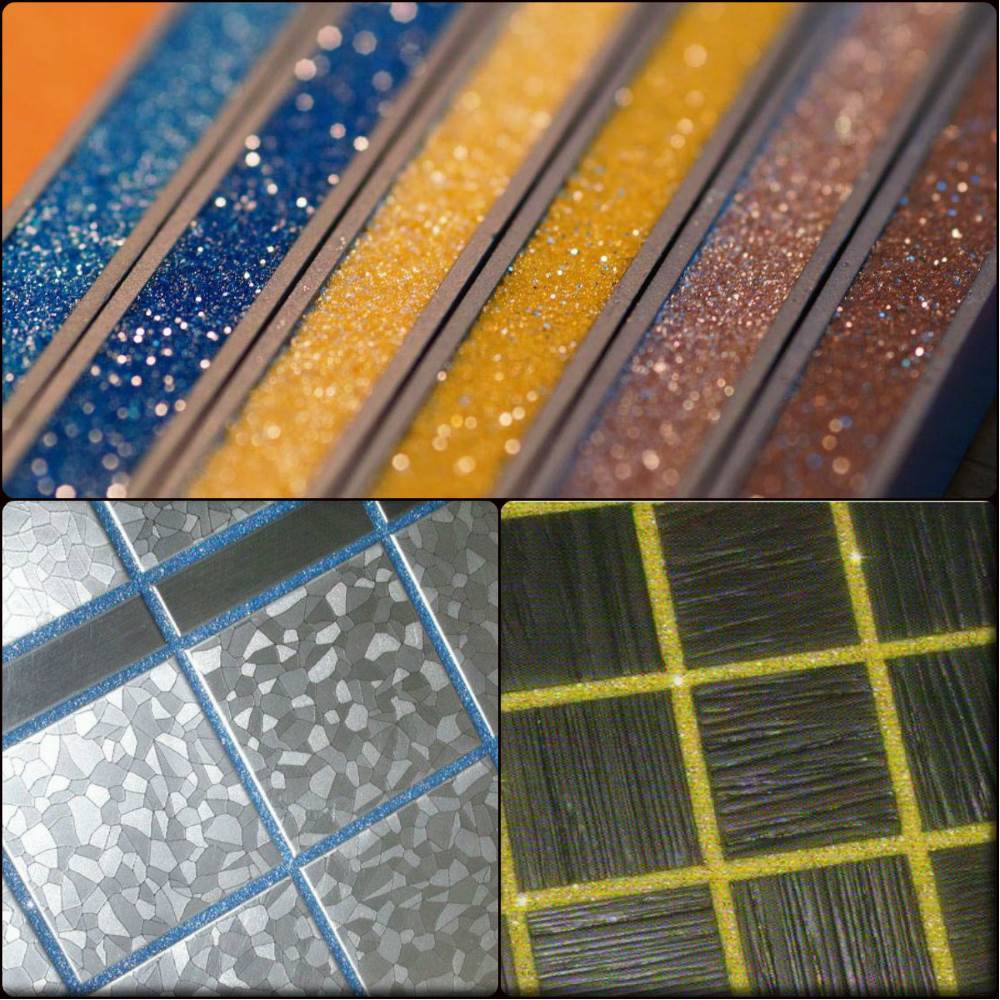
There are a large number of shades of grout on the construction market. The right selection of the color of the tile joints can completely transform the entire installation.
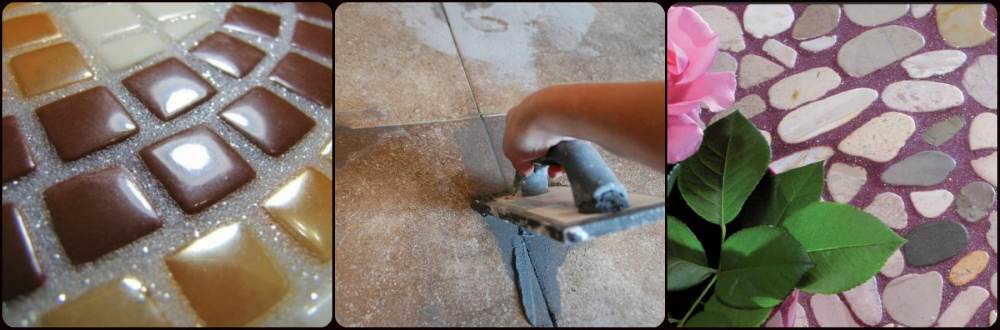
Traditional grouting of ceramic tiles light color produced by a dark mixture and vice versa. For mosaics, the color of the mixture is usually matched to the tone of the tile, or colorless. For floor tiles almost always brown gray shades. For the kitchen should not choose too bright colors, since the ingress of fat and oil, followed by use detergents may spoil the color.

Most neutral color- white, suitable for almost all shades of tiles. Another option is to match the same color with tiles, furniture or sanitary ware in the bathroom.
If the shade of the grout is significantly darker than the tile itself, then much attention is paid to the quality of its installation in the seams. Because dark color on light it attracts attention and all the flaws and irregularities will immediately be visible.
Before starting work, it is necessary to check the quality of the grout. This can be done on a tile that is “hidden from view”. As a result, you can determine whether the color is suitable, whether it has changed after drying, whether it paints the tile.
Important! It should be remembered that after drying, the grout fades and sometimes changes shade. It is possible to determine whether the shade is suitable only after the mixture has completely dried.
If it was not possible to choose a suitable grout color, then you can tint it using a special paste. But it should be remembered that with this method, preparing a mixture of the same shade twice may not work.
Preparing tiles for grouting
Even before laying, it should be remembered that the seams subsequently need to be rubbed, which means that there must be a sufficient distance between the tiles.
The width of the seam is chosen based on preferences, but, nevertheless, some recommendations must be considered:
- to square tiles looked neat, the width of the seam should be no more than 3-4 mm .;
- if tiles irregular shape, then you can emphasize this with wider seams, but not more than 10-12 mm .;
- do not make the distances too small, otherwise the use of even cement mixture it will be difficult.
When the tile has already been laid and the tile adhesive has dried, the surface is prepared for grouting. From the seams, with a sharp object, the remnants of tile glue and debris are removed. This can be done, for example, with a screwdriver.
Important! Most surplus tile adhesive is removed from the joints during installation, otherwise it will be difficult to clean later.
After removing the adhesive, the tiles can be vacuumed or wiped with a damp sponge. The less dust in the seams, the better the mixture will set.
If the seams of the tiles have already been rubbed, but for some reason the result is not satisfactory, the old mixture can be removed special solution, which can be purchased at a hardware store. Under its influence, the mixture softens and is easily removed.
Preparation of the mixture and tools for grouting
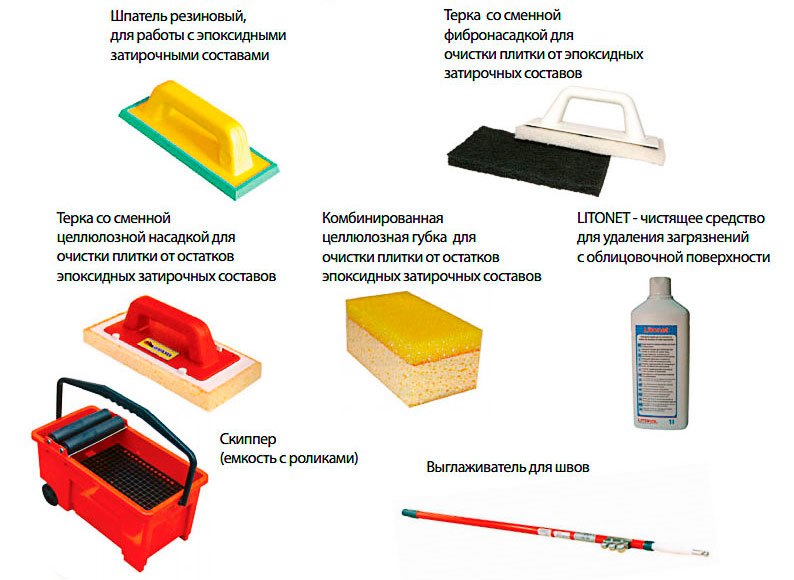
Before grouting the seams on the tiles, you need to prepare the tool:
— rubber spatula;
- a bucket of water and a sponge;
- a spatula for stirring the mixture;
- a small container for the preparation of the mixture.
Additional may be useful rubber gloves, jointing, for those sensitive to the cement mixture - a respirator.
When all the tools are ready, you can proceed to the preparation of the mixture itself. Pour into prepared container required amount powder and water is added, the temperature of which should be approximately 20 degrees. You can read about the proportions in which to add powder and water on the package.
After that, you need to immediately start stirring. This can be done with a spatula or a construction mixer, if available. In the second way, stirring will be done more thoroughly.
Important! If there is no construction mixer, then you can replace it conventional drill, to which a special nozzle is connected. It is sold in construction stores and has a low cost.
You should not use the entire mixture at once, since grouting the tile joints is a rather laborious process that takes time. Excess mixture may dry out. It is better to mix several times.
Thoroughly mixed grout must be left for a few minutes (5-6), and then re-stirred. If it has reached the consistency of thick sour cream, then work can begin. Too liquid mixture will flow out of the seams.
Application process
Grouting ceramic tiles is done with a rubber spatula. A small amount of the mixture is applied to it, which is rubbed into the seam with careful pressing movements. Then it is necessary to draw a spatula perpendicular to the seam of the tile to remove any residue.
To save grout, the residues must be collected back into the container and then reapplied to the tile.
If grouting is done on the floor, then the mixture can be laid out in a slide and start rubbing.

It is necessary to go over the seam several times with a rubber spatula so that the mixture is sufficiently compacted and there are no voids left.
Start grouting with small area to determine how quickly the mixture dries and how well it washes off. If it dries quickly and is difficult to wash, then periodically you will have to stop and clean the already treated area. If it is washed well, then you can finish the grout and only then proceed to cleaning.
To facilitate the process, you can use a grout bag, which is similar in functionality and appearance to a pastry bag. This is especially true if the mixture is poorly cleaned and dries quickly. From the bag, through a special tip, the mixture is squeezed into the seam and then compacted.
To give the seams an even, “depressed” look, stitching is used. This can be a stick that presses the mixture into the seam, giving it rounded shape, after which the residues are removed.
Depending on how quickly the mixture dries, it is necessary to remove its residues.
The cement-based mixture is quite easy to remove, so you can finish the job, wait for it to dry, and then start removing excess with a damp one. In this case, the sponge should be moistened as often as possible, and, if possible, change the water as often as possible. Then there will be no white or colored plaque on the tile.

It is necessary to wash the seams for the first time with caution, since a careless movement can remove the mixture from the seam.
If the mixture has dried and is not removed, then it can be rubbed with an abrasive float. It does not leave scratches on the surface and cleans it well. After that, wipe again with a damp sponge.
When the mixture is sufficiently dry, the tiles can be wiped down with detergent and then again with a dry microfiber cloth. Through these works, she will acquire her glossy look.
Important! If used matte tiles with a rough surface, then until completely cleaned of white plaque may take several days.
If it is necessary to apply a sealant, then this should be done after 2-3 days, after the mixture has completely dried. For a neat finish, you can use a small paint brush.
The final stage of facing works is the grouting of ceramic tiles in the bathroom, kitchen, hallway, on the terrace and other objects. A variety of filling mixtures and pastes are used to treat gaps, respectively, the method of their application also differs.
A whole class is used for jointing gaps various formulations, whose basic purpose is to fill the seams of ceramic, stone, glass and even metal linings. In addition, these mixtures correct selection help to hide minor flaws in the work and give finishing finished look.
Before proceeding to the story of how to grout the seams on the tiles correctly, let's decide what exactly needs to be done. Mixes according to the following criteria:
Application area
There are four groups:
- universal,
- for internal works wall,
- for walls and floors indoors;
- for outdoor decoration.
According to this classification feature, it is possible to distinguish products intended for:
Compound
This is one of the key features, because it is from base component depends on how to properly rub the tiles with one product or another. They produce mixtures:
Cement and cement-polymer grouts can be tinted to any shade by manual or machine tinting. In the first case, standard pigments for paints (acrylic, latex, enamel) are used, in the second case, any coloring system (RAL, Dulux, Derufa, etc.)

Acrylic compositions, unlike silicone ones, can be painted with enamels after polymerization.
Seam width
The compositions produced can be divided into three categories:
- For narrow gaps from 0 to 5-8 mm;
- For medium seams from 5 to 12-20 mm;
- For wide tile intervals - up to 50 mm.
Each manufacturer on the packaging must indicate the limit values \u200b\u200bfor the above parameter and strongly recommend that you adhere to them. Otherwise, cracking or chipping of the mixture from the tile gaps is possible.
We have not included in the list such features as resistance to household chemicals and the possibility of using the "warm floors" system. The fact is that all modern grout mixtures from such well-known manufacturers like Litokol, KeraKoll, Mapei, Atlas and others are characterized by hydrophobicity, elasticity and deformation resistance. Therefore, the compositions can be safely used on the heated floor and washed using disinfectants or alkaline cleaners.
Some craftsmen, in an effort to save money, try to make their own cement or gypsum grout for tiles in the bathroom. To give a mixture hydrophobic properties it is possible to treat the surface after hardening with a water-repellent impregnation, but the problem is that the resulting mixture does not even have the minimum required level of elasticity. Therefore, it soon begins to crack and “fall out” of the tile joints. Recall that the cost of industrial products starts from 60 rubles per kg. If desired, you can tint the composition yourself, spending on household pigment Russian production 50-100 rubles / tube.

Household colors are universal.
How to wipe
First, prepare a set of tools and materials:

Filling of joints can only be started after the expiration of the period recommended by the manufacturer of tile adhesive. The base must be absolutely dry and clean, so this period is usually 3-7 days. The grout consumption depends on the width of the joints, but on average varies from 100 to 150 g/m².
Cement based grout
Seam preparation
Tiled edges must be cleaned to a depth of at least 2/3 of the thickness, removing adhesive residue, old grout. Remove dust with a brush and rinse the surface with water, dry.
If the lining is porous, unprotected by glaze, then the surface is additionally moistened with a sponge or a spray gun, and a staining test is carried out on an inconspicuous area with pigments contained in grout mixture.
Preparing the mixture
Measure the required amount according to the instructions clean water, pour into a container and, with continuous stirring with a mixer, pour in the dry mixture. After obtaining a homogeneous mass without lumps, allow the solution to stand for 5-10 minutes, then mix again. The composition must be worked out within the period indicated on the label - from 40 minutes to 2 hours.

Seam filling
Apply the prepared mortar to the joints between the tiles with a rubber spatula or float diagonally with respect to the direction of the gaps. It is necessary to wipe thoroughly, without voids, irregularities and gaps. Remove excess immediately with the same tool. 10-20 minutes after the grout hardens, the surface is cleaned with a damp, well-wrung sponge.
How long the filling mixture dries depends on the temperature and humidity indicators. The higher the temperature and lower the humidity, the faster the composition hardens. In any case, before washing the surface, you need to check the consistency of the grout to the touch in order to avoid emptying the gaps.
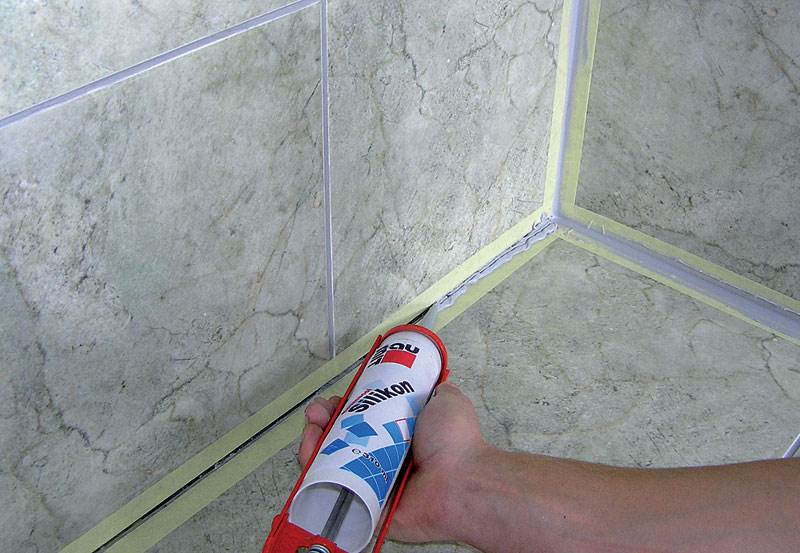
Now you can start processing corners and junctions. Deformation gaps and joint areas must be sealed with a correction cord. Cut off the top of the sealant tube, screw on the tip and insert it into the skeleton gun.
It is better to protect the tiles at the joints in advance with masking tape. Apply acrylic or silicone compound at the corners, after 15-20 minutes, moisten the surface with a spray bottle and rub the sealant with a spatula or jointer, while removing excess. After finishing work, remove the adhesive tape and allow the compositions to dry for at least 24 hours.
Sealing of joints.
Finishing surface cleaning
On a surface tile cladding usually a whitish coating remains, which is removed with an acid cleaner. As a rule, masters use concentrated products, but they are also available in the form of ready-to-use solutions.
Apply cleaner with a sponge according to the instructions on the floor, then rinse clean water. To improve the water-repellent properties, after 5-7 days, treat the seams with hydrophobic impregnations.
Polymer based grouts
Foundation preparation
First you need to make sure that the tile adhesive has hardened, dried, and its traces are completely removed from the tile edges by at least 2/3 of the thickness of the cladding. Vacuum thoroughly, rinse and dry the surface.
Before starting work on absorbent surfaces (clinker, marble, terracotta, a natural stone, unglazed tiles) it is necessary to carry out a trial troweling to identify possible problems: staining, painting, discoloration of tiles, etc. When detected negative impact it is better to abandon this type of grout and replace it with a neutral one.

Pasta kneading
Mix the one-component composition thoroughly with a trowel by hand. Multi-component mixtures must be handled carefully. Separate the required amount from the base paste by weighing on electronic scales accurate to the gram. Add hardener or catalysts, mix gently with a mixer for low revs until a homogeneous mass is obtained. The solution must be developed within 30-90 minutes.
Seam filling
Apply the mass to the gaps with a grater with a rubber nozzle for polymer compositions(with sharp edges) diagonally in relation to the direction of the seams, immediately removing excess. The seams must be fully jointed, without voids or irregularities.

After 10-15 minutes, remove excess solution: moisten the surface with water and treat with a felt or cellulose sponge, rinsing it often and thoroughly.
Finishing tiles
A day after the end of the work, it is necessary to wash the surface of the cladding with a sponge with an acidic cleaner that removes grout residues. If this is not done, then over time, yellowish stains from synthetic resin appear on the lining. handle water-repellent impregnations seams are not necessary, since the polymer component of the grout is the best hydrophobic agent.
And finally, we remind you: before purchasing the mixture, pay attention to the expiration date of the grout, the recommended width of the joints, the area of \u200b\u200buse (indoor or outdoor, horizontal or vertical use) and lot number. This will avoid the appearance of such undesirable defects as uneven tone, premature cracking, etc.
The ceramic tile itself in the shower or bathtub practically does not need to be updated. To keep it looking good for as long as possible, it needs to be washed thoroughly from time to time. Grout is a completely different story - it can crack or collapse over time. Anxiety is caused not only by deep cracks and falling out pieces of grout, but also by minor damage. Stains that don't clean up and cracks are places where water seeps under the tile. Over time, moisture can weaken the adhesive and cause mold to form. In this case, you will have to remove old tiles and install a new one.
However, until the destruction process has begun, you have the opportunity to easily and quickly give the tile fresh look with a new layer of grout. We will dwell in detail on all stages of its renewal, give recommendations on the choice of tools and materials, as well as helpful tips how to get great results.
The materials needed to re-tile a shower room are relatively inexpensive. You may be able to get the job done in a few hours, but it's best to play it safe and spend the weekend fixing it. If you start re-grouting on Saturday morning, you will be able to shower on Monday.
Choosing the Right Tools and Grout
Before removing old grout, make sure you have everything necessary tools and materials for work. To help you with their choice, we will conditionally divide the whole process into three stages: scraping the old grout and cleaning, applying a new grout, and finishing the surface.
In order not to damage the tiles, it is preferable to choose tools with metal parts made of steel for grout removal. Often, special trowel scrapers are equipped with tungsten carbide-tipped blades that stay sharp for a long time. However, if the tool slips out of the joint, the hard point can damage the tile or tub. It is possible that a steel scraper will not remove the grout as quickly, but it will reduce the likelihood of scratching the tile. Buy a replacement blade knife and a full pack of spare blades. This tool is ideal for stripping narrow seams. A special scraper with a serrated steel blade (photo 2) is also very convenient to remove grout fragments.
As for dry grout, buy a larger package (4.5 kg) - let it stay better. There are two types of grout - with sand and without sand. When choosing, focus on the width of the gaps between the tiles. For joints up to 3 mm grout without sand is suitable, and for more wide seams buy grout with sand to avoid cracking. In both cases, the mixture must be polymer-modified. Additional ingredients will help prevent cracking and staining. It is almost impossible to find a grout that would not differ from the old one. But don't worry - removing upper layer old grout and filling the joints with new grout, you will get a clean, uniform color.
Advice. In the store, when buying grout, choose those brands that offer a selection of sealants by color. Combination of grout and sealant suitable color will give the perfect result.
To work with grout, buy a special spatula and grout sponge. For cases where the grout starts to set too quickly, you will need an abrasive-coated synthetic sponge (see Note below). Lastly, don't forget to buy a tube of bath and tile sealer that matches the color of the grout.
When difficulties arise at work
In most cases conventional tools to remove grout from the seams do a good job. But sometimes you still need extra help. Here are a couple of tips to quickly get rid of stubborn grout and sealant.
The first is a special electric scraper. With a carbide-reinforced edge, this tool cleans seams like an electric toothbrush. Practice the technique, starting with light pressure. When the blade enters the grout layer, it will be easy to move it in the desired direction.
The second is a means for removing sealant from the seams. It will be simply indispensable if previous installers used silicone sealant to seal gaps around the perimeter of the bathroom or shower. Removing sticky silicone from the seams is a real headache. chemical agent it will take several hours to soften the "stubborn" sealant, but it is better to wait than to deal with the chore of removing silicone residue with a knife, risking damage to the tile or bathtub.
Step 2. Removing the old sealant and grout from the joints
Photo 2. Remove the grout
Using a utility knife or special scraper, remove at least 3 mm of old grout from all horizontal and vertical joints. When working, change the blade of the knife more often.
Before cleaning, cover the tub to prevent scratches and debris from clogging the drain (photo 1). Fasten polyethylene film along the top of the tub. Then cover the film with a cloth to protect the tub and your knees. Remove the faucet or wrap it with masking tape.
Removing old caulk and grout is a lot of work, but it's not a difficult job, especially if you have a lot of time. Start by cleaning out the sealant (photo 1) and then move on to grouting (photo 2). When working with a construction knife, change the blade as soon as it stops piercing into the grout and begins to slide along it (photo 2). In some cases, it is better to use a special scraper. Whichever tool you choose, the goal remains the same: remove at least 3mm of the top layer of grout (or even more if it's easy to remove).
When you've finished stripping, remove any dust or debris that might weaken the bond between the tile and the new grout layer (photo 3).
Step 3. Prepare the grout and fill the joints
As soon as the solution reaches the desired consistency, the countdown begins until it hardens on the wall ... or right in the bucket. Of course, you can mix a large package of dry mix with water, but it’s better to play it safe and prepare the solution in separate portions for a specific area of \u200b\u200bthe wall - this way you will have more time to apply grout and remove excess grout from the wall at the same time. Before preparing a new portion of the solution, be sure to rinse the bucket to remove the remnants of the previous grout.
Before pouring the mixture out of the package, shake it well to evenly distribute the ingredients. After that, scoop up a few cups of the mixture (about 230 g in one) and pour it into a bucket. The instructions on the package indicate how much water is required per 1 kg of the mixture. To make it dense, start with 3/4 of the indicated amount of water, and then gradually add the remaining water until you get the desired consistency - something between cake icing and peanut butter (photo 4a). Don't worry if the grout looks lumpy. After mixing, let it stand for 10 minutes - during this time, the remaining lumps of the dry mixture will absorb water. Stir the solution vigorously one last time (repeated stirring will prevent it from setting in the bucket). Now the grout is ready to use.
Focus on one wall. Scoop up a portion of the grout and spread it on the tile, holding the spatula at a 45° angle to the grout (photo 5). It's pretty dirty work. Your task is to try to tightly fill the seams with grout. Press the spatula harder against the surface and work it in different directions.
Step 4. Removal of residues of the solution and cleaning the surface
Remove grout residue with a damp sponge as soon as it hardens in the joints. To keep the sponge rinse water clean, dip the dirty sponge first into the "dirty" bucket and wring it out, then dip into the "clean" bucket and wring out the sponge over the bucket of dirty water.
Remove excess grout after grouting. Work the trowel like a snow blower, trying to capture as much of the grout residue as possible (photo 6). Move the spatula diagonally towards the joints so as not to remove too much grout from them. Try to work quickly before the mortar begins to set. The time between removing the old grout and wiping the surface can be different - it depends on the type of dry mix, humidity and temperature in the room, and can be from 5 to 20 minutes until the final hardening. Wiping the tiles can begin only when the grout becomes hard and does not stick to your fingers.
Using a soft, circular motion, remove excess grout with a well-wrung sponge (photo 7). Rotate the sponge to use clean edges with each stroke. Rinse it in the "dirty" bucket and squeeze it well, then dip it in a bucket of clean water and squeeze it over the "dirty" bucket. This technique will help keep the sponge clean and more effectively remove grout residue from the tile. Wring out the sponge carefully, as excess water can draw the cement and dye out of the fresh grout.
Using a damp sponge, you can not only wipe the tiles, but also level the surface of the joints. To remove bulges, run the sponge along the seam until it is even. If there are cavities in the seams, rub a small amount of grout into them with your finger.
Note: use a special sponge for safety
The most common mistake is too long time waiting before wiping the surface. For example, in a shower cabin, the grout in the joints hardens after 5 minutes.
Sponge with plastic handle is a useful and inexpensive tool. Its rough surface cleans hardened grout quickly and easily without scratching the material. In addition, it is convenient to use it for adjusting grout joints.
Step 5. Removing grout from corners and joints. Tile polishing
Before applying the sealant, remove any lumps of grout that may have gotten into the corners and joints between the tub and the tile (photo 8). Of course, they can be removed later, but it is much easier to do this before the final hardening of the grout.
Immediately after you wipe the tile with a damp sponge, the surface will look clean, but when the water dries, streaks will remain on the tile. Let the grout dry for 1-2 hours, and then buff the tile with a soft towel (Photo 9).
Step 6. Applying sealant
Photo 10. Seal the seams
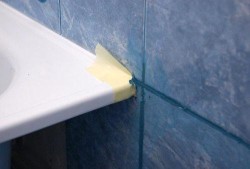
Use masking tape to form seam borders at corners and seams. Fill the seams with sealant and smooth it with your finger. After that, immediately remove the strips of tape.
Allow the grout to fully cure overnight before filling corners and joints with sealant. To form precise borders along the corners and at the joints, use masking tape (photo 10). Remember to remove the tape immediately after smoothing the surface of the sealant - if this is not done for a long time, the sealant will stick to the tape, and if you try to tear off the tape, you can remove part of the sealant from the seam. It will be possible to use the bathtub or shower cabin approximately 24 hours after applying the sealant (this will depend on its type).
To protect against mold and moisture, and for additional touch-up, apply thin layer sealant on grout seams- this should be done no earlier than 1-2 weeks after applying the grout. Keep in mind that sealant has a limited shelf life, so you will need to reapply it every year.
Necessary tools and materials
Tools
- Sealant gun.
- Cordless drill / screwdriver.
- Protective mask.
- Protective glasses.
- Household vacuum cleaner.
- Construction knife.
You will also need a pack of replacement knife blades, a grout sponge, a sponge with a plastic handle, a stiff brush, a grout scraper, a paint stirrer, and rubber gloves.
materials
- Dry mix for grout preparation.
- Sealant.
Get the latest news weekly
Grouting tiles at first glance is not the best important work in the bathroom, however, when the tile is laid, it becomes clear that without grout, the repair will look unfinished.
When tiling a bath with your own hands, you should know that the effect of the repair will largely depend on the quality of the seams. It is this factor that affects the tightness of the finish, its service life, provides protection against the occurrence of mold, fungus and, of course, gives a finished look to the interior. Read this article on how to seal the seams correctly.
- Grouting - what are they?
- Grouting technology;
- Surface preparation and tools;
- Do-it-yourself grouting process;
Grouting - purpose, varieties
The installation of tiles is not hermetically sealed; during installation, gaps are formed between the tiles, the coating and the wall, in the corners, at the junction with a shower cabin, or a bathtub, with skirting boards. They need to be wiped in order to:
- hide small flaws, irregularities that arose during the installation of the flooring;
- prevent the ingress of dust, moisture;
- compensate for the expansion of tiles when heated - when laying a warm floor under ceramic tiles;
- give the finish a finished, neat look (see photo).
What types of mixtures are used for grouting in the bathroom:
- for narrow seams up to 5 mm wide - epoxy mix based on cement with the addition of various additives, plasticizers that improve its properties. After applying to ceramic tiles, it shrinks, so it is used only for processing narrow joints;
- for wide gaps - grout for joints with the addition of sand, synthetic resins, which does not give sediment when dried (although, as experts advise, it is better not to leave such large gaps);
- for corner joints of tiles and places of its contact with plumbing - an elastic silicone mixture, a sealant with increased moisture resistance.
Tip: when choosing a grout for a bathroom, you should pay attention to its antifungal properties, because the bathroom is a room with high level humidity.
The price of grouting for a bathroom is not high, the price of a bag of dry mix weighing 2 kg is from 150-200 rubles. There are options for a higher cost, you can choose for every taste and color. There are grouts different colors, which can be matched to the tone of your tiles (black, blue, red, blue, brown, etc.) Popular brands these are: Ceresit, Baulux, Knauf.
For small areas, ready-made liquid solutions in banks, they do not need to be kneaded, but the price for them is many times higher. As reviews show, ready-made grouts are much more convenient, but if you need to process large area, then it is better to buy a dry mix.
Technology for grouting
Preparatory work
 Before processing, the seams between the tiles must be cleaned of glue and dirt. Think ahead about what plastic tools and rags that do not leave marks, scratches on the coating, you can come in handy in this matter. Immediately before grouting, the seams should be slightly moistened with water - this will reduce the consumption of the mixture.
Attention: sealing of seams is made not less than a day after installation of a tile in a bathroom.
Devices for work
To work, you will need the following tools and devices:
- tank for mixing the mixture;
- container with clean water;
- spatula rubber, steel;
- sponge.
 The dry mixture is diluted with water to the required consistency - the proportions are indicated by the manufacturer on the package. The solution is kneaded with your own hands to a homogeneous mass by hand, or with a mixer. After that, you need to wait 5-10 minutes for the mixture to mature, and then mix it again. Ready solutions also need to be stirred so that they are homogeneous.
grouting process
The mixture is applied to a steel spatula, then a small amount of it is scooped up with a rubber spatula and the seam is filled at an angle to the full depth. Then the remaining material is removed by running a rubber spatula parallel to the gap.
Experience will show how much mixture to take on a rubber spatula at a time. The rest of the sections are treated similarly, without missing even the most short openings. This technology allows you to securely fix the grout on the ends of the tiles. See photos and videos for clarity.
Tip: If the mixture shrinks, a fresh layer should be applied on top.
 After filling all the joints, it is necessary to wait some time (20-30 minutes) for the grout to set. Next, the gaps are corrected, the surface is cleaned with a sponge. She is soaked in warm water, wring out well, process the laid tile light in circular motions.
Important: it is necessary to rub exactly in a circle, and not along the seam, so as not to wash out of it grouting material but just remove the leftovers.
If unfilled areas appear during the cleaning process, they must be filled with a mixture and allowed to dry. After that, the surface is again wiped with a sponge. During the cleaning process, the sponge should be regularly rinsed with water so that there are no stains on the tile.
After the grout is completely dry, the entire tiled surface is wiped with a dry cloth, giving it a shine. After that, the coating will acquire a neat aesthetic appearance. You can find out how long the grout dries on the packaging of the mixture, usually at least 24 hours.
Watch the video with visual instructions:
By the way, the old waterproof grout can always be updated, cleaning the old one as thoroughly as possible before that. You can replace it with a more modern and more suitable color.
Seal the seam between plumbing and sink
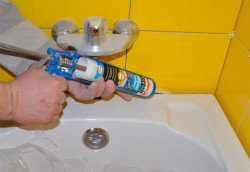 The joint between the bathroom and the wall can be sealed with:
- sealant;
- plastic plinth;
- ceramic corner;
- self-adhesive tape.
If the sink is installed in a cabinet, it is not necessary to seal its joint with the tiles. Otherwise, it can be treated with a sealant - this will prevent water from entering. The sealant is poured into the cleaned dry joint, leveled and cut a little, forming a smooth connection between the surfaces. Similarly, the grout is processed the seam between the shower and the wall.