Classic designs of multi-level plasterboard ceilings. Installation options for two-level stretch ceilings
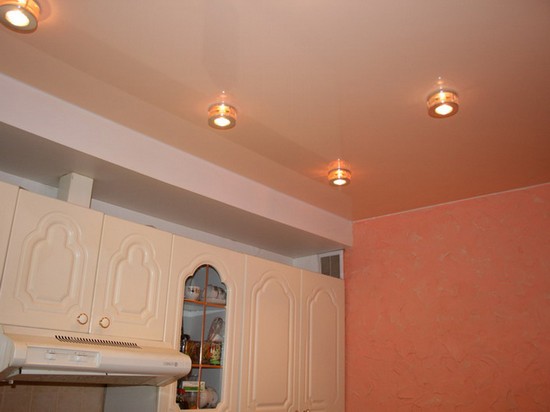
Two-level ceilings in the kitchen can be of two types: stretch and plasterboard. Most often, to create multi-level compositions, consumers choose plasterboard ceilings, since their installation is much easier than installation. stretch ceilings.
Two-level ceilings allow you to highlight all the intended areas of the kitchen: work, dining, recreation areas, as well as focus on several parts of the room, using not only steps or transitions, but also different colors.


So that the ceiling is not boring and ordinary, each level is painted in its own color. In this way, you can create a beautiful composition or even a kind of picture. Via two level ceiling in your kitchen you can create a sky with clouds or stars, or flowers with multi-colored petals, or just an abstraction.
Better than neighbors
Built-in lights will help support the theme. By illuminating a certain area of the ceiling, they help to achieve the desired effect. For example, create the illusion of the sun emerging from behind the clouds or bright stars in the night sky.


Two-level ceilings have not only excellent appearance, but also perform the following practical functions:
- level the surface of the ceiling;
- hide fittings, ventilation, wiring and other communications;
- mask sound insulation;
- have thermal insulation properties.
Stretch two-level ceilings look much more attractive than suspended two-level plasterboard ceilings. This is due to the fact that on the fabric, which is the basis of the stretch ceiling, you can apply the most various photos and drawings.


The applied image on the ceiling is often distinguished by the method of creating a two-level ceiling. If the image is a drawing or a copy of a painting, then it is placed in the center of the room. The image can be placed both on the first and on the second level. It depends directly on the color and content of the picture or photo.


The canvas with ornaments looks great on the second level, located along the edges of the room. The center of the room can be left plain in light color. This will visually enlarge the space.
More recently, to create complex structures it took a lot of time and a significant amount building materials. The main components were massive, heavy sheets of drywall. Modern materials will help to make the ceiling more spectacular, beautiful and airy. A multi-level ceiling will make it possible to quickly change the geometry of the room to hide design flaws without complex and expensive finishing work. Such decoration of a house or apartment will help to fill the room with light and emphasize the individuality of the owners. Such a decoration will surely delight friends and acquaintances, as you can fill the space with new meaning, making the room brighter.
- First of all, it guarantees a quick change in the appearance of the room with the repair already completed. They will help to quickly and inexpensively change the interior, make it brighter and more spectacular.
- A good way to quickly finish the ceiling after unexpected cracks or smudges.
- Since each stretch ceiling is unique, it great way express your individuality and artistic taste.
- Two-level ceilings help to correct visual design flaws well, you can lengthen or expand the space, smooth and round sharp corners. Make the room taller and fill with additional light.
- In rooms with poor lighting, requiring the installation of hidden fixtures.
Two-level stretch ceilings in the kitchen

- First, this a great opportunity hide all external communications of the air conditioning and ventilation system.
- Secondly, the design will help to separate working area with a place to eat in two separate areas.
- Thirdly, installing a well-designed and directional lighting system will make the kitchen feel more voluminous, expanding the boundaries of the space.
- Fourthly, by highlighting one zone with the help of a bright panel with a spectacular pattern, you can emphasize the uniqueness of the interior, its indescribable sophistication and elegance.
Although the trend towards decoration kitchen ceilings With the help of two-tier structures appeared relatively recently, more and more designers are using the modern possibilities of new materials to give the room depth and originality.
Advantages of installing two-level ceilings in the living room
Hall - central room in any home. Guests gather here for holidays and solemn events. It should be the brightest and most colorful, allowing its appearance to cheer up, making the atmosphere sublime and enchanting. Any hostess wants the house to look as beautiful and rich as possible, and the hall is the main room where people who visit your home gather. By installing a two-level ceiling in the hall, you can organically distinguish multifunctional room on the various zones, giving them additional brightness and gloss.
What to focus on when installing multi-tiered ceilings in a bedroom or nursery

People, getting into the bedroom, want to relieve the burden of the problems accumulated during the day, relax and unwind. Therefore, colors should contribute to a calm and peaceful pastime. The ceiling is playing important role in the bedroom, because when we lie down and wake up, we first of all see this surface in front of us. It’s bad if, when you open your eyes, cracks, peeling plaster and ugly yellow spots appear in front of you.
Stretch ceiling will help create perfect flat surface, but matte colour make the colors pleasing to the eye. Modern materials allow you to quickly mount any structure, and after installation there is no need to spend money on overhaul. It is enough to wipe the surface with a damp cloth and the ceiling will again shine with novelty and bright colors.
It is important for children that the atmosphere in their room is always joyful and festive. Two-level stretch ceilings will help create a fabulous landscape that takes the child to the world of adventure and games. The advantage of this design is that it can be quickly changed if necessary. The growing baby will have the opportunity, growing up, to quickly change the interior of the room. The new ceiling will help reflect changing interests and moods with age.
Stages of work
As in any business, repair requires a comprehensive study. various options and choosing the most beautiful and comfortable. To do this, it is better to seek help from specialists who have been doing their job for a long time.
- Making a sketch may require working out not only in the AutoCAD program, but also transferring the drawing to the ceiling surface. Such work requires good preparation and experience. But you will get a complete picture of how the room will look after the work is completed.
- The second stage is no less important, since you need to place the lamp in the most favorable place for lighting. Having developed a scheme, you need to agree on the location lighting fixtures with the owner.
- Multi-level design - a complex structure, for easier perception common idea it is better to break the drawing into several components. Check each level separately.
- It is better to create a frame separately, where each element is thought out and ready for installation. After that, you can transport the structure to the site and proceed with the assembly. aluminum profiles can be mounted by a couple of workers and the process does not take much time.
- Design multilevel ceilings requires careful fastening of its elements not only to the ceiling, but also to the walls. Careful assembly should not be neglected. At this stage, the strength and durability of the structure is laid.
- The tension of the film is carried out in stages by separate canvases. The master carefully smoothes the material, strengthening it in the bearing elements.
- The last step is the installation of fixtures in marked and prepared places.
- The scheme of work is quite simple. Subject to simple and clear rules work can be done quickly and efficiently. If you do not have sufficient experience, and there is no necessary tools, it is better to contact a company that has long been involved in the installation of stretch ceilings. This will save you from unnecessary financial costs, and the work will be done quickly with excellent results.
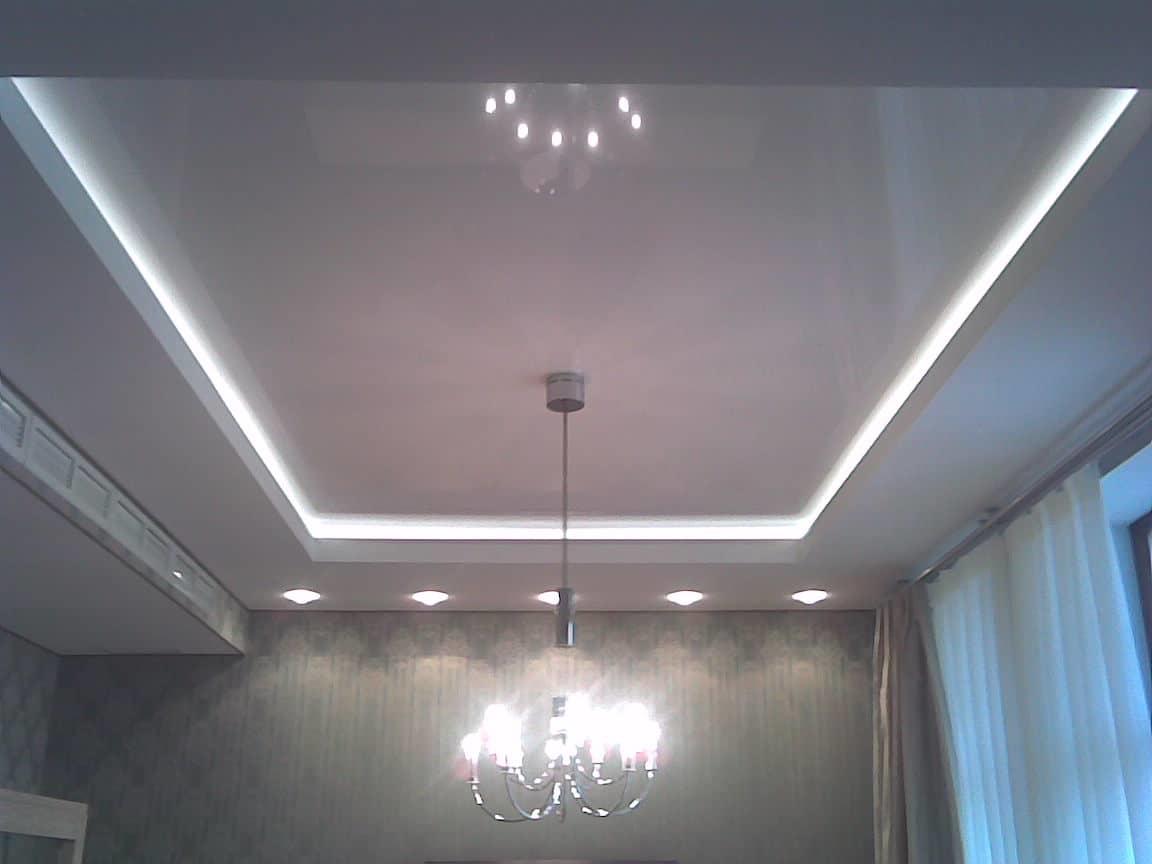
LED lighting of stretch ceilings

This method is suitable not only for original design. Often this is the only way to create discreet soft room lighting with low ceilings. The ceilings of bathrooms, bedrooms and children's rooms that glow from the inside look best. This choice of lighting does not hurt the eyes, filling the room with soft, warm light.
Before mounting on the frame, they have led strip, which, after stretching a translucent film, can create various color schemes and a person can choose the lighting according to his taste and mood.
LED strips will help to clearly separate individual zones, thus limiting the space and filling the room with new colors. Simply switching the lighting mode will help to make the atmosphere chamber or festive.
It must be understood that LED lightening cannot provide full light. Such lamps will not allow you to do needlework or read, as there will not be enough light. It serves only for decorative purposes, so additional lamps and chandeliers are a must.
Built-in luminaires for stretch ceilings
When choosing fixtures, one should take into account the distance between the main and stretch ceilings, since its reliability and ease of maintenance will depend on this. The most convenient and compact are considered LED lights built into the ceiling. However, their blue glow may not suit the chosen interior.
The best way to illuminate a room is incandescent lamps, which are mounted if the distance between the stretch ceiling structure and the floor slabs is at least twelve centimeters. If the space is less than eight centimeters, then you should use halogen lamps.
Recessed luminaires differ in:
- Swivel, with the ability to change the direction of the light flux with a deflection angle of up to forty degrees. The hinge makes it possible special efforts change the direction of lighting, highlighting a certain area with light.
- With a firm fixation, they make it possible to create light curtains for delimitation separate zones or providing lighting for places of recreation or work.
When choosing a luminaire, special attention must be paid to the power of the lamp used, since excess heat can lead to a violation of the integrity of the structure. Therefore, the correct calculation of the number of fixtures, their location and the power of the lamps used is an important process that requires good knowledge and solid practical experience.
When choosing fixtures, it is necessary to take into account the area of \u200b\u200bthe room, the height of the ceilings, the functional purpose of the room, and the type of lamps used.
Existing types of two-level stretch ceilings

Fabric. The most expensive type of stretch ceiling. It looks great in any room, demonstrating the financial viability and good taste of the owners of the house. Designers use fabric to create a unique and sophisticated atmosphere, giving the home an individual, unique touch. Production is carried out using polyester threads, from which the base is woven, which is subsequently impregnated with polyurethane. This technology guarantees high strength and durability combined with elasticity and plasticity. During installation, the canvas does not require additional heating. It is immediately mounted using special fasteners and, stretching, forms a perfectly smooth and even surface. There are much fewer colors than in film coatings, but this is more than offset by juiciness and texture. 
Innovative materials are firmly embedded in our everyday life. Today, finishing work can be carried out by a small team in the shortest possible time. At the end of the repair, there is practically no construction debris left. It takes no more than a day to change the interior. When you leave your old home for work, you can return to new apartment with perfectly flat ceilings, sparkling bright colors, smooth and even. In addition, if for some reason you get tired of the look of the ceiling, you can quickly change the coating and the room will look completely different. Availability and reasonable cost gives unlimited opportunities for quick repairs.
There are no similar posts, but there are more interesting ones.
Drywall - already long time one of the most sought after materials. Make him completely simple designs requiring elementary assembly, as well as complex suspension systems, the shape of which can be the most bizarre.
Drywall is two layers, gypsum and cardboard. It is an environmentally friendly and safe material for human health. You can mount the plasterboard ceiling structure yourself, with the help of at least one partner.
Do-it-yourself two-level plasterboard ceilings with lighting: technology
Before studying the drywall ceiling device, go through a few important points. Once again, make sure that you are not considering other options for ceiling structures.
What you need to pay attention to:
- Room height. The design of two levels will reduce it. And if you are the owner of an apartment with low ceilings, even 5-10 cm is a significant loss. In this case, a different finish is recommended.
- accents. This means that the design of the ceiling must also be practical, that is, the lamps that are built into the lower level can be room zonators.
- Humidity in the room. Gypsum board constructions the best way for the bathroom, sheet deformation is more than likely. Will have to do repairs.
- The complexity of the design. Make diagrams, drawing, use online services calculations, indicate the dimensions there, etc. But if you want to do something very complex, albeit on two levels, but original look(and not a simple rectangular one) you can’t cope on your own.
One more important point – step-by-step instruction in the head, and better - in the hands. So that the work "does not stand in the middle of the road."
Two-level plasterboard ceiling (video)
How to make a two-level plasterboard ceiling with your own hands correctly
Even experts disagree on which way to carry out installation more correctly.
It is customary to distinguish two methods:
- First. In this case, work starts with the installation of the first frame, and then the second tier is suspended from it. This is true if the area of the second level is small - after all, the weight of the second frame will fall on the drywall sheets of the first level.
- Second. This method involves first collecting the frame of the second level, this design is more complex.

The first option makes sense to consider, since it is resorted to more often, it is more indicative for knowledge about installation.
All work takes place in five stages:
- Training ceiling surface;
- Marking the ceiling under the frame for plasterboard;
- Frame installation - 1st level;
- Frame installation - 2nd level;
- Finishing the ceiling with plasterboard sheets.
Remove all loose plaster, do not leave it - endanger it.
Construction of a two-level plasterboard ceiling: marking and further course of events
First you must measure the height of the corners in the room. Then define a corner with a lower height. This is the starting point for marking so that the horizontal structure is even.
Do the markup. Mark a straight line on the walls for the profiles. Place points on the ceiling for direct suspension. Don't use too much markup, it will only confuse you.

What to do if not only the angles are different in the room, but also the lengths of the opposite walls. Then, first of all, make the leveled parts horizontally. Then draw a clear pattern on the ceiling, and align the structure along the edges. So you visually center the ceiling.
Frame 2-level plasterboard ceiling with lighting: 1st level
Installation begins with the installation of UD profiles. These are guides that are mounted on the wall. The fastening step along the perimeter of the structure is 600 mm. They are also mounted on the ceiling. If it is necessary to create rounded elements, draw a picture on the wall, and fasten the guides according to this picture. Do not forget to make notches on the profile.

- Attach a direct suspension to the points marked on the ceiling. The fastening interval will be 60 cm. By the way, if you are a happy owner of an ideal ceiling surface, it makes no sense to do the first level - immediately proceed to the second.
- A CD-profile is fixed on a direct suspension. For the rigidity of the frame, fasteners such as crabs are used.
- It remains to sew up the frame with drywall sheets.
Where the sheet was cut, a chamfer is needed. With a knife, cut off part of the material from the plasterboard.
Two-level plasterboard ceiling: step by step instructions, second level
The scheme is familiar - draw lines on the wall under the guide profiles. Draw on the ceiling. Detailed scheme on the ceiling always simplifies installation. Yes, and having applied the scheme to the ceiling, you will see how the final result will look like, that is, you can adjust the scheme.

- Attach a metal profile to the wall and ceiling.
- After that, the frame must be lowered to the required length. To do this, the CD-profile is cut to the length you want to lower the frame.
- On one side of these pieces, the so-called tongues are cut out. The side parts of the profile are cut off. So it's easier to install.
- The cut pieces are inserted into the guide profile, already fixed to the ceiling. Insert it straight side up.
- Fix the pieces with a "flea". The step between the segments is 60 cm. The interval between the curved segments is 30 cm.
- A UD profile is “put on” on the hanging pieces, and is also fixed with a “flea”. Get the sidewall of the frame.
- The CD profile is cut to a length that is equal to the distance from the side of the frame to the UD profile, which is located on the wall. Fixed on both sides with "fleas".
It turned out a finished metal frame, after which it is sheathed with drywall and proceed to finishing.
Level ceilings are both two and three levels, structures that require effort and time. Such double ceiling looks great in the hall, as well as in a studio apartment where zoning is needed. often do drywall constructions in the attic.
The decision has been made, we are renovating. Moreover, the repair is global, so that there is something to see. Let's start from the ceiling. No matter how much they tried to close the gap between unsuccessfully laid slabs ceilings, a crack still appears and it is clear that the ceiling is uneven. Should I apply another layer of putty? Stop! What if….
We make a multi-level ceiling
To close all the flaws and irregularities of the ceiling, we will make suspended ceilings and, as an option, stretch ceilings.
Advantages
Now there are such repair technologies that will allow us to implement the most daring plans for the design of our premises. In all rooms it is possible to create something much more aesthetic, beautiful and practical than usual. flat ceiling. Why:
- Due to the possibility of creating an unlimited in shape, color, texture, lighting, variety of individual images.
- Details that are unnecessary for future design, as well as communications, are hidden.
- Specifically for stretch ceilings: protection against flooding by neighbors from above.
- The ability to visually change the geometry of the room. Visual increase in ceiling height. Without installing partitions, you can separate the space.
Ceiling options
And there are a lot of variations!

Stretch ceiling color combinations
The design of two-level and multi-level ceilings is no longer exclusive today, but along with single-level ceilings it often looks like a masterpiece.
Now you need to decide on the material of execution, each and which has its own characteristics.
- Two-level film stretch ceilings, their advantages:
- installation of a two-level ceiling occurs without the usual dust for any repair;
- hygiene - because the film prevents the accumulation of dirt and the reproduction of fungus on the surface;
- anti-static - no threat of discharge of static electricity;
- non-toxic - there is no danger to the health of people living in this room;
- fire resistance is an important quality that ensures the safety of people in case of accidental fire in the room;
- waterproof - makes applicable given material in all wet areas.

Design of a multi-level plasterboard ceiling
Tasks and their solution
With the help of the design of two-level and multi-level ceilings, such a problem as dividing the room into different areas. For example, in the kitchen, you can separate the area for cooking and for receiving guests. If the area allows, then you can select a zone for the bar.
The design of multi-level ceilings is interesting in terms of creativity for the developer. The ability to create vaults, arches or sloping structures opens broad horizons for the imagination of the designer.
When installing stretch multi-level ceilings, it is possible to solve such a topical issue as reducing noise from neighbors. The issue of sound insulation is solved as follows - before the installation of the tension or false ceiling from plasterboard, concrete ceiling a sound-absorbing fiber is fixed on a special profile.
For multi-level plasterboard ceilings, due to the fact that the ceiling structure is suspended, i.e. for fastening to the main ceiling, a sufficiently powerful structure is used; it is possible to hang a system of luminaires weighing up to 10 kilograms.
Solutions for different rooms

You can’t just overdo it, otherwise you will always have to walk with your head up. Excessively curved ceiling lines can cause dizziness when entering a room.