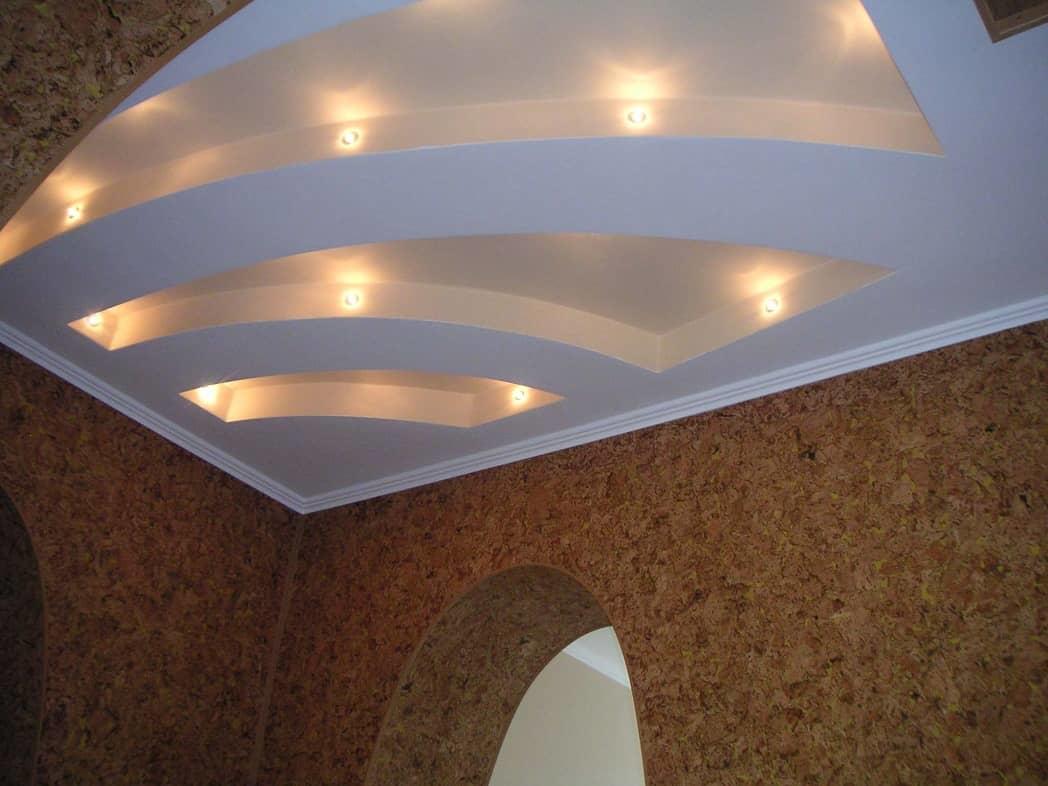
Multi-level plasterboard ceilings: manufacturing instructions for non-professionals. Already classics: multi-level plasterboard ceilings
You can create a unique interior in the room with the help of various design solutions. Three-level stretch ceilings are especially popular. Such designs are very practical and benefit from aesthetics and the ability to hide all the defects of the base floor as much as possible. You should take into account the area of \u200b\u200bthe room in which it is planned to make a multi-level tension structure.
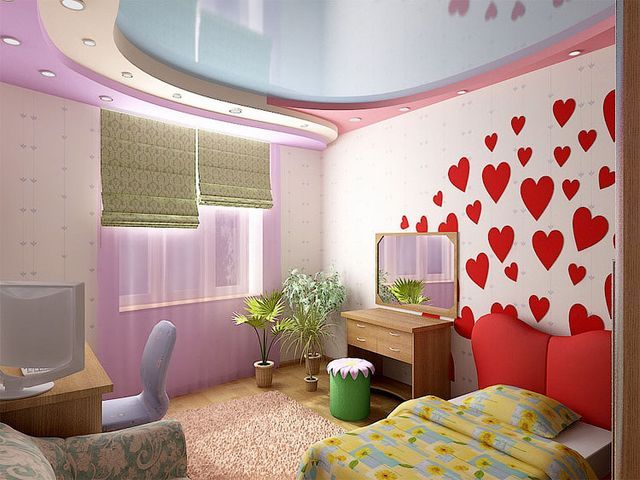
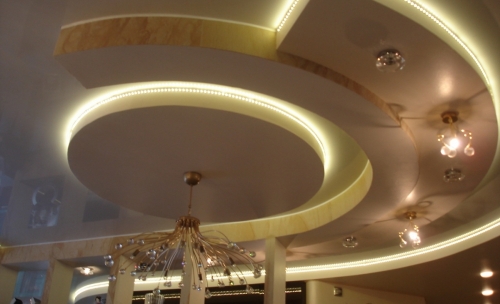
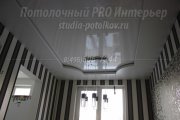
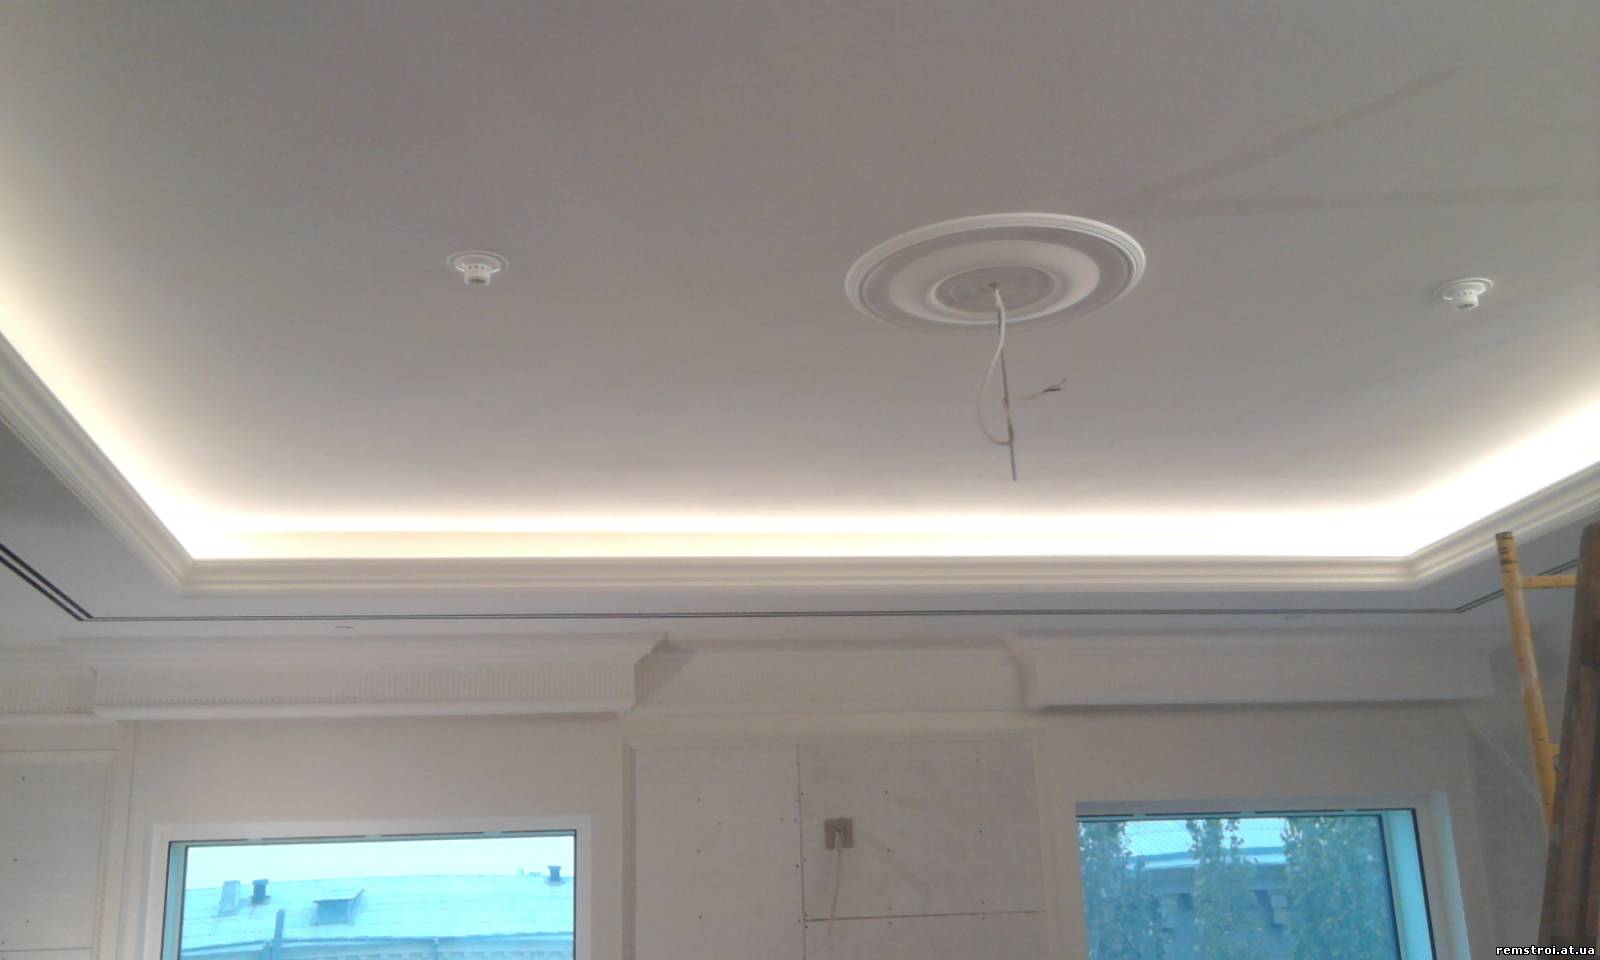
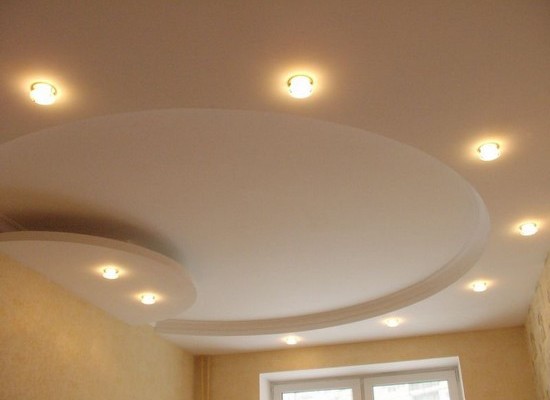
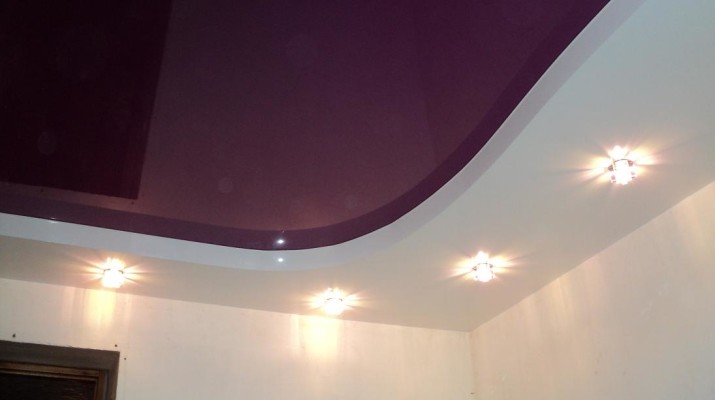
In standard apartments, such ceilings are not entirely appropriate, since drywall "steals" a lot of useful centimeters. But if you beat all the nuances, then the disadvantage becomes an advantage. For example, a small bedroom or a nursery, which are most often found in standard apartments located in high-rise buildings, can be visually enlarged using a multi-level tensile structure: mount drywall molds around the perimeter, in which to place the lighting device according to the designer's vision, and in the center stretch a glossy PVC film covering that follows the contours of the bed or other elements. This will not only uniqueize the design, but also make the interior especially luxurious and unusual.
general characteristics
What are multi-level stretch ceilings in fact? These are quite complex structures that require a special approach during installation. With the help of such solutions, you can visually enlarge the room, zone various sections by means of illumination, hide all defects under the level of drywall.
The main advantage of multilevel structures is the ability to implement many design options. Three-tier ceilings are mounted not only in residential premises, but also in offices, shopping and exhibition centers, concert halls. That's why modern solutions in the interior are widely popular among consumers.
But there are also negative nuances. Firstly, for installation it is necessary to invite only a professional team with specialized equipment. Secondly, there should be a serious preliminary training: completely remove the mold and disinfect the rough floor as much as possible so that later the structure does not have to be disassembled, since there will be no access to the base surface. And the last thing is the price: the cost of a multi-level stretch ceiling is much higher than the standard one. Because here not only is used large quantity expensive materials, but also labor costs increase significantly.
You can mount it yourself if you have certain skills and have special tool. But it should be borne in mind that initially it is necessary to design the structure. In any case, you will need the help of improvised persons. But the most important thing is the increase in installation time. Professional team at right approach can make a ceiling in one day.
Features of a three-level stretch ceiling
 Three-level stretch ceilings are multifunctional. Such designs are not only one of the main elements of the interior, but also perform very important functions:
- provide an opportunity to create a perfectly smooth surface;
- create a barrier to extraneous noise;
- protect the premises from floods from the upper floors, as they take on the main load.
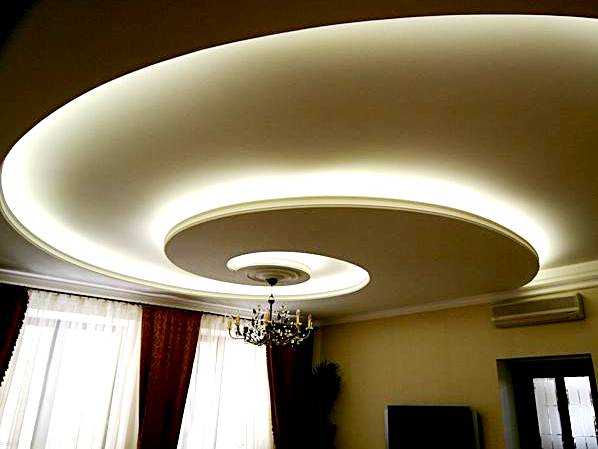
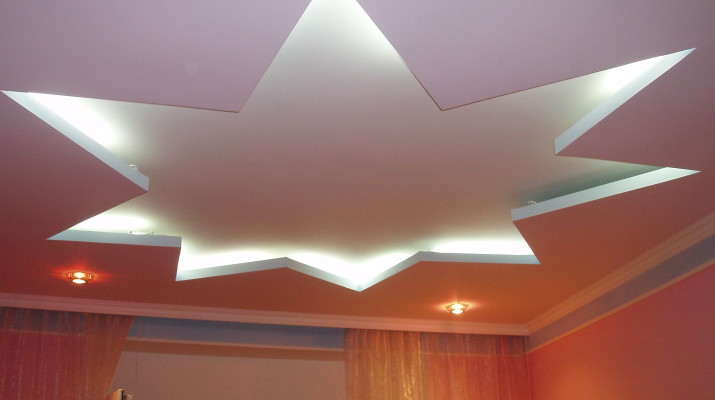
Multi-level tension structures are very easy to maintain, environmentally friendly and fireproof. With the help of such ceilings, you can create complex geometric shapes indoors: arches, vaults, individual curved images. The service life is calculated in decades, which significantly saves financial resources consumers. Therefore, the installation of a tension structure is profitable, reliable, economical and safe. The benefits are obvious.
Features of installation of a three-level stretch ceiling:
- first, a design is developed - lines and shapes of the future structure are applied to the drawing;
- the base ceiling is being prepared: the layer is removed old plaster and cement, fungus and mold are completely eliminated - this is one of the most important conditions;
- marking is carried out along the perimeter of the room;
- mounted U and C-profile as a framework for the main level;
- formed a basic level of- drywall sheets are mounted on the profile;
- a frame is installed for the second and third levels;
- PVC and fabric webs are stretched.
The stretch coating is mounted in the same way as on a conventional single-level ceiling. That is, the film or fabric is heated, stretched and fixed on the profile. The last step is the installation of chandeliers and lamps. But it should be borne in mind that the wiring must be done earlier.
Room requirements for a three-level ceiling
 Three-level structures are mounted in rooms with high ceilings. Such areas are usually in new elite houses or old so-called "Stalinka". Very popular multi-level ceilings in mansions and cottages. Therefore, the demand in the market is quite high.
You can experiment with interiors in standard small apartments. Here, the flight of fantasy is not held back. You can originally divide the zones, for example: in the hallway, make low ceiling, smoothly turning into spacious and light forms of the living room - such lines visually enlarge the room due to a sharp difference in levels and light.
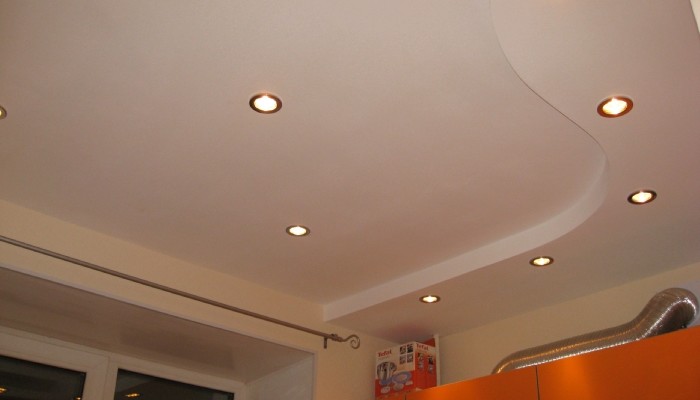
It is not recommended to install multi-level structures in rooms with a high level of humidity, such as a bathroom. But in the kitchen, this design fits perfectly. First, you can create an individual working and dining area with split lighting. Secondly, in hypocratonic boxes it is good to hide unaesthetic pipes and wiring elements. Should such ceilings be installed in the living room or bedroom? It depends solely on the individual preferences of the owners of the house or apartment. If the three-level ceilings are regularly maintained and not subjected to mechanical impact, such designs will last a very long time, decorating your home. Designers love to work with complex shapes, creating both a simple and luxurious interior.
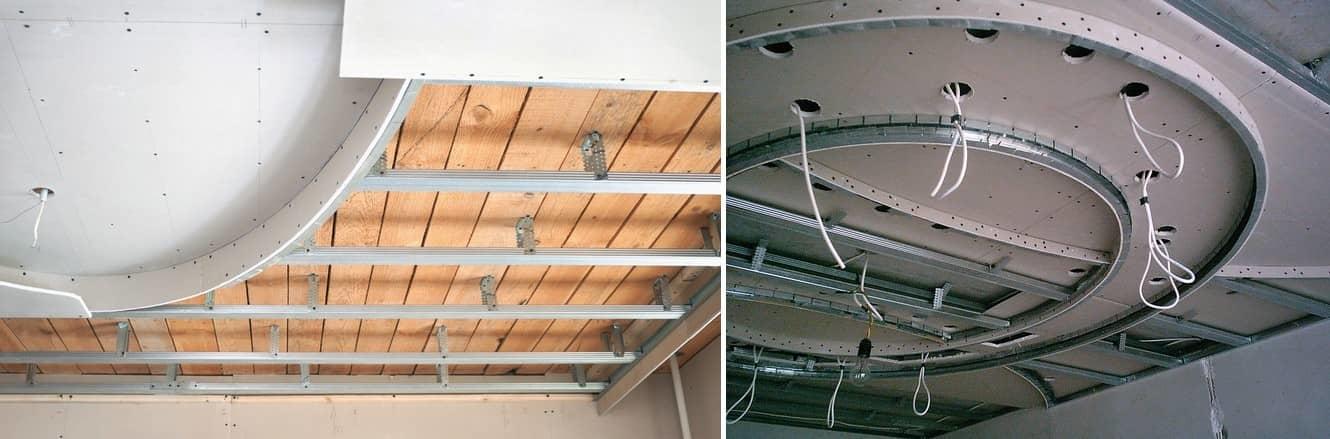
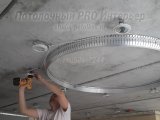
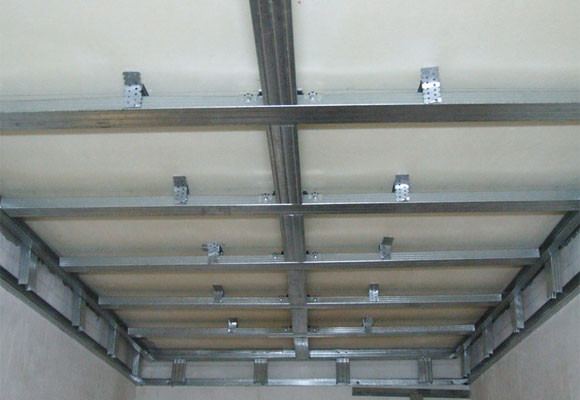
The main difficulty in creating multi-tiered structures is the construction metal frame. And the subsequent sheathing of it with drywall is already easier, even a person without such experience can handle it. But the frame device follows some principles, they need to be known, understood, and in stages, according to them, to make a strong rigid frame.
Multi-level plasterboard ceiling with backlight: where to start
The first thought that should come to you is whether you are ready to lower the ceiling level, how many centimeters of room height you can sacrifice. If the ceiling in your apartment is not higher than two and a half meters, multi-tiered ceilings build is not very reasonable. Two levels is still possible, but three or more will “eat up” the space.
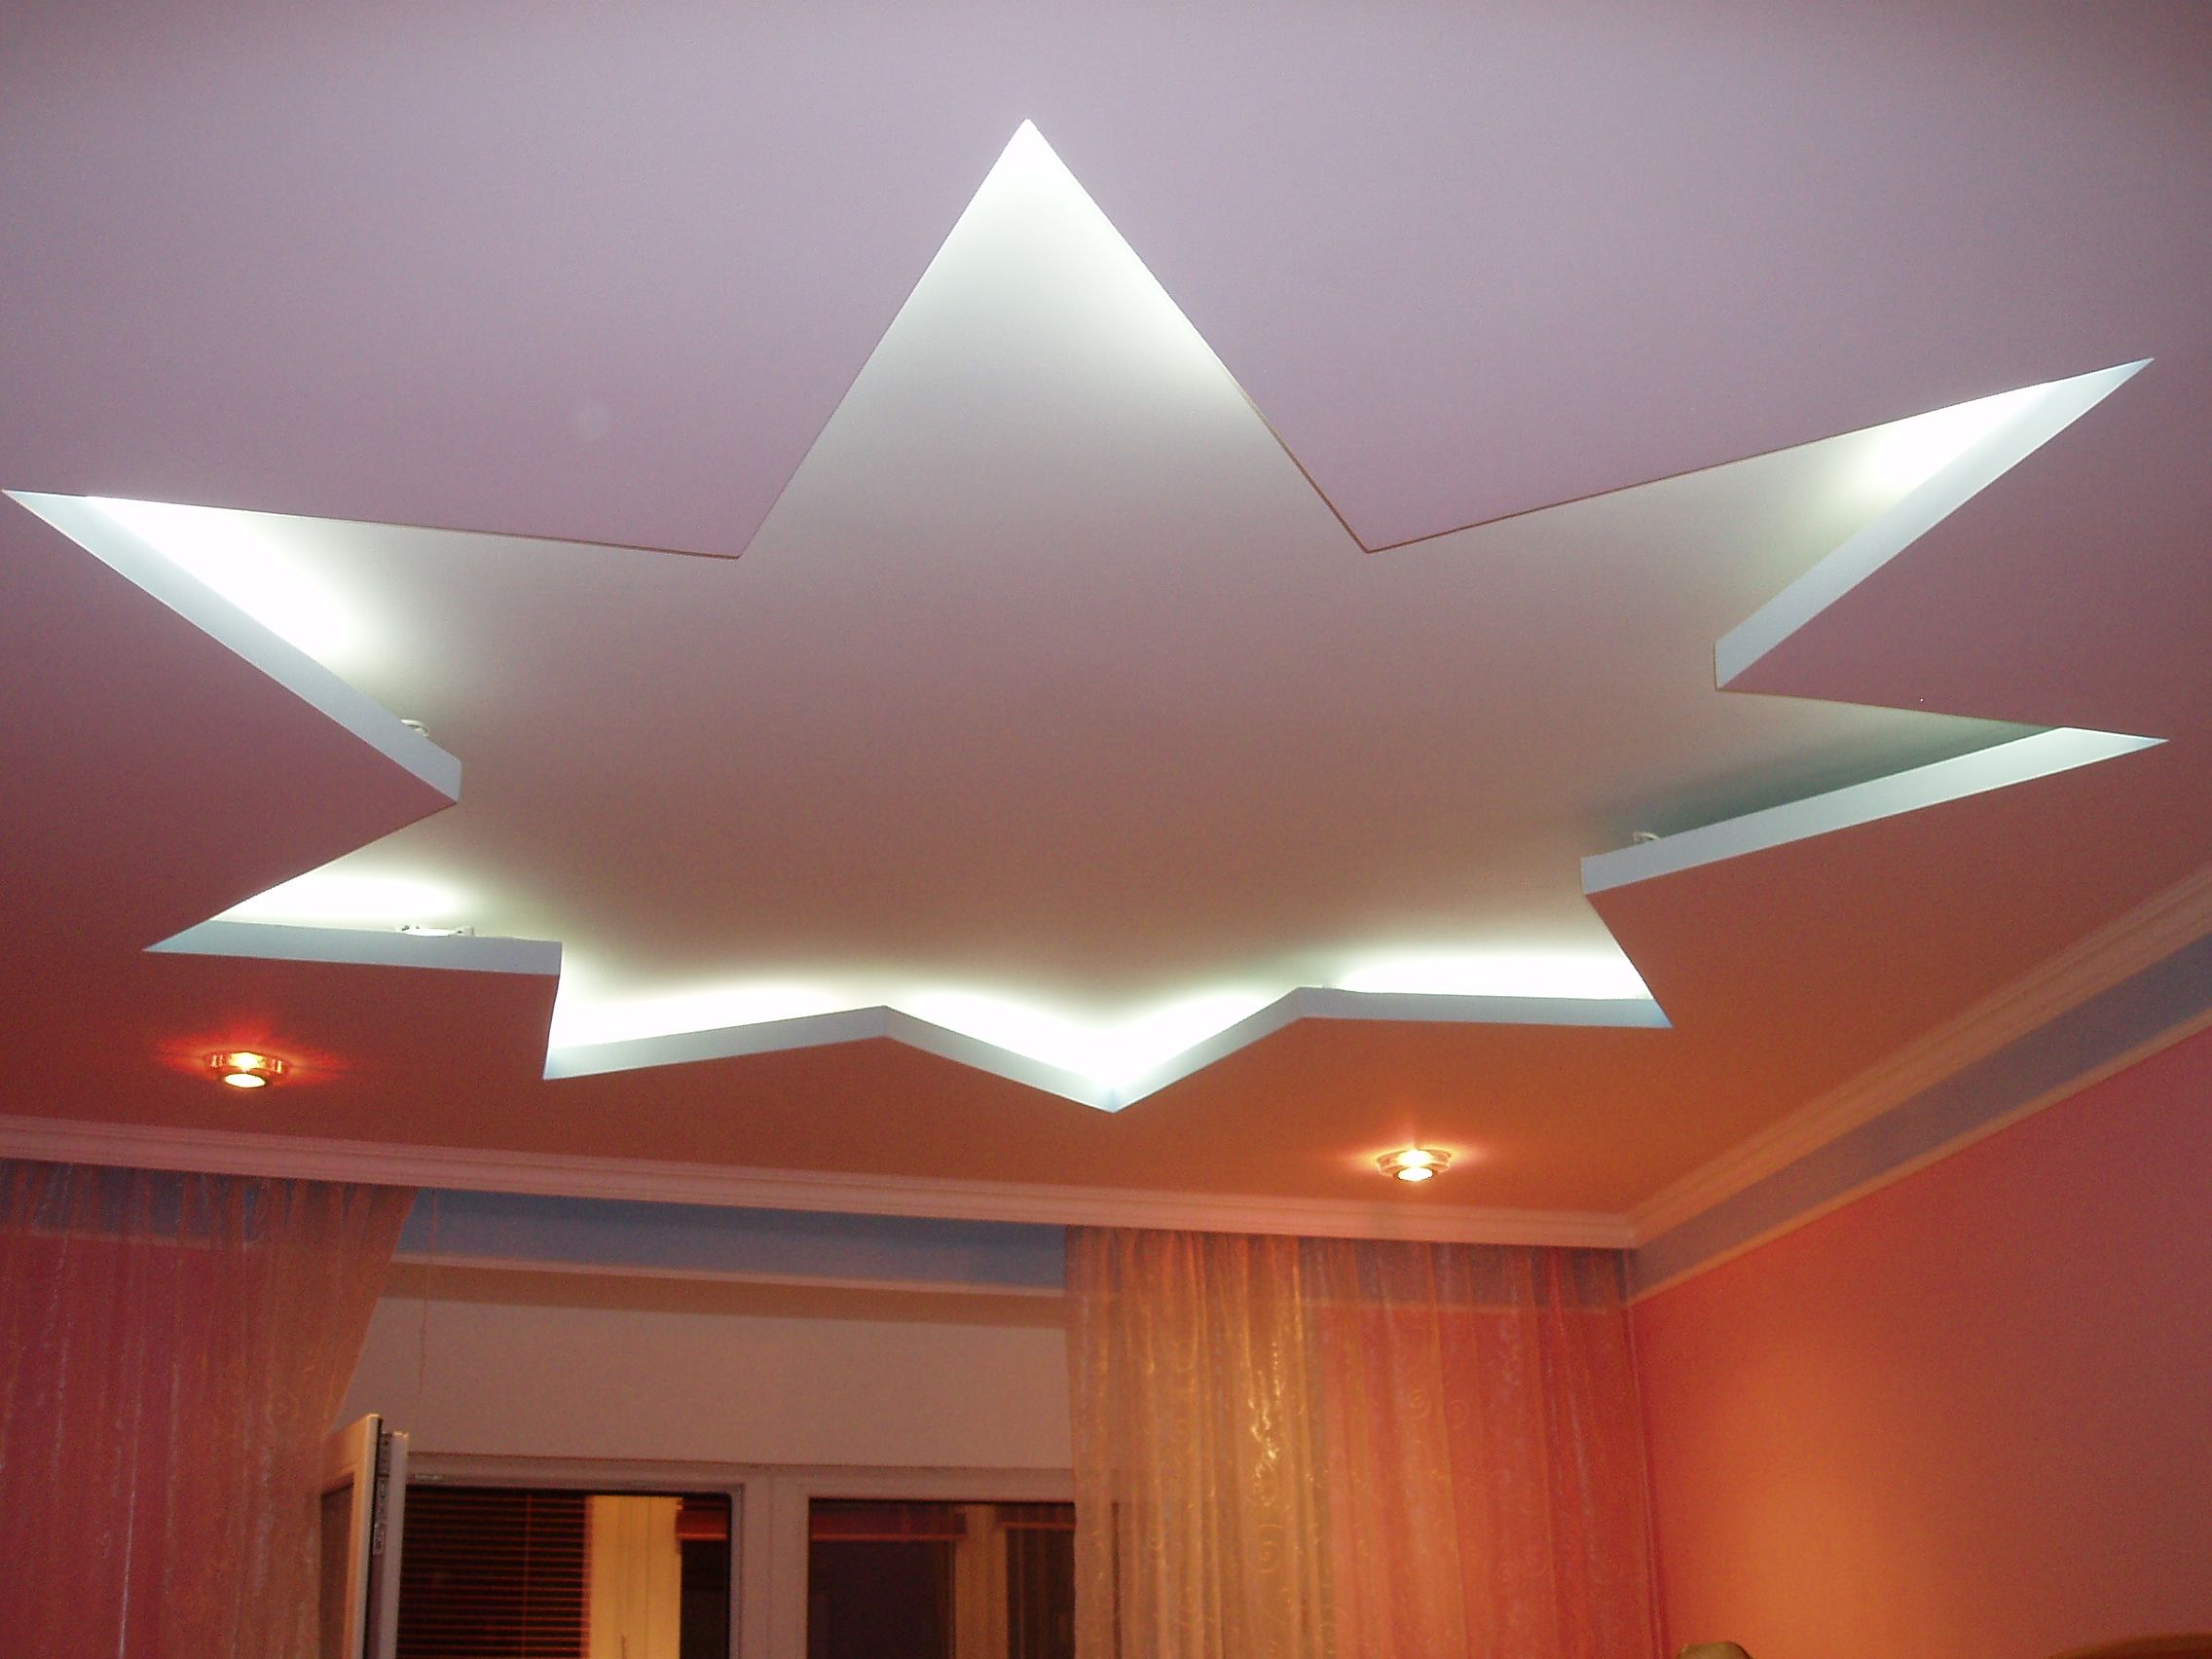
Next - you need to make a choice of ceiling pattern. What will he be like? With squares, waves, triangles, flowers, curved stripes, etc. If you are building a multi-level ceiling in the bedroom, this design should be outwardly calm, without an abundance of details.
In the living room you can be bolder, but even very complex structure should find a response in another element of the interior. Severity and asceticism in the decoration of the living room and complex, original design ceiling - dubious duet.
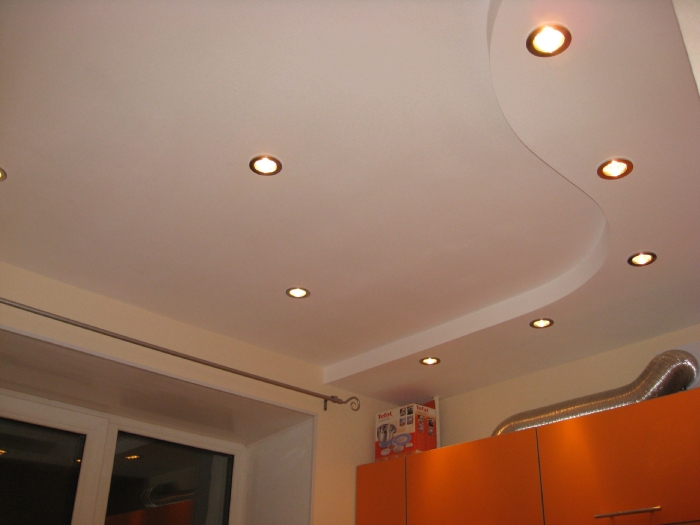
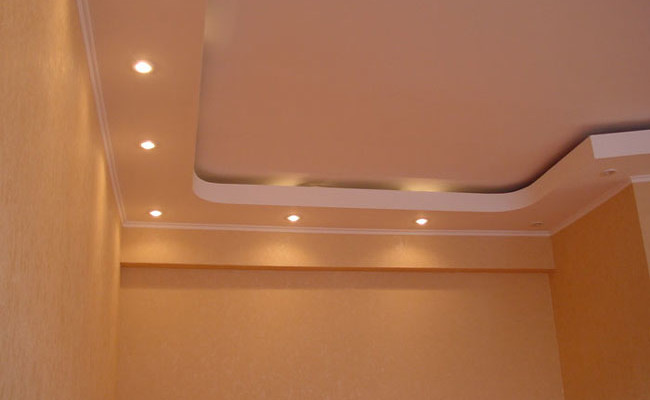
Then you decide how lighting will be presented on such a ceiling. It is often made pointy, or a chandelier is left. You can also make hidden lighting. Neon or LED. A combination of lighting types is not excluded. Hidden lighting is often made between design levels, and spotlights are installed on the second tier.
Mounting multilevel ceiling (video)
Do-it-yourself multi-tiered plasterboard ceilings: marking
The overall quality of the structure depends on the evenness of the markup. The main tool is the level.
How markup is done:
- Using a level, mark the heights of the levels on the walls of the room. The distance between the overlap and the level itself is taken into account. It should be such that lamps can be found there.
- Next, markings are applied to the ceiling in increments of 60 cm. All lines that you apply should, of course, be parallel to each other. Guides will be fixed on them.
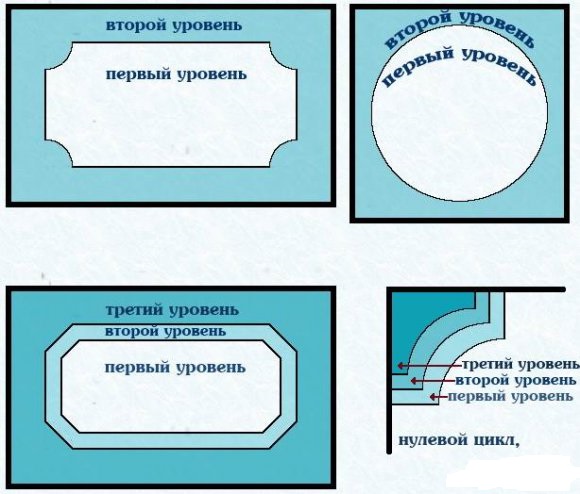
- From design features the ceiling depends on where the markings of the second level will be - on the floor or on the first level.
- If you are using arc-shaped elements in the ceiling installation process, you need a rail with drilled holes.
Experts say that you need to look at the markup from the point of view of the complexity of the design, if the ceilings are multi-level, complex, it is more logical to mark up according to templates.
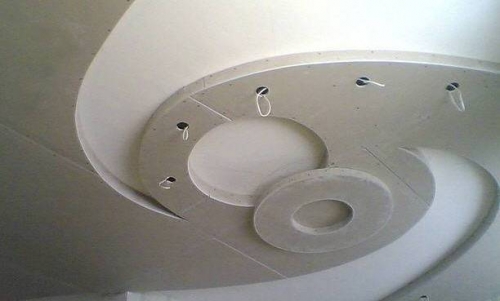
Do-it-yourself three-level plasterboard ceiling: how to make a frame
TO ceiling drywall construction is attached with a metal frame. Mounting the frame is half the battle in organizing a multi-tiered ceiling.
First, the frame of the first level is mounted:
- Attached to the marking line start profile;
- Tie a cord to the starting profile, stretch it through the wind. This will be the designation of the plane of the first level.
- Attach suspensions to the ceiling, fix the beams of the main profile on them. Then form the entire frame.
- Segments of the main profile are inserted into the starting one, they are fixed in increments of 30 cm. The length of these segments should be equal to the height of the second tier.
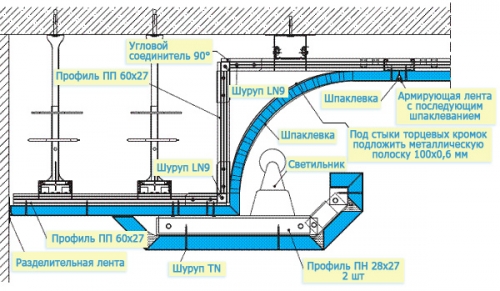
- Attach the lower starting profile, curved along the required contour, to the segments fixed vertically.
- To strengthen the lower plane, bring the main profiles into the starting one, fix them to the ceiling with hangers.

This stage involves the wiring for lighting.
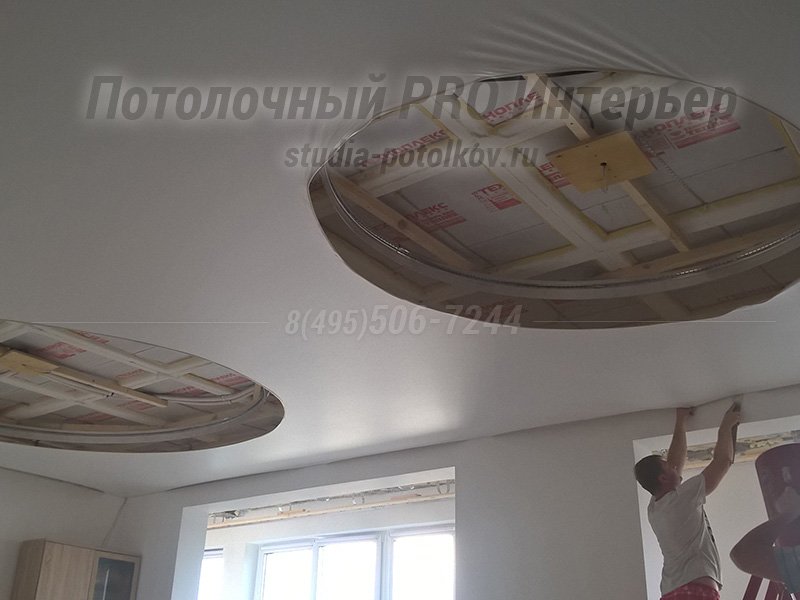
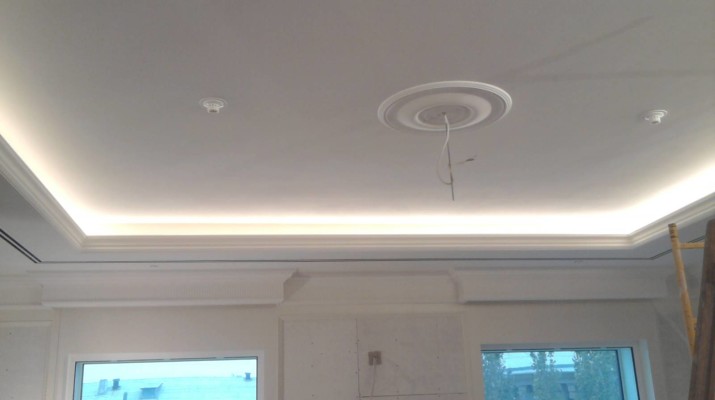
Soaring plasterboard ceiling: what is it
This interesting design where the opaque overlap appears to be hanging in the air. In this case, when mounting along the walls, you need to leave a gap, a light source is installed there. It turns out that the drywall levels hide the lighting in the niche, creating the effect of rays coming from above.

The LED strip is laid either in a niche on the draft ceiling, or in a profile groove, which is purchased specifically for this purpose.
In these niches, a ceiling cornice is often hung along the wall with a window, so that the rays of the lamps emphasize the draperies that fall from under the ceiling.
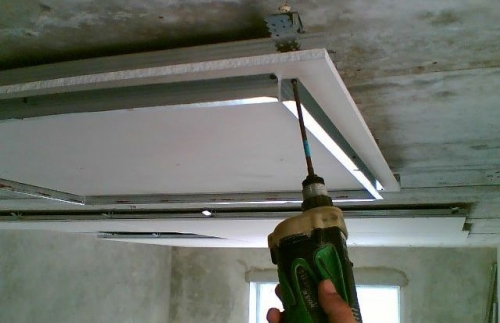
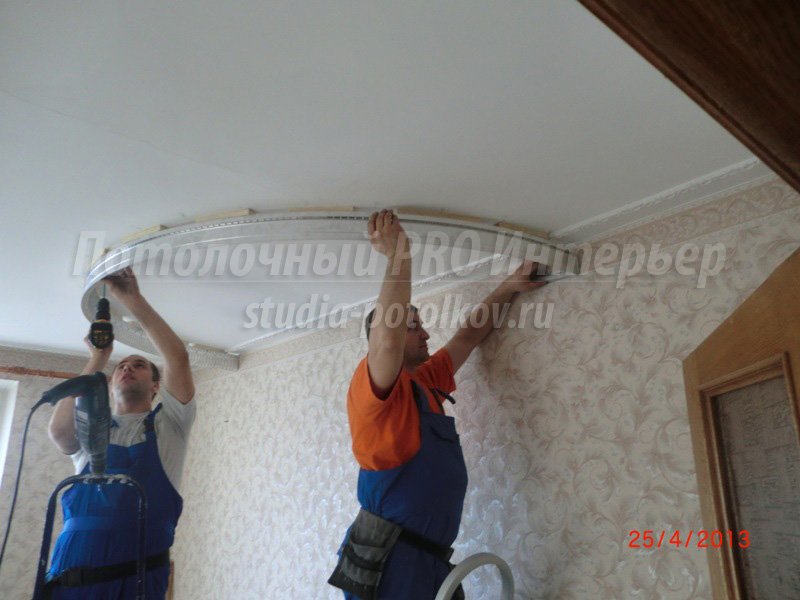
Do-it-yourself installation of a multi-level plasterboard ceiling: sheathing
After the frame is made, you can attach the plasterboard to the first level. The sheet must be measured so that in the allotted place it fits without problems, but slightly protrudes beyond the borders of the element, for example, waves.
After grabbing the sheet, the excess is cut off sharp knife. That is, draw a knife along the wrong side of the sheet, break the drywall a little to get a line from below, and draw a knife along it.
Then self-tapping screws are screwed along the edge, the ends are trimmed.
How the frame is sheathed:
- Drywall is suspended first on the first level, the sheets are attached with self-tapping screws (60 self-tapping screws per 1 sheet). You don't have to start from the wall. Leave the perimeter free for sheathing other levels.
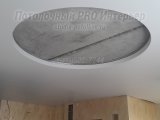
- After installing the first level appears Smooth surface, where the drawing from the finished sketch is transferred. In the same way, the second level is made, sheathed, and work begins on the third.
That is, the ceiling can be leveled +3 or even more, but a three-tiered ceiling is already a lot, and even more levels will steal space very much. First, a frame is made according to the markings of the first level, sheathing, then the markings of the second level, the frame and sheathing, and the same with the third. Such a tiered ceiling requires money, effort, and time, but the result is amazing.
Each of us is trying to diversify the interior of his home, choosing original finish walls or ceiling. Multi-level ceilings today are no longer a luxury, but for some reason they remain a dream for many. However, if you decide to equip such a ceiling in your house, you will not regret it later, as it will bring zest to the interior of your home.
Features of multi-level ceilings
Many developers prefer to divide spaces into several zones according to functional purpose. When arranging a multi-level ceiling in this case, zoning can be mirrored on the ceiling. Borders functional areas on the ceiling they look different - these are color transitions, and level differences in height, and lighting contrast.
Accents are most often made in the living room on the working and dining areas, but the cinema hall and the recreation area remain subdued. Multi-level plasterboard ceilings - perfect solution for large rooms in which it is easy flat ceiling looks out of place. Another thing is the perspective in the vertical direction.
The simplest version of a multi-level ceiling made of drywall - two-level plasterboard ceilings. To do this, on a single-level ceiling, another level is built along the perimeter along the walls. You can make simple ledges, or with niches for hidden diffused ceiling lighting. Depending on the idea of the decorator, the ceiling cornice along the walls can be rounded or rectangular.
Three-level ceilings differ from two-level ones only in the number of layers created sequentially on the previous layers. With an increase in the number of levels, it becomes necessary to strengthen load-bearing structure the overlying layers. Standard design loads are calculated based on the allowable value - 14 kilograms per square meter.
Different levels of plasterboard ceilings are usually distinguished by color different layers different colors and with the help decorative lighting. It is worth noting that it is more difficult to equip a curved multi-level ceiling than a traditional straight ceiling or a multi-level structure with straight lines. The main difficulty lies in drawing the lines along which the vertical part of the circles, bends and waves will subsequently pass. Simply put, accurate markup is the key to successful work.
Advantages of multi-level structures
Choosing a multi-level plasterboard ceiling for arranging in your home, you will not lose, because this design has a lot of advantages. Let's consider the main ones:
- Ease of use. Even the simplest single-level ceiling is mounted much faster classic ceiling. After a maximum of two days, the ceiling will be ready for finishing.
- Changing the geometry of the room. Multi-level plasterboard ceilings with their variety of curvilinear shapes and various options lighting is able to optically increase the overall space, rebuilding the shape and geometry of the room.
- Communication masking. Multi-level ceilings are able to cover various defects in the original draft surface, mask electrical wiring, communications of ventilation and air conditioning systems, and sometimes even pipes.
- functional zoning. A multi-level plasterboard ceiling will successfully divide the studio apartment and large rooms where installation is not provided interior partitions to functional areas.
- Original lighting. When installing a multi-level plasterboard ceiling, you can equip an original and unique lighting system of its kind using halogen bulbs that are common in our time with swivel mechanism, Spotlights, modern chandeliers for multi-level ceilings and LED lighting.
- Ecological purity. Drywall is environmentally friendly safe material. In addition, its moisture-permeable properties allow you to maintain a normal microclimate in the room.
- Price-quality ratio. Multi-level plasterboard ceilings have almost no equal in this price category. Along with these advantages, multi-level plasterboard ceilings have high durability, which has been proven by more than 20 years of operation of the first plasterboard structures.
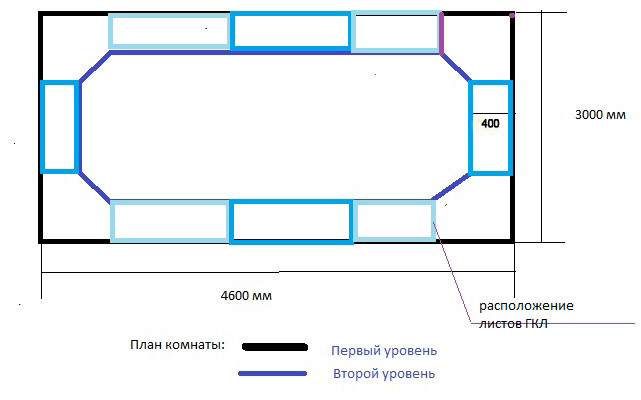
Sketch of a multi-level plasterboard ceiling
To analyze how a multi-level plasterboard ceiling will fit into the interior of the room and look relative to furniture, it is recommended to first develop a sketch of such a design. The main thing in the drawing of a multi-level ceiling is compliance with the scale, accuracy and correctly calculated dimensions, without errors.
On the sketch, you should draw all the walls in the room and mark the windows and doors in it without fail. This moment is especially important if you yourself come up with the shape of the ceiling. Everything should be thought out to the smallest detail, for example, whether there will be hidden cornices for curtains above the windows, and how the ceiling will look from the doorway.
After that, at least schematically mark the placement of furniture in the room in the figure. These should not be too bright features so that attention is not distracted from the borders of the ceiling itself. After completing these sketches, you can proceed directly to drawing the most multi-level ceiling. If you saw somewhere a photo of a multi-level plasterboard ceiling that you liked, then you can choose the same configuration for yourself, adapting it to the shape of your room.
When creating a sketch of a multi-level ceiling, consider the number of levels, based on the height of the main ceiling in the apartment. Remember that the more you plan to make tiers, and the greater the distance between them, the lower the ceiling will end up. Therefore, it is not recommended to equip an overly bulky structure in low-ceiling apartments of old buildings.
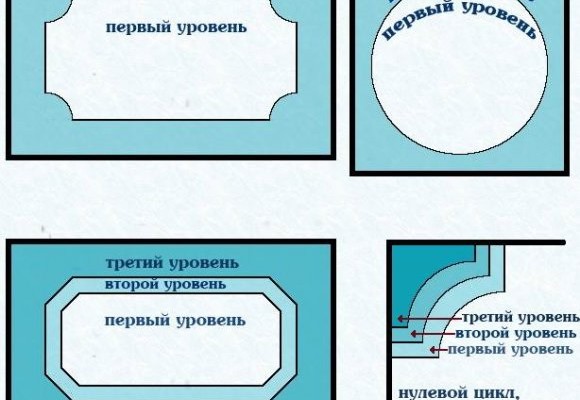
The first part of the ceiling is the lowest level of a multi-level plasterboard ceiling and one fourth of the circle, located in one corner of the room. The two remaining parts, which are undulating forms, will be placed on the same level and in the middle between the ceiling itself and part of the circle.
You can draw the wave-like shapes and bends of the middle part of the future multi-level ceiling by hand with the additional use of a compass. When applying all parts of the ceiling to the sketch, it is necessary to take into account its actual dimensions. Also at this stage, it is recommended to stock up on fixtures in advance to create illumination, before starting work.
Marking the surface for the arrangement of the ceiling
Immediately before marking the surface, it is recommended to clean the ceiling from the old coating. If you have panels attached to the ceiling, they must be removed and the surface cleaned of adhesive residue and various irregularities. If whitewashing has been done, you can not clean it off if you do not observe its departure from the surface and cracks on the ceiling.
Chalk, which is applied in several layers and does not hold well, will have to be removed, since in the future it will gradually fall off and fall onto drywall fragments. It is advisable to delete old paint, which you can do with a spatula or a metal brush. The old stretch ceiling is dismantled by removing fasteners.
After cleaning the surface, you can start marking the ceiling. First of all, it is recommended to mark the place of the first level of the future multi-level ceiling, as in the video about multi-level plasterboard ceilings. It is customary to mark the walls along the walls, given that lamps will be located between the levels. Therefore, make sure that the distance allows them to place.
Next, you need to select the corner with the smallest height value and make a mark at the distance you need from the ceiling, which indicates the placement of the drywall sheet. In this case, it is necessary to mark both adjoining walls on the sides of the corner. And the next step is marking the 3 remaining corners.
The easiest way to do this is with a laser or water level. But you can also use the following mathematical calculations. From the height of the placement of each subsequent corner, you need to subtract the height of the initial one. Add the difference to the distance at which the new multi-level ceiling will be lowered, and subtract the amount from the level of the main surface.
Let's take a simple example. If the room is the most low angle is located at a height of two meters, and the next is at a height of 2.1 meters, the difference is 10 centimeters. If you want to make the first level 10 centimeters below the base, then the markings in the first corner should be at a height of 1.9 meters. In the second corner, make markings, retreating from the main plane by 20 centimeters.
After such marking, it is necessary to start marking for attaching future hangers and profiles. Under the profiles, it is customary to draw parallel lines, to indicate the attachment points of the suspension - to put dots. The profiles will be located on all drywall seams, that is, the edges of the material should not hang in the air.
The pitch of the suspensions is 60 centimeters, and the pitch of the profiles is about 40 centimeters, the suspensions are also located at the end of each profile. Based overall dimensions rooms and the shape of the ceiling to be mounted, you need to determine the direction of the profile, following the path of the least resistance, in other words - as it will be more convenient for you. Very often there are persistent recommendations that it is worth installing the carrier profiles in a perpendicular direction to the window so that the seams on the material are not so noticeable under the rays of the sun.
However, when choosing the direction of installation of the profile, it is more correct to take into account its length, the placement of drywall sheets, the type of dressing between the sheets and the number of transverse seams. And to make the seams less noticeable, you need to try at the stage of puttying.
Mounting the frame of a multi-level ceiling
To perform work on the installation of a multi-level plasterboard ceiling, you will need the following tools and materials:
- marker or pencil for marking;
- metal scissors or grinder for cutting load-bearing profiles;
- electric jigsaw or paint knife for cutting patterns on drywall sheets;
- drill for making holes for fasteners;
- edge planer for cleaning a chamfer of 45 degrees for future puttying;
- spiked roller for creating a curved surface on drywall;
- protective gloves to keep hands safe while working and prevent cuts and blisters;
- goggles to protect the eyes from the ingress of crumbs and dust, which will pour in large quantities during operation.
Before proceeding with the arrangement of a multi-level plasterboard ceiling, you should attach the frame to the walls and the main ceiling. The main UD profile is attached along the perimeter of the walls, which is a supporting structure. In the future, it needs to be supplemented with CD-profiles, which increase the rigidity and stability of the entire system. The UD profile is installed on the walls using dowels. They are placed in increments of close to 25 - 30 centimeters.
After that, it is necessary to proceed with the installation of intermediate CD-profiles, which are usually connected to each other with metal-to-metal self-tapping screws. Now we can say that the work for installing the first level of plasterboard ceiling is done. To install the second level and subsequent elements, it is necessary to additionally install carrier levels.
To do this, you will need spacers, which are also called suspensions. They need to be attached to the main crate, they act as carriers of the second level. Hangers should be fixed with self-tapping screws, and then the second tier of the plasterboard ceiling will be hung on them.
In order for the profile to turn out to be bent, it must be cut. If the area of the room is more than 20 square meters, then the profiles must be placed at a distance from each other, not more than 40 centimeters. Marks for CD profiles are made along the ceiling or walls approximately every 50 centimeters. Here you should screw the brackets for fasteners.
Measure the distance between the walls, then cut the CD-profiles approximately 0.5 centimeters less than the distance obtained as a result of the calculations. Now you can insert CD profiles into UD profiles by slightly lifting the latter. Therefore, each profile will have to be tightened with an average fastening bracket, then bending it under the profile.
Pull the thread across the auxiliary frame along the level of its plane. On it you need to expose all auxiliary profiles. Then you will need to attach them to the main one with self-tapping screws or mounting brackets. The ends of the staples should be bent up or to the sides.
After that, you can sew up the frame of the first level, but you should not forget about the dressing of the seams, jumpers and the margin that should be left for the first level. Unnecessary corners must be removed immediately - cut off so that the structure is not unnecessarily loaded with additional weight. So, the first level is already ready, and you can transfer the drawing from the sketch to the ceiling.
Installation of drywall sheets on the ceiling
After the manufacture and installation of the frame, you can proceed to attaching drywall sheets to the first level, according to the instructions for a multi-level plasterboard ceiling. I would like to warn you that cutting drywall so that it repeats the lines of the wave is not yet “on the ground”. Do it differently. Measure the sheet in such a way that it fits without problems in the allotted place, but at the same time protrudes a little beyond the boundaries of the wave. After the sheet is tacked, you can cut off everything superfluous with a sharp knife.
To do this, use a knife to back side sheet, focusing on the wave and using it as a ruler. Then break the drywall a little in such a way that you get a line from the bottom, and draw a knife along it. After that, scroll along the edge of the screws. Then you need to trim the ends. Well, at the end of all the work, you need to cut the frayed cardboard, although this is not mandatory.
It is customary to hang drywall on the first level, and you should not start from the wall at all. You can leave the perimeter free, as this is where you will set the subsequent levels. It is recommended to attach sheets to the frame special self-tapping screws. Approximately 60 pieces per sheet.
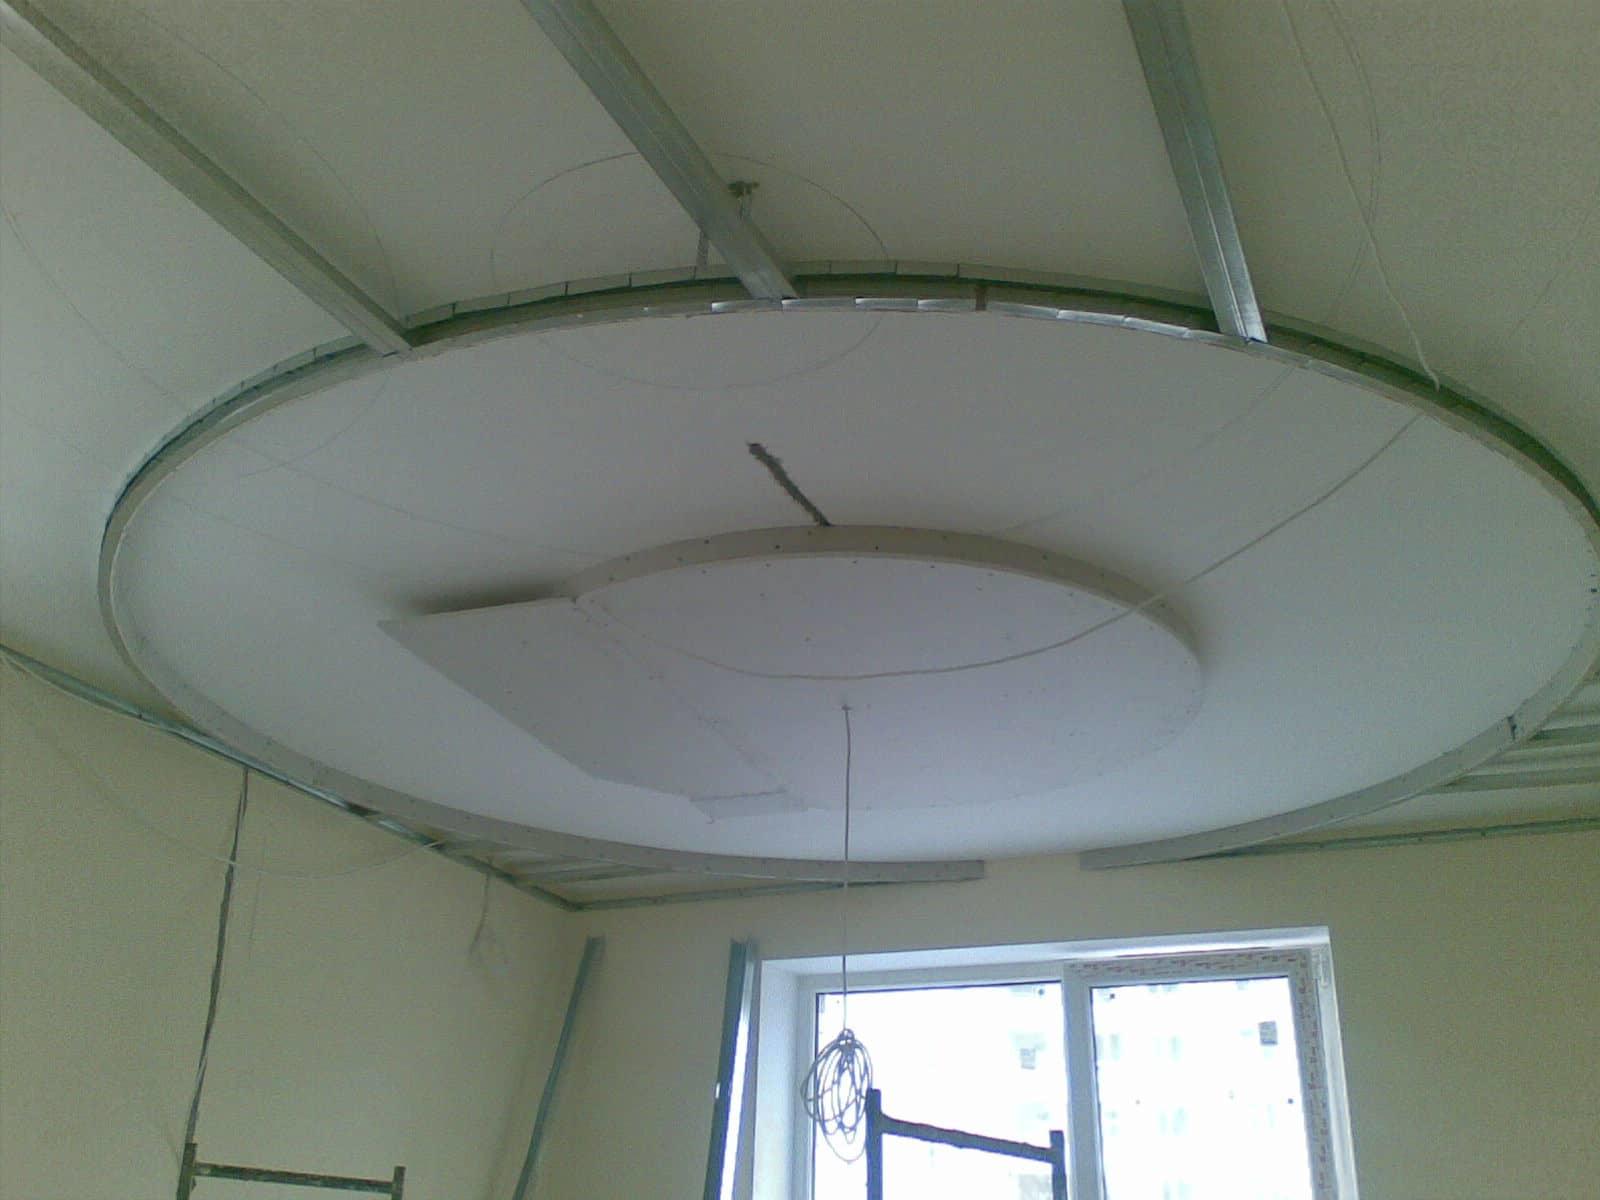
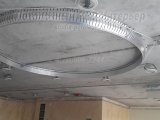
Consider future lighting when installing drywall sheets. Eyeliner for it must be carried out even before attaching the sheets to the profiles. The shape of the second level will depend on your imagination. If you chose a round shape. To do this, you need to draw a circle and attach the frame of the second level of the ceiling according to the markup, the basis of which is also the UD profile. It must be attached to the first level, preferably in places where the planks of the first tier will pass.
After that, it is necessary to insert CD profiles into the main profile, which are usually attached to the first level CD profiles through drywall. To do this, you need self-tapping screws for metal, which have a length of 60 - 70 millimeters. Sheets are screwed, and then cut off. It is convenient to do this with electric jigsaw or an ordinary hacksaw for metal.
Now you can start creating the third level. However, remember that the price of a multi-level plasterboard ceiling will increase in this case. In general, the arrangement of a multi-level plasterboard ceiling implies the presence of any number of tiers. However, it is not recommended to do more than 3 levels, otherwise the ceiling will become too low. Do not forget to bring out the eyeliner for the fixtures, otherwise you will have to dismantle part of what has been done.
Ceilings in two or more levels are distinguished by special sophistication and beauty! Such stretch multi-level and two-level stretch ceilings give the room volume and depth, visually expand and enlarge the space!
With the help of multi-level ceilings, you can create an unusual and Beautiful design, which will emphasize the features of all rooms. But this is not their only task. Multi-level and two-level ceilings can be used to hide irregularities and defects in the base ceiling. It happens that the differences are so large that they cannot be hidden in other ways. For example, in bad condition often there are old floors between floors. In an apartment, sometimes you have to hide the electrical wiring, air vents, air conditioning, heating and water supply pipes. Such a multi-level stretch ceiling can be used as a casing that will cover technical elements that should always be accessible for maintenance.
Our installation of a two-level ceiling with LED lighting


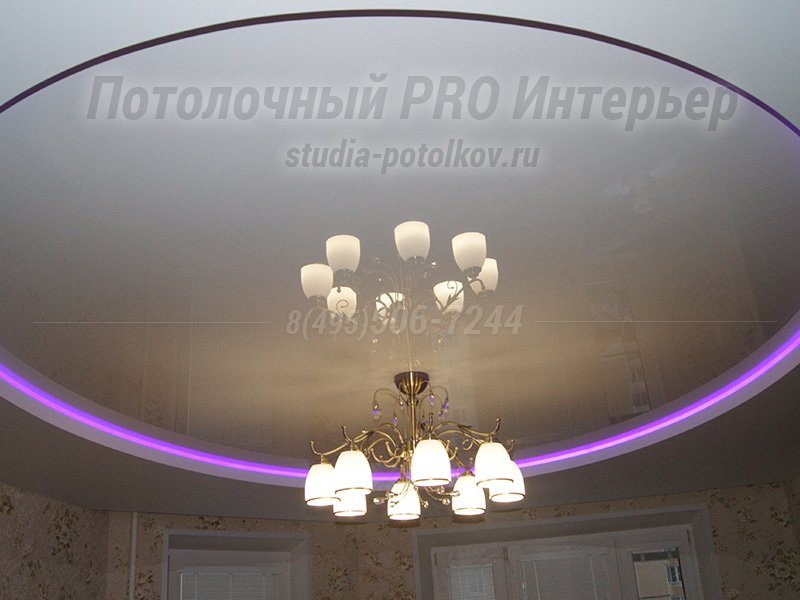
Two-level and multi-level stretch ceilings will perfectly cope with the task of optically increasing the height of the room.
During repairs, quite often there is a need to raise the ceiling, even visually. Experienced Designers know one thing well. It lies in the fact that modern interior you can increase the space by reducing the ceiling level in several rooms. For example, if you lower the ceiling level in the hallway, and keep the original level in the dining room, then the dining room will visually become larger. In this case, the base ceiling must be distinguished using a stretch ceiling, as well as additional design techniques, such as color, highlight, or texture. Photo printing on the ceiling will emphasize the individuality of your room. This will be especially successful on two-level and multi-level stretch ceilings!
1 linear meter two-level ceiling 2000r. With a niche for lighting from 2800r.
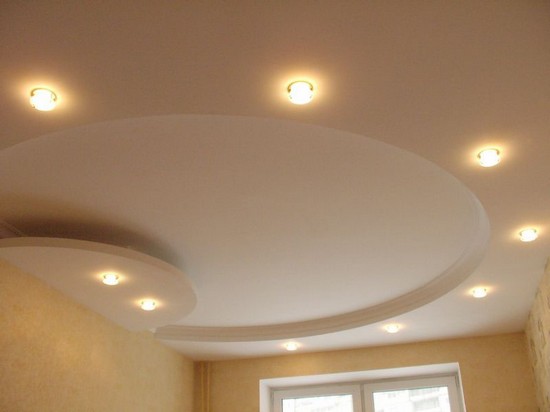
Our installation of a two-level ceiling with lamps


Bedroom 15 sq.m. two-level ceiling from only 27300r. 24800 r.
When designing and installing two-level ceilings, it is correct to use PVC ceilings matte and glossy, their combination gives a very presentable look and depth. For lovers of the classics to build multi-level ceilings fit Clipso and Descor fabric ceilings. As a rule, only straight and slightly curved structures are made of fabric.A particularly important function of a multi-level stretch ceiling is the division of the living space into zones. Living quarters with the use of stretch ceiling levels are arranged in the form of flowing open spaces that make up a single plastic structure. For comfortable living in such premises, it is necessary proper organization. If there are no walls in the room, then the zones are also emphasized by finishing the floor, walls or lighting. As well as an additional level of stretch ceiling. So, for example, a stretch ceiling can be made in the form of an oval, resembling dinner table in the dining room. You can also select a bath, bed, bar counter, winter Garden, as well as the road between the zones. Basically, multi-level stretch ceilings are organized in accordance with the floor finish. These may be podiums in some places, materials for floor covering different color and invoices.Our installation of a complex two-level PVC ceiling matte+glossy
![]()
Room 16 sq.m. two-level ceiling from only 29600r.26300r.
Kitchen 9 sq.m. two-level ceiling from only 22700r. 19600r.
Installation of multi-level ceilings is characterized by increased complexity in the manufacture of special structures, usually made of aluminum, requires filigree precision in their assembly and installation. Particularly important is the accuracy in the installation of joints and compliance with the level specified by the design. Such work on the arrangement of multi-level stretch ceilings can only be carried out by highly qualified and experienced installers. And there are such specialists in our company.
Our installation of a two-level ceiling with roses
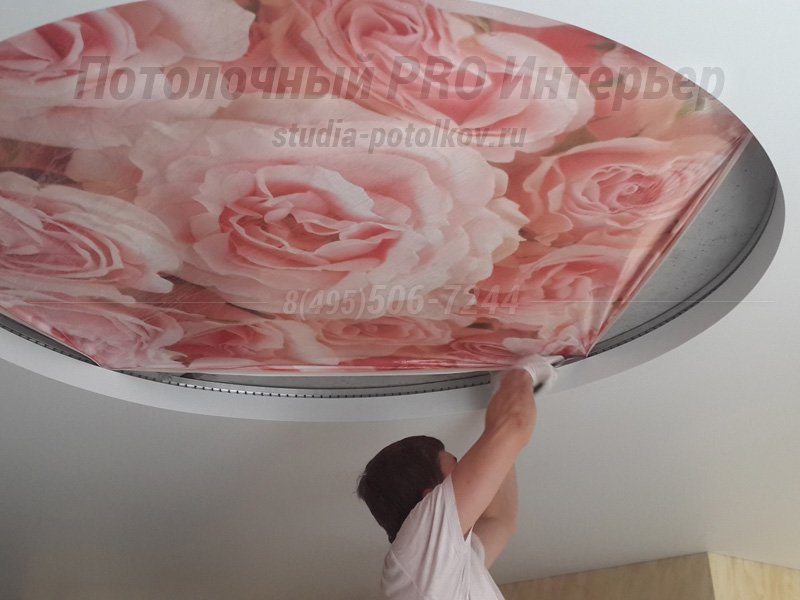

System suspended ceilings deservedly won the love of most fans exquisite interior. These constructions in themselves express the originality of the owners' view of the world, their exclusivity as individuals. For creating exclusive interiors often in currently two-level plasterboard ceilings are used, the photos of which show various non-standard approaches to solve this design problem.
Distinctive characteristics of drywall - strength, hardness, resistance to mechanical damage. In all cases, the process of installing a suspended structure begins with the development of a sketch. The most popular options include wavy lines and round elements - they are especially effective for multifunctional premises. Laconic forms are easy to fit into a room of any size.
In some cases, there is a need for visual magnification the height of the room or its zoning, for this a two-level plasterboard ceiling - perfect solution. With its help, you can, for example, allocate places for rest, eating, working, sleeping, and so on. The design of such finishes, which always look extremely impressive, includes combinations of various curly elements on a plasterboard ceiling, materials, lighting. Too complex systems they require artistic taste and technical knowledge during their development, since when designing a structure, the load on the frame is calculated, and fasteners are selected.
Drafting a project
At the stage of planning a plasterboard ceiling, one of critical aspects- determination of the level to which it is permissible to lower the structure. For example, the use of a floor slab as the upper level allows you to save money and the height of the room. This solution is optimal when creating the design of apartments in Khrushchev, which are distinguished by a low floor height. Another important step is the development of the layout lighting fixtures.
 Plasterboard ceiling projects
 The final drawing indicates the installation locations of load-bearing profiles, suspensions, fixtures.
When calculating the height of the structure, the existing distance from floor to ceiling must be taken into account initially. As a rule, from the overlap to the top level there should be a minimum of 50 mm, to the bottom 100 mm. Max Height two-level design - 250 mm. The ceiling diagram also indicates the location of the curtain rods.
 One of the two-level ceiling schemes
 The cost of the structure will be the higher, the more complex it is - each niche and bend increase in price construction works. What they will cost is calculated based on the following factors:
- price building materials: hangers, profiles, drywall sheets;
- price finishing works and materials - putties, paints, reinforcement meshes;
- prices for installation work;
- the cost of electrical work.
Variants of designs with installation of additional lighting
The special charm and exclusivity of such a design of the room with lighting, which can play the role of both the main source of lighting and a decorative element. By far the most common option at the moment is to use led lamp, characterized by reliability, economy, safety and special effect when the design of the space is formed. This lighting is perfect for drywall surfaces in two levels, with which it is easy to experiment by creating a variety of patterns and shades.
Another option is ceilings with LED strip illumination, which can be done by hand. In addition, it is an excellent base for the implementation of all kinds of creative ideas. Such lighting equipment is produced in one or full color. The first variety is cheaper and more suitable for a long configuration lighting device, when price plays a decisive role.
Additional lighting equipment is mounted before installation of the structure or directly into it. It is possible to use light lighting fixtures equipped with their own clamp. Large fixtures for plasterboard ceilings, as a rule, are not used because of the significant load they create.
The design of the ceiling should be stylistically consistent with the overall design concept of the living room.
 Hidden backlight
 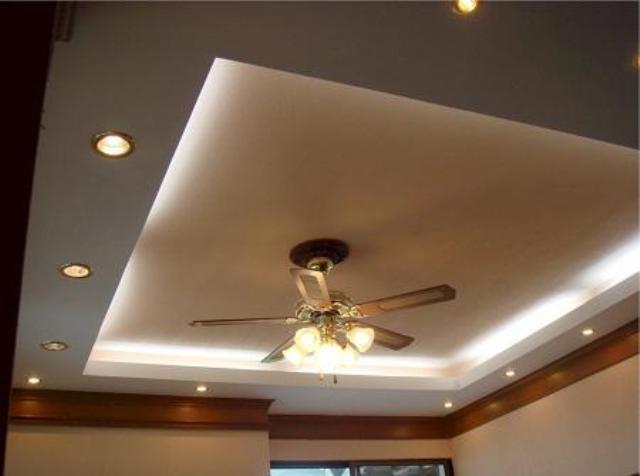 Combination of several types of lighting
 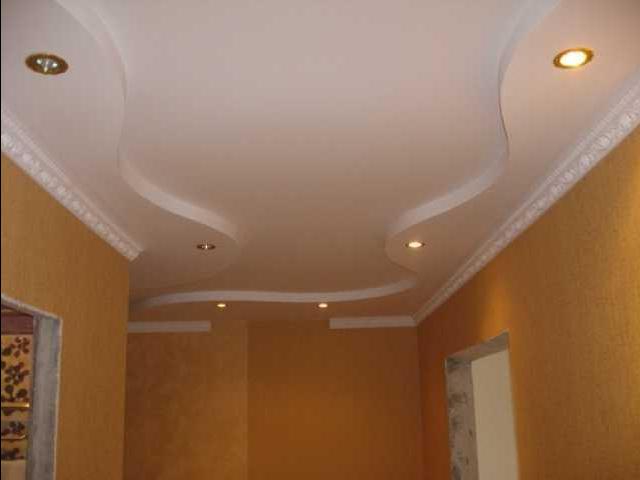 Spotlights
 Possibilities of combining drywall with other materials
Recently, two-level drywall systems have been popular, where the lower level is suspended, made of sheet material drywall, and the top - tension. Between them, a space is formed in which lighting fixtures are usually placed. Often to form unique interior an LED strip is used, installed around the perimeter of the levels. This source acts as a decorative source, and its color is selected in accordance with the general color solution interior. Typically, the LED strip is complemented by a chandelier in the middle of the room.
The combination of drywall and such looks good. decorative elements like glass with photo printing. A well-chosen image and lighting will emphasize the style of the interior and help adjust the proportions of the space. The design of the room with the use of stained glass and mirror elements looks extremely original. A two-level ceiling with one of the tiers decorated with three-dimensional painting is perceived fresh and interesting.
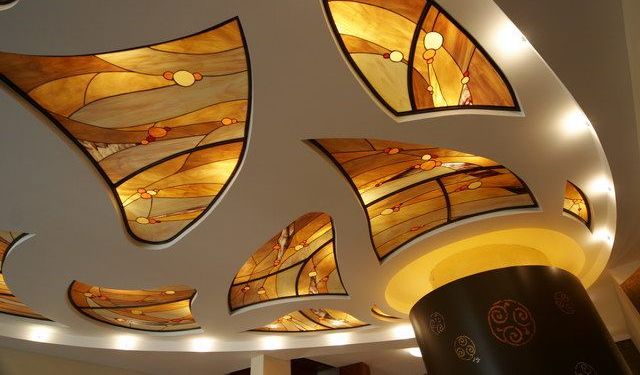 The combination of drywall and stained glass
  Combination of drywall and tensile structure
 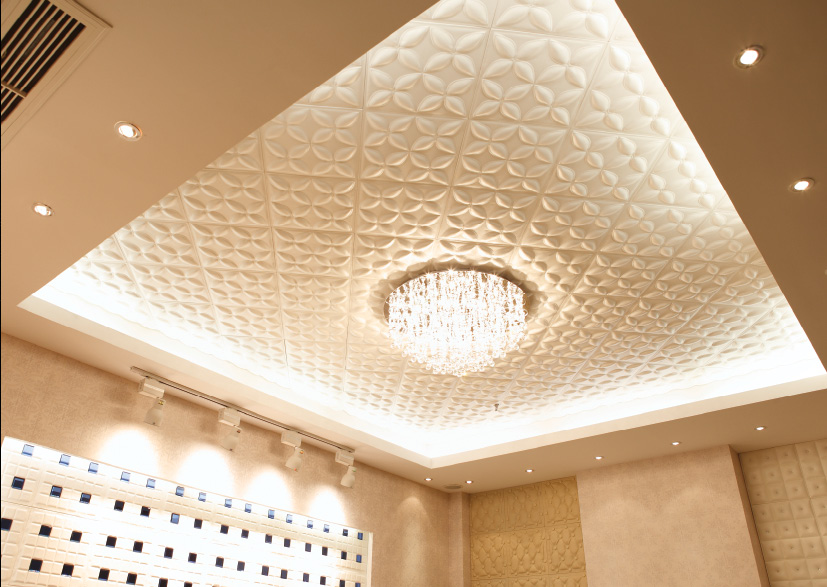 The combination of gypsum craton and decorative panels
 How to install yourself
With sufficient building skills, a do-it-yourself two-level plasterboard ceiling is a fully feasible idea. In other cases, it is advisable to contact a specialized firm with significant experience and a good reputation in the market.
Finishing work includes several stages:
- pre-treatment of the floor: leveling, elimination of defects and cracks;
- marking of each tier, location of profiles and frames;
- laying electrical wiring for lighting fixtures;
- fixing the frame of the upper level;
- top-level drywall sheathing or execution finishing in the case when it is an overlap;
- installation and sheathing of the frame of the lower tier;
- sealing and filling seams;
- installation of lighting fixtures;
- surface finishing.
Drywall construction frame
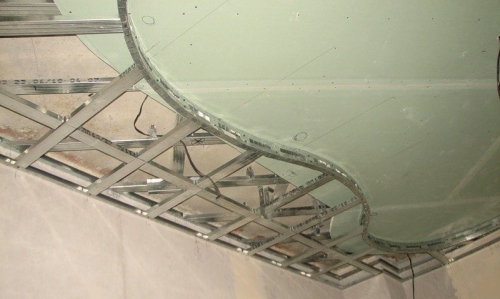
The first stage of installation is the installation of carriers and guides of the upper tier, for which two types of profiles are used. Guide structures are required to form top-level figures. The design of curvilinear outlines is created by incisions with metal scissors or a profile grinder. Racks equal in height to the lower ceiling drop are mounted vertically to connect a pair of parallel rails.
The next step in the installation of two-level ceilings is the installation of racks with a pitch of 600 mm. With the same interval, transverse jumpers are attached to them. Profiles to the ceiling are mounted using direct hangers, fixed with a step of 400 mm. It is required to stock up on a sufficient amount of fasteners, from which screws, dowels, self-tapping screws and other elements are needed.
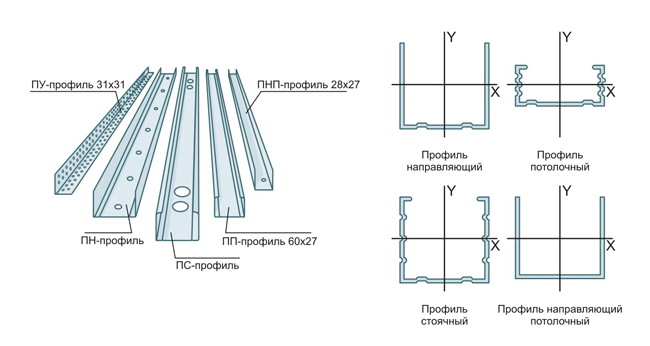 Drywall profiles
  Scheme of the ceiling structure for plasterboard
 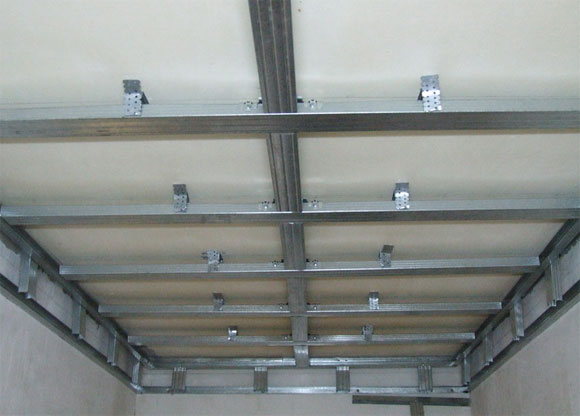 Frame for drywall construction
Features of installing drywall sheets
The thickness of the drywall material should be 9.5 mm - this is optimal size. Plasterboard sheets are cut on the floor, and to facilitate giving the drywall a given shape, the bends are moistened. Then the patterns are fastened to the frame profiles. It is also desirable to make holes for lamps in the cutting process.
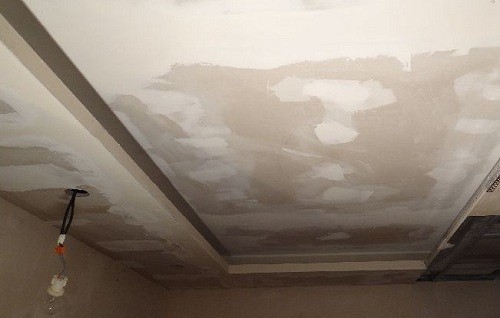
The final stage is the primer of the entire structure, sealing the joints with sickle and putty. The clarity of the fractures is ensured by using a metal or plastic plaster corner for straight sections and arched ones if their design is curved. Then the surfaces are puttied, primed and proceed to finishing.
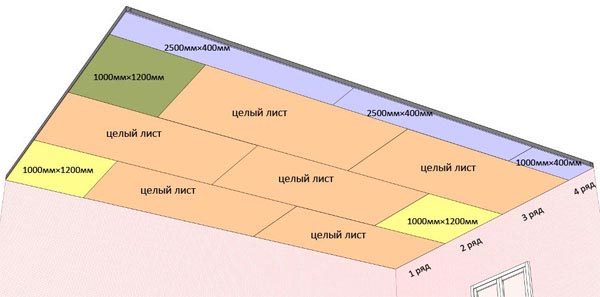 Correct placement drywall sheets on the ceiling surface
 Correct Method fixing drywall sheets
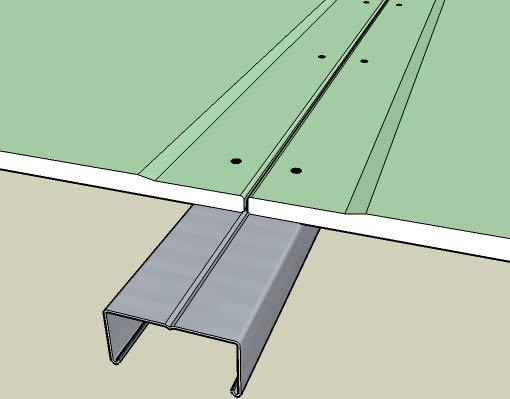
 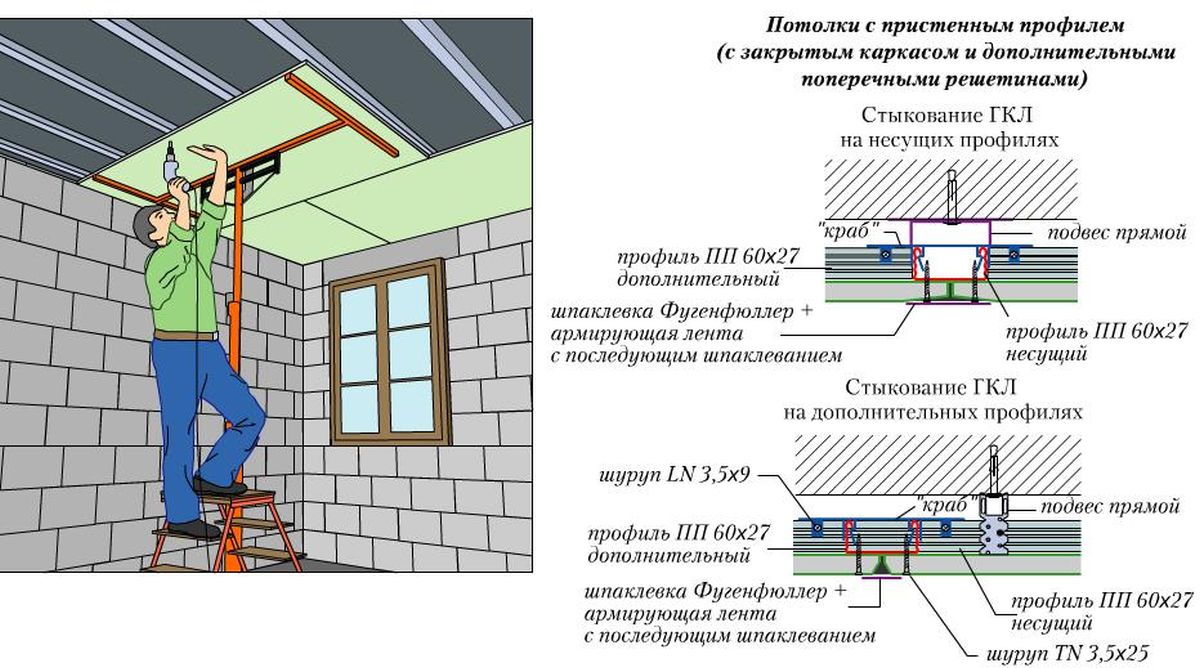 GKL fastening and joints of drywall sheets for ceiling sheathing
 Lighting rules
Two-level backlit drywall constructions can be made with different types lighting fixtures, choose different color scheme flow, but in any case, a number of requirements must be met:
- wiring is carried out exclusively with the use of insulating sealed sleeves;
- wires should not come into contact with sharp sections of the metal frame;
- wire connections are carried out using junction boxes, taking into account the calculated load;
- at the lower level, plasterboard lining is done in such a way as to create an equal protrusion around the entire perimeter beyond the edges of the structure - a backlight is installed on it;
- to hide the fixtures, it is required to mount an additional side with a height of at least 60 mm - if it is lower, this will make it difficult to change the lamps.
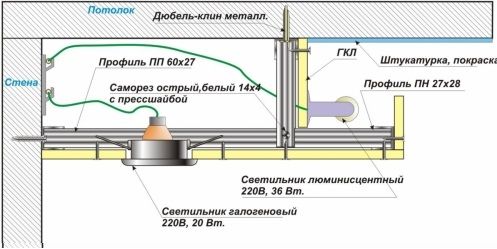 Scheme correct location spotlight and hidden lighting
 In case of use LED strips, the power and brightness of which is regulated by the number of LEDs per square meter(60-240), they are mounted along the edge of the frame.
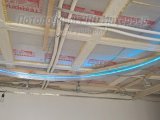
Wiring
Drywall is excellent material in order to mask the wiring. That is why many people perfectly use this property of it and install hidden electrical wiring, thereby avoiding the need to make strobes in the walls.
For concealed wiring are used corrugated hoses and fireproof boxes. Installation is as follows:
- after installing the profile for drywall, the stage of laying telephone, telephone cable, as well as electrical wiring begins. All wires must be insulated with a corrugation in order to prevent a fire hazard in the future;
- for the installation of electrical wiring, you need to stock up on such materials and tools;
- corrugated hose;
- distribution boxes;
- cable;
- clips for attaching the hose;
- dowel nails;
- perforator with drills.
- first you need to determine the location of electricity consumers and mark the route, after which you can pass the cable through the corrugation;
- fasten the missed corrugation with the cable to the wall behind the profile frame, for which it will be necessary to make holes at a distance of 30-40 cm from each other. It is in these places that the clips will be attached using dowel nails. A corrugated hose is subsequently attached to these clips;
- installation of distribution boxes is carried out in previously marked places, where sockets and switches will be located in the future;
- after the completion of the electrical wiring installation in corrugated pipe, you can proceed with the installation of drywall.
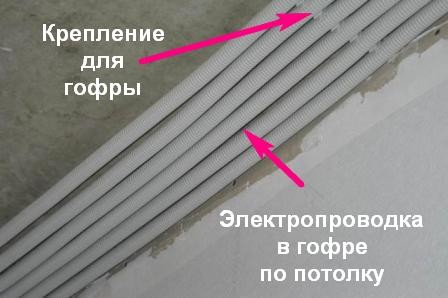 All electrical wires must be hidden in the corrugation
 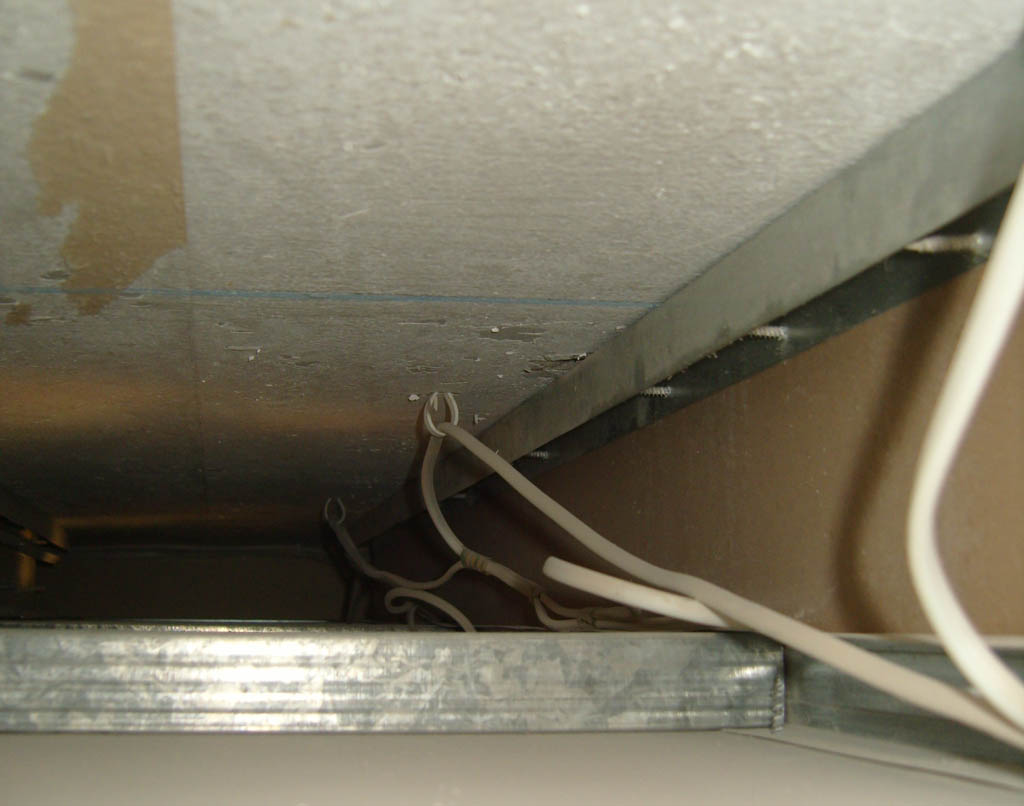 Installation of electrical wiring
 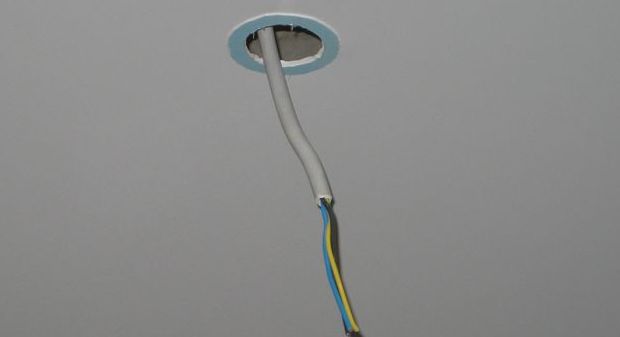 Wires go down through specially prepared holes
 Finishing methods
The most common method is painting plasterboard ceilings. water-based paint in living rooms and acrylic facade paint in wet rooms. Drywall structures are often pasted over with ceiling wallpaper, mostly non-woven or vinyl, which can also be painted during repairs. The design of "liquid" drywall wallpaper allows you to create seamless surfaces that have a textile texture. You can decorate a two-level ceiling by using a baguette made of polyurethane or foam - it goes well with drywall.
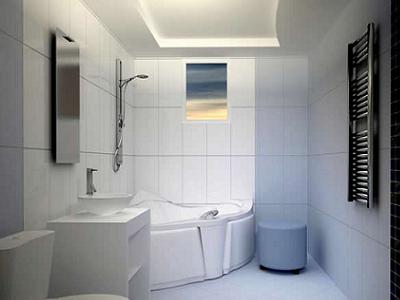
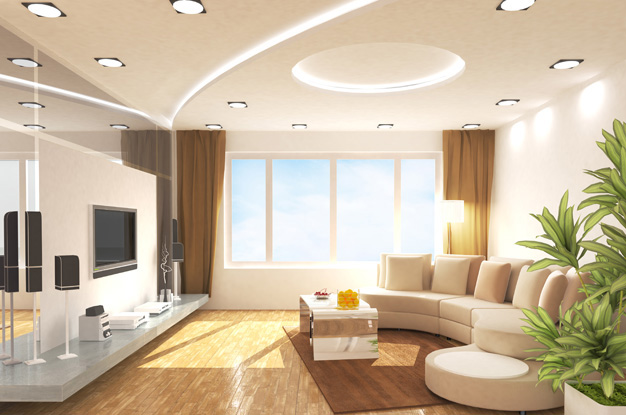
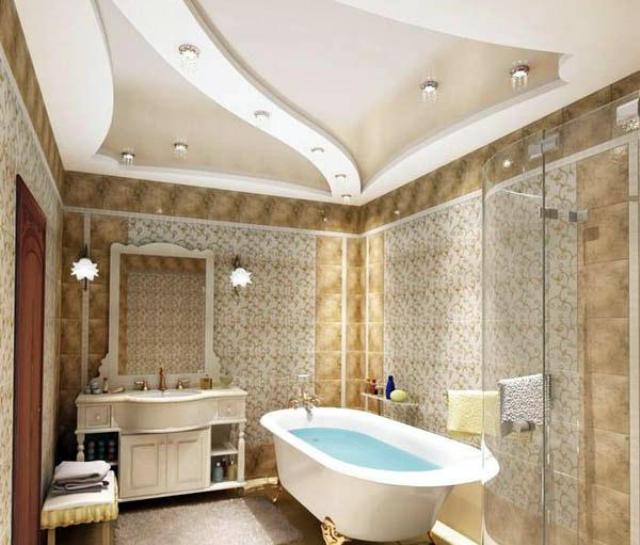
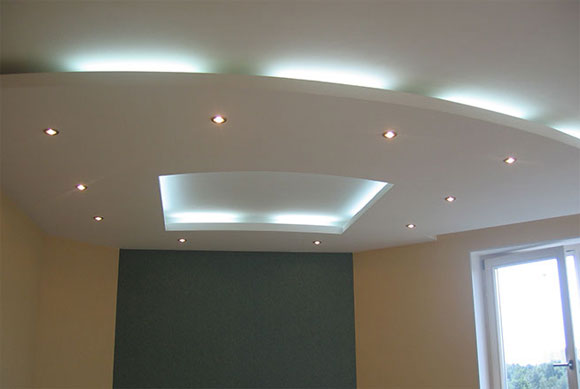
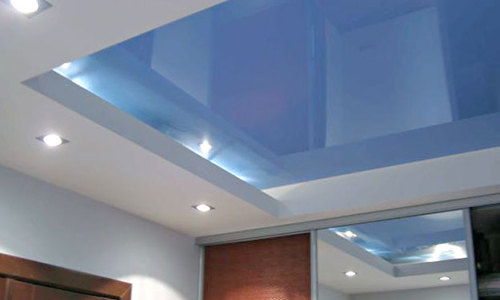
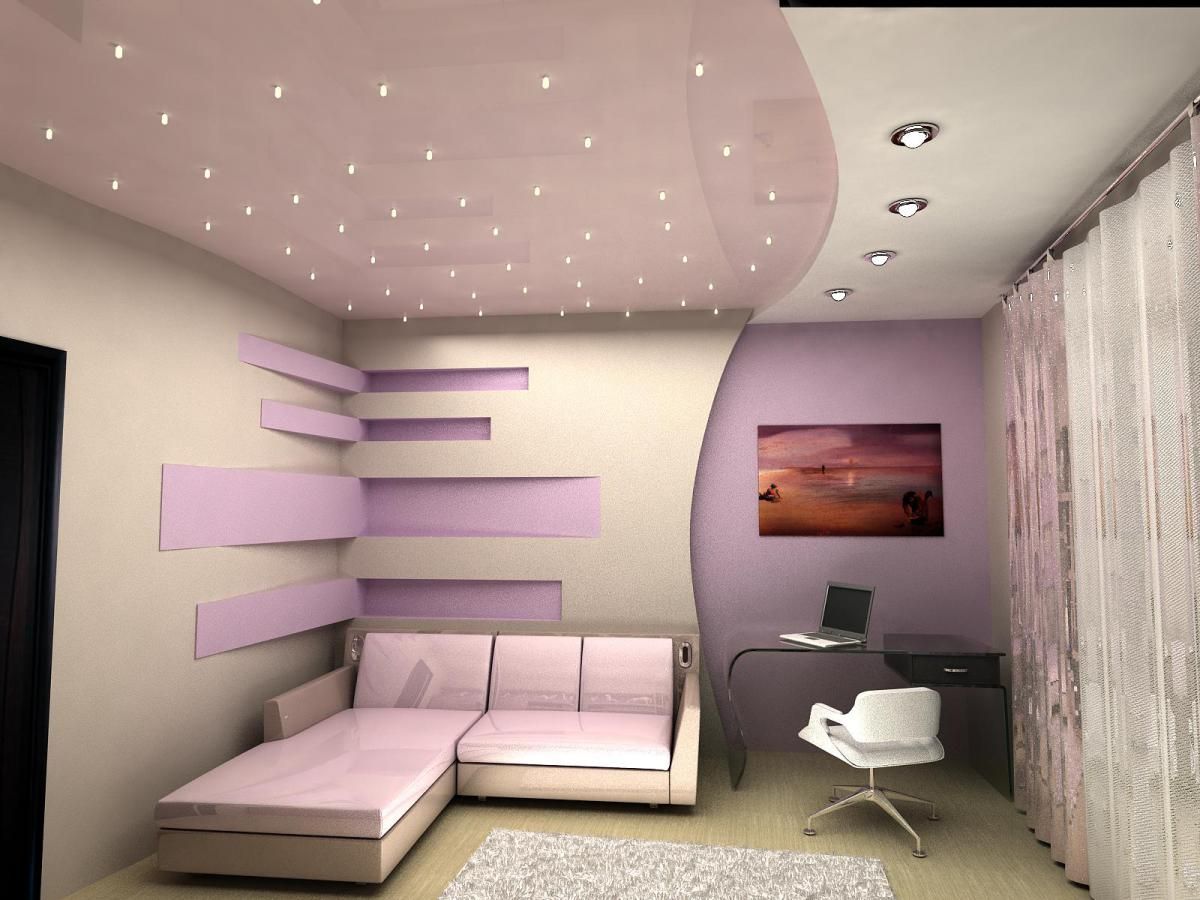
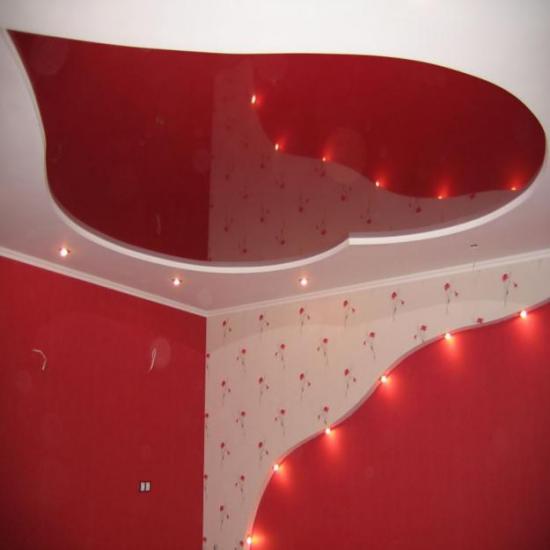
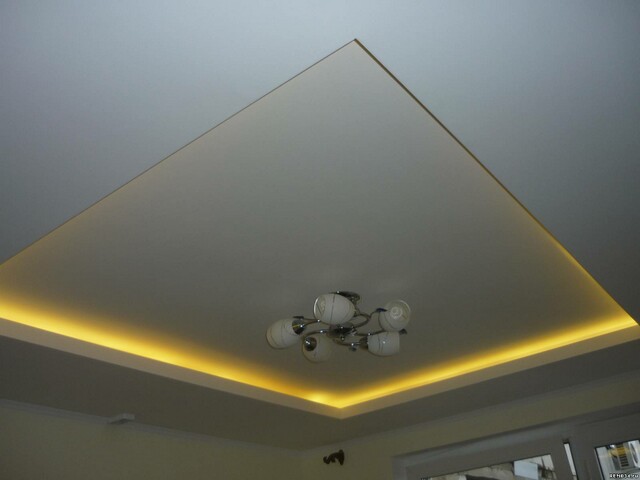
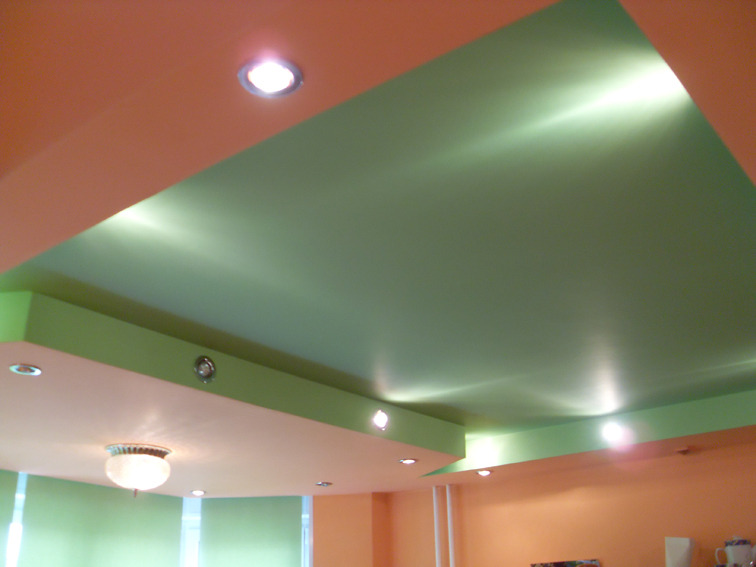

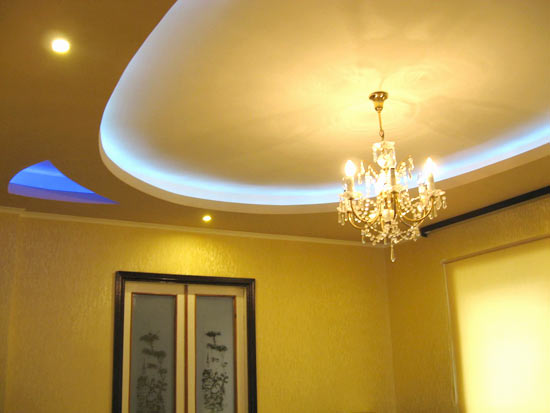
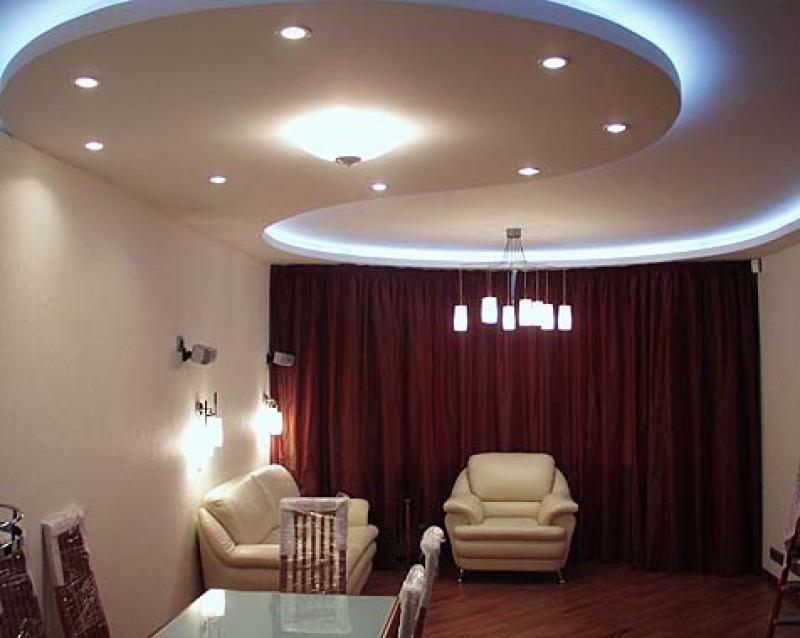
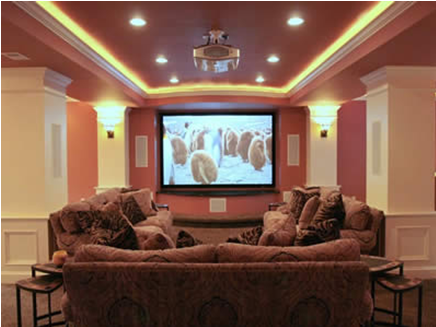
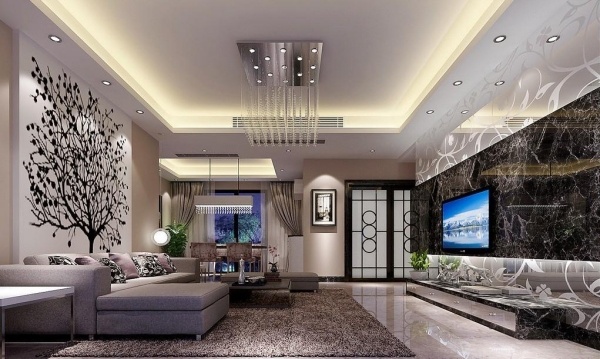
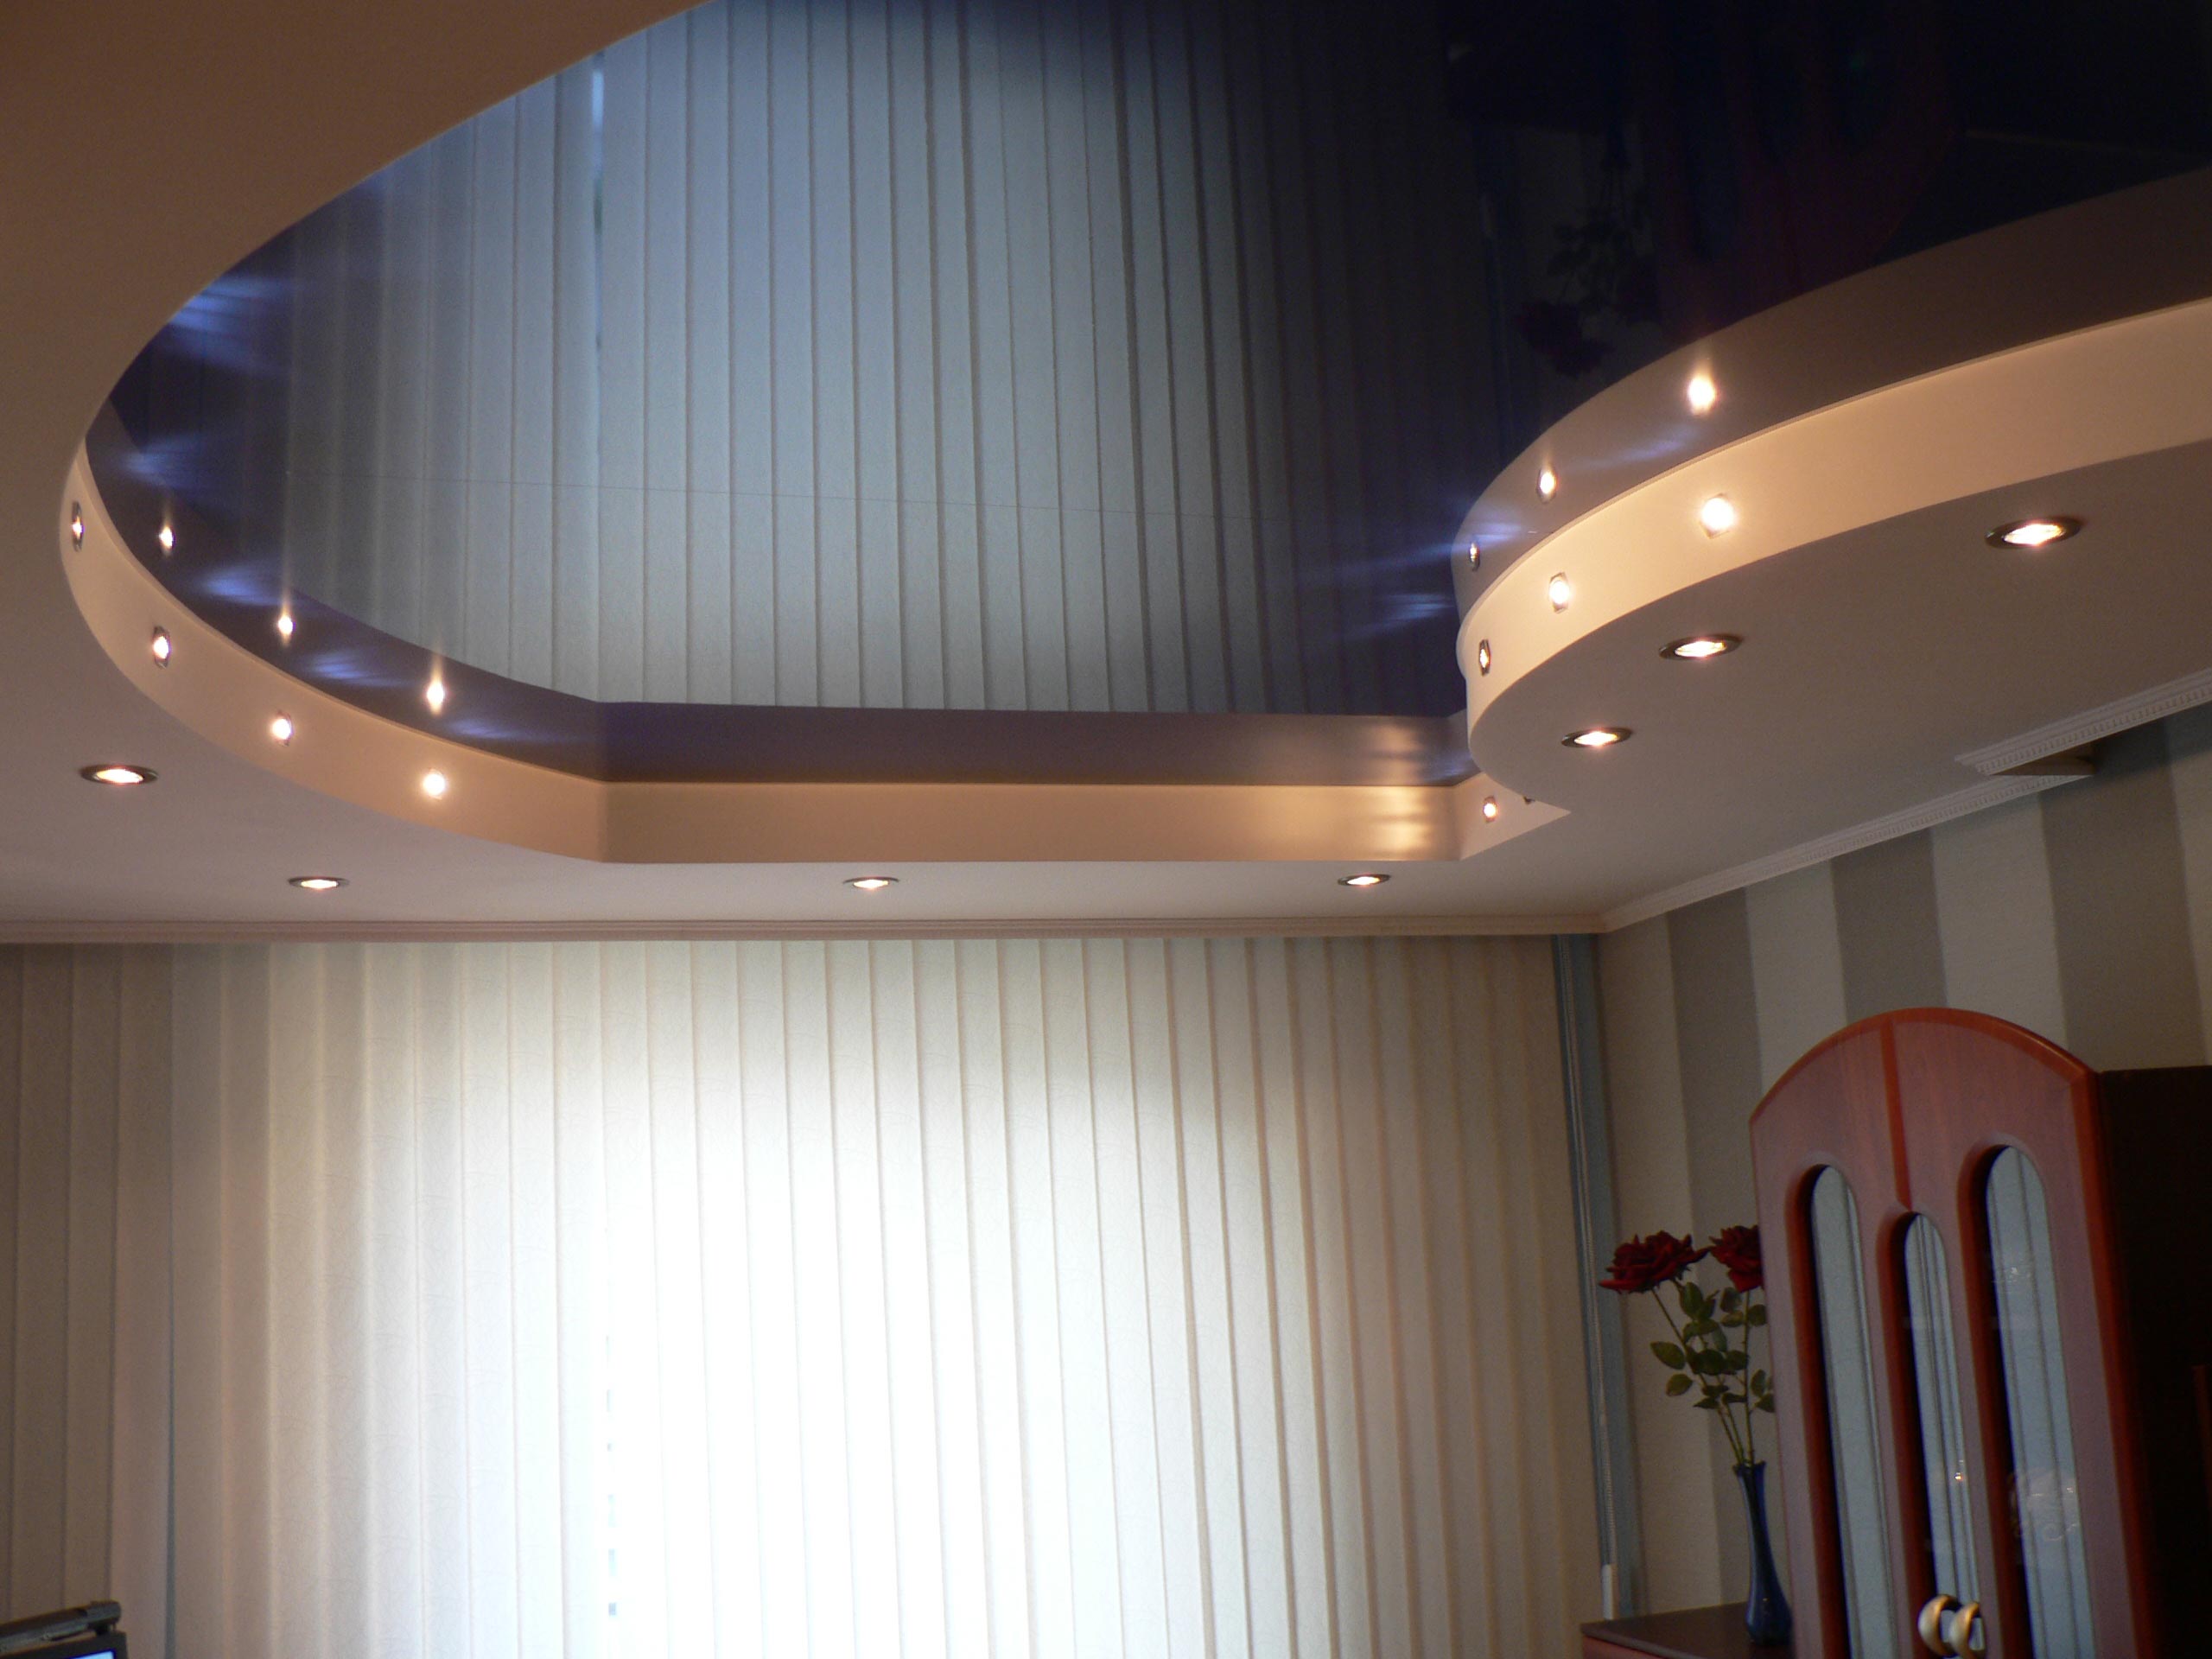
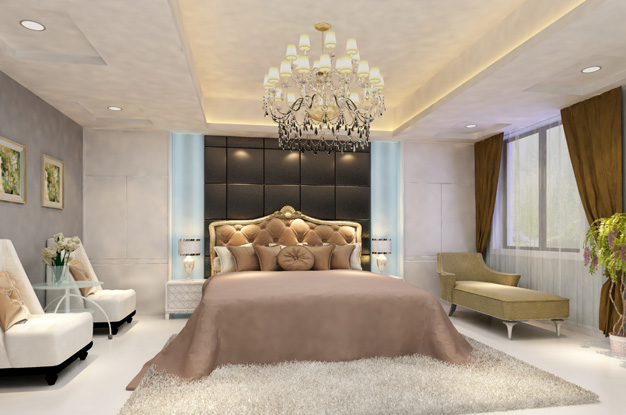
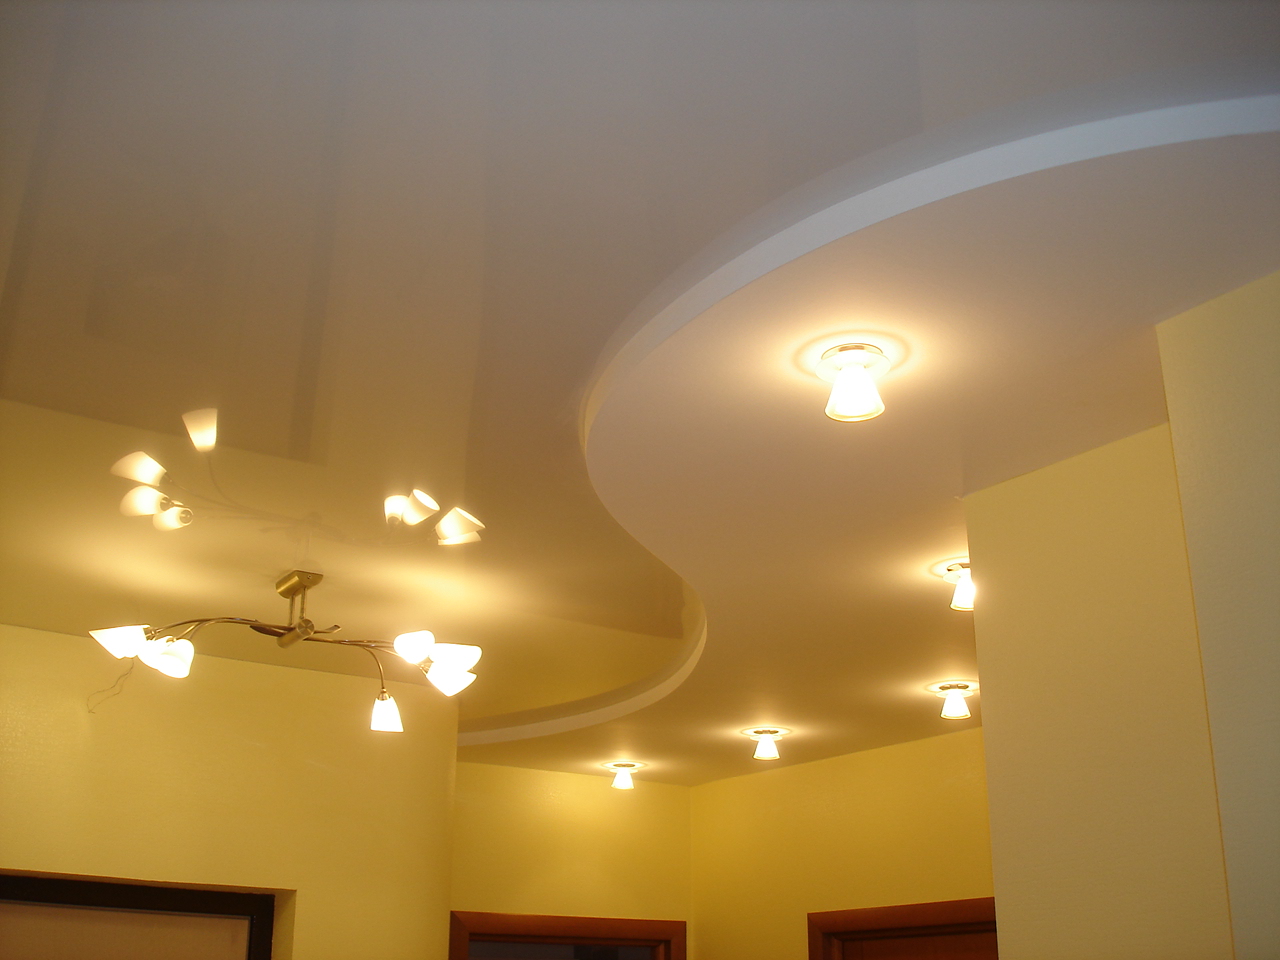

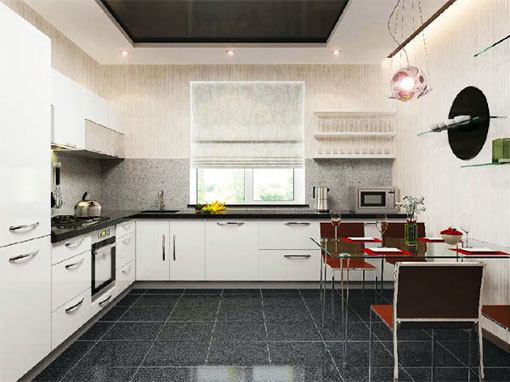
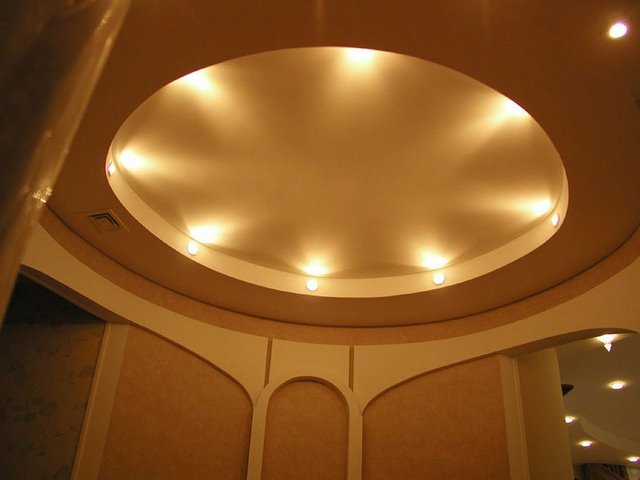

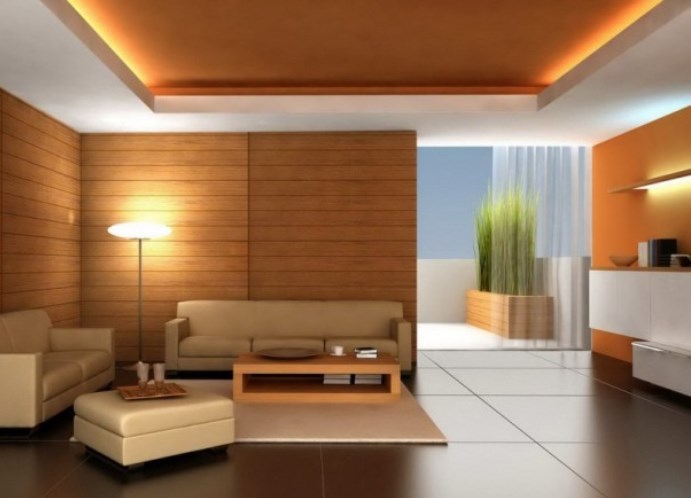
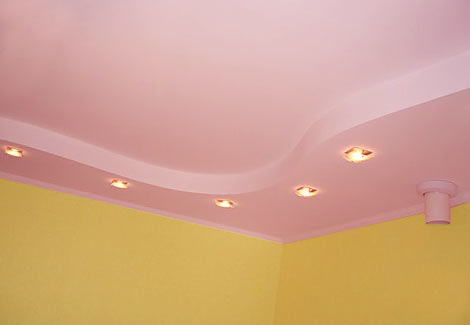
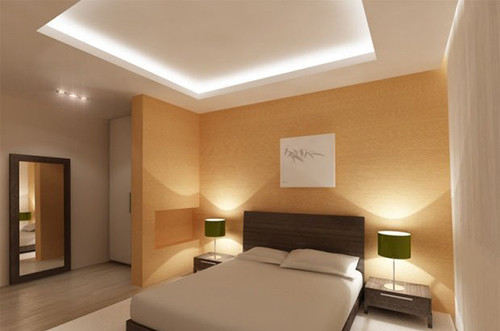
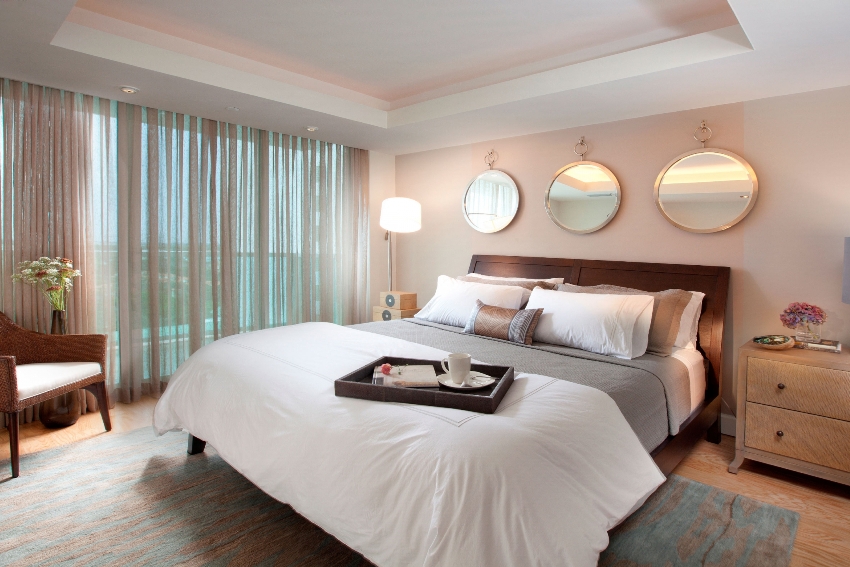
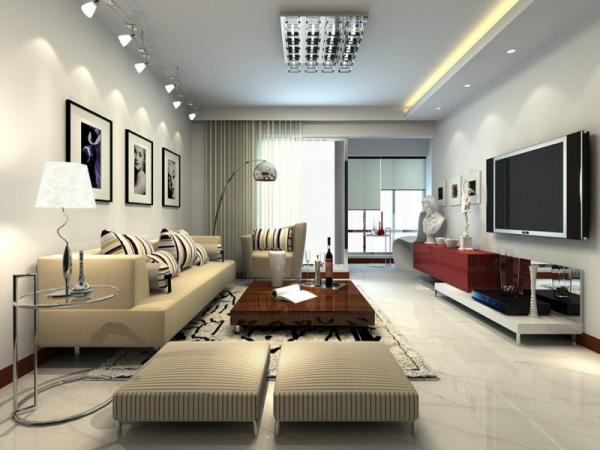
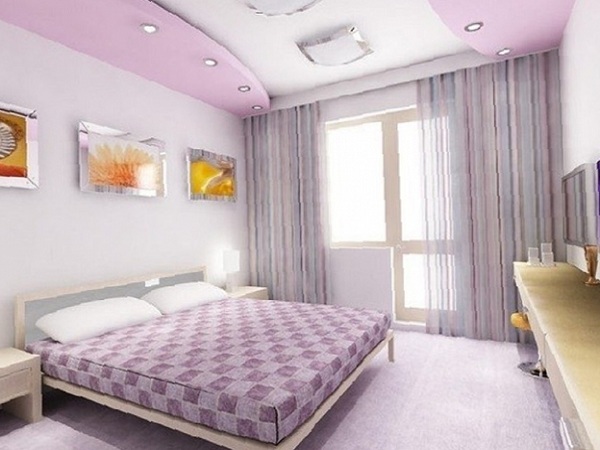
Photo gallery (50 photos)
One of the two-level ceiling schemes
Plasterboard ceiling projects
Hidden backlight
Combination of several types of lighting
Spotlights
The combination of drywall and stained glass
Combination of drywall and tensile structure
The combination of gypsum craton and decorative panels
Frame for drywall construction
Scheme of the ceiling structure for drywall
Drywall profiles
GKL fastening and joints of drywall sheets for ceiling sheathing
Proper placement of drywall sheets on the ceiling surface
The correct method of attaching drywall sheets
Scheme of the correct location of the spotlight and hidden lighting
All electrical wires must be hidden in the corrugation
![]()
Installation of electrical wiring