Installation of LED strip under the stretch ceiling. LED strip under a stretch ceiling - ample opportunities
Stretch ceiling lighting with LED strip
A lot of material on lighting has accumulated, I am gradually posting it. Today, the article will be not so much on LED lighting, but on design.
LED strips are used for decorative lighting of the ceiling and local lighting more and more, and it’s not for me to talk about it - there are a lot of advertising sites in RuNet. Mine is the lighting of a commercial glass showcase.
Recently I did decorative and intimate lighting of the stretch ceiling with LED strip, I really liked it - it takes your breath away! LED Strip Light, installed in the ceiling from the inside - today a fashionable and popular trend, and with this article I will try to present all the information on the topic.
Initially, we have a loggia with a perimeter of 10 meters, and a stretch ceiling is stretched onto the main ceiling (sorry for the tautological expression).
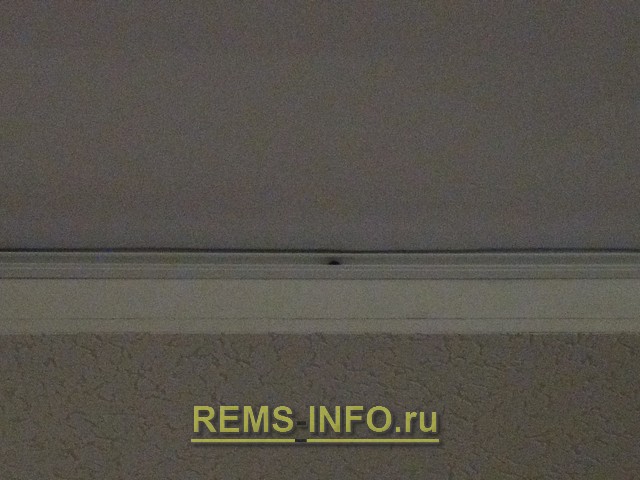
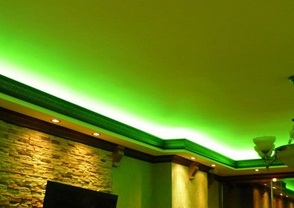
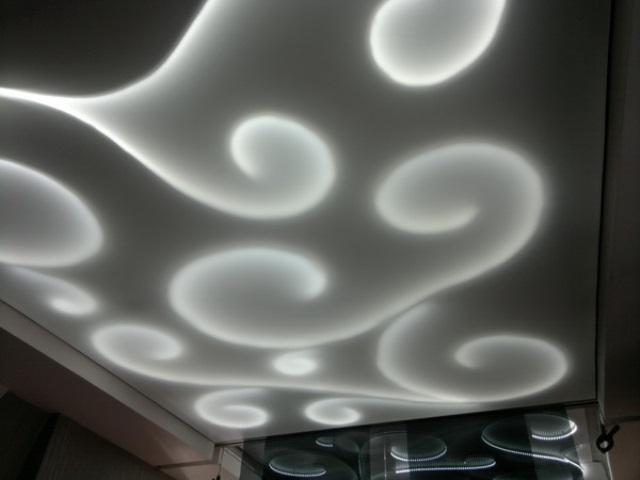
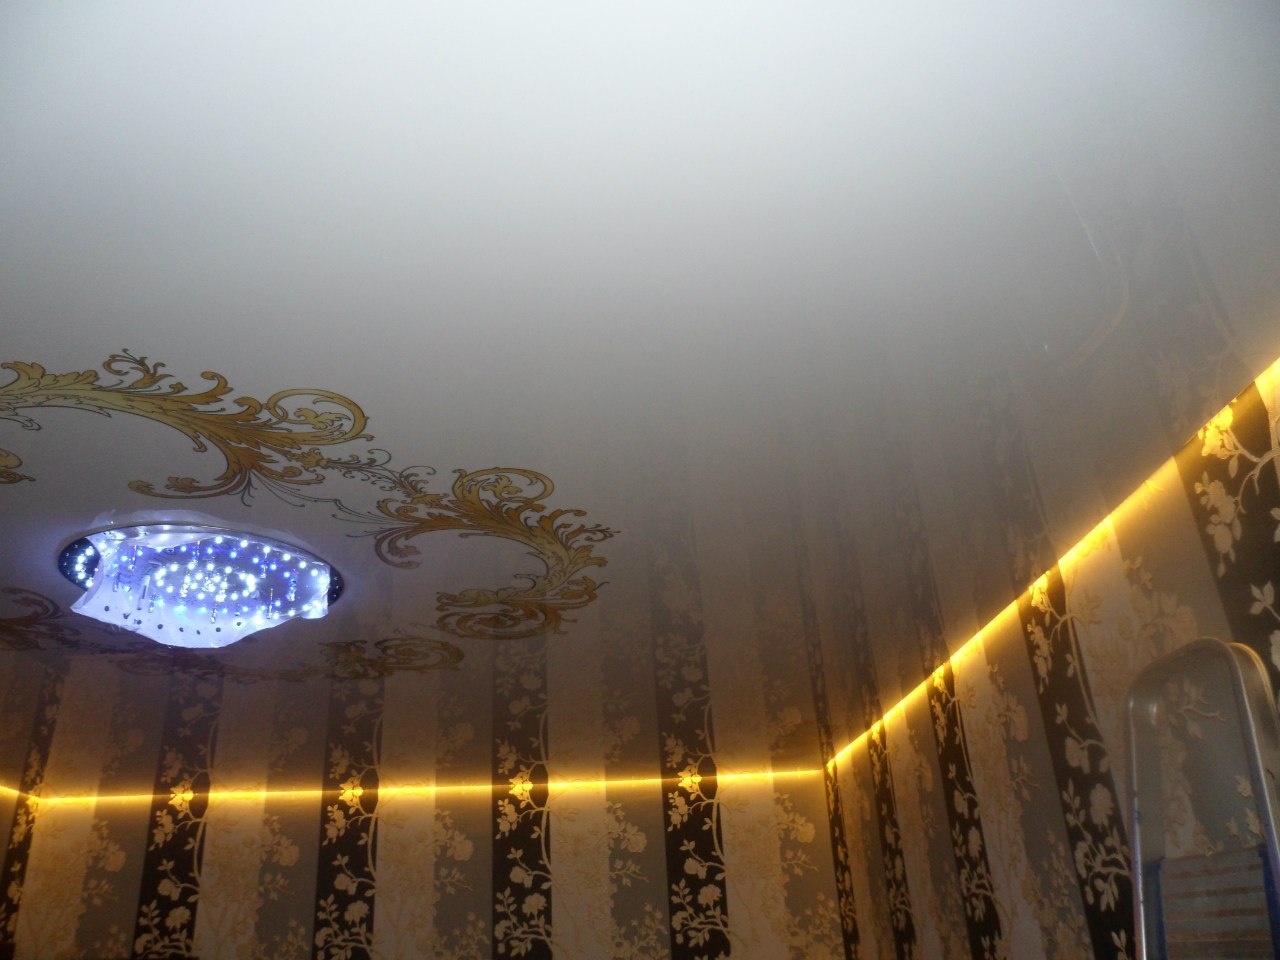
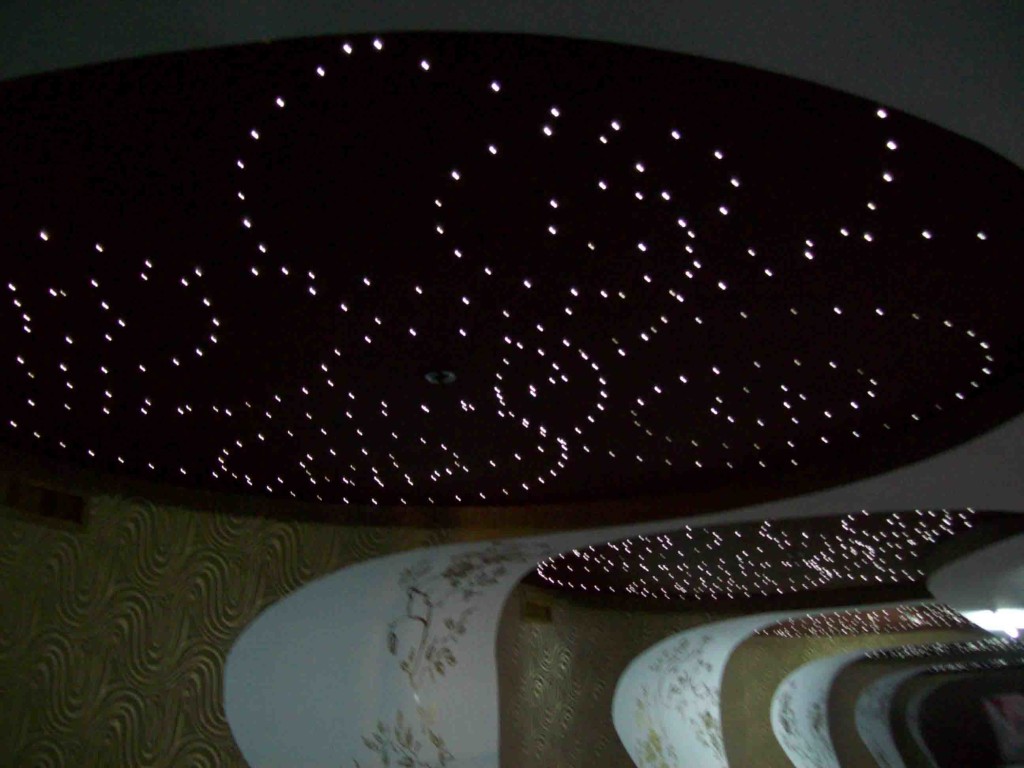
The designer's idea is simple and beautiful - what if the ceiling is made with a print of the starry sky, and a light source is installed in the ceiling - an LED strip? The black sections of the stretch ceiling (sky) do not shine through, and the stars and other luminaries begin to glow when the backlight is on. Exactly like the title photo.
Of course, it is difficult to call this lighting, here we are talking about decorative lighting. Such a ceiling will be good especially in the bedroom ...
There are such solutions on the Internet, but light guides and even crystals are increasingly used there. Yes, probably the stars are brighter and clearer, but the price ...
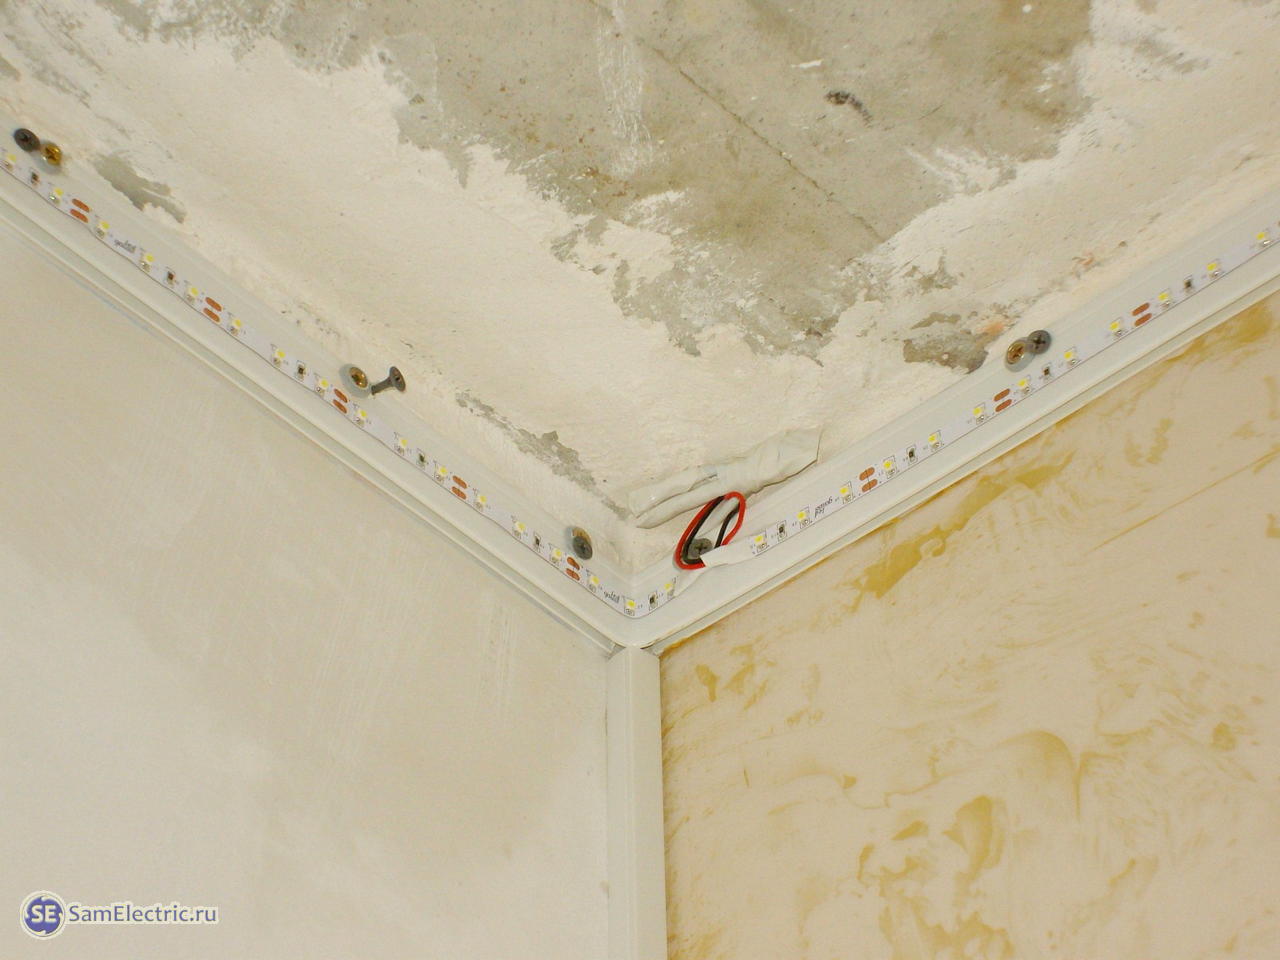
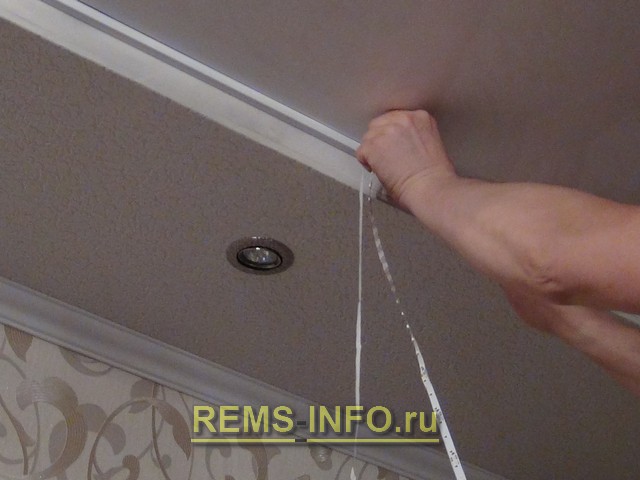
Installation of LED strip under a stretch ceiling
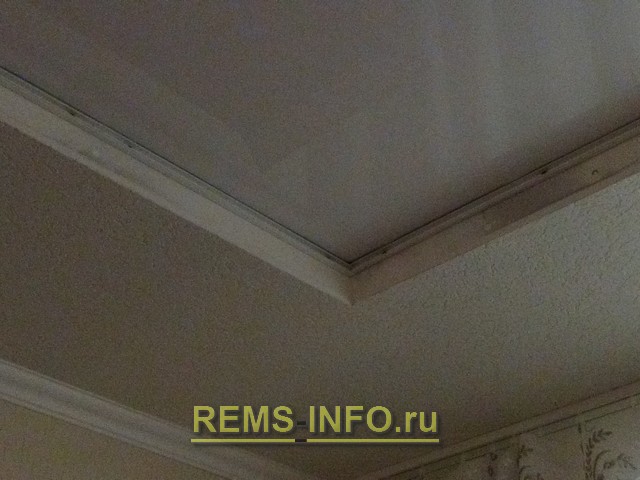
The implementation of the idea of lighting the ceiling with LED strip began with joining with ceiling and finishers. They pre-fixed their fasteners for the stretch ceiling.
So after that I'm straight to this fastener (it's plastic frame) glued two pieces of LED strip 5 meters each. It turned out just right, without soldering and without cutting.
It is worth noting that the tape may have a low-quality adhesive part, and the tape may peel off after a month. Therefore, before installation, it is necessary to degrease the surface, or better, use your own glue, such as Dragon for plastic, or liquid nails.
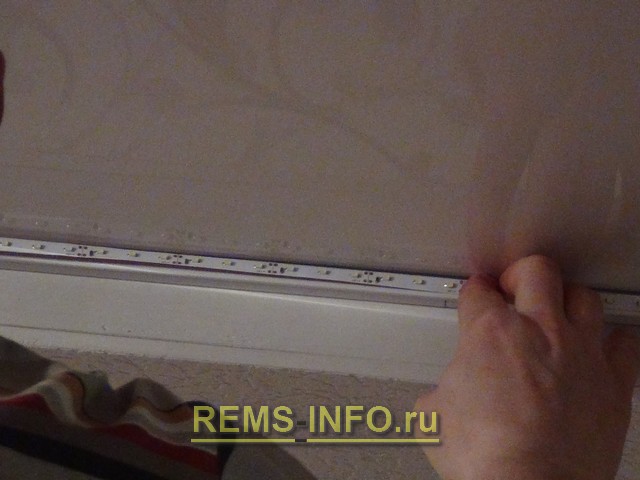
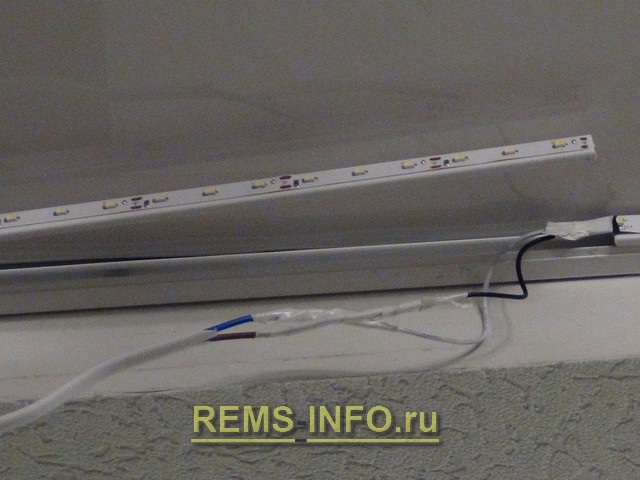
Tape connection
Down the cable channel goes the wire (more precisely, the cord) ShVVP-2x0.75 to the power supply. The connection of the wires must be reliable, otherwise it will be problematic to get this place later. It is clear that it is better to tighten the supply wire under the plaster, but then the idea came to the client (as is often the case during the repair process) after.
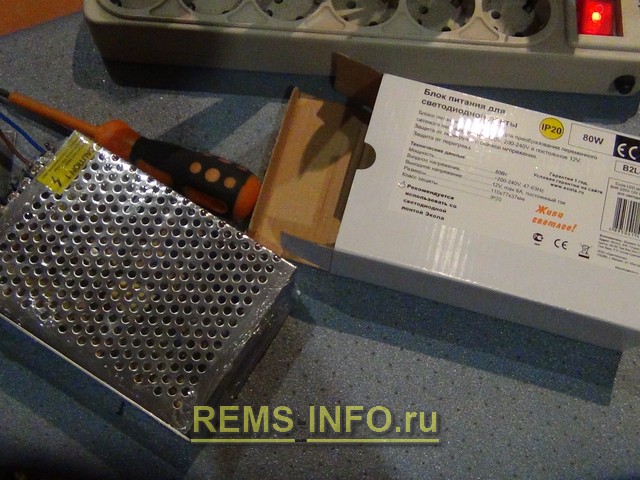
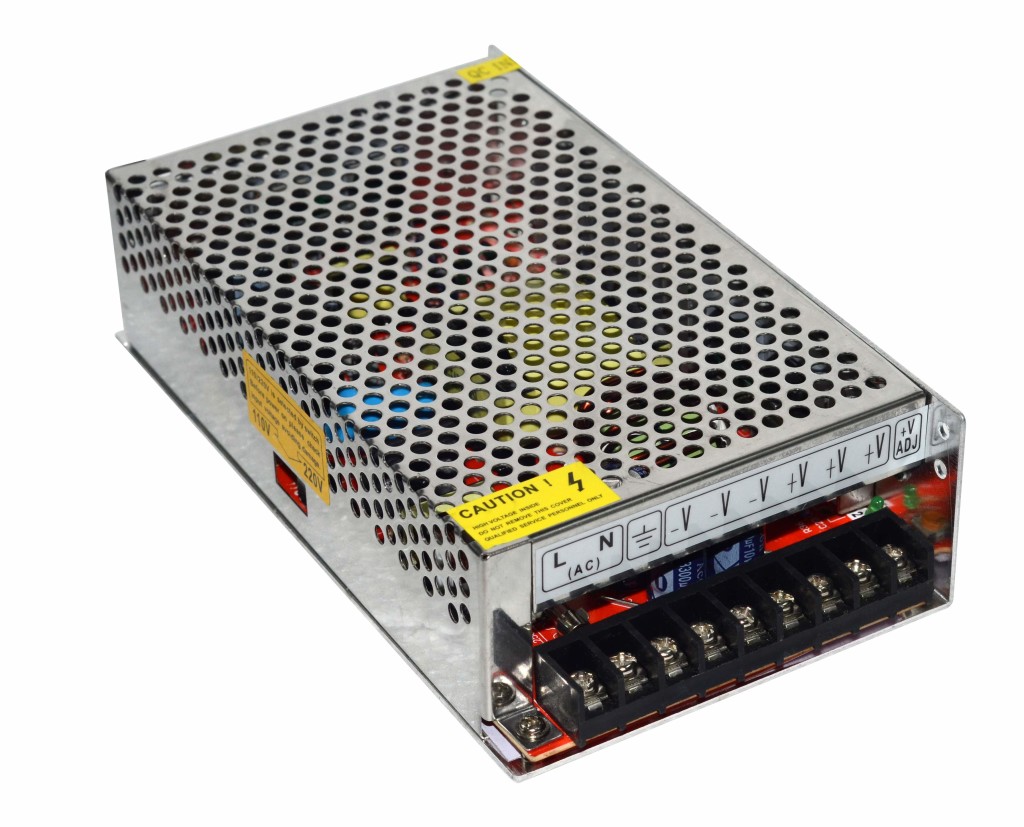
In this place, there will just be a cabinet on the entire wall, which will close both the cable channel and the power supply. Under no circumstances should the power supply unit be mounted on the ceiling, because this is a serviced unit, in other words, it can burn out and have to be changed. In this case, the power supply for the LED strip is attached to the wall above the baseboard.
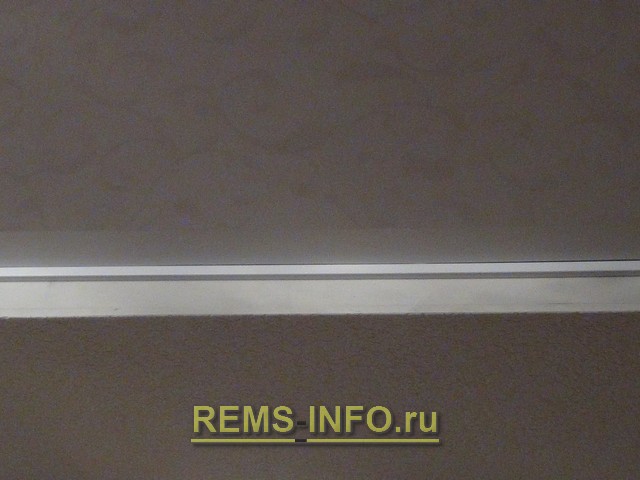
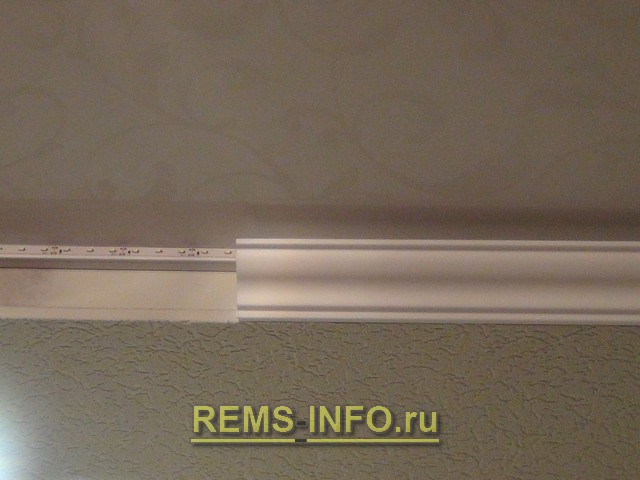
Here is the junction of the power wire and two tapes closer:
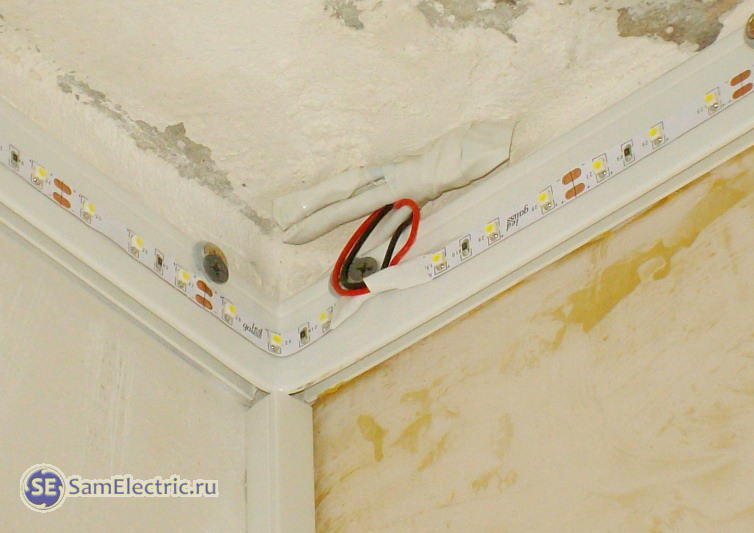
Installation of LED strip to illuminate the stretch ceiling - the junction.
The power supply is installed at the “above the baseboard” level, behind the cabinet, where no one can get it. This is also important for security reasons. More details - on SamElectrica in an article about connecting an LED strip, the link was above.
If the power supply has an output voltage adjustment, then in our case, to increase reliability, it is better to set the voltage at the PSU terminals to about 11.5 - 12.0 V. A couple of tenths of a volt will be lost on the wires.
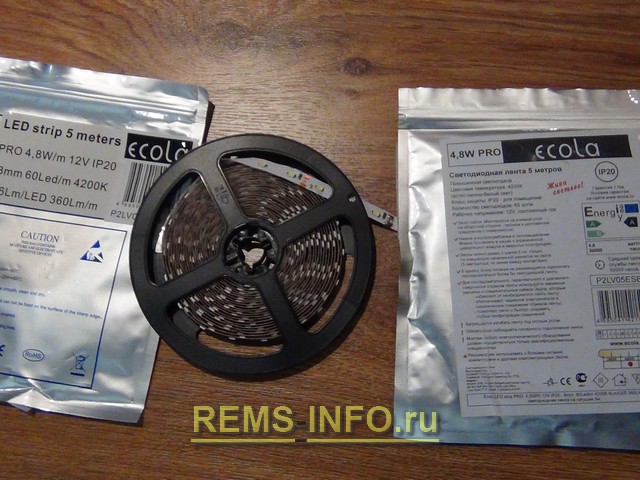
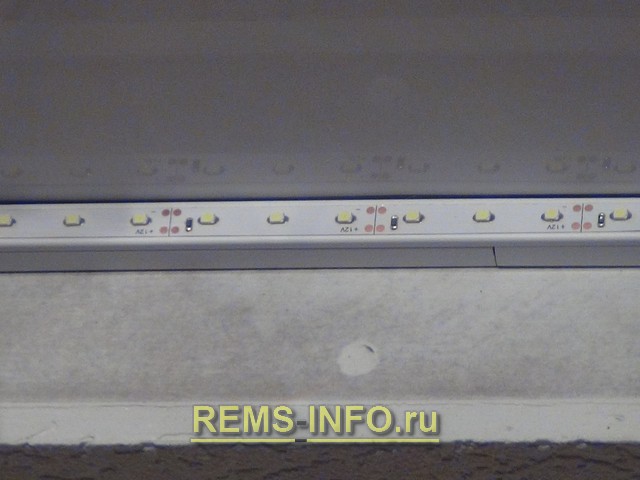
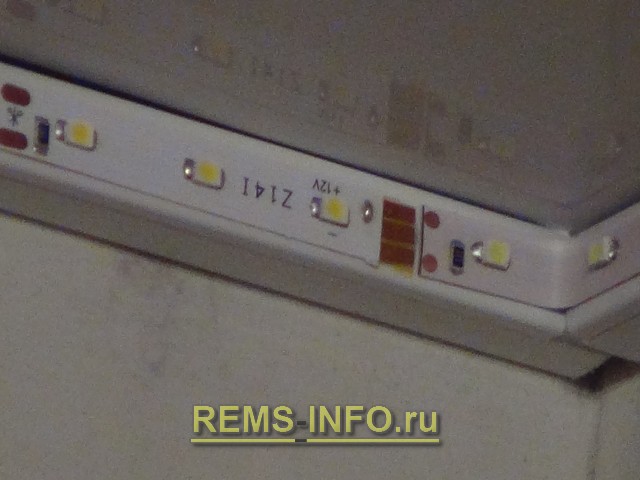
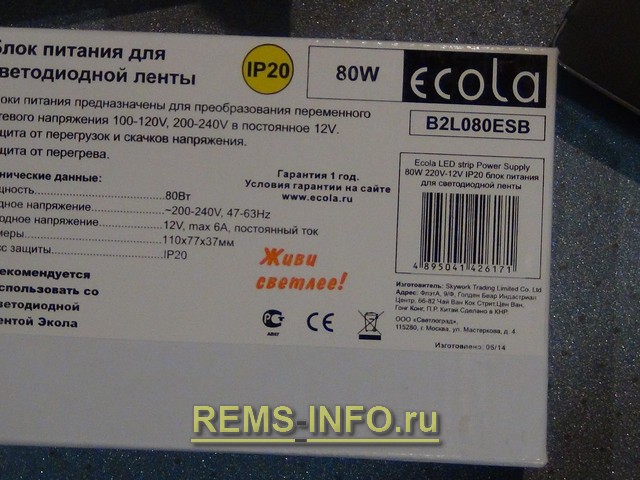
This project uses 60 W power supply, LED strip Gauss Led, 2 spools of 5 meters, power supply 12 V, 60 leds 3528 per meter, 4.8 watts per meter, not waterproof.
It is important - in order not to experience a feeling of deep disappointment in a year, you need to glue the tape with superglue to the base every meter or more often.
For a stretch ceiling, I do not recommend putting brighter (powerful) LED strips(for example, on 505 diodes) - overheating is possible. The temperature inside the ceiling depends not only on the power and number of LEDs, but also on the cooling and volume of the ceiling (ceiling space). If the gap between stretch ceiling and the floor slab is very small (1-2 cm), better tape do not use - overheating possible ...

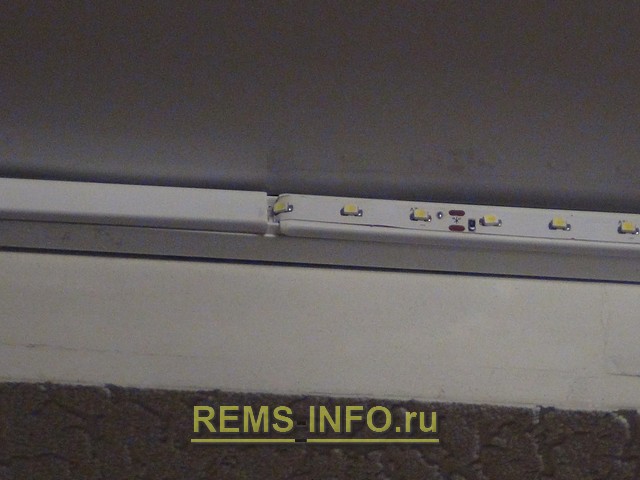
Power is supplied to the LED strip.
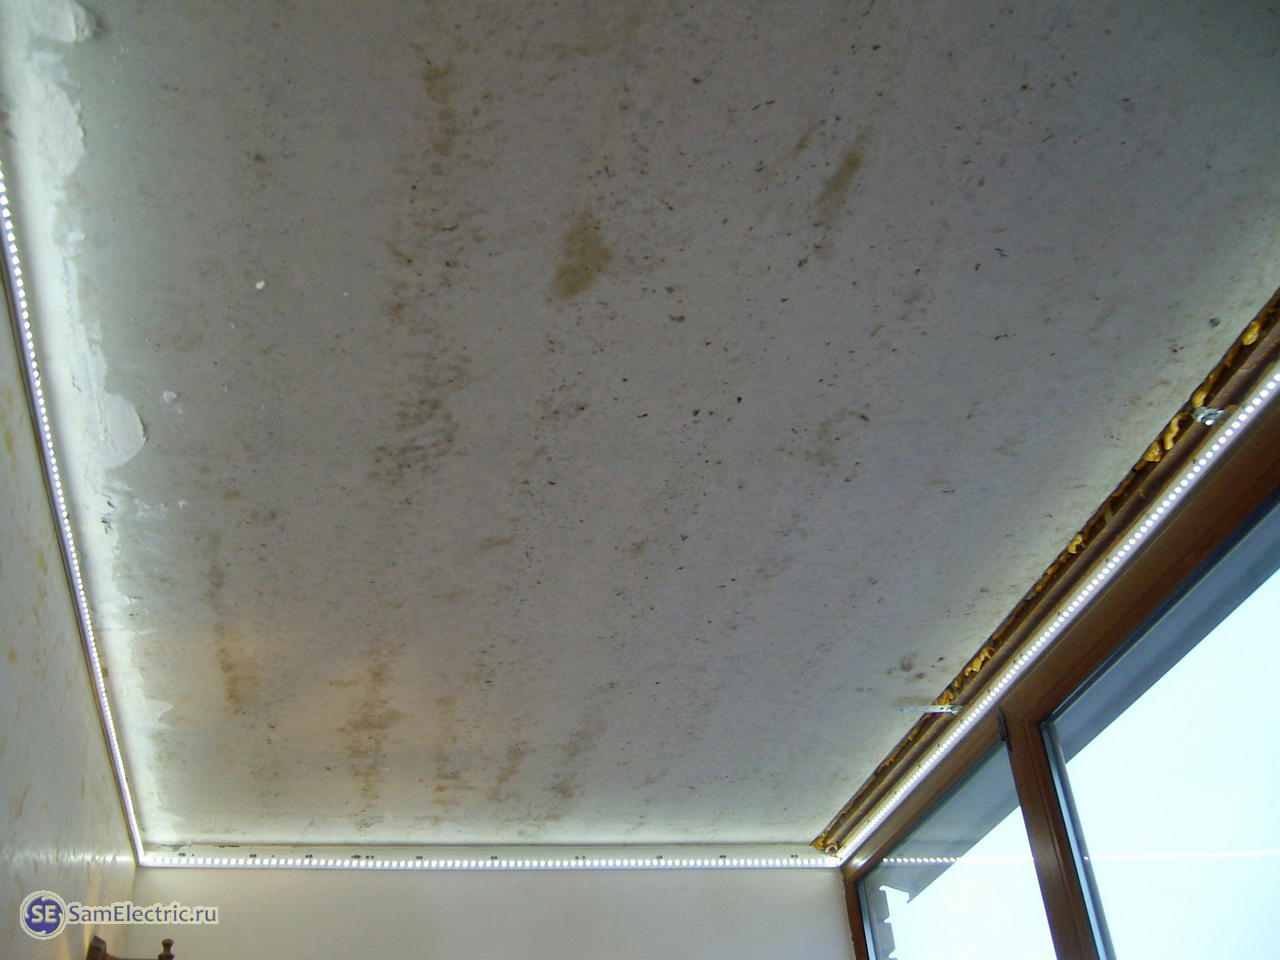
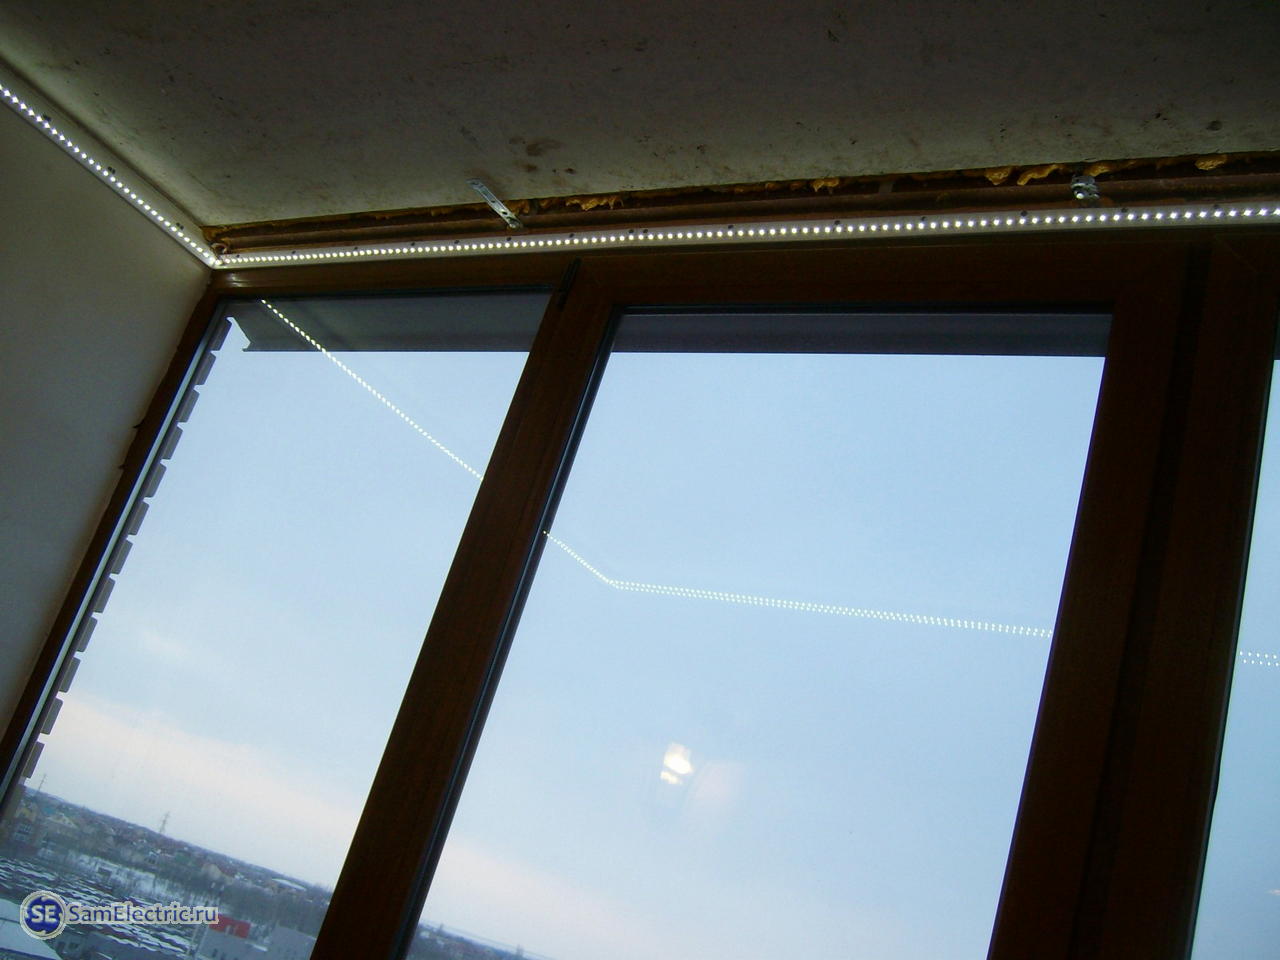
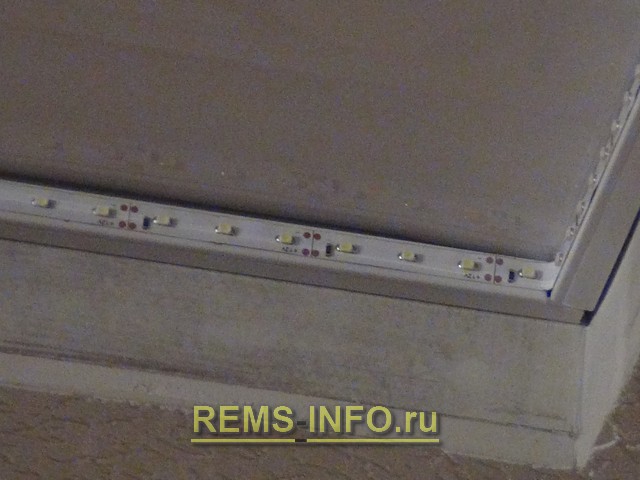
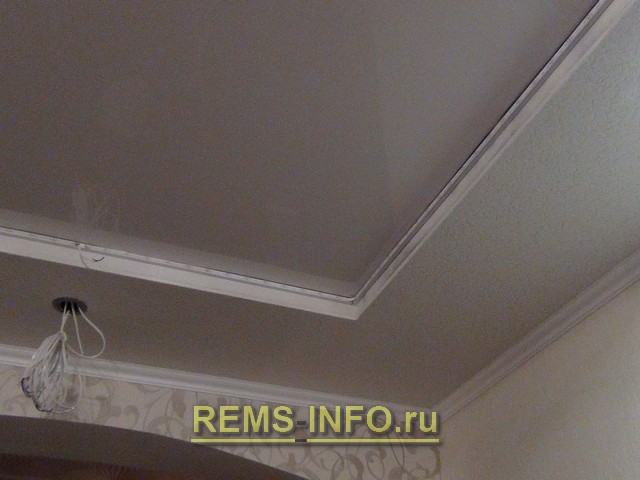
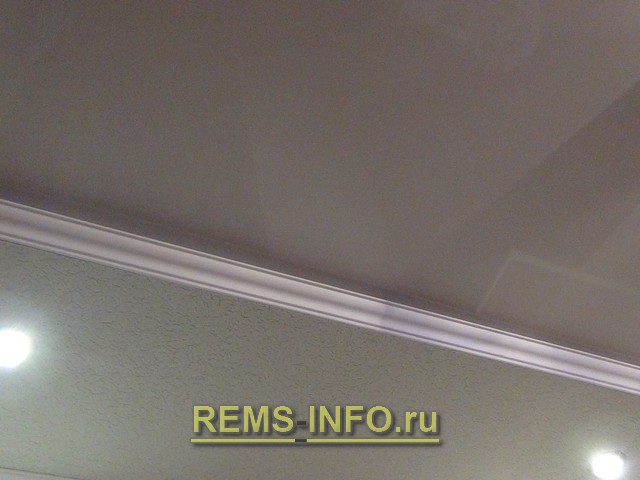
LED strip before installation of a stretch ceiling. (And this is Taganrog. (C) Our Russia)
That's all, and that's it, my work is finished.
Then the concrete slab was painted with white paint, and a stretch ceiling film was stretched a couple of days later.
Unfortunately, I didn’t manage to take the final photo, but I can assure you that the stars and other celestial bodies on the stretch ceiling glow quite naturally. And the black color remains bottomless black. There is a bit of flare around the edges, if you look closely. It would be better to lift the tape higher, to concrete slab, then the scattering will be ideal.
This concludes the article, if you have any questions about lighting the stretch ceiling with LED strip, ask them in the comments.
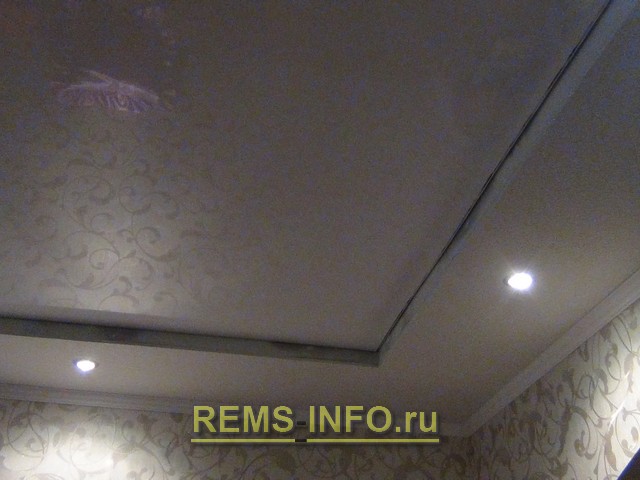
The article clearly shows an example of lighting a stretch ceiling with an LED strip installed around the perimeter closed box from drywall under the plinth. The proposed option is also feasible, if necessary, to illuminate the stretch ceiling made in one level (without a box around the perimeter) with the installation of an LED strip on the walls under the ceiling plinth.
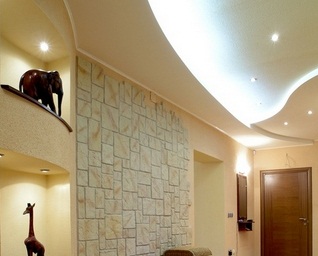
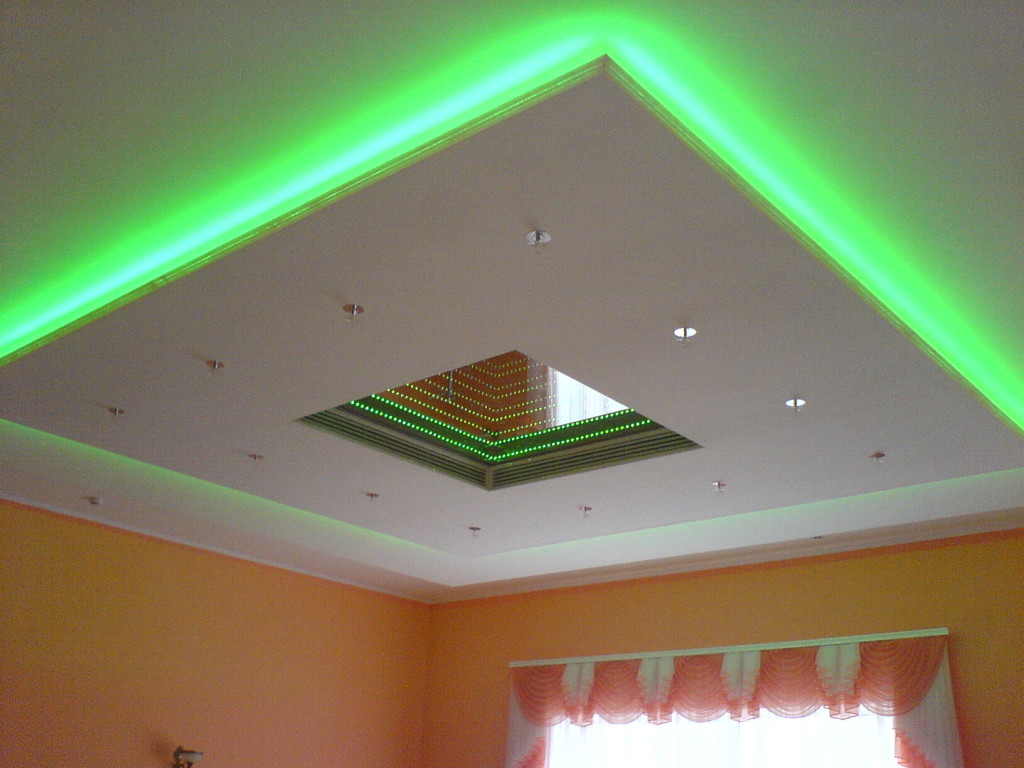
A combined stretch ceiling with lighting and a plasterboard box around the perimeter is most in demand in design solutions apartment renovation. Equally important in creating the interior of the room is the correct lighting design.
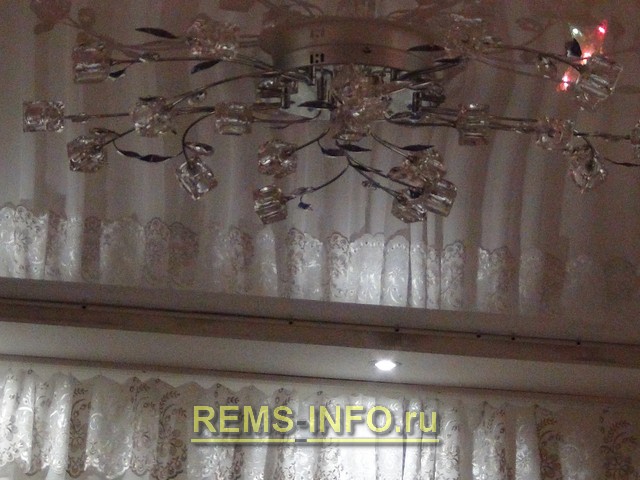
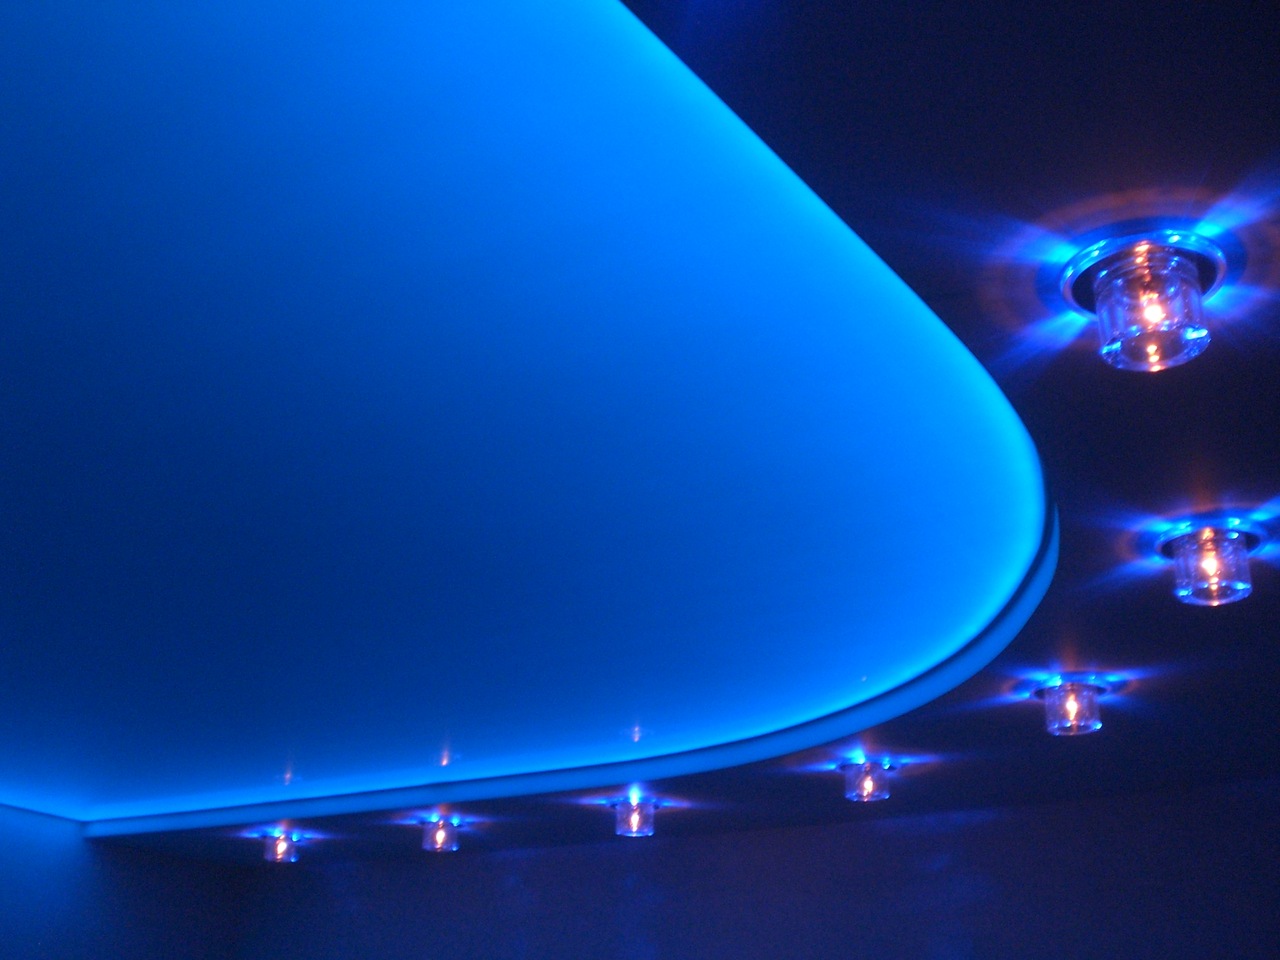
Ceiling lighting and decorative elements can be carried out using a chandelier, spotlights, LED strips (monochrome or multi-colored), etc., and also combine several options. It is no secret that the comfort and brightness of the appearance of the room directly depends on the degree of illumination. The originality of the visual effect of the scattered beam of light is achieved thanks to LED sources.
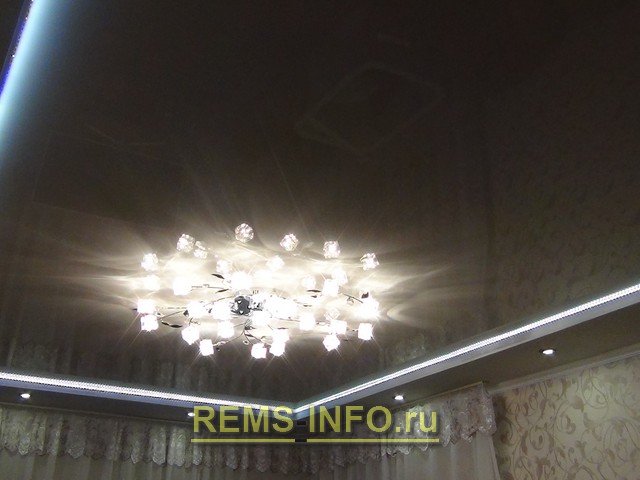
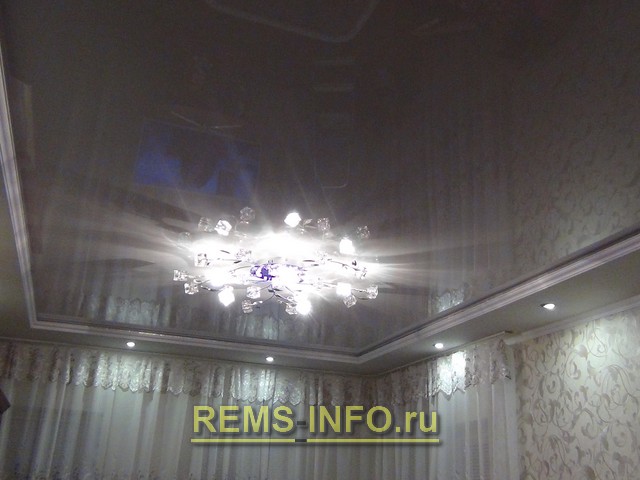
Photo of stretch ceiling lighting spotlights, chandelier, led strip.
LED strip - a thin elastic strip with paths that conduct electricity and LEDs soldered to them. Its length varies from 5 cm to infinity, due to the possibility of separation or adhesion of separate segments. How independent element lighting, modern, more powerful and bright contour lighting can be used.
Preparatory measures for mounting LED backlight
First, determine the length of the LED strip by measuring the total perimeter of the cornice to which it will be attached. Most often, LED strips are already packaged in 5 m coils. This is due to the fact that with its longer length, the diodes located at the end of the tape will emit weaker light than at the beginning.
LED strip used to illuminate the ceiling.
Method of fixing the diode tape
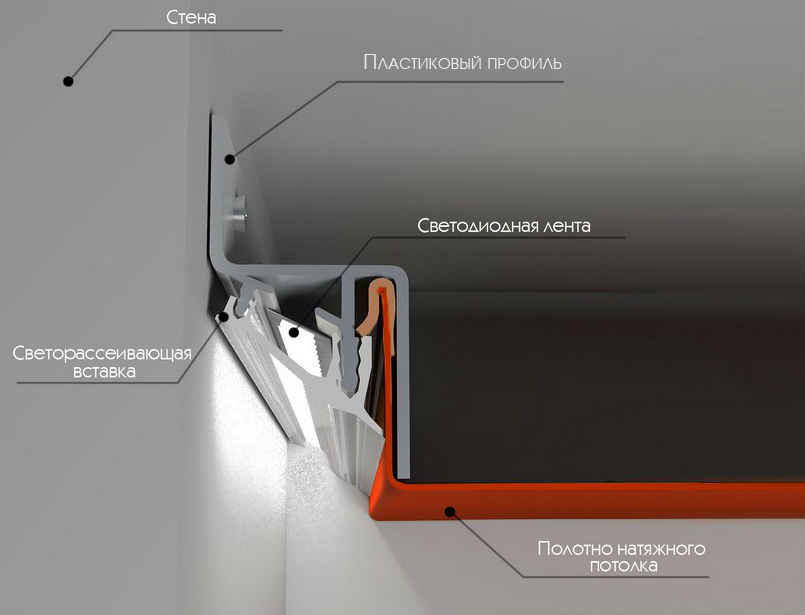
Due to the sticky self-adhesive base, the light strip is usually attached to a drywall cornice.
Cornice (box) of drywall - the second level.
But since during installation it may be necessary to dismantle the tape, due to various reasons, then I recommend using a regular cable channel (for example, 6 * 10 or 10 * 10 mm, the wire is also conveniently removed into it). In this case, the LED strip can be pasted again and you won't have to torture yourself with special measures to prepare the surface of the cornice for its installation!

Light installation installation
Illumination lighting is installed on the stretch ceiling cornice, along the perimeter of which a line is “beaten off” with a chocline (paint cord). A cable channel will be attached along its upper border.
After attaching the mounting box, close it with a lid and glue the LED strip on top, pressing lightly for better adhesion.
In the corners, in order not to damage the ice strip itself, a smooth bend is made. If necessary, the tape can be cut in specially indicated places on it.
Before soldering, the contact areas are cleaned and tinned using a soldering iron with a power of not more than 25 watts. To them, observing the polarity, the wire is soldered. Connection points must be tinned, insulated and put into an electrical box.
Connecting a secondary power supply (LED strip power supply)
After the installation of the light strip is completed, we connect the power source observing the polarity. The power of the block is calculated by the formula 1 diode x 0.08 W + a margin of 20-25% of the total power.
When the market was "illuminated" by LEDs, manufacturers rapidly picked up the idea to develop lighting devices based on them. Incandescent lamps, mercury lamps and gas-discharge lamps have outlived their time, giving way to super-bright LEDs, which are used not only in the design solutions of apartments, but also in streets, shop windows, and also in some retail areas.
The excitement around LED devices can be explained not only by the practical benefits of replacing conventional lamps, but also by a number of characteristics and features, which allowed them to become leaders among lighting devices. The original location of the LED strip on the stretch ceiling can create a harmonious mood in the room and an atmosphere of comfort.
Imagine how individual you can make the design of any corner of the apartment by choosing an LED strip? Soft or ultra-bright light gives the impression that the ceiling glows and shimmers, but does not blind you, and objects illuminated by LEDs do not cast shadows. Let's figure out together what advantages it has and how to achieve comfort and originality of the interior.
Why LED strip?
- this is lightness and airiness, so they require a special approach. By choosing dynamic lighting in the form of LED strips, you can achieve a clean and clear light supply in any room, the main thing here is not to overdo it. It is very important to find a balance between smoothness and eye-catching light.
Note! The living room is not a surgical department, so in some functional areas you can make the accent a little brighter, and in some it is muted and softer, do not overdo it!
Implementation led lighting has some features:
- Optimal lighting. The angle of illumination of the LEDs is up to 140 0, which allows you to qualitatively illuminate a large amount of elements and get clear light without reflectors;
- Profitability. With its small size, the LED strip allows not only to successfully replace an ordinary lamp in a stretch ceiling, but also to provide the same amount of light, while consuming several times less power;
- Long service life. Did you know that an LED strip can work up to 100,000 hours of failure? In years, this is 10 years of work, despite the fact that the backlight will actively function for about 6 hours a day;
- Fast payback period. Confused about the price of LED strips? Don't worry - traditional lighting "eats" a lot of electricity, and LEDs can pay for themselves in a year and a half. Calculate how much you will save over the entire service life on electricity;
- uniform light. Silent LED strip allows you to light up the room at full brightness with a wave of your hand, which is an advantage in comparison with the "housekeepers".
If you decide to light up a room with LEDs on a stretch ceiling, you must understand that you need to create lighting for comfortable well-being. LED strip often acts as a decorative solution for a stretch ceiling. Sometimes it is required to place accents on the objects of the room, visually “push apart” small room or divided into functional areas.
Differences of LED strips
Want to save space and not "grab" a piece of the ceiling? Does your room have small dimensions, or maybe you want to highlight furniture or an arch in the wall? Select the purpose and type of LED strip. If you are attracted to brightness and non-typicalness, you can use several multi-colored LED strips. For lovers of the classics, one-color white light is suitable.
What is the difference between LED strips?
- LED strips differ in the type of diode. For example, the marking of the SMD 3528 diode means the following: the letters first characterize the type of installation, and the numbers next - the dimensions of the diode. For example, there are SMD 5050 diodes that come in multi-color, which cannot be said about SMD 3528 - this type of diode is developed only in white.
Did you know? The sum of red, blue and green colors when merged gives pure White color. The cost of SMD 5050 tapes is much higher in price, since they contain three crystals of green, blue and red colors. The SMD 3528 diode tape uses a blue crystal that burns out over time;
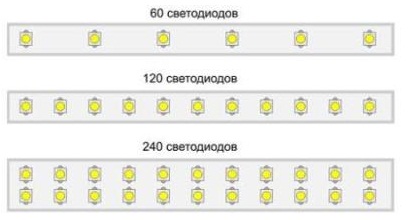
- Diode density. The density of the arrangement of the diodes determines how brightly the LED strip will shine. In stores, 30, 60, 120 diode densities per 1 m are especially common. Densities of 30 and 60 diodes are well suited for contour lighting, and for the “illumination” effect, you can use a tape with a density of 120 diodes;
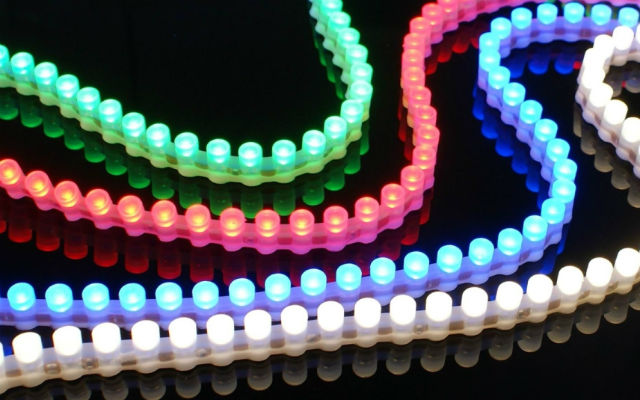
- Colors. A stretch ceiling in a duet with an LED strip can create a completely fabulous atmosphere, depending on your preferences. Single color ribbon will satisfy the exacting taste of strict owners, and multi-color RGB ribbon will illuminate your room depending on the mood;
- Security. Some types of LED strips are protected from moisture, but, nevertheless, their price is not much different from analogues that are not protected from water. It makes sense to buy a waterproof tape if you are worried that the neighbors on the floor above can give you an unexpected "water surprise".
Installation of LED strip on a stretch ceiling
In fact, mounting LED strips is not difficult. Let's try to figure out what "salt" is? A person who is even minimally versed in the basics of connecting devices and banal knowledge from a physics course from school will not cause difficulties. Shall we start?
- Let's pick required amount tapes and power supply. It is calculated as follows: tape footage x per 1 m. To illuminate areas over 10 meters, the tape should be connected in parallel;
- It is more advisable to use several power supplies if the total power consumption is more than 40 watts. You will need a large power supply, which has a large weight and size, therefore, it is not easy to hide it. It is better to limit yourself to two power supplies;
- You will also need the help of an electrician if you do not know what "signal amplification" is;
- The tape is easily connected to the power supply, as it is marked - even a girl can handle it;
- The tape itself is protected by a film on the base, which should be removed and stuck to the desired surface.
![]()
Please note that during the assembly of the stretch ceiling, you will have to hide all the wiring in the inter-ceiling space. It will be impossible to conduct wiring in the ceiling after collecting the box, so take care of lighting the ceiling in advance.
LED lights- this is a great innovation for those who are tired of the stereotypical daylight and cold light, but still want something new. Many do not want to change what has been established over the years, but, in any case, the success of LEDs is growing every year and wise owners have long afforded this stylish and compact solution.
The LED strip under the stretch ceiling is not only beautiful and economical, but also functional. Translucent structure stretch fabric allows you to have LED lights right under the ceiling. They create soft lighting with a decorative effect.
There are a number of ways to install an LED strip under a stretch ceiling, namely under the lower level multi-level ceiling from GKL:
- in an open niche;
- in a closed niche;
- in skirting boards.
They differ from each other in the way the lamps are located. This method of lighting rooms has a fairly wide range of possibilities. For example, the creation of beautiful color compositions is due to the richness of the choice of colors.
The following are other advantages that diode lighting elements have:
- devices are not able to heat up to high temperatures;
- lamps are durable and safe;
- light sources based on diodes are resistant to mechanical damage;
- low power consumption unlike other light sources.
The tape itself after installation becomes invisible from below. Only the light from it is noticeable, which is directed from an open or closed niche on the stretch ceiling of the upper level. This solution is more suitable for matte canvases and not for glossy ones.
Gloss is able to reflect the lamps themselves, as well as power supplies and controls, and this does not add beauty ceiling structure.
The active use of LEDs in outdoor advertising, in the design of entertainment halls and retail space has already become familiar. This source is safe, since diode lamps cannot heat up to temperatures that are dangerous for vinyl stretch fabrics.
LED lighting and its characteristics
LED strips differ in their technical specifications depending on purpose. Diodes are usually located on the ceiling in a certain amount. The density of standard decorative tapes for contour lighting can be 30 and 60 elements per 1 m. Full lighting of the room is provided using tapes with a LED density of 120 or 240 pcs. at 1 m.
LED ceiling lights are economical and durable. Such an element has a service life of about 100 thousand hours. If you use the LED lighting of the stretch ceiling every day for 12 hours, then this source will last for 22 years. At the same time, the installation of LED strip in a stretch ceiling is beneficial for the following reasons:
- quick payback of electricity costs;
- selection of the optimal lighting angle;
- spectral purity when choosing a color.
The low energy consumption of LED elements quickly enough allows you to recoup all the costs of electricity. Uniform scattering of light by these sources occurs under optimal angle lighting, which is up to 140 °. The LED gives exactly the color that was chosen to illuminate the stretch ceiling.
The room fills up with soft light, which does not cast shadows. If you take a photo in such a room, then expensive lighting equipment is not required. Professional photographers attach great importance to it.
Thanks to its functions, LED equipment allows you to create bright elegant ceilings that shine different colors. For creating classic design suitable in the room white lighting. Can be equipped with LED strip only separate sections ceiling or adjust the lighting of the entire perimeter. The LED strip in the stretch ceiling can be used both as the main source of lighting and as an additional one.
There are models of LED strips that are protected from moisture. In terms of their cost, they do not differ too much from conventional diodes, and the benefits from their use are obvious. If flooding occurs from above, then such a light source will not fail, so it will not have to be replaced with a new one.
The choice of LEDs for stretch ceiling
The brightness of the LED strip may be uneven around the entire perimeter of the room. Such a light source in the room makes it more comfortable. For different parts rooms can be provided with a tape having a different density of diodes. The brightness of the light can be adjusted using a dimmer.
When choosing diodes, you should pay attention to their marking. SMD elements 5050 give white light High Quality. They are quite expensive because they include 3 colors. The SMD 3528 brand is produced on the basis of a diode that has a blue glow, which should fade during operation.
After installing the stretch fabric, in most cases it is impossible or very difficult to dismantle it so as not to damage the vinyl film.
The decorative strip for the stretch ceiling must be installed before the canvas is mounted.
Harpoon-strengthened ceilings can be removed and then re-arranged.
The creation of lighting for stretch ceilings is associated with the use of LEDs that have a long service life. Diode manufacturers guarantee continuous operation of the equipment for about 10 years. Since during this period something can happen to the ceiling, the installation of LEDs under a false or stretch ceiling is quite reliable.
If there are concerns about the durability of the LED elements inside the ceiling structure, it is possible to place them around the perimeter. To do this, you need to hide the lighting system in a drywall box. In some cases, the stretch ceiling and the LED strip are covered with a special plinth after installation.
Scheme of installation of a soaring stretch ceiling with LED backlight
When choosing a light source of one color or another, it should be borne in mind that the unchanged picture of the stretch fabric can be boring. Such lighting is often preferred by young people who create color music for discos and parties at home.
This type of lamp remains unchanged for children's rooms. Many babies are afraid to go to bed without the lights on, and this is very expensive. The pattern of LED strips in the children's room under the ceiling may resemble a starry sky map or a favorite character from a fairy tale. This will not only save energy, but also soothe the child.
Mounting options for stretch ceilings with lighting
The best way to illuminate is to illuminate the entire perimeter of the room. To create a calm mood, you can use soft lighting. Both options never go out of style, and the backlight type can be changed.
When installing the lighting of the stretch ceiling around the perimeter, the LED system is masked using a special plinth. During installation, the installation of LEDs is carried out slightly below the stretch ceiling. When arranging a multi-level ceiling with plasterboard around the entire perimeter, it is best to hide the tape in it.
A stretch ceiling with LED lighting does not provide full lighting, so a chandelier should be installed in the room. When the main light is off, you can relax, watch TV or read. If you leave lighting with a chandelier, then your eyes will not rest.
The installation of lighting sources on stretch ceilings requires the preparation of a power supply and lead wires. Mounting diode lamps on the ceiling structure is quite simple. Installation is carried out in accordance with certain nuances. Before performing work, it is necessary to make the appropriate calculations:
- power supply unit;
- length of the LED strip.
To do this, find the product of the total footage of the tape and its power on a segment of 1 m. Experts do not recommend serial connection more than 10 m of tape. When using long circuits, a parallel connection is the best option.
You can use a certain number of power supplies if the total power consumption exceeds 40 watts. If a multi-colored backlight device is planned, you will need not only a power supply, but also an RGB controller that allows you to control the color.
First you need to apply a primer to the surface of the ceiling. The tape must be securely fastened, so it must be removed from it before installation. protective film. After gluing the material, connect it to the power supply and check the system's performance. If no violations are found, then you can begin to stretch the vinyl sheet.
Since the ceiling is mounted by fixing it to the rails around the entire perimeter of the room, the space between them is the basis for the backlight device. Installing a stretch ceiling is quite complicated, but the installation of light patterns on it is available to many.
The location of the fixtures on the ceiling is designed on the basis of an exclusive light pattern. They should be chosen depending on the color of the ceiling material. These can be white or colored LEDs.
The footage of the tape is carried out according to the drawing. The material is taken with a margin. Its cutting is carried out only on special marks. Separate parts of the tape are connected using connectors. A relay is used to change the light intensity.
The surface of the base for fixing the backlight must be well cleaned and degreased so that the light source can last a long time.
When creating a pattern, it is necessary to take into account the fact that the service life of luminaires is reduced under the influence of strong bends. No need to think that the lighting mounted on the ceiling is connected directly to the outlet. This should be done using a special power supply. After the final installation of the backlight and connecting the lighting to the network, it is necessary to check the operation of the entire system.
Stretch ceiling is modern look cover, which is quickly mounted. Its advantage is glossy surface and transparency, which makes it possible to arrange interesting lighting. The light from the inside looks gorgeous if you use LED strips. They make a starry sky, logos of a car, or a sports team, drawings in the form of a palm tree or the sea, and many others.
Such lighting transforms the look of the room. It allows you to make exclusively local lighting, perfect as a night light. Installation will not cause difficulties. Let's figure out how to create a backlight yourself, and what it takes.
LED strip for the design of the tension ceiling covering, colorful and creative solution.
Advantages of LED strips
- Flexibility. The LED strip is bent at different angles and given any shape.
- Small dimensions. It takes up little space and is used for installation in boxes. small size, on structural baguettes designed for a multi-level stretch ceiling.
- Wide choose color palette. The transitions created with tape look good on a stretch ceiling.
- Low electricity consumption.
- Long period of operation. Products from a reliable manufacturer will last 10 years;
- No heat transfer. Heat is worst enemy PVC films for stretch ceilings.
- Brightness. Despite the low power this characteristic LEDs are higher than other lighting devices.
The only significant disadvantage of LED strips used for lighting is the high cost.
Ways to perform LED strip lighting
There are two ways: installation under the stretch ceiling covering and above it.
 Illumination mounted in a specialized box.
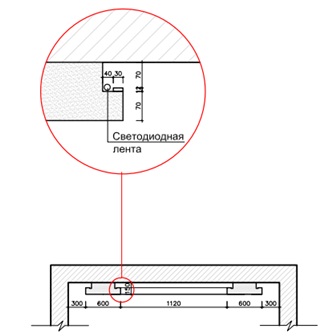
 In the first case, a drywall box is created, it is mounted on the wall, the tape is attached to the bottom wall of the box, which runs parallel to the base ceiling. The width of this zone reaches half a meter, and the height is twenty centimeters.
In order for the diodes to shine exclusively on the PVC film, a narrow bar is attached to the inner lower wall of the box, covering the LED product. It is parallel to the wall. A sheet made of PVC is mounted directly above the tape with diodes. The result is a tension two-level ceiling where the canvas is illuminated from below. The first level of the ceiling with LED lighting is the canvas. The second level is a drywall box where the LED strip is placed.
A distinctive feature of LED lighting is that the illumination extends exclusively to the edges of the stretch ceiling. The center remains dark with this installation, but if necessary, the tape can be installed above it, and the diodes in this situation are fixed to the main ceiling surface and shine from above.
LED strip allows you to create a variety of shapes, emphasize geometric shapes ceiling. Due to this, the design of the room changes.
 Installation of LED lighting device directly to the ceiling
 In addition to the first option, there is also the possibility of attaching the LED strip directly to the walls, but the ceiling canvas should be somewhat transparent.
The methods differ only in the place where the tape with diodes is attached, and the principles of organization are similar.
Mounting materials
To create LED lighting you will need:
- LED strip of the required size;
- power unit;
- controller;
Figure 4. The controller is a necessary thing to create lighting for the ceiling. Using the remote control, change the lighting mode
- RGB amplifiers;
- connectors;
- soldering iron with a power of 25 to 40 watts;
- cable for connecting to the network;
- wires with a cross section of less than 0.5 mm².
.
Choosing a strip with LEDs
There are white and colored ribbons on the market. The former decorate and emphasize the interior design, but the best option- the use of blocks with colored diodes, which you need to choose depending on your mood.
Such tapes as SMD 3528, SMD 5050 have found wide application in the design of the ceiling with illumination. The first version is smaller, with one crystal in the diode. The second is longer, with three crystals.
Important parameters when choosing: diode density per 1 running meter and their power.
Advice! Do not purchase powerful LED strips, as there is a risk of overheating. Especially if the installation is carried out above a stretch ceiling. This is because air masses above PVC sheet will be excessively hot, which provokes the risk of overheating of the tape, block and burning of diodes.
The diode tape requires low voltage, which is 12.24, 36 and 64 volts. The power supply is required one that can provide low power. Pay attention to its power. For a block, it should be 25% higher than for all tapes.
LED strip installation process
After the components are purchased, they begin to prepare a place for fastening the LED strip. Installing it is not difficult, since the installation is carried out on a double adhesive tape.
The surface is pre-degreased specialized solutions and cover with primer. These procedures are necessary to improve the reliability of fastening. You can also use glue or PVC corner instead of native double-sided tape.

If the lighting is done in the form of a pattern, then several pieces of LED strip will be required. Connect them using connectors or using soldering intermediate wires to each of the pieces. If the second option is chosen, then first they are connected and then fixed. Polarity is important. Soldering is carried out to the pads located on the cut line. Finding them will not be difficult, as there is a line and a scissors icon. The soldering site is fragile and requires extra care when handling it.
Connection
Once the tape is fixed, it is connected to the controller and power supply. Two parts 5 meters long are connected in parallel. Each of them must have its own power supply.
Connectors are connected to the cable of the general network, to which two power supplies are suitable. The controller is connected to the first of them, and five meters of LED strip will already go from it.
 original backlight using a diode device - this is an original design idea
 Products differ in color scheme which will help to completely change appearance rooms.
Important! The controller and power supply can fail, so mount them in easily accessible places, but always under the stretch ceiling film. For example, on the wall above the plinth.
 LED backlight suitable as a night light
 After installation is completed, check the work and install the stretch ceiling only later. Be sure to maintain a distance of three centimeters from the ceiling to the ceiling to be mounted to avoid the risk of overheating the tape.
Installing an LED strip to illuminate a stretch ceiling is a troublesome business, but it is easy to do it yourself. You just need to follow the recommendations and advice.
The video will help facilitate the process of installing LED lighting on a stretch ceiling: