LED strip under tension. Installation of LED strip under a stretch ceiling
LED lighting in last years became really popular. The reasons are easy to explain - they are more economical, brighter and more reliable. simple lamps incandescent.
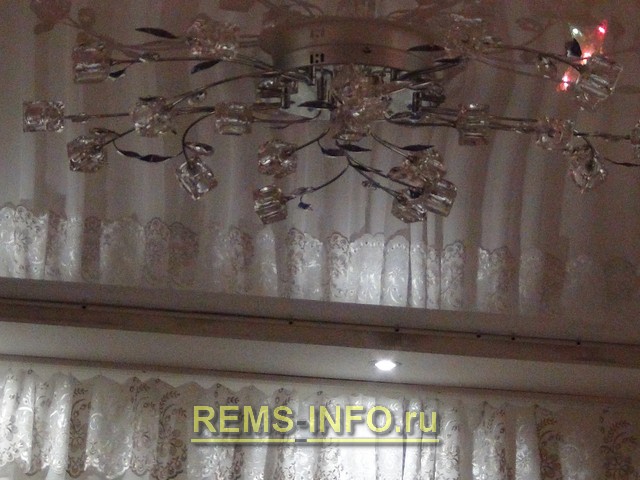
In addition, LED light sources have best performance and don't get hot. These qualities have opened up a lot of opportunities for the use of the product, including in the field of ceiling structures. The stretch ceiling, which is illuminated by LEDs, looks bright and unusual.
Remains to be decided technical question- how to do this work, and what material will be required.
LED strip under a stretch ceiling: characteristics, advantages
In the process of creating LED structures, it is possible to use two technologies:
The second version (SMD) is more popular in the domestic market, so it is he who should be preferred. When buying a device, you should pay attention to the size of the chip.
For example, the number "3528" in the designation indicates the size of 3.5 * 2.5 mm. Recently, SMD series "5050" (multi-colored LEDs) have been popular.
The main characteristics of LED lamps:
1. Placement density. One of the main parameters when choosing light sources is density. The higher the value, the brighter the light. The following options are most popular (by the number of LEDs):
- thirty pieces per meter;
- sixty pieces per meter;
- one hundred and twenty pieces per meter.
If you plan to install led strip under the ceiling, then thirty or sixty light bulbs will be enough. If the design plays the role of the main lighting (not just lighting), then the number of light sources per meter should be 120.
1. Color. Thanks to the variety of colors, it is possible to give the interior new "shades". For example, a ribbon with a single-color glow - classic version which is suitable for most tasks. Here we are talking not only about white (as many believe). There are enough options - yellow, blue, green, purple and others. As for multi-color diodes, they open the way for changing the design of the room according to the mood;
2. Protection. At first glance, the tape with light sources looks unreliable from the standpoint of the potential effect of water. But it's not. Modern devices There are two types - with protection and without protection against moisture. If there is a risk that the neighbors will arrange a "surprise" in the form of a flood or installation is carried out in a room with high humidity, then you can’t do without a special (moisture-proof) tape.
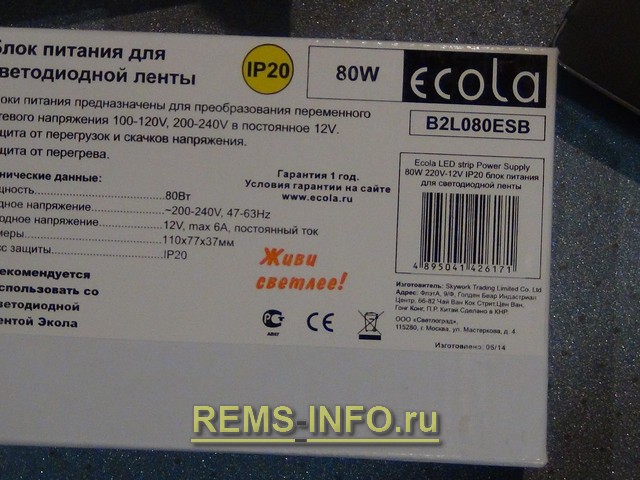
3. Tension. Modern designs are powered by different voltages - 12 Volts, 24 Volts (there are devices for 48 or 64 Volts). The first option is more popular. But you can't do without a transformer that converts the voltage from household 220 to 12 volts.
Advantages:
- ease of installation. It is enough to watch the video of mounting the LED strip under stretch ceiling to understand the intricacies of the process. In the absence of a video, the option with photos is suitable;
- economy. One of the main advantages of diode light sources is energy saving (the brightness of the lighting remains at its best);
- reliability. Operational practice shows one hundred average term LED service life exceeds the ten-year threshold. Some manufacturers note that their devices are able to work even longer;
- no heating. PVC film is afraid of high temperature, which can cause the structure to melt. In the case of LED lighting such problems are excluded;
- optimal lighting. Unlike competitors, diode light sources are able to illuminate at an optimal angle, covering the maximum amount of elements. At the same time, high-quality lighting is guaranteed, without reflection in the film;
- fast payback. This advantage is possible due to two parameters (were discussed above) - reliability and low light consumption.
Watch the video: Connecting and installing LED strip. 3 main rules
As for the shortcomings, it is one - the high cost, which scares away most of the buyers.
Masking tape for stretch ceiling: advantages, features
The PVC tension structure is a solution that allows you to eliminate many of the shortcomings of the ceiling, ensuring the implementation of any ideas. Correct installation blades guarantee the concealment of defects and maximum service life.
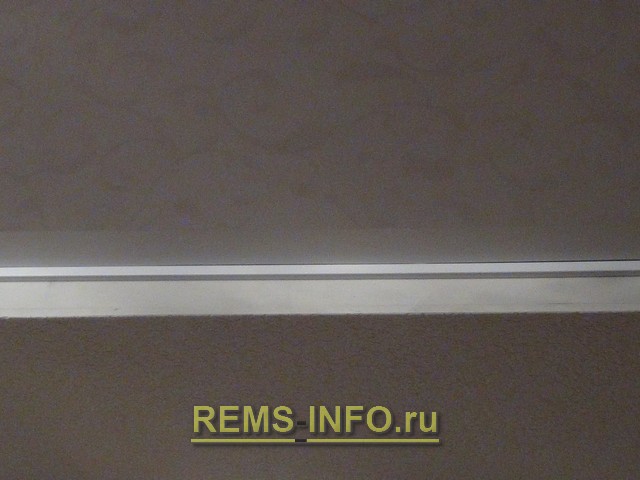
One “but” remains - the junction of the wall and tensile structure. This is where masking tape comes into play. At the same time, there is still debate about which is better - a ceiling plinth or masking tape.
The principle of operation of the masking tape is simple - it camouflages the joints between the PVC film and the wall. Installation of such a tape is carried out without applying an adhesive composition, and the entire process of performing work takes several minutes.
The product is installed in the opening between the wall and the profile. The reason for the appearance of such a gap is easily explained. PVC film is not attached directly to the ceiling, but to a special profile.
After finishing installation work there is a technological hole where the tape is installed.
Why not use a ceiling plinth? There are several reasons:
- the classic plinth is attached only to the wall (you can’t glue it to the ceiling, because ugly waves will appear on the canvas). In addition, the action of the adhesive composition may damage the film. That is why it is recommended to buy skirting boards with a wide adhesive area on the side that is attached to the wall;
- mounting ceiling plinth and the need to work with glue cause a number of difficulties for beginners. In addition, there are risks to smear pvc film. Subsequently, it will be difficult to clean the product from the frozen glue;
- additional problems if it is necessary to dismantle the ceiling structure, for example, when it is necessary to repair ceiling communications or change pipes, eliminate the consequences of flooding from neighbors from above, and so on. Glued skirting boards will have to be torn off and it is unlikely that they will be reused. This means that you will have to endure additional costs.
Benefits of masking tape:
- ease of dismantling(if it is necessary to change the wallpaper or remove the ceiling structure). Upon completion of all activities, the film can be easily returned to its place without worrying about its integrity;
- efficiency. At correct installation existing defects are easily masked. Such work is especially relevant when the walls are pasted over with vinyl or textile wallpaper;
- wide opportunities. Thanks to the flexibility decorative film can be used for multi-level ceiling structures;
- ease of cleaning. If there is such a need, the masking tape can be washed and used in the future.
The main types of masking tapes:
- T-shaped. The product is based on rigid PVC. Such a tape is more suitable for flat walls, for example, on which ceramic tiles or tiles lie;
- L-shaped. Distinctive feature- comparative softness. The product is used to mask cracks on curved surfaces;
- Separating tape- a product that is mounted in a connecting different areas ceiling profile. The product is most relevant when the goal is splicing ceiling structures different colors.
The most versatile of the described "trinity" is the L-shaped tape for masking the gaps between the wall and the stretched PVC film. The main advantages are flexibility, elasticity and the ability to use with various types profile.
Masking tapes differ in color:
- in colour installed PVC films. In the case of using such a film, the area of \u200b\u200bthe ceiling visually increases;
- in the color of the wall. In this case, the height of the walls visually increases;
- contrast to the ceiling and wall. Such a tape is a chance to outline the transition point and achieve a more original design.
When installing masking tape, the following points should be considered:
- installation of the product is carried out around the entire perimeter of the room;
- no adhesives are used in the process of work;
- to avoid the appearance of seams, the tape is mounted at a right angle;
- re-use of the tape after removal is allowed;
- thanks to the installation of such a product, the overall strength of the structure increases.
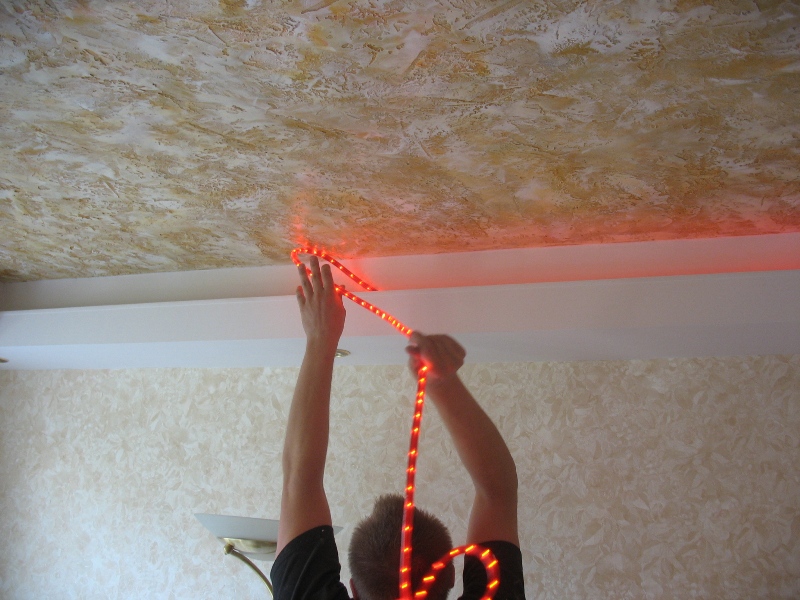
Installation of LED strip under a stretch ceiling
The simplicity of the design of lighting devices based on LEDs opens up a lot of opportunities for the realization of ideas and fantasies.
So, the tape can be attached in several ways:
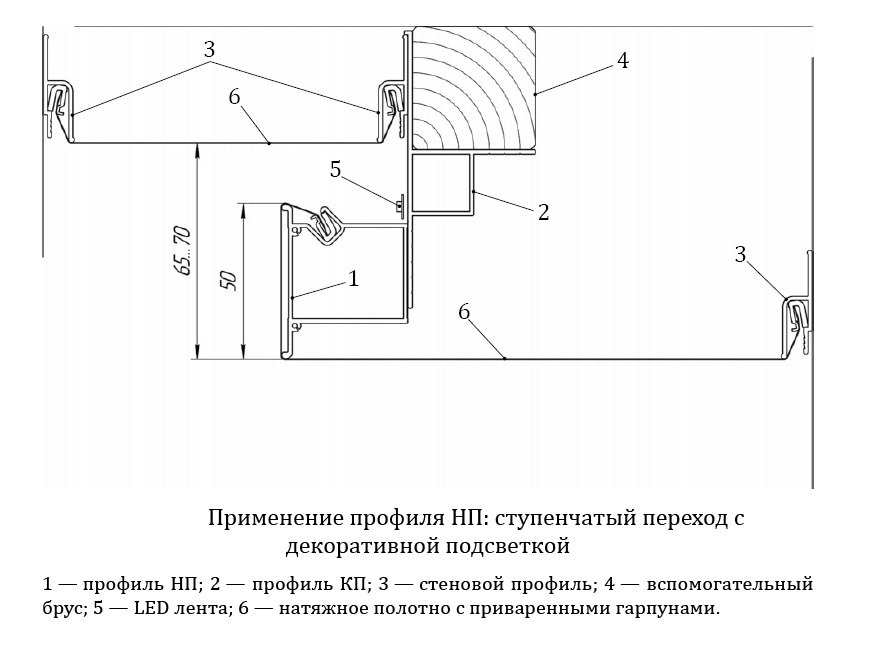
- illumination from within. In this case, an LED strip is installed behind the stretch ceiling. The place for installation is a plate or a specially installed profile. Thanks to this method, it is possible not only to illuminate ceiling structure from the inside, but also to create various images (figures, geometric shapes);
- invisible ceiling cornice. In this case, the installation is carried out on a special cornice. The peculiarity is that the light falls on the curtains to a greater extent, and not on the PVC film. With proper installation, it is possible to obtain a “hovering effect” of a tension structure;
- drywall layer. Here, as a rule, 2-level structures are used. Installed from below metal carcass, upholstered with drywall, and on top - a tension structure.
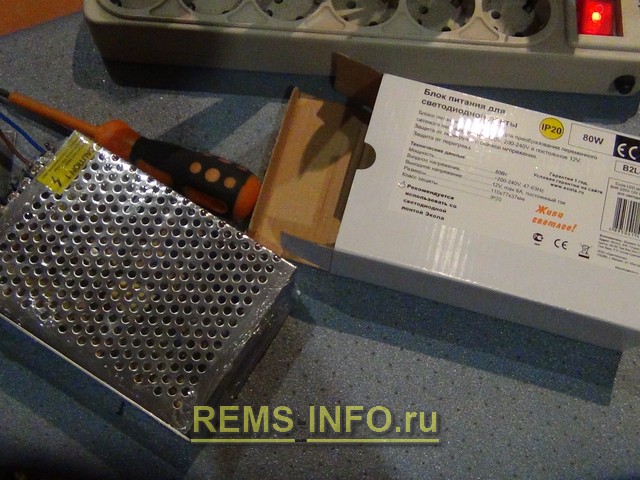
For mounting a diode tape under a stretch ceiling (or behind it), it may be required- controller, power supply, LED strip, connector, RGB amplifier, soldering iron with a power of 20-40 W, wires with a “square” floor section, cable for connecting to the network.
When choosing a light source, it is worth considering that the power of the product depends on the number of light bulbs.
So, tapes with 60 LEDs consume 4.8 W (based on one meter of construction), 120 - 7.2 W, 240 - 16 W.
Many choose products as powerful as possible, but this is wrong.
The air near the PVC film can heat up, which leads to premature failure of products.
LED strips can be powered by different voltages - from 12 to 64 volts. Based on this, it is worth choosing a power supply. The power of the PSU should be a quarter higher than the total power of the diodes.
If the length of the tape exceeds five meters, then without purchase additional block not enough. On average, one PSU accounts for five meters of tape. Otherwise, the LEDs closest to the source will overheat.
In addition, you will need a controller, which is necessary to change the color of the glow of the device.
When installing the tape, consider the following points:
- prepare a place for fixing the tape. The product can be fixed to a wall or ceiling. The place where the device is attached must be primed and degreased;
- to increase the reliability of installation, it is allowed to use glue or special PVC corners. Such foresight will protect against problems associated with installing tape on low-quality tape;
- when using several sectors of the tape with diodes, it is worth using special connectors or using soldering. The main thing here is not to confuse the polarity;
- after attaching the tape to the ceiling or wall, it is connected to the PSU or controller;
- during operation, the PSU and the controller may break, so they must be installed in accessible places, that is, under a PVC film (for example, near a floor plinth);
- the wires that connect the tape and the PSU can be hidden behind furniture, behind a corner plinth or behind plaster;
- installation of the ceiling is carried out after the completion of the installation of the tape.
Photo of the LED strip under the stretch ceiling - help in choosing
As can be seen from the article, the types of light diode tapes and many options. Against this background, it is difficult to determine suitable option for your interior. To simplify the task, it is worth studying the photos, which show the following points:
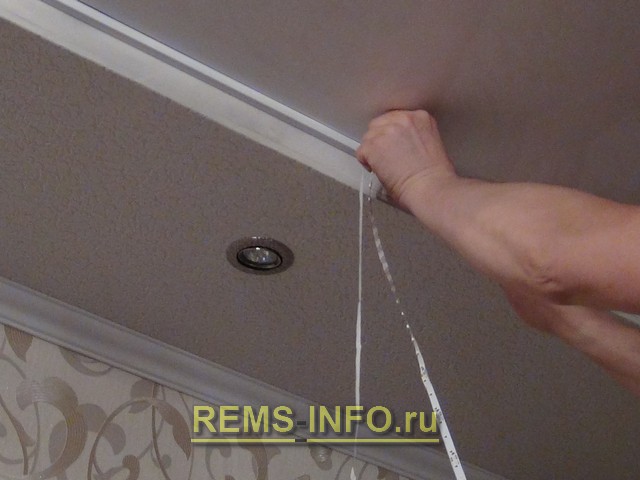
- the process of mounting the LED strip (step by step);
- the process of installing masking tape;
- the final result of work in various mounting options (under or above PVC construction), with different color schemes;
- the subtleties of fastening the PSU and the controller.
If you have a complete picture before your eyes, then problems with installation and selection are excluded.
To beautifully, economically and at the same time functionally illuminate the room, LED strip for stretch ceilings is best suited. The translucent structure of the coating allows you to place such lamps under the ceiling, creating soft lighting with additional decorative effect. The article will tell you the types and methods of fastening the LED strip.
Luminaire characteristics
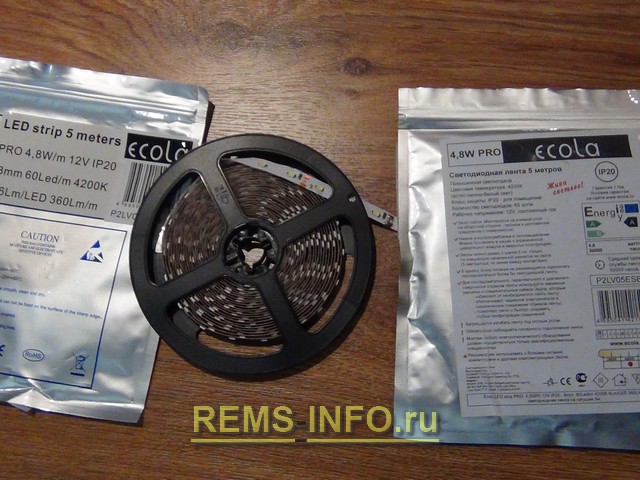
LED strip is a long strip with dimensions:
- Length - 5 meters.
- Width - up to 10 millimeters.
- Thickness - up to 3 millimeters.
Compact storage is ensured by winding the product into a reel.

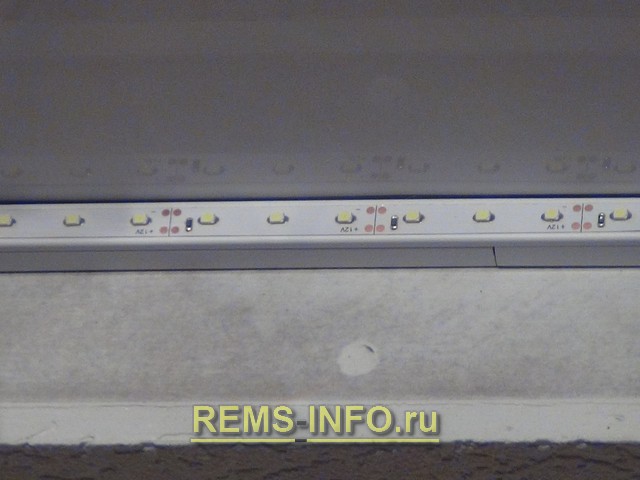
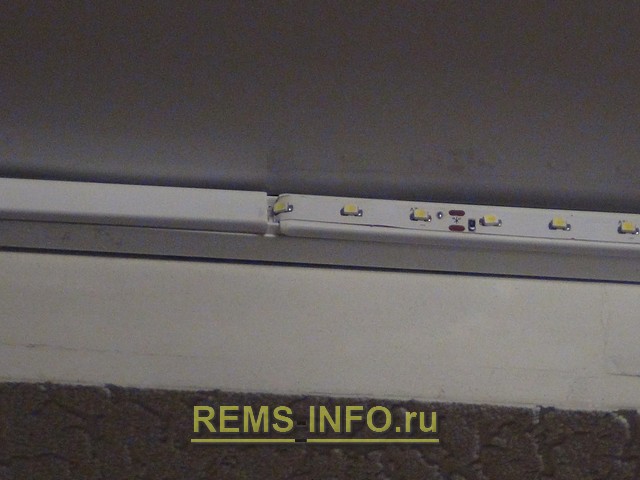
On the front surface are multi-colored and different power LEDs as pictured.

For quick and easy installation, on the reverse side of the tape, under protective film applied a layer of glue.
The main characteristics of the lamps are:
- LED type. On the basis can be fixed different amount crystals. For materials of the same color, their number is 1 or 3.
- The number of glow elements per linear meter. There can be: 240, 120, 60 or 30, depending on the model chosen. At the same time, stripes are used for illumination, the density index of which is 30 and 60. And 120 and 240 units are used as room lighting sources.
- Power. This value is measured in watts, and its value depends on the number and size of diodes per linear meter:
- On a standard LED strip there are 60 diodes per meter, its power consumption is 4.8 watts.
- A tape with 120 diodes per meter requires 9.6 watts.
- A strip with 240 diodes per meter consumes 16.8 watts.
The length and power of the tape are the main criteria for selecting power sources for them.
- Moisture protection level. Each tape has an alphanumeric designation: IP20, IP33, IP65. The degree of protection of the strip sheath against dust and moisture depends on these values, in accordance with international quality standards. The first digit determines the degree of protection of the material from dry elements, the second - from moisture. As the digital value increases, the security of the tape increases. The version with the highest level of material protection IP65 - 68, can also be mounted to illuminate pools.

- Chromaticity. LEDs come in warm and cool colors. LED - these are elements of white cold color and single-color warm colors: yellow, green, red and blue. RGB- colorful ribbons glowing in all sorts of colors. They look especially beautiful in.
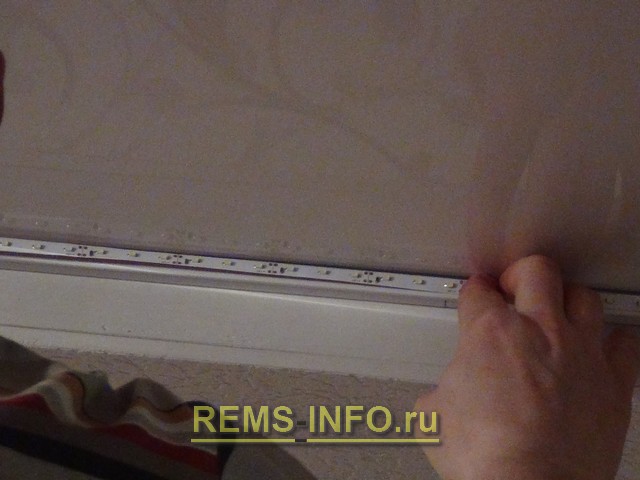
By the way: the LED strip in the stretch ceiling can be placed not only behind the plinth, but also behind the canvas, as it has a certain degree of transparency.
Tip: To change the LED colors and light intensity, please purchase products with a remote control.
Advantages and disadvantages of fixtures
LED strip under the stretch ceiling allows you to create harmony and comfort in the apartment, make its interior individual and stylish.
The main advantages of using LED strips:
- economy and attractiveness.
- Security. The low degree of heating allows the use of lamps on a PVC film.
- Durability. LEDs can last up to 100,000 hours. When using lighting 12 hours a day, they can be used for more than 20 years.
- Fast payback. Despite the high cost of the LED strip, it is quite profitable to use it. It consumes a small amount of energy, which contributes to the payback of the installation of the product due to energy savings.
- LED strip provides uniform light, create figures of any shape on the ceiling and fit into structures of a rather complex configuration.
- You can diversify the design on the ceiling.
- Possibility to adjust the intensity of lighting by connecting the LED strip to a dimmer.
The main disadvantage of LEDs is their high price. But the reliability guaranteed when using a tape to illuminate the inside of a stretch ceiling more than compensates for this shortcoming.
Tip: Using an LED strip in a child's room allows a baby who is afraid of the dark to fall asleep peacefully. You can leave the lighting on all night, this will not affect the family budget too much.
Backlight Options
The device of such decorative lighting makes the room very beautiful. At the same time, before the lighting is turned on, it is absolutely not visible. But, the flip of the switch changes everything drastically, ordinary room is being transformed.
Choosing an LED Strip

How to choose LED strip for ceiling lighting, working area in kitchen area, and for other purposes? It is necessary first to determine the functional load and feature of the room.
It could be:
- An eye-pleasing shade that emphasizes the beauty of the pattern on mirrored cabinets.
- Create an intimate atmosphere in the bedroom.
- Diffused white light source.
- Cool white stream of light that will emphasize the whiteness kitchen appliances, perfectly complements the main lighting.
Each person can choose an LED strip for himself, and the stretch ceiling will turn into a unique and beautiful coating.
Tip: The light that the LED strip emits can distort the colors of objects in the room. Especially if it's blue light. This fact should be taken into account so that after the first switching on of the lighting there are no disappointments.
The color of the LEDs used for decorative lighting is selected according to individual taste. Do-it-yourself implementation should be comprehensive, from the beginning of a competent technical calculation to installation work.
Each stage is an important link in the chain, its strength becomes the key to trouble-free and reliable operation the entire system. How to choose the right LED strip will show the video.
LED strip installation
After purchasing the components, you can begin to prepare the fasteners for the LED strip.

In this case, the installation is carried out on a double adhesive tape.
The instruction suggests:
- Degrease the surface with special solutions.
- Re-priming.
- To make lighting in the form of a pattern, you will need several pieces of LED strip.
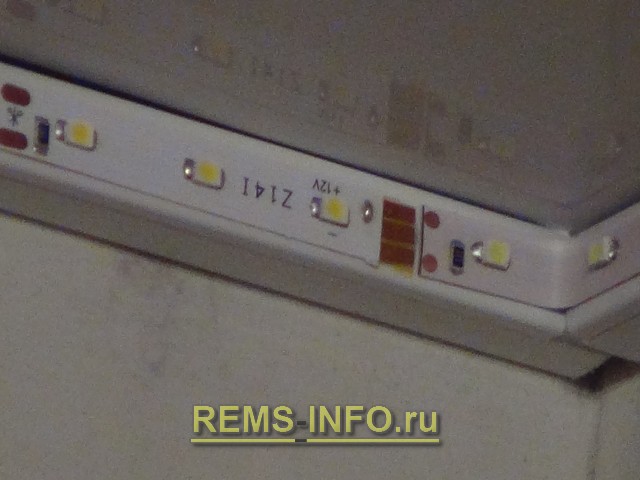
- Sections of the tape are connected by connectors or by soldering intermediate wires.
- In this case, it is important to observe the polarity.
- Soldering is done to the contact pads, which are located on the cut line, with the scissors icon.

- The soldering point is very fragile, and extra care is required when working.
Lighting connection

After attaching the tape, it is connected to the power supply and the controller. Two parts, 5 meters long, are connected in parallel - each to its own power supply.
The connectors, with two power supplies going to them, are connected to the main network cable. The controller is connected to the first block, five meters of the LED strip go from it.
The colored LED strip has four wires on two sides: yellow, green, red, blue.

Each of them is connected at one end to the desired connector:
- V- will be connected first.
- To G - the second.
- To R - the third.
- To B - the fourth.
The second end is connected to the RGB amplifier in a similar way. The amplifier is connected to part of the tape and to the second power supply. This will illuminate the second part of the ceiling.
Tip: The controller and power supply sometimes fail. They should be mounted in easily accessible places, but under a stretch ceiling.
- After the installation is completed, the operation of the system is checked.

- Stretch ceiling is installed. In this case, it is imperative to maintain a distance from the ceiling to the ceiling of about three centimeters, so that there is no risk of overheating of the tape.
Installing LED strips for stretch ceilings is a troublesome business, but you can do all the work yourself. It is necessary to follow the recommendations and advice of experts.
How is the installation performed when the LED strip is located under the stretch ceiling. Features and technical indicators diode cords. Pros and cons of using this product. Various ways installation of LEDs under a stretch ceiling covering.
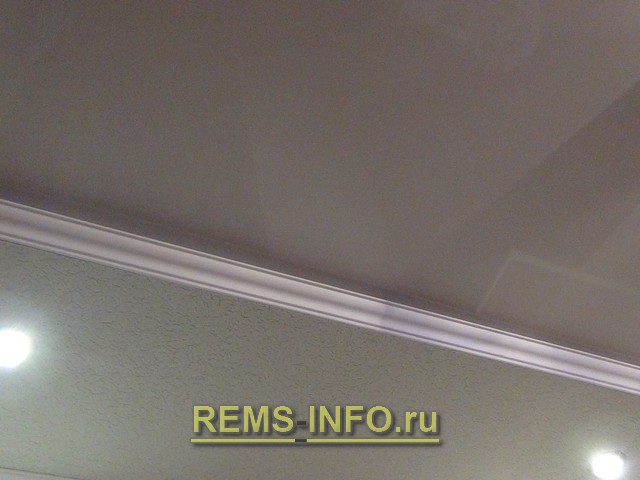
Very often used design technique when the LED strip is located under the stretch ceiling. Such installation allows not only to illuminate the room, but also to get the effect of a soaring stretch ceiling.
LED Strip Features
Due to its compactness and lack of heating, the LED strip can be mounted at any distance from the tension cover. This gave the designers unlimited possibilities to create unique lighting for these coatings. So, the installation of the LED strip is possible on the base ceiling, in addition, it can be installed under the stretch ceiling. Last option installation, we will consider in our article. This arrangement allows you to organize the LED decorative lighting and at the same time not to violate the integrity of the tension coating.
The tape itself is a five-meter strip about a centimeter wide and 0.3 cm thick. The product is sold in coils. On one side of the tape there are LEDs installed with a certain pitch (for different manufacturers it is different). The color and power of the LEDs may also vary. With reverse side strips is a self-adhesive surface.

Characteristics of LED strips
| Technical indicator | Tape features |
| Diode type | Depending on the number of crystals, there can be single-color and multi-color diodes. Elements of the same color have from 1 to 3 crystals |
| Diode density | At the tapes different firms may be different number one diode running meter(from 30 to 240 pieces). This depends on the intensity of the light. For illumination, tapes with a number of diodes from 30 to 60 will fit, and elements with 120-240 diodes per meter can act as the main light source. |
| Protection | You can buy waterproof tapes suitable for installation in rooms with high humidity. Also on sale there are regular tapes. |
| Colors | In the distribution network you can purchase ribbons with a white glow, products of one certain color and elements that change their color. |
| Power | Usually Neon lights stretch ceiling is performed with tapes with a power of 12 watts. Installation takes place using a step-down transformer operating from the network. |
Quite often, several LED strips that differ in type can be used to decorate a stretch ceiling at once. Thanks to this technique, it is possible to perform zoning of the room and diversify its lighting.

Pros and cons of LED strips
The positive aspects of using LEDs include the following:
- The product is quite flexible, so it can be attached to any surface.
- Due to its compactness, the LED strip can be easily placed in a shelf or cornice under a stretch ceiling. Its installation is quick and easy.
- rich color palette diode cords allows you to create original curly lighting.
- The product does not heat up during operation, which does not harm the tension coatings.
- The efficiency of the device is another plus in its favor.
- Durability. You can order tape well-known manufacturers which will last up to 10 years.
- The good brightness of these products allows them to be used as the main source of illumination.
The only disadvantage of these units is their high price. However, its efficiency and durability more than compensate for this shortcoming.

Stretch ceiling mounting options
A variety of diode tapes and ceiling baguettes allows you to create the most various designs ceilings and perform various options their highlights:

If you need to use a product longer than five meters to mount the LED cord, then you can connect two segments. To do this, a piece of the desired length is cut off from the tape and attached to the previous one. It is important to cut only along the markings in the form of a dotted line and scissors.
You can order not only stretch ceilings from us, but also their installation with illumination from below using LED strip.
LED strip under a stretch ceiling, installation (video):
Among all modern lighting elements, LEDs have the most wide opportunities. They don't heat up high temperatures which allows them to be used in close proximity to polymer materials. LEDs have a very rich choice of colors, which is why they can be used to create beautiful light compositions. Finally, they are durable, safe and resistant to mechanical damage.
Beauty and economy

Benefits of LED strip
In addition to cost-effectiveness, LED strip in a stretch ceiling has other advantages:
Durability. The service life of the LED element is up to one hundred thousand hours. Even if you use it daily for 12 hours a day, this will last more than 22 years.
Fast payback. At first glance, the LED strip seems to be quite an expensive pleasure, but due to its extremely low energy consumption, it will very quickly pay for itself due to the constant savings on electricity.

Optimal Angle lighting. LEDs can evenly scatter light within an angle of up to 140 degrees. The result is smooth, soft lighting. LED strip under the stretch ceiling allows you to achieve the effect of the absence of shadows in the room. This circumstance has already been assessed professional photographers. After all, in such a room you can do high quality photos without the use of expensive lighting equipment.
Spectral purity. The LEDs provide lighting in exactly the color you have chosen (read: ""). In this case, the desired shade is achieved without the use of additional filters and does not change over time.
Types of LED strips
As already mentioned, LED strips can perform various functions. With their help, you can create a bright elegant ceiling, shining different colors. And you can stop at the classic white lighting. You can illuminate the entire perimeter of the room, or you can only illuminate its individual sections. The LED strip in the stretch ceiling can be both the main source of lighting and complement open fixtures.

Depending on the purpose, they differ specifications tapes.
- The density of the diodes. The brightness of the light emitted by it depends on how many diodes are located on a meter of tape. Standard decorative tapes have a density of 30, 60 and 120 diodes per meter. The first two options are suitable for contour lighting. To fully illuminate the room, you will need tapes with a density of 120 or 240 LEDs per meter.
- Colour. LEDs can provide lighting in various shades. In addition to white, you can shine the ceiling in a color that matches the general color style room interior. Or install a garland of diodes of several different colors. Also remember that the color stretch fabric also affects the hue.
- Hydroprotection. There are models of LED strips that are protected from moisture. Their cost is not much different from the usual ones, and the benefit is obvious - in the event of flooding from above, such a tape will not suffer and will not require replacement.
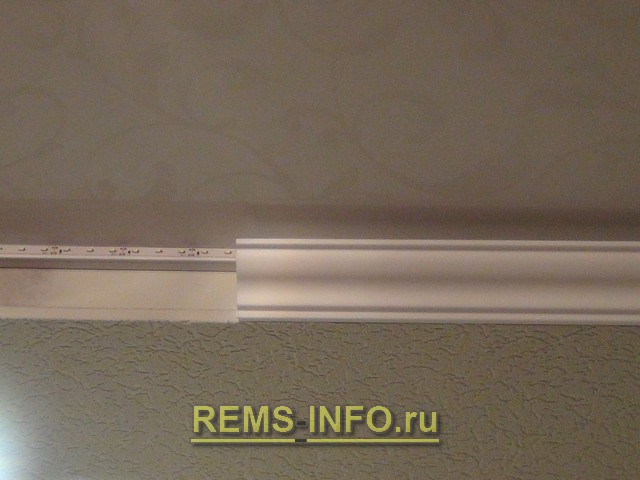
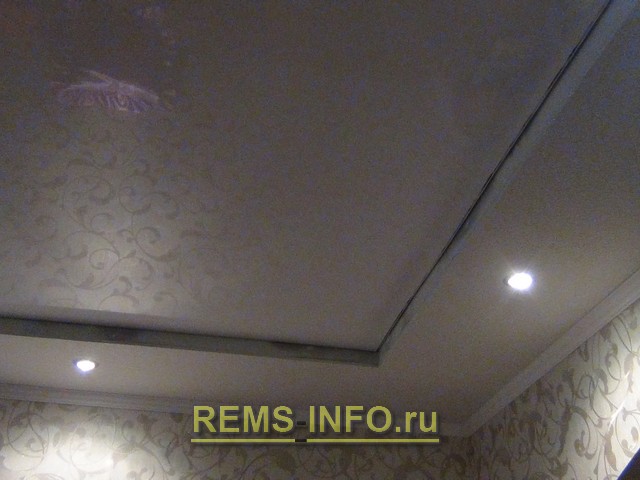
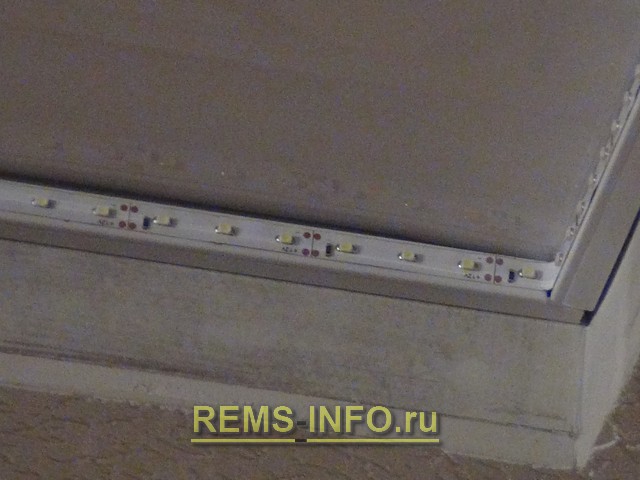
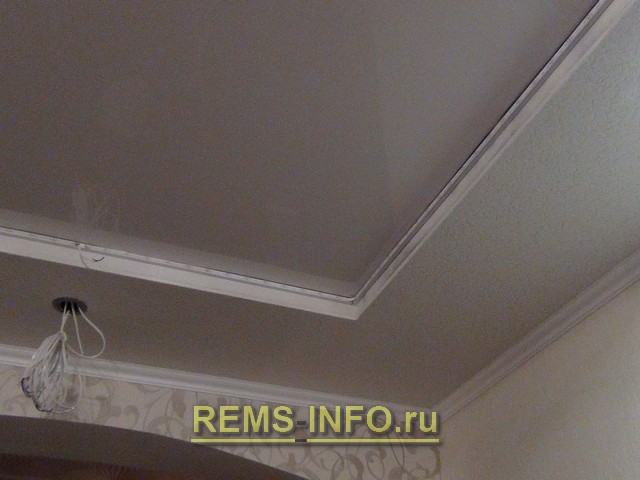
The article clearly shows an example of lighting a stretch ceiling with an LED strip installed around the perimeter closed box from drywall under the plinth. The proposed option is also feasible, if necessary, to illuminate the stretch ceiling made in one level (without a box around the perimeter) with the installation of an LED strip on the walls under the ceiling plinth.
A combined stretch ceiling with lighting and a plasterboard box around the perimeter is most in demand in design solutions apartment renovation. Equally important in creating the interior of the room is the correct lighting design.
Ceiling lighting and decorative elements can be carried out using a chandelier, spotlights, LED strips (monochrome or multi-colored), etc., and also combine several options. It is no secret that the comfort and brightness of the appearance of the room directly depends on the degree of illumination. The originality of the visual effect of the scattered beam of light is achieved thanks to LED sources.
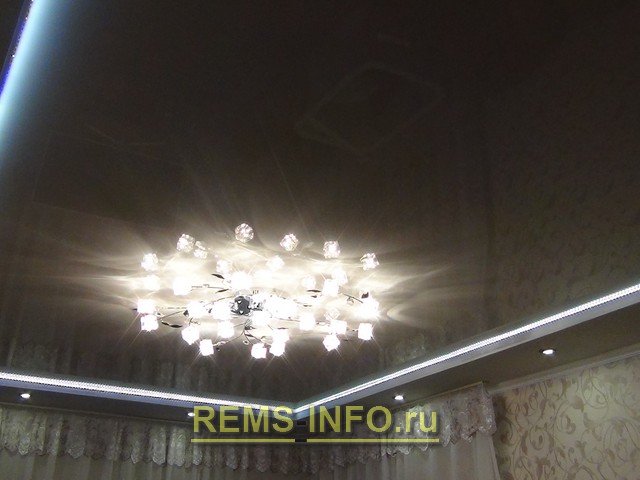
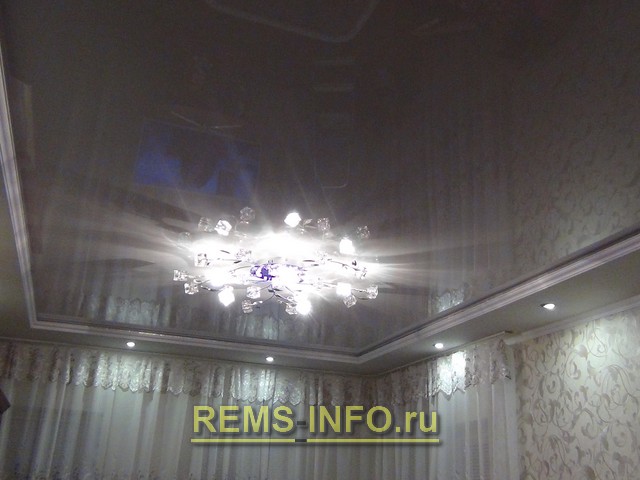
Photo of stretch ceiling lighting spotlights, chandelier, led strip.
LED strip - a thin elastic strip with paths that conduct electricity and LEDs soldered to them. Its length varies from 5 cm to infinity, due to the possibility of separation or adhesion of separate segments. how independent element lighting, modern, more powerful and bright contour lighting can be used.
Preparatory measures for mounting LED backlight
First, determine the length of the LED strip by measuring the total perimeter of the cornice to which it will be attached. Most often, LED strips are already packaged in 5 m coils. This is due to the fact that with its longer length, the diodes located at the end of the tape will emit weaker light than at the beginning.
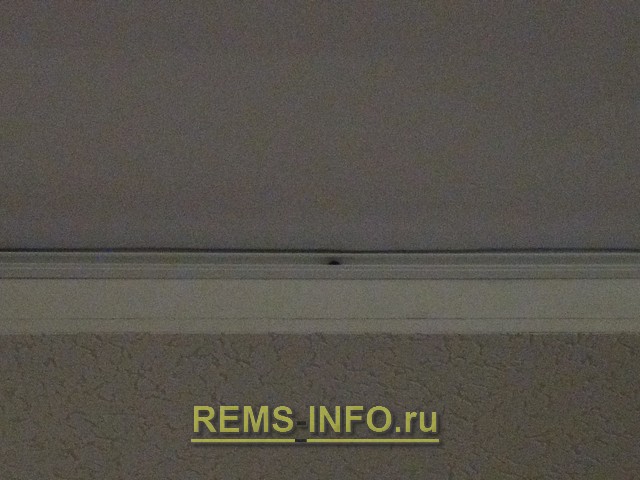
LED strip used to illuminate the ceiling.
Method of fixing the diode tape
Due to the sticky self-adhesive base, the light strip is usually attached to a drywall cornice.
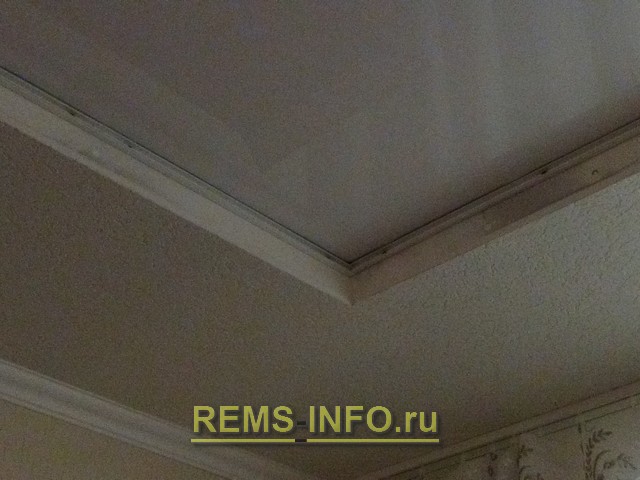
Cornice (box) of drywall - the second level.
But since during installation it may be necessary to dismantle the tape, due to various reasons, then I recommend using a regular cable channel (for example, 6 * 10 or 10 * 10 mm, the wire is also conveniently removed into it). In this case, the LED strip can be pasted again and you won't have to torture yourself with special measures to prepare the surface of the cornice for its installation!

Light installation installation
Illumination lighting is installed on a stretch ceiling cornice, along the perimeter of which a line is “beaten off” with a chokeline (paint cord). A cable channel will be attached along its upper border.
After attaching the mounting box, close it with a lid and glue the LED strip on top, pressing lightly for better adhesion.
In the corners, in order not to damage the ice strip itself, a smooth bend is made. If necessary, the tape can be cut in specially indicated places on it.
Before soldering, the contact areas are cleaned and tinned using a soldering iron with a power of not more than 25 watts. To them, observing the polarity, the wire is soldered. Connection points must be tinned, insulated and put into an electrical box.
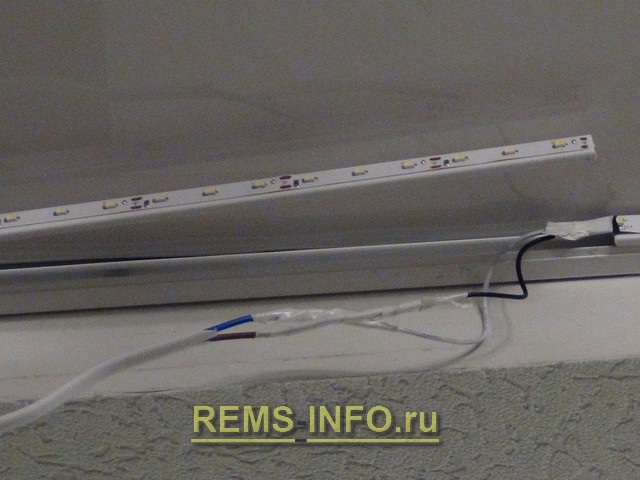
Connecting a secondary power supply (LED strip power supply)
After the installation of the light strip is completed, we connect the power source observing the polarity. The power of the block is calculated by the formula 1 diode x 0.08 W + a margin of 20-25% of the total power.