Download weathervane drawings. We make a weather vane with our own hands. Unique composition on the roof of the house. Devils, angels and roosters. Who lives on the roof
In the old days, weathercocks served as the simplest instruments for determining the wind. Initially, they were installed on ships, then they smoothly moved to the roofs of houses located in coastal cities. After all, knowledge about the direction of air currents was important for sailors who were preparing for distant wanderings, and fishermen, whose fishing was inextricably linked with the sea element. With the advent of more accurate meteorological devices practical function the weather vane faded into the background. The decision to install a weather vane on the roof of the house is mainly due to the desire to give the building individuality. Sketches and a description of the symbolic meaning of the images will help you decide on the design of the weather vane on the roof of your own house.
The order of the formation of the weather vane
Before proceeding with the manufacture of a weather vane, it is necessary to study the main elements of its design, the principle of operation and possible arrangement options. The classic windsock contains the following parts:
- A case that needs a secure fit. Traditionally, decorative weathervanes are installed on the roof of the house.
- The bearing axis, which provides rotation of the structure.
- Checkbox with counterweight. This detail is called a wind vane and can be represented in the form of various figures.
- Wind rose fixed on the body in a fixed position. Her task is to indicate the cardinal directions.
- The cap (lid) serves to protect the design of the weather vane from moisture.
The rotation of the device is provided by air pressure on the wind vane, which tries to take the optimal position. At correct work the arrow indicates the direction from which the wind is blowing, and the counterweight indicates where the air flow is directed. If you want to decorate the roof of the house beautifully, the design of the windsock is selected exclusively from metal. For self-arrangement, galvanized sheet steel is suitable. If the product is purchased in ready-made, you can order a forged model or a copper copy. It all depends on the planned financial costs. Look at the photo, how elegant the windsock looks, on the production of which professionals in their field worked:

If the weather vane will not crown the roof of the house, and it is planned to be installed on the ground, it is allowed to choose a model made of wood or plastic.
Advice! Treatment of the material with anti-corrosion agents will extend the life of the windsock structure.
Sample drawings and their symbolic meaning
Before installing the original windsock on the roof, it is necessary to study the sketches and select suitable model devices. The figure of a weather vane can testify to the hobbies of the owner of the house, his inner worldview, or simply become a roof decoration that attracts the attention of others. The sketches proposed below for the design of a windsock with simple outlines will allow you to make the model you like on your own. The design of a weather vane with a cannon looks very non-trivial on the roof; it will suit people who are fond of historical or military subjects.

Among the Slavic peoples, weathercocks depicting animals or birds are popular, to which magical properties. These are a kind of amulets on the roof that protect the house from various misfortunes. The dog has always been distinguished by its devotion, therefore, people for whom the concepts of friendship and fidelity come first, will have a windsock device with a four-legged friend in the yard. The horse also has similar features; sketches of these helpers for placement on the roof of the house are proposed below.


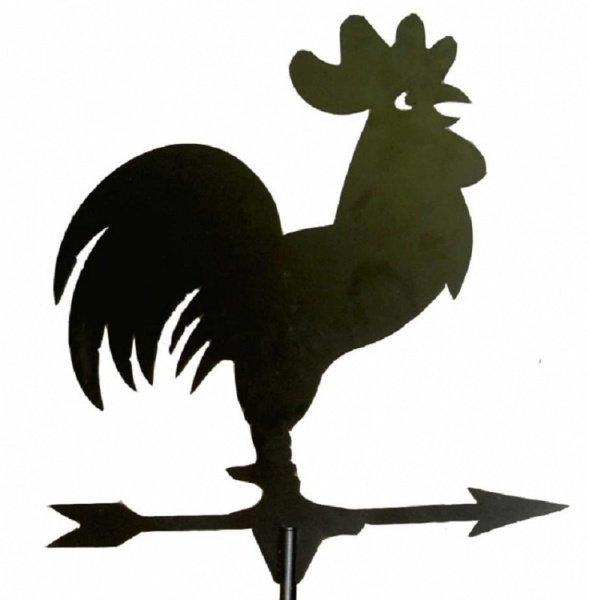
A special role on the roof is given to the rooster. Such a weather vane on the roof is a symbol of vigilance. It is believed that the rooster blocks the way to the house for thieves, protects housing from people with unclean thoughts.

Powerful persons, whose inner vocation is to lead the masses, will like the design of the weather vane on the roof with the king of beasts. If the lion dominates the hot continent, then the owner of the taiga in the form of a bear is closer to the Russian soul. Such a windsock figure will form a unique image on the roof of the house.


Spirituality, fidelity to Christian customs is symbolized by a device on the roof with the outlines of an angel. The complete opposite is a windsock, the wind vane of which is made in the shape of a witch. Perhaps the owner of the house wanted to emphasize his magical abilities with such a weather vane.


For our latitudes, the dragon is more of a fairy-tale character. In China, it is a symbol of wisdom and a powerful talisman for the home. Look at sketches and photos of weather vane designs with this entertaining rooftop figure.


Fans of distant wanderings, sea voyages or simply fans of Green's romantic history will love the design of the windsock with a simple boat or sailboat, symbolizing the desire for change.

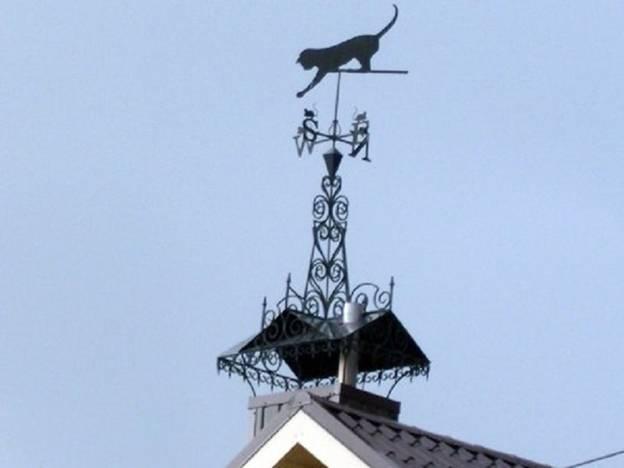
The image of a cat on the roof is interpreted extremely ambiguously. The choice of a weather vane design with such a figure may mean opposite signs. On the one hand, this is an example of love of freedom, intuition and cunning, back side medals - love for relaxation and imposing life.


Which option you choose depends entirely on personal preference. The windsock on the roof does not have to carry a semantic load, it can simply be a kind of home decoration.
Manufacturing nuances
The whole process of designing a structure for a roof includes several stages:
- selection of materials and tools;
- design of a wind vane;
- installation of the rotational mechanism;
- connection of individual elements and installation on the roof.
Comment! The fascinating process of metal processing must be carried out in compliance with safety regulations. Stage welding work should be organized in a ventilated room or in an open space, in the absence of fuel and lubricants nearby. The presence of overalls is welcome.
Wind vane design
The image you like for the design of the windsock is first applied to lined paper. Then the sketch of the weather vane is enlarged on cardboard to required dimensions and cut out. Optimal size the figure for the roof is 40x70 cm. If you want to become the owner of a weather vane that works correctly, the outline of the pointer should be extended horizontally, and most of the figure should be located on the side of the counterweight. Such a position will provide the design of the windsock with windage.
The main stages of work on the design of a figure for a weather vane
- the sketch is attached to metal blank clamps;
- the outlines of the weather vane are cut out with a jigsaw;
- a grinding wheel on a grinder eliminates metal burrs;
- on the separate sections use a file;
- after the formation of the weather vane figure, they proceed to the manufacture of the arrow.

Mounting the swivel mechanism
To ensure the rotation of the weather vane on the roof, you can use one of the following design schemes:


For correct installation windsock design, it is necessary to use the level when determining the vertical. The second important point is the fastening of the wind rose, it must be carried out using a compass. Before installation, individual rotating elements of the weather vane design are lubricated with grease.
Rooftop installation
The optimal height at which it is necessary to install the windsock design is about 10 m. At the same time, it is desirable that there are no tall trees or buildings. Compliance with this condition will increase the accuracy of the readings of the weather vane on the roof. Fastening is carried out in two ways: on the roof ridge or pipe cap. Constant wind loads on the structure require special care when organizing installation.
Mounting the device on the pipe cap
The most convenient place for fastening a weather vane is a pipe cap. A prerequisite for installation is compliance with the acceptable thickness of the metal on the surface of which the windsock will be fixed. It should be at least 1.5 mm. Procedure:
- A steel strip 2 mm thick is used as a bracket, the edges of which are bent by 3-5 cm.
- Mounting fastener weather vane design is carried out with rivets.
- A hole is prepared in the cap first.
- Then the axis of the windsock enters it, the lower edge of which has a thread.
- The structure is fastened to the bracket with a nut and washer.
Installing a weather vane on a roof ridge
To securely fasten the windsock structure to the roof ridge, you will need two metal plates bent at an angle. A photo of the fastener is shown below.
Many owners are trying to find a zest for the exterior of their home, but there are not many such devices. A weather vane is ideal for this. It simultaneously performs both practical and aesthetic functions.
Features of a weather vane with a propeller
This device may be different shapes, most often the weather vane has the form of a domestic and wild animal, an angel, fairy tale hero, aircraft.
The weather vane is not only a functional device, but also a decoration of the roof of the house.
The choice of material for the manufacture of a weather vane
The main criterion when choosing a material for a weather vane should be the ultimate goal of its manufacture. But, despite this, it is recommended to choose the material that will make the structure a decoration of your home for a long time. A weather vane is made from almost any material, but each of them requires different instruments and equipment.
weather vane made of wood
Pretty light and easy to work with construction material that does not require specific tools and skills. Raw materials are suitable for a weather vane High Quality. Before use, wood is recommended to be impregnated with mixtures to protect it from dampness and harmful insects. However, this product will not last long.
This material is durable, resistant to any mechanical influences. Most often, black or stainless steel is used for a weather vane. The second type is corrosion resistant, has a long service life, but still requires proper maintenance and timely repair. This can be a problem as the weather vane is installed in a location where it is difficult to repair.
Steel has high anti-corrosion properties, which is why it is the steel weather vane that can most often be seen on the roof.
It is a durable metal that can withstand even hurricanes. It is quite easy to work with him. Additionally, a layer of silver can be applied to the surface of the copper weather vane, for which the reagents used in the manufacture of photographs are ideal. This metal is resistant to corrosion, due to which the product long time can be exposed to rain and will last a long time without repair.
Copper resists weather adversity perfectly, so it is best suited for making a weather vane.
Plastic structures
Plastic is modern material, is characterized high strength and resistance to sunbeams. Another advantage is its ease of processing. Plastic products can be sawn, glued, soldered, while the properties of the material do not change.
Plastic weather vane can be made in any color, it has high strength and resistance to sunlight
Plywood
For the manufacture of a weather vane, only multilayer waterproof plywood is suitable, but you need to be prepared for the fact that such a product will not last long. Coloring the material will help to artificially increase the service life, but for a very short time.
For the manufacture of a weather vane, you can only use multi-layer waterproof plywood
Tools for making a weather vane
The list of tools for making this device is quite simple:
- metal scissors;
- hacksaw or saw;
- sandpaper of different fractions;
- electric drill;
- Bulgarian;
- stationery tools, e.g. ruler, pencil, glue.
The main elements of the weather vane
Regardless of what shape your weather vane will be, certain elements must be present in it, the main of which are the axis and the flag with a counterweight.
Body and axis of the weather vane
The body serves as a support for the entire structure. For its manufacture, both steel and brass pipes with a diameter of 1 inch are suitable. In the case, an axis is located strictly vertically - a rod, usually made of steel reinforcement.
The main function of the carrier rod is to hold the windmill. The diameter of the reinforcement is about 9 mm, this is enough to withstand strong winds and any other mechanical load that will act on the weather vane.
The weather vane body is the support of the entire structure
Flag with a counterweight (wind vane)
The main part of the device, located on the vertical axis. The flag shows which way the wind is blowing. The counterweight serves to balance the flag and is located on the opposite side. The main difficulty in the manufacture of this element is that the flag and the counterweight must be evenly located on both sides of the axis, that is, they must have the same mass.
Of the entire structure, it is the weather vane that is of artistic value. Experienced Master is able to perform a detail of any shape, while not disturbing the balance between the flag and the counterweight.
In the manufacture of a wind vane, it is important to observe a uniform distribution of mass on both sides of the axis
protective cap
The protective cap has the shape of a circle or cone and is located on the axis of the weather vane, most often directly above the body. Its main function is to protect the housing and bearings from moisture and dirt.
Rose of Wind
An indicator of cardinal directions, consisting of two rods crossed at an angle of 90 °. As a rule, the rods are attached to the top of the cover in a stationary state. Letters are set at the ends of the pointer to indicate the cardinal directions. To fix an element in correct position you need to use a compass.
To set the direction indicators in the correct direction, you must use a compass
Bearings
They are located inside the body and provide free movement of the carrier rod under gusts of wind. The internal diameter of the parts is 9 mm.
fasteners
The choice of fasteners depends on the material used and the method of fastening. These can be corners, linings, bolts, rivets.
Propeller
It helps to determine the wind speed. The propeller can be made independently from plastic and wood, or you can use ready-made parts.
It is the aircraft with the propeller that looks the most organically, because in original design this item is also present. Yes, and modeling this form is much easier than others.
The aircraft is ideal for making a weather vane with a propeller
Drawing of an airplane weather vane with a propeller
The weather vane is usually located on the roof, so high aesthetic requirements are set for it - according to its appearance will judge not only the taste of the owner of the house, but also prosperity. Therefore, it is very important to design the structure correctly, while showing maximum imagination and creativity. The drawing of the future model should be as detailed and accurate as possible.
The drawing of the future aircraft model should be as detailed as possible and with exact dimensions.
Step-by-step instructions for making an airplane weather vane
This device will become a hallmark of the house only if the element is correctly made and installed.
Metal weather vane
It is performed in the following sequence:
- Cut the pipe 120 mm long. Make small holes in it for fastening to the support with rivets or bolts. Pre-holes must be threaded.
- Insert bearings at each end into the pipe, securing by welding. Additionally, the bearings can be fixed by heating the pipe into which the bearing must be inserted. After the pipe has cooled, the bearings will sit quite firmly in it. Fill the pipe itself with grease.
Bearings help the wind vane to easily rotate around its axis
- Close the top of the pipe with a cap, which can be a plastic plug. Now this place needs to be sealed. insulating tape. Between the cap and the body it is necessary to lay a layer of felt gland.
- Now you can start making the wind vane. On paper, you need to make a drawing, which later needs to be transferred to a steel sheet. Remember that the dimensions of the aircraft must be proportional to the parameters of the hull. It is recommended to make a product 400–600 mm long and 200–400 mm high.
With special scissors for metal, steel sheet is very easy to cut
- After the aircraft figurine is ready, you need to attach it to the carrier rod using clamps or welding. The last step is the installation of the propeller. You need to install it on a weather vane or on a carrier rod. In the case of an airplane, it will look more harmonious on a weather vane. For fastening, it is recommended to use a bolt, which must be placed between two washers. To reduce the noise of the weather vane, it is recommended to fit it on a bearing.
Weather vane from plastic bottles
You can make an airplane weather vane from plastic bottles. For this you need:
- Collect empty containers, wash them thoroughly. For a weather vane in the form of an airplane, 4 bottles are enough. For two bottles, cut off the top half with the cork. As a result, you should get 2 cut off tops with a cork and 4 bottoms, the height of which is 5 cm.
From the bottle you need to cut off the top and bottom
- On each bottom at an angle of 45 °, make cuts in the form of burrs, which will be fasteners.
Cut the bottom of the bottle into strips
- Now you need to work with the tops of the bottles. It is necessary to unscrew the plug in which to make holes for the axis. This can be done with an awl or a hot rod. Screw this cap back on. Leave the top of the bottle without the cork.
In traffic jams with an awl, you need to make holes for the axis
- Now you can start collecting the weather vane. The two upper parts are connected by cut surfaces to each other. This process is similar to collecting nesting dolls. It is necessary to attach the bottoms with slices, placing them around the body in one direction. Now, through the bottom holes of the bottle, you need to pass a bar or metal rod, on top of which you install the bottle cap. That's it, the weather vane is ready. Install it in a suitable location.
The weather vane from a plastic bottle does not look very aesthetically pleasing, but it performs its functions effectively
Video: weather vane airplane made of plastic bottles
For a homemade weather vane, you can use plywood scraps. In addition to this material, you will need:
- nails or screws;
- flat beads - 3 pieces;
- special glue for plywood;
- small wooden beam OK;
- protective paint.
All work on the manufacture of a weather vane from this material are performed in the following order:

Video: weather vane made of wood with a do-it-yourself propeller
The propeller can be made from any material
The manufacturing process is as follows:
- Prepare wooden block with a side of 5 cm. Draw diagonals on each face of the cube, mark the place where they intersect. Drill a through hole in one of the planes.
- On a sheet of tin, mark segments equal to the width of the bar. Cut strips 15x5 cm in size. There should be 4 such strips. Process the edges of each strip with a grinder.
- Each strip is conditionally divided into 5 parts. Bend one of them with pliers at a right angle. You should end up with four blades. L-shaped. Place each blank diagonally on one side of a wooden cube with a hole.
- The protruding parts of the tin must be cut off in such a way that the part that will be fixed is acute-angled.
- Now the blades must be fixed with screws in two places.
- Sharpen another wooden beam from one end under a cone, from this side fasten a cube with blades with a nail. This propeller can be installed on a weather vane made in advance.
Video: do-it-yourself tin propeller
Remember that when installing a weather vane on the roof, you need to ensure that the waterproofing of the latter is not broken, otherwise leaks cannot be avoided. It is also not recommended to install a weather vane on a ridge or chimney pipe. Incorrect installation can also lead to the fact that the device will make a lot of noise, scaring away birds and annoying others.
Everyone has seen and knows what it is. vane. There are especially many of them on the buildings of the Baltic States, Scandinavia and the Netherlands, where the weather vane is, one might say, part of the unique landscape and business card cities - Riga, Tallinn, Amsterdam, Leiden and others. Few people know that not so long ago a weather vane was one of the most necessary attributes - only with its help it was possible to determine the speed and strength of the wind. Therefore, it is so common in countries with access to the sea, as well as where navigation was developed in the Middle Ages.
Now, weather vane on the roof, mostly a toy, a tribute to tradition. But the house on which it stands, for example, rooster weather vane, handmade looks very original and unusual. You can make your own weather vane or order one from a craftsman. For this you will need structural steel sheet, but if you are lucky enough to get copper sheet, it will be perfect option, because the manufacture of a weather vane from copper suggests that he will delight with his unusual view not only you, but also your grandchildren and great-grandchildren, because copper does not lend itself to atmospheric corrosion.
You can make a weather vane with your own hands with some skills in plumbing, and if you don’t have them, but you have a desire to make a weather vane with your own hands, go to the appropriate service on the Internet and look at the technology and design options. It should be noted, that a do-it-yourself chimney weather vane, will also perform the function of protecting the chimney from wind blowing.
Do-it-yourself rooster weather vane
Now for the details of the process. How to make a weather vane with our own hands, we decided to look on the Internet, very important point How is the weather vane attached to the chimney?  or other location. This is done with the help of special strips - spacers and it is better to do this on the pipe cap, because strong wind exerts a very large load on the fastener.
Before you start, making a weather vane with your own hands, familiarize yourself with the list of tools necessary in this case. You may need to buy something or ask neighbors for a while. But I must say, looking through articles on the topic " how to make a weather vane with your own hands from metal"You can pay attention that the technology uses such tools that are in every home.
On the pages of this article it is impossible to describe all the subtleties of the process and the question "how to make a weather vane?". This is a complex issue, where there are nuances and subtleties, besides, at least initial experience is needed. Having studied the information on the Internet, you may not immediately get what you have in mind, but, as you know, no theory can replace experience, try and you will succeed.
Now for the details of the process. how make a weather vane, this is a very important point - how the weather vane is attached to the chimney or other location. This is done with the help of special strips - spacers, and it is better to do this on the pipe cap, because a strong wind exerts a very large load on the fastener.  Before you start making a weather vane with your own hands, drawings, you can see examples and get acquainted with the list of tools necessary in this case. You may need to buy something or ask neighbors for a while. But I must say that in the manufacture of a weather vane, tools that are in every home are independently used.
On the pages of this article it is impossible to describe all the subtleties of the process and the question “how to make a weather vane yourself?”. This is a complex issue, where there are nuances and subtleties, besides, at least initial experience is needed. After studying the information on the Internet, you may not immediately get what you have in mind, but, as you know, no theory can replace experience, try to do do-it-yourself weathervanes and you will succeed.
Weathercocks how to make
For those who would like to do do-it-yourself weather vane immediately, without wasting time searching the Internet weather vane toys driven by the wind
, I will give detailed description the process of how to make a weather vane, which can be created in a home workshop. I would like to make a reservation right away that the manufacture of a weather vane will require welding or serious soldering with brass or zirconium solder. Of course, welding is better, and small turning work will also be needed, but if there is emery in the house, you can get by with it. True, in any auto repair shop, which are now on every corner, they will help you make a weather vane literally for a penny.
So, let's start making a weather vane with our own hands. You can make a drawing of a weather vane, or you can make a weather vane for your home without weather vane drawing according to descriptions and drawings. Everyone would like to know how to make a rotary weather vane without having drawings of weather vanes. The most important node of the weather vane is the body and the axis. It will depend on the design of this node how sensitively the weather vane will react to the slightest breath of wind. If you make a weather vane yourself on the drawing of the hull, of course, it is desirable to have, but not necessary. The best way if the axis of the weather vane will rotate on ball bearings with a closed housing, they do not require regular lubrication and are not afraid of moisture. We will start from the diameter of the axis of the weather vane, its diameter should provide sufficient resistance to radial loads, which, with gusts of wind, will be quite decent. It is necessary to pick up a steel wire or rod with a diameter of at least 10 mm and a length of approximately 400 - 450 mm. This diameter is required to be able to select the desired bearing. As an option, I can suggest using a deep groove ball bearing No. 1000099 according to GOST, but you can use what you have or what you can find on the nearest iron market. Bearing No. 1000099 has the following characteristics: inner ring diameter - 9mm, outer ring diameter - 20mm. Thus, we need a housing in which we can drive a bearing with a diameter of 20mm. For such a body, a ¾ inch pipe segment 120 - 130 mm long is suitable. On the top of the pipe we cut pipe thread, on which we will screw the cover. We drive our bearing into the lower part, which should enter with an interference fit. It may happen that there will be no tightness, in this case, using a powerful soldering iron (at least 100W) and soldering acid, it is necessary to weld a layer of tin onto the outer ring, due to this layer we will get the tightness we need.
We go further and comprehend the question, how to make a weathervane. We already have a body, now we need to deal with the axis on which we will mount the figure. Since we have selected a bar with a diameter of 10 mm, and the diameter of the inner ring where the axis will rest is 9 mm, the end of the bar must be machined to a diameter of 9 mm, this is best done on a machine, but it can also be done on emery, removing layers of metal slowly, and controlling with a caliper or trying on  axle to bearing. The next step is when you do weathervanes how to make- housing cover, protective cap and indicators of cardinal directions. The housing cover can be made from a blind plug for a ¾ pipe, such plugs are sold on any market, then a hole with a diameter of 10 mm is drilled in it and bars with a diameter of 6 mm and a length of 200 mm are welded to its sides, crosswise, you can make a radius along the diameter of the pipe in the middle of the rod , so it will be more beautiful. Attached to the ends of the bars by soldering or welding letters, which will indicate the cardinal points: W , N , S , E . They are cut from sheet steel with a thickness of 0.8 - 1 mm. The size of the letters depends on the height at which we will put vane(in order to be clearly visible), in my opinion, the dimensions of 70x70 should be enough.
We screw the cover onto the body and insert the axis into it until it stops into the bearing, try how freely it rotates, if everything is in order with rotation, a cap with a diameter of about 40 / 50mm should be welded right above the cover so that it gets into the body less water. The cap can be cut out of sheet steel, which you used in the manufacture of letters - cardinal directions. We measure another 250 mm from the cap and cut off the excess from the axis, although it is better to do this locally in each case.
We proceed to the most interesting - a stylized figure that is attached to the axis of the weather vane and 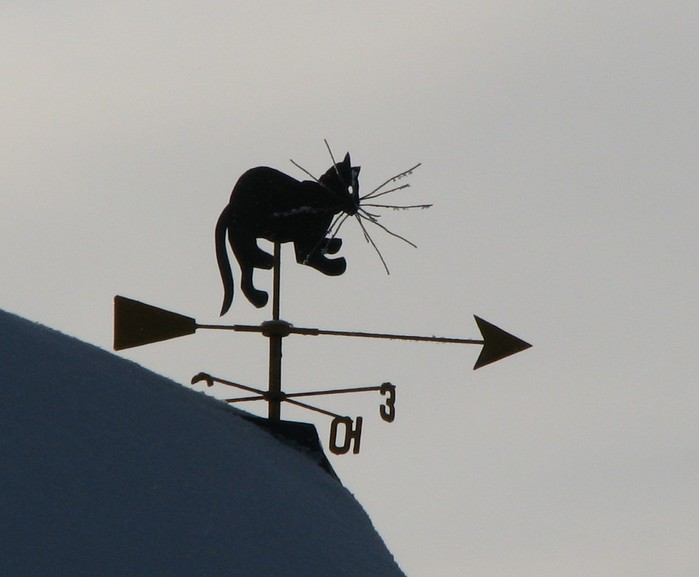 determines its entire appearance. Usually this is a rooster weather vane, according to popular belief do-it-yourself rooster weather vane manufactured serves as a guardian of the house from evil spirits. best material for the figure there will be sheet copper with a thickness of 0.8 - 1 mm, but you are unlikely to find it now, so we make a cockerel from sheet steel 0.8 - 1 mm, you will have to draw a picture yourself or search on the Internet weathercocks inpictures. The dimensions of the figure in the plan should be approximately 500x300 mm and the whole figure should be elongated in a horizontal plane so that there is an appropriate windage, you can focus on examples weather vane photo posted on the network. Doing weather vane pictures figures on paper, then glue it on a sheet of metal and with the help of metal scissors, a small chisel and a file, we cut it out and bring the figure to the outlines we need. There are two options for attaching it to the axle. Can be heated blowtorch or in the fire end of the axle and flatten it on the anvil, to a width of 15 mm. Then drill holes in it with a diameter of 4 - 5 mm, lean the figure as it will stand in the working position, and mark the reciprocal holes. Next is a matter of technology - we fasten the cockerel with rivets or screws and nuts. The easiest way is to grab a figurine weathercocks welding.
 .jpg)
 There are little things left. Install weather vane on the roof and orient vane on the sides of the world. Before installing weather vane on the house, it is necessary to fill the body with grease (just in case) - grease or lithol. Many mounting options, you can install do-it-yourself weather vane on the chimney. From the same sheet steel 0.8 - 1 mm we cut 4 strips 25 mm wide and 300 - 350 mm long. We bend them at an angle of 90 degrees, you can cut them in half on one side 200, and on the other you get 100 - 150 mm. Using self-tapping screws, we fasten them crosswise to the body, but first you need to link the ridge, the location of the strips and the location of the cardinal points to each other. The cardinal directions can be determined by sunrise, the polar star or a compass. In the bent part of the strip, two holes with a diameter of 4 - 5 mm are also drilled, through which the entire structure is attached to the ridge, by means of long studs or bolts, which must be passed through the ridge and secured inside roof bolts, washers and nuts.
material support to make a weather vane with your own hands.
You will need the following tools: drill (manual or electric), ruler, scriber, metal scissors, drills with a diameter of 3.3; 4; 5; 9 or 10 mm., files, emery, soldering iron, welding, lathe, hammer, anvil.
What can you make a weather vane from.
Materials: a rod with a diameter of 10mm and a length of 450mm, a ball bearing, a pipe ¾ 120/130mm long, a rod with a diameter of 6mm and a length of 1 meter, a plug ¾, sheet steel 0.8-1 mm thick, dimensions 0.5x0.5 meters (approximately), grease or lithol, M5 / M4 bolts, M5 / M4 nuts, self-tapping screws, rivets with a diameter of 4/5 mm.
By functional purpose these devices serve to determine the direction and strength of the wind, as they were originally created. However, being in the most prominent place of the building, weathercocks have become visible and significant elements of decor, giving the building a unique and original look. The location for them is chosen, as a rule, at the ends of the roof ridge.
Materials for manufacturing
Traditionally, these products are made of metal, the most popular is a steel sheet with a thickness of about 2 mm, products made of copper, brass, bronze and other non-ferrous metals are also used. Drawings for the manufacture of parts are practically not needed, the products are simple, and the manufacture is carried out "in place". An indispensable element of the weather vane is the rod on which it is fixed. Here it is better to use a stainless steel rod with a diameter of up to 16 mm, it most painlessly perceives wind loads and is not subject to corrosion.
Choosing and drawing a picture
Objects for displaying the silhouette of a weather vane are very different, you can choose a ready-made silhouette or plot you like. And they often use photos of their favorite pets, as a rule, these are cats or roosters. Often they depict angels or demons, in general - the variety is such that it is impossible to enumerate. The size of the drawing must be coordinated with the size and shape of the chimney.
Even without artistic skills, you can easily transfer the contour you like with your own hands along the coordinate grid, then cut it out on paper and use it as a stencil for drawing a picture on metal. Manufacturing is reduced to cutting along the contour.
Contour cutting

To perform this operation with your own hands, you can use metal scissors, but with a sheet thickness of 2 mm, this will be difficult. It is better to use a jigsaw, firmly securing the part to the workbench with clamps. Slotted elements are performed with preliminary drilling of a hole inside such an element of the pattern, and then the operation is completed with a jigsaw.
Attention! Upon completion of work on the creation of the body of the weather vane, it is necessary to carefully clean the part from burrs and dull sharp edges, otherwise injury during further work inevitably.
Tool and fixtures
To make a weather vane body with your own hands, you will need tools:
- electric drill - for drilling holes for a jigsaw file, you can also use it to process a part in order to eliminate burrs using a special nozzle;
- drill with a diameter of about 5 - 6 mm;
- chisel - for performing pointed cuts;
- clamp - for fixing the part on the workbench;
- sanding paper - for processing contours;
- file - with the same purpose.
And, of course, you need sheet material at the discretion of the performer.
Selecting the axis of rotation of the weather vane
The peculiarity of the product lies in the fact that the windage of the rear part must be greater than the same indicator for the front part of the weather vane body, otherwise it will not work. At the same time, a large difference in the weight of the part on the sides of the axis of rotation creates an unbalance of the entire product. In this case, proceed as follows:
- It is necessary to lay an even piece of a corner of any size on the table top of the workbench with the edge up.
- Place the finished part of the weather vane body on the edge of the corner and make it stable. horizontal position. Mark the natural location of the axis.
- Move the part towards the rear part by 3 - 5 mm, and additionally load the front part with a counterweight, achieving an equilibrium position. Subsequently, the counterweight must be installed in the front.
- Mark the position of the axis of rotation, on which you need to subsequently install the weather vane.
Product assembly
The weather vane is installed on the rod using a sleeve with a cut under the main part of the product. It is almost impossible to make this part with your own hands at home, you need a lathe. The hole must be located along the axis of the part. The drawings of the parts are so simple that they can easily be made by hand.
To facilitate the rotation of the weather vane around its own axis, the design uses a standard bearing ball installed in the bushing hole.
The weather vane can be mounted in any way convenient for doing it yourself. When installing a three-dimensional weather vane "Airplane", it is better to mount it directly on the stem.

The rod is fixed at the place of installation. An obligatory element should be considered stretch marks and a reliable base plate in shape suitable for the installation site.
To install the cardinal pointers, you need to weld a plate onto the stem directly under the bushing, through which you can install extensions. You can determine the location of the cardinal points using a compass already during the installation of the product at the installation site.
It should be borne in mind that all parts installed using welding must comply with the conditions of weldability, that is, you cannot weld a part from carbon steel to stainless steel. The connection will be unreliable.
Corrosion protection
It all depends on the choice of material of the main part. If it is made of copper, protection is not needed, over time the product will be covered with a noble patina, giving it a noble look. It is generally undesirable to accept a sheet of galvanized steel. Machining breaks the cladding layer, which subsequently causes its delamination in different places, the product will look dirty and sloppy. Stainless steel is good for everyone, but it is difficult to machine. And in in kind, crowning a chimney or a ridge, such a product will be non-contrasting, visually hiding the elements of the pattern. Still, it should be recognized as the most acceptable option to use cold-rolled steel sheet coated with paint resistant to environmental influences.
All listed works must be done in a workshop.

The photo shows an example of a weather vane of the "airplane" type with a propeller. Parts drawings are made in the course of production, depending on the size and installation location.

In the photo, a drawing and a model of a weather vane aircraft. Based on the indicated dimensions, the drawings of the main parts can be done by hand. Manufactured from aluminum and foam.
Wind vane installation
Attention! Installing a weather vane on a chimney or roof ridge with your own hands is a high-altitude work that requires certain rules security.
Such work cannot be performed:
- with strong wind;
- during precipitation - rain or snow;
- if the chimney is not fenced with a platform that provides unhindered movement around it;
- all work must be carried out with the participation of an insurer.
Conclusion
Chimney or ridge house, decorated beautiful weather vane, acquire completed design solution, and self-made also aesthetic pleasure from a job well done. Decorate your life and success to you!
A meteorological device designed to determine the direction of the wind is called a weather vane. The practical purpose of the design eventually lost its relevance and gradually moved into the sphere decorative design roofs. Information about the types and design of weathercocks, recommendations for manufacturing and installation are given below.
The main elements of the weather vane
The principle of operation of the device is based on the action of air currents that set the arrow with the figure in motion. Standard design includes four key elements:
- A metal pipe with a bearing inside, securely fixed to the roof.
- Wind rose, intended to indicate cardinal directions. To do this, two metal rods are crossed at a right angle, at the end of which letters are fixed.
- Reinforcing bar axis, which ensures free rotation of the pointer due to fixation in the bearing.
- A weather vane, in the role of which an ordinary arrow or a flat figure acts.
The correct design of the weather vane ensures that the pointer points in the direction from which the wind is blowing. The simplest and most accurate example of a device is an arrow with plumage.
Advice! If desired, install on the roof original figure in the form of a rooster or any animal, it is necessary to correctly approach the choice of drawings in order to avoid sail balance. Wind vane tail should have windage.
Types of devices and material for manufacturing
Among the variety of weathercocks, there are several main types of devices:
- Meteorological devices are carefully balanced during manufacture. High-precision instruments are operated at meteorological stations.
- Wind vane Vilde is designed to measure the strength of wind gusts. The intensity of the wind is determined by the degree of deviation of the vertical plate from the zero position.
- A weather vane on the roof that prevents the chimney from blowing out and increases draft in it is called a deflector.
- Decorative designs that are extremely popular among private home owners despite inaccurate readings.
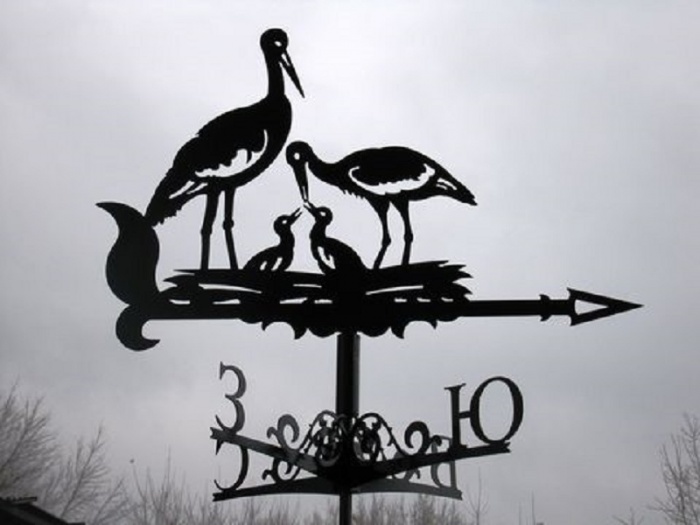
The figure for the wind vane is often chosen taking into account its mystical meaning. The image of a rooster is especially popular. Installed on the roof with the outlines of a rooster, according to popular belief, drives away evil spirit, blocks the way for thieves and protects from fires. The windsock in the shape of a stork symbolizes the reliability of the family hearth and favors the birth of a new life.
When preparing a drawing of a weather vane, one should adhere to standard sizes weathervanes that fluctuate between 40x75-80x120 cm.

To create a weather vane pointer, various materials are used:
- Galvanized steel or other metal, not corroded. Most suitable option construction for a long service life.
- Tin or plywood are the second most used materials in the manufacture of roof windsocks. Having chosen the figure of a rooster from plywood as a weather vane, it can be decorated bright colors resistant to moisture.
- Wood and plastic are used much less often.
- There are extraordinary weathercocks made of plastic bottles or CDs.
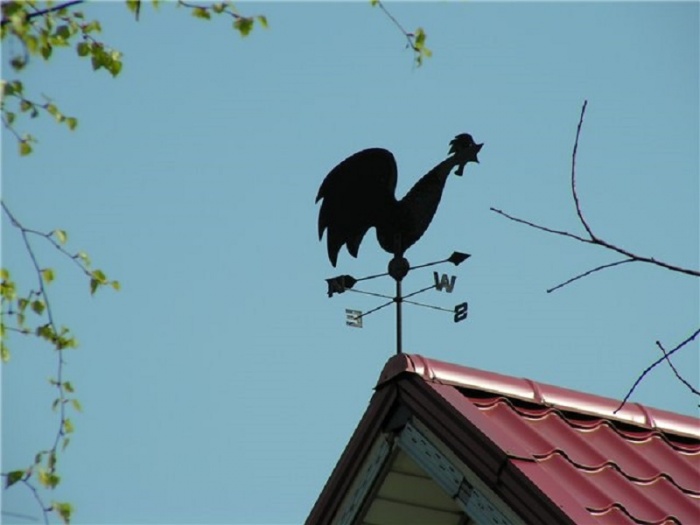
An intricate rooster on the roof is shown in the photo:

plywood construction
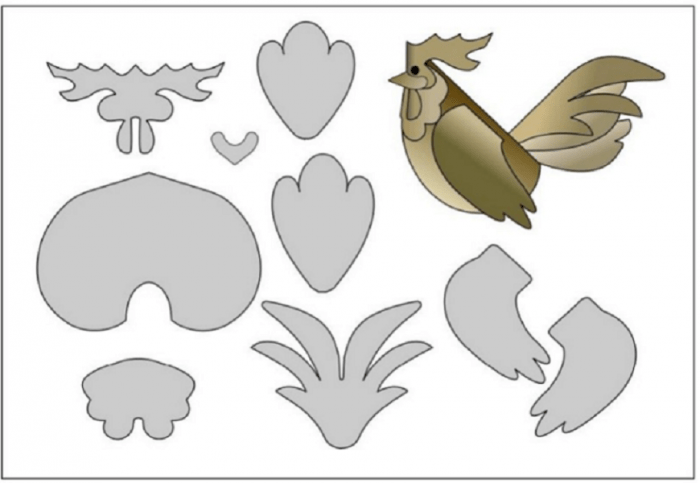
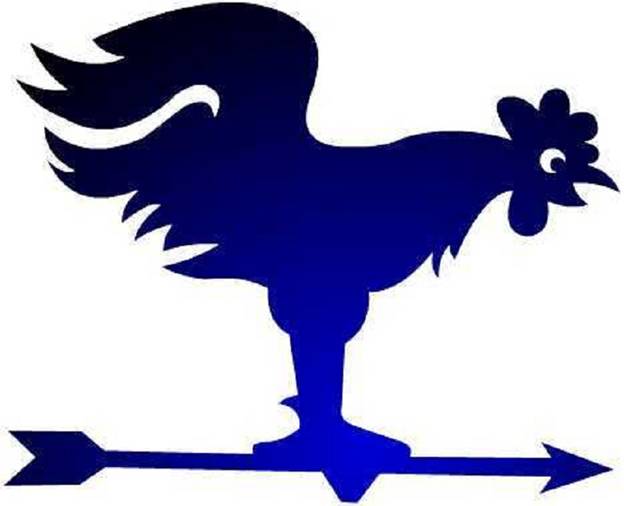
The lack of skills in working with metal is not an obstacle if the idea arose to install a weather vane topped with a picture of a rooster on the roof. Waterproof plywood is suitable as a basis for a weather vane. The following drawings will help you choose an interesting roof rooster model:


The procedure includes the following steps:
- The drawing you like is printed and enlarged to the required size on thick cardboard. For the convenience of transferring the image of a rooster, it is better to divide both sheets into sectors.
- Cutting out the shape of the weather vane on the roof is carried out with a jigsaw.
- The uneven outlines of the rooster are processed with emery.
- Depending on the design of the weather vane for the roof, the parts are interconnected (if the figure of the rooster consists of several elements).
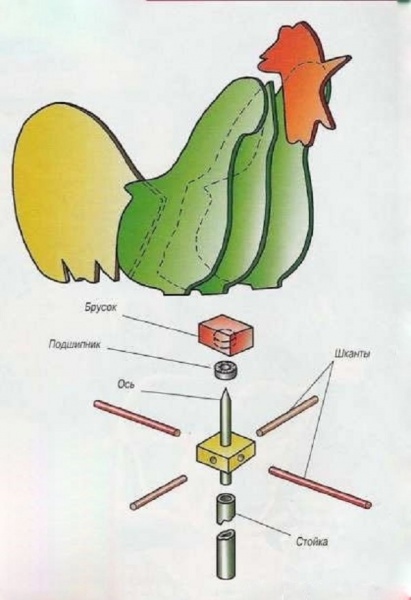
- A bar with an inserted bearing is mounted to the bottom of the rooster figure.
Comment! For gluing individual parts, use only waterproof glue.
- The weather vane is treated with waterproof paints or colorless varnish.
- While the design of the rooster for the roof dries up, proceed to the creation of fasteners.
- acts as an axis wooden beam or a metal rod, the diameter of which corresponds to the size of the installed bearing on the wind vane. One end of the rod goes into a bearing attached to the figure of a rooster, the other end into a similar mount on the body (stand) of the weather vane.
- A wind rose with letter symbols is installed on a fixed rack. The accuracy of the pointers will ensure the use of a compass.
Advice! When used in construction wooden elements, carefully connect the fasteners, otherwise the accuracy of the weather vane on the roof will be impaired.
metal pointer
A weather vane, where metal was used to make a rooster, will look much more spectacular on the roof.
Variants of drawings and methods for transferring them to metal
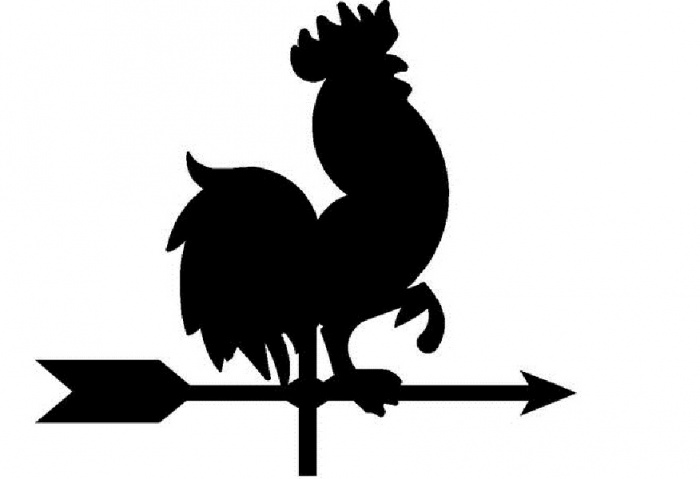
We offer a choice of several photos with interesting sketches of rooster figures, using which it will not be difficult to draw up your own weather vane drawings.
Less common, but no less attractive, are weathervanes with storks on the roof. You may want to install just such a structure on the roof, made according to the photos below with drawings:


note, the optimal image of a rooster for the roof is located in such a way that the tail part exceeds the front by 1.5-2 times. This will ensure that the weather vane pointer points in the direction of the wind.
Having previously cut out on paper all the holes that the figure of the rooster contains, the image is transferred to the metal. For these purposes, stainless steel with a thickness of 1.0-1.5 mm is suitable. You can do this in the following way:
- The paper drawing is fixed on the base base of the weather vane and outlined special tool leaving a noticeable scratch on the metal.
- The second way to transfer the drawing is to fix it on the selected material and spray paint over the sketch of the rooster. Then all unnecessary areas for the future weather vane will be painted over.
- To form the figure of a rooster on the roof, they work with a chisel, after which the pointed edges are treated with emery.
- On a production scale, laser cutting is used to create a weather vane, where the drawing is processed using a computer program.
- Before installation on the roof, the figure is coated with an anti-corrosion agent, after which it is painted or the rooster is left monophonic.

Connection of elements
The key node of the weather vane on the roof is the rotary axis, which rotates due to fixation in bearings. This part of the design of the weather vane with a rooster must be reliably protected from moisture. The entire process of joining a roof structure consists of the following steps:
- A half-inch pipe, 125 mm long, is suitable as a base for a weather vane. Her top part contains a thread for fixing the cover.
- A bearing is placed in the lower edge of the support, its size must correspond to the diameter of the axis in order to ensure free rotation on the roof of the weather vane in the form of a rooster.
- A cover is fixed on the support, on top of which there is a wind rose. Installation of pointers necessarily occurs with the use of a compass.
- To make it, you need two metal rods connected perpendicular to each other. Along the edges of the structure, pointers of the cardinal points in the form of letters are attached.
- A metal rod, which acts as an axis for a rooster on the roof, is inserted into the support pipe. Its approximate length is 45 cm.
Comment! If a rod with a thickness of 10 mm is taken and a bearing with an inner diameter of 9 mm, the edge metal rod must be ground down to 9mm to match bearing dimensions.
- The exit point of the rod from the weather vane body is closed with a cap to protect it from moisture.
- An arrow with a figure of a rooster is welded onto the rotating axis.
The diagram below clearly demonstrates all the main structural elements for installing a rooster on the roof.

roof mount
Regardless of what material the figure of a rooster (or stork) is made of, it is important to correctly mount the weather vane on the roof. The fastening of the structure must withstand heavy loads as a result of gusts of wind. Installation of a windsock with a rooster on the roof is carried out according to one of the proposed scenarios:
- mounted on the roof ridge;
- fixed on the side of the pipe;
- installation is carried out directly on the chimney cap.
The latter option is the most optimal, since the most accurate weather vane performance is achieved when it is located above the ground at a height of 10-12 m. Look at the photo various options windsock location:

To install the housing, corners are used that are securely welded to the selected base. Help increase strength metal strips side of the wind vane support. metal structure on the roof will successfully cope with the function of a lightning rod with additional grounding of the wire.
If the practical purpose of the weather vane on the roof is not so important, but its decorative role hard to overestimate. He attaches architectural structure unique charm and personality.