Frame painted with acrylic paint. How to age a frame for a picture and a photo. How to paint plastic products
In every house you can find a huge variety of plastic items: partitions, skirting boards, cabinet doors, photo frames, computer mice, vases, window sills, etc. All these products are not exclusive, as they are produced in huge volumes. To make something unique and original, you will have to apply maximum imagination. You can very easily decorate plastic products with a special one.
How to paint plastic
Paint for plastic is used not only to change the color and decorate the product. With the help of paint, you can hide the defects that have appeared on the product: scratches, scuffs. It is also possible to achieve plastic surface various effects such as matte shade, velvety surface, mirror gloss. Wide selection paints for plastic will allow you to choose the material that suits you:
- Abrasion-resistant plastic paint that protects the plastic surface from scratches and abrasions. It contains acrylic polyurethane resin, thanks to which the product receives additional shine.
- A paint that is endowed with the characteristic of enamel and primer.
- Structural paint on plastic, which allows you to hide defects and irregularities on the surface.
- Soft touch paint that creates a velvety surface on plastics. It is used most often for surfaces that are in constant contact with human hands.
- Paint for PVC that protects the material from negative influences environment, including ultraviolet radiation, moisture, etc.
- and for plastic, suitable for creating designer pieces that glow in the dark.


How to paint plastic products
Before you start painting the plastic, it should be sanded, degreased and primed. Each process has its own nuances, and this must be done wisely so as not to damage the structure of the plastic product.
- Grinding. Plastic can be soft or hard. soft views plastics are more susceptible to damage, so they cannot be sanded with coarse sandpaper. For their grinding, an abrasive cloth is selected, and for hard species plastic - fine-grained sandpaper.
- Degreasing plastic. Some types of plastic products cannot be processed with aggressive solvents such as benzene or acetone. Most often, it is recommended to use neutral mild degreasers, anti-silicone or anti-static washes. To avoid mistakes, apply a small amount of the compound to an inconspicuous part of the plastic and check the reaction of the material. The same should be done in the case of applying paint to plastic without a primer.
- Surface primer. Experts advise using a special primer for painting. For example, a one-component acrylic primer provides excellent adhesion of any paint to a plastic surface.


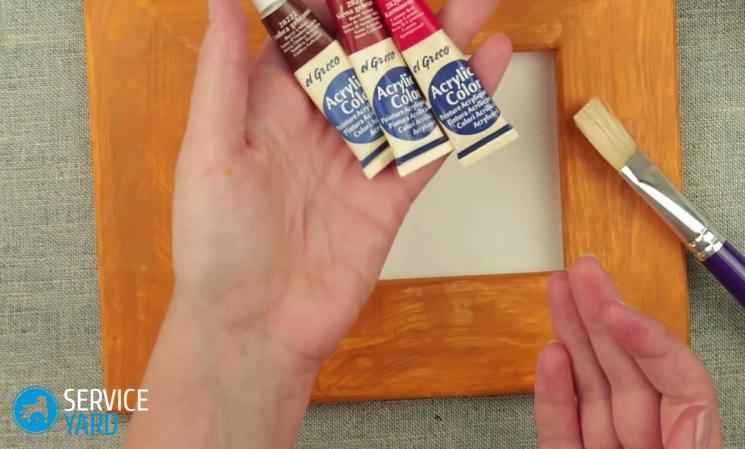
Plastic painting
For different types plastic are matched different colors. For example, for soft plastics, elastic enamels with great content plasticizers. For hard plastics, universal paints, spray paints, etc. are suitable. We bring to your attention a step-by-step coloring of a plastic product using the example of a photo frame. To decorate the photo frame will be applied decorative paint under chrome in cans:
- it is necessary to clean the frame from natural contaminants;
- apply degreaser by spraying;
- apply a primer to the product;
- if you will not prime the surface, then try applying a little paint on back side frames to check the reaction of the plastic and not spoil the product;
- after two minutes of shaking the can, the paint can be applied to the frame from a distance of 20 cm;
- choose a quick-drying paint. After drying one side, turn the product over, and paint the back side of the photo frame;
- for embossed surfaces, it is preferable to use a spray can, since it is very difficult to walk with a brush in hard-to-reach places;
- wait for the frame to dry completely, and feel free to hang it on the wall.
In the wake of the fact that it is gaining more and more popularity, and wooden picture frames are increasingly associated with high, sometimes even very, cost - we want to remind you, or maybe open (for someone) a wooden frame for painting.
This baguette is made of natural wood and has a wide variety of widths and profile textures. The surface of such a baguette is perfectly sanded and ready for painting. For painting, you can use any paint intended for woodworking. Now available on the market a large assortment paints from various manufacturers, both domestic and foreign.
During creation, for example, photo frames, in the framing workshop we use wood stains various shades. Wood stains provide the highest level of protection for wood, even if exposed to the elements. Also, we use spray paints. The main advantage of which is that they dry quickly and evenly apply color without smudges. In addition, they are relatively inexpensive, and a cylinder is enough for several frames, even of a large size.
 However, such paint is convenient in the workshop, where dust and dirt are not a problem. Indeed, when applying paint from a spray can, it is necessary to keep it at a sufficient distance to avoid smudges.
It is also appropriate to use varnishes for wood. They create an additional protective layer, and also very well emphasize the natural texture (pattern) on the wood. What may be appropriate for use in an interior decorated with lining, for example.
Where to buy ready-made frames
If you do not have the desire to make photo frames with your own hands, then you can order a ready-made frame from us. Suppose you already have a picture of beads - this type of picture looks great in a painted baguette, the width of which is selected depending on the size of the picture itself.
It doesn't really matter to us what kind artwork you are going to arrange. We are ready to make any frame for you. Call us and we will solve all your problems related to the design of paintings in a frame.
I want to show how I decorate frames.
materials :
- A simple photo frame.
- Cereals, semolina, small pasta, dry blades of grass, twigs, etc.
- PVA glue.
- Acrylic, mother-of-pearl and other paints
1. Sand a simple frame with sandpaper.
With the help of PVA, we glue blades of hay (I expropriated a little from my rabbit).
Dry and once again go through the glue and sprinkle with millet.
Dry and again PVA.

2.
When well dried - you can paint with the main color.
Dry and paint over protruding blades of grass dark color.

3.
We dry and paint the wheat with golden acrylic.
We dry and with light movements of the sponge we go through mother-of-pearl paint.

Here's what happened: 
Materials: sandpaper, PVA, hay, millet, acrylic paints.
small frames
- simple wooden frame sand off with sandpaper.
- Cover with PVA glue and dry.
- Once again cover with PVA glue and sprinkle with semolina - dry.
- Once again cover with PVA and sprinkle with semolina. For semolina, this procedure must be repeated four times, for wheat - it is enough just to correct those places where there are bald spots after the first sprinkling. In general, at the discretion of your taste and desire.
- Final good layer PVA and dry well.
1. Mix acrylic paints according to the colors you need for your design and cover the frame well - dry it (acrylic dries very quickly) That's what happened - frames with semolina.
2. You can also take mother-of-pearl acrylic paints - make them a few tones lighter and thin strokes, leaving bald spots, cover the frames again. As a result, in my opinion it became more interesting.

Bigger frames
And these frames are sprinkled with wheat groats. Painted in light lilac and dark turquoise. Therefore, with mother-of-pearl paints, I slightly darkened the light lilac (the left side of the frame is still light, and the right side is already a little darker), and brightened the dark turquoise. 
And since I want to embroider three more pictures about chicken girlfriends from this series, I need all the frames in color and they will all be in the same style. You will not find these in a baguette.
Frame for aunty chef
Everything is the same, only instead of cereals I used pasta - asterisks. 
Painted the whole frame yellow, and then selectively flower-stars with other bright colors (present in the embroidery).

The materials are the same: simple frame, sandpaper, PVA, pasta, acrylic paints.

Frames "Sun" and "Moon"
And I also want to bring to your attention the frames that I made to my friend for the New Year.
I decided to decorate with soft oatmeal. I've been looking for an idea for a very long time. color design, went on a whim, eventually settled on gold and silver. I liked the result.
1.
We cover the frames with PVA glue and sprinkle with oatmeal crackers. We dry.
2.
Again PVA, you can add more crackers at your discretion - drying.

3.
Well, actually painting with acrylic paints - drying Very simple.
True, how would it consist of small gold and silver plates?

Gold did not shade with a different color, because. I tried it and didn't like how it turned out. On silver, only 2 times covered with acrylic - 1 time darker color, 2 times lighter.
Instruction
Photo. Choose what your soul and heart tells you. The success of a gift largely depends on the image that will be in the frame.
Select a frame. Before anything, buy a frame you like. Pay maximum attention to its size, the material from which it is made, relief, etc. It should be noted that wood gives a special grace, and plastic looks more and more simply.
Choose a drawing. If it is just some color, then this item should be missed, if you plan to make a drawing, then first draw it on a piece of paper. Cut the paper to the size of the purchased frame and sketch.
Choose a color. Take a look at the photo. The color of the frame should emphasize it. At the same time, do not use too much bright colours because the frame must fit into the room.
Buy paint and primer. Frames can be covered different types: from paints with color shades to natural woods. Each in its own way, but it's up to you to decide. You can also buy and use silver and gold plating. This will further add to the uniqueness of the gift. If you want to use, then pay attention: if you want it - buy glossy, if on the contrary, you don’t want it - buy matte.
Primer. This item is relevant only for a wooden frame. Use a brush or roller to prime the frame and let it dry for a couple of hours. After priming, the paint will lay down well and not be absorbed into the wood.
note
Can't choose a frame. You can make it yourself. This will allow you to make it exactly the way you want.
Antique items are usually associated with something expensive, noble, beautiful and refined. Antiques in specialty stores sell for a lot of money, and finding something worthwhile at flea markets takes a lot of time. But you can make unique items with a touch of antiquity yourself. For example, a picture frame covered with a light patina will become a real work of art.
You will need
- acrylic primer;
- gray, blue, green, white and gold acrylic paints;
- rice paper or napkin;
- red brass;
- glue for tompak;
- brush;
- stain;
- umber;
- liquid wax.
Instruction
Wipe the frame well, getting rid of dust and dirt. If it's a wood frame, prime it acrylic primer. Polymer or plastic frame can be painted immediately. Take light gray acrylic paint, cover the frame with one coat. Wait for the layer to dry.
Take the raw rice paper(such paper is used for decoupage on glass, it can be found in an art store), this is a structural material that perfectly absorbs moisture. Make a small swab. You can also take a napkin, but it should not leave fibers on the frame. With a swab, apply gold paint to the frame over the gray layer.
Prepare the glaze - in a small jar, make a mixture of blue, green and white acrylic paints. It is better to start with white and pour colored into it. Mix, but not completely, to get a non-uniform color from several independent shades. Glaze the frame with a swab. Before it dries, erase it in several places so that the gilding shows through. The first gray layer will acquire a patina shade.
Instead of acrylic paint, you can use special gilding, for example, tompak “under”, sold in the form of sheets. It looks very impressive, gives the impression of real gilding, but is cheaper. First, it is better to cover the frame with colored paint of any shade, you can take both dark and light. Paint over the curly sections of the frame well. Apply tombac special glue to ensure that the metal adheres to the surface. Let the glue dry a little, but it should remain tacky. Lay the tombac sheet, removing the backing. With a small brush, smooth and press it into the surface of the frame. The remaining scales that are not stuck to the frame, sweep with a clean brush. Then rub natural umber into the profile of the frame with a piece of cloth, thus achieving the effect of antiquity.
You can frame without gilding, to do this, cover it with stain, making a test smear from the wrong side. If it turned out too dark color, dilute with water. Dry the frame, run in several places with sandpaper. Cover the surface with white water-based paint and while it is still wet, wipe it with a soft cloth. If you like the result, dry the frame and coat it with liquid wax.
Sources:
- Frame gilding
The style of each person is individual and unique. But it tends to change from time to time, depending on changes in the inner worldview or as a result of an immanent impulse. And what do you prefer classical direction in clothes, does not at all exclude the possibility that one day you suddenly want something diametrically opposed. Something like the now fashionable worn effect on brand new classic jeans.

Instruction
Use sandpaper, a pumice stone, or a nail file to create a build-up of scuffs. Keep in mind that pumice can only give the appearance of some kind of negligence or minor wear. With the help of sandpaper, you can achieve not just a visual effect, but real scuffs. Moreover, for more accurate scuffs, it is best to use the finest sandpaper. If you want the scuffs to look rough and very natural, treat the fabric areas with coarse sandpaper. As for the nail file, here the end result also depends on the roughness of its surface, the more it is, the more impressive the effect of attrition.
Before you begin the process, select from the areas of clothing that you want to see frayed. Circle them with a dry remnant, chalk or pencil. You should not stop your choice on the elbow and knee areas, because the fabric in those places already quickly becomes thinner and wears out. If you apply scuffs to these areas, they will turn into holes pretty soon.
Prepare in advance a piece of plywood or a plank that you will place under the layer of fabric being processed (inside the sleeve or leg). First, so you do not spoil the fabric with reverse side Secondly, it will be more convenient for you to work.
Now take a pumice stone, a nail file, or sandpaper and start rubbing the surface of the fabric in pre-selected areas.
After the process is completed, wash the clothes in the usual way.
If suddenly it seems to you that the abrasions are not convincing enough, repeat the procedure again.
Related videos
note
In this case, the main thing is not to overdo it! After all, from wear to a real hole is just one step, so try to stop in time.
In the process of work, a lot of fluff and other rubbish is formed, which immediately scatters and settles on surrounding objects. Therefore, it is best to deal with the creation of scuffs on the fabric where there is no carpet, cabinets, foreign clothing, etc.
By the way, if you look at the scuffs on the jeans bought in the store, you will see that there are only longitudinal threads and no transverse threads. To achieve this effect at home, you will need a special ripper. It can be purchased at any store sewing supplies for a pretty reasonable price. With it, you can painstakingly remove all the transverse threads from denim fraying.
Sources:
- How to make scuffs on jeans.
- How to make holes and scuffs on jeans.
- how to make holes in shorts
Old antiques have a special charm and charm, but not everyone has "grandmother's" furniture, and real "antique" is very expensive. There is a fairly simple way out of this situation - you need artificially your furniture. It will not take much time and effort, and the purchase of materials that will be needed for work will not hit your wallet hard.

You will need
- - emery skin;
- - soil;
- - acrylic paint;
- - candle;
- - varnish for craquelure;
- - a metal brush.
Instruction
For aging, things from, ceramics, brass, glass and forged metal. Give antique wood furniture. Take the item, clean it of dust and sand the paint and varnish. It is better to take a large emery skin, you can work faster with it. Sweep all debris from the surface and clean workplace so that the particles old paint did not stick to new layers.
Cover the thing with primer, a mixture of PVA glue with white acrylic enamel. Let the surface dry. Then cover the piece of furniture with brown acrylic paint. Apply two coats of this product. Leave overnight to dry well.
Paraffin or wax rub all the edges and corners of the product. Choose the color of your future "antique" furniture. Looks good pale pink or ivory. Create your own color by mixing white paint with color. A few drops added to the jar will be enough.
The brown base should be completely hidden under the layers. new paint, these layers can be from two to four. Be sure to dry each layer well.
Take sandpaper with grain size 800. Sand the places that you rubbed with a candle. The base paint will rub off and expose the brown. Rub gently so that there are no "burrs". For greater reliability, work unevenly, somewhere rub harder, in other places make only a hint of wear.
The process of painting a picture frame is quite a creative and unusual activity. To update the baguette will help the use of some tricks and secrets. You can arrange both a self-made frame, and give a second life to an old product. In this article, we will look at options for how to paint a picture frame with your own hands.
How to paint a picture frame?
If you have purchased a new baguette for a painting that is not painted, then you can transform it with your own hands. To paint the product, paint of a suitable shade is used, as well as bronze or silver.
bronze powder
If bronze powder is used, then the following steps must be taken:
- The baguette is covered with alkyd varnish or paint of the desired tone.
- After that, bronze powder is applied to the sticky varnish.
Important! This procedure creates an effective appearance with a golden or bronze tint. But such a picture frame is short-lived. Even the touch of fingers causes a tarnishing of the “goldenness”. Therefore, it is necessary to apply an additional procedure in which the powder is covered with a layer of varnish. Recoating with varnish reduces the “golden effect”.
bronze paint
To paint a baguette for paintings, bronze paint is used, which can be purchased at ready-made in construction stores. In addition, you can make your own bronze powder paint. To do this, stir the bronze powder in the composition of alkyd varnish, drying oil. Even the usual sunflower oil suitable for this procedure.
Important! If you use varnish, then it must be diluted with a solvent. The more diluted the lacquer, the greater the “goldenness” of the paint. The coated surface of the frame in this case is not strong enough.

Aged Bronze
The picture frame, reminiscent of aged bronze, looks very stylish and beautiful. This effect can be achieved by performing several consecutive actions.
How to paint a DIY aged bronze picture frame:
- First, the frame is attached dark shade, applying black-brown tint, brown-green tint and other color schemes.
Important! The paint used must have a matte base.
- The field of this bronze paint from a can is sprayed over the surface of the frame with sliding movements.
Important! As a result of this procedure, all protruding parts on the surface of the frame will be golden, and the depressions will remain a dark shade. In this way, the effect of an old product from which the gilding has peeled off is created.
imitation wood
Modern technological processes allow you to create an imitation of the valuable texture of wood on the surface of the frame. In this case, you need to take the following actions:
- The baguette is coated with a primer or treated with matte paint white color.
- Then the coloring pigment is diluted in varnish to the desired colors. Basically, a dark brown color with some shade is used. The composition of the prepared paint should be translucent in consistency.
- This paint is applied to the surface of the frame with a brush with stiff bristles. Such a brush scratches the layer of applied paint and a white base is unevenly visible under it.
Important! Applying paint in this way requires certain skills. The imitation of wood texture will depend on how the brush is located in the hand and what movements are used during application. High level craftsmanship allows you to independently invent patterns of all kinds of wood textures.
foil coating
There is another original method of painting. To do this, the picture frame is covered with foil. How to decorate a picture frame with foil with your own hands:
- Before this, the baguette is treated with glue or varnish.
- While the coating dries, foil or potal is applied to it and pressed down with a sponge. The pasted foil repeats the relief of the frame and fits snugly to the baguette.
- received metal surface must be tinted with translucent paint.
Important! When using not golden, but white aluminum foil, warm shade bronze is created by applying grated lead from colored pencils. The lead must be ground to a powder state. This composition is rubbed into the metal surface of the frame with a brush with a hard base or rags.
For self-decoration baguette requires a wide imagination, creative thinking and versatile creativity. By experimenting and improvising, you can come up with new techniques, methods, and achieve interesting compositions in such creative process.
How to make a picture frame old?
The appearance of the items in the living room depends on the style of the interior. So, the interior in the style of Provence, Vintage and Shabby-chic means decorating the existing pieces of furniture “antique”. The antique look is created by a set of furniture, complemented by aged chairs, tables and chests of drawers.
In this style, flower pots, photo frames, all kinds of vases are decorated, Wall Clock, framing frames for mirrors. It is not at all necessary to purchase such things in the markets, since the items in the apartment can be transformed beyond recognition on your own.
Consider how to color wooden frame for the picture in vintage style handmade acrylic paint.
For this we need:
- ordinary wooden frame;
- brown acrylic paint, which we use as a base;
- white acrylic paint;
- acrylic craquelure varnish;
- tassel.
The first stage is painting the frame with paint, which serves as the basis
The main paint is used for pronounced cracks. Therefore, the base paint and the paint that imitates a cracked surface are selected on contrasting colors. If for the main color we use brown tone, then it will appear in place of cracks.
Important! We stock up on old newspapers so as not to stain the surface on which we will work. We put a picture frame on the newspapers.
Let's start painting the frame with acrylic paint. brown covered in one layer. A single-layer coating is quite enough, since the paint has a dense composition. If somewhere the layer is not quite thick, then the second coat will be crater varnish and white paint, which safely cover any defects in the main brown background. Our frame should dry for about two hours. Products treated with acrylic paint dry very quickly.
The second stage is the processing of the frame for the picture with crater varnish
We process the picture frame with varnish. The thickness of the layer depends on what kind of cracks there will be:
- If the applied layer is thin, then the cracks will look small.
- With a thick layer of varnish, the cracks will have pronounced outlines.
After painting, leave the frame to dry for at least 2 hours.
Important! Crater varnish is a coating that creates cracks. It's not the lacquer that's cracking, it's the paint applied over it. The crater component resembles an ordinary varnish.
The third stage - painting the baguette with white acrylic paint
Quickly paint over the frame with white acrylic paint. As a result, cracks appear right before our eyes. The paint should dry for about 2 hours. When the product dries, the cracks become clearly defined and the desired texture of the product is visible.
Important! It is very important to paint the frame over the entire surface, without taking your hands off, in one stroke. You can pre-train in the processing of any other material. If you pass the brush twice in one place, then the pattern of the crack is violated.
With the first layer, it has already manifested itself, and if you go through the second time, then the next layer of paint does not crack. In addition, the secondary passage literally lubricates the drawing.
How to paint a frame for a specific interior style?
Stylishly designed frames can emphasize the interior design, so you need to choose color scheme baguette, depending on the style of the room. How to paint a picture frame with your own hands, depending on the style of the interior:
- Wall decorations from carved frames in dark gold or dark bronze tones complement trendy glamorous interiors and are suitable for a classic option.
- The vintage style is characterized by a composition where aged frames, a candlestick and various accessories such as a mirror on a stand, figurines, caskets, antique perfume bottles can be present.
- Fancy frames painted in white, black and silver color, emphasize modern interior in fusion style.
- With a minimalist interior, standard square frames in white or any color that contrasts with the walls look great.
Frame style depending on the genre of the picture
The frame is the "clothes" for the picture. The design of the baguette should not cover the composition of the canvas. But there are exceptions, mainly for small-sized paintings. The ideal option is the correspondence between the texture of the baguette and the style of the picture:
- The texture of the frame can even repeat the characteristic strokes of paint or ornament that are used in the picture.
- With an uncomplicated plot of the picture, the frame should be in simple style. Conversely, deep story line pictures should be made interesting design solution baguette.
- Modern abstraction will not look beautiful in a lush gilded frame design. Therefore, for the simple, the simple serves, and the complex corresponds to the complex.
Important! A strict aluminum frame for a picture cannot reveal the lightness of a watercolor drawing. But it will perfectly emphasize the contrasting black and white photo. A graceful picture frame carved wood light tone Perfectly combined with a delicate watercolor pattern.
- Very beautiful and modern technology baguette scheduling. In this case, the image of the picture is continued in the frame, into which it smoothly “flows”.
- It also looks very impressive way to design a picture using two or more composite profiles, different in thickness. In this case, it is important that the composite profile consists of frames of different widths. The inner baguette, located near the picture, plays the role of a passe-partout, while emphasizing the picture itself, but at the same time emphasizes beautiful decoration"outer" frame.
Baguette color
If you are going to paint a picture frame with your own hands, big role plays and colors. The color of the frame of the picture should be complementary, respectively, set off the picture image. In addition, the color scheme of the baguette implies a difference in tone from the main color either to the dark side or to the light side.
Important! It is necessary to take into account such a nuance that a cold-colored frame is used for paintings in cold colors, and vice versa - a baguette of light colors is suitable for a warm image. However, there is an exception where natural wood goes well with any shade.
Baguette width:
- How large sizes picture, the wider the baguette for the image should be. This correspondence favorably emphasizes the significance of the picture. Such compositions are placed at the central point of the interior and make them accent elements.
- Small paintings are decorated with wide frames. At the same time, compliance is maintained when total area baguette more area Images. This option looks very impressive. But keep in mind that such a design requires a stylistic approach for other images in the room.
- When choosing a frame for small images, thin baguettes are often used. This choice looks stylish and modern, especially suitable for a whole group of paintings.
How to decorate a frame?
When decorating paintings, anything can serve as a material: wine corks, various cereals, fabric, old glossy magazines, all kinds of shells. Consider the most interesting options for decorating the frame at home.
Wine corks
This method of decorating a baguette is a modern hand-made art. To arrange such a frame, you need to take care of the basis for the baguette:
- Wine corks should be cut into thin circles.
- Using acrylic paints, give the appropriate color. It turns out a kind of cork buttons.
- Now you need to turn on creativity and imagination in order to decorate. It is necessary to stick cork buttons of various colors on the main part of the picture frame.
Important! The frame can be designed as a multi-colored solution, made in two-color or in a single-color version. In this case, taste, personal preferences and interior style play a role.
Groats
There is a very interesting option decorating picture frames that are intended to be placed in kitchen area. How to decorate a frame for a picture with cereals with your own hands:
- We process the base of the frame with PVA glue.
- After that, generously sprinkle the surface of the baguette with selected cereals. All kinds of cereals can be used. Basically, barley, buckwheat, rice, wheat are used in decoration.
Important! The frame will look much neater if the base of the baguette is pre-treated with paint that matches the color of the selected cereal.

old magazines
Even from old glossy magazines, you can design picture frames that create a surprisingly beautiful interior:
- Cut old glossy magazines into thin strips of the same size.
- From the cut strips, it is necessary to wind tight tubes and fix them with glue.
- With such tubes you need to paste over the base of the frame for the picture, and unusual design ready.
natural materials
For the decoration process, you can use natural materials:
- Small branches of shrubs can be used to decorate an outdated picture frame.
- Large branches are suitable for unusual and creative design baguette.
Decoupage technique
Also, the base of the picture frame can be pasted over with interesting fragments from old magazines and comics. To decorate the frame with your own hands, you can use special paper, which is characterized by a variety of storylines.
Textile
For true needlewomen, the design of the frame becomes a real art, so beautiful fabric. How to decorate a picture frame with a fabric with your own hands:
- We make the base of the baguette on a thick sheet of cardboard.
- Cut it out along the contour lines.
- Then you need to drape the surface of the frame with a beautiful fabric.
Important! There is an option to make a soft frame. To do this, use cotton wool or synthetic winterizer, which fill the baguette for the picture.
Decorative tape
In this article, we have offered you a lot of interesting ideas how to paint a picture frame and then decorate a baguette. Choose the ones that appeal to you more, and which you master in your practical decorating skills, then the result will certainly impress you!