How to hang a picture without drilling the wall. How to hang a picture without nails on the wallpaper yourself Fixing modular paintings without drilling walls
We will send the material to you by e-mail
More recently, the main requirement for design own house or apartments were limited only by properly selected wallpapers: color, pattern, texture. Today, designer accessories have entered our lives as an integral part of the interior of residential premises. One of them that has become very popular today is modular paintings. In this article, we will talk about them and how to properly hang a modular picture on the wall using different technologies.
Modular painting on the wall
This is a composition consisting of several elements, which depict a part of a drawing or a fragment of one common canvas. When parts are joined, a overall plan, so it is very important to correctly arrange the modules by comparing them with each other.

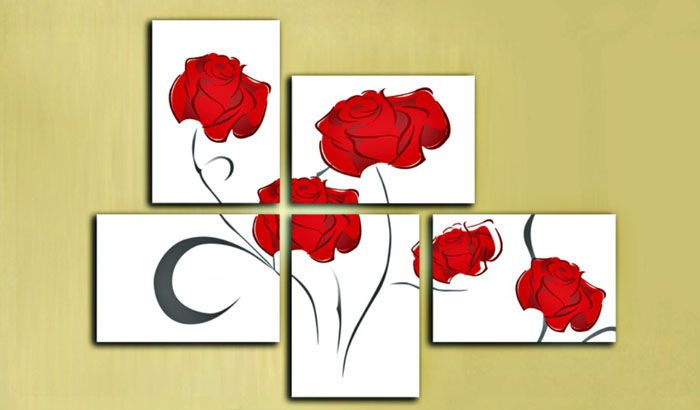
The number of modules must be at least two. By the number of elements, modular paintings are called differently:
- a picture consisting of two elements is called diptych;
- in three parts - triptych;
- out of five penaptych;
- more than five elements polyptych.
However, not always a large number of stands for larger size paintings. Elements can be of small width, which makes it possible to more effectively display a piece of the overall picture on them, writing small details on it.

This can complete the conversation about themselves modular paintings ah and go directly to the main topic of the article - how to hang modular paintings on the wall.
How to hang pictures on the wall
Let's start with the fact that modular elements are pieces of one large canvas. They are a purely structurally separate picture that can be hung by any convenient way. The main requirement is the strength of the fastener, which would allow it to withstand the weight of the object being hung. The second requirement is the exact location of the modules among themselves and in the required plane. For example, in the photo below you can see that the parts of one whole are not located on the same level. So this dimensional arrangement on the wall must be precisely determined.
There is no point in considering the first two, these are ordinary fasteners that have been used for a long time. They can be classified as classic fasteners. But with others it is necessary to understand thoroughly.

Liquid Nails
This adhesive composition is known as strong and reliable. But when using it, care must be taken to ensure that the surface of the wall is very even. The point is that the rest fasteners can smooth out some of the unevenness of the plane. The adhesive is applied thin layer, besides, the pictures are pressed tightly against the wall. This means that surface irregularities will immediately be transferred to the mounted modules in the form of distortions that will be visible to the naked eye.
As for the process itself, depending on the size and weight of the picture, liquid nails are applied either to the entire perimeter of the frame on the reverse side, or in sections.

After that, it is applied to the wall along the marked area and pressed with hands. Within a few minutes, the element can be moved, leveling. It should be noted that in this way it is possible to install paintings in any intended premises, because the adhesive composition does not change its strength properties either under the influence of temperature changes or changes in humidity. So the pictures in the kitchen or in the bathroom, pasted liquid nails, sag for more than one year.
This fastening material appeared on the market relatively recently, but many home craftsmen have rightfully rated it as one of the most reliable and easy to use. In principle, this is a fabric base treated on both sides with an adhesive composition. On top of the adhesive tape on both sides is closed with a protective polymer film. You remove the last one, apply the strip to the required place, and it is immediately firmly attached to it.
It is on this quality of adhesive tape that the method of its use for hanging modular pictures is based. How it's done:
- The sticky material is cut into several pieces up to 10 cm long.
- A protective film is removed from one side.
- The adhesive tape is pressed with the adhesive side to the frame of the picture.
- So all segments are established, evenly spaced from each other. Be sure to install at the corners of the object.
- The top protective films are removed.
- The module is pressed in place of its installation.

Expert point of view
Dmitry Kholodok
Technical director of the repair and construction company "ILASSTROY"
Ask a Question“Regardless of the texture of the wall (drywall, plaster, wallpaper with different surface and so on), double-sided tape can be easily attached to it. Therefore, it is not necessary to do additional manipulations related to increasing the adhesion of the wall plane.

Velcro
These fasteners are called the "Command" system. In their use, they resemble double-sided tape, but only these are two parts, each of which has one side - this is a sticky adhesive, and the opposite is Velcro. That is, one of them is attached to the wall, the second - to the picture. Then the latter is applied to the wall so that both parts of the Velcro are joined to each other.

The most unique thing about this whole variant is that the Velcro is also easy to separate from each other. Of course, when connected, they firmly hold the picture on the wall. But not very much effort allows you to separate them. So, if I may say so, this is a reusable fastener.We add that you can install ordinary plastic hooks on Velcro, which come complete with fasteners, and modules are already hung on them. Also a simple option with the ability to take a picture.

There is exactly the same fastening system, which is called "Kreps". How to use it, you can see in the video below.
Hook-spider for pictures
This fastener got its name from its resemblance to a spider. This is a plastic hook, in the design of which there are two or four carnations sticking out in the form of insect legs. Carnations are made of durable steel, their ends are sharp, so with the help of a hammer they are driven into almost any construction material. The main requirement for the latter is strength in the sense that it is under the influence of impact loads didn't crumble.

Using spider hooks is simple:
- Pull the cloves towards the front of the fastener.
- Put it at the place of installation.
- The legs are hammered with a hammer to the plane of the hook.
- If it is necessary to remove the fastener, it is simply pulled out of the wall with pliers. There will be 2-4 small holes on the surface that are easy to disguise.

Smart retainer
These are polyurethane rectangles that are easily attached to any surface. These are reusable products that just need to be rinsed after dismantling. warm water and they are ready to use again.
To understand what we are talking about, we suggest watching the video below.
Video: how to hang modular paintings and other household items on the wall
What else can you hang a modular picture on
One more is enough interesting option – suspension system for paintings and photographs. In fact, this is a rail (wooden, metal or plastic) that is attached to the wall under the ceiling. Vertical rods are fixed on it, to which the modules of the picture themselves must be attached. In this case, the parts can be moved along the rods, lowering or raising.
Threads with hooks at the ends can be used as guides. It's over complex structure, because it has a built-in mechanism by which the elements of the modular web are lowered and raised.

How much do they cost and where can I buy mounts for modular paintings
Today, all of the above fasteners are not in short supply. They are traded by both ordinary construction stores and Internet services. Let's just denote their average prices across the country.

How to hang a picture on a concrete wall
The last question of the article concerns the most common wall, or rather, the material from which it is made. Concrete is the most durable material from all walls. Previously, in order to hang a picture, you had to drill it, hammer in dowels or wooden "chops", and only then screw screws into them. It is reliable in terms of withstanding heavy loads, but it is long and dusty, and the process itself cannot be called simple.
Therefore, all the fasteners that were described above can be used for concrete walls. The main thing for the first is a clean and even surface.

So, in this article we have analyzed the question of how to hang a modular picture, regardless of whether it includes five segments, two or ten. If you have any questions, leave them in the comments. Our editors will definitely answer them.

Save Time: Featured Articles Every Week by Mail
Many will agree that even the most modern and expensive interior can look a bit boring and inexpressive without small decorative elements. Little things like wall paintings, frames with family photos or decorative plates brought from different exotic places make the home more comfortable, homely, filled with a characteristic mood and soulful atmosphere. However, given how much effort and money was spent on this very repair, many still refuse to place such items on their walls, fearing damage wallpaper or others Decoration Materials. To avoid undesirable consequences from the use of familiar fasteners, in this article we will look at several ways, how to hang on the wall without nails picture, frame or decorative plate.
Criteria influencing the choice of fastening method
Before we begin to consider the fastening methods themselves without the use of nails or self-tapping screws, it is necessary to understand what parameters affect the possibility of their application. by the most important indicators are:
- the weight of the item;
- type of wall covering;
If you do not take into account such an obvious fact as painting weight or plates, then all your efforts may not be successful. Some fastening methods allow you to securely hold objects weighing up to 9 kg. But most are still intended for small-sized elements weighing up to 1.5-2 kg. It is clear that a heavy clay plate cannot be held with the help of double sided tape.
The next important factor is base material, on which the fastener will be held. For example, the same double-sided tape will not stick well to textured wallpaper. However, on smooth wallpaper or at drywall surface he will feel quite safe. Brickwork or a surface made of natural or artificial stone Works well with various adhesives.
Do not forget that it is not enough to securely fix the picture on the wall - this must also be done relatively smooth. Only correctly located objects will create a harmonious atmosphere. For this, do not neglect building level or applying markings immediately before starting work. 
Methods for fastening light objects without nails
Weightless objects like posters or posters calendars or schedule of the day, photographs frameless and other thin elements, the fastest and most reliable can be mounted on the wall using the following methods.
No. 1. Double sided tape
Double-sided tape will be the best solution for placing objects on drywall walls. This is explained very simply - such fasteners do not violate the integrity of the GKL, which has a positive effect on its strength indicators. By the way, this figure decreases with each new hole that you make in such a surface.
The most aesthetically pleasing item will look that is glued on all four edges, which will prevent them from bending. To fix a small photograph, it is enough to glue small strips no more than 1 cm wide along the edges. The larger the format, the longer the pieces of adhesive tape should be. Mark the location of the poster on the wall in advance and check its evenness. Neglecting this point and focusing "by eye", it may be necessary to tear off the glued element in order to correct its position. In this case, you can tear both the object itself and tear off a piece of wallpaper or paintwork from the wall.
It is necessary to remove the protective layer from the second sticky side immediately before gluing. So you will not leave fingerprints on the sticky layer and dust will not have time to settle on it while you “try on” the photo on the wall. The wall surface must be dry, smooth, clean, free of dust and other particles. If after a while you need to remove a strip of adhesive tape from a decent wall without damaging its lining, you need to carefully peel it off small plot, starting at the corner, and slowly pull the rest of the strip down at a 90 degree angle to its orientation.
You can immediately use double-sided adhesive tape on a fabric basis, which is removed without a trace at any angle and from any surface. There is such a variety as foam tape, which can withstand much greater loads. It can be used to attach small paintings or photographs to plastic framework.
No. 2. Pushpins
Pushpins also perfectly cope with the task of securely fastening light objects. There are many types of buttons, the heads of which have decoration. Thus, this visible fastener will not only not spoil appearance poster or photo, but also help to decorate and even complement it. Pushpins will stick well on plastered walls, as well as walls pasted over with wallpaper, covered with paint or decorative plaster. It is easy to stick them into such a surface. But in the case of concrete walls difficulties may arise. If the layer of plaster under the wallpaper is already old and begins to crumble, the puncture sites may turn out to be too loose, and the buttons will periodically fall out. Consider this when choosing this method of fastening in the children's room. You may not immediately notice the missing button, and the child will easily prick it.
After dismantling such a mount, barely noticeable traces in the form of small holes will remain. To eliminate them, it is enough to run your finger over the wallpaper and smooth them at the puncture site. Thus, buttons are good if a private change of scenery is required.
Now back to concrete walls. It is still possible to attach the same photo to them using the buttons. You just have to spoil the wallpaper a little. To do this, choose buttons with a flat thin hat. Using a clerical knife, it is necessary to make a horizontal incision of the wallpaper, the length of which is equal to the diameter of the hat with a small margin. Now make the same transverse incision. You will get a small cross. With a knife, carefully separate the wallpaper from the wall and bend the corners.  In the resulting free place lean the button with a hat against the wall, after dropping a drop of superglue on it so that the tip looks at you. Now put small drops on each corner of the folded wallpaper and bend them back. When the glue dries, you will get a fairly strong mount in the form of a small tip protruding from the plane of the wall. It remains only to prick him desired element. This method is good if you are not afraid to damage the surface. After installation, you can hide the tip with a Styrofoam ball or a piece of wine cork.
Number 3. paper clip
paper clip can also easily and quickly turn into fastener for light pictures or frames. To do this, it needs to be slightly redone. We will paste the paper clip under the wallpaper as in the previous version. Only the cut will look a little different. The horizontal line should be slightly longer than the paper clip, and the perpendicular line should be slightly larger than the width of the paper clip. A transverse incision is necessary for the free insertion of a paper clip for the wallpaper. The edges need to be bent and peeled off the wallpaper from the wall along the entire length of the notch. The paper clip itself must be unbent so that it resembles the letter "L". As if you fastened it with a large stack of papers, and then removed it.  Get one of the edges behind the wallpaper, see if it goes completely into the notch. If all is well, remove the paperclip, drop some glue, position the paperclip and firmly press the wallpaper into place. The glue should fill all the void that has formed and be sure to get on the paper clip. Leave the impromptu fasteners to dry for a day, and then feel free to hang a picture on it. The edges of the wallpaper will adhere well and the traces of the cut will be almost invisible, especially if the wallpaper has a texture.
At first it may seem that such fasteners are not particularly reliable, but in practice you will be pleasantly surprised. If doubts still remain, you can make several of these hooks. If the moment comes when you have to remove the paper clip, you do not need to pull it out along with the wallpaper. Just bite it off at the very base with sharp wire cutters. By the same principle, you can use fishing or clothes hook. All stages of work will be similar. 
No. 4. sewing pins
sewing pins- one of the most accurate methods of fastening, which causes the least damage to the surface of the walls. Lean the photo against the wall and pierce it with a pin at a slight angle to the plane of the wall. Her leg should go behind the wallpaper, but not stick into the wall. Instead of pins, you can use the usual sewing needle. It will be less noticeable. Such fasteners can withstand weight up to 500 grams. 
No. 5. decorative ribbon
decorative ribbon or a decorative harness can also be used as a fastener. With it, you can arrange small paintings or photos in a more original way. In the desired location, you must perform one of the above hooks. Take a ribbon with finished edges, fold in half and tie on the hook. You will end up with two loose ends. We will place pictures on them. If you don’t really like the knot in the middle of the wall from an aesthetic point of view, you can tie a neat bow and another knot so that the bow does not untie under the weight of objects. You can fasten the bow separately and then simply glue it onto the knot. There are a lot of options for decorating the place where the ribbon is attached, ranging from artificial flowers to beautiful beads. Push off general interior. To fix the pictures on the ends of the tape, you need to put a little glue on their reverse side. And for reliability, you can cut strips of thick paper and additionally glue them over the tape. Alternating the height of the location decorative elements you can create a very unusual collage. 
Such simple ways you can fix small plates made of light materials, photographs or small pictures in plastic frames. If you make several fasteners of the same type on the same line, and on reverse side stretch the fishing line or nylon thread into the ears along the edges, then by hanging it in this way on all fasteners at the same time, you can significantly increase the strength of the fastening, and the allowable weight will increase several times.
Methods for mounting objects of medium weight
The same, loved by many, modular pictures or photo frames made of wood with glass protective sheets weigh much more. And if the format exceeds the size of A4, then they can even reach a weight of 1-1.5 kg or more. But this is not a reason to grab a puncher and remind your neighbors about yourself. If several painless mounting methods that can easily withstand large objects and heavy plates.
No. 6. Spider Hook
Spider Hook- a small tricky item, which, despite its simplicity and modest size, is highly reliable. He is plastic product with flat back side. On the front side there is a hook at the bottom, reminiscent of the hook on a clothes hanger. And on the upper edge are four sharp spikes. They provide a secure hold. The spider is attached to the wall as follows - a mark is made in the selected place, to which the fasteners are leaned with the flat side. The spikes will look at you. Now, using a small metal hammer, you need to hammer these spikes into the wall. Do not strike with all your might, so as not to damage the plastic surface or break it. As soon as the spikes enter the wall flush with the plastic, the hook will lock securely.  Please note that the hook is located at the bottom. Therefore, the loop on the back of the picture or plate must be made at such a height that its surface completely hides the fastener. The hook-spider can withstand objects weighing up to 2 kg. This is his average. smallest model designed for a weight of 1-1.5 kg, and the largest can withstand loads up to 9 kg. Delete this hook is very simply. Grab the outer surface of the hook with pliers at the level where the spikes enter the wall, and simply pull it out. There will be a trace in the form of four small holes, which can be easily smoothed out. Definitely better than a dowel sticking out of the wall.
No. 7. Miracle Velcro
Miracle Velcro, or command system, have proven themselves as a way of attaching objects to even, smooth walls. These stickies are made of plastic. At the ends they have a small hook. This system consists of two parts that have a sticky layer. One part is glued to the wall, the other to the reverse side of the desired object, and then they are interconnected.
The beauty of these stickies is that they can be easily removed without harming the surface of the walls and reuse, as opposed to double sided tape. There are several types of configuration, which differ depending on allowable weight. The most minimal equipment is 4 sets of 8 small strips. Medium includes 3 sets of 6 strips. In the first case, one Velcro can withstand 100 g, and the whole set - 450 g. In the second case, the Velcro can withstand 400 g, and the whole set - a load of up to 1 kg. To dismantle or outweigh the picture, you just need to remove white stripe from the system. 
No. 8. Kreps fastening system
System mounts "Kreps"- another one modern system designed for fastening various elements to the wall without the use of nails and without harm to the surface. "Kreps" is designed for items that are attached to ropes or cables. Therefore, if you like this method, then you will need to take care of attaching the ropes to the back of decorative items.
The system is plastic element, the back side of which is flat and has an adhesive layer. The surface of the wall must be smooth and even. Then it will be possible to ensure high reliability of fastening. The lower part of the device is retractable and has several rows of small hooks. It is very easy to use this system even for the first time. It is necessary to remove the protective tape from the adhesive tape and stick it to the wrong side of the hook. Now you need to remove the protective tape from the second side and lean the hook against the wall. Press firmly for 30 seconds. Now you can hang the picture. for one "creps" is 1.5 kg. To hang a larger item, use several fasteners. The main thing is to arrange them evenly to ensure a snug fit of the picture to the wall. 
Hello all readers!
I dedicate this review to one of the most ingenious inventions of mankind, after dishwasher(!!!), which allows you to attach pictures and posters without drilling walls and hammering nails! This review is about easy-to-remove Velcro fasteners from the Command brand!
I understand that if you have ever watched the "School of Repair", this is "know-how", not know-how for you at all ... Then in my review, you will also find photos of interesting pictures on kitchen topics and ideas on how to do without this Command in principle!)))
Of course, I don’t know how anyone, but I like to change my interior, make hand-made gizmos and even drag furniture from corner to corner. All this not so much in the name of beauty and functionality, how much because the same thing bothers me ... So with the pictures I get exactly the same. I do not just "shuffle" images, but also drag them from place to place. It is clear that so many holes (for each of my “I want this”, and now “I want that way”) in the walls, with all the desire, you can’t do it! More precisely, make holes Yes, you certainly may! The question is what THEN, with these drilled holes and make protruding dowels or nails ...
Once attached, the paintings can be shifted, aligned, centered. The main thing is that the Velcro is long enough. In my case, it was attached to one mount, although the manufacturer recommends at least 2 pcs. It's been on for a year now and it hasn't fizzled out yet!
In general, the option with sticky fasteners for pictures from the Command brand was a great way out for me.
What is the Command picture and poster mounting system?
The technology of fastening to the walls, with the help of this wonderful fastener, "looks" like a Velcro tape used by needlewomen, scientifically called Velcro. You can meet such a mount on almost any down jacket (zipper protection from blowing).
How to attach Velcro tape to walls and paintings?
Very simple! Decide on the location of the "masterpiece" on the walls, mark them, remove protective film from the fastener and sculpt as evenly as possible on the wall and picture. The adhesive layer in the form of a silicone substrate has already been applied to the Command. The sticky part of the fastener has a special tongue-tail, it allows you to easily remove the fastener from the wall without leaving marks.
Where to buy and how much Velcro for Command pictures!
This version of "fastening without drilling and nails" is sold in almost all major hardware stores, as well as in chain supermarkets. I bought my sample in Lenta. When buying Velcro, consider the weight of your poster or painting. Command has several types of such mounts in its assortment, they differ in weight / load that they can withstand and colors (white and black). The cost of a set of Velcro depends entirely on the weight it can withstand and the number of fasteners in the package. For my "masterpieces", I bought the smallest fasteners, 4 pieces were included in the set. The cost is about 200 rubles per set.
About other options for attaching paintings without drilling walls:
The need to look for a replacement for Commrad, for me, is connected precisely with the cost of mounting material ... It's one thing when you need to hook a few light pictures, and it's a completely different option when you decorate an entire wall with pictures ... So you can go broke - min 100 rubles per one. .. And if there are 20 or 30 paintings... A decent amount comes out in the end!
My replacement options:
1. Ordinary Velcro sewing tape, I already talked about the fact that the connection technology is similar. The issue of attaching the tape to the wall and frame is solved with the help of budgetary double-sided tape for mirrors (about 100 rubles per three meters, they are sold in stationery, as well as construction stores) or ordinary glue (I used hot glue from a Fix praic gun). In the case of double-sided tape, there are no traces left on the walls after removing the tape. In the case of hot melt adhesive, there may be nuances ...)))
2. Plastic wall fasteners for drywall. The downside of such fasteners is that driving a fastener into plastered walls is akin to science fiction!))) And it clings wonderfully to plasterboard structures! There will also be no traces of mounting on the walls, only three small holes with a diameter of less than a millimeter. Where could I buy? Look either in baguette stores, or even better on Aliexpress (the most budget option).
Thanks for reading!
How to hang a 5 piece modular painting? The question often arises in people who are used modular option paintings in the interior and pay attention to design.
Modular canvases can attract attention in any apartment or house, after a glance you will immediately get an impression of the room, as well as the owner of the house. Therefore, it is important to know how to hang a picture module without nails, without using a drill and other similar tools, without ruining the look.
What are modular paintings?
Modular system pictures - several pictures in one. In other words, there will be one drawing, but there will be from two to five canvases. Another such work is called a segmented picture. All parts of the picture are not connected to each other, and the installation is carried out at a distance from each other.
For framing, a regular frame or baguette is used. end part continues the picture, due to this canvas are voluminous. If you attach everything correctly, then the pattern at different angles will be different.
Types of modular canvases are presented in the table:
The modular paintings got their name from Ancient Greece. Then the painters made a large drawing on canvas, the overall picture included several segments. When creating modules, the whole picture is divided into 2 or more parts, their size can be the same or different. You need to install the canvas at a distance of 2-3 cm, after which you get a general pattern. The problem is how to hang a picture on the walls without drilling.
After all, it is not always possible to use power tools and screws, self-tapping screws, dowels, and other fasteners. Not everyone wants to make holes in the surface of the wall and spoil it, especially if the repair is fresh. It is not necessary to break through the walls and the main alternatives will be described below.
Smart retainer

You can hang a picture without drilling on the wall with the help of a special fixer "Smart Fixer". Such a device is a polyurethane rectangle that must be attached to the wall. The bracket has the main advantage - the latch is reusable. After use, it will be enough to rinse it in water. According to the instructions, such a latch does not withstand all paintings; the safe weight for the holder is no more than 2 kg. Therefore, it is impossible to install a heavy poster, it is better if the picture is small, otherwise the poorly fixed canvas will simply fall off.
The latch works like Velcro, while it does not leave marks on the wallpaper, although the method will not work if there is whitewashing. It is convenient and easy to use with your own hands, no need to drill and hammer nails.
How to hang modular paintings (video)
Tape and Velcro
Velcro is used for painting on the wall, the method is ideal for people who like to change home interior, rearrange furniture and outweigh paintings. In this case, the hole drywall walls or concrete is not needed, otherwise putty holes are needed.
Velcro are cheap, easy to fix and you can do everything yourself. The material is bought in sewing stores. One part of the Velcro is glued to the wall, the location of the paintings that should be hung is preliminarily indicated. The second part must be glued on canvases, from the back surface. Next, the fastener simply connects to the wall and you're done. The number of fasteners depends on the type of modular picture. The attached attribute must hang securely on the wall.

Some are used Double-sided tape, if desired, you can hang not only frames on it, but also a tree, so as not to make holes in the wall and decoration, you can drill holes in the tree and hang picture hooks on them without drilling the walls. It is better to make the hook not long, because the fixation is carried out on a sticky material that is not reinforced in any way and this original way may not be reliable. Some fix the canvases with kitchen hooks, in the middle and on the side. The main thing is that the surfaces of the walls are not textured, a fishing line is hung on the canvas and everything clings to it on hooks.
Fixing a polyptych
Setting up a stand where many parts are hung like this:
- The central canvas of 5 parts is determined and a split element is placed on the wall. The middle is a long segment and a wide one. Its height and dimensions are greater than those of other parts.
- Side elements are placed parallel to the center, the gap between the canvases is up to 4 cm.

One is hard to bear right angle and work with each part, it’s good if another person comes to the rescue, which can provide a drill or a metal bracket. Some for fixation paper sheets on drywall, GVL and other walls use:
- Silicone adhesive.
- Liquid nails, glues very high quality special compound"Kleber".
- Pins.
- Subframes.
A sheet of modular canvas, together with the described materials, is hung, and the wall is not damaged.

Before installing modular paintings, it is better to read a few tips:
- Choosing the right place is the main condition.
- Vertical photos are hung on the walls in order to visually enlarge the space. Horizontal canvases expand the wall.
- Large drawings are not suitable for the hall or living rooms. The room should not be densely crowded for such a canvas.
- Oil paintings are hung in darker places where there is no backlight so that the colors do not deteriorate.
- Canvases should be hung at a distance of 1.5 meters from the floor level.
- To create an effect, glass frames are hung on modular canvases, due to the play of colors, an unusual effect is obtained.
Photo gallery of finished works


Since ancient times, people have sought to decorate their home with a variety of decorative things: panels, photographs, masks, decorative hanging figurines, amulets, paintings.
Pictures have always been hung on the walls, and sometimes situations arise when there is no way to drive a nail into the wall or screw in a screw, or there would be no one to do it.
About the paintings, more precisely, about their mounting on the walls, we will talk further. Shall we consider ten options? how to hang a picture using different fasteners.
As a rule, nails and screws leave behind quite big holes and even chips that look unaesthetic and holes from them subsequently need to be repaired and painted over.
And then simple ones come to the rescue, but effective ways mounting pictures. There are several of them, and you will definitely find the right option for yourself.
No. 1. Paperclip or hook
This method is suitable for walls covered with wallpaper. On the wall, in the place where you want to hang the picture, make an incision horizontally. Fill the incision with superglue and insert a paper clip there, after bending it in the form of a hook. You can also use a clothes hook as a fastener. The place where we glued the paper clip or hook is covered with wallpaper. This mount is suitable for not very heavy paintings.
No. 2. Button
Fastening with a button is done as follows: make an incision on the wallpaper, pour glue in there, stick the button in there and hide the base of the button under the wallpaper. All fasteners are ready! Such a mount is able to withstand not a heavy picture.
No. 3. Spider hook
Such fasteners are sold in hardware stores, it is called a "spider hook". The mount has four sharp ends that are well attached to the wall with a hammer. The hook will withstand a picture weighing about two kilograms and is securely fixed to any wall.
No. 4. Needle
What interior item is this fastener designed for?
This type of fastener is able to withstand a light picture or drawing.
For this they take sewing needle and stuck into the wall. You can also carefully drive a tailor's pin into the wallpaper. They also break off the eye of the needle and carefully drive it into the wall with a sharp end. The hole from the needle is small and invisible, unlike screws and nails. Since the needle is made of steel, it has good strength and will hold the picture securely.
No. 5. Double-sided tape
This fastener is suitable for walls that are pasted over with thin paper wallpaper and for partitions from. The adhesive tape just needs to be glued to the edges of the frame and pressed against the wall, so that the picture sticks well to the wall surface. But this method has a minus, the double-sided tape used after removing the picture leaves sticky traces. To avoid this, you need to hold the tape at an angle of 90 degrees with respect to the wall when you shoot the picture.
No. 6 Velcro Command
Such a mount can be glued to any surface, they can withstand paintings up to two kilograms.
Velcro Command is very easy to remove from any surface. Velcro sold in a set of several pieces. The principle of operation of Command Velcro is as follows: one Velcro is glued to the frame of the picture, the other to the surface of the wall. The weight of the picture depends on the number of strips, that is, the more Velcro, the greater the weight of the picture.
No. 7. Wine cork
An ordinary wine cork is cut into washers 1 cm thick and glued to the wall with glue that dries quickly. After the cork washer is glued, a small carnation is driven into it, and it will serve as a mount for the picture.
No. 8. Ceiling plinth
This method is suitable for those who want to hang a lot of pictures and not damage the walls. Moldings () are sold in hardware stores or markets. They are usually simply glued to a wall or ceiling, and then a strong fishing line is hooked to it, and pictures are hung only on the fishing line.
How to hang a picture without drilling. Chemical methods
No. 9. Liquid nails
This is a special adhesive that sticks surfaces together. Liquid nails are applied pointwise to the surface of the frame (in the event that the weight of the picture is large, then the entire frame is smeared). Then the picture is pressed against the wall and held for a few seconds. If necessary, place a support so that the picture adheres well to the wall surface.
No. 10. Polymer glue
This glue leaves no residue behind. Works the same as liquid nails. In order for the picture to stick well, we support the picture for a day, for example, with a board.
If the picture is heavy, glue is applied over the entire surface, and if the picture is light, then only along the edges of the frame.
Here we have described several ways to attach paintings without drilling. These are quite simple and accessible to all methods. Of course, you will choose the ideal method of fastening for yourself. Decorate your houses, admire the beauty of the paintings. We hope that you will learn from this article for yourself useful information and you were interested in reading our article. We wish you good luck and inspiration!