Vinyl wallpaper on paper basis how to properly glue. Wall covering with vinyl wallpaper. Removing old paint
Among the huge variety of types of wallpaper produced by the industry, all of them, regardless of the complexity of the production technology or the number of layers, have either a paper or non-woven base. Depending on this, an adhesive is selected that corresponds to one or another basis. The selection of glue for vinyl wallpaper on paper bases requires special attention. Why you should pay special attention to the selection of glue, specifically for this type of wallpaper, we will answer in this article.

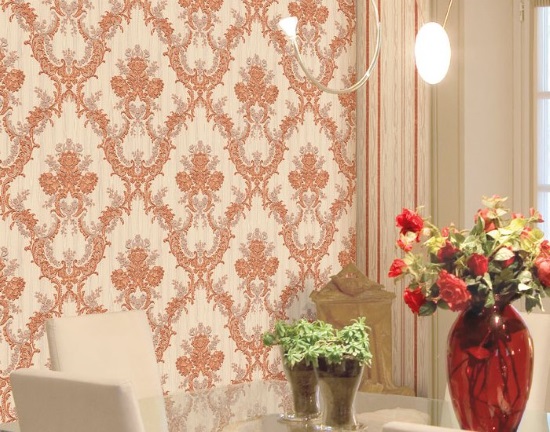
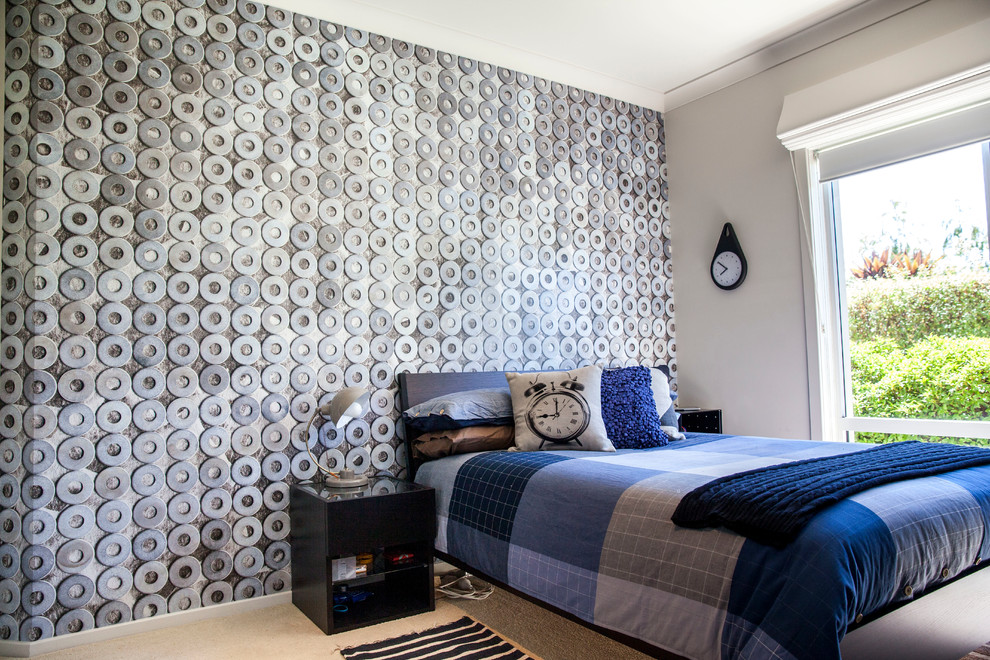
Wallpaper has been and remains the most popular means of decorating walls in residential areas. This is especially true of living rooms, bedrooms, children's rooms. Wallpaper is less widely used in hallways, kitchens, and toilets. Almost never used in bathrooms.
Vinyl wallpapers
Vinyl wallpaper became widespread in the late 80s - 90s of the last century. The novelty of the product in the post-Soviet market, brightness and color fastness, attractive appearance and ... perhaps the main thing at that time for the average consumer was their phenomenal wear resistance and the ability to wash off pollution with a damp cloth.
In order to save money, vinyl wallpaper, with the prospect of their possible “renewal” by washing, began to paste over everything indiscriminately in apartments - from children's rooms and bedrooms to bathroom walls. The practice of using vinyl wallpaper very quickly showed the fallacy and inadmissibility of such a thoughtless use of "vinyl".

It became difficult to breathe in the apartments; for a long time, a specific smell from the wallpaper remained in the rooms. On some surfaces, the wallpaper began to flake off and fall off in whole strips, while on others, cracks began to appear between the joints of the wallpaper, which greatly spoiled the appearance of the room, especially if the wallpaper was of dark tones.

The reason was ignorance of the features of the use of vinyl wallpaper. There was practically no information from foreign manufacturers about the product and the composition of wallpaper adhesives that should be used for sticking this type of wallpaper.
Texture of vinyl wallpaper
Vinyl wallpaper is nothing more than a thin, mass-dyed, polyvinyl chloride film applied to a paper or non-woven base. There is a kind of vinyl wallpaper - “foamed” - this is really a foamed polyvinyl chloride mass, usually highly embossed, also having a paper or non-woven base.

Based on these features of the structure of vinyl wallpaper, one can distinguish a number of their properties:
- The ability to stick depends on the properties of the substrate: paper or non-woven layer.
- Vinyl wallpapers have more weight compared to other types of wallpaper due to the severity of the polymer coating.
- Vinyl wallpaper absolutely does not let air and moisture through.
- Requires special preparation of the surface for gluing.
- Requires special wallpaper adhesives.
Surface preparation
Features of surface preparation for sticking vinyl wallpaper are due to the fact that the top - vinyl layer, absolutely does not allow air and moisture to pass through. Therefore, the drying time of the glue applied to the paper base increases several times compared to paper, non-woven or fabric wallpaper.

Painted walls are absolutely not suitable for sticking vinyl wallpaper. oil paint, which also does not allow moisture to pass through.
wall under vinyl wallpapers must have flat surface, be completely puttied and processed sandpaper wrapped on a sanding block to remove small sagging and bubbles on the putty. After grinding, the wall is treated with a primer to give the surface density and eliminate traces of building dust.

Only in this case, when the wall comes into contact with vinyl wallpaper on paper basis, there will be sufficient air exchange, which will allow the adhesive to dry quickly and evenly.
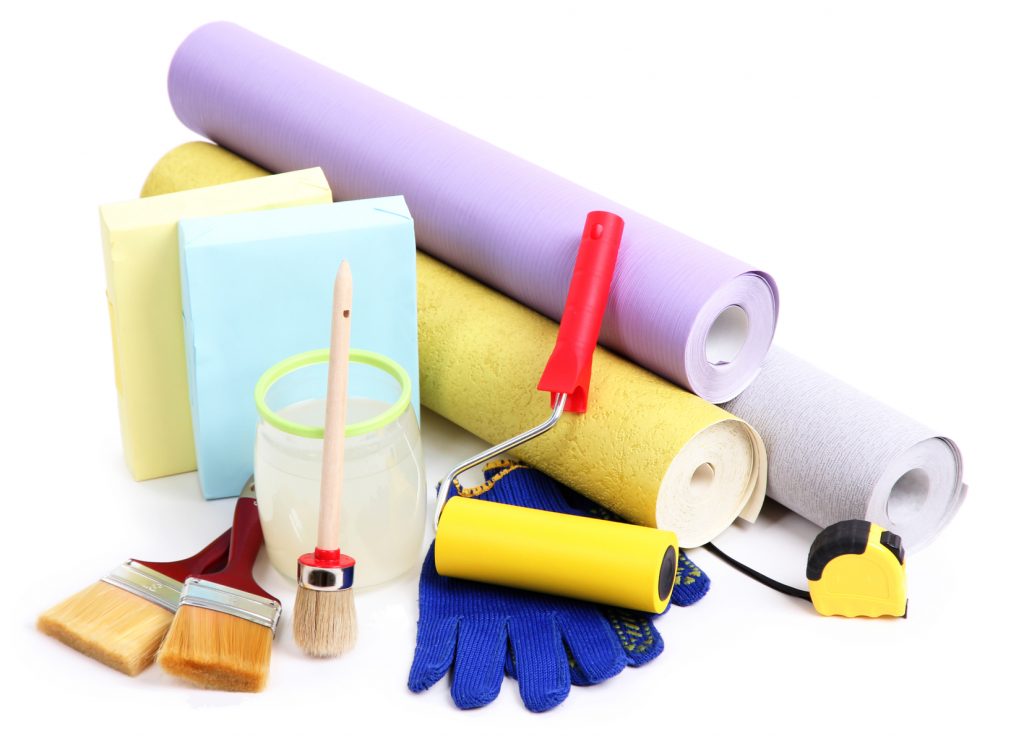
Glue composition
Currently in construction stores you can find a fairly rich assortment of wallpaper glue from various manufacturers and for various types wallpaper. Therefore, the question of which glue to use is not worth it.
The question is which one - should not be used!

You can try to use archaic means for sticking vinyl wallpapers - such as paste, PVA glue or Bustilat, if you are pasting over a shed or chicken coop and do not plan to make any repairs in them in the next 25-30 years.
A paste made at home from potato starch or flour is a very unstable adhesive composition, which, moreover, is adored different kinds molds and cockroaches.

PVA glue or Bustilat - this is for those who do not think about the subsequent possible repair or change boring wallpaper. Both adhesives create a strong airtight film that is almost impossible to remove from the wall surface without completely removing upper layer plasters. Think about the time and effort it will take to remove the old wallpaper from the wall in the event of a subsequent repair before applying these “non-wallpaper” vinyl wallpaper adhesives.
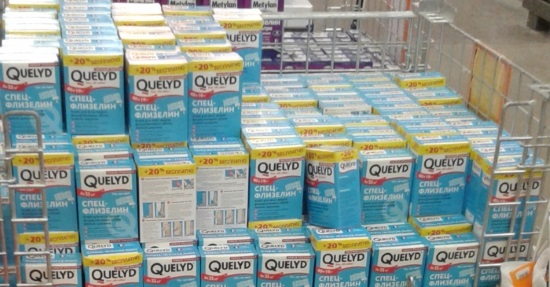
The most acceptable are the compositions of world famous brands: "Cleo", "Metylan", "Quelyd", or domestic production"Moment".
When choosing among manufacturers, it is better to focus not only on the price of a package of glue, but also on the number of rolls of paper-based wallpaper that can be pasted using 1 package (indicated on the glue package), drying time and, most importantly, what types of wallpaper this glue is intended for.

All of the manufacturers listed above have a range of wallpaper adhesives for different types of wallpapers. Ideal - would be the use of glue for "vinyl wallpaper". In the absence of glue for vinyl wallpaper, it can be replaced with glue for "heavy wallpaper".

All modern wallpaper paste compositions are based on modified starch, with big amount various additives that not only increase the adhesive properties of starch, but prevent the formation of mold, eating wallpaper by termites and other insects. The possibility of easy application to the surface with a roller, adjustment of the wallpaper on the wall due to its high sliding properties, as well as fast withdrawal wallpaper canvases during repairs without the use of steaming or spatulas.
It is for these indicators that the French wallpaper glue "Quelid" is out of competition. True, and the price category is one of the highest.
Any more "heavy" category can be successfully used as glue for paper wallpaper or lighter types. It is better to dilute it more strongly than the standard recipes indicated on the package.
Features of applying glue to vinyl wallpaper
When sticking paper-based vinyl wallpaper, prepared in accordance with the instructions on the package, apply the adhesive both on the wall surface - in the first place, and on the paper-based wallpaper. After applying the glue, the wallpaper strip must be folded in such a way that the surfaces smeared with glue come into contact with each other. Then roll up into a loose roll and leave for 15-20 minutes to evenly impregnate the paper base.

Only after such an “exposure” will the strip of wallpaper lie evenly on the wall, no air bubbles will form, and a large amount of glue will not be released from under the edges of the wallpaper when smoothed with a wallpaper spatula.
Tip: Never smooth the wallpaper with a cloth or your hands. This does not guarantee complete removal of air and excess glue from under the canvas. Used when wallpapering a wide soft plastic "wallpaper" spatula.

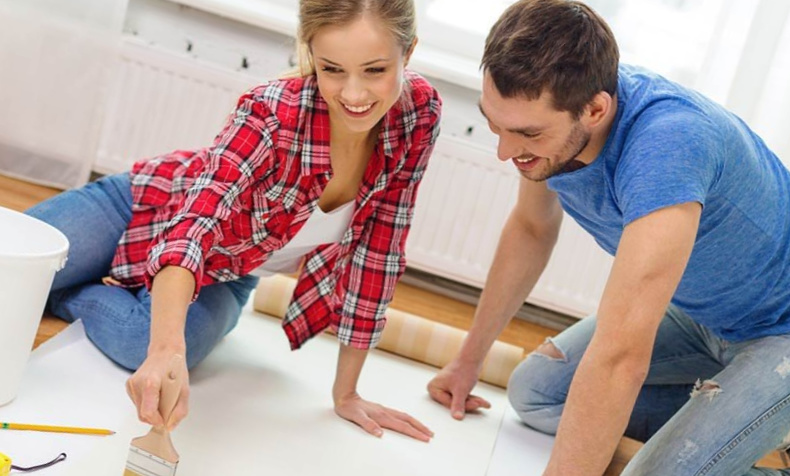
Wallpaper sticker is perhaps one of the few construction and finishing works that every adult has not done at least once in his life.
Summing up
The right choice of wallpaper paste for paper-based vinyl wallpaper is not only choosing a manufacturer that is affordable for you, but that you take a few minutes to read the information on the adhesive package and make sure that it is intended for sticking vinyl wallpaper. And in the future - it will be better to strictly adhere to the manufacturer's recommendations for the preparation of glue, without trying to improve or speed up the dissolution process - brewing with boiling water (instead of cold water) or "increase" stickiness - diluting 2-3 times thicker than recommended by the manufacturer.
Gluing paper-based vinyl wallpaper is a fairly simple task, which hardly anyone would call too laborious. However, in order to understand in detail all the intricacies of this process, it is advisable to familiarize yourself with some recommendations. Next, we will describe the main characteristics of paper-based vinyl wallpaper, give instructions for their competent gluing, having considered the most complex options. And also we will give advice on the right choice of glue and present the latest fashion trends in 2016.


The main characteristics of paper-based vinyl wallpaper

This kind wall covering is perhaps the most popular in Russia. This is explained by his positive characteristics. The main one is the optimal ratio of cost and enough High Quality. So, this type of wallpaper is different affordable price and is considered relatively harmless to humans and environment. To do this, the wallpaper is specially treated with substances that prevent the appearance of such an unpleasant phenomenon as mold. Thus, protection against allergens and harmful fungi is provided. In addition, such a coating is reliable and practical, easy to stick, and housewives should not be afraid to use it in the kitchen, since any dirt can be easily removed with detergents.
It also attracts a wide variety of textures, color solutions and drawings: such a coating can be chosen for every taste. What are these wonderful wallpapers made of? Such wallpapers are made on a paper basis, and the composition of the top layer includes polyvinyl chloride, which provides most of the advantages of this type of coating.

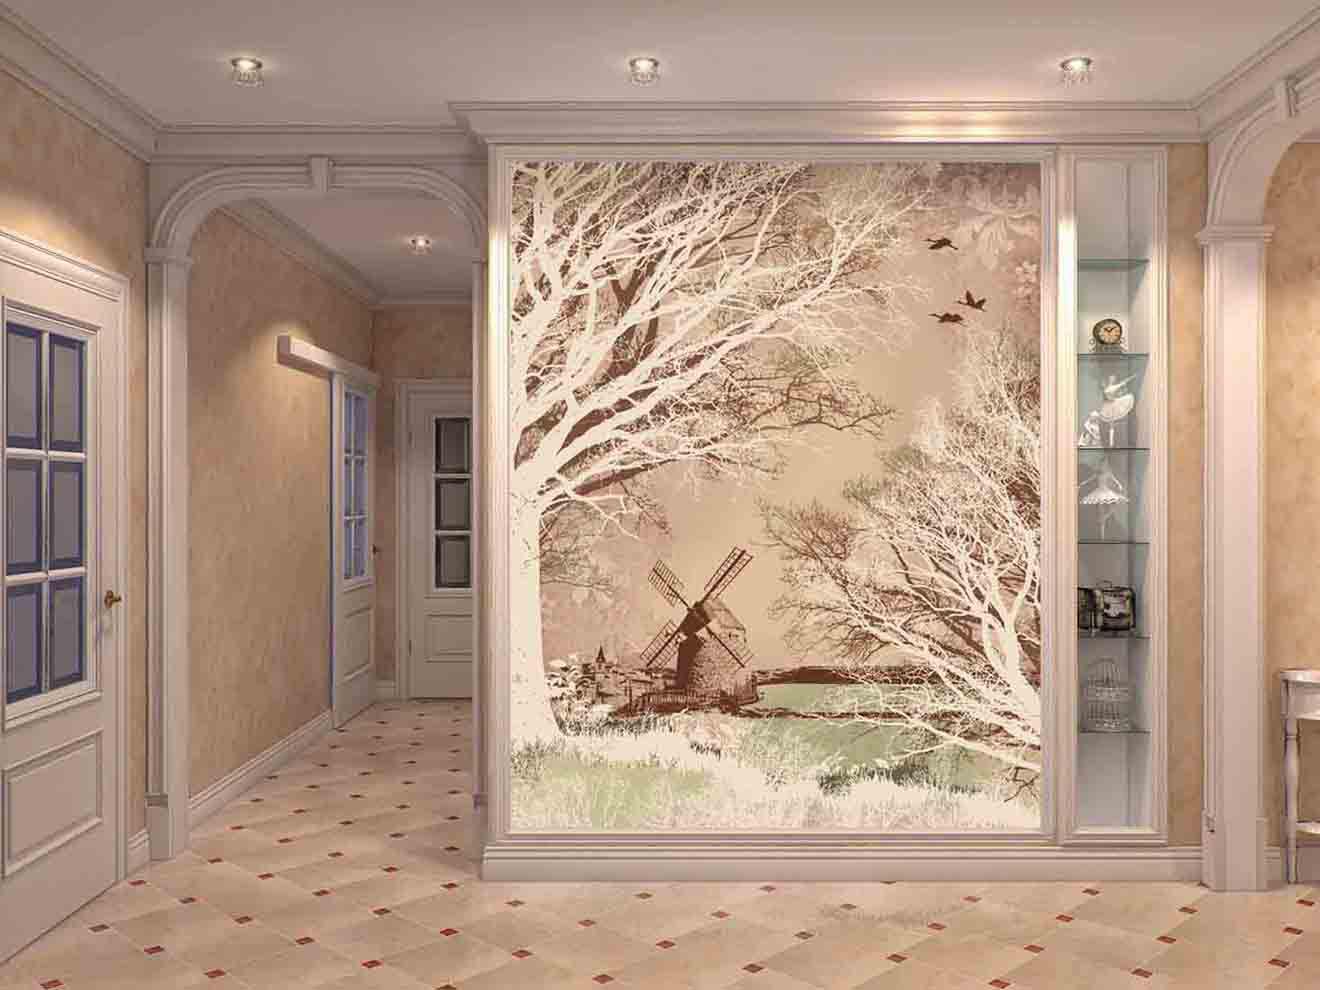
Stylish wallpaper in a retro interior
![]()
Its main disadvantage of such a coating is that it does not allow air to pass through itself, which prevents comfortable ventilation of the room. Therefore, this option will be an unsuccessful choice for the bedroom, children's room and bathroom. The paper base of the coating is able to swell from the action of glue, therefore it is less durable than the non-woven base.
How to glue paper-based vinyl wallpaper: technology
Having dealt with the advantages of paper-based vinyl wallpaper, let's move on to the most burning issue - their proper gluing. After all, all the advantages of wallpaper can be leveled by the wrong technology for applying them.
The general scheme for pasting the surface with wallpaper is as follows:
- preparatory stage;
- wallpaper preparation;
- gluing;
- formal final stage.


Preparatory stage
Before sticking vinyl flooring on a paper basis, as well as other types of wallpaper, the surface should be carefully prepared. To do this, make the walls even, eliminate even the smallest cracks, as well as the remnants of old wallpaper, if you are doing a secondary repair. In the latter case, you will also have to first remove the sockets and switches. Make sure air sources are isolated.


Advice! Treat the surface with a fungicide. This will help prevent fungal growth.

The second stage of work - the preparation of the wallpaper itself
Then you should prepare the wallpaper itself. To do this, measure and cut off the necessary strips, after adding about 10 cm to their length. Spread them on the floor and carefully coat with glue.


Advice! Number the strips so as not to get confused later in the sequence of their gluing.
Properly approach the choice of glue. It must be durable. It is better to give preference to the option with antifungal additives. The glue should indicate that it is suitable for the selected type of wallpaper. You can also use PVA glue. Read more about the choice of glue below.
Fold each of the strips in half. In this case, the pattern should remain outside, and the surface covered with glue should remain inside. Wait a while for the strips to swell, which will allow them to stretch a little. It is important that the swelling time of absolutely all strips be the same. This is necessary so that the junction between the strips is almost invisible.
Third stage. We proceed directly to wallpapering.

We begin to glue the wallpaper to the wall. In this case, it is recommended to glue the first strip from the corner. Use a level for this to prevent crooked sticking. It is advisable that you have an assistant who would be responsible for adjusting the joints. It is important to avoid getting glue on the front surface of the wallpaper. If you failed, then you should immediately wipe them until the glue has dried. In no case do not stretch the strips in width, otherwise it threatens the appearance of deformation. Instead, go over the wallpaper with a roller or a special brush.
![]()

Excess material should be trimmed. Make sure that the bottom edge of the wallpaper goes a little beyond the baseboard.
Final design stage.
Having coped with the main part of wallpapering, do not forget about the final stage.

It often happens that with self-pasting, flaws are visible. Basically, these are bubbles that become visible after drying. You can eliminate this drawback with a syringe. To do this, pierce the bubble, squeeze the air out of it, let in the glue. Roll out with a roller.
Now you should screw all the sockets and switches, plinth and other elements.
This is the basic technique for gluing paper backed vinyl wallpaper. Next, we will analyze more specific options.
Sticking meter wallpaper
Meter wallpaper, of course, is attractive in that when they are glued, a minimum number of joints will be visible, which will make the wall seem to be covered with a continuous canvas. However, many are afraid of the question - how to glue meter-long wallpaper. Therefore, they call specialists, which further increases the cost of repairs. However, one can easily restrict on their own. In fact, to paste wide wallpaper, it takes less effort and even less time than when sticking ordinary wallpaper. Indeed, in this case, it is necessary to use fewer bands.
On the preparatory stage Measure 1 meter long on the wall and draw a vertical line (using a ruler, plumb bob and pencil). Measure the height of the walls from floor to ceiling and add about 5-10 centimeters to the result. Calculate required amount stripes. To do this, divide the length of the roll (which is usually indicated on the package) by the calculation obtained in the previous step.

Stylish wallpaper in the design of the working area Meter wallpaper will make the gluing process faster
Next, we proceed directly to gluing. As in the previous instructions, the glue is applied directly to the strips using a roller. We adjust the first strip of wallpaper to the line marked earlier and the height of the ceiling, without protruding beyond it. Then we start gluing. We squeeze out excess air between the wall and the wallpaper with the help of a roller, which needs to be drawn along the wall with smoothing movements. We smooth according to the following scheme: from the center towards the edges and in the direction from top to bottom. Cut off the excess edges. For this, a sharp knife or a special spatula is suitable.
Advice! Before trimming the excess edges, it is necessary to allow the wallpaper to dry properly so that it does not tear.
How to choose glue for vinyl wallpaper

The success of wallpapering is largely determined by the choice of the right adhesive. For vinyl wallpaper, it is better to use a special glue. This is due to the relative severity of this type of coating. Therefore, before buying glue, make sure that the manufacturer indicated on the packaging that it is possible to use glue specifically for vinyl wallpaper.
Usually the question arises - what is better to use in this case - non-woven glue or vinyl? However, experts believe that there is no significant difference between these options: both are equally well suited for gluing heavy wallpaper, which is vinyl. However, vinyl adhesive is only suitable for vinyl wallpaper. While non-woven - and for other types of coatings. However, if you decide to apply non-woven adhesive to vinyl wallpaper, then it must first be made more liquid.
Golden glitter in the interior of the living room
Concerning vinyl adhesive, then its main advantage is the sliding structure, which makes it more convenient to join patterns on the wallpaper. Besides, vinyl adhesive you can easily re-glue the canvas if you make a mistake.
Pay attention to the wallpaper packaging: the manufacturer must indicate the recommended adhesive on it. If you are in doubt about the choice of glue, it is advisable to opt for a line of adhesives, which in most cases is produced by the wallpaper manufacturer.
Whatever type of glue you choose, remember that you should not skimp on it. Dream quality glue difficult to work with, it can leave stains, and eventually the canvas will fall off. Such glue may turn yellow over time.

Features of wallpapering on the ceiling
Wallpapering on a flat wall does not cause any particular difficulties, however, when working in hard-to-reach places, problems can arise even for sophisticated builders who have undergone more than one repair. At the same time, the type of wallpaper in question is ideal not only for the wall, but also for the ceiling. In principle, the instructions for gluing the ceiling are similar to the above recommendations for gluing walls. The only caveat is the inconvenience of this process, since you have to keep your head up all the time.


However, there are some secrets that can greatly facilitate the gluing process. Before starting work, the ceiling should be prepared in the same way as the walls. It will become easier to work if you pre-moisten the ceiling with water.
To begin with, along the wall, sketch out the starting line. Subsequently, along its contour, we will align the first strip of wallpaper. It is better to coat with glue not the strips themselves, but the ceiling - it will be more convenient to glue. It is more comfortable to work with a partner. In this case, you stick one end of the strip, and your partner holds the second from the other end. The strips should be glued away from the window. And then you need to act as in the instructions for gluing the walls.

Advice! If you have already pasted over the walls, then try not to stain them. To do this, it is better to cover them cling film. You can also use newspaper attached with tape.
Modern vinyl wallpaper design

Of course, of paramount importance when pasting walls or ceilings with wallpaper is their good quality and proper sticking, but do not forget about the design that will delight you for more than one year. It should fit perfectly into the interior and the overall concept of the room. Following fashion trends, do not get hung up on them, because next season the fashion may change, and you will have more than one season to live with these wallpapers. Therefore, it is better to give preference classic options that will always be relevant.
Let's list the main trends current year in "wallpaper" fashion:
- Bright and unusual patterns. This option will become a bright spot in any interior, focusing on itself. So if you choose this original version, other interior details should be made more calm to balance it.

- Usage pastel shades. This is the opposite trend, which only sets the general direction for the interior and at the same time gives a wide scope to the imagination: after all, such options do not limit you in anything. They are suitable for any style of interior.
- Stylistic direction. More than ever popular wallpaper, aged in the already classic styles: Scandinavian, Oriental, English.

- simulation options. They can imitate anything - brickwork, logs, etc. They are ideal for zoning space. To do this, it is recommended to decorate only one of the walls in the chosen style so as not to overload the interior.

Thus, by opting for vinyl wallpaper, you will not only save money, but you will also enjoy the result for a long time. And pasting wallpaper does not require excessive effort.
Paper-based vinyl wallpapers are currently very popular among a wide consumer circle, as they are inexpensive, presented by a variety of collections and manufacturers, and allow you to embody almost any design idea and are sold in almost every hardware store. Not surprisingly, the question of how to glue them correctly is gaining more and more relevance. Let's consider it in detail in this article.
Vinyl wallpaper is a type of coating made from polyvinyl chloride (a type of plastic) applied to a natural base.
Most often, paper is used for this purpose, as it provides better breathability of the cladding and simpler laying technology. You can also often find disputes between experts,. But this question can only be answered by practical application. Vinyl wallpapers are produced in various colors and textures, among them there is an imitation natural stone, wood, brick, tiles, samples with a relief pattern. Their use will allow you to embody exactly any design, including loft, modern, classic and much more.

About Features this material it is worth talking in more detail in order to accurately determine all the pros and cons of such a choice.
disadvantages
Many coating manufacturers position themselves as universal coating. However, this is not really the case. The use of paper-based vinyl wallpaper has, unfortunately, a number of disadvantages that consumers must reckon with. Among them:
- Low strength- in the course of work, paper-based vinyl wallpapers are very easy to tear, especially if you use non-sharp tools or pull the material too hard.

- Non-compliance with environmental regulations- not all paper-based vinyl wallpapers have pores, therefore for some rooms, including which they are not suitable for sanitary and hygienic standards.
- Possibility of fungus on the wall due to the low moisture permeability of the samples(the problem is leveled by the correct primer of the walls).
Most of the shortcomings of vinyl wallpaper are easily leveled. proper preparation surfaces for installation, as well as following the recommendations for their installation, with the exception of low air permeability. If this indicator bothers you, choose samples with perforations - they do not have such disadvantages.
Advantages
Vinyl wallpapers have a lot of advantages over similar types of coatings, thanks to which consumers love them so much. The main advantages of acquiring this particular type of wallpaper include:
- low cost;
- versatility of application- wallpaper can be glued in working rooms, kitchens, as well as corridors and living rooms;
- a wide range of models;
- resistance to external influences;

- greater plasticity: in comparison with samples - such obi stretch much better, with their help you can block minor wall imperfections and better stretch the material on a relief surface;
- coating durability- over time, vinyl wallpaper samples do not fade and retain a clear pattern.
Generally this species wallpaper has much more pluses than minuses, so installing them is always justified.
About how to properly conduct it, you need to talk in more detail.

Sticking technique
The process of sticking vinyl wallpaper as a whole differs little from standard procedure for all types of similar products. It is necessary in advance, and then proceed directly to the work itself. However, he has his own nuances. There are several secrets to successful gluing vinyl wallpaper that you should take into account when getting started:
- It is not necessary with great zeal to achieve a perfectly even joint between the wallpaper. In such places, there is high pressure sheets, which may cause the material to bulge. It's better to leave a small gap here.
- It is worth gluing wallpaper on a window or door, but not on a plumb line. This helps to level the curvature of the walls, which is observed to one degree or another in every home.
- To work with paper-based vinyl wallpaper, you need to select only the sharpest tools. The use of a dull knife can cause tissue rupture.
- When gluing such wallpaper, drafts should not be allowed in the room. Airing, air conditioning - all this should be postponed until the canvases are completely dry. Otherwise, you risk ruining everything.
Given these nuances, you can proceed directly to the preparation of the process.
Wall preparation
Vinyl wallpaper on a paper basis can only be hung on a dry, flat surface. Often the walls in our houses are not very suitable for these characteristics, therefore, builders or apartment owners (depending on who in your case deals with this issue) have to carry out complex preparatory work so that everything goes as it should. It is also worth considering that in most apartments there is already a layer of wallpaper that must first be removed. To do this, you need to know. Conventionally, they can be divided into several stages:
- We remove the old coating. If the walls were previously painted, you need to remove a layer of plaster, as it will not work under the wallpaper.
- Putty for leveling walls can be used only if there are large irregularities. After such treatment, the surface becomes spotty, it can either be pre-painted completely in White color(if you plan to install light wallpaper), or choose darker ones, under which spots will not be visible.
- Primer is the next stage of wall preparation. In no case should the primer be skipped - otherwise mold may appear on the walls during further operation. To carry it out, you can use a special mixture or diluted glue - both of these approaches do not have significant differences.
- If at the end of the work you find slight irregularities in the walls, do not be discouraged - the wallpaper will completely hide them, there is no need to adjust them to the ideal.

At the end of this stage of work, do not forget to take care of sockets and switches. It is worth removing the lining from them, and then sealing the holes with tape. This will provide protection from moisture and glue on the contacts. Before starting work, it is desirable to de-energize the system.
step by step process
When everything necessary to start work has been done, the wallpaper has been cut and fitted according to the pattern, and the walls have been processed, you can proceed directly to gluing. This process is carried out in several stages:
- Preparing to start work. At this stage, you should collect the main equipment that will be needed at various further stages: pressure rollers, a basin of water, a tape measure, a ruler and a pencil, rags to remove excess glue, scissors and stationery knives, a brush for applying glue. At the same stage, it is worth preparing the room for work - closing the windows, doors and pores with cellophane film or newspapers - whichever is more convenient for you consumable you need to take it with a margin so as not to be distracted by its squeaks during the installation of wallpaper.
- We apply glue to the wallpaper. The coating should be well saturated with it, therefore it must be left for 5-10 minutes before gluing, but not longer - the glue may dry out and the wallpaper will have to be processed again.
- Installing wallpaper. We press the upper edge of the canvas against the wall, and then level it to the bottom, trying to avoid bumps and bubbles. We glue the next strip end-to-end, following the pattern.
- We remove excess air. This should be done with a special roller, pressing the canvas against the wall with it. If you got samples with a delicate pattern, it is better to cut large bubbles on them with a knife, otherwise you risk ruining the coating. Traces of the cut on the dried wallpaper will not be visible.
- Cut out sockets and switches around the room. Before work, it is advisable to de-energize them so as not to get into contact.

All wallpapering procedures are faster and easier to carry out together, when one person fixes the canvas on top, and the second level it along the entire length. This avoids the vast majority of coverage problems.
After the coating has completely dried, you need to make sure that the glue is taken well, the wallpaper does not give bubbles and does not swell at the joints. If no visible flaws in the cladding are found, we can assume that the work was completed successfully.

Full vinyl wallpaper gluing course: video
conclusions
As you can see, sticking vinyl wallpaper is extremely simple. In order to cope with it, you only need to pick up quality material and adhere strictly. Then everything will work out for sure.
If the base is paper, then the glue is applied to the cut strip. Vinyl wallpaper on a paper basis cannot be glued immediately after applying the adhesive. To do this, the strip smeared with glue is folded base to base. The swelling time is indicated on the wallpaper than denser material the more time it takes. When swelling, the fibrous parts of the paper swell and the wallpaper stretches a little. The swelling time should be the same for all strips, and the adhesive layer should be uniform and thick enough. This is important for clean seams and a flawless finish. A video on how to glue corners with wallpaper is presented on our page.
Non-woven based wallpapers are easier to process; when sticking them, glue should not be applied on reverse side wallpaper, but directly on the wall. Another advantage of this type of wallpaper is that when sticking it, it is not necessary to withstand the time required for impregnation, the non-woven material ensures the stability of the wallpaper's dimensions. best glue for non-woven wallpaper - methylan. It is better to check the method of applying glue with the instructions on the roll.
Wallpapering technology
It is always better to glue vinyl wallpaper from the corner. It is more convenient to glue vinyl wallpaper with two people, when one applies and aligns the top, standing on a stepladder, and the second supports the lower end of the strip, standing on the floor and carefully aligning the edge with a vertical line drawn along the wall.
It is always necessary to glue vinyl wallpapers end-to-end, that is, the panels do not find each other. Be careful not to get glue on front side panels. If this happens, immediately wipe it off with a dry cloth (not a brush)
The remaining material under and at the plinth is carefully trimmed with a wallpaper knife along the ruler. When using blunt knives, it is possible to tear or crumple the wallpaper. The lower one should be bent onto the plinth by 5 mm. If possible, it is better to remove the plinth before starting. You can watch a video of how to glue on our page.
Near sockets and switches, the wallpaper is not cut in advance, but glued directly onto the holes for switches and sockets. When the glue dries, holes are cut at the locations of sockets and switches. After the work is completed, the sockets and switches are screwed into place. Be sure to de-energize the sockets before starting work.
The wallpaper panel should go from one side to the other by no more than 3-4 cm. The first panel on the other wall is glued from the very corner, overlapping this area.
Wallpaper care
Most vinyl wallpapers allow wet cleaning including the use of cleaning products. However, you must first familiarize yourself with the information on the rolls.
How to choose and stick vinyl wallpaper on paper or non-woven base
Non-comprehensive instructions for choosing and sticking vinyl wallpaper on paper and non-woven base from personal experience
Instruction
Choose wallpaper design. Coloring and drawing is a matter of taste, but there are basic rules:
- Bright hues visually increase the room, dark - reduce.
- Too large a drawing, especially in a small area, looks bulky, too small causes flickering in the eyes.
- vertical stripes visually increase the height of the room, horizontal or curb - reduce the height, but increase the length.
Choose a wallpaper base. It can be paper or non-woven.
Non-woven properties:
1. Advantages:
- easier technology, no need to apply glue to the wallpaper and impregnate them, the glue is applied directly to the wall.
- as a result, less time is required for gluing.
- at quality training walls and good glue initial strength is higher than that of paper-based wallpaper
- better smooth out small bumps and cracks on the walls
2. Disadvantages.
- since the wallpaper is not impregnated with glue, they are completely non-plastic (do not stretch), therefore, unlike paper ones, it is impossible to “wrap” around a sufficiently large irregularity without cutting.
- non-woven fabric transmits light better than paper, so if you have a wall with the remnants of old colored coatings, very dark, or all spotty, it will be noticeable through non-woven wallpaper (especially light ones).
Paper properties:
1. Advantages:
- Respectively, it covers old coatings well
- stretches, it is easier to close, for example, slightly protruding mounting box or “fit” an uneven corner.
2. Disadvantages:
- when applying glue, you can stain the wallpaper with it
- initial matchmaking is worse
- it is more difficult to glue the edges (usually, they have time to dry during the impregnation and have to be greased)
- easier to accidentally break.
Assess the condition of the walls and consider what material they are made of
1. Remove old coatings. If you really don’t want to (actually, you need it))), or it doesn’t work out to the end, it’s better to glue wallpaper on a paper basis, because when glue for non-woven fabric is applied to the wall, they can just fall off.
2. If there are strong irregularities, the walls should be leveled with putty. In this case, you risk getting a smooth, but spotted wall. You can glue either paper wallpaper or dark non-woven wallpaper on it, or already putty completely in white, but this is already real hard work which requires separate instructions. 
3. Prime the wall. There are three options. Special primer before wallpapering, diluted wallpaper paste or universal leveling primer. IMHO, the result is about the same and depends more on the manufacturer than on the type of material. A primer is especially needed for concrete and wood (including chipboard) and for non-woven wallpaper. If glue is applied to an unprimed, highly absorbent material, it can simply be completely absorbed, and, in fact, it will not remain on the wallpaper.
4. Look at the wall again. Are there any small imperfections? “Thick” wallpaper with a three-dimensional structure will really help to hide them.
Choose wallpaper and glue. Wallpaper first. Then under them - glue. Please note that there is not only "vinyl" and "non-woven", but also "heavy vinyl", "structural vinyl" and much more, see the packaging or consult the seller. Personally, I vote for rasch wallpaper and any Italian interlining, from inexpensive ones - “palette” and “home color”, quelyd and “moment” adhesives. But, for sure, there are other worthy manufacturers. But the “methylan” glue, I remember, did not please me. True, it was a long time ago, maybe it has gotten better since then.
Prepare your tools. Optimal set:
1. Basin for wallpaper and a bucket for clean water
2. Two pressure rollers - wide (main) and narrow (for joints), a special plastic spatula
3. Fur roller, wide brush, narrow brush - for applying glue
4. Newspapers or polyethylene to cover the floor
5. Scissors and a construction (or powerful stationery) knife.
6. Tape measure, ruler and pencil
7. Rag and sponge to remove excess glue.
Look like that's it. You can do without half, but it will be more difficult to work
Actually, a sticker. Firstly, carefully read the instructions for wallpaper and glue, there are a lot of useful things. I will not duplicate. The principle for non-woven fabric is simply cut and stick on a wall smeared with glue. For vinyl on paper - wet with glue, fold, hold for 5-10 minutes, unfold and stick.
A couple of nuances.
1. Wallpaper is glued butt to butt. But do not make the joint too tight, otherwise the wallpaper will swell in this place. The fit should be perfect, but a small gap is better than pressure between adjacent sheets.
2. It's no secret that our walls are usually crooked. I advise you to glue not on a plumb line, but on the most noticeable vertical elements interior - window hole, doorway, the corner of the room. So visually it will be smoother than if it is actually smooth)
3. Walkthrough internal corners- This is problem. Often, at the bottom and at the top, the corner “converges” to the center of the room, and a wrinkle appears on the wallpaper. If the wallpaper is paper, a small one can be smoothed out. If we can't, we do it. One cut is made along the entire length of the fold with a knife or scissors to overlap the excess on top of each other. Further we work only very sharp knife and carefully so as not to tear the wallpaper (especially paper)! We draw one line with a knife, which should cut through both layers of wallpaper along the entire length of the fold. It is not very important how even it will be, but the line should be continuous and clear, without breaks and folds. Then we simply remove the cut off excess, smear it with glue (it probably had time to dry) and get the perfect joint.
4. Very small wrinkles can be removed by cutting off each side separately with a ruler. The main thing here is a good eye and slowness.
Removing air from under the wallpaper.
In my opinion, it is best to do this with strong movements of a special plastic spatula. But, if the wallpaper has a very delicate pattern of something that looks like soft polyurethane, it can also be cut off with a spatula. Then we use a large roller, with an effort to move the bubble to the edge of the wallpaper. You can also use a cut with a knife in place of the bubble, it will not be noticeable.
Sockets and switches. The pads need to be removed. Then it is better to de-energize. But if there is no possibility, at least stick it with something like adhesive tape so that it doesn’t finish, otherwise it will hurt. It is better to cut holes for them after the wallpaper has dried, because it is easier. With interlining, you can immediately, it does not get wet and is cut normally. Just, again, do not get into contact if it is energized.
Like, basically everything. Comments are welcome. If there are questions, I will try to add.
Before wallpapering, the walls are primed with a primer deep penetration or special glue for vinyl wallpaper and treated with a fungicidal composition that prevents the appearance of mold under the wallpaper. You can only glue vinyl wallpaper on a completely dry wall!
The wallpaper must be cut into strips, leaving a length allowance of 10 cm. If there is a pattern on the wallpaper, select adjacent panels in such a way that the pattern matches as much as possible. Before cutting wallpaper, check that all rolls have the same series - wallpaper from different series may vary slightly in color.
You need to glue vinyl wallpaper end-to-end. But such wallpapering has its own nuances: after drying, vinyl wallpaper can “shrink”, and gaps will appear between the panels. Therefore, vinyl wallpaper is applied less glue than on paper, and in no case stretch them in width when gluing. The wallpaper is pressed against the wall not with a spatula, but with a special rubber roller or a brush with short bristles, especially carefully ironing the seams.
For the same reason, wallpaper must be glued indoors without drafts - when dried, they are “capricious”, do not tolerate changes in humidity and temperature. Therefore, in no case should you open windows or turn on the air conditioner until the wallpaper is completely dry.
Vinyl wallpaper glue must be diluted according to the instructions, usually it needs to stand for 5-10 minutes to swell. Glue is applied either only to the wall, or to the wall and wallpaper - this should be indicated in the instructions on the roll with vinyl wallpaper. It depends on the base: you need to apply glue to wallpaper with a paper base, but not to wallpaper with non-woven backing.
If you are applying adhesive to paper backed vinyl wallpaper, make sure the edges are not dry. Paper-based wallpaper is not glued immediately after applying the glue. They are folded base to base so that the glue swells (the swelling time depends on the density of the material and is indicated on the package). In order for the seams to be clean and the wallpaper to look perfect, the adhesive layer must be thick and uniform, and the swelling time must be the same for all panels.
Two people need to glue vinyl wallpaper. One person climbs onto a stepladder and puts the top edge of the wallpaper against the wall. The second one stands on the floor and supports the lower edge of the panel, carefully aligning the wallpaper strip vertically (to do this, you can draw a vertical line on the wall in advance to navigate along it).
Then you need to lightly press the wallpaper to the base and force out air bubbles with a brush: from top to bottom and from the center to the edges. If glue protrudes from the edge of the wallpaper, it must be wiped off immediately with a clean cloth. It is important to ensure that the glue does not get on the front side of the wallpaper.
Excess vinyl wallpaper under the ceiling and near the plinth should be cut along the ruler with a sharpened knife. If the blade is blunt, it will crumple and tear the wallpaper. The bottom edge of the wallpaper is bent under the plinth by 5 mm (it is better if you remove the plinth before gluing, and then put it back in place).
With regards to sockets and switches - they are de-energized before starting work, removed, glued wallpaper directly over the holes, cut out after drying desired areas wallpaper and screw sockets and switches into place.
Glue selection.
Maybe some of the most zealous guardians of traditions use glue cooked on their own from flour and PVA, but it's still easier to use glue bought in a store. Is it better? Actually, yes. If you take a closer look at the composition that is indicated on the packaging of the glue, then most likely you will be disappointed in your best expectations. "And here is starch?!" Yes, and there is starch. But besides it, there are still a bunch of additives that improve more interesting qualities of glue than just the ability to firmly stick wallpaper. Let's be honest - you can also improve ordinary self-made glue from flour by adding ordinary PVA to it. Try some more wallpapers like this. But you yourself were convinced of this while ripping off the remnants of old wallpaper from the walls. Here, the main strong point of the glue is not the strength of gluing, but the ability to resist the occurrence of fungus. And he loves the walls of his home very much.
In addition, some adhesives have an interesting feature in the form of a color application indicator. The freshly mixed glue itself becomes Pink colour, it gives exactly the same shade on the walls, but under the wallpaper and after drying it becomes completely transparent. Conveniently? Still would! home headache when applying glue to the wall and wallpaper - apply it so that there is not the slightest gap anywhere. Otherwise, in this place, the wallpaper will begin to peel off, and over time it will take on a rather strange look.
So, we figured out the glue, now let's think, as it were, with the wallpaper itself. Usually everything happens the other way around, first the wallpaper is chosen, and this is understandable, and only then the glue, if necessary. In principle, this is correct. We talked about glue at the very beginning to convince you to carefully look at its composition before buying and make sure that you are buying exactly what you need.
In total, you will first meet three types of wallpaper on the market: paper, vinyl and non-woven.
Everyone has long been accustomed to paper wallpapers, and they are rightfully considered the most popular. Mostly because they are the cheapest. Zealous supporters of ecology can breathe easy, although trees were actually used during their manufacture, but that is why they are considered the most environmentally friendly. They play a small role in the role of heat and sound insulators, but for us they are mostly attractive because they can be used in almost all dry rooms.
There is nothing to say about the aesthetics of paper wallpaper - it is on highest level. Some have, among other things, a relief pattern.
But they have a rather serious drawback. For example, they cannot be washed. Paper, after all. For the same reason, it is pointless to glue them in wet rooms. They are also quite easily torn and clearly repeat all the features of the relief of the wall. In all other respects, this is a completely worthy representative of the wallpaper world.
How to glue non-woven vinyl wallpaper
In any room, gluing non-woven vinyl wallpaper is much easier than using ordinary paper ones. In addition, if you buy high-quality glue in the store that is specifically designed for this type of wallpaper, then there will be no problems with sticking them on the walls in the kitchen or bedroom.
You will need
Glue;
- rubber spatula;
- rubber roller.
Instruction
1 First you need to prepare the surface by removing old wallpaper, tiles, dust and other defects. Walls must be puttied, sanded and primed. After the primer dries, you can start wallpapering.
2 When gluing vinyl wallpaper on a non-woven base, they can not be completely smeared with glue. For this type of wallpaper, you just need to smear the walls with high-quality glue, and smear the wallpaper a little around the edges. But when lubricating walls, saving glue is not at all worth it. It should be applied quite thickly, smearing every inch of your wall as you apply it.
3 For more convenient application of glue, it is best to use a special model of a roller for wallpapering. You may also need a brush to apply high-quality glue to the most inaccessible places for rollers on the surface of the walls and in their corners. After you miss the edges of the wallpaper sheet and all the walls, you can start gluing. For convenient smoothing of vinyl wallpaper, it is best to use a modern rubber roller or special rubber spatulas and brushes.
4 When sticking non-woven wallpaper, all the glue is applied not to the wallpaper, but to the wall, which is why the wallpaper sheet itself will always remain dry. Therefore, it will never get wet and will not tear while sticking to the wall. Also, the advantage of this method of gluing vinyl wallpaper is that if the sheet does not fit properly on the wall, then it can be carefully removed immediately and glued again without damaging the sheet structure.
Vinyl wallpapers
Of the many wallpapers on the construction market, vinyl wallpapers have gained the most popularity. This is quite logical, because they can be of various textures and colors, they wash well and are not able to fade in the sun.
It is quite natural that today many people who have started repairs have a question - “how to glue vinyl wallpaper correctly?”. And this question is quite correct, because there are some nuances in pasting walls with vinyl wallpaper, which, of course, should be observed during repairs, otherwise you can ruin the material and lose a significant amount of money to buy a new one.
Features of the technique of pasting with vinyl wallpaper are connected, first of all, with the fact that they tend to significantly stretch in width when wet. In this regard, they are highly discouraged from being lubricated with glue strongly enough and plentifully. Also, do not leave vinyl wallpaper for a long time to "swell". Such wallpapers should be glued as carefully as possible, without stretching one iota, but pressing against the wall with little force. 
Secondly, vinyl wallpapers can be quite thick, as a result, gluing by the "overlap" method is completely excluded. Naturally, it is necessary to glue end-to-end. If there is no pattern on the canvases, then you can make an overlap of 10-15 mm, and then cut through two layers at once. After removing the extra strips, the joint of the canvases should turn out to be just perfect. If the pattern is present, then in case of fitting, you should join the edges with your hands.
Glue for vinyl wallpaper is prepared as indicated on the package. Glue should be intended exclusively for vinyl wallpaper, no "universal" ones will work. The canvases are rolled out to the required length, just in case, adding up to 70 mm to each (walls may have a height difference). Wallpaper should begin to be glued from the corners that are closest to the windows. Using a plumb line, it is necessary to mark a vertical line from the corner at a distance of the width of the canvas. It is on it that the first canvas will be glued. Before pasting, of course, the prepared walls are primed exclusively with the glue that is often indicated in the instructions for vinyl wallpaper.
Each canvas is smeared in such a way that even minor gaps do not remain on it, but, making sure that it does not turn out too thick either. After that, the canvas is folded in half (to prevent drying) and left for about 8-10 minutes to “swell”. Next, the panel is straightened and glued to the surface, of course, making sure that it does not stretch. The wallpaper is pressed down with a stiff brush or a clean cloth.
How to properly glue vinyl wallpaper Often the question may arise - "how to glue vinyl wallpaper correctly so that they do not move apart and do not" bubble ". In this case, there are some rules. Vinyl wallpaper is desirable to glue when temperature regime not exceeding 23 degrees Celsius. They are very afraid of drafts, even more than their paper counterparts. Vinyl wallpaper should dry gradually. If the vinyl wallpaper was stretched during gluing, then after drying, gaps form between the canvases.
The choice of vinyl wallpaper is huge. They can be chosen for the interior of any room or the room as a whole. In the article we will look at how to glue paper-based vinyl wallpaper and more! They come with small and large drawings, bright and rigorous. Their diversity allows you to realize any of your ideas.
The service life of vinyl wallpaper is more than ten years, therefore, having repaired it once, you can long years admire the beauty of the wallpaper.
They do not darken and do not turn yellow over time, they are cleaned by special means. So if you have little tomboys (children) in your family who love to dirty everything around, including wallpaper, do not worry that in a year you will have to re-paste the wallpaper. Just clean them and they will be like new again.
How to glue paper based vinyl wallpaper
Those who independently make repairs indoors often ask themselves the question: “How to glue vinyl wallpaper on a paper basis?”. This is what we will talk about today. So, let's begin.
Wall surface preparation
Before gluing any wallpaper, you must first prepare the surface of the walls. They should be clean, dry and preferably perfectly even. To do this, the old coating is removed from the surface, the walls are leveled with building plaster or putty. If the flaws are strong, then the surface can be leveled with drywall. The surface is then treated liquid primer(needed for better adhesion of the adhesive to the wall) and dries.
A bit of theory
It is worth noting that the vinyl wallpaper, which has a non-woven base, does not apply glue when gluing, only on the wall. The paper base, in turn, requires the application of glue to the wallpaper, and the edges of the canvas should be very well coated so that they are not dry. See the instructions that came with the wallpaper.
As a rule, the manufacturer describes whether wallpapering requires applying glue to the wall and canvas, or only to the surface. As well as methods for cleaning wallpaper. Vinyl wallpapers can be cleaned with special cleaners.
Wallpaper is glued using the "butt-to-butt" method. And since the paper from which the base of the wallpaper is made tends to “shrink” when dried, a special roller with short bristles is used to press the canvases against the wall, and not spatulas. And so that later gaps do not form between the seams, the wallpaper should not be strongly smoothed and stretched when gluing.
Glue and wallpaper pattern
 In the room where the wallpaper will be pasted, there should be no drafts, because they do not tolerate changes in temperature and humidity. And the air conditioning system is off. Otherwise, all the canvases will simply peel off, and all your work will be in vain.
So, we dilute the glue strictly according to the attached instructions. Glue must be specifically for vinyl wallpaper. While the glue swells (as a rule, it takes from 10 to 15 minutes), we prepare the canvases. The canvases are cut to the desired length, leaving an allowance of about ten centimeters, and stacked on top of each other (stack) with a pattern down.
Follow the drawing! The picture must match exactly. Therefore, before cutting off the next canvas, measure the pattern on it with the already cut canvas.
Wallpapering process
After all the canvases are cut, we begin wallpapering. Due to the density of vinyl, the adhesive is applied to the wallpaper in a thick layer. It is not worth gluing wallpaper on the wall immediately after applying glue to the canvas. They simply won't stick.
They need to be rolled base to base and left to swell. The swelling time of paper-based vinyl wallpaper can be found on the manufacturer's packaging.
The denser the canvas, the more time it will take. When swelling, the fibrous fibers of the wallpaper swell, and the canvases themselves stretch slightly. Therefore, in order to avoid "surprises" during wallpapering, the swelling time of each canvas should be the same.
 Wallpaper canvases must necessarily go a little on the ceiling and baseboard. If possible, remove the plinth before work.
First sticks upper part canvases from above, using a stepladder, the second aligns the wallpaper from below as much as possible. The bottom edge of the canvas should be bent onto the plinth.
In order for the canvases to lie flat, lines can be drawn on the walls before wallpapering. Then, using a roller with small bristles, all the air formed between the wall and the canvas is expelled, making smooth movements, starting from the center and approaching the edges, as well as from top to bottom so that the wallpaper does not move away when it dries.
As a rule, wallpapering starts from any corner of the room. Cloths, overlapping this area, should overlap each other by at least three, or even four centimeters. Another canvas is glued on another wall from the very corner.
If glue sticks out at the edges when sticking the canvases, be sure to remove it with a dry roller or rag so as not to stain the front side of the vinyl wallpaper. Press the joints carefully. If suddenly they start to move away, take a small brush and gently coat these areas with glue, then press it against the wall again.
Trimming the Remaining Material
After the wallpaper has dried, using a sharp special construction knife, the remaining material is cut off under the ceiling and on the plinth strictly along the line. Make sure that the tool is sharp, otherwise you run the risk of making an uneven line of wallpaper (which will not look very nice) or even tearing the wallpaper. Then you have to do all the work again.
Treatment of the area where sockets and switches are located
 If there are sockets and switches in the room, turn off the electricity and unscrew them. Holes for them are not cut out until the wallpaper is completely dry. After the panels have completely dried, holes are carefully cut out with a construction knife and the plastic components of sockets and switches are screwed back.
Useful advice
If you do not have experience in wallpapering, then it is best to use the services of craftsmen who will make “candy” out of your room. True, you have to pay for such services, but what can you do for the sake of the beauty of your home. You can also consult with them about how it is produced. They will tell you all the nuances, and you can create unique design premises!