How to glue ceiling tiles: step by step instructions. How to glue ceiling tiles: preparatory work and pasting methods
It is not necessary to finish the ceiling expensive material. Exist budget material, with which you can get good result. These are foam boards. In the article we will tell you how to stick tiles on the ceiling, in what sequence you need to perform installation in order to get a high-quality coating.
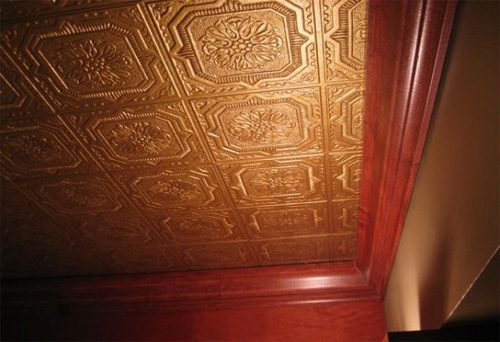
foam tiles
Before pasting the ceiling with tiles, you need to decide on the choice of material. For finishing the ceiling surface, the following types of material are on sale:
- molded foam panels made by stamping. The material has a porous structure, which is clogged with dirt during operation. It is recommended that after installing the panels, paint them acrylic paint. The material is inexpensive, brittle and wrinkled, inconvenient to use. When choosing this type of coating, you should take the material with a margin of about 10%. The thickness of a single panel is from 6 to 12 mm;
- extruded. Panels of small thickness, only 2-3 mm, but quite dense and expensive. Profiles imitating wood or a natural stone. Expanded polystyrene material is easy to care for, but cannot be painted. Paint literally rolls off a smooth surface;
- injection. The difference from other types of tiles in a clearly visible pattern, which is obtained during production. Materials can be painted, not difficult to mount. The cost is average.
It is easiest to glue the ceiling with extruded tiles. This coating is easier to care for.
The usual shape of the panels is square. But, non-standard, rectangular panels are produced. You can paste over the ceiling with seamless tiles, the edges of which can be wavy or even.
Foam ceiling tiles are considered the most popular material for gluing ceilings. But there are other types of tiles made from the following materials:
- acrylic. Such profiles visually increase the height and area of the room;
- wood. Environmentally friendly profiles;
- ceramics. This type is used in rooms with high humidity;
- metal. Spectacular, durable and non-combustible material, but very expensive.
When choosing profiles for the ceiling, pay attention to how the material is combined with the interior and furnishings.
How to choose a tile?
To properly glue the ceiling with tiles, you need to choose the right material.
When choosing, you need to pay attention not only to the appearance of the panels. Each element must be the same shape, size and thickness. The corners must be 90 degrees. During installation, if the panel does not meet the requirements, the surface will be flawed.

When choosing foam tiles for gluing the ceiling, carefully inspect the corners of the product. They shouldn't crumble. The structure of each panel should be fine-grained and uniform, and the pattern should be clearly visible.
Calculation of the amount of material
Before gluing the tiles to the ceiling, it is necessary to calculate the amount of material for finishing.
The standard side of the tile is 50 cm. This number indicates that you will need 4 panels per 1 square meter. To calculate the required amount of material, it is necessary to multiply the area of \u200b\u200bthe room by 4. The resulting figure must be rounded up.
Buy 10% or 15% more material than you need. Additional tiles will go to cutting and corners.
To glue the tiles to the ceiling, you will need glue or liquid nails. You can take an adhesive with a rubber base, the consumption will be small. They also use such types of glue as Titanium and Moment.
Ceramic tile
In rooms with high humidity, such as bathrooms or kitchens, you can glue ceramic tiles to the ceiling. The material, in addition to moisture resistance, is durable and long term operation.

First you need to choose the right material, which must be of high quality and meet certain requirements:
- the dimensions of each panel must match diagonally, literally up to a millimeter;
- to check the panels, you need to put two pieces facing or back side to each other. In this position, the corners of the panels are examined, which must match. Even with a slight discrepancy of 0.5 mm, it will not be possible to perform high-quality gluing of the ceiling with tiles;
- Further, the material is checked in this way. The panels are placed on a flat surface, and inspected so that there are no gaps under them.
It is not necessary to check all panels, and this is impossible. It is enough to take several panels from different packages for testing.
To glue ceramic tiles to the ceiling, you must perform the following steps:
- prepare the work surface. The old ceiling covering is removed. It can be wallpaper, paint, whitewash, layers. old plaster. Regardless of the type of old coating, it must be completely removed. The cleaned surface is primed and puttied;
- then a cement-based mortar is kneaded for gluing tiles to the ceiling. The solution in the form of a track is thrown onto the surface of the ceiling, and a profile is attached that acts as a beacon;
- you can apply the solution not on the ceiling, but directly on the tiles. After applying the solution, it must be smoothed with a spatula, combed;
- the tile with the applied mortar is applied to the surface and pressed for shrinkage;
- with a rubber spatula, you need to remove excess mortar that protrudes along the edges of the profile;
- when mounting each subsequent element, special crosses are placed in the seams to get the perfect angle. Thus, the tile will not move to the side;
- usually latest tiles cut before installation. A tile cutter or grinder is used.
After installing all the tiles, the lined surface is wiped with a damp sponge or rag. If this is done after the solution has dried, then more effort will have to be made.
After gluing the tiles to the ceiling and completely drying the surface, proceed to rubbing the seams. For this purpose, a special mixture is purchased. Before grouting, the seams are cleaned with a spatula.

The grout mixture is applied rubber spatula thrusting movements. When the grout dries, the surface is wiped with a sponge.
Before installation, you can watch a video on how to properly stick ceramic tiles on the ceiling, and once again study the step-by-step instructions.
Adhesive on uneven ceiling
If you are going to glue the ceiling with foam tiles, there is often such a problem as an uneven work surface. If you do not solve the problem, then the installation simply cannot be completed.
You can, of course, stick the ceiling plate on flat ceiling if it is made of polystyrene foam. This option is possible with small surface defects and reliable fixation of the profiles.

To glue ceiling tiles on an uneven ceiling, you need to consider the following points:
- the tile is selected in size so that the dimensions of the surface irregularities are taken into account;
- it is better to dwell on relief profiles, because with such a texture, irregularities will be less noticeable.
To save time and additional materials, you can glue the ceiling tiles on an uneven ceiling. Perhaps, if you do not look closely at the ceiling, this option will even look. In this case, the floor and walls should be even.
But, if you need to get a high-quality result, then you should not glue the ceiling tiles on an uneven ceiling. If the tiles are metal or ceramic, then they will not hold on to an uneven base coat.
But, even light foam profiles are desirable to be mounted on a prepared, leveled surface. You can use two options. Either the ceiling surface is completely cleaned of the old coating and leveled, or a metal or foam frame is mounted. The tile is mounted on a frame structure.
Leveling the surface with putty
To work, you need the following tools:
- putty knife;
- beacons;
- rule;
- grater.

To prepare the ceiling for pasting with foam tiles or a profile made of another material, you must perform the following steps:
- it is necessary to completely remove the old coating using a dry or wet technique. The old coating usually crumbles, leaks, mold marks, cracks and crevices are visible. It is also desirable to remove the old layer of plaster;
- then you need to choose how to process the ceiling before gluing the ceiling tiles. Usually, a high-quality antiseptic solution is used to protect against various microorganisms, which fills the pores. working surface;
- the ceiling cleaned from the old coating is primed. Primer used deep penetration;
- The next step is to apply the starting layer of putty. Instead of putty, a cement solution with the addition of glue for elasticity is suitable;
- further mark places for beacons;
- markup is performed. With a spatula, along the marking lines, a putty track is applied or cement mortar. The beacon is installed on the track and fixed by the rule. A thread is pulled from the edge of the first beacon, and the remaining marks are set to allow the tiles to be correctly glued to the ceiling;
- putty is applied between the beacons, then the alignment is performed by the rule;
- if in the process of work irregularities appear, then they need to be rubbed with a grater;
- after the putty layer has dried, the beacons can be removed. Remove the beacons a day after applying the plaster;
- at the final stage, the surface is rubbed with a wet float.
You can glue the foam board on the shelves on the third or fourth day after the completion of the surface leveling work.
Styrofoam frame for mounting tiles on uneven surfaces
The frame is suitable for ceiling surfaces consisting of individual blocks. At the same time, the sealed joints protrude, and it will not be possible to correctly stick the tiles on the ceiling.

The frame is mounted as follows:
- foam sheets are cut into strips;
- the strips are glued to the ceiling at such a distance that one tile can be fixed on two foam strips;
- where sections of the ceiling are uneven, recesses are cut out on the foam strips with a knife.
To make foam strips of the required width, you need to take into account the dimensions of the profiles.
Installation of a foam frame is considered more simple option work surface preparation. No need to wait until the putty layer dries, as when leveling the ceiling. All work can be done in a day.
But, this option will be less reliable. In addition, only foam tiles can be glued to the ceiling on the foam frame. The design will not withstand heavy ceramic or metal profiles.
Mounting
After leveling the working surface, you can start pasting the ceiling with foam tiles.
The following profile locations are available:
- parallel to the walls. The option is possible only with perfectly flat walls;
- diagonal sticking;
- rhombus wrap. The corner of the profile for finishing is fixed in the center.
After choosing a method, the following installation steps are performed:
- markings are made on the ceiling;
- glue is applied to the first tile. The adhesive composition is applied along the perimeter and diagonals of the profile;
- the tile smeared with glue is applied in the right place and pressed;
- other profiles are fixed similarly to the first one;
- after installation of all tiles, the seams are puttied or rubbed with silicone-based sealant.

Upon completion of installation, ceiling plinths are mounted.
You can see the video below on how to glue the ceiling with ceiling tiles.
Whitewashed ceiling sticker
You can tile the ceiling surface with tiles on almost any base coat. But, it is not always possible to glue ceiling tiles on a whitewashed ceiling. In this matter, it all depends on the following points:
- type of whitewash;
- features of applying the old coating.
If chalk whitewash was applied, then from the tile as ceiling finish better to refuse. The material will definitely start to come off.

- the old finish easily lags behind the surface;
- on the ceiling there are several lime whitewash layers that are already stratifying;
- as a whitewash, frozen lime was used, reminiscent of the chalk coating method.
Important: sticking foam tiles to the ceiling will only work if old whitewash applied once and thin layer. One more nuance - the old covering keeps normally.
The tile used in the case of an old whitewash coating can only be light. These can be profiles made of foam or extruded polystyrene foam.
Installation of tiles consists of several stages:
- preparatory work;
- primer of the cleaned surface;
- markup;
- installation of foam plastic profiles with finishing.
Consider how to properly glue the tiles on the ceiling for whitewashing in more detail.
Preparatory work
Preparatory activities consist of the following:
- run your hand over the old whitewash, and make sure that the whitewash does not smear;
- then the surface is brushed, then wiped with a damp sponge;
- after the previous steps, you need to check again how well the old layer holds. Use a spatula to remove areas of whitewash that are suspicious. If the lime begins to fall off, then you need to remove these parts, capturing a few extra centimeters.
The preparatory activities are completed, and you can start priming work.
Primer application
Thanks to the primer, the adhesion between the base ceiling surface and the adhesive is improved.

The primer is applied as follows:
- before using a deep penetration primer, the composition is shaken and poured into a special container, from which it can be taken with a roller;
- the roller is impregnated with a primer and slightly squeezed. Then you need to walk with a roller along the cleaned whitewashed surface of the ceiling. The layer is applied thinly. To get to hard-to-reach areas, use a brush;
- you need to wait for the complete drying of the soil layer, then apply a second layer.
If large defects are found on the surface, then they need to be puttied.
markup
The quality of the future finish of the foam lining depends on the correctly applied markings.
The markup is done like this:
- mark a point at the intersection of the diagonals of the ceiling. This will be the center mark;
- further lines are marked along which you need to align the foam tiles. The location of these lines depends on the laying method.

You can not mark the entire ceiling surface. You can mark up only two center lines, then align the rest of the profiles with them.
Sticking
Before installing the panels, you need to cut off the burrs from them. As an adhesive, it is better to take liquid nails or glue from polymers.

Installation is done like this:
- installation starts from the center of the ceiling;
- glue is applied around the perimeter and center of the profile;
- the profile with the applied glue is aligned according to the markup and pressed against the ceiling;
- this is how a square of panels is laid out, and subsequent foam profiles;
- gluing in the corner, at the joints, is carried out after cutting the profiles;
- after the glue has hardened, the gaps between the profiles are puttied.
For finishing and closing puttied joints, can be painted foam tiles. If the profile has a rough rather than glossy structure, then the surface is pre-primed. The paint is applied in two or three layers with a roller. The first layer goes along the direction of the light, the next - across the natural light.
Today there is a large number of finishing materials for the ceiling. Most affordable option are ceiling tiles, which are square panels of polystyrene. They have a wide variety of textures and a wide range of colors. This makes them great option to create beautiful practical interior at minimal cost. The article will tell you not only how to glue the ceiling tiles, but also how to care for it in the future.
Advantages and disadvantages of ceiling tiles
The polystyrene from which the plates are made is a light and environmentally friendly material with good soundproofing properties. Products from it are easily cut with a simple clerical knife and quickly mounted.

It belongs to flame-retardant materials, but can be melted and deformed by a powerful light bulb. Therefore, it is recommended to place chandeliers at a distance of at least 20 cm from the tiles.
With the help of foam tiles, a smooth surface is easily and quickly created without significant financial costs. But, with all the advantages, the adhesive ceiling is not very durable, subject to negative influence moisture and ultraviolet.
Calculation of the required amount of material
The sizes of ceiling tiles can be different, but in most cases they are produced in square 50x50 cm. Also produced rectangular tiles 100x16.5 cm in size, but they are extremely rare on sale.
After done final choice plates, should be calculated required amount. The simplest option is to divide the length and width of the ceiling by the length of the side of the slab. For example: the ceiling has a size of 300 cm by 600 cm, and the width of the tile is 50 cm. It turns out that 6 tiles fit in width and 12 in length. Multiply 6 by 12 and get 72 - this is right amount ceiling tiles.
In the event that the ceiling is not a multiple of 50, you can draw the location of the panels on paper, observing the exact proportions of the ceiling.
Tip: must be purchased at 15% more material. This is done in case of breakage, deformation or incorrect cutting.
Ceiling surface preparation
Before you start gluing the ceiling tiles, you need to clean the ceiling from the old coating and dust. If necessary, it should be leveled with putty. If the irregularities exceed 1.5 cm, then plastering is performed first and only then finishing putty. When it dries, a primer is applied to the entire surface.
The next step is to apply markings for laying tiles. Only evenly distributed panels will give the room the necessary aesthetics. To do this, two diagonal lines are drawn on it, the center is located at the point of their intersection. Then, perpendicular lines are drawn through the resulting point, dividing the ceiling into 4 equal parts.

How to glue ceiling tiles
Panels made of polystyrene can be glued to almost any surface. For kitchen fit laminated tiles, and for the bathroom - extruded.
But you need to know how to properly glue ceiling tiles, because even the simplest workflow requires compliance with the technology.
First of all, you need to decide on the glue. For these purposes, a large number of special formulations. But you can also use PVA or Moment. It is applied in a zigzag pattern on the reverse side.

The tile reacts to temperature changes and changes in humidity, which leads to deformation after installation. To avoid this, it should be left unpacked for several hours in the room where it will be mounted. The quality of the tiles will also affect the aesthetics of the glued ceiling. It must have consistent geometric dimensions and even cuts.
The first tile is installed so that one of its corners is located at the center point of the ceiling. If there are wires in this place, they are de-energized, and the corner of the panel is cut (later it will be closed with a glass of a chandelier or a decorative ceiling rosette). Align it along the lines drawn in advance on the ceiling. When sticking, the tile must be pressed tightly, but in such a way that no dents remain on it, and hold for several seconds.

All subsequent rows are arranged in parallel, without gaps between the tiles. The triangular arrows on the reverse side- they must point in the same direction.
Tiles in the last rows, in most cases, have to be cut to required size. Therefore, you first need to try them on and only then apply glue. The remaining gap between the wall and the extreme rows of panels will close ceiling plinth.
Tip: Remove all adhesive residue immediately with a sponge.
Effect seamless ceiling created with silicone sealant. They fill all the seams and level with a trowel. Excess is easily removed with a damp cloth.
The final stage of the installation of the plates will be the installation of a ceiling outlet around the hole for the chandelier and the plinth. Also, the finished ceiling can be coated with any water-based paint.
After completion of work, the doors and windows in the room are tightly closed to prevent air movement.
Tips to help you properly glue the ceiling tiles
Pressing the plate is best wooden block, not by hand. This will prevent possible dents from appearing on it.
If the ceiling has an uneven geometry and the gaps between the tiles are too large, it is recommended to use acrylic sealant which, after drying, can be painted. But this method is only suitable for white, non-laminated tiles.
If the gap between the extreme rows of plates and the wall is less than 1.5 cm, in the future it will be decorated with a ceiling plinth. But if it is larger, then they close it with a strip of the panel, cut not only in size, but also taking into account the pattern.
Glue the boards from the center to the edges in small rooms impractical. As a result, they will not create the effect of a continuous surface, but will only increase material consumption. the best way there will be installation of tiles from the corner to the center.
Ceiling tile care
- non-laminated tiles are cleaned with a dry cloth or very carefully with a vacuum cleaner;
- the laminated panel should be wiped with a damp sponge;
- small dirt is removed with a regular eraser;
- from direct exposure to rays, polystyrene tiles turn yellow over time;
- complex pollution, from plates white color can be cleaned with alcohol. But the use of turpentine, acetone or gasoline is unacceptable.
Ceiling tiles in the interior
Very often it is associated with simple white slabs that have a simple pattern. But today their design has become more perfect, and they are already able not only to finish the ceiling of the room on a budget, but also to add luxury to the interior.

Ceiling tiling - budget way repairs that are easy to do yourself. However, in most apartments, the evenness of the ceiling surface leaves much to be desired, and too large deviations on the plane create inconvenience in work, spoil the impression of the repair. If you know how to glue ceiling tiles on an uneven ceiling, you will get a monolithic surface.
For the manufacture of ceiling tiles are used different materials. So, fiberglass panels will provide reliable sound insulation. Other components used in the production of decorative boards include wood, expanded polystyrene, and light metals.

Expanded polystyrene (polystyrene, polystyrene) is considered a common and affordable option. Price, range of shades and textures of surfaces - distinctive features such a tile.
According to the method of manufacture, it happens:
- pressed (stamped) - produced by pressing. The thickness of the segments is 6 - 8 mm;
- injection is made by sintering the components of expanded polystyrene. Product thickness - 9-14 mm;
- extruded is made from strips of polystyrene obtained by pressing. Finished tiles painted or laminated.
According to the type of surface, the panels for finishing are divided into:
- laminated, coated protective film from the front side;
- seamless are characterized smooth edges, after gluing the joints remain invisible;
- mirrors are made of plastic, front side segments are covered with a mirror layer.
How to solve the problem of uneven ceiling
Often, those who decide to stick ceiling tiles are faced with the problem of uneven overlap. But, if you know the technology of laying panels, the problem can be solved.

An easy way would be to install parts on an uneven ceiling. This is done with polystyrene foam, which hides minor height differences. But then you have to choose suitable size panels and drawing. For example, a large relief visually masks flaws more than a flat surface of tiles.
If the goal of finishing is to obtain not only smooth, but also durable decorative ceilings, it is better to pre-align the base base, and only then proceed to the design of the ceiling with tiles.
In this case, choose the following alignment methods:
- using putty mixture;
- installation of a frame base made of metal or foam.
How to glue ceiling tiles on an uneven ceiling: leveling with putty

Work starts with pre-cleaning surfaces from the previous finish. For this they use mechanically using water and a construction spatula. If this method does not help, get special chemical compositions that corrode old finishes.
When the ceiling is cleaned, it is primed. Next, cracks are sealed on the surface, then the base is covered with a layer of putty in such a way as to remove irregularities and height differences. The layer thickness should not exceed 2 cm. The putty will hold better if a reinforcing mesh is glued to the ceiling.
After puttying, the ceiling is left to dry completely, then the plane is polished with fine-grained sandpaper. Sanding will make the surface smooth. At the end of the grouting work, the ceiling is again covered with a primer layer.
Construction of a foam frame for gluing tiles
This method is suitable for rooms with a flat ceiling plane, but with slight bulges. For example, if the overlap is made of concrete slabs, the gaps between adjacent plates are sealed with putty, but the dried mixture protrudes from the plane. Then sticking the panels to such a base will not work.

To do this, construct a frame of foam strips:
- sheets are cut into strips, which are glued to the ceiling with a step corresponding to the width of the tile. As a result, one panel should lie on two strips;
- if the strip falls on an uneven area of \u200b\u200bthe base, a recess is cut in the foam with a knife corresponding to the width of the unevenness.
When choosing the width of the strips, take into account the dimensions of the tiles that are supposed to decorate the ceilings. Such a frame is mounted only under light foam tiles.

After leveling the surface, proceed directly to gluing the panels. But first, they mark the ceiling for the ceiling tiles, choosing the method of mounting the segments:
- parallel to the walls - a simple option, used if the walls in the room are even. To do this, first the first row is glued from the wall, and then the following rows are laid one after the other;
- diagonally. Two lines are drawn on the ceiling from corner to corner, the intersection of which will be the starting point for installation. Then more lines are drawn along the diagonals;
- rhombus, when several squares are measured from the center of the ceiling, additional diagonals are drawn from each figure. The corner of the foam tile is placed in the center of the ceiling, and the sides of the part should run along the lines.
If the ceiling could not be leveled, then it is impossible to stick the panels on special adhesives. To mask minor height differences, glue is used under sheets of drywall or putty, which is diluted to the consistency of thick sour cream. So that the putty does not have time to dry out, the ceiling is smeared first for gluing the first four tiles, then the next four, etc.

The tile is laid on a layer of glue. The panels adhere well and move easily if a segment needs to be adjusted. First, the edges of adjacent elements are combined, and then set in a single plane using a rule or a building level.
If glue gets on the front of the panels, the composition is immediately removed. damp cloth. The voids between adjacent parts are filled with sealant or putty. As a handy tool for masking joints, use a rubber spatula.
Thus, the problem of gluing tiles on uneven ceilings is easily solved. The main thing is to follow the technology when finishing.
Video how to glue ceiling tiles without seams
Expanded polystyrene tiles are one of the most popular types. ceiling coverings. Therefore, the question of how to glue ceiling tiles is of interest to many novice craftsmen who plan to do the finishing work with their own hands.
How to choose a tile for finishing the ceiling?
The great popularity of this decorative material due to its following advantages:
- simple installation - everyone can handle gluing tiles;
- easy care - foam tiles can be washed with any non-abrasive agent;
- the ability to hide small defects in the base;
- speed of finishing - a small base (for example, a ceiling in a bathroom) can be easily decorated in a few hours;
- low cost - prices for ceiling tiles are quite low, so everyone can afford such a finish.
For successful completion repair work 3 questions need to be answered:
- how to choose a facing material so that it lasts for many years;
- how to glue the selected finish option so that it does not fall off;
- how to properly glue ceiling tiles so that the ceiling is not only reliable, but also attractive.
In the domestic market, ceiling tiles are presented in a wide range. Different models differ in color and texture design, production technology, geometric dimensions, quality of expanded polystyrene and cost. Therefore, before gluing tiles to the ceiling, you need to choose the right finishing material.
According to the production method, ceiling tiles are divided into 3 types:
- Injection. It has a low density and, accordingly, strength, and therefore it costs less than other types of finishes. Its thickness is no more than 14 mm. Such a tile is made by sintering foamed plastic, which is why it is called foam.
- Stamp. It has a denser texture and mechanical strength. The thickness of the product is 6-8 mm. It is made by pressing polystyrene foam at high temperatures.
- extruded. Is the most expensive and most quality tiles. At high density and strength, its thickness is about 3 mm, which, when finishing, saves extra millimeters free space. During the production process, the tile is covered with a laminated layer, which not only improves it appearance but also protects against the harmful effects of moisture. This allows you to use the material in rooms with high humidity (bathroom, kitchen).

By choosing suitable type products, its color and pattern, you need to check the quality of the material and its geometric dimensions. The first step is to inspect the edges of the sheets - they should be dense and consist of small granules. The smaller the granules, the better. Then the strength of the material is checked. To do this, from the selected batch, you need to take one element by the edge and shake it a little. If at the same time it does not deform or break, then its quality is good.
Each tile must have the correct geometric dimensions. For example, if it is a square, then all the edges must be the same length and the corners must be 90°, that is, they must not be rounded or flattened. Only in this case you will be able to finish the ceiling without seams.
Choosing a ceiling tile adhesive
When answering the question of how to glue a ceiling tile, one cannot ignore the glue, which is the connecting link between the base and the finishing material. The adhesive composition for cladding ceilings must have the following properties:
- strength and reliability;
- quick grasp;
- good adhesion;
- environmental safety;
- the ability to lay down both thin and thick layers.

If everything is more or less clear with the first four points, then the last one needs a little pause for clarification. Most old-style apartments do not have flat ceilings; they can have height differences of more than 15 mm. How to finish in this case? Exit from similar situation there are two ways: before facing, level the ceiling or use glue that can be applied in a thick layer. The first option is not optimal, since it requires additional financial investments from the contractor. So the best option is the application of the adhesive composition in a thick layer, thereby simultaneously leveling and finishing the ceiling base.
Gluing tiles on a flat ceiling can be done using adhesives such as liquid nails, "Moment", "Eco-naset" or "Titan". They have excellent adhesion to any coating, be it plaster, wallpaper or other material, and fast time drying, which greatly facilitates installation work.
What to glue foam tiles on an uneven ceiling? In this case the best option speaks ordinary putty and glue for tiles or drywall. These compounds can be applied in layers up to 40 mm, thereby leveling even big swings heights.
Preparatory work
Any repair process begins with preparatory work. And finishing the ceiling with tiles in this regard is no exception. Before pasting given material, you need to do the following:
- choose a laying scheme;
- calculate the required number of tiles;
- prepare the ceiling for finishing.
Exist different ways placing tiles on the ceiling relative to the walls, the most popular are (Fig. 1):
- rows;
- in a checkerboard pattern (with a shift);
- diagonally.

Each styling option allows you to create a specific pattern, the best way suitable for a specific design idea.
To calculate the required amount of finishing material, it is necessary to make drawings on a sheet of paper in a box in the selected scale, which indicate the dimensions of the room and the layout of the tiles. In doing so, it should be taken into account that standard sizes ceiling tiles are 50x50 cm. You can start laying from the center of the room or from the wall opposite the window. If there is a chandelier in the center of the ceiling, then it is recommended to start finishing from it (Fig. 2).
After that, according to the drawing, the number of whole tiles and the number of elements that will be cut off are counted. If gaps remain near the walls, the width of which will be less than the width of the tile (less than 25 cm), then in this case 1 element will go to cover two rows. If the size of the gaps is more than 25 cm, then you should buy tiles at the rate of 1 piece per 1 row.

How to glue the tiles so that they do not fall off over time? To do this, it is necessary to properly prepare the finishing surface. First, the ceiling is cleared of poorly held old finish and treated with a deep penetration primer. If the base has deep cracks and chips, then they should additionally be repaired with putty. Before finishing, it is recommended to prime the ceiling made of chipboard or plywood with a special mixture with abrasive additives that increase the adhesion of the material. After the primer dries, you can glue.
How beautiful to glue the ceiling? First you need to correctly draw the finishing base and designate its center. For this, two cords are taken, which are pulled from opposite corners diagonally. The point of their intersection will be the center of the room. Then they retreat from this point by 25 cm (half of the tile) and draw lines along which the first element will be glued.
Do-it-yourself tile gluing
Before gluing the tiles, you need to prepare the following tools and materials:
- ladder;
- spatula, if a mixture for drywall or putty will be used as glue;
- roulette;
- stationery knife;
- mounting gun;
- tiles;
- adhesive composition;
- white sealant.

How to apply glue to the tile depends on what composition will be used. If gluing will be done using putty or cement mixture, then the glue is applied pointwise so as not to increase the weight of the finishing material. If it is planned to use Titanium, liquid nails or another similar composition, then it is applied around the entire perimeter of the tile with a thickness of 20-30 mm, and a small spot is also made in the center.
After applying the glue, you need to leave the tile alone for a few minutes so that the glue dries a little. After that, the finishing material is applied to the ceiling along the markings and pressed with uniform efforts over the entire area. Before mounting each subsequent element, it is applied dry to its place to see how it will lie down and whether it will spoil the drawing. The tiles in the last row, if necessary, are cut with a clerical knife on a hard surface. At the last stage finishing works ceiling plinth is glued.
Before gluing tiles, all windows and doors in the room must be closed to prevent drafts, because they adversely affect the strength of the hitch.
If for some reason small gaps have formed in some places, then you should not be upset, as they can be sealed with white sealant. After the sealant dries, it will need to be painted over.
There is nothing complicated in gluing ceiling tiles. The only thing that can cause difficulties is the marking of the ceiling, since it must be done as accurately as possible. If everything is done correctly, then the do-it-yourself ceiling will look no worse than if the installation work was carried out by the repair team.
The question of how to stick ceiling tiles is of concern to most of those owners who started do-it-yourself repairs in the apartment.
Ceiling tiles are made from very light material(foam or expanded polystyrene), which allows them to be used even for small apartments, because they do not weigh down the ceiling.
There is also nothing difficult in gluing the material, given that a diagram, instructions and a video will be given to help with this.
Those who start repairs cannot always decide what to glue first: wallpaper or foam tiles. So, according to the rules, tiles are glued first.
The fact is that as a result of their installation, the wallpaper is easy to damage with glue or other material. If your wallpaper suits you, then try to cover the walls with something before you start working with tiles.
You will learn more about how to properly glue polystyrene or foam ceiling tiles, how to choose the material, what to glue, where to start, as well as different ways of sticking, you will learn in this article from the instructions and video.
Tile selection
Start gluing ceiling tiles should be with its choice. There are several options for ceiling tiles. There is also a variety of tiles for rooms, bathrooms, kitchens.
It can be extruded: it is made from a polystyrene strip covered with a film.
When it is created, the pressing method is used, and after this procedure, the size of the plate is about 2.5 mm in thickness.
It is smooth and even (although in some cases it may have relief).
The color of the foam or polystyrene plate can be white or painted. Usually it is painted under some natural materials such as wood or marble.

Such tiles can be glued in the bathroom, because. it is quite waterproof and tolerates the temperature of this room well.
Injection tiles are made by sintering polystyrene foam material. It is slightly thicker - 9-14 mm. It is made with a clear pattern and the correct geometric size.
These tiles are not very suitable for the bathroom, but will look good in the kitchen or in the living room.
Pressed tiles are also made from expanded polystyrene. They are medium in thickness, about 7 mm. Such tiles can be slightly embossed or even.
These are the most common ways for sticking with your own hands, because. it has the best ratio of price and quality of production.
Seamless ceiling materials- the most aesthetic option, because they look like a continuous coating. Such a coating is somewhat more expensive, but significantly changes the look of a room or bathroom.
In addition to types, foam tiles also differ in quality.


To choose suitable option, you need to know what requirements the ceiling tiles must meet: firstly, it must be strictly square (the corners are 90 degrees), without bent or beveled corners.
In addition to square tiles, tiles can be rectangular, but this happens much less frequently, in which case the edges of the material must also be even.
Before buying, you first need to evaluate the quality of the material: if the corners crumble, and the grains of the tile are very large, then you should not take it.
The grains of the material must be very small, tightly glued to each other and not crumble when rubbed or deformed.
The top and bottom surfaces of the material must be hard and smooth, without dents or other signs of deformation. It is easy to check the quality of a tile: take it by the corner and shake it slightly.
If its structure has not collapsed, it means that it is of high quality and can be used in finishing the bathroom, kitchen and other rooms.
Apart from quality material, you need to understand how much of it will be needed for repairs. This will require a calculation.
You can make it yourself by drawing on a regular sheet of paper the room in which you want to place the tile (for example, in the bathroom), while maintaining its proportions.

After that, the tiles are “placed” on paper from the middle of the ceiling to the edges. Having drawn all this on paper, you can estimate how much you will need for your bathroom.
Usually this calculation is quite accurate, but it is better to take a few more tiles (usually take + 10%) so as not to return to the store.
Stages of work
You can follow the whole process and methods of gluing tiles diagonally on the video.
Before tiling, the surface is first prepared. Your ceiling must be completely flat and clean. First you need to wash it, remove dust and if it is uneven, then eliminate all irregularities.
If you live in wooden house and the ceiling is finished with plywood or chipboard - then you need to carry out a primer to level the surface.

If your ceiling is whitewashed, then the question arises - how to glue ceiling tiles on whitewash? But do not worry - the plates can be glued directly to it.
But there is a nuance: it should not crumble and crumble, otherwise high-quality pasting will not work, and the coating will constantly fall off.
If whitewashing was carried out repeatedly and now there are several lime layers on the ceiling, then the procedure will most likely fail.
To check whether it is possible to glue the ceiling tiles on your whitewash or not, just run your hand along the ceiling - if there are no traces, then everything is in order.
However, before starting the procedure, it is still recommended to thoroughly wash and prime the whitewash so that it completely “merges” with the ceiling.
If there is wallpaper on the ceiling, they will have to be removed first. Wallpaper not best material to interact with the tile, so if you do not want to permanently glue it, then it is better to clean the surface in advance and remove the wallpaper first.
Wallpaper from the ceiling is removed no more difficult than wallpaper from the walls - with a spatula and plain water.
After you remove the wallpaper and the surface is completely dry, you can start gluing.
It happens that complete leveling of the surface is impossible - in this case, prepare a sealant with which you will cover up the gaps and joints that have arisen between the tiles.
Best to use seamless tile where the seams will not be very noticeable, and take a white sealant.
What glue to glue the ceiling tiles with is the next question that worries those who started repairs with their own hands. For gluing ceiling tiles, you can take the usual Russian Moment glue.
Sometimes adhesives "Titan" and "Eco-naset" are chosen - they are Polish-made.
It is Moment that is best suited for this work, because. it ensures fast and high-quality adhesion of the material and the ceiling and minimizes the risk of material peeling off.
True, to apply it, you will need a sealant gun - otherwise you will not be able to place the tiles on the ceiling with your own hands.
Where to start gluing tiles depends on several factors. Main element on which this question depends - a chandelier.
If it is in the center, then the gluing scheme will be as follows: two threads are stretched diagonally across the ceiling, and the center will be where they intersect.
If everything is correct, then the threads will intersect with the wires drawn for the chandelier.
Two more lines are drawn through the center (perpendicular) and it turns out that the surface of your ceiling is divided into 4 identical parts.
Sticking starts from the center. You need to move forward in each section. When one is full, you can move on to the next.
The first part is glued so that its corner goes exactly to the center (you can start with any of the parts).
During gluing, make sure that the arrows that are behind tiled panels, were directed in the same direction.
The last tiles to be placed will need to be slightly reduced with a knife, as there will be less space. The gaps between them and the walls are usually closed with ceiling moldings.
If the chandelier is not located in the center, then the place in which it is located is taken for it. In the same way, two lines are drawn perpendicularly through this place, running parallel to the walls in the room.
If everything is done correctly, then you will get right angles that need to be divided by lines by another 45 degrees.
After that, the algorithm of work is similar to the first option: the tiles are glued with lines in one direction, and you should start from the selected center.
It happens that in the center it is impossible to remove the fasteners for the chandelier with your own hands.
In this case, after you have found a position in which the corner of the plate will go into the center, this part is cut off with a square, which will then be closed by the chandelier.
This is done with other plates located in this place.
Seamless material is laid in the same way. The main thing is to monitor the quality of the joints.
This method is used in large rooms. If you need to glue tiles, for example, in the bathroom, it will be pointless to do it this way, since it will not look like the surface is solid.
In the bathroom, it is best to start gluing from the corner opposite the entrance or with a rhombus - this will not only look better for the appearance of the ceiling, but also significantly reduce material consumption. How to glue the ceiling tiles with a rhombus can be seen in the video in the article.
To keep the tiles stronger, they are pressed not with hands, but wooden beam– so the grip is better and faster.
There are many ways to glue seamless and other types of tiles - from the video you can learn how to glue the ceiling tiles diagonally, how to glue the ceiling tiles with a rhombus and some other options, as well as the better to glue the ceiling tiles.