Detailed installation of a shower cabin. Tips for installing a shower cabin. Vertical shower railings
The shower cabin has become almost a standard in modern housing, replacing the usual bath with a shower. It does not in any way replace a bath or a bath, but is rather an addition to them. And although this is a high-tech device, assembling shower cabins with your own hands is not particularly difficult.
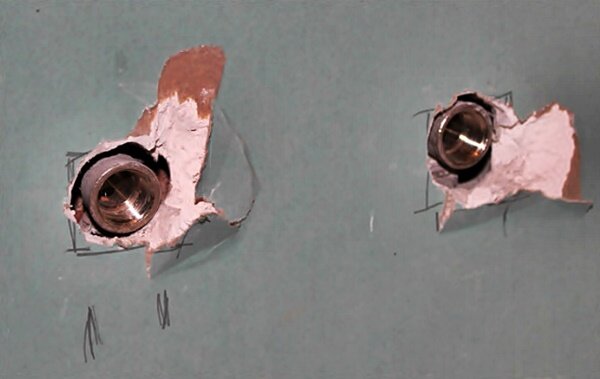
Assembling a shower cabin photo
Each such device is usually accompanied by a shower cabin assembly diagram explaining the installation process of a particular model. But there is a general approach. Let's go through the build process step by step.
Necessary tools and materials for assembling a shower
The assembly of the shower cabin begins with the preparation of tools and additional materials.
To carry out the work, it is necessary to prepare the tools:
- a set of keys or an adjustable wrench;
- flat and Phillips screwdriver;
- building level;
- drill with a set of drills;
- level;
- sealant gun.
Additional material required to mount the booth:
- transparent silicone sealant;
- waterproofing thread or tape FUM;
- tap for connecting the cabin to cold water supply;
- faucet for connecting the cabin to hot water supply.
In addition, many showers are equipped with electric lighting, ventilation, wired communication etc. Connecting these devices will require appropriate equipment and material.
Before starting the assembly, it is necessary to check the availability of all the components of the shower cabin with the assembly instructions.
Shower cabin set
Depending on the specific design, the equipment may vary.
Includes the following basic parts:
- Pallet . Represents a bath on which the rest of the body kit is attached, usually a one-piece structure. The apron can be separate from the pallet;
- Back panel . Most often, it contains: control panel, taps, hose fasteners for hand watering cans, etc.;
- Vertical racks . Side panels, additional equipment can also be located on them;
- Door guides and doors ;
- Top cover . May have an overhead shower, built-in lighting, ventilation, etc.
The complete set is checked at purchase in shop. Before assembly, it will be necessary to check again, unpack and lay out the component parts.
Step-by-step assembly of a shower cabin - instructions
A wonderful Russian proverb says: Better to see once than hear a hundred times. For better understanding it is proposed to watch the video of the assembly of shower cabins.
We will not consider the choice and placement of a shower cabin in the room.
One has only to focus attention: the dimensions of the shower enclosure components are voluminous and before buying it will be necessary to make sure that they can be carried through the existing openings. Of course, the dimensions of the cab assembly itself must fit into the space allotted for it.
Pay attention to the distance between the roof of the selected cabin model and the ceiling: a minimum of 25-30 cm is recommended.
Preparatory stage for assembling a shower

Part of the preparatory stage can already be considered a check of the configuration, preparation of the necessary tools and materials.
One clarification needs to be made: When preparing tools, pay attention to the need for special tools. Often, for commercial purposes, the manufacturer develops the original bolt head (rosette, snowflake, etc.) so that the appropriate keys are bought for assembly.
In our opinion, this is not a completely correct marketing move, but it occurs. At well-known manufacturers have not come across anything like this. For example, when assembling shower enclosures serena, such cases were not noted, similarly when assembling ika shower enclosures. It is difficult to say how things are with other manufacturers.
Immediately before installation:
- Check the readiness of the installation site. The floor must be level and the tolerances for the slope of the floor must be given in the shower enclosure assembly instructions. The floor covering must have certain waterproofing properties. Here, check the sewer drain: it must be at least 5 ° below the drain hole;
- Check that the hoses are long enough to connect to the hot and cold water supply. In case of insufficiency: replace the hoses, build up with extension hoses, or bring the water supply pipes closer. Pay attention to the quality of the water supply hoses included in the kit. Cheap cabins are often equipped with hoses Bad quality;
- Check that the sewer hose is long enough. In case of insufficiency: replace, extend with additional hoses or bring the drain pipe closer. Pay attention to the quality of the siphon. Cheap cabins can be equipped with a low-quality siphon. In this case, it is recommended to change it immediately;
- Check the length of the electrical cable to the socket, check the socket. When placing the outlet in the immediate vicinity of the shower, the outlet must be waterproof;
- Preparation of the necessary tool;
- Checking the availability of necessary additional materials;
- Checking the package, unpacking.
Comment: Shower enclosures should be assembled in the same room where they will be located. Otherwise, it will be necessary to control the passage of the finished booth into the doorway.
Video of assembly and installation of a shower cabin
The assembly of the shower cabin on the video gives a visual representation of the installation process. As can be seen from the presented material, assembling a shower cabin with your own hands is not difficult. Enough attentiveness, patience and our instructions with recommendations.
Shower tray assembly
Shower trays are produced by:
- cast iron;
- metal;
- plastic.
For metal and plastic pallets there is a frame for additional reinforcement of the structure. You can collect the pallet anywhere, dimensions in assembled it does not increase, and it is more convenient to assemble in a spacious room, and not in a cramped bathroom.
Different models may differ in design. Therefore, when installing parts of the shower cabin, pay attention to the assembly diagram.
General approach to pallet assembly:
- Turn the tray upside down. First remove the facing apron;
- Assemble the metal frame (if any) and attach according to the instructions. No gaps between the bottom and the frame are allowed;
- Install the legs in the seats. The design of the legs has nuts that regulate the height of the leg. They are necessary for horizontal alignment and to prevent the shower cabin from rocking;
- Mount the siphon (see below);
Siphon installation
Siphon- one of the problem areas in the shower.
Firstly, this node is closed, there is no direct access to it, and it is not immediately possible to detect problems that arise due to its malfunction. A malfunctioning siphon can lead to a leak, which could leave water on the floor. a large number of water followed by flooding of the lower floors, etc.
In addition, this unit is difficult to access for replacement, sometimes you have to significantly disassemble the shower cabin in order to replace the siphon.
Secondly, the manufacturer often saves on quality, especially for cheap booths. The serena shower cabin assembly was completed with high-quality siphons, the same applies to the assembly of the ika shower cabin. We cannot vouch for other companies.
Therefore, before installing the siphon, we strongly recommend that you pay attention to its quality. If in doubt, it is better to seek advice or buy a known high-quality siphon.
When buying a new siphon, you need to make sure that it fits the model of the shower cabin being assembled: the size of the drain hole, the distance between the bottom and the floor.
When installing the siphon, it is important to ensure perfect sealing.
Siphon installation steps:
- We process the landing part of the siphon and the gasket with silicone and mount it in the drain hole;
- Install the bottom gasket and tighten the nut;
- We wind the lower part of the siphon, having previously lubricated both parts of the thread silicone sealant.
After installation, it is recommended to wait for the technological setting time of the sealant and check the connection for tightness. To do this, it is enough to pour a bucket of water into the pan, naturally, pre-direct the drain into the sewer or some kind of container.
Installing the shower tray on site
After installing the pallet in place, it is necessary to align using the building level. Adjusting leg nuts allow you to eliminate minor slopes and uneven floors.
For shower enclosures, slight slopes are acceptable. It is important at the same time to ensure the angle of inclination towards the drain hole so that the water does not stagnate.
Shower cabin rocking is unacceptable. This defect will need to be eliminated by adjusting the legs. It is undesirable to use additional methods that are not provided for by the technology: linings, extension cords, welding, etc.
Assembly and installation of walls
The installation of the walls depends on the specific design.
General approach to wall mounting:
- Before installation, each panel or part with a through hole is treated with silicone sealant;
- Part attachments it is convenient to mount before installing the panel on the pallet: faucets, fasteners for shower heads, etc.;
- After assembly, the joints are again treated with silicone sealant;
- Fixing the panels is usually carried out using guides. Before attaching the panels, it will be necessary to install the guides. The panels themselves are mounted on self-tapping screws;
- Install the back and one sidebar, then mount the second side (if any);
- Install uninstalled accessories: mirrors, holders, handles, etc.
Roof installation
General approach to roof installation:
- Install all the elements: a watering can, lighting, speakers, ventilation, etc .;
- It is recommended to treat with silicone sealant before installation. A small amount of water directly enters the roof, sealing performs the function of vapor barrier and sound insulation;
- Put the roof back in place. Usually fastened with self-tapping screws. In case of insufficiency, it can be strengthened with additional ones.
doors
General Approach:
- We fix on the doors: rollers, seals, handles;
- We hang the doors and adjust them so that the doors fit snugly without gaps and the side gaps are closed with seals.
Possible inconsistencies may be due to inaccurate installation of the pallet. Check the levelness with a spirit level and correct the slope if necessary.
Connecting the shower cubicle to the mains
Connecting to the power supply consists in installing a moisture-proof socket, or pulling the power cable outside the room. In the case of a power socket, it must be installed in a place where water splashes cannot enter.
Leak test
Even, it would seem, quite recently, most of us saw showers only in movies or in advertising magazines. This plumbing "unit" was perceived, rather, not as a convenient complex for regular hygiene procedures, but as a luxury item, not available to everyone. But very little time passed, and the booth turned into a faithful assistant, sometimes even more useful than the bathroom familiar from childhood.

Yes, and judge logically - how often do we use the bathroom in our time? In the “epoch” of meters for hot and cold water, spending 100 liters each for one procedure will not be allowed by everyone, except perhaps to bathe a child. Washing in the bathrooms has also almost ceased - automatic washing machines have become responsible for this matter, which also migrated from the category of "elite" to a completely ordinary set of an ordinary family. But you can't do without a soul. In addition, we must not forget about the eternal issue of lack of space in the bathrooms and bathrooms - and the acquisition and assembly of a shower cabin with your own hands in most cases alleviates this problem at once.
Of course, if you can have both, that's great. But even in matters of ease of use, the shower cabin leaves far behind with a mixer. Modern models make the process of taking a shower very pleasant, sometimes even a wellness procedure. And some of them, in addition, allow the owners to even “not turn off from the media space” - IP or GSM communication channels or the built-in FM radio will take care of this.
The article will give brief recommendations for choosing desired model, and, most importantly, the reader should get an answer to the question - is it feasible for him to install a shower stall with his own hands, or is it still better not to risk it and turn to the help of specialists.
To choose correctly and, then, correctly install, you need at least roughly understand its basic structure. Of course, there are a great many models of booths, but the general layout pattern for everything is observed.
First of all, shower cabins differ in the types of construction.
- Open cabins are, rather, just a space fenced off for taking a shower - they consist of walls and a pallet. Although, in some cases, a special pallet may not even be used - if a different way of collecting and draining water into the sewer is thought out, for example, reliably waterproofed floor with ladder.

shower cubicles open type can be wall-mounted, but most often produced in corner version- in this case, the role of the two walls of the booth is taken over, in fact, finished tiles room walls. If the room has some kind of complex configuration, then, if desired, you can pick up a shower stall designed to be built into a niche. In this version, it becomes even easier - three walls are already ready, and all that remains is to install the front one, with the front door.
Sometimes in reviews of such products, open stalls are called shower screens or shower enclosures.
- Closed cubicles can also be wall or corner, but they are already a fully insulated box, with a pallet and obligatory roof, with very tight-fitting door leaves.

This design opens wide opportunities in expanding the functionality of the booth. Hydraulic nozzles are built into the wall and ceiling panels to create massage jets, various shower heads, special devices and devices for aromatherapy, to provide the effect of a steam bath or sauna with infrared heating. In fact, an ordinary shower cabin can become a kind of home universal bathing and health complex.
- By the way, the apartment owners who if you would like to have a modern shower cubicle, but at the same time not to refuse the presence of a bathroom (even in conditions that are cramped in terms of space), “hybrid” models can be advised. Such products, of course, are quite expensive, but they allow you to use the bathroom as needed, or turn it (completely or definite her area) in the shower.

Interesting design - combines both a bath and a shower
Now - about the main constituent parts starting from the bottom.
shower tray
The pallet is the “base” on which the entire design of the shower stall is based. Plus, he must also withstand the considerable weight of a washing adult of a solid build. In a word, the requirements for its strength are special.
Pallets can be made from various materials. From time to time, metal ones (enamelled cast iron or stamped steel) still come across. Much more often, booths are equipped with polymer pallets, or made of special composite materials. The most common are acrylic or quartz (quaril is a more advanced composition, which is a mixture of acrylic and quartz filler. The popularity of artificial stone products is growing - special polymer composite, perfectly imitating natural marble or granite.
The shape and size of the pallet, in principle, largely determines the volume and spaciousness of the shower stall itself.

In shape, they can be rectangular, pentagonal, a segment of ½ or ¼ circle, take on other, rather complex configurations (for example, there are booths without doors in the form of a “snail”). When choosing right size it must be borne in mind that the space of the booth should not greatly hamper the movements of the person washing in it. This is especially important if there are very large or obese people in the family.
The minimum size of corner trays is 800 x 800 mm, but this seems to be too cramped. Of course, one should always proceed from “territorial possibilities”, but if the area allows, then the best option would still be 900 × 900 mm or even 1000 × 1000. By the way, this is also important if, for some reason, someone from family members will need to be taken water procedures in a sitting position.

It would seem that only 10 - 20 centimeters, but how dramatically the cabins differ in spaciousness
Now - the depth of the pallet. According to this parameter, it can be flat, more than 30 ÷ 40 mm deep, medium or deep (with a bowl up to 180 mm). When choosing, again, you need to take into account the fact that sometimes not all family members will be comfortable climbing into the booth through the high side (the considerable depth of the bowl itself, plus the pallet is at a certain elevation from the floor level). But on the other hand, the function of reliable collection of water and its timely discharge into the sewer must be fully observed.

Often, home craftsmen refuse the “regular” booth tray, and lay out their own - made of cement, with thorough waterproofing, organization of a reliable drain and lining with non-slip ceramic tiles. Then, on this ready-made home-made pallet, the walls of the booth are mounted.
Vertical shower railings
These elements include a frame, fixed walls, conventional or functional, and entrance doors of one design or another.
The frame, which is attached to the pallet and will serve as the basis for the walls of the booth, is usually made of light and corrosion-resistant metal (aluminum) or plastic. Plastic frames, of course, are less durable, and they are often “disguised” as metal using surface painting - you need to be careful when choosing.
The enclosing walls themselves are made of either fiberglass or natural tempered glass. Fiberglass is lighter, cheaper, but its inexpensive varieties tend to gradually, under the influence of time, temperature and humidity, lose transparency and color saturation, become cloudy, and become covered with a network of microcracks. If selected plastic version, then it is better to immediately acquire a translucent one - on it the indicated shortcomings will be less significant and will remain invisible for a longer time.
The glass walls are made from very durable material, and you shouldn’t be afraid to break out - it’s almost impossible, unless, of course, you set such a goal and don’t use a heavy tool. Yes, and in this case, the glass will shatter into small fragments of the correct shape, which should not represent injury risk.

The rear and side walls of some models are not just a fence, but perform many functions. They are all attached to plumbing fixtures, including various mixers, shower heads, massage hydraulic nozzles, steam generators, lighting systems and other "bells and whistles" with all the elements of a mechanical or electronic control. On the back side of these walls are all the necessary hydraulic and electrical wiring with connections to the water supply, electricity and, if necessary, to other communications.
The doors to the shower cabin can be hinged, sliding (folding or sliding) or rotary-sliding, turning about the vertical axis.

From the point of view of ease of installation and practicality in operation, the usual hinged doors, single or double sided. But they also have a drawback - they require a certain space to open relative to the axis of the suspension. Large cubicles sometimes have inward-opening doors. Well, in small models, it will be necessary to provide space for the sash during installation, so as not to accidentally injure yourself about it or break the door.

Sliding ones do not have such a drawback - they move along the guide "rails" using a system of suspension and thrust rollers. This gives some complexity to the installation and adjustment work, but it is quite convenient during use.
Usually, all vertical shower enclosures, regardless of the material of manufacture, are covered with a special hydrophobic material. This measure does not allow drops of water to remain on the walls - they simply flow down, leaving no characteristic whitish spots after drying.
shower roof
This structural element, as already mentioned, is not available for all models, but where there is a cover, it performs several important functions:

- Firstly, this is the sealing of the booth space, especially if the possibility of a “steam bath” or “aromatherapy” is implemented in it.
- Secondly, usually several plumbing devices are attached to the lid - a shower head, massage nozzles, etc.
- Thirdly, it is on the roof that the ventilation system is assembled with steam removal to ventilation ducts Houses.
- And fourthly, various electrical devices can be attached to the cover, for example, acoustic systems or highlight points.
Additional shower equipment
Sometimes it seems that in matters of additional equipment for shower cabins, some manufacturers are simply trying to "outdo" each other. So, in addition to ordinary and showers, as already mentioned, various massage jets are used, the effects of " tropical rain". Models with steam generators are in demand, especially with the ability to adjust the temperature of the steam and saturate it with aromatic or cosmetic compounds. There is a possibility of ionization (ozonization) of air. Embedded in the booth mobile communication, radio, others media capabilities, is set original views backlights, voice control of all embedded functions. Is it worth paying a lot of money for such "bells and whistles" - a purely individual question.
But from the point of view of operational capabilities, one of the features should definitely be paid attention to. The fact is that showers equipped with massage nozzles require a certain pressure at the water inlet. Very often there are situations when, after installation, the owner of the booth is suddenly faced with the fact that the shower - and it barely flows, but there is no question of hydromassage. And the reason is that it was necessary to compare the parameters of the model and the pressure in water supply network. So, in high-rise buildings, usually the pressure rarely exceeds 1.5 ÷ 2 atmospheres (and on high floors it can even drop to critically low levels), and according to the equipment parameters, all 3 ÷ 4 atm may be required. This means that you will have to fork out more for an electric pump and a water receiver (hydraulic accumulator), from where water will be supplied to all the hydraulic devices of the cabin under the required pressure.
Shower cabins are produced by many manufacturers, both European and Asian, mainly from China. To the credit of our eastern friends, we can say that the quality of their products is getting higher every year, and taking into account the relatively low price, their products are quite serious competition to recognized brands. Moreover, many Chinese companies began to let in European models in their own licensed version.
But almost all products from China have one big “sin”. If Europeans accompany their goods with carefully thought-out instructions (even if not in Russian, then they are easy to translate), then our eastern neighbors approach this issue somewhat differently. Perhaps the problem lies in the “difficulty of translation”, but, as a rule, “manuals” are slurred, hard-to-read text with a lot of errors, accompanied, moreover, by rather carelessly executed illegible pictures. In a word, understand how you want.
To help in self assembly standard insulated corner shower cubicle, we suggest looking at this process in more detail with a step-by-step presentation. Of course, each of the models has its own characteristics, but general principle will still be the same.

For example, a shower cubicle of a Chinese assembly of the RANCHOS-406 type is taken. It belongs to the category of corner cabins, with a quarter-circle tray, with a minimum number of options - in addition to the hand shower, there are six hydromassage jets on the rear panel, and a “tropical shower” on top. The size of the pallet (in radial terms, from the corner to the circle line) is 900 mm.
The price for such shower cabins is quite “democratic”, about 14 ÷ 20 thousand rubles, and therefore it will probably be somewhat insulting to give 5 ÷ 7 thousand more for installation. Moreover, it does not differ in particular complexity.
- First of all, it is necessary to prepare in advance the place where the booth will be installed. Its total weight, excluding the washing person, is 83 kilograms, that is, the base must be strong, not have unstable areas.

- It is very important to ensure the desired slope of the water drain, that is, the height of the drain hole of the pan above the sewer inlet pipe. In order for the water to confidently descend without lingering, an excess of 70 mm is required or a slope angle of at least 5 degrees is required. If this is not observed, then you will probably have to take immediate action - either to deepen the sewer pipes, or to raise the booth, building a solid podium under it.
Video: podium option for a shower stall
- It is clear that to the installation site it is tedious to provide for the supply of pipes for cold and hot water supply, a power line equipped with a safety device on the shield -
- For work, you need to prepare a free area near the place of the future stationary installation - at first, all actions will be carried out there. should be on hand necessary tools- wrenches (preferably adjustable), screwdrivers or a screwdriver with a set of bits, a sharp construction knife, a syringe and tubes with silicone or acrylic sealant, a measuring tool - a tape measure and, of course, a building level. There should be some paint, about 50 g, for metal surfaces(it is best to use AkzoNobel "Hammerite", which can be applied to rust), and, accordingly, a brush. Acrylic pallet with back side- quite dangerous in terms of getting cut wounds on the hands or driving deep splinters, so all work must be done in mittens (thick fabric gloves).

- Work begins with unpacking the kit of the future booth. You need to immediately make sure that all large parts are present and intact - first of all, of course, glasses. They are still removed to the side so as not to accidentally damage them.

Spare parts and accessories are checked immediately - very often there are some shortages "in small things"
- The availability of all spare parts is immediately checked. If in terms of major components or accessories of precedents understaffing has not yet been noted, then in terms of fasteners with a probability close to 100%, there will be some kind of shortage - either self-tapping screws, or nuts, or M16 washers will not be enough. Therefore, it is better to immediately check and create the necessary reserve - it will be a shame to be distracted in the midst of work because of such trifles.
Pay attention to the drain siphon (shown with a green arrow in the figure). As a rule, the one that comes with the kit does not stand up to criticism, and it is better to purchase a decent one in advance, which you can rely on.
- The tray turns upside down. The surface on which produced working with it should not scratch its front surface - you may have to lay some kind of soft material. Once again, warnings - all work is done only with gloves on!

- Four studs are cut into the mounting holes until they stop: three in the corners and one in the center of the arc. Under no circumstances should you over-tighten them. The studs will not take a perfectly vertical position - do not be embarrassed by this, at the moment it does not matter.
Nuts are screwed onto the studs approximately to the level of the bottom surface of the pallet, on top of which washers are installed (shown in the figure with green arrows).
- Metal racks of the pallet support are put on the studs. First, they put on a solid, shorter beam - it goes from the stud in the back corner to the arcuate front side. Then a second one is put on top of it, consisting of two halves welded on top with a metal plate.

When installing the first, short beam, you need to make sure that the threaded hole (nut) for installing the central support leg is outside, and from the intersection of the beams - closer to the front of the booth (shown by a green arrow).

Once again, for control, the prefabricated beam must be installed from above (shown by a white arrow), otherwise the pallet will not be uniformly pressed against the supports, and its deformation may begin.
- After the beams are put on, the studs will take the required vertical position. The bottom nuts can be adjusted so that the beams lie freely on the surface of the pallet. One more washer is put on top and the fixing nuts are tightened (shown with a green arrow). However, they should not be tightened yet.

- Now it's the turn to fix the beams to the pallet with self-tapping screws. To do this, wooden inserts are poured into the thickness of acrylic in the right places. Their location exactly coincides with the holes made in metal profile. It remains only with the help of a curly screwdriver to wrap the screws there, having previously put the washers included in the kit on them.

- After all the screws are completely screwed in, you can finally fix the beams on vertically standing stud legs. This is done very carefully, with uniform efforts from above and below, so as not to disturb the position of the squirrels and thereby accidentally pull out the self-tapping screw.

- Here now - important point, which is never mentioned in any factory Chinese instructions. The support beams are made of the most common steel, which, under conditions high humidity It will rust very quickly and will not last long. So, you need not be too lazy, and paint over all suspicious places with Hammerite paint (its color is absolutely not important). This precaution will create reliable protection against corrosion - the main thing is not to leave "bare" areas. By the way, the ends of the beams are plugged with plastic rectangular plugs, and under them, as a rule, there is metal already touched by corrosion. Be sure to pull out the plugs, paint over the cavity to the maximum available depth, and then put the plugs in place.

- The next step will be to screw on the studs and pre-fix the legs with a lock nut. It should not be strongly locked, since the main alignment will still be carried out later, after installing the booth already in its regular place. (In the picture, the arrow additionally shows a filled and plugged hole in a metal beam).

Do not forget to put on the brackets for attaching the decorative "apron"!
When installing the legs, you must not forget to first put on the studs special brackets that are necessary to install a decorative "skirt" - a screen that closes the space under the bottom. True, this operation - the installation of the screen, it would be better to postpone until the very end of the work.

- You can and should immediately pre-set the legs to the same height. In this case, a long building level (or a long rule with a level) is used, so that control measurements can be taken both between adjacent legs and diagonally. In addition, the level of the central support leg must also be verified. After that, the legs are pre-fixed with locknuts.

- You can turn the pallet upside down and check its position on the floor. It must stand steadily, immediately on five points of support. It is especially important to prevent the central leg from sagging - this can result in the surface of the pallet being pressed through.

- Now you can screw in the outlet valve with a stopper for the pan (if, of course, the need is felt). This option, however, makes it possible to take foot baths and can be useful.

As already mentioned, it is better to change the siphon, although the picture shows a "Chinese"
- After that, the outlet siphon is installed in place. The picture shows the installation of the siphon included in the kit. However, as already noted, it is not of the best quality, and you should not skimp on a good, cranked or bottle type, depending on the clearance from the floor below.
- The next difficult operation is the assembly of a block of front arc-shaped shower enclosures with side glass inserts.
The difficulty is that first you need to figure out the purpose of the details - they are not at all symmetrical. The upper curved rail is always wider, the lower one is much smaller in height, but has noticeable curly cutouts along the edges.
The glasses also have a different top and bottom. The difference is noticeable in the number of holes - there are more of them in the upper part.

Careful Operation - Assembling the Frame and Fixed Glasses of the Front Guardrail
- To begin with, we assemble the structure, as they say "on weight". The glass has visible edges with grooves - they should fit well with the upper and lower guides.

- After that, the glass must be sequentially slightly pushed out of their groove - only in order to apply a small amount of silicone sealant with a syringe (it is better to use transparent). Then the glass is inserted all the way into place, and the excess sealant that comes out is immediately removed. This "fresh" is very easy to do with a finger dipped in a thick soapy solution. There is a clamping latch on the guide (shown with a green arrow). It is tightened with a screwdriver, and the glass will be securely installed.

- Next, you need to install vertical racks along the outer contours of both glasses. There is a regular seal, and silicone does not need to be coated. Just the stand is put on the glass until it stops, and is fixed with arc-shaped guide screws from above and below.

- It remains only to put on the inner edges of the installed glasses the silicone seals included in the kit. At the same time, we make sure that the wider side - the "petal" remains inside the booth. The seal is put on all the way, no special fixation or additional use of silicone is required in this case.

- The assembled unit should be immediately installed on a pallet. The pallet is not yet in its regular place, but must be completely stable and stand strictly horizontally - not superfluous will check it out.
This is especially important because the front arc-shaped guard with side windows is installed exclusively on the sealant, and, at first, until it is fixed to the side walls, only under its own gravity. No fastenings to the pallet with self-tapping screws are provided here by the designers. When sealing the installation site with sealant, care must be taken not to close the drainage grooves for water.

Preparation for the installation of side panels - the junction is coated with sealant
- It's time to install the side opaque panels. The places of their joints with the vertical posts of the front fence are abundantly smeared with silicone sealant - gaps cannot be left here.

Similarly - at the place where the panels are attached to the pallet
Similarly, the sealant is applied to the pallet, in the area where the side wall will stand. And again - in no case do not fill the water gutters with sealant.

- Then, using self-tapping screws with washers put on them, they are fastened together vertically. wall profile with vertical rail of the front guard, as well as the lower wall profile with pallet. In both cases, special holes are provided for this. Self-tapping screws are screwed tightly, until they stop. Excess sealant that has come out is immediately carefully removed.

After installing both side walls, you should get this design. You can proceed to the installation of the rear panel with controls and plumbing fittings.

- To do this, in the same way as before, silicone strips are applied to the junction of vertical and horizontal parts - along the racks of the side walls and along the line of contact on the pallet.

It is important - first bait everything, and only then tighten the connecting screws tightly
- Now you can carefully install the back panel and grab it at the attachment points with self-tapping screws. To begin with, it is to grab it in order to make all the fasteners, since a slight backlash may be required. After that, all self-tapping screws are completely tightened, excess sealant, as before, is removed.

In this position, it is recommended to leave the structure for a day - during this time the sealant is completely vulcanized, will harden, and the assembled booth will gain the desired strength. It is only after this that it is worth moving on to hanging doors.

- And during this time, you can prepare the doors for hanging. Silicone sealing inserts are installed along the vertical edges of the glass curved sheet. The one that is placed on the outer edge of the glass should be oriented with the “petal” outward, and the one that goes along the inner edge should be vice versa.
- The rollers, upper and lower, are inserted and attached to the regular nests. The upper ones are adjustable, and for the initial installation they are temporarily fixed in the highest position. The lower ones are simply spring-loaded, push-on - they will allow you to pull them off when installing the door.

- After the time required for the sealant to harden has elapsed, the doors are suspended by the upper rollers on the upper guide, the lower rollers, after temporary pressing, should stand on their “rail”. Now, by tightening the screws for adjusting the upper rollers, it is necessary to achieve, firstly, a reliable suspension, without play, and secondly, smooth closing and opening, without wedging, and, thirdly, uniform convergence of the wings along the entire vertical line, so as not to there were gaps for the penetration of splashes of water.

- All adjusting screws must be subsequently closed with plastic plugs. The door is checked for "functionality". After that, you can proceed to the installation of the upper part of the booth - its roof.

The main part is the roof cap, on which several elements are mounted
- At its core, the roof is a finished figured part, but it is necessary to mount several additional elements. This is a shower for "tropical rain", exhaust fans and an acoustic head - a speaker for connecting to a radio or telephone.

Fans are mounted on self-tapping screws ...
- Fans are fastened with self-tapping screws to the places prepared for them. Often you can hear complaints that the centering of the holes does not match. Well, you will have to work with a drill or screw a self-tapping screw into the plastic “on the live”. It's not scary - this place will still be covered from below with a decorative cap.

... and speaker. It is advisable to smear the place of contact with sealant
- The speaker mount differs little - the same screws. By the way, both when installing the speaker and when installing the fans, it would be useful to smear the seat with silicone sealant - this will become a kind of gasket and remove noise - the lid will not resonate much.

Installing the rain shower head with water inlet hose
- Shower head for « tropical downpour» is first fastened in its socket with a special nut, and then a flexible hose is connected to it, which will subsequently go to the hydraulic unit on the rear panel of the booth. The connection is very simple - with a clamp, and should not cause any problems.

From below the roof looks much nicer...
Everything, the roof can be raised and installed to the cabin the same sealant and regular metal fasteners.

- There are still a bunch of small parts left in the kit - shiny door handles, shelves, mirrors, shower holders - all this is neatly installed on regular fasteners.
- Next, you need to very carefully move the booth to its place, where it will already be permanently located. This installation must be preceded by connecting the booth to sewerage, to plumbing highways and electrical communications. All connection points are located on the back side of the rear panel, and later there will be no access here. The connection is made with special flexible hoses, and a terminal cable connector is provided for electrical switching. To connect the cabin, with a lack of plumbing and electrical experience, it is better to contact the relevant specialists or friends who understand these issues.
- After the booth is connected, the horizontal position of its position and the uniformity of the support legs to the surface or podium must be carefully checked again. If so, it's not too late to make adjustments. In addition, it is recommended to fix the legs for reliability, for example, by “planting” them on a layer of silicone sealant.

After connecting to all communications, a thorough practical check, you can consider the booth installed and finish the installation with a decorative "apron"
- Further, it is necessary to carry out "sea trials" - to arrange a full-fledged wash cycle using all modes. The main goal is to make sure that the booth is stable, the pallet does not creak or “walk”, the doors and walls do not warp and do not let water splash or drip.
- Now you can take the final step 0 to install a decorative “skirt” on the brackets, which will close the gap between the floor and the pallet and give the whole booth a finished look.
And finally - another video about the installation of a simpler corner open booth.
Video: self-installation of a corner shower screen
A shower cabin, like a car, has long become by no means a luxury for many. What's more, it's a great way to save space! In the end, the main and main advantage that shower cabins have is precisely their compactness, coupled with functionality. If you are not a fan of soaking in the bathroom for a long time, then the convenience that a shower cabin can offer you will certainly not leave you indifferent. In an attempt to further improve this plumbing fixture, manufacturers do not skimp on additional features and accessories. A radio and a telephone (!), a hydromassage and a steam generator to simulate a sauna, an aromatherapy device, and more can be built into the shower cabin.
may be different, and the price of the model will directly depend on the set of functions, quality and manufacturer. The most budget models are made, perhaps, in China. If it seems to you that Chinese shower cabins are of low quality and worthless, then you are mistaken. They are quite functional and can serve you faithfully for a very long time. The price-quality ratio of models from Chinese manufacturers is quite adequate and there are only a couple of nuances that will depend on:
- Firstly, the quality of individual components - they will simply need to be replaced with better ones.
- Secondly, instructions. It may be incomplete and not give a clear idea of all the stages of connecting a shower cabin. Moreover, it will not necessarily be in Russian.
 If you want to install the booth you bought yourself, then you should ask yourself: how to assemble the shower booth in this situation? Don't worry, we've put together a list of tips and tricks for you. Thanks to them, you will easily understand the process and understand that assembling a shower cabin with your own hands is a more than doable task! We can only wish you good luck and careful reading.
So, assembling a shower cabin with your own hands will require you to have a certain set of tools, knowledge and skills. It is advisable to have an assistant, and also, if possible, to make a trial assembly of the shower cabin in a more or less spacious room. The thing is, it certainly can fit. However, do not forget that you will also need some space to work. During the trial assembly, it is not necessary to seal the seams with sealant, but assembled pallet it will be possible to simply drag everything into the bathroom in the same assembled form. Do-it-yourself trial assembly of a shower cabin is good because you can check the reliability of the parts in a relaxed atmosphere, gain valuable experience and, possibly, correct some mistakes that you could have made without a trial assembly of the cabin.
- When choosing a model in the store, we pay attention to the features of the configuration, set and quality of parts. Something may be missing, and something may be of poor quality. If necessary, we buy additional individual elements of fittings on the spot.
- We ask the seller questions about the procedure for assembling the shower cabin, what will need to be taken into account, what is its working pressure, are there any requirements for electrical wiring, a water supply system, etc. The more you know, the less problems you will have.
- We carefully study the instructions, even if it is in an incomprehensible language - the diagrams and images available there can serve you well.
- After the cabin has been delivered to your home, check again that everything is in place and that everything is safe and sound.
- Prepare tools: wrench, washers, bolts, nuts, screwdrivers, building level, etc.
- Make sure the floor is properly prepared as shower stalls can only be placed on perfectly leveled surfaces. Floor waterproofing also deserves special attention. Check the siphon - whether it is of good quality and whether it reaches the sewer drain.
- Insulate plumbing connections, take care of a waterproof outlet and check that the wires can easily reach it. There should be no tension!
Step 2. Pallet

- Assembling a shower cabin with your own hands begins with the installation of a pallet. Remove the “skirt” (or “apron” as the lining of the pallet is also called) from the pallet and turn it upside down. If your pallet is made of fiberglass, then it is better not to touch it with bare hands - work with gloves.
- Find metal studs among the details - these are the legs from the pallet. They need to be properly fixed in the seats on the pallet. Screw the washers and nuts on top, and then you can proceed with the installation of the frame itself. On the frame, approximately in the center, there will be one more seat - it is for the central leg. The central leg is fastened with nuts.
- After you have twisted the legs, you need to carry out the adjustment. Use the building level to see if there are any distortions. If they are, adjust the fasteners and align the pallet.
Step 3. Walls
- Features of the installation of the walls will depend on the characteristics of the shower stall. Expensive and high-quality models will have marks where the top and where the bottom is. Budget models, which are simpler, may not have such marks - then you need to focus on the number of holes for fasteners. There should be more on top. After you have assembled the arch, the joints will need to be treated with silicone sealant.
- The most common type of fixing panels are guides. They can be thin or wide. The wide ones are for the top, and the thin ones for the bottom.
- Partitions will also differ from model to model. Their size, shape, number and material from which they are made - there can be many variations. To fix them, you will need washers and screws. You do not need to tighten the screws all the way, otherwise you may damage the panels. In addition, you will need to adjust the fasteners separately, after you have installed the walls and partitions. Also treat the joint of the cab of the rear panel with sealant. Don't forget that it needs time to dry!
Step 4: Roof
- First, pay attention to the height of the cabin - there are certain requirements for the distance between the roof of the cabin and the ceiling. The established minimum is 25-30 cm, this space is needed for the assembly and further maintenance of the shower stall.
- Further, before proceeding with the installation of the roof, install a watering can, lights, speakers on it. In order not to hear extraneous noise during the operation of the speaker, which occurs due to the fact that the speaker does not fit snugly against the roof of the booth, the joints can also be sealed with silicone waterproof sealant.
- The roof is fastened with screws and self-tapping screws. Please note that additional holes can be made for mounting the roof in addition to those already provided for this.
Step 5: Doors.

- Doors are best installed after you have adjusted the pallet, fixed the frame and roof.
- Before installing the doors, you need to fix the rollers and seals on them. Then the rollers should be adjusted - the doors should close perfectly, they should not let moisture through. Put special plugs on top of the rollers.
Step 6 Accessories
- It's time to start installing and fastening shelves, hangers, seats, mirrors, stands and other parts that are included with the booth you purchased.
Step 7: Drainage
- Before installing a siphon, make sure that it has a decent quality. As practice shows, it is on the siphon that the manufacturer often saves. Most likely, you will have to buy a new, better one.
- One end of the hose from the siphon is attached to the pallet, the other is diverted to sewer drain. Walk along the seam with sealant, and then try to drain a couple of buckets of water into the pan to see if it is leaking.
- There is a high probability that you will connect several outlets to the sewer at once, because in addition to the shower stall there is also a washbasin, washing machine, bathroom. In this case, we recommend installing a tee as well. The connecting gasket of the tee must be very reliable. If necessary, you can strengthen it with sealant.
Step 8. Plumbing
- Next is to bring hot and cold water. Above, we have already talked about the working pressure of the shower cabin. It can vary between 1.5-4 bar, depending on the model and characteristics. The pressure in the water supply is also not a constant value and it will be better if the working pressure of the cabin and the pressure in the water pipes coincide.
Step 9Power Supply
- Most models on the market have features that require a power connection. For the shower you need a separate outlet, and a special one, designed for rooms with a high level of humidity. The socket must never be splashed. Also take care of the RCD and a separate power line.
Step 10. Final
- If the assembly of the shower cabin with your own hands is finally finished, you can put a “skirt” on the pallet.
- Before starting operation, once again make sure that all seams are sealed with sealant thoroughly enough and your shower cabin is not leaking anywhere.
- Even if the cabin is airtight, a ventilation system must be provided in the bathroom.
If it seems to you that it is better to entrust the process of assembling a shower cabin to specialists, then you can always resort to their help. Also note that to get a warranty on a shower cabin - especially a complex model with a lot of additional features like a steam generator or hydromassage - you may have to resort to the services of specialists. Otherwise, you may be denied a coupon for warranty service.
If for you the assembly of the shower cabin on your own is finally completed and everything is working properly, we can only wish you to enjoy your new purchase for your pleasure!
Video instruction - "Assembling the shower cabin"
Related posts:
2014-08-29 18:08:08
First, pay attention to the height of the cabin - there are certain requirements for the distance between the cabin roof and the ceiling. The established minimum is 25-30 cm, this space is needed for the assembly and further maintenance of the shower stall.
A shower cabin with dimensions of 90x90 cm is an excellent option for installation in the washing room of a bath. Compact dimensions allow you to organically fit the design even into the room small sizes, while the space available inside the cabin will be quite enough for comfortable water procedures.
Shower cabins 90x90 cm are in stable demand among buyers. Manufacturers react to this state of affairs and, in turn, regularly update their lineups, offering consumers both budget designs without additional functions, and elite hydraulic boxes equipped with many useful options.
Shower cabins can be completed with very low (up to 8-10 cm on average), simply low (from 10-15 to 20-25 cm) and deep (on average 30-40 cm) trays. It is with the features and advantages of the last of the listed options that you are invited to familiarize yourself with the study of the information below. Additionally, you will consider the procedure for self-installation of a shower cabin 90x90 cm with deep pan.


Advantages and disadvantages of deep shower trays
Let's start with the pros and cons of products such as deep shower trays. It would seem, why take on additional expenses buying this kind of product? Do they have advantages over lower and budget counterparts? Of course there is.


Firstly, the presence of a deep tray contributes to more intense heating of the interior space of the shower cabin. The materials used for the manufacture of shower trays, for the most part, are characterized by excellent thermal conductivity, heat up quite quickly and retain the heat given off by water for a long time (with rare exceptions). In view of this, in a cabin with a deep pallet it will be as warm as possible and generally comfortable to be in.
Secondly, a deep tray can be adapted for a bath, albeit a very small one. To do this, just close the drain and draw water into the pan. Of course, it will not be possible to relax comfortably while lying in a container up to 1 m2, but it will be great to have a good time in a sitting position. Yes, and you don’t need to buy a baby bath in the presence of a cabin with a deep pallet - an additional plus in favor of families with children.

 Deep tray - a great replacement for a small bath
Along with this, deep shower trays have their own weak sides. As noted, other things being equal, more money will have to be allocated for the purchase of such a product than for the purchase of a structure that has a more modest depth.
In addition to additional financial costs, it is also worth noting the following disadvantages of the considered option:

With information about the existing forms and materials for the manufacture of showers and cabin walls, additional features and other important related nuances you can find in.
Next, you can read the instructions for self-installation of a shower cabin measuring 90x90 cm with a deep tray. The information received will allow you to refuse the services of third-party contractors or control the correctness of their work and its final quality.
Shower cabin installation instructions
If you bought a high-quality shower cabin from some German, Italian or simply certified domestic brand, it will most likely come with detailed instructions on installation with beautiful diagrams, explanations for each item and notes on various nuances. If, however, they decided to save on the purchase of a cabin for installation in the washing room of the bath (namely, this is often the case in practice), as a result of which it was decided to buy an inexpensive Chinese cabin, opening the manufacturer's instructions, you will either not find the text translated into Russian in it, or it will be a low-quality machine translation in an extremely compressed form, literally like this:
- unpack the cabin;
- assemble the pallet;
- connect the siphon;
- assemble the walls;
- install the roof;
- connect the water and enjoy.
Of course, there can be no question of any independent installation in accordance with such instructions.
By the way, once the conversation turned to the siphon. Representatives of the most budgetary price segment of shower cabins are mostly equipped not with a full-fledged siphon, but with its simplified counterpart, which can hardly be called reliable, high-quality and durable. If the situation is exactly the same in your case, we recommend that you initially buy and install a normal high-quality siphon so that you do not have to replace it in the near future.

Note! We will not consider the installation process in detail, because. information on this subject has already been consecrated in detail within the framework of the corresponding instructions. You can follow the provisions of the mentioned manual - for a cab with a deep sump, the procedure will remain the same.
We will install such a pallet.

The length of the straight edges is 90 cm. rounded shape is, in our opinion, more attractive, which is why we chose it. In general, the installation of rectangular and any other pallets is carried out in the same way.
In addition to a new siphon (if needed), you will need to prepare the following tools and fixtures:
- sharp knife;
- gloves;
- a few clean rags;
- soap;
- sealant;
- cross screwdriver.
spanners;
building level;

Additionally, washers with M16 holes may be required.
Note! Until the installation of various additional devices (rain shower, cascade shower, lighting, etc.), the procedure for assembling a shower cabin remains the same, regardless of the model. We will not give recommendations on the arrangement of such devices, because. the features of their installation and connection may vary depending on the model and are described in detail in the accompanying instructions (frankly budget cabins additional devices are not equipped, and reputable manufacturers take care of their customers and cover in detail the nuances of installing premium equipment).
Table. Installation of a shower cabin 90x90 cm with a deep tray
| Stage of work | Description |
|---|---|
| We check whether all the elements are intact, for cracks, chips, extra holes and other damage. The integrity of the glasses can be checked even before unpacking the cabin - to do this, just gently shake the box. The presence of damage will be indicated by the corresponding characteristic sound. | |
| We open the box with accessories, fasteners and other additional elements. What and in what quantity should be included in the kit is specified in the manufacturer's instructions. | |
| After making sure that the equipment is complete and whole, we proceed to the assembly of the pallet. Turn it over and attach the legs. We do it in the following order: - put on gloves; - take long hairpins; - we screw them right up to the stop into the seats specially designed for this (provided for in the design of the pallet). It will not work to mount the legs strictly vertically, no matter how hard you try. Yes, and there is no need for such a position. |
|
| We screwed up the pins. Now we follow this order: - screw the nuts from the kit onto the installed studs; - we put washers on the screwed nuts; - mount the legs from the kit. They look like square/rectangular tubes. |
|
| We study the structure of a short support. Our task is to find a welded nut on it. This is where the center leg will be installed. | |
| In the image, the arrow points to the welded-on patch mentioned in the previous paragraph, which must not come into contact with the surface of the shower tank. Here you see correct option her installation. We proceed to the installation of the specified leg in a previously loosened nut. We do the following: we twist the leg, put a washer on top, and after that - a lock nut until it stops. After we need to put on another additional nut - it will take over the functions of the support locknut for the mounted leg. | |
| Our task: to pull the beams from the kit to the pallet. For this we use self-tapping screws. In budget cabins, fastening is carried out to wooden blocks hidden by the manufacturer using fiberglass. In more expensive models the composition of these elements may vary. In any case, we screw the screws exclusively into the protrusions, and not into flat surface pallet. | |
| Supports and fixing bolts can only be tightened after screwing in the self-tapping screws (described in the paragraph above). If this rule is not observed, internal stresses and significant distortions will occur, under the influence of which the self-tapping screws will turn out. | |
| We came across a set of "not the first freshness" - some sections are rusted. The problem was solved with the help of Hammerite paint (a composition that is excellent in its properties, restoring appearance metal surfaces and providing their protection against corrosion), painting over problem areas in a couple of layers. You can use the product recommended by us or purchase another composition with similar characteristics and a similar purpose. | |
| We set the legs on the level. It is not necessary to tighten the locknuts too much - in the future you will still have to additionally tighten the elements in place. At the same stage of work, we need to mount plastic brackets through which the decorative screen pallet (in the case of your cabin, the procedure for attaching the screen may be slightly different, act according to the situation, there are usually no difficulties at this stage). |
|
| The photo shows the mounted brackets, through which the decorative screen will be attached. Many guides advise at the same stage to level the pallet and mount the screen. We believe that this is not worth doing - you will not be able to get to the opposite side of the cabin, but you still have to do it. We recommend attaching the screen last - so the product will remain intact, and it will be more convenient for you to connect the required communications and align the cabin correctly, that is, according to the level. | |
| Armed with a level of suitable length, we set the legs in an equal plane. | |
| Complete with our cabin was the so-called. "automatic siphon", which in practice turned out to be a device for controlling the discharge of water (by foot). Such a product is convenient to use, but not very durable. Let's show how it is installed. you in similar situation we, as noted, would recommend immediately replacing this miracle of Chinese thought with a better product. The outlet is inserted from the front side of the pallet and tightened from the back edge with a gas wrench. Gaskets are included. In the absence of a gas key, you can resort to the semi-extreme method shown in the photo. |
|
| We install the part of the siphon shown in the photo. The further connection scheme is standard: through the corrugation and adapters (if necessary) to the sewer pipe. All the nuances of this work are covered in detail in the previously mentioned article on connecting a siphon. | |
| The pallet is assembled. Temporarily set it aside and turn our attention to the fences. Our cockpit windows were unmarked. If in your case the situation is similar, we find the top on our own - you can recognize it by the presence of numerous holes. There will be no problems with determining the order of placement of the guides either: we put a thin one (we had figured cutouts along its edges) from below, a wide product - from above. The cockpit windows are equipped with an edge, on which, in turn, there are grooves. We attach them to the arches of the fence by carefully sliding one element into the other. |
|
| Next, we need to slightly lift the glass and apply a silicone-based sealant. How high to raise the mounted glass and where to apply the product you see in the photo. After you need to do the following: - lower the glass; - tighten the screw on the presser foot; - remove any excess sealant that has come out, first with a finger dipped in a simple soapy solution, and then with a clean cloth. |
|
| The connection is made from below and from above. For fastening, we use self-tapping screws from the kit or independently purchased suitable products. |
|
| To improve the quality of the connection, we take a silicone seal and put it on the installed glass. We place the material in a “petal” in inside. It will not fit under the paw, so there is no need to try to put it there. You don't even need to apply sealant. | |
| We apply sealant on the side of the container, in the area where it will come into contact with the lower rail of the mounted fence. We mount the fences directly. Be careful: the recesses designed to ensure the drainage of water must not be closed with a sealing agent. Important! Self-tapping screws at this stage of the work performed do not need to be fixed to the container body. |
|
| We pass the sealing compound at the junction with the mounted panel (look at the photo). | |
| We apply sealant to the pallet of our cab at the place of its subsequent docking with the side panel. This image clearly shows the previously mentioned drains. Again, we do not seal them. | |
| The side panel frame is fixed to the wall using small self-tapping screws with washers. Normally, the manufacturer pre-cuts one side of the washers, which ensures a tighter fit. If this has not been done, you will have to be content with what you have. | |
| We successfully completed the installation of one of the side panels. This element structure, in contrast to the previously considered wall, is attached to the cabin tray using self-tapping screws - in the shower tank, appropriate holes are provided for such attachment. | |
| All actions are similar to those already considered. | |
| We cover the place where the side and rear panels are joined with a silicone sealant that is already well known to us. |
|
| We fix the back panel of our shower cabin with self-tapping screws. Important! Often the holes do not match the first time. In view of this, it is not necessary to tighten all the fasteners - leave a slight play for the possibility of adjusting the connections, and only after making sure that everything is fine, finally tighten the screws. The material for the manufacture of structures, especially in budget models, is quite simply torn off and damaged, so be extremely careful |
|
| We have successfully installed the back panel. | |
| We are getting ready for the upcoming arrangement of the doors of our cabin. We start by posting videos. Upper have adjustable design. We need to turn them up as much as possible. The design of the lower rollers of the cabin is press-type - during installation, the elements are pulled back. We put seals on the edges of the cabin door to be installed. The sealant, placed outside, is fixed with the “petal” outward. |
|
| After installing the doors, carefully tighten the rollers located at the top. Our task is to ensure the even position of the doors and at the same time the correct closing of the door leaves. We mask the screws on the rollers with plastic plugs. |
|
| Our deep-sump cab has its own roof and, surprisingly for a budget model, comes with a rain shower, fan, as well as lights and a speaker. As noted, additional elements are installed and connected in accordance with the manufacturer's recommendations. | |
| In the process of fastening additional elements, it may well be found that some of the screw holes prepared by the manufacturer are not suitable for successfully placing fasteners in them. If this is the case in your case, the “inappropriate” screws will have to be screwed in like self-tapping screws through solid plastic. The roof will not suffer much from this. | |
| If your booth is designed to include a speaker, coat it around the edges with silicone sealant, otherwise it will rattle. | |
| The roof was successfully installed. | |
| Handles and mirrors, all kinds of shelves and other related accessories - we install all this in its place. | |
| Before doing this, the following must be done: - connected communications; - the shower tray has been leveled. The screen in most models of the shower cabin is attached with a kind of clips. In your case, focus on the situation. It may need to be screwed or fixed in another way. in a suitable way. There are no difficulties at this stage of work. Previously, the space between the lower edge of the tank and the floor can be blown out with mounting foam - the floor in the cabin will be warmer. |
|
| We successfully coped with the installation of a shower cabin and very soon we will be able to take it into permanent operation. Before this, it remains only to carry out a test wash to make sure that there are no leaks and that the system is in general normal operation. We enter the cabin and observe the state of the pallet. If crackles began to be heard, we made a mistake when installing the legs, installing them not in a single plane, or not taking into account the curvature of the floor. We fix the problem by removing the decorative screen and adjusting the legs as needed. |
Successful work!
Video - Shower cabin 90x90 with a deep tray
Reading time ≈ 9 minutes
From this article you will learn how to install a shower cabin with your own hands in an apartment or private house. I want to immediately draw your attention to the difference between the cabin and boxing - many ordinary people believe that this is one and the same thing, but this is not so. The cabin is attached to a wall finished with ceramic tiles and on both sides its inside is ceramic, and the box is autonomous and does not need to be attached to the wall, except perhaps for rigidity during operation.
Advantages and disadvantages of shower cabins
Quadrangular model with a low tray
Such plumbing units are very easy to use and take up little space, but, alas, they are imperfect. However, you can compare the positive and negative qualities to make your own decision.
What's in the arsenal of positive
Of the indisputable positive aspects of such a device, the following qualities can be distinguished:
- ergonomics - most models take less square meter usable area. Thanks to this, such nodes can be mounted even in very small bathrooms;
- savings - the cost of water when washing is 3-5 times less than with a similar procedure in the bathroom;
- hygiene - running water washes away dirt and dust better than standing in one place;
- functionality - you can install a panel with hydromassage;
- placement - the small area of \u200b\u200bthe device allows you to place it in any corner, if it is possible to connect to the sewer;
- availability - you can always put on a pallet plastic stool, and attach a handrail to the wall, which is very convenient for the disabled;
- security - acrylic pallets not slippery, but more modern models pallets are produced with anti-slip effect:
- cost - a shower is cheaper than a bath.
What's in the arsenal of negativity
As noted above, nothing is perfect, so you should pay attention to the cons:
- fragility - glass for bathrooms, as a rule, is made from a material with increased mechanical strength(tempered), but, nevertheless, glass remains glass;
- space - sometimes (especially for tall people) problems can arise due to lack of space, especially in small showers, for example, 80 × 80 cm;
- rest - lovers of soaking up in hot water will not be able to lie down, as in the bathroom, since such bathrooms are designed exclusively for washing.
What are showers

High tray model
Once again I want to remind you not to confuse a shower cabin with a shower box that can function right in the center of the room - the main thing is to bring water and sewage. The cabin, on the other hand, is dependent on the wall, since it only has movable doors and fixed curtains in front, located on profile mounts, and two rear walls are stationary and are tiles on the bathroom wall. Below you can watch a video clip showing both boxes and cabins (the differences are indicated in the text).
Video: Showers and boxes
Let's start from the bottom - there are models with a high and low pallet. The first option is a mini bath, which the manufacturer usually supplies with a bottom valve. This is very convenient for families with small children - the child will splash and splash, and at this time the mother will be able to watch him through the transparent door. There is a double benefit here - and the child will enjoy, and the floor will remain dry.

square pallet
Pallets vary in shape and can be rectangular and square, as well as triangular. Last option purely angular and is in the greatest demand, besides, the triangle can be either isosceles (80 × 80 cm, 100 × 100 cm) or versatile (80 × 100 cm, 90 × 120 cm), while the dimensions may be different. Pallets also differ in the material from which they are made: acrylic (the most popular), steel, cast iron, cast marble and fake diamond(the last two refer to composites).
Note. In the shower, you can also connect a wall-mounted hydromassage, but nothing more. If you hear that the kit also has flavors, a Turkish bath and the like, then this already applies to the hydrobox.

With frosted glass
At present, of course, this is a rarity, but if desired, frosted glass can still be found. Their advantage is that this is a family, not an erotic option. That is, children can freely go to the bathroom when their parents are washing there and this will not create any inconvenience. Also, young people can live with elderly parents, and then transparent doors are also useless.
Stages of assembly and installation of a shower cabin
The installation work of bathrooms of this type consists of several stages, which are simply impossible to bypass or skip. But you should not immediately turn away from self-installation - if you wish, you will succeed.
Water and sewerage

Sewerage supply
To install such a bathroom, you need good drain and for this floor pallet let down 50 mm sewer pipe. The photo above shows that a tee with a 45⁰ outlet is embedded in this pipe - this is for the siphon of the pallet, and on the left edge a 90⁰ corner is for a sink or automatic washing machine. Of course, it is best when the sewer is completely recessed into the floor, but this is not always possible and open areas close, which is then tiled.
After laying the tiles, there will be a mixer here
A shower cabin cannot be installed after a bathroom renovation, unless a separate place has been prepared for it. The thing is that you need to connect a hot and cold water on the mixer, which simply cannot be done on top of the tile, since the glass guides and the pallet are closely adjacent to the wall (tile). Therefore, when plumbing is done, the fittings for the shower faucet are brought in in advance, as shown in the photo above.
Complete with a mixer, eccentrics are sold, with which you can level the horizontal level and the distance between them by 1-3 mm. But, nevertheless, it is better to maintain the correct distance between the fittings even when supplying hot and cold water. This is 150 mm between the centers, as on the Americans of the mixer itself. Optimal Height crane 1 m from the finished floor - from the pallet you get about 80-85 cm.
Advice. Before installing the shower stall, it is better not to install the mixer, so as not to accidentally damage it. Simply put male plugs on the fittings temporarily.
Assembly and installation
In this case, the concepts of assembly and installation are intertwined, since the assembly process occurs in parallel with the installation.

The passport often has part numbering.
As a rule, the assembly and installation of a shower cabin begins with reading the detailed step-by-step instructions that are in the passport (almost all manufacturers leave it). It should be noted that in some documents in this manual everything small parts are numbered and the same numbers are on the bags, so it is very difficult to confuse them, except with intent.

We fasten the legs
On the underside of the pallet there are special threaded grooves for assembling the legs. The legs themselves are studs, on which three lock nuts are screwed - one fixes the leg at the pallet and two clamp the cross. The number of legs, as a rule, depends on the area of \u200b\u200bthe cabin to be installed - the larger it is, the more reference points are involved. Plastic support heels are screwed onto the ends of the studs, which, in addition to the supporting function, can serve as regulators for leveling horizontally by screwing in and out.

Installing the siphon pipe
Further, installing a shower cabin with your own hands involves screwing the pipe from the siphon to drain. There are gaskets on both sides, but on the underside it is best to put it on silicone (only ordinary white silicone, not sealant). The remaining parts of the siphon (water seal and corrugation) can also be installed at this stage.


Mounting the decorative cover
Attaching the decorative cover is very easy - it has special mounting holes, and on the side of the pallet there are threaded seats for fixing screws. When the assembly is ready, you can put it in a corner and see if there are any gaps. This default angle should be 90⁰, but if there are small gaps (up to 3 mm), then this is not a problem - they can be sealed with silicone. But the pallet itself, if the fitting was successful, should also be glued to the wall with a sealant so that there are no leaks when the water flows down the tile.
Important! Before gluing the pallet to the tile, do not forget to connect to the sewer!

Glass frame assembled separately
Unpack the box with profiles for the frame and guides - there are four straight profiles and two arcuate ones. Assemble the glass frame separately from the pallet, as in the photo above.
Attach the assembled frame to its future fixation place and level it. Mark the vertical posts with a pencil to guide the guide profiles. Then, along the control lines, press the guide against the wall, mark the places for drilling through the mounting holes, carefully drill the tile and insert the dowels.

Be sure to ask for guides
Be sure to remove the rails from the back before screwing them to the wall. No matter how perfectly the tile is laid, water will still break through between it and the profile without additional insulation.
And now in different models actions may vary. That is, fixed windows are sometimes installed on assembled frame, and sometimes you have to remove the upper arcuate profile, put glass and press them. Before installing the frame on the pallet, make a silicone seal under the lower arcuate profile.

Cabin assembly
Screw the frame to the rails, hang the doors, put magnetic seals on them and attach the handles.
Video: Cabin assembly
Conclusion
Do-it-yourself installation of a shower cabin is carried out even without the help of another person, since all elements are light and easy to install. Dare, and you will succeed!