Installation of a sliding door in a plasterboard partition. Convenient built-in drywall cabinets
Drywall sheets can be made not only perfectly flat ceilings, walls and niches. Plasterboard cabinets - perfect solution for small room or kitchens. Limitless design possibilities combined with relative cheapness are the main advantages of this material. You can save on the purchase of frame furniture and make the interior unique.
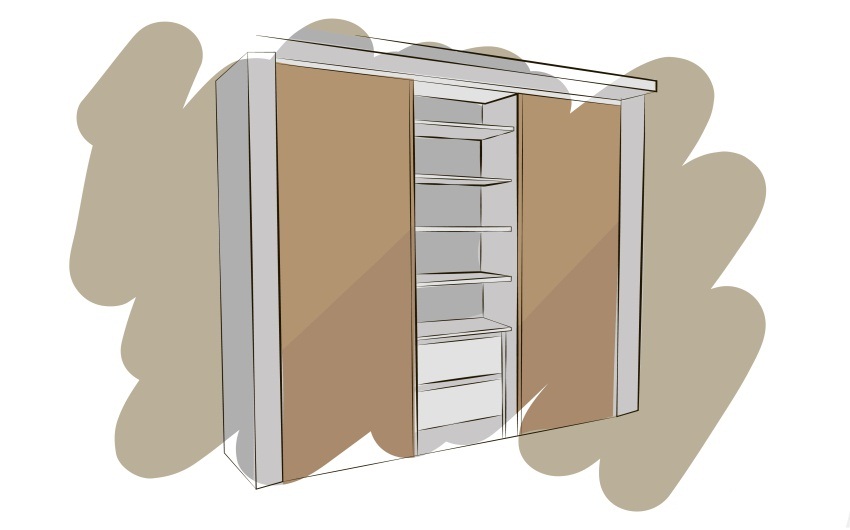
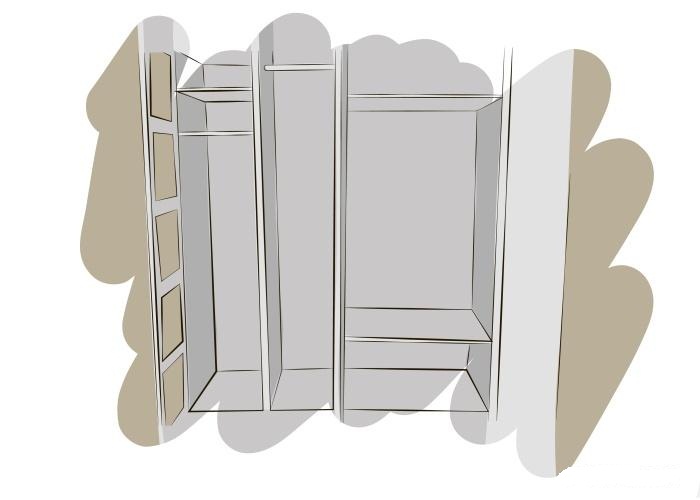
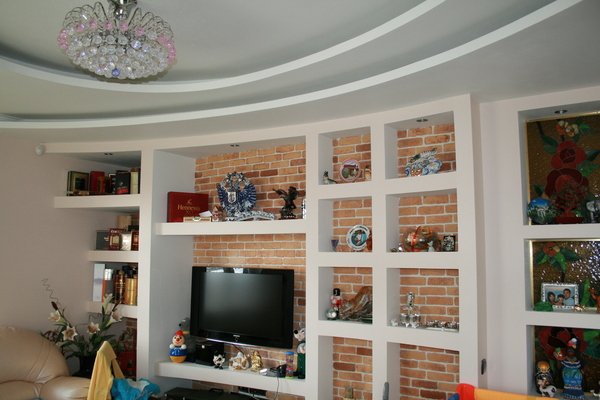
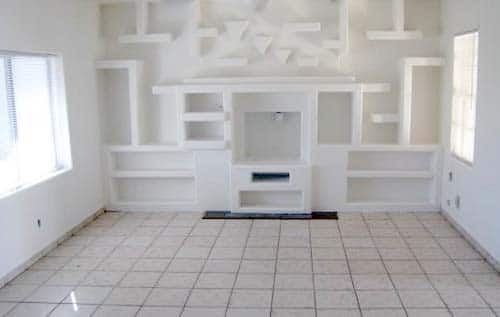
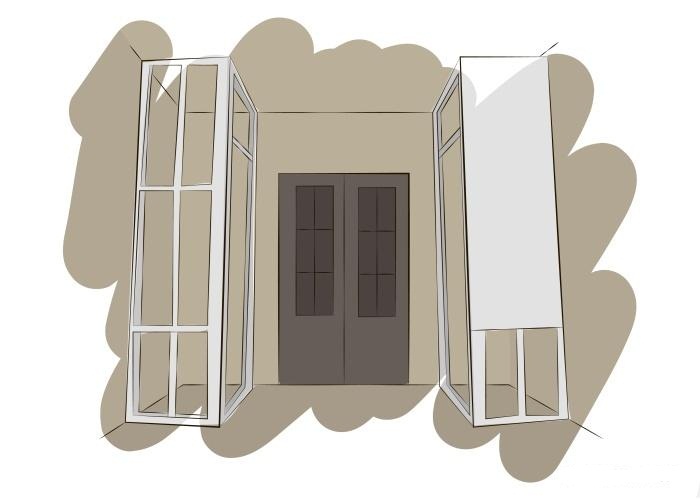
An example of the design of a built-in drywall cabinet
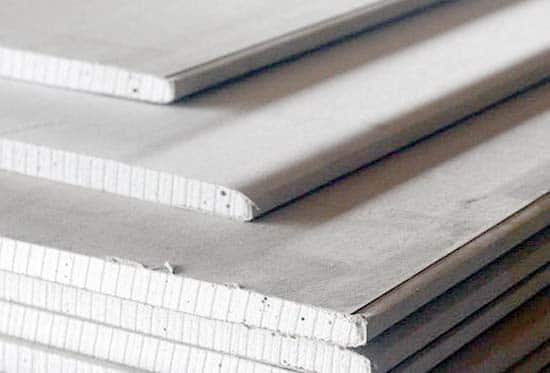
For the manufacture of drywall cabinets, elementary skills in working with this material will be required, metallic profile and fasteners, putty, primer, paint for finishing.
How to make a drywall cabinet with your own hands
If you do not yet know what your future drywall cabinet will look like, photos on the Internet can be the start of your imagination. You can make a corner, linear or built-in drywall wardrobe, as well as a drywall closet. The material allows you to design furniture that fits well into any room. Having measured the room, or rather, the place where you plan to install the cabinet, draw its diagram with all sizes. Pay attention to the distribution of loads on the drywall surface. If we are talking about a large shelf for large things, provide for it transverse structural elements from the profile.
How to make a frame
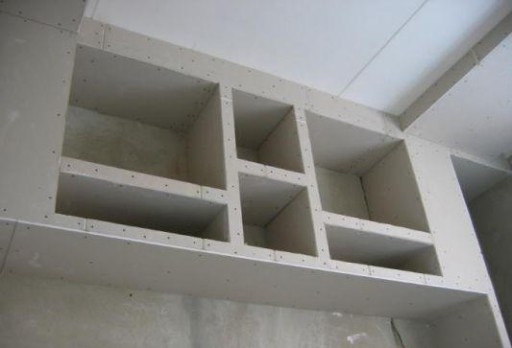
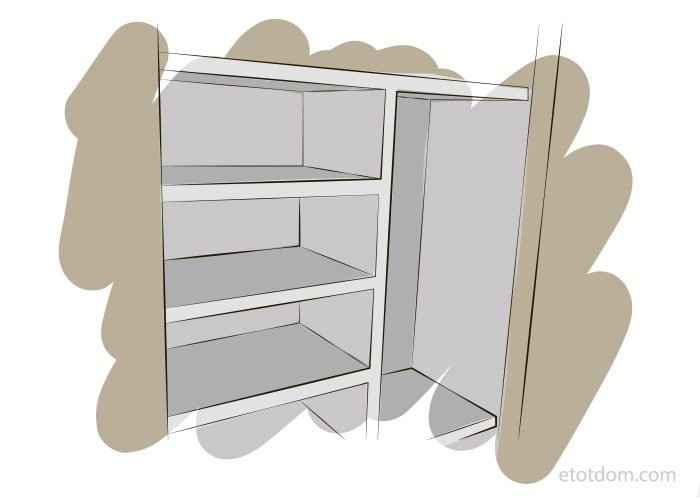
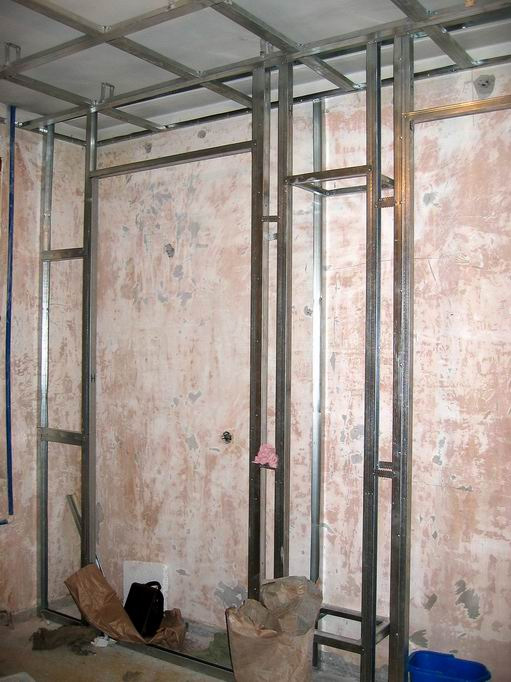
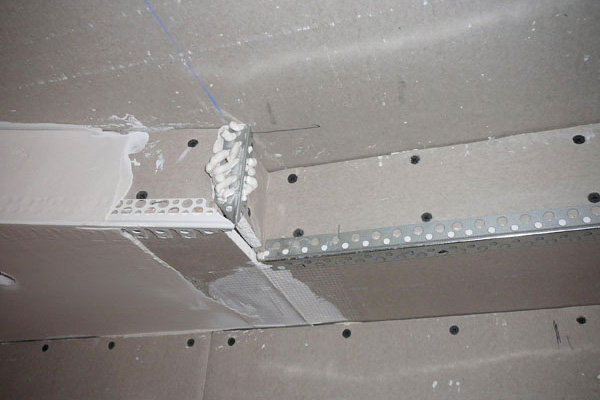
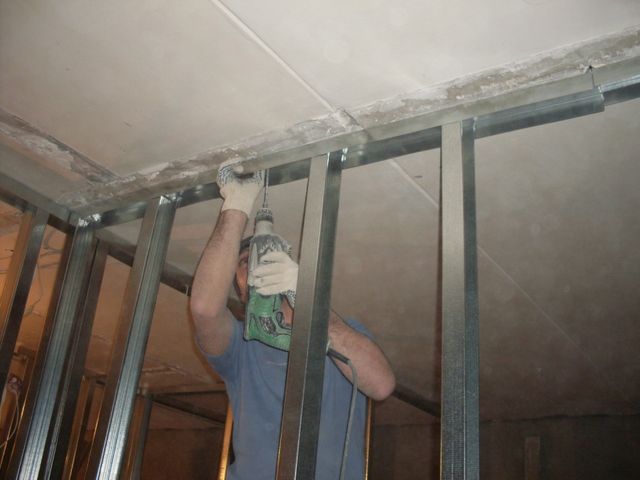
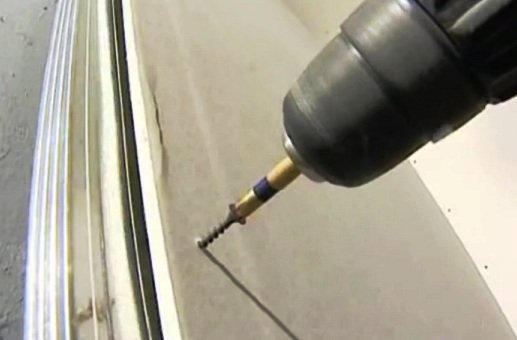
As a rule, drywall is attached to the ceiling or wall. If you make a drywall cabinet with your own hands, they usually use the entire available height of the room. Therefore, you first need to prepare the surface of the walls and ceilings for attaching elements cut from the gypsum board. The guide profile is attached to walls and ceilings with dowels. If the surface of the wall is not stone, but wooden, self-tapping screws can be used for fastening. After that, suspensions are located at a distance of 500 mm from each other. A vertical rack profile is attached to them. Horizontal elements frame provide additional rigidity to the entire structure. They are connected to the rack profile with the help of special fasteners, which are popularly called crabs. At the frame device stage, a profile for shelves and drawers is mounted, if you decide that they will also be plasterboard.
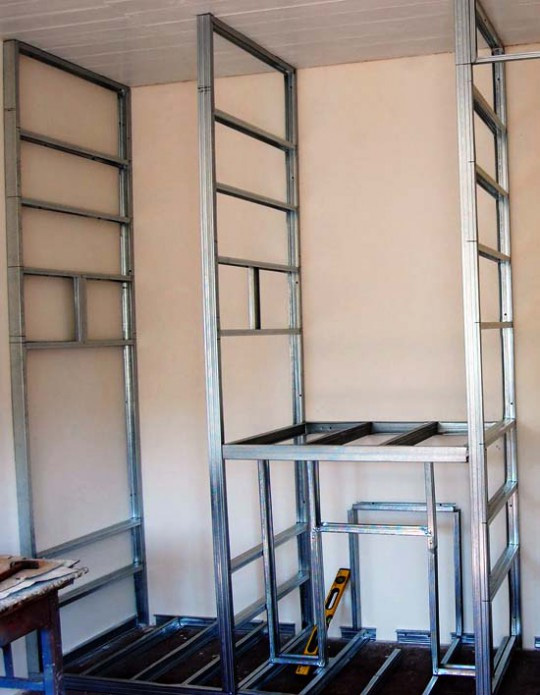
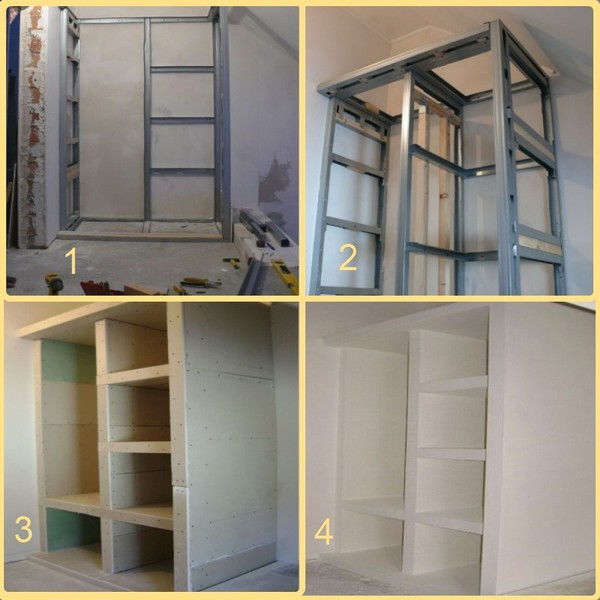
Plasterboard cabinet frame
In places where the profile is laid on the floor, it is necessary to attach a special shock-absorbing tape. This is necessary so that vibrations from the floor are not transmitted. structural elements closet.
If you are going to make a built-in drywall cabinet with lighting, it is necessary to provide for the subsequent placement of wires and fixtures even at the frame manufacturing stage. Holes for lamps are made with a knife manually or using a jigsaw. In addition, you need to attach all the rails and hinges for the doors if you are planning a drywall wardrobe.
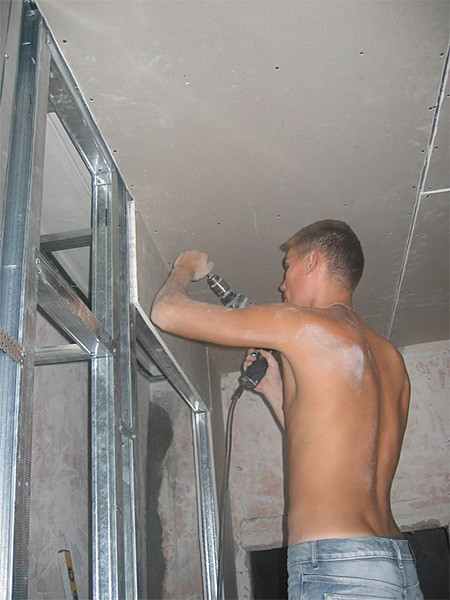
Frame sheathing technology
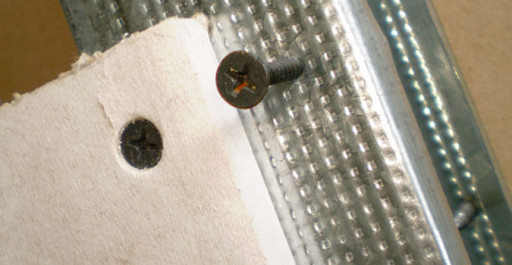
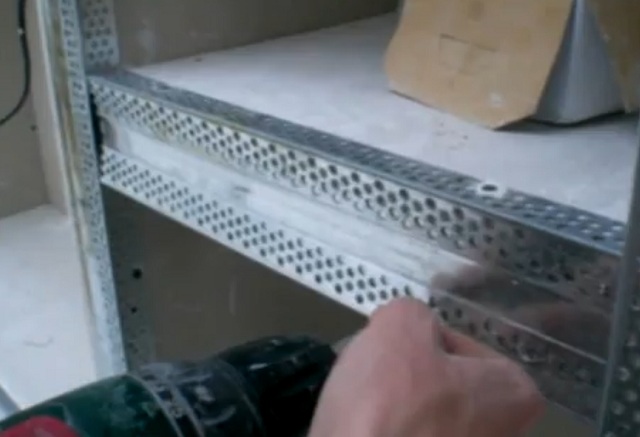
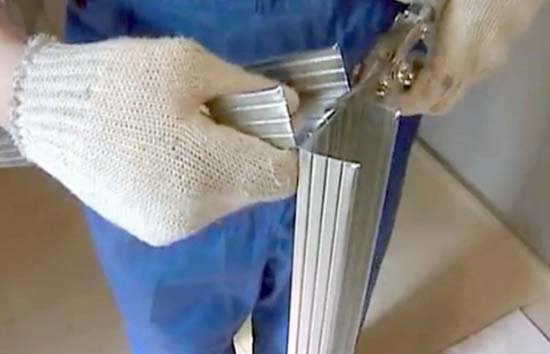
It's very simple. To work, you need self-tapping screws for metal 25 mm long. They should be screwed in every 200 mm so that the head does not go deeper into the material by more than 1 mm. Drywall sheets can only be mounted with outer side, but also with inside your closet. Usually use sheets with a thickness of 12 mm. But if the cabinet is designed for heavy items, you can take thicker sheets. To make the edges even, process them with an edge planer.
Sheathing the frame with drywall
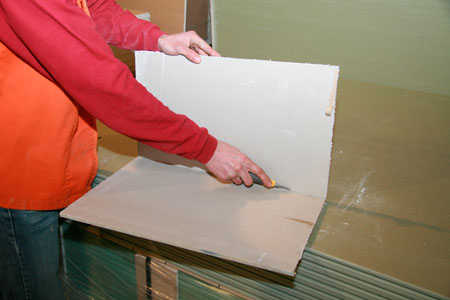
You can accurately measure the length of the sheet with a T-square. You will get a straight line along which you should make an undercut with a knife at the beginning and at the end of the cutting place. Place the sheet on the edge of the table so that the drawn line protrudes slightly beyond the edge. Tap the raised edge lightly with the palm of your hand. The sheet should break along the intended line. Paper can be cut with a utility knife.
Making a drywall cabinet
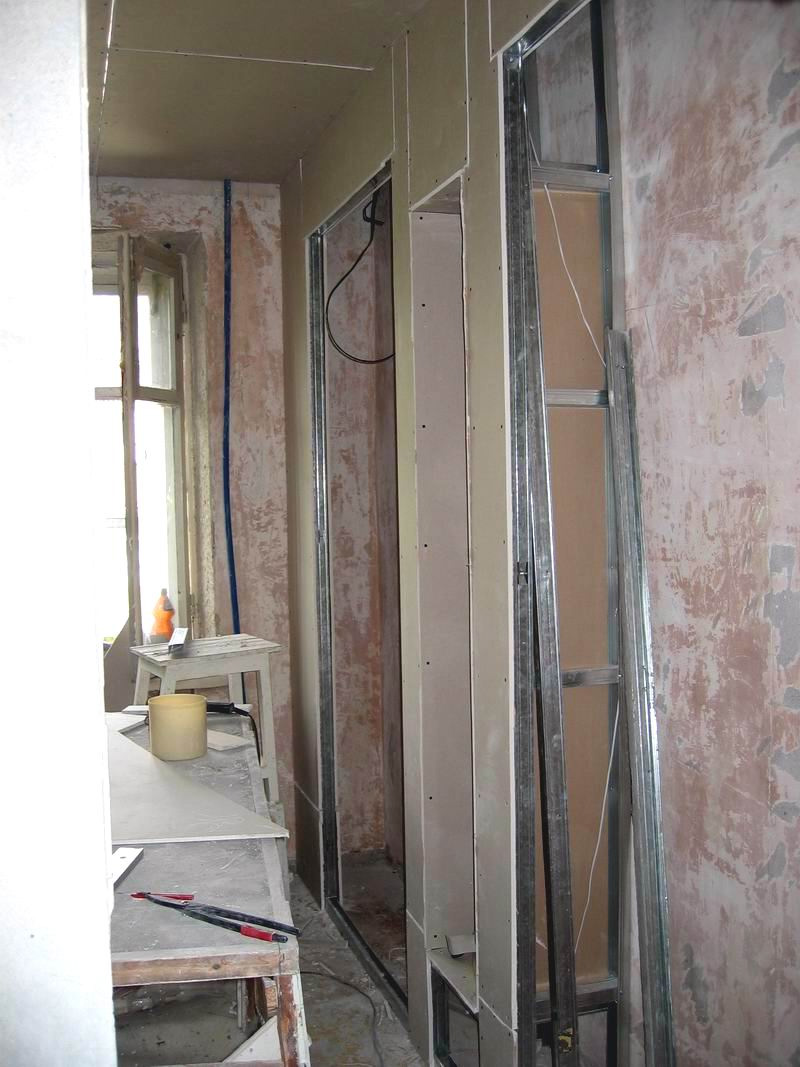
When sheathing the frame, place the joints in the middle of the vertical profile, then they will be almost invisible after plastering the surface.
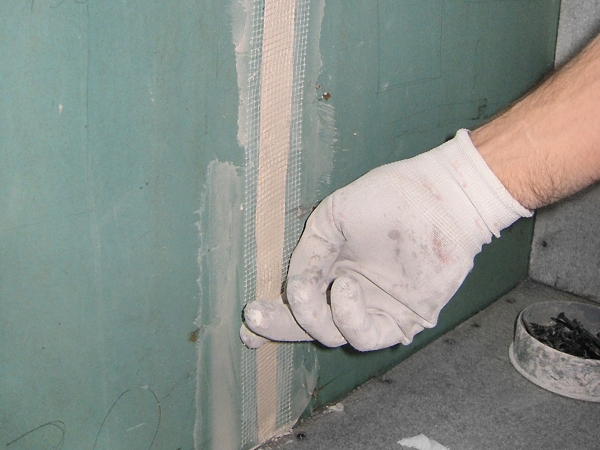
To make drywall cabinets with even corners, use a metal corner, plaster mesh or reinforcing paper. So the corners will be protected from destruction.
Sheathing the frame with drywall
What will your drywall cabinet look like?
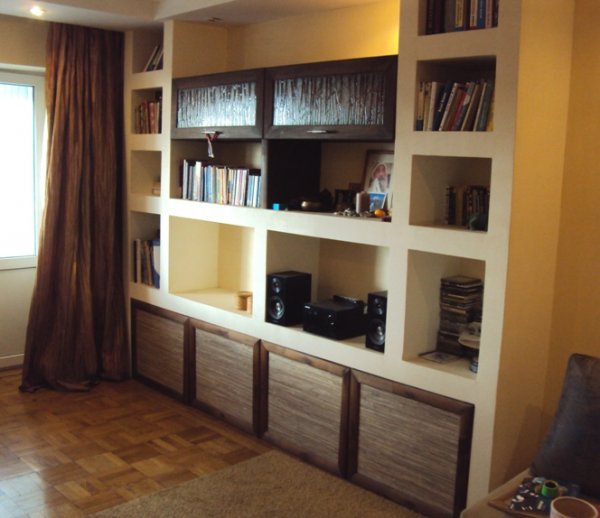
The finished product may look different as a result. The simplest cabinet is a drywall cabinet with open shelves. In this case, after sheathing the frame, the surface is puttied, painted or pasted over with self-adhesive wallpaper. The closet is ready. It is convenient to use in the kitchen to store dishes, bulk products, preparations for the winter. The closet will become not only a place to store something, but also a full-fledged element of decor. Buy beautiful containers for bulk products and blanks, or tie pieces of bright fabric (for example, the same one that your kitchen tablecloth or curtains are made of) to the lids of the jars. It will turn out beautiful, original and very inexpensive.
Drywall closet
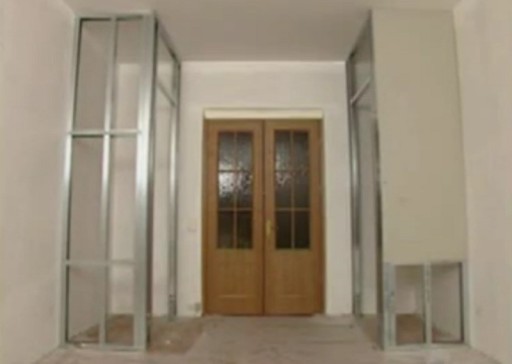
Do you want to make a wardrobe from drywall? The technology is the same, but keep in mind that the depth of the structure must be at least 0.6 m. The door is inserted into the grooves when all the seams are already sealed.
Built-in plasterboard wardrobe - comfortable and inexpensive furniture. If it is located in the kitchen, it is better to use moisture-resistant drywall. Cabinets are attached close to the walls of the room, in addition, back wall maybe not drywall, but the wall of your room or kitchen. And this saves material, and therefore your money.
You can make a drywall cabinet with your own hands - embody any design idea and save money at the same time. Today, together with experts, we are learning how to independently and quickly make a drywall construction.
The main stages of manufacturing: drawing, frame, finishing
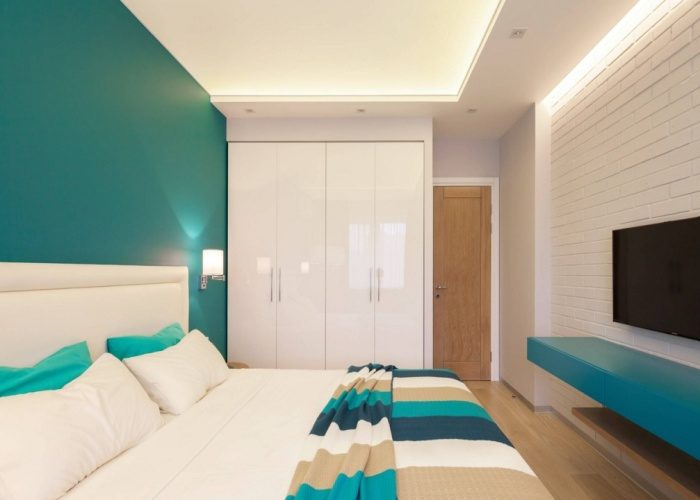 Photo 1 - Modern interior from ANCCONCEPT design bureau
 Exist general principles production of boxes from GKL.
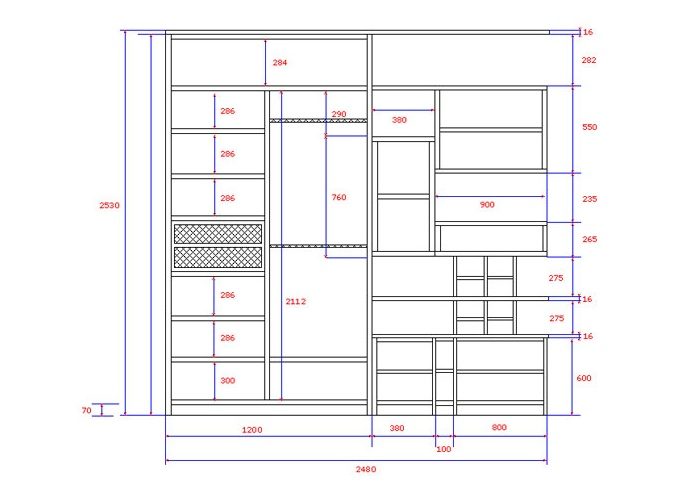
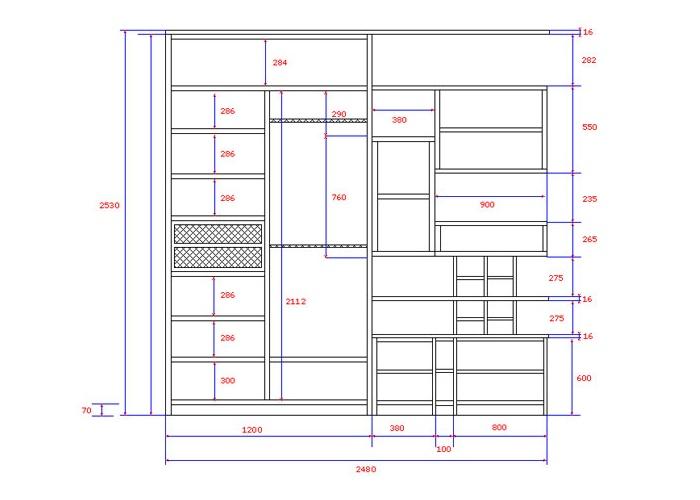
Construction drawing
First, we will choose the location of the structure and draw up a detailed project not only with measurements of the overall dimensions, but also with the dimensions of all, even small parts. We determine the thickness of the shelves, plan sliding and hanging elements, doors.
On the floor, ceiling and walls we mark the lines of the frame. For this you will need:
- level;
- plumb;
- paint cord;
- pencil;
- square.
Frame installation
If there are lamps in the furniture, then we mark up for them before mounting the frame. We do the wiring during the installation of the frame.
Using dowel-nails, we fasten guide profiles along the marked lines on the floor and ceiling, pre-glued with rubber insulation from the side that will be adjacent to the base.
 Photo 2 - Stylish minimalism from CheaperFloors
 Then we insert the rack profiles into the guides. The profiles are fixed to the walls with the help of suspensions, they are fixed to each other with special screws. For rigidity, cross bars from the profile are mounted between the racks. The smaller the pitch between the profiles, the stronger the structure.
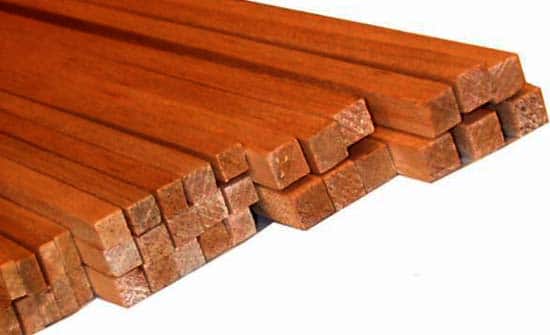
The frame can also be wooden.
IMPORTANT! Mounting a wooden frame is more difficult, and shrinkage of wooden slats can ruin furniture. We advise you to take a well-dried tree.
Drywall installation
Depending on the planned load, the shelves are made of one or two layers of plasterboard.
The choice of the type of drywall depends on the conditions of the room in which the furniture will stand. Do not forget about the checkerboard pattern of fastening sheets (mismatch of horizontal seams) and chamfers on non-factory edges.
Finishing

Algorithm:
- we glue the joints of the planes with a dividing tape;
- we putty the seams using a reinforcing mesh or tape;
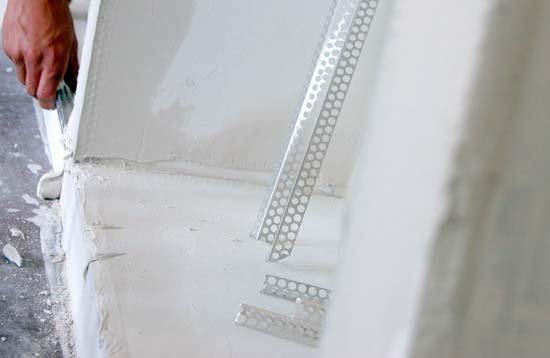
- glue the perforated corners on the putty;
- putty the entire surface;
- finishing.
 Step 5 - Finished Construction
 hanging cabinet
It is mounted on the floor or wall. Usually they are built into niches and corners.
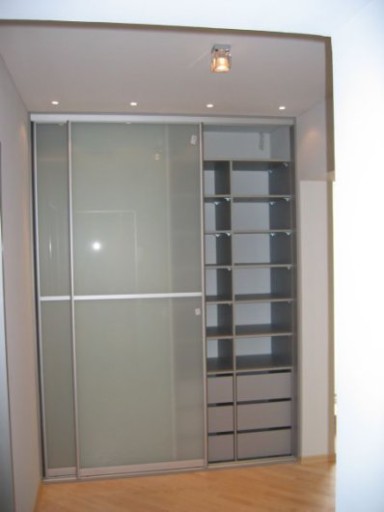
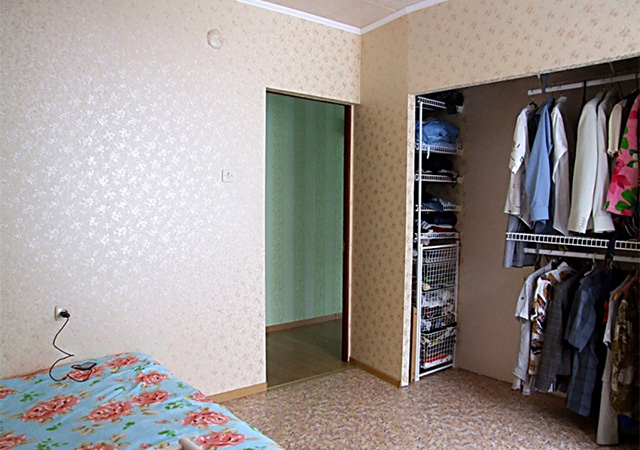
Built-in drywall wardrobe
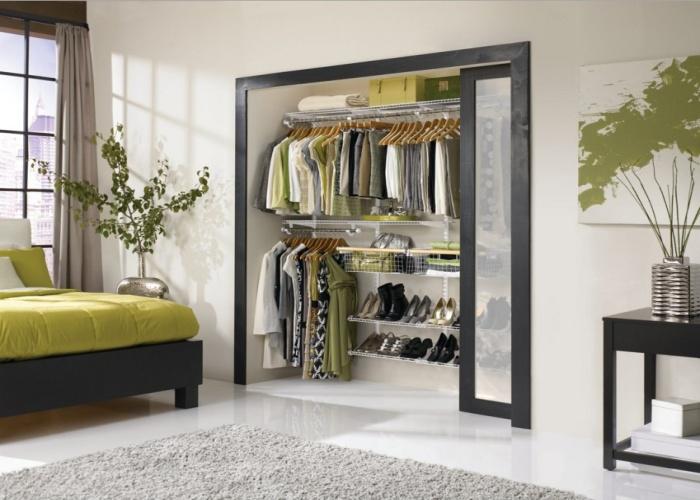
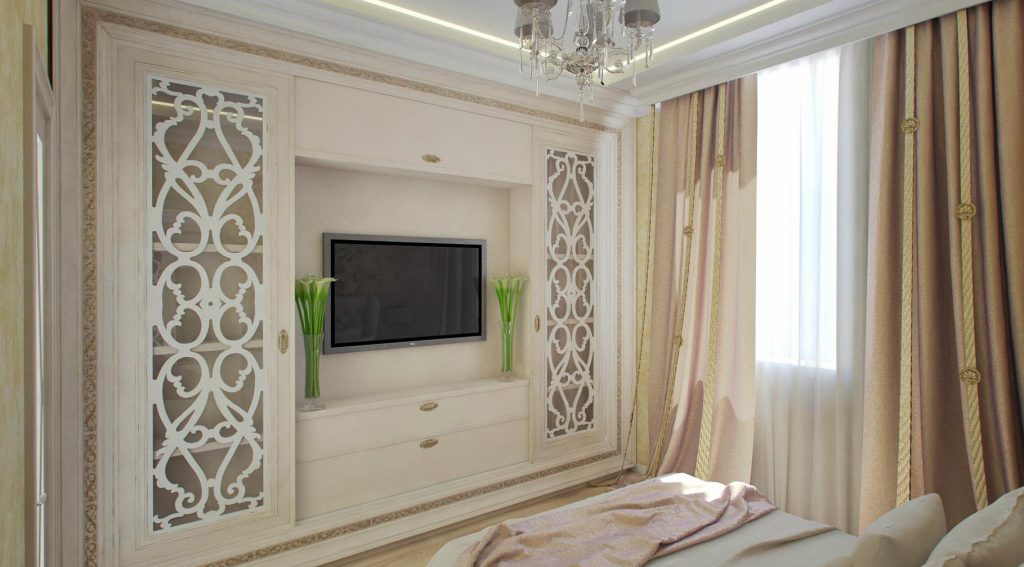
 Photo 3 - Everything is compact and at hand in the interior from Rubbermaid
 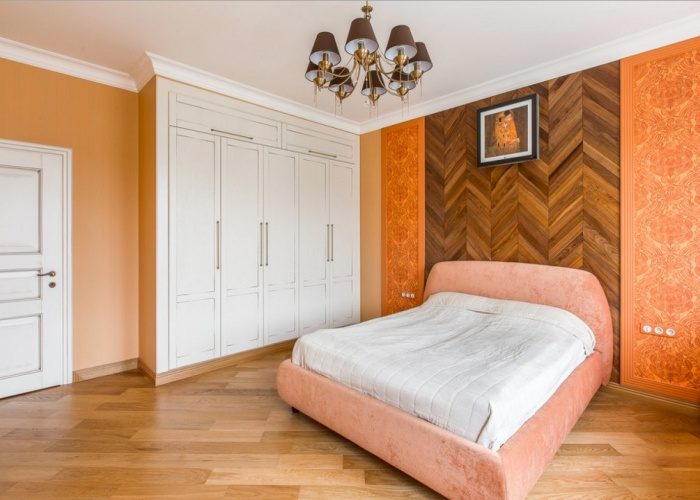 Photo 4 - bright bedroom in classical style by PlatFORM Design Studio
 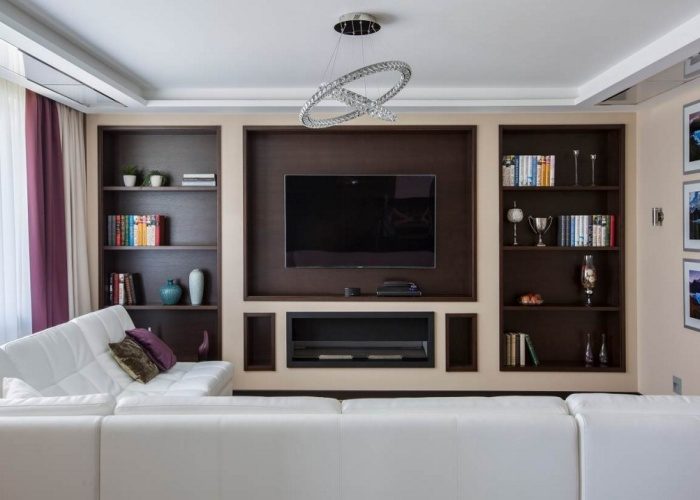 Photo 5 - Open sections of plasterboard in the interior from Studio NW-Interior
 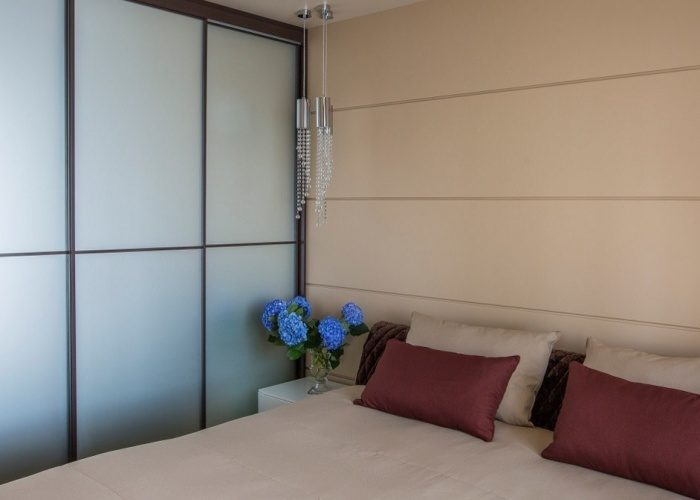 Photo 6 - Harmony in the bedroom interior from NW-Interior Studio
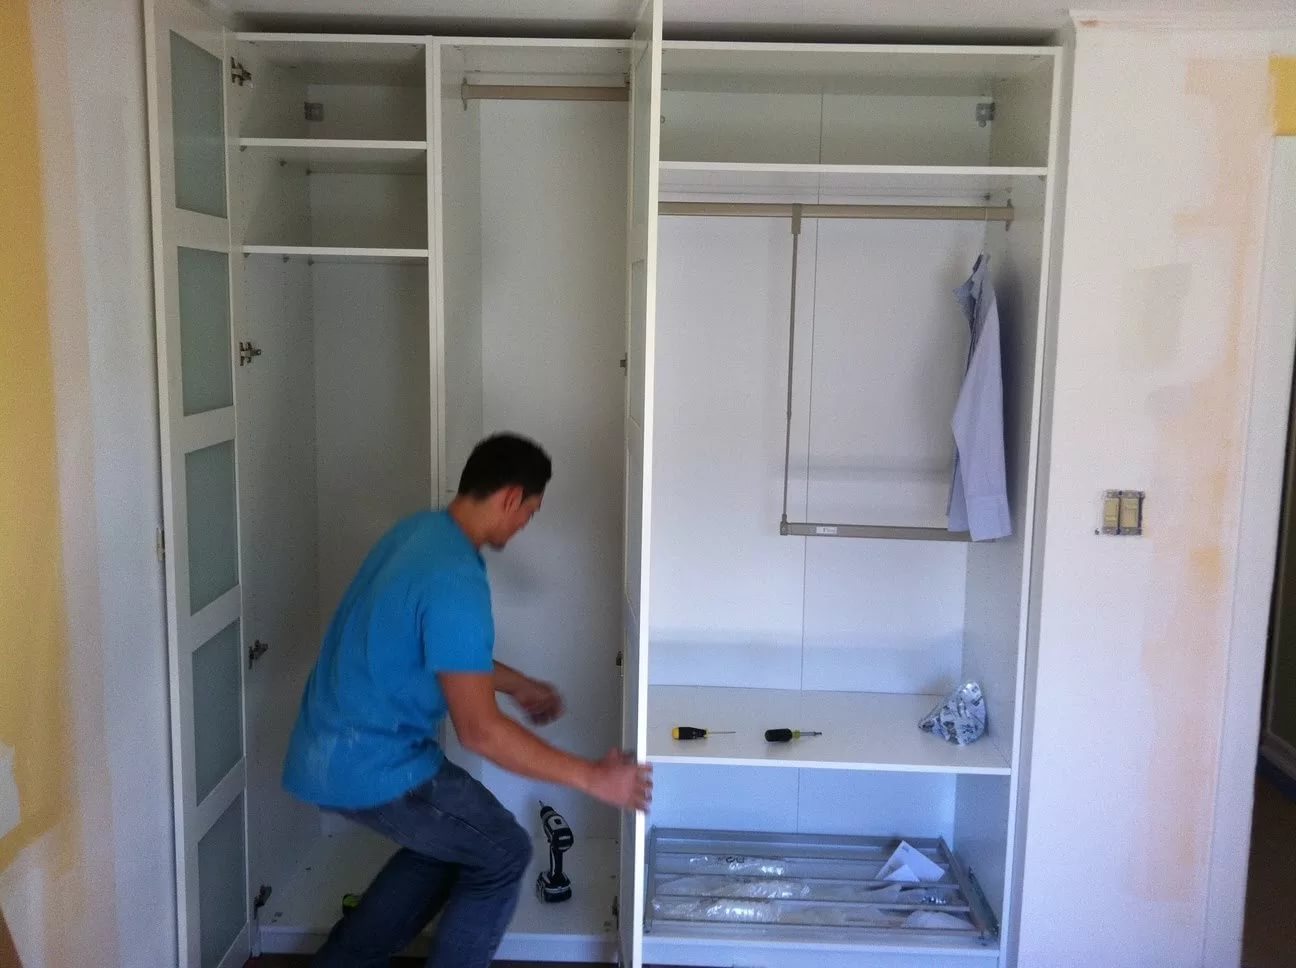
 After finishing the finished structure, we proceed to the installation of furniture fittings and finishing from other materials, such as MDF. You need to plan it in advance, but buy, as well as order a sliding system, after installation and sheathing of the frame, so as not to be mistaken in size.
The fastening of shelves, pipes for hangers, drawers and other structural elements is carried out in the same way as in a conventional wardrobe. Do not forget that all parts are fixed in those places where there is a profile under the skin.
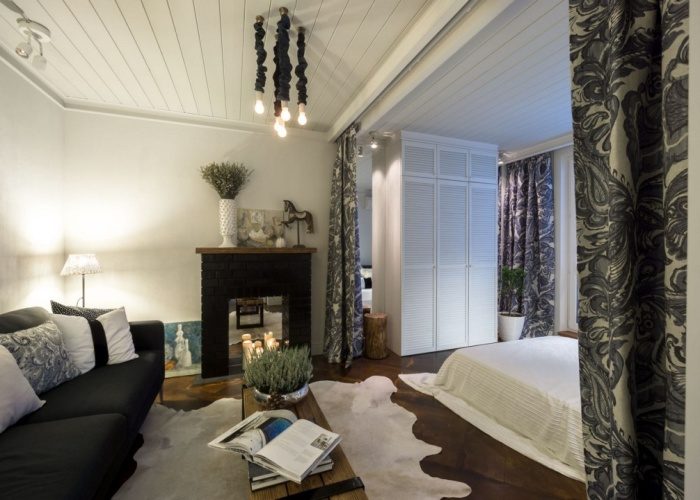 Photo 7 - Variation on a theme modern classics by Oliya Latypova Design and Decor
 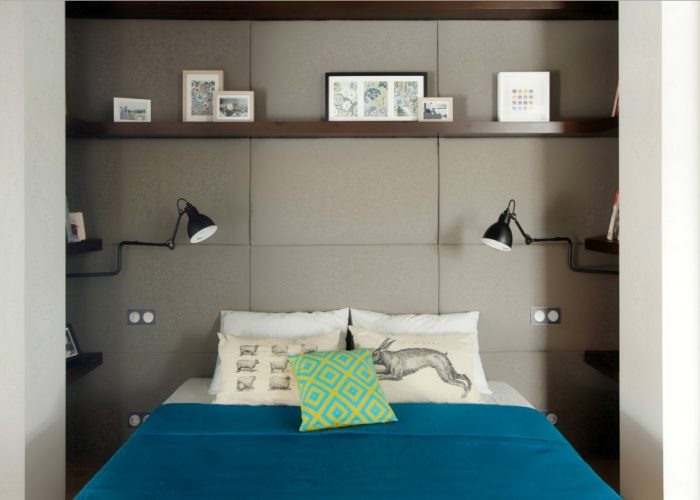 Photo 8 - Unusual headboard beds by Ze Workroom Studio
 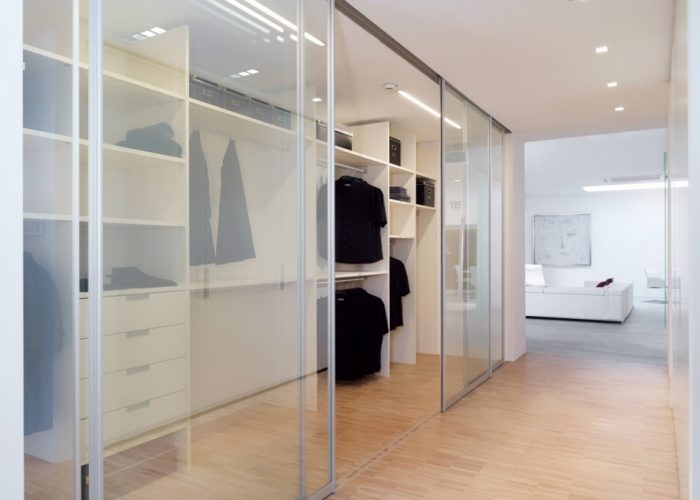 Photo 9 - A small dressing room with transparent facades from Anton Thelen GmbH
 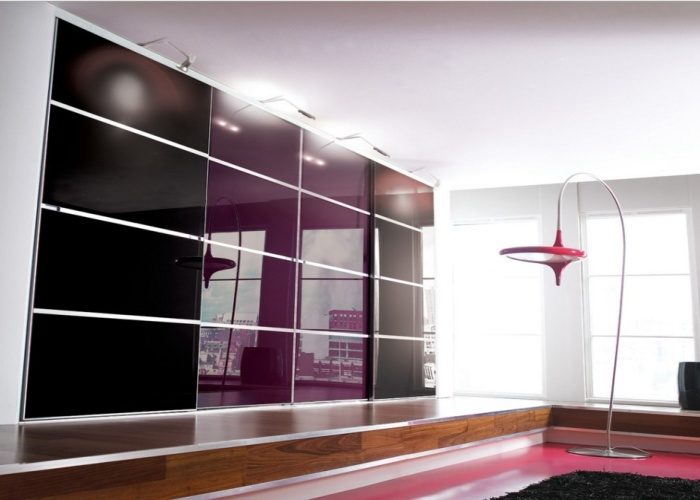 Photo 10 - Juicy colors in the interior from Cosmos bedrooms
 Lastly, profiles are attached to the ceiling and floor, in which it is mounted sliding system. The main thing is the strength of the structure. It will depend on the quality of the installation of the frame, the degree of its reinforcement with transverse sections of the profile, the pitch of the racks.
Corner cupboard
Any advantage corner cabinet, whether it is a closet in the hallway for clothes or bookcase in the living room, it is fastening to two walls. So you can save material and make the structure more stable, especially if the structure is from ceiling to floor.
Improvised designs do not require additional details - everything is made from plasterboard.
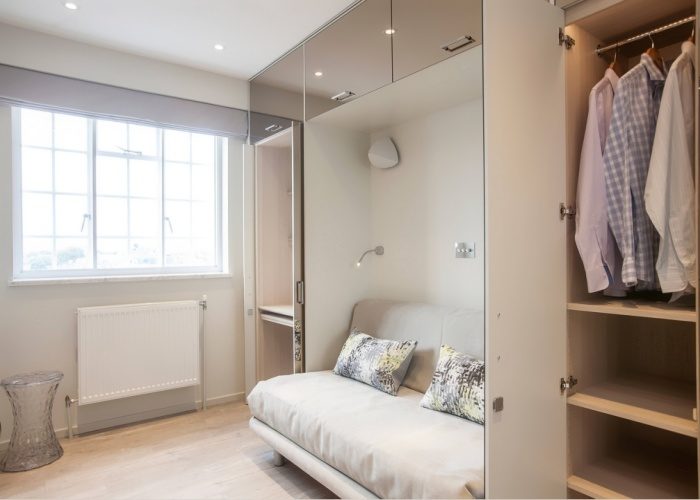 Photo 11 - There is never too much storage space. Interior by VS Design Studio
 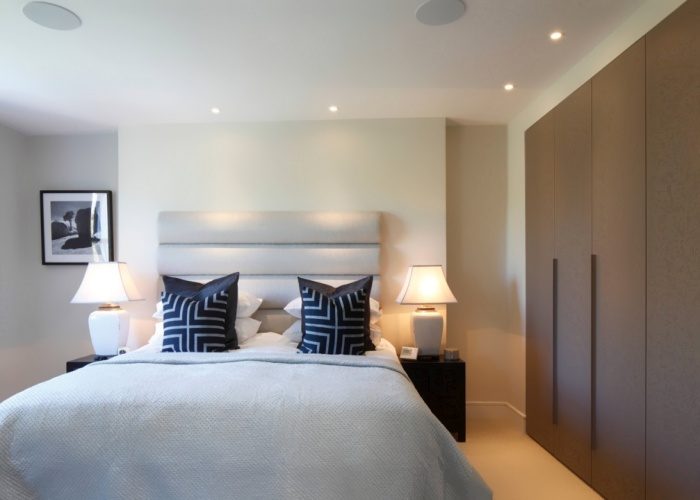 Photo 12 - Combination of light wall finishes with dark wood facades from FHI Design Ltd
 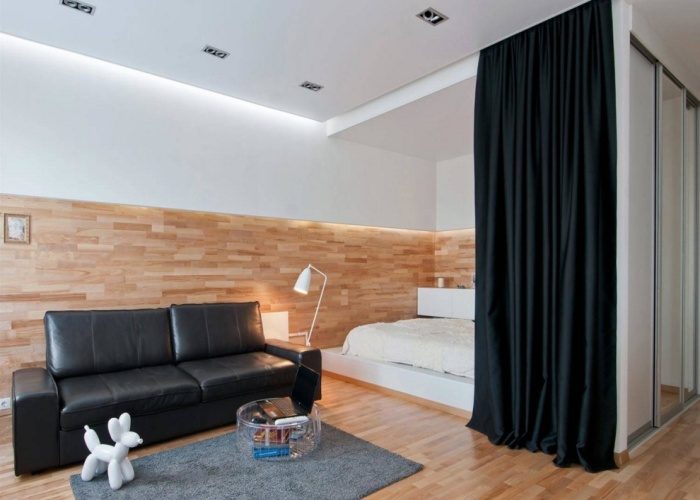 Photo 13 - Hidden behind a drywall cabinet is a bed on a podium. Interior by ART-UGOL
 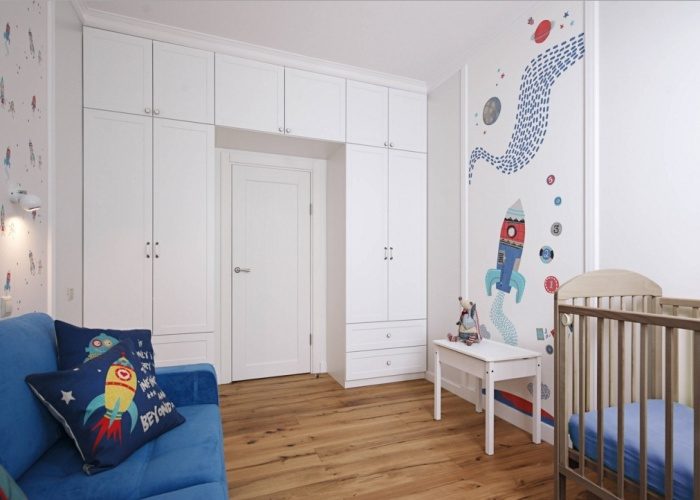 Photo 14 - Light interior children's from Mila Kolpakova
 A through cabinet with drywall shelves will help zone the room. Niches and shelves in a plasterboard wall are multifunctional: they can be adjusted to appliances or a library.Interior Design and Decorating Photo 17 - open shelving in the interior of the nursery from Ivan Churaev 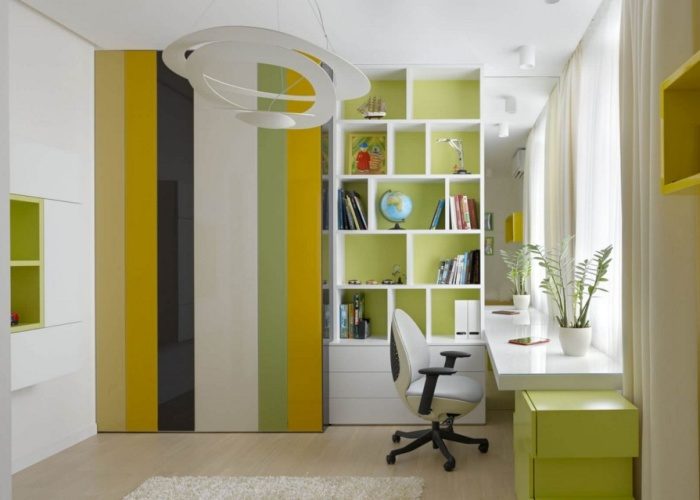 Photo 20 - Spring bright and fresh interior from
Drywall is a finishing material that is distinguished by an affordable price level, ease of installation and good operational characteristics. He has high thermal insulation properties and excellent environmental performance. Some varieties of drywall are characterized by increased resistance to moisture and temperature fluctuations. The surface of such a material can be safely painted or wallpapered on it.
Features of the use of drywall in the interior
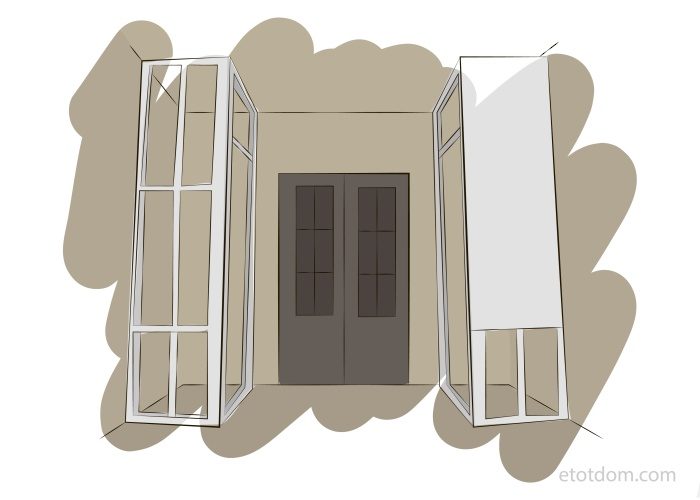
Drywall has a fairly wide scope. Use cases are limited only by the imagination of the author. This variation of the finishing material can be used for all kinds of niches, arches and other decorative elements. Through the use of drywall are created various forms doorways. Moreover, with the help of such material you can even do it yourself.
Today they are also very common. decorative element. Such designs can be given a variety of shapes and styles, which will solve design problems of any level of complexity.
Drywall niche for built-in wardrobe
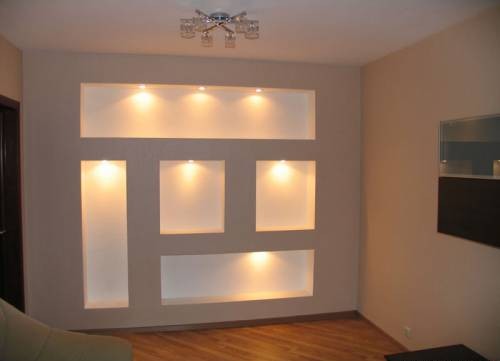
Recently also very popular drywall niches. The advantage of using them lies not only in decorative characteristics elements, but also in maximum functionality. Depending on the purpose of further operation, niches can be completely made of drywall or simply sheathed with such material.
Drywall niche for dressing room
In niches of this type, you can put a TV or equip them to store vases and figurines. In the latter case, you can resort to the implementation of spot lighting or illuminate the niche around the entire perimeter. This will help create a warm, cozy and even romantic atmosphere in the room.
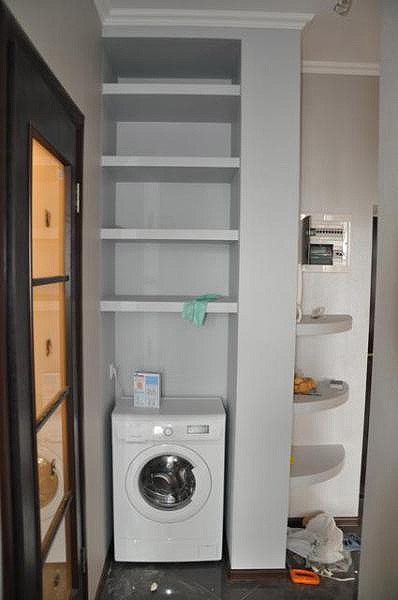
Drywall cabinet in the laundry room, can accommodate a washing machine
If necessary, presented in the form of shelves or niches can be further reinforced. To do this, a wooden beam is pre-installed in a metal frame. Here you should make sure that the tree is as dry as possible. It is also recommended to treat the timber with special antiseptics, which will increase the resistance of the material to decay and the negative effects of living microorganisms. If wet wood is used for strengthening, then the metal frame may warp during further operation.
What you need to know when making a drywall cabinet?
A drywall cabinet is able to easily fit into the overall design pattern of the room. Subject to availability additional illumination a unique favorable atmosphere can be created in the room. In addition, the cabinet performs practical function, resolving the issue of constant lack of space for things.
Before the start of the installation work should determine the most appropriate place the location of the future cabinet. The final results will depend on the estimated dimensions of the structure. In this context, it is best to create a preliminary drawing.
Important! A drywall cabinet is not recommended for storing tools and other heavy items. This is due to the fact that this variation of the material is subject to mechanical damage.
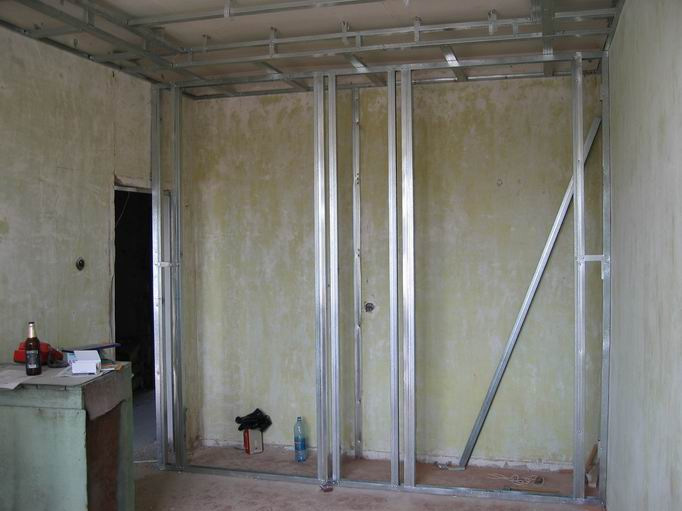
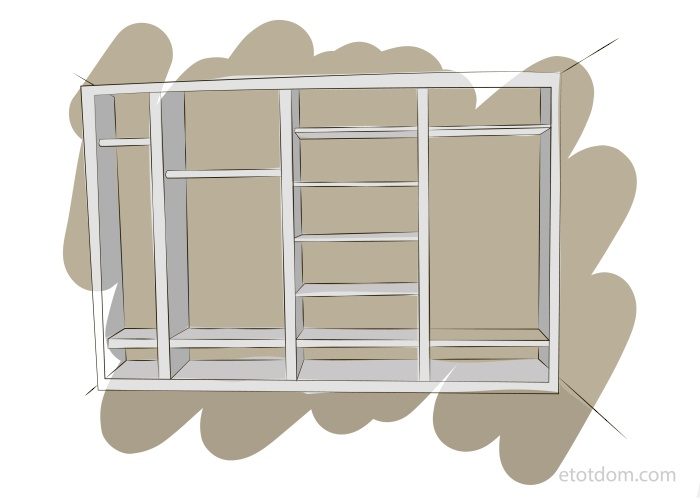
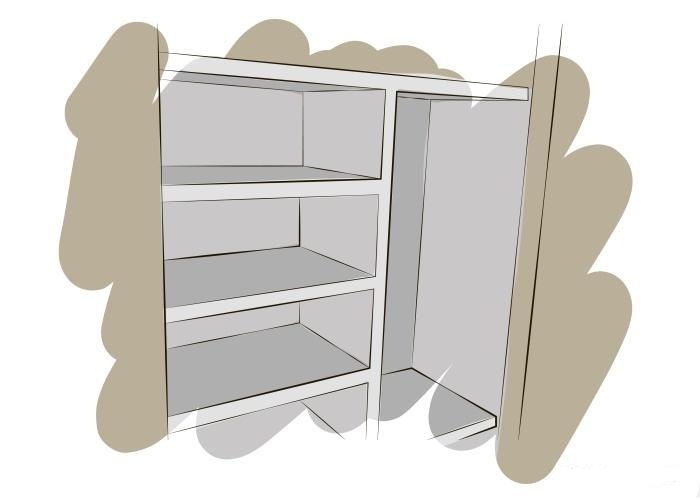
Frame of a regular rectangular cabinet
In the manufacture of such a cabinet, it should be remembered that finished construction belongs to the category of built-in furniture. During subsequent operation, it cannot be moved to another place or placed back side. For this reason, it is recommended to think carefully about the location of the cabinet, so that the chosen place meets all the requirements of ergonomics.
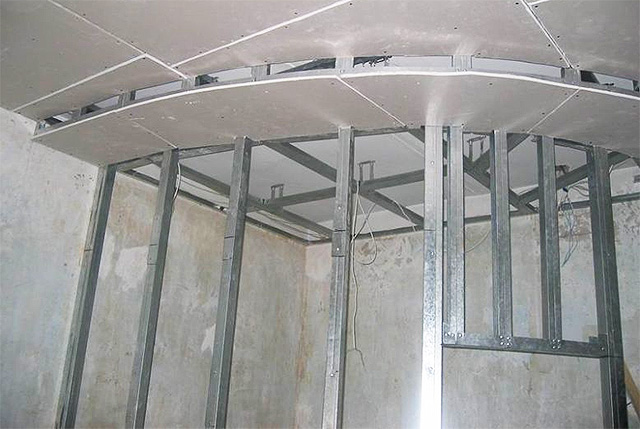
Frame for a semicircular cabinet
Drywall in this case is used exclusively as finishing material. To give strength to the structure, it becomes necessary to use a frame. The base of the entire structure can be made of wood or metal. In the latter case, we can talk about the ease of installation work and a fairly long service life.
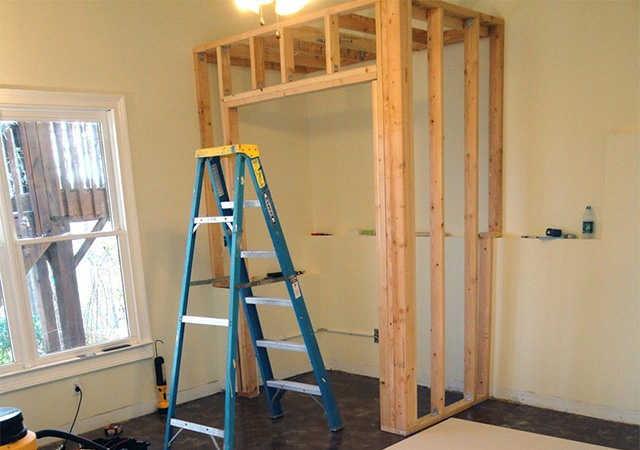
Wooden frame option
If a wooden frame is used, certain difficulties may arise due to the need pre-treatment material with special antiseptics. In addition, the wood must be well dried, since in a different scenario, the entire structure can be skewed. Despite all the controversial points, the wooden frame is able to withstand higher loads.
Necessary tools and materials
One of the main advantages of using drywall is the ease of installation work. To resolve this issue, there is no need to use special tools and equipment. Improvised materials are quite suitable:
- roulette;
- plumb;
- pencil;
- putty knife;
- construction knife;
- screwdriver;
- hammer;
- self-tapping screws.
With help measuring instruments appropriate markup is made. For maximum accuracy, it is recommended to resort to the use of a plumb line, tape measure and ruler. It is much easier to control the quality of corners with a corner. The slightest inaccuracy in measurement can lead to a distortion of the entire structure.
Individual elements metal frame must be connected to each other with self-tapping screws. The quality of their fastening depends on the reliability and strength of the entire structure.
For cutting sheets of drywall, it is best to resort to using a construction knife with interchangeable nozzles. Fastening the entire structure to the wall is best done using a plastic variation of the dowels.
When solving this issue, a spatula may be needed in order to apply a putty layer to the surface in order to level it. At the finishing stage, it may also be necessary to paintwork material or wallpaper. In any case, it is recommended to properly prepare the surface.
When wallpapering, use only high quality adhesive mixtures and follow all manufacturer's recommendations. Paint is applied to the surface in several layers.
Work technology
The procedure for installing a drywall cabinet is carried out in several stages. At the initial stage, the issue of drafting a project and carrying out the appropriate markup should be resolved.
Stage number 1. Drafting and marking
When drawing up a sketch of a future cabinet, you can use ready models from directories or just search suitable option in the Internet. For creating original design you should show imagination and complete the author's sketch. During design, there are many details to consider:
- number of shelves;
- features of the location of the shelves;
- distance between shelves;
- features of the location of the rod;
- shelf thickness.
When transferring the sketch to the wall, floor and ceiling, the maximum accuracy of the specified parameters should be observed.
Stage number 2. Installation of the structure frame
The cabinet frame is mounted according to the finished drawing. To create it, wooden or metal elements. Individual parts of the structure are attached along the marked lines using dowels, screws or self-tapping screws.
Advice! The remoteness of the location of such connecting elements depends on the overall dimensions of the cabinet. How more sizes construction, the smaller the distance between the screws.
Stage number 3. Sheathing the frame with drywall
Sheets of drywall are quite easy to cut with a construction knife. The sheathing of the frame must be done very carefully so as not to damage the integrity of the material.
The corners of the structure should be additionally reinforced with metal corners or plaster mesh.
The house cannot be truly cozy and comfortable without comfortable furniture. However, built-in furniture natural wood, which differs long term service and versatility, is very expensive. In such a situation, ordinary drywall can help, which is most often perceived only as a sheathing material. But in practice this is not the case. From drywall, you can easily make a multifunctional chest of drawers with your own hands.
You can make a drywall cabinet with your own hands - embody any design idea and at the same time save money.
Do not forget that all parts are fixed in those places where there is a profile under the skin.
The main advantage of GKL products is their versatility. This option has already been marked, but the pluses are not limited to it.
- A drywall cabinet is an excellent replacement for expensive furniture that is not inferior to it in terms of aesthetics. With proper handling and stylish finish a handmade product will look very impressive.
- GKL is a malleable and versatile building material, from which you can make not only a dressing room, but also shelves for various little things.
- Construction from this material can be placed almost anywhere - in the corridor, bedroom, nursery, toilet.
- The compartment can act as a partition. This is very convenient if you need not only to delimit the space, but to preserve its functionality.
- The wardrobe compartment made of GKL is durable. This design is able to withstand significant loads, so there are practically no restrictions on the use of such chests of drawers.
- Built-in drywall cabinet with shelves saves free space. The design can be easily built into the wall or into the corner of any room.
- Possibility to vary the design. A wardrobe, created independently, will make the interior extraordinary and more attractive.
First, we will choose the location of the structure and draw up a detailed project not only with measurements of the overall dimensions, but also with the dimensions of all, even small details.
It would be fair to note not only the advantages, but also the disadvantages of such chests of drawers. There aren't many of them. Firstly, such a design can only be built-in. She cannot be moved. Secondly, you need to be careful when placing sharp objects in the compartment. The material will support their weight, but can be damaged if it is touched by a sharp end.
Choose the design of the chest of drawers
Before starting installation, you need to decide on some important points. The first one is the choice of location. This is an individual decision of each owner of the house. When the place is determined, you can make a drawing of the walls and come up with the location of the dresser itself.
On the floor, ceiling and walls we mark the lines of the frame.
The drawing can be done on a regular sheet of paper or you can use a ready-made one. but last option more complex, because ready plan work should ideally fit the parameters of your apartment.
Without resorting to the help of a professional, everyone, with an effort, will be able to make a drywall cabinet with their own hands.
In order to create a plan, you also need to familiarize yourself with the main varieties of such a design.
Drywall is modern material which everyone can work with.
GKL locker can be of different types:
- corner;
- linear;
- built-in;
- coupe.

One of the components of the GCR ( drywall sheet) is gypsum.
Angled design is ideal for small room. It will save space. Linear cabinet with shelves - universal. It can be installed in any room of the house.
The cardboard shell is responsible for the strength of the material, optimizing specifications plates.
If the room has niches, then it is wiser to make a built-in wardrobe with lighting. big size. For example, it can be used as a dressing room. A chest of drawers with shelves will be an excellent solution when there is not enough space for storing things. It can accommodate not only clothes, but also books, equipment or shoes. Coupe is the best solution for a small apartment.
It's ecological pure material, which does not contain harmful elements and has an acidity close to human skin.
You should also decide in advance on the features of the chest of drawers. It can have open and closed shelves. Drywall cabinet with closed shelves as practical as possible, since any accessories can be stored in it, but it will be more difficult to build such a frame.
The metal profile is easier to process.
If you are not able to decide what design your drywall cabinet will have, then you can use the photos that are posted in this article.
Fasteners cut to size drywall boards we carry out on self-tapping screws gypsum-metal or gypsum-wood, depending on the selected frame material.
The finished drywall cabinet in the end result may look different.
Necessary materials and tools
To make a drywall cabinet with your own hands, you must first prepare certain materials and construction tools.
When you make a drywall cabinet with your own hands, keep in mind: The most fragile place on your building is the corners.

Do not forget about the staggered order of fastening sheets (mismatch of horizontal seams) and chamfers on non-factory edges.
In particular, for work you will need:
- GKL sheets;
- metal or wooden profiles;
- pencil;
- roulette;
- plumb;
- putty knife;
- primer;
- hammer;
- square;
- self-tapping screws;
- damper tape;
- plaster mesh;
- plaster;
- construction knife,
- antiseptic (if wood is used).
The choice of finishes in today's hardware stores is so great that no one will dare to give clear advice on this matter - a matter of taste.
As you can see, the installation of such a cabinet requires a solid set of available tools. Use any professional tools or sophisticated equipment is not necessary.
The choice of wood is approached very carefully.
Step-by-step instruction
- Creating a drawing. You can make a drawing using computer program or a plain piece of paper. To begin with, measurements of the walls are made, and then the dimensions of the future chest of drawers are fixed. All data of the premises and structures must be immediately transferred to paper. In this case, all points should be taken into account: starting from the outline of the chest of drawers, ending with the number and location of the shelves.
- Job site marking. If the plan is done correctly, then you can safely make markings on the walls in the room. For marking you will need a regular pencil, ruler and square.
- Purchase of goods. At this stage, you need to decide which frame you want to use. wooden frame more reliable and can withstand high load. However, there are several disadvantages when using it. Firstly, the tree is not cheap, and secondly, it requires pre-treatment with a high-quality antiseptic. All other materials must be purchased based on the data of the preliminary plan.
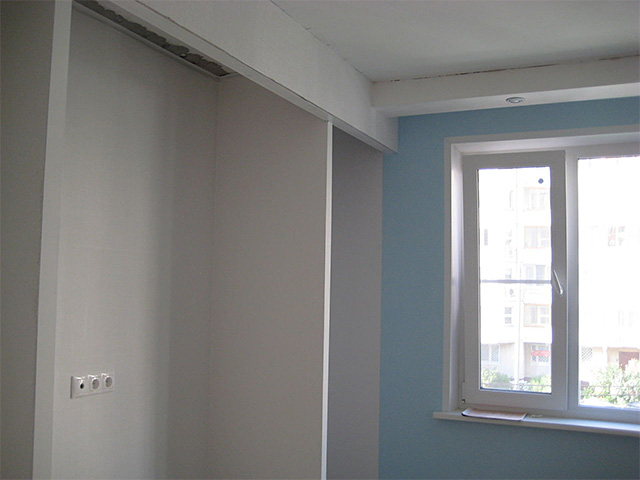
- Base installation. In order for the drywall cabinet to serve for a long time, special attention should be paid to the process of mounting the frame. The foundation must be strong and reliable. First, profiles are installed on the floor and walls. They are attached to the wall with screws. The distance between the profiles should not be more than 40 cm. A damper tape must be laid under each profile. It will avoid the hum when using the chest of drawers. Before installing each profile unit, it is worth checking the structures using a level. The frame must be stable and even. When all adjacent profiles are installed, you can proceed with the installation of vertical and horizontal. All jumpers are installed from top to bottom.
- Rear wall installation. The need to form a back wall depends on where the drywall cabinet is located. If the wall of the room itself has a good appearance, then additional finishing is not necessary.
- Cutting sheets. When the frame is installed, you can begin to prepare the base material. GKL should be marked and cut into pieces with a construction knife. For the manufacture of furniture, sheets with a thickness of 12 mm are usually used.
- Frame sheathing. It is enough to sheathe the frame with outside, but many also sheathe the inside. Sheets are attached to the screws. Between them, the step should be two hundred millimeters.
- Padding. For this step you will need special remedy. It can be found in any hardware store. The primer must be carefully treated with the entire drywall cabinet.
- Corner preparation and plastering. To make the cabinet aesthetic, every corner should be made even. A stucco mesh can help with this. It is attached with plaster when processing the entire surface.
- Door installation. When the base dries after plastering, you can take measurements of the surface of the future door. It is not worth making it yourself. This work should only be done professional master. It is better to order a door ready-made along with guides. When it is delivered, the managers must first be installed, and then the canvas itself.
Before building a built-in drywall cabinet, transfer the dimensions of the future structure to the wall, ceiling and floor.
Everyone, making a product at will, can create a truly unique design.
How can you decorate a chest of drawers?
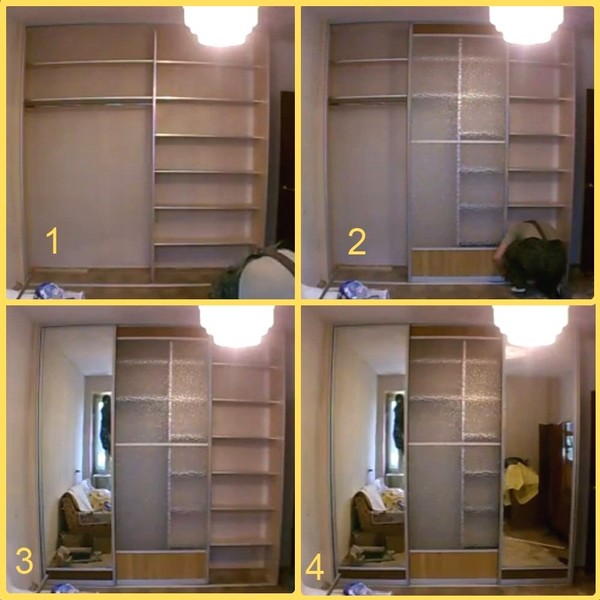
The sliding wardrobe performs not only the role of a pantry. It is the center of the interior and should look decent. How to decorate ready product? The easiest option is to paste over the surface of the structure with wallpaper in the color of the interior of the room. It is best to give preference to washable wallpaper. They are very practical and able to withstand difficult conditions operation. You can also use liquid wallpaper for decoration. With their help, beautiful ornaments and figures are easily created. Such decoration will never go unnoticed by the guests.
The choice of the type of drywall depends on the conditions of the room in which the furniture will stand.
Depending on the planned load, the shelves are made of one or two layers of plasterboard.
If the room is small, then you can decorate and visually enlarge the space with the help of mirrors. They are attached to the surface of the sheets with glue. It is not worth saving on buying mirrors. They must be of high quality and not have creases. However, when using mirrors, there is one significant drawback - they are easy to break and get dirty. If there are small children in the house, then it is better to refuse this finishing option.

Paint the cabinet in any color, paste over with wallpaper or cover self-adhesive film- it doesn’t matter, the main thing is that your creation will be in a single copy.

The profiles are fixed to the walls with the help of suspensions, they are fixed to each other with special screws.
Wall-paper can decorate a cabinet from GKL sheets in an original way. They are sold with a ready-made image, or you can order unique wallpaper with self-developed design. Wall mural remind thin film. Their service life is practically unlimited.
We determine the thickness of the shelves, plan sliding and hanging elements, doors.
If there are lamps in the furniture, then we mark up for them before mounting the frame.
VIDEO: plasterboard cabinet, installation and white version.
50 photo ideas for installing a drywall cabinet
From sheets of drywall, you can make not only perfectly flat ceilings, walls and niches. Plasterboard cabinets are a great solution for a small room or kitchen. Limitless design possibilities combined with relative cheapness are the main advantages of this material. You can save on the purchase of frame furniture and make the interior unique.
For the manufacture of drywall cabinets, you will need elementary skills in working with this material, a metal profile and fasteners, putty, primer, paint for finishing.
How to make a drywall cabinet with your own hands
If you do not yet know what your future drywall cabinet will look like, photos on the Internet can be the start of your imagination. You can make a corner, linear or built-in drywall wardrobe, as well as a drywall closet. The material allows you to design furniture that fits well into any room. Having measured the room, or rather, the place where you plan to install the cabinet, draw its diagram with all sizes. Pay attention to the distribution of loads on the drywall surface. If we are talking about a large shelf for large things, provide for it transverse structural elements from the profile.
How to make a frame
As a rule, drywall is attached to the ceiling or wall. If you make a drywall cabinet with your own hands, they usually use the entire available height of the room. Therefore, you first need to prepare the surface of the walls and ceilings for attaching elements cut from the gypsum board. The guide profile is attached to walls and ceilings with dowels. If the surface of the wall is not stone, but wooden, self-tapping screws can be used for fastening. After that, suspensions are located at a distance of 500 mm from each other. A vertical rack profile is attached to them. Horizontal frame elements provide additional rigidity to the entire structure. They are connected to the rack profile with the help of special fasteners, which are popularly called crabs. At the frame device stage, a profile for shelves and drawers is mounted, if you decide that they will also be plasterboard.
In places where the profile is laid on the floor, it is necessary to attach a special shock-absorbing tape. This is necessary so that vibrations from the floor are not transmitted to the structural elements of the cabinet.
If you are going to make a built-in drywall cabinet with lighting, it is necessary to provide for the subsequent placement of wires and fixtures even at the frame manufacturing stage. Holes for lamps are made with a knife manually or using a jigsaw. In addition, you need to attach all the rails and hinges for the doors if you are planning a drywall wardrobe.
Frame sheathing technology
It's very simple. To work, you need self-tapping screws for metal 25 mm long. They should be screwed in every 200 mm so that the head does not go deeper into the material by more than 1 mm. Drywall sheets can only be mounted on the outside, but you can also install them on the inside of your cabinet. Usually use sheets with a thickness of 12 mm. But if the cabinet is designed for heavy items, you can take thicker sheets. To make the edges even, process them with an edge planer.
Sheathing the frame with drywall
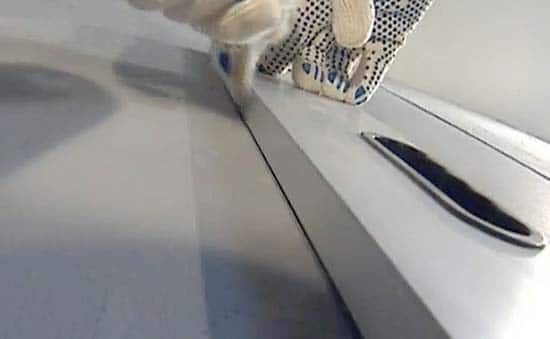
You can accurately measure the length of the sheet with a T-square. You will get a straight line along which you should make an undercut with a knife at the beginning and at the end of the cutting place. Place the sheet on the edge of the table so that the drawn line protrudes slightly beyond the edge. Tap the raised edge lightly with the palm of your hand. The sheet should break along the intended line. Paper can be cut with a utility knife.
Making a drywall cabinet
When sheathing the frame, place the joints in the middle of the vertical profile, then they will be almost invisible after plastering the surface.
To make drywall cabinets with even corners, use a metal corner, plaster mesh, or reinforcing paper. So the corners will be protected from destruction.
Sheathing the frame with drywall
What will your drywall cabinet look like?
The finished product may look different as a result. The simplest cabinet is a drywall cabinet with open shelves. In this case, after sheathing the frame, the surface is puttied, painted or pasted over with self-adhesive wallpaper. The closet is ready. It is convenient to use it in the kitchen for storing dishes, bulk products, blanks for the winter. The closet will become not only a place to store something, but also a full-fledged element of decor. Buy beautiful containers for bulk products and blanks, or tie pieces of bright fabric (for example, the same one that your kitchen tablecloth or curtains are made of) to the lids of the jars. It will turn out beautiful, original and very inexpensive.
Drywall closet
Do you want to make a wardrobe from drywall? The technology is the same, but keep in mind that the depth of the structure must be at least 0.6 m. The door is inserted into the grooves when all the seams are already sealed.
Built-in wardrobe made of plasterboard - comfortable and inexpensive furniture. If it is located in the kitchen, it is better to use moisture-resistant drywall. Cabinets are attached close to the walls of the room, in addition, the back wall may not be drywall, but the wall of your room or kitchen. And this saves material, and therefore your money.