What to make a bedside table. Bedside table with your own hands - from detailing to assembly. Stage No5. Planks under the table
Bedside tables in the interior are mainly used for convenience and practicality. But how to make it so that this piece of furniture not only flows into the overall interior, but also transforms? If you are one of those who especially do not like to spend money on various creative furniture, the site offers you 12 interesting ideas bedside tables that you can make yourself at no extra cost!
Idea number 1. Bedside table from old suitcases

A couple of suitcases can be found in every house on the mezzanine or in the pantry. Of these, you can make not only a spectacular, but also a roomy nightstand with your own hands.
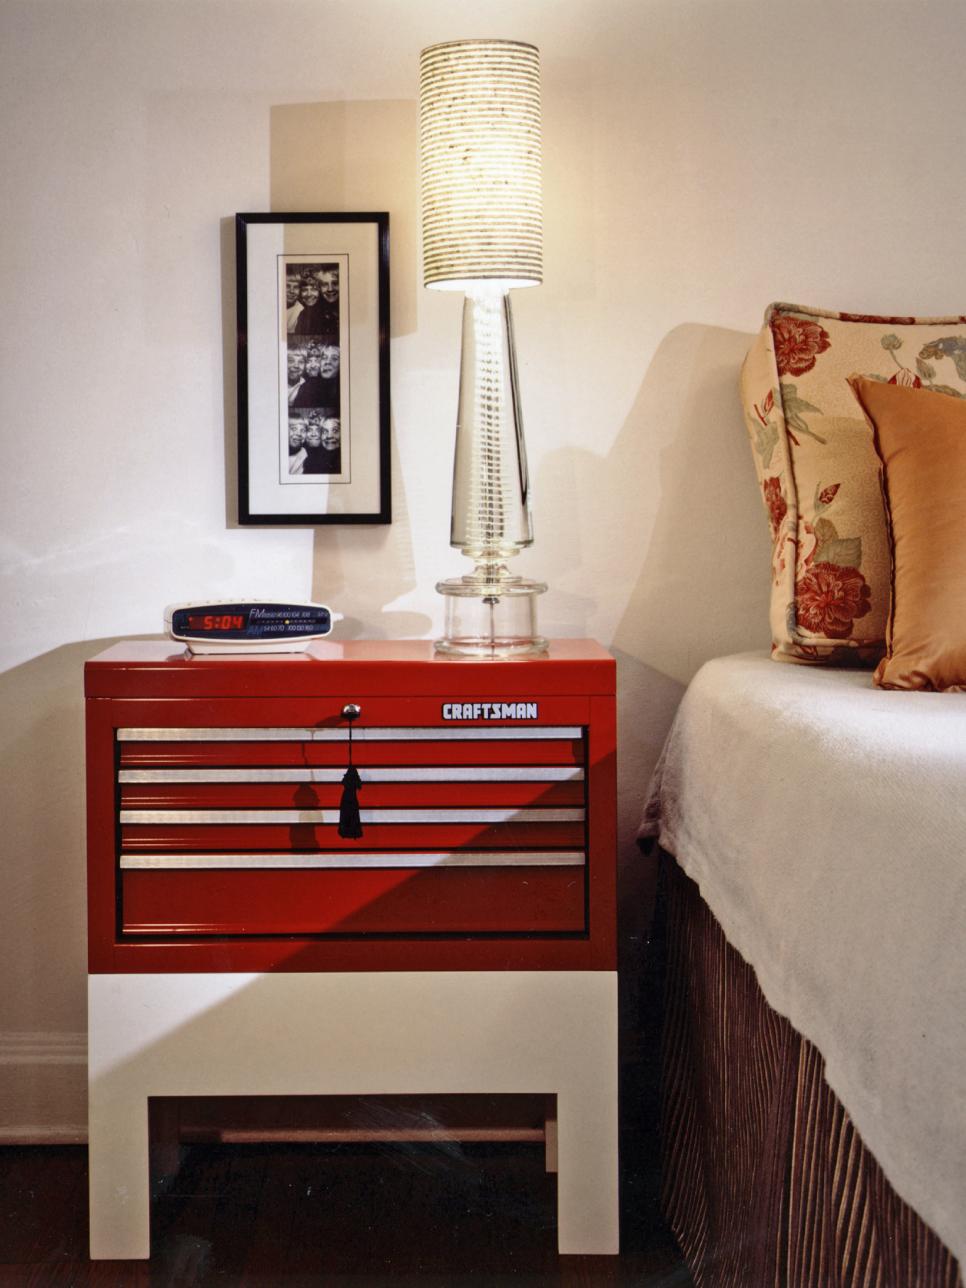
Idea number 2. Nightstand with a masculine character

A bedside table made of concrete will fit perfectly into the interior of a loft-style bedroom. building block. If the porous surface does not seem attractive enough, then it can be coated acrylic varnish with your own hands.
Idea number 3. Interesting nightstand-console

Any old furniture on legs, from which half has been sawn off, can become an unusual bedside console. For a really impressive effect, color it in bright shade. Then the bedside table will surprise not only with its shape, but also with its color.
Idea number 4. Laconic nightstand from the drawer

An ordinary drawer from an old table, painted with your own hands in a color suitable for the interior, can become an original bedside table. It is only necessary to close it with a board of a suitable size.
Idea number 5. Staircase instead of bedside table

An ordinary staircase can serve as a place to accommodate various necessary little things- from a book and clothes to a lamp with a retainer. If desired, paint the stairs with your own hands in an unusual color.
Idea number 6. Bedside table from a barrel

inverted metal barrel will become an extravagant bedside table. In order for the barrel-bedside table to serve for a long time, treat it with your own hands with an anti-corrosion compound.
Idea number 7. For the smartest

We are all used to the fact that books or magazines lie on the bedside table. So why not make a bedside table out of books? In order for it to be stable, their covers can be glued together or tied with a belt.
Idea number 8. Chairs instead of a bedside table

An ordinary chair will replace the bedside table. We recommend choosing wooden models unusual design or use several chairs of different sizes.
Idea number 9. wooden collection

Many wooden log cabins, fastened together with their own hands, create a spectacular bedside table. In order for the furniture to last a long time, do not forget about special impregnations for wood.
Idea number 10. Simple but effective drawer bedside table

The easiest way to make a bedside table from drawers with your own hands is to hang it on the wall. For lovers of more sophisticated solutions, we recommend screwing the legs to the drawer.
Idea number 11. old cage

A large animal cage can also replace a bedside table. It remains only to make wooden table top suitable size.
Idea number 12. Musical bedside table

The gramophone record acts as a countertop for the bedside table. The legs are made of thick wire or ready-made ones are used, which can be purchased at a furniture store.
Detailed instructions on how to make a bedside table with your own hands in this video:
Don't miss interesting news in photos:


Unusual design of children's rooms
Crafts from felt for the New Year 2019 do it yourself
12 DIY bedside cabinet ideas
How difficult it is to find a suitable, and even more narrow bedside table (and also all the more modern design and the required functionality) is known to everyone who has at least once attended to this issue. This project is the perfect middle ground between the ability to drink coffee while watching TV and put a book somewhere, the chance to squeeze a cabinet into the narrow gap between the sofa and the closet / wall, and finally the potential to store newspapers and magazines without creating cluttered stacks of waste paper from them.
To you will be required:
- Copper pipes(diameter about 1.2-1.3 cm): 4 pieces of 2.54 cm; 4 pieces of 10.16 cm; 2 pieces of 16.51 cm; 4 pieces of 30.48 cm; 4 pieces of 35.56 cm;
- T-shaped straight connectors with a diameter of about 1.2-1.3 cm (the diameter of the inlets, as usual, is slightly larger so that pipes of the same diameter can be inserted) - 8 pieces;
- Corner connectors with a diameter of about 1.2-1.3 cm (diameter of inlets by analogy) - 4 pcs.;
- Tool for cutting pipes;
- Wooden plank- better pine (1.9x22.86x48.26);
- Skin;
- stain;
- Polyurethane coating for wood (or any equivalent, for example, varnish);
- Epoxy adhesive;
- Paint - black matte (optimally - spray paint; optional);
- Nylon fabric (or equivalent) - 31.75x71.12;
- Sewing machine.
1. Take the purchased pipes and cut them to the lengths indicated above with a special tool.

2. Fold the table base parts together with the connectors to make sure all parts fit into each other.

3. Glue the base of the table frame completely - for now, only the base. Use a small(!) amount of epoxy for each joint.

4. Turn the finished (dry) table base upside down and center on back side boards. Trace around with a pencil where you want to drill holes around upper parts T-shaped connections.


5. Using a special nozzle on a drill (with a diameter slightly larger than the diameter of the pipes), drill wide grooves along the marks - to a depth of 1.27 cm. Be careful - in no case drill through the board.

6. Take the sandpaper and work it over any rough corners of the board.

7. Treat the wood with a stain and then with a polyurethane coating or any equivalent.

8. Assemble the rest of the base - the table frame. But do not glue the last 4 T-connectors to the 35.56 cm long pipes yet.

9. Sand the copper a little. Wipe the pipes clean of any dust.

10. In a well-ventilated area, paint the entire pipe table base in several coats. Apply light coats of paint, let it dry completely before applying paint again.

11. Take the cut out piece of fabric. Fold the smaller edges of the 2.54 cm fabric rectangle. Pin the folded edges and sew on sewing machine. It is not necessary to process the cut edges of nylon fabric - it almost does not fray.

12. Remove non-glued top horizontal pipes on both sides and put fabric on them - threading the pipes into the loops just sewn. Now add a little glue to each end of the pipe and reinsert the pipes into the fittings.


13. Take the prepared board, put a small amount of epoxy glue into each drilled recess and put the board on the base pipes sticking up. Let the glue dry.

The bedside table is an indispensable piece of furniture for every bedroom. It can hold any things that may be needed in this room and for which you do not want to get up and go to another room. You can also put glasses on it, put a night light or a glass of water at night. The bedside table for the bedroom has a simple design, making it easy to do it yourself.
Bedside tables can have varied design and construction. Choosing suitable model, you should rely on your financial capabilities, carpentry experience and the interior of the room in which the product will be located, in our case, this is a bedroom. Consider the main types of cabinets:
Bedside table with drawers. This option is the most common and conservative. It is suitable for lovers of simple furnishings not gravitating towards fashion trends.
Open nightstand. There are no drawers in this model, and all things are in plain sight. It is suitable for those who do not hide any objects from children and generally do not store many things in it.
Bedside table with pull-out table. Such a model will be indispensable for people caring for the sick and disabled, who find it difficult to get out of bed to eat.
Hanging bedside table. This solution is suitable for bedrooms with limited area. Mounted option, as well as floor, can be open, and can have a drawer or shelf. The cabinet is usually mounted on the wall, while freeing up space on the floor.
Bedside table unusual design. There is already someone in that much. It all depends on imagination, skill and experience in woodworking. If you want to complement the decor in the bedroom with some unusual detail, then you can think about an unconventional design.
Don't forget one thing important parameter bedside table - dimensions. They should match the free space next to the bed. When installing it, there should still be some space around. If the width of the bedside table is such that the product occupies the entire space and rests against neighboring pieces of furniture, then it will only spoil general form and cause inconvenience. But it will also not be very beautiful if the bedside tables are narrow and too low. In other words, in everything it is necessary to adhere to the golden mean, and not go too far with any parameters.
All of the above options are quite possible to make your own. The cost that a homemade nightstand will cost depends on its size, the number of drawers, the quality of the fittings and the material chosen for manufacturing. But today we will look at this process on the example of the simplest and cheapest, traditional model, which can be easily made by a person who does not have much experience in furniture production.
Tools you need for the job
You will need the most common tools, which are most often in the arsenal of every man who works out from time to time. minor repairs and other household chores:
- drill with a nozzle "screwdriver";
- perforator (if any);
- wood drills;
- different screwdrivers;
- cutter 35 mm. in diameter;
- iron;
- roulette;
- pencil;
- right angle tool with a ruler;
- rag, sandpaper.

By the way, the iron in this list was not at all by mistake, as you first thought. The fact is that, whatever one may say, you will have to order the cutting of details in a carpentry workshop, because. to do it yourself, you need conditions, a special tool and special knowledge. To keep costs to a minimum, you can try to save on gluing the edges. You can purchase a 0.5 mm thick melamine edge in the store, match it to the shade of the future bedside table and glue it yourself. It has an adhesive side, which must be applied to the surface of the part and ironed with a hot iron. To ensure that the surfaces to be glued are well connected, take a rag and, without waiting for the edge to cool, press it firmly and iron it.
The material from which we will make our bedside table
In order to decide on the choice of materials, you need to study their types and properties, as well as estimate how much you can spend on them. Chipboard cabinets are the cheapest. It is because of its low cost that this material has become widespread. And the most expensive are the cabinets from natural array tree. But since today we are making a simple, a budget option, then we will consider materials that are not expensive:
chipboard. From this material we will make the facades of our bedside table with our own hands. Chipboard is a chipboard coated with a quality decorative coating laminate. This material has a rich palette of colors and textures, it is easy to process. But not everyone knows that it is impossible to carve out furniture parts from it on your own, because. if you saw it with an ordinary improvised tool, then the decorative coating will break off, and the place through which the saw passed will turn out to be torn and ugly. Therefore, if for handmade the bedside tables were chosen precisely by chipboard, then it is better to order cutting parts in a carpentry workshop.
Fiberboard. This is a fibreboard, which is made in much the same way as particle board, only wood fibers are used as a material, and not sawdust and shavings. Fiberboards are thinner and more flexible than chipboards. From this material we will make the bottom of the box and back wall bedside tables (details that are not visible from the side) in order to save money, because Fiberboard is cheaper than chipboard.

Tips and subtleties to consider when working with chipboard:
chipboard sheets may have different thickness- from 1 to 3.8 cm. The most commonly used plate is 1.6 cm thick;
the size of the plate can also be any, therefore, in order to save money, before sawing, you should draw a diagram of the layout of the parts on the plate and figure out what size it should be in order to fit all the structural elements on itself and at the same time leave a minimum of waste;
before purchasing the material, it is important to carefully examine it. The surface of the plate should not have damage, scratches, potholes. If they are, then it is desirable that they are only on one side, otherwise, the product will look bad;
You also need to pay attention to the degree of dryness of the material. It should not be saturated with water, otherwise, upon drying, it will warp, and it will simply be impossible to process it;
when transporting already cut parts future design, from the carpentry shop to the house, you need to make sure that when the car bounces on bumps, they do not hit each other and the body, and are not damaged. It would be best to overlay the bottom and sides of the body with foam or other material that can soften the blows, and tie the parts themselves together.
Important information about fiberboard:
furniture thickness fiberboard sheets happens from 3 to 5 mm. The strength of the product depends on it. But most often this material is used for the manufacture of internal parts not visible from the outside. In terms of thickness, a three-millimeter sheet is optimal for these purposes;
the dimensions of fiberboard, like chipboard, can be different, but, unlike the latter, this is not very important. It happens that there is simply no choice, and the store has only one format;
There are no strict criteria for the quality of fiberboard. For our purposes, any sheet will be suitable. But still, it is better to refuse to buy if it has a wavy surface. After all, this means that the sheet is wet and warped, and now it will be very difficult to work with it.
Dimensions and number of parts for the manufacture of cabinets of the simplest design
To order in the carpentry workshop cutting the details of the bedside table, the drawing is required in without fail. You should sit down at the table and draw with all its components, think over the dimensions, design and number of identical parts. I remind you that in our case this is the simplest and cheapest model with a drawer without skids and facades made of chipboard. Dimensions and number of parts:
side details of the bedside table measuring 77.2x50 cm - 2 pcs;
bottom and shelf measuring 36.8x50 cm - 2 pcs;
plinth and top strips measuring 36.8x10 cm - 3 pcs;
side parts of a box measuring 48x11 cm - 2 pcs;
the walls of the box measuring 33.4x11 cm - 2 pcs;
drawer front 15x39.5 cm in size;
bedside table door measuring 51.5x39.5 cm.
The plate from which the bedside table will be made has a thickness of 1.6 cm. The cover of the curbstone is better to take the kitchen one. Its size is 52.5x40 cm, and its thickness is 2.8 cm.

The back wall and bottom of the box can be made from cheaper fiberboard in the following dimensions:
back wall measuring 67x39.5 cm;
the bottom of the box measures 47.5x36.5 cm.
The main fasteners will be furniture euro screws, for which you need to drill holes. In the planes we drill 8 mm in diameter, and in the ends - 5 mm in diameter. The drawing mentioned above should also indicate the number of holes, and which of them are drilled where.
Hardware required for assembly
The choice of fasteners must be taken very responsibly, because they largely determine how long the product will last. In a store selling furniture fittings, you must purchase:
a package of 4x30 self-tapping screws for mounting the bedside table cover and front panel box. They should be attached from the inside;
euro screws 5x70 in the amount of 22 pcs. They fix the plinth and slats. Screw in one euro screw on each side;

a package of 4x16 self-tapping screws with a hidden head to fasten hinges and fiberboard. When screwing into the bottom of the box, they should be deepened to avoid scratches on the shelf;
hinges for furniture in the amount of 2 pieces. It is necessary that they correspond to the diameter of the existing cutter;
handles for the door and drawer in the amount of 2 pieces;
if you wish, you can purchase adjustable legs for furniture, so that if necessary, you can install the cabinet on uneven floor. But this is optional.
Assembly of cabinet parts
The smallest chipboard sheet- 183x244 cm. 2.5 bedside tables of a given size and design will come out of it, so before starting work, it makes sense to cooperate with one of your friends or relatives so as not to store the remaining material, but at the same time share the costs.
From the foregoing, it is already quite clear how the cabinet parts can be assembled, it remains only to mention two important technical details:
When assembling a bedside table, it is imperative to control the correctness of the angles. All of them must be straight, otherwise, the structure will warp, and the facades will not open well.
The distance from the edge of the door to the middle of the holes for the hinges is 2.2 cm. This is true for our case when we have a 3.5 cm cutter and the corresponding hinges. Above and below, the distance from the edges is usually from 6 to 8 cm. If there are no design features, then how much is not so important. Next, you just need to attach the door with fixed hinges at the required height to the body and screw it with a fastener.

When the assembly work is completed, you can install the product in place and start using it.
If you have made facades from a material that does not have a decorative coating, then it is better to paint it. To do this, you must first degrease the surface, and then prime it. This operation is performed in order to achieve maximum adhesion of the paint to the surface of the bedside table.
After the primer coat is completely dry, you can start painting. Best to use acrylic paint on the water based. It dries quickly and doesn't smell like solvent based paint. It is better to apply the dye in two layers, and before applying the second, the first should be thoroughly dried.
For the main work, a large brush is suitable, and for painting hard-to-reach places - a small one. After the product is completely dry, you can fix the result with a layer of furniture varnish.
part 1
part 2
part 3
The bedside table is the main decoration of the bedroom. It can be of any shape, size, design, materials of manufacture and color scheme.
When choosing this piece of furniture, it is necessary to build on the general style of the room and your personal preferences.
Despite the huge assortment of finished furniture in stores, you can make a bedside table with your own hands. Thus, in your room you will have a product made from safe and environmentally friendly clean materials the size and design you need.
 A small bedside table is a versatile piece of furniture. It has become fashionable thanks to the French and the British, who like to read magazines in the morning or drink a cup of coffee.
Over time, they replaced the massive chests of drawers, and became the main decoration of the bedrooms.
There are no special requirements or any standards for the manufacture of this furniture. Its height is from 40 to 50 cm, and the width and length can be any.
According to the type of design, the bedside table is:
- stationary. Most often, the same models are installed on both sides of the bed, equipped with several drawers. You can put on them table lamp, put the phone log and other accessories;
- on wheels. Highly comfortable model which can be easily moved from place to place. Such models are suitable for small apartments;
- cabinets tables. Thanks to the presence of an additional cabinet and shelves, you can conveniently arrange personal items;
- folding. They represent practical furniture, which, if necessary, can be folded and hidden in a closet, saving free space in the bedroom.
- with a mirror. Such products can completely replace the dressing table, and harmoniously fit into any interior.

Advice: when choosing a table design, it is worth starting from general interior. For classic or retro styles it is worth making a product from natural wood rectangular or round shape. For neoclassic, neo-baroque or glamour, suitable table with a mirror surface.
Material selection
Do small table you can go to the bedroom from improvised materials:

Each material is unique in its own way. Which option to opt for is up to you.
Advice: make sure that the future piece of furniture fits harmoniously into the environment and is combined with other furniture.
Drawing
If you want to make a bedside table yourself, you need to take care of having a quality drawing. You can draw and calculate it yourself, you can use a special program on a computer or order it from a specialized company.

The latter option provides not only for the preparation of a competent sketch of the future table, but also for the manufacture of individual elements with the trimming of all sides. After that, you will only have to assemble the product in the correct sequence, and it will be completely ready for use.
Tools
If you have never dealt with making furniture with your own hands before, start with those materials that are easiest to process, for example, laminated chipboard. To create a beautiful and comfortable table, you will need the following: materials:

From tools you will need:
- screwdriver;
- jigsaw,
- building hair dryer;
- drill;
- hexagons.
How to make from chipboard?
If you have done the detailing of the product in the company, you can immediately start assembling. If you prefer to cut the details yourself, study the drawing carefully before you start cutting the chipboard. First cut out, then planks, legs and bottom shelf.
Attention: it is more convenient to cut parts with a jigsaw. In its absence, a wood file with fine teeth is suitable.
 Before assembling the table, you will need trim all the details with a special PVC film. This is best done with two people using a building hair dryer.
The assembly process of the product must be carried out in the following sequence:
- We take a cut tabletop and joining planks with screws on the corners of the table.
- Centered vertical bars install bottom shelf. To keep it strong, we strengthen it with confirmations.
- If you opted for a mobile model, fasten to the bottom previously purchased wheels. If the table will not move around the room, we fasten the legs to it.
Attention: the attachment points with self-tapping screws should be decorated. For this in construction stores special stickers for sale.
We have considered the simplest option for making a bedside table from chipboard. If you already have experience in manufacturing and assembling furniture items, you can opt for a more complex model made from a natural array.
How to make from solid wood?
To do this, prepare the following tools and materials:
- boards for crossbars and legs;
- thick boards;
- grinder;
- saw;
- drill;
- drills of the required diameter;
- glue;
- stain;
 It should be noted right away that natural wood furniture fits perfectly into classic motifs. It looks elegant and noble, and has high technical characteristics.
Before proceeding with the manufacture of individual elements of the product, make a preliminary sketch in which all the details and their dimensions will be written.
- We cut the boards to the right size.
- Shaping the table top using a jigsaw or saw.
- Sanding boards, which will serve as legs and crossbars.
- To give the effect of antiquity, we process all the details with a stain. After it dries, you can start assembling.
We collect the product in the following sequence:
- With glue and plug-in spikes attaching the crossbars to the tabletop.
- Fixing table legs.
- All holes for fasteners are drilled, and the parts are carefully processed with furniture glue.
This completes the assembly of the bedside table, and you can proceed to its finishing.
Finishing
 If the table was made from laminated chipboard, then in the additional decorative trim he doesn't need. But natural wood products can be painted or simply varnished.
In addition to giving the product a decorative effect, paints and varnishes prolong the life of the piece of furniture.
They protect him from high humidity, hits sun rays and other negative impacts.
A photo
The bedside table allows you to make any fantasy come true:


Useful video
If you are a fan unusual furniture be sure to watch the following video:
Conclusion
In conclusion, I would like to note that you can make an original and practical bedside table with your own hands in one evening. The main thing is to take a responsible approach to the workflow: prepare expendable materials and tools, draw a drawing, stock up on free time and an unlimited desire to build furniture yourself.
In contact with
It is interesting that the cabinet with their own hands- not easy cheap option furniture. This is a stylish addition to the interior of the room. Almost anyone can create a cabinet. But the original is already more difficult to make.
Let us dwell on the most popular types and the most simple products to create.
In terms of design and construction, do-it-yourself cabinets can be different.Here are a dozen consistently popular from the "bedside table" category.
- simple, by type small table, with obvious wood textures, here you can even use ordinary nails against a background of light natural wood in texture and it will look amazing.

If you have worked with wood before, you can make this unique and simple cabinet.
- Wooden pedestal made of thick timber, which has been cut and retained as a surface graceful coils of rings of old wood. All this is complemented by a durable dark metal corner, which serves as a fastener for the timber.

Lovely wooden cabinets that can be appreciated if placed in a room.
- Light wood bedside table with open shelves will always be relevant and emphasize the cleanliness in the interior.

It is worth approaching the design of bedside tables and tables with a special feeling.
- Simple nightstands with marvelous ornaments are open products, which the master flatteringly awarded with special decorative elements.

Various ornaments and shapes are used to create such interesting bedside tables.
- Openwork bedside tables made of metal look so charming that the metal ceases to be something bulky, on the contrary, it gives the product lightness and subtlety.

Interesting and custom design cabinets with metal legs will decorate the interior of the room.
- A cabinet with doors and an open shelf at the same time ordinary and boring with the help of paints and fabric turns into a retro version, this one will definitely not be thrown away.

Interesting and bright cabinets are decorated in various styles create an unforgettable calm atmosphere in the room.
- Drawers in antique style also look great indoors.

An interesting light pedestal is created in an incredible antique style with your own hands.
- There was a “gray horse”, but it became a black and white stylish bedside table.

Bright and unforgettable cabinet in black and white will be a great addition to the interior of the room.
- You can not rush to carry old wooden boxes to the trash, because after careful processing of this valuable ancient wood you can safely put them in a special configuration in place of the bedside table.

Vintage wooden boxes formed such a cute bedside table that will decorate any room.
- A brick block bedside table will be in perfect harmony with everything that you put on it. Juicy green flowers in pots on such a bedside table look especially elegant and modern.

Beautiful and non-standard pedestal is made of brick blocks.
You can list for a long time, but all the abundance of bedside tables, depending on the production technology, is divided into only three types:

FROM floor options everything is clear, these are ordinary products that are easy to move, and for stability they need legs or wheels. But the suspended one is practically a new variety. These products are attached to the ceiling with convenient way(it can be a rope or a special strong decorative chain). Wall options it is also easy to make cabinets with your own hands.

It is necessary to make a structure and fix it in the right place right in the wall with the help of long self-tapping screws.
You can find an affordable master class on how to make a bedside table from drawers. Try to create things yourself and at no extra cost.
Necessary materials
In order to make the simplest version of the bedside table, which would “fit” into any room, the following materials will come in handy:
- Several boxes (three small ones are enough);
- Means for wood processing (any available paints and varnishes);
- Flexible sanding block;
- Various elements for decoration;
- self-tapping screws;
- Screwdriver;
- Material for the top panel of the nightstand.

Materials for making bedside tables with your own hands.
Work process
Making a bedside table from drawers is easy and simple if you follow these simple steps:

Treatment
In order to be able to use old boxes as pedestals, it is necessary to improve the spoiled pieces of wood of each product.

Using a flexible sanding pad, you need to make a smooth and flat surface each side.
Then the surface after rubbing should be cleaned of excess sawdust and dust. Only after that, cover the tree with a stain, if you plan to use varnish as a decoration. Or cover with a special paint base for long-term storage tree.

After you can paint in the desired color.
Fastening elements
Drawers can be connected to each other using special self-tapping screws. It is also more reliable to attach a beam on the back side. We also fasten the beam with self-tapping screws.

We buy corners and fasteners in a furniture fittings store.
Top of the product
Any strong material can serve as a cover for an exclusive nightstand. We fix it with self-tapping screws. You can decorate at this stage ready product with the help of any decorative elements. Rhinestones, various beads, special adhesive elements can act as a decor. Popular in decoration, lace fabric can easily be used to create retro-style nightstands.
You can easily make such a bedside table with your own hands.
Final step: wall mounting
Now the moment has come when it will be possible to try it on indoors new furniture. We simply fix the finished product with long self-tapping screws, and you can call the hostess, who will decorate the cabinet with stylish gizmos and indoor flowers.

Pay special attention to the quality of each fastener.
If you have chosen a fairly massive material for the top of the product, then you should pay special attention to decent reinforcement. Since there will be nothing holding the cabinet down, it will be hung on the wall. The type of design is easy to change, just make legs for this furniture and it will already turn into wall product in the floor.

Try yourself as a master and do it without mistakes.
Today, do-it-yourself products are valued, and how much more you can think of!
VIDEO: Bedside tables in the interior.