How to lay a castle laminate. How to put a laminate in the apartment with your own hands. Step-by-step instructions - how to lay a laminate with your own hands
It replaced the expensive parquet, it looks no worse, and its advantages more than compensate for the shortcomings. If you decide to replace linoleum or old wood floors with a new trendy coating, it is better to hire professionals. But the masters of all trades have not yet been translated, and if you want to save money and do everything on your own, then tips on how to lay a laminate flooring will be useful for you.


Some hundred years ago, parquet made of natural wood was considered the most prestigious flooring. Putting it was difficult and expensive, but it looked rich and very beautiful. However, caring for him was not the easiest. From time to time the parquet had to be sanded, varnished or waxed. The tree dried out or swelled from temperature changes and high humidity, creaked and squirmed. In general, beautiful, expensive, but impractical in everyday life.
Laminate flooring is a success artificial imitation parquet. A laminate board consists of fiberboard or chipboard, several layers of paper that imitates wood, stone or other material, and a laminated film made from acrylic or melamine resin.
This film is best protection from dirt, moisture, and various damages. Therefore, when choosing a laminate, you should pay attention to the strength and resistance to mechanical damage, and only then to the color and pattern.
The main parameter of the laminate is its class, it is on it that the service life and cost of the material depend. It is denoted by a two-digit number, two indicates residential premises, three - commercial.
Coating classification and main parameters
The classification of the laminate is carried out according to several criteria.
By class
- 21. Out of production due to low performance quality.
- 22. Used in children's rooms and living rooms. Service life - 4 years.
- 23. Designed for residential areas with a lot of heavy and bulky furniture.
- 31. Can be used for conference rooms or other office space with light furniture. The service life will be 3-4 years, and if it is put in a residential area, it will increase to 12 years.
- 32. Medium load - offices, educational establishments, reception. In commercial premises it will last up to 5 years, in residential - at least 15.
- 33. Heavy load - gyms, restaurants, shops. In them, the laminate will last 6-8 years, and in apartments and houses - at least 24 years.
- 34. The highest quality, but also the most expensive. Possesses high strength, moisture resistance, has a backing and is characterized by long-term operation - it can serve your children and even grandchildren.
The most optimal in terms of price and quality ratio is the 32nd class, it is perfect for both offices and residential premises.
When choosing a laminate, also be guided by the reputation of the manufacturer and the product warranty. Many manufacturers give a guarantee for 20 years or more, if it is 5-10 years, then the quality is already being questioned.
By type of connections
According to the type of panel connection, laminate can be divided into:
- adhesive. The boards are connected using a special quick-drying glue. Its installation requires experience and professionalism. Such a laminate is moisture resistant, since the joints are firmly glued, but in case of any damage, the repair will be very difficult - in order to change one plank, you will have to remove and disturb the rest;
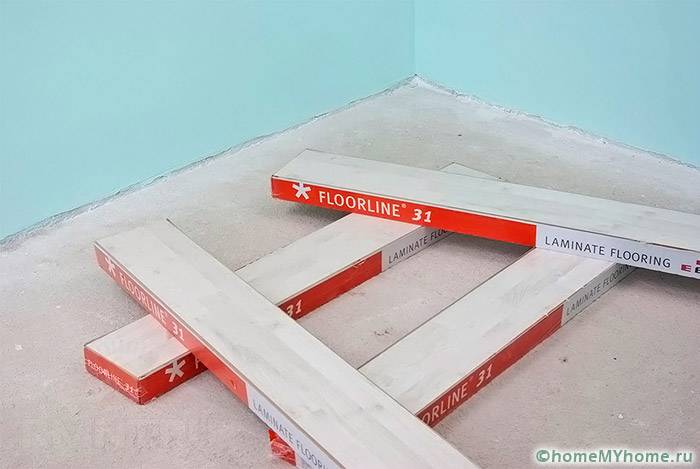
- castle. The panels are specially designed and do not require adhesive bond. Repairs are quick and easy, but joints may be subject to negative influence moisture during cleaning.

When buying a laminate, pay attention to the designations on the packaging, each picture indicates some additional advantage.
- Does not attract dust.
- No special care needed.
- Resistant to mechanical damage.
- Not combustible.
- Does not fade from sunlight.
- When cleaning, you can use household chemicals.
- Suitable for "warm floor".
Now you can pay attention to appearance boards. In addition to a variety of colors and imitations under natural materials, the laminate can be rectangular or chamfered.
A chamfer is a beveled part, it can run along the entire perimeter or only on the long side of the boards. Its merits include the following qualities.
- Durability.
- The gaps are practically invisible.
- Convenient for wet cleaning.
- Hides uneven floors.
- Doesn't deform.
- Almost indistinguishable from a natural wooden floor.
Whenever possible, always choose a beveled laminate.
Preparing for styling
After you have chosen and purchased a laminate, it must be laid for several days in the very room where it will be laid. It is necessary to give him the opportunity to "maturing", to adapt to the conditions of humidity and temperature. This is especially true if the laying will take place in the cold season and the laminate was brought in warm room from frost.
While the laminate is “resting”, carry out the necessary preparatory work.
Floor surface preparation
Carefully evaluate the surface of the old coating. It is possible that before laying the laminate correctly, additional steps will be required to align it. Sometimes it will be advisable to lay plywood from 8 mm or more on the old floor. chipboard in a checkerboard pattern - this will provide maximum alignment, additional insulation and a solid foundation.
from wood
Using a level, check how flat the horizontal surface is. On an area of 2 meters, differences of no more than two millimeters are permissible. If a allowable rate exceeded, then the grinder must be used.
Pay attention to the hardness of the floor. If the boards sag or creak, they must be strengthened or replaced. Inspect floors for fungus, rot, or mold.
Concrete
Irregularities in the concrete floor are eliminated with a screed using a self-leveling mixture. She needs to be aged for at least one and a half months, otherwise perspiration and condensate will lead to rotting of the laminate.
From linoleum
Such a coating does not require an additional substrate, it provides sufficient thermal and sound insulation. However, laminate should not be laid on too soft linoleum - it will sag and deform from the weight of the furniture.

How to calculate the amount of material? It depends on the installation method, we will use the most economical classic version. Determine the area of the room, for those who do not remember the basics of mathematics, multiply the length of the room by the width. If the length of the room is 4 m, and the width is 3, then the area will be equal to 12 square meters. Add 10% margin to the resulting area value.
When laying diagonally, you need to add a twenty percent margin, since the cost of cutting and fitting will be more than with straight laying.
You may need the following tools:
- roulette;
- square;
- hacksaw;
- jigsaw;
- perforator;
- mallet or hammer;
- marker.
Underlayment and waterproofing
Substrate - a material that is laid between the floor and the laminate, and serves as a hydro, heat and sound insulator. Before laying it, it is necessary to thoroughly clean the floor surface. As an economical option, you can use the usual polyethylene film. The strips should be overlapped and fastened with adhesive tape. Better insulation can be achieved with 10 mm thick plywood sheets.
Some laminate grades, such as 32, already have backing on the underside of the boards.
- Polyethylene foam. The most popular type is moisture resistant, inexpensive and easy to use. Among the shortcomings, poor shape keeping can be noted; over time, it will compact and sag. If stored incorrectly, the material will deform if exposed to direct sunlight.
- Cork. A good heat insulator, has shock-absorbing properties, keeps its shape, is durable in operation, but is prone to condensation. To avoid this, you need to buy cork backing with bitumen or rubber.
Types of fastening laminate to each other
There are several ways to fasten laminate panels.

Installation of such a laminate should be entrusted to professionals. Also keep in mind that despite reliable protection from moisture, the coating is fixed rigidly, and in case of dismantling, it will not be possible to reuse this laminate.
The essence of fastening consists in applying a special water-repellent glue to the ends of the boards and connecting them according to the “tongue-groove” scheme. Glue is applied along the entire length of the groove, inserted into the tongue and tapped with a mallet. Excess glue is immediately wiped off with a damp cloth.
Lock system
Laminate panels are equipped with latches for fastening between them. They fit very simply, you do not need professional skills, but an even coating is a prerequisite. If the floor is uneven, the locks may not snap into place, which means that gaps are formed.
When fixing, the lock must be knocked out with a hammer, so be careful not to damage the structure.
Such a system is best chosen for rooms with low traffic, as they wear out over time, become loose and lead to the formation of cracks.
Click system
In the Click system, laminate boards are equipped with collapsible locks. They are more difficult to install than the "Lock" system, but not by much. The locks are double, located at an angle of 45 degrees, are strong and reliable.
A flat floor surface in this case is not necessary, the slope can be 3 mm per running meter.
Of the advantages, one can note the ease of repair, since the laminate is easily dismantled and allows you to easily replace a damaged plank.
This system is more expensive, but its advantages compensate for the costs.

How to properly install laminate? First of all, measure the room and calculate the width of the very last plank of laminate that will be laid along the wall. If its width is less than five centimeters, then in the first and last row the panels must be sawn so that they are the same.
With temperature changes, the laminate expands or narrows. To prevent the surface from arching during expansion, a gap between the coating and the wall is required, it should be 10-15 mm. To ensure it, expansion wedges are installed, which are removed after the final laying.
Start the installation of the first row from the far left corner. Place the second and subsequent rows in the end lock of the previous one. The last row will be the hardest. The laminate board is cut to the required width and laid using a special lever with a hook. If it is not there, then you can use the crowbar.
Around the pipes
To frame pipe risers, the ends of the laminate must be trimmed. The easiest way to do this is if the pipe hits the joint between two panels. Otherwise, mark the notch with a paper template, and drill a few holes through which it will be easier to cut with a jigsaw. When attaching, you must use glue.
In doorways
Laying laminate flooring can be done in a number of ways.
- Cuts are made between the door slope and the floor, into which laminate boards are then inserted.
- The second option is more convenient, but it is used if the door leaf has not yet been installed. First, a laminate is laid, then doors are installed and slopes are made.
- Mark and cut the laminate so that it fits snugly with the slopes. This method is the most unprofessional, since at the slightest mistake cracks will be visible.
In order for the flooring to harmoniously pass from one room to another, an aluminum profile is attached to the threshold, which overlaps the joints.
Skirting board installation
Without a frame, the flooring will look unfinished. Skirting boards can be taken from plastic, wooden or cut from an MDF panel. For fastening, purchase special clamps, they will ensure a uniform fit of the panels to the floor.
It is necessary to start the installation of skirting boards from the corner of the room, moving clockwise. Between the two strips, install connecting elements and plugs, this way the gaps will hide.
Conclusion
As you can see, installing a laminate with your own hands is a simple process. If you follow all the recommendations, the new floor covering will serve you for a long time, and a wide range of color solutions will help you to successfully fit into your interior.
We will send the material to you by e-mail
The housing issue remains relevant for many. Home repairs and related problems worry everyone who plans to spend construction works on one's own. Today we will discuss some of the subtleties of laying laminate flooring, answer the question “how to lay laminate flooring correctly”, show you how to avoid the most common mistakes and reveal little professional secrets.
Coating happens different types and flowers
Laminate board is a very popular and common flooring material today. The collective name "laminate" (derived from the Latin "layered") combines the types of fiberboard used for finishing floors.
Today, the industry produces a wide variety of flooring. The right choice of material will allow you to forget about the floors for a long time and not worry about their condition. Let us briefly dwell on the layered structure of the floor in order to competently choose the most suitable material for us. The laminate has several layers, the top one is protective film carrying a decorative function at the same time.

In addition, this film has different wear resistance. It is this characteristic that parquet is divided into classes. And when we mentioned right choice, it was the wear of the coating that was meant. Surely, every person who has begun repairs wants to do the job efficiently and for a long time. For this you need to use quality material not Chinese knockoffs. Good material must have certain characteristics corresponding to its class.

Sex classification is carried out in accordance with European standard EN13329. He distinguishes two groups of use:
- home - code 2;
a. wear class 1
b. wear class 2
in. wear class 3
wear class 4
- commercial - code 3.
a. wear class 1 up to 4th
This is reflected in the coding of the material, the 1st digit is the area of application, and the 2nd is the abrasion class. So for residential apartments a board marked 21 or 22 is perfect, and for public spaces I need class 33-34. It is important to know this so that freshly laid floors do not turn into a worn board in six months.
Helpful advice! Before laying, it is not recommended to unpack the material for about 2-3 days, let the material rest in room temperature and humidity. Packs should not be opened, let them be in their original packaging. This will give good adaptation to local conditions.

Which one is better is hard to say. It depends on the conditions in which the coating is laid: humidity, subfloor (concrete or board), floor horizontalness, etc. It is considered optimal to listen to the recommendations of the seller of the original floor material, because a substrate with a specific set of properties is selected for a specific laminated board. It is important that the substrate perform the main functions:
- bactericidal;
- mold resistance;
- inedible for insects.

Related article:
When laying the underlay, it is important that its seams do not coincide with the seams of the board. It is better to lay the substrate sheet material in a checkerboard pattern, and fix masking tape. The substrate in the roll must be rolled out with an overlap on the walls, and the joints of the canvas must also be fastened with adhesive tape.
Important! Overlapped seams will create an uneven surface that will damage the finish.
In order not to make mistakes, watch the do-it-yourself laminate installation video below.
How to lay a laminate with your own hands: video process
How to lay a laminate with your own hands straight flooring
You can start laying laminated panels from any corner of the room, and preferably continue from the window to the door. First you need to calculate the required number of boards, for this you need to calculate the size of the extreme slats at opposite ends of the room, with a slat width of at least 50 mm. Start laying with a gap between the wall and the first plank of 10 mm, so that the indent does not “leave”, it is necessary to install a spacer. Below is a handy laminate calculator, which will allow you to calculate the required amount of this material for different laying methods:
With the question of how to lay a laminate with your own hands, everyone faces more people. This is due to the ever-increasing popularity of a beautiful shiny floor covering that fits into any design of a residential or non-residential area.
Laminate is produced not only different colors, but also of different quality and design. So, for example, there are several strength classes of a laminated board, each of which corresponds to a certain level of loads. The most low-strength and inexpensive laminate is suitable for laying in the bedroom. And for corridors, living rooms, kitchens, you should look at commercial options that can withstand a large operational load.

At the same time, in the bathroom, the laminate is not laid at all due to the moisture fear of the material. Despite the fact that the laminate is covered with a moisture-repellent layer, the joints are weakness this flooring. If a spilled water will remain on the surface of the boards for a long time and seep into the fastening points, this can lead to swelling and similar defects in the laminate.
If we consider the installation methods of laminate boards, then there are only two of them:
- lock type connection (on each individual board there are lock grooves and spikes of the “lock” or “click” type on four sides, assembly is done with one click);
- glued connection (more resistant to moisture and, with appropriate processing, suitable for kitchen area, but the installation is somewhat complicated).

Laying boards is usually done perpendicular to the window, but it is possible to lay diagonally in the room (angle of 45 or 30 degrees) to visually enlarge the space. Last option involves a greater consumption of material for arranging flooring.

Consider how to calculate and find out required amount material.

In order not to spend money on extra packs of laminate, or vice versa, not to run to the store in case of insufficient quantity, you should stock up on a tape measure and a calculator.
It is necessary to measure the dimensions of the entire room where it is planned to lay. It is necessary to take into account all the protrusions into the corridor, onto the balcony, etc. We find the area of \u200b\u200bthe room and each ledge / niche / column by multiplying the length and width found, taking into account the complexity of the layout of the room.
Note! Expansion joints should be taken into account - 15 mm along each wall where the laminate will be absent.
Now we need to determine the area of each laminate board. Most manufacturers produce laminate with dimensions of 1.26 x 0.185 m or 1.38 x 0.195 m. Accordingly, the area will be 0.2331 or 0.2691 square meters.
It remains only to divide the area of \u200b\u200bthe room by the area of \u200b\u200bthe panels you have chosen and round the result up to a whole number. For example, for a room of 10 m 2, 43 or 38 panels will be needed.
It remains only to find out how many laminate boards are in one package (usually 8 pieces) and divide the total number of panels needed by the number of boards contained in one package. Therefore, 43/8 \u003d 6 (we round up so that there is a margin for trimming and marriage) or 38/8 \u003d 5 packs.
Attention! Despite the apparent simplicity of laying laminate, it is recommended to purchase an additional package (for a large area of \u200b\u200bthe room - 2-3 packages) of the material. After all, without work experience, you can easily ruin the board by cutting it on the wrong side or damaging the mount. And if you are planning a diagonal laying, then it is recommended to increase the margin for trimming by 15-20%.
Got material? Don't rush to start styling! Let the laminate sit in a warm room for a day or two.
What will be needed for work?
To install the laminate with your own hands, you should stock up:
- with an electric jigsaw - sawing a laminate by hand is quite difficult;
- wedges - to save expansion joint between the coating and the wall;
- a small block of wood;
- mallet;
- hook / clamp - needed when laying end parts coatings;
- tape measure and square;
- tape;
- pencil;
- scissors.
Under the laminate, you will need a thermal and vapor barrier substrate, but in the case of laying panels on linoleum, you can neglect the use of this layer.
A water-repellent vinyl sealant (e.g. Moment or Click Guard) will be needed to increase the strength of the junction of click-on panels or for adhesive laminate flooring.
Preparing a rough floor covering for laminate
As all manufacturers state, the laying of the material should be carried out on a strictly horizontal floor surface without drops, potholes and other irregularities, each of which will negatively affect the durability of the laminate panels.
If you do not want the floor to diverge, creak, play in the future, level the floor with a screed or self-leveling mixture. You can not disassemble the wooden floor by covering all the joints of the boards with putty and processing grinder. Sufficiently smooth linoleum, carpet covering and even tile also can not be dismantled. AT without fail check the horizontal level with a building level.
How to lay laminate at a 45 degree angle (diagonally)
Such a laying scheme is rather complicated, but the room will look non-standard and very attractive.
- We lay the substrate
If the base of the floor is concrete, you can additionally prime it and remove dust. From other flat draft surfaces, it is enough to remove furniture, sweep out debris and dirt. The area of the roll or sheet substrate must correspond to the area of the room. The flooring is made without an overlap. We lay the sheet-type substrate according to the type of brickwork (with an offset). We fix the joints with tape.
- We start laying
We will lay the first board in the far left corner of the room. Using a square with sides of 45 degrees, we mark and cut the ends of the first panel with an electric jigsaw. If necessary, cut holes for the radiator pipes. We put wedges close to the wall (size 10-15 mm). Place the first board in the corner.
The next row of laminate floorboards will already consist of two boards. We mark and cut in such a way that the connection of the two floorboards of the second row is in the center of the first laid board. We cut off the edges, which will be adjacent to the wall, respectively at an angle of 45 degrees.
We connect the first and second rows:

- under the condition of a lock joint of the “lock” laminate, each board is inserted separately, the joint is made with the adjacent board of the row and the upper laid row of floorboards;
- rows of laminate panels with a click connection are mounted differently. First, the entire row of boards is joined at the ends and only after that it is inserted into the groove of the previous laid row of laminate.
Attention! It is necessary to observe a "run-up" of the order of 20-40 cm between the end seams of two adjacent rows of laminate.

Gradually move from the far left corner of the room towards the lower right. We insert triangular pieces of boards directly into the corners using a simple device - a hook, tapping it with a mallet for a tight connection.
Video - How to lay a laminate diagonally
How to lay laminate flooring the traditional way
This method is simple and more economical than the diagonal laying method, material consumption.

We prepare the surface and lay the substrate in accordance with the instructions described above. Next, open the first package and start laying.
Each laminate floorboard has ridges and grooves of the interlock. The first row of floorboards will be located close to the wall (taking into account the expansion gap), so it is necessary to turn the panel so that the grooves face the wall and the ridges face the inside of the room.
We collect the first row. After the first board is placed in one of the corners of the room, we take the second panel from the package and connect the ends of adjacent floorboards, immediately aligning the boards in a straight line. Thus, we join the boards, moving along the wall to the opposite corner. The last board of the row will need to be cut. We make measurements with a ruler or tape measure, then we mark the outer floorboard and cut it, not forgetting the compensation gap of 10-15 mm.
We start the second row with the piece of board remaining after cutting, then building up the row with whole floorboards. When the second row is laid, you should take a wooden block, a mallet and carefully tap it so that the locking joint snaps into place tightly.

To lay the last row, you will have to make a longitudinal cut of the boards. Be guided by the rule "measure seven times", not forgetting about the possible unevenness of the walls and the need to leave a gap between the boards and the wall.
Video - do-it-yourself laminate flooring
Apart from listed ways laying, there are also innovative methods of laying laminate flooring in a herringbone pattern and in other ways, similar to the technology of laying a parquet board. In addition, when laying, you can combine laminate in several shades, creating an exclusive floor covering for your interior.
Laminate is an excellent flooring that has become widespread in our country recently. Due to its appearance and ease of work with it , laminate has become the main competitor other coatings: parquet, linoleum, ceramic tiles. In order to properly lay the laminate, you need to familiarize yourself with the theoretical part, as well as have some skills in carrying out repair work.
When choosing this coating, everyone is guided not only by its appearance, but also by considerations of practicality. When planning the use of laminate, it is necessary to take into account its advantages and disadvantages.
Material advantages
The main advantages of this flooring include:

All this characterizes the laminate as universal coating . It is necessary to take into account both the pros and cons of the material. This will help avoid the need to re-lay the floors after 2-3 years.
The downsides of coverage are:

Very often, the choice of coating is carried out solely on an aesthetic basis. The spectacular floor, which is in the same concept as the walls and the interior, pleases the eye. But when choosing this material, it is necessary to take into account its compliance operating conditions. Which laminate to choose for the kitchen or bathroom, and how long it will retain its appearance - this will be indicated by its classification.
It is very important to determine the operating conditions of the flooring in advance. Depending on this, the material of one class or another is selected. The class indicates strength characteristics and is always displayed on the label. There are 3 classes of laminate:
- household (grade 21−23);
- commercial (31-33rd class);
- industrial (41−43 class).
 The household class is quite suitable for a bedroom or office. If you need to decide which laminate to choose for the kitchen or bathroom, experts recommend choosing a material from class 31 and above. . commercial laminate suitable for the hallway, where the floor is subject to rapid abrasion. Industrial grade is not used for flooring in the apartment.
Laminate selected according to the desired colors, texture, pattern. Accounted for it performance characteristics. With the huge selection that stores offer today, purchase desired material is not difficult. It should be ensured that the lamellas from different packs have the same shade.
Do not start work immediately after purchasing coverage. Laminate must be unpacked and left in the same room where the repair will be made for 2-3 days.
Installation of laminate flooring is not particularly difficult. No qualifications or sophisticated equipment required. It is enough to know the basic rules and some subtleties in order to qualitatively lay a laminate with your own hands, without resorting to the help of specialists.
Preparatory stage
Even before purchasing the material, it makes sense to assess the condition of the surface on which the new floor will be laid. If necessary, carry out restoration or repair work. In some cases, the "rough" floor will have to be completely replaced. Do not neglect this step. The surface must be flat and horizontal. Level difference of more than 2 mm per 1 running meter is unacceptable. Any irregularities, potholes, cracks can lead to deformation and even breakage. finished coating. The laminate will creak, there may be discrepancies in the joints.

Minor surface imperfections can be hidden under OSB sheets. This will give the finished floor additional thermal and sound insulation.
 A waterproofing layer is laid out on the prepared surface. It is especially relevant for "wet places" in the apartment - kitchen, bathroom, toilet. Film is best suited for this. waterproofing material
, but ordinary polyethylene can also be laid. It is spread with an overlap with an allowance of up to 15 cm and with an overlap on the walls of up to 20 cm. The canvases are fastened together with adhesive tape.
A waterproofing layer is laid out on the prepared surface. It is especially relevant for "wet places" in the apartment - kitchen, bathroom, toilet. Film is best suited for this. waterproofing material
, but ordinary polyethylene can also be laid. It is spread with an overlap with an allowance of up to 15 cm and with an overlap on the walls of up to 20 cm. The canvases are fastened together with adhesive tape.
A substrate is laid on the waterproofing layer. The underlay serves as an excellent shock absorber. It dampens sounds well and prolongs the life of the laminated coating. The backing is made of foamed polyethylene or polystyrene. Often a natural cork substrate is used. This is the ideal, albeit the most expensive option. Laying is carried out exclusively end-to-end, it is necessary to ensure that there are no overlaps and gaps. Between themselves, the strips are fastened with adhesive tape or adhesive tape. If the material has a foil layer, then when laying it should be on top.
Tool preparation
The necessary tool must be prepared in advance so as not to stop in the process of performing work. In the process of laying the laminate you will need:
- Wooden wedges - spacers 10-12 mm thick to maintain a gap between the laid laminate and the wall. Under the influence of humidity and temperature, the assembled floor can "walk". Gap prevent it from deforming. The number of wedges depends on the area of the room. They are set at intervals of 40-60 cm.
- Hacksaw or electric jigsaw. If there are pipes in the room, without electric jigsaw not enough. Cutting complex holes by hand is difficult and time consuming.
- Roulette, ruler, square.
- Pencil.
- Wooden or rubber mallet. You can use a regular, metal one, but then you will need to use a wooden gasket.
- A small mount or a special lever with a shoulder protruding upwards. Such a lever can be purchased at the store, or you can make it yourself from a metal strip. This tool will greatly facilitate the work in hard-to-reach places and along walls.
It is possible that an additional trip to the store in order to purchase essential tool, will not need.
It is customary to lay laminate flooring in long joints along the direction of natural light, that is, from the window. In this case with poke panels are almost invisible, as the light glides along them. They usually start work from the far corner, in order, from left to right. There are also transverse and diagonal laying laminate. It is used, as a rule, in design repairs to emphasize the structure of the surface of the flooring or beat the shape of the room.
Between themselves, the lamellas are laid out in various ways:
- Diagonally - the rows are shifted to the width of the board.
- "Brick wall" - the rows are shifted by ½ of the length of the lamella.
- "Deck" laying - the rows are shifted by 1/3 of the length of the lamella.
 Laminate manufacturers recommend the latter installation method. It is he who provides sufficient strength of the castle connection.
It is worthwhile to calculate the number of rows in advance and take into account that the last row should not be narrower than 10 cm. Otherwise, you need fold the first row. If pipes pass in the room, then the layout must be thought out in such a way that the joints of the lamellas are located in their locations. Laminate should not interfere with the opening and closing of doors. If necessary, the door leaf can be trimmed.
Regardless of the type of lock, a spike is cut off from all panels of the first row. After installation, the row is wedged from the wall.
There are two types of interlocking laminated panels - "Lock" and "Click". The remaining species are modifications of one of them.
 Installation of slats with locks "Lock". The lock connection has a spike and a groove in the same plane. Fixation occurs due to special protrusions and grooves. The connection of the side and end sides is carried out by tapping with a hammer until the connection is complete. If you use metal hammer without a lining, you can damage the lock spike. After wedging from the wall of the first row, the second is assembled. Each lamella is attached separately to the adjacent lamella and the previous row. In this case, the first and last lamella of the row is trimmed taking into account the displacement of the transverse seam. When installing the last row adjacent to the wall, a mount or a curved lever is indispensable.
Installation of slats with "Click" locks. The groove and spike of the interlock are in different planes. You can connect one lamella to another only at an angle. The lock snaps into place when the panels are rotated in one plane. The assembly process is much easier than with the "Lock" lock. We inserted the spike into the groove at an angle, then tilted the inserted panel until a characteristic click. The peculiarity of laying laminate with this type of lock is that the whole row is mounted first, and then it joins the previous row. This laminate does not need tapping. The joints are almost invisible.
"Lock" panels are gradually giving way to "Click" panels. Knowing how to properly lay a laminate with a modern lock can significantly reduce installation time. In addition, it is much easier to dismantle a laminate with a “Click” lock, while the lamellas retain their integrity and can be used again.
Completion of laying work
After complete installation of the laminated surface, you can remove the wedges from the walls and lay the plinth. It should be remembered that the plinth is attached to the wall, not to the floor. The places where the assembled surface adjoins other coatings (for example, tiles in working area in the kitchen) are covered with decorative overlays. The floor is ready, it does not require additional time for curing or drying. Can be entered furniture and start decorating.
Laminate is a beautiful and practical coating, which also saves a lot of effort, time and money during repairs. The main thing is to understand how to lay laminate and follow some rules and guidelines.
Such a practical and beautiful coating is very different simple installation. Laying, laminate is quite possible to carry out independently. And detailed step-by-step instructions, recommendations and videos of the main stages of installation will help in this matter.
Today, many homeowners choose laminate as their flooring and decide to do the installation themselves. It is worth saying that such zeal is quite understandable. There is really nothing complicated in installing lamellas, in comparison with - laying a laminate is extremely simple.

Even an unprepared person can handle laying a laminate
Difficulties may arise in preparatory stage when it is required to align the rough base with the highest quality, but you can do it on your own in this matter.
Material calculation
There are several ways to calculate the laminate, but none of them guarantees that there will be no residue at all. In any case, when laying, some part of the board will have to be cut and the trim will remain.
First calculation method.
First you need to know the area of \u200b\u200bthe room, multiply the width by the length. Let's say the length is 6 m, the width is 3.5 m, which means: 6 × 3.5 = 21 m2. The shape of the room is not always standard, for example, there is a niche, it must be considered separately: width - 0.5 m, length - 1.2 m. 0.5 × 1.2 = 0.6 m2. total area: 21+ 0.6=21.6 m2.

Carefully calculate the required amount of material before purchasing
The next step is to calculate the area of one laminate panel. The dimensions of the material must be known in advance. Take the panel width - 185 mm, length - 1260 mm. The area of one panel is 0.185×1.260=0.24 m2. Now you can find out how many boards you need in total, for this the area of \u200b\u200bthe room is divided by the area of \u200b\u200bthe panel: 21.6 / 0.24 \u003d 90 pieces.
Advice! To calculate the amount of laminate yourself, you can also use online calculators.
The second way to calculate
The second method is more reliable because it takes into account the amount of waste. If the length of the room is 6 m, and the length of the panel is 1.26 m, then 6 / 1.26 \u003d 5.23, this number of panels will fit along long wall. Same for width: 3.5/0, 85=18.9. In total, panels will be required: 5.23 × 18, 9 \u003d 98, 85 pcs, rounding up - 99 panels and 1 stock per hundred.

Measure the exact size of the room
We calculate in a similar way, the existing "appendix": 0.5 / 0.185 \u003d 2.7; 1.2/126=0.95. Total: 2.7 × 0.95 = 2.56. That is 3 panels. For the entire floor area you need: 99 + 1 + 3 = 104 pcs.
Requirements for a rough base for laminate
The laminate is laid on a flat, clean surface. Permissible height difference - no more than 2 mm per 1 m2. If the differences on the floor are higher than the norms specified in SNiP, it is likely that during operation the laminate locks will diverge and even break, dust and dirt will accumulate under the panel, cracks will gradually increase, and a creak will appear.
If the slope of the subfloor still takes place, but within the normal range, it is not recommended to install in these areas heavy cabinets or chests of drawers on four legs. Over time, their doors will not close well due to skew.

In order for the floor covering to serve for a long time, it is laid only on a leveled base.
Subfloor preparation
Regardless of the type of the main floor, it must be properly prepared and leveled. Concrete floors are cleared, cracks are filled cement-sand mortar, large exfoliated pieces are removed, the recess is closed.
Often there are foundations that are a dull confirmation of the negligence of the builders or show the unevenness of the slab in all its glory. These are easier to refill with a screed. It can be difficult to level the floor on your own without experience, so at this stage you can turn to specialists.

Most often, the basis for a laminate is a screed
If the differences in the subfloor do not exceed 5 cm, it is primed, Ceresit ST 17; 15 is suitable and poured with a self-leveling screed mixture.
Wooden floors are repaired, damaged parts are changed, and if a little height can be taken away, they are leveled with plywood. The caps of the fasteners are sunk into the flooring, the irregularities are polished with a machine.
Substrate selection and installation
Between the leveled rough base and the laminate flooring, a substrate must be laid. The main task of this layer is moisture absorption, sound insulation and additional smoothing of irregularities. Moisture insulation is needed to protect the panel, which is only covered with laminate on top, and is vulnerable at the base due to its porosity.
- Noise isolation, in turn, muffles the sounds when walking, especially important when laying in a floating way. Some substrates additionally have thermal insulation qualities, it is rational to cover them on the basement floors.
- Cork materials are usually chosen for bedrooms and children's rooms. They do not mold, perfectly cushion the step and have a long service life. Depending on the material, the substrate can be rubber-cork, bitumen-cork, cork chips or cork cloth. For rooms with high humidity it is better to give preference to a rubber-cork substrate or material impregnated with bitumen.

There must be a special substrate between the laminate and the base
- Expanded polypropylene is moisture-resistant, hides small irregularities in the base and has good ventilation, but under the influence of static load, for example, heavy furniture wears out quickly. Under pressure, its thickness becomes uneven, and this reduces the quality characteristics.
- Expanded polystyrene is officially approved by laminate manufacturers. This material is durable, stable, withstands the weight of a serious load, does not allow moisture to pass through and provides thermal insulation. The disadvantages include its sensitivity to all floor irregularities, loss of properties after 6 years.

Cork base for laminate
- Coniferous substrate is sold in the form of tiles, technical parameters resembles natural cork.
- The foil substrate is valued for its thermal effect, it can be one-sided and two-sided. It is more often used if the laminated board is laid on water-heated floors.
- Polyethylene film is used very rarely. Literally after 3-4 years, it loses its properties. On sale, this material is as difficult to find as low-quality laminate of the 21st class. Its main plus in cheapness.
The thickness of the substrate depends on the thickness of the laminate. In residential premises, it is recommended to lay panels at least 9 mm thick, a 3 mm waterproofing substrate is laid under them. For a thicker laminate, a substrate of 4 and 5 mm is selected.

Coniferous substrate under the laminate
The substrate is not attached to the rough base, but lies freely pressed by the weight of the floor, occasionally glued. Strips or tiles are laid in a joint with or without an overlap on the wall. At the joints they are connected with adhesive tape. Only polyethylene is overlapped by 20 cm.
Layout
Before laying laminate flooring, a preliminary layout planning is carried out, following a few important rules.
- AT flooring there should be no cross joints. The layout should remind brickwork, where the butt weld rests against the middle of the panel of the previous row. This option is the most reliable, but requires a lot of trimming, so most craftsmen shift the seam by the length of the segment that remains after laying the last die of the previous row, if its length is at least 30 cm.
- The direction of the panel is longitudinal, transverse or diagonal. The latter method is the most difficult to implement and requires more material.

Laminate installation
- The minimum thickness of trim near the wall along the grain line is 5 cm.
- It is recommended to draw a simple plan by hand on a scale and outline the future layout.
- The simplest and most economical scheme is that the trimming from the last panel of the stacked row is laid as the initial element of the next row. Docking of panels turns out to be chaotic.
- Joints are best placed along the stream of light.
Advice! If there is a small residue in the width, it can be blocked by stepping back from the wall 1-1.5 cm, which will be covered with a plinth.
Panel fixing methods
Panel assembly methods differ slightly depending on the type of factory locks, the quality of which determines the appearance and durability of the entire coating.
- Lock-lock is the most economical and imperfect connection. In fact, this is the good old technology - "thorn-groove". Laying lamellas involves hammering a spike into a groove with a wooden mallet.
- Click-lock is already a new generation of connections, a little more expensive, but more perfect. It allows you to disassemble and assemble the coating several times. Click is a latch lock. One part is inserted into the other at an angle of 45 degrees and snaps into place. No need to score and worry.

Scheme: methods of joining laminate plates
- An aluminum lock is the strongest and most reliable option. aluminum profiles inserted into the thickness of the board, which helps to avoid any deformation during installation.
- 2-Lock (5G) combines principles lock systems Click and Lock. By long side the laminate is laid in the corner method, and on the short one it lies on top and snaps into place.
Laminate installation instructions
Laying laminate is recommended in a heated room at a temperature of 15-30 ° C, without sudden changes and humidity from 35 to 65%. Before laying, the material is left in the room where it will be laid for two days to get used to the given conditions. It is better to start laying from the far left corner from the entrance.
Advice! You will have to cut the laminate in any case, so that the joint is beautiful, it is better to use a jigsaw or end saw. The hacksaw damages the decorative layer. On the cut line, you can stick adhesive tape.
Marking is carried out on the floor of the room covered with a substrate. The first panel is laid with a comb against the wall with a lock on itself. Spacer wedges are installed along the perimeter of the panel at the junction with the wall, which form a damper gap.

Laminate installation
You can purchase special wedges for laminate, use crosses for or pieces of drywall. Mounting dimensions should be the same, about 1-1.5 cm.
The next panel is connected from the end. After snapping the laminate boards into place, a perfect plane should form, with no protrusions, steps or gaps. If necessary, gently knock to each other. The entire row is laid along the wall, after which they move on to the next one. Etc. Very clearly the installation steps are shown in the video.
Installing laminate flooring in doorways
Laying laminate in doorway, it is recommended to file the jamb a little at floor level, so that the panel enters a few millimeters into the cut made. The gap between the jamb and the lamella is filled with sealant. For the panel that will be installed in the doorway, you will need to make an exact template. Door leaf removed, shortened and hung back on the loops.

Installing laminate flooring in a doorway
How to lay a board under a radiator
There are situations when the edge board needs to be brought under the casing or radiator, but it is not possible to raise it to such a height that it enters the lock. Will have to tweak it a bit. From below, the protruding edge is carefully cut off. Of course, this affects the strength of the joint, so the joint is additionally coated with glue.
How to cut a panel for pipes
Often the pipes from the radiator in apartments go to the floor, and in order to beautifully arrange this passage, you will have to cut the laminate correctly. Taking into account the indentation from the wall, mark the center point of the pipe on the board and draw a circle with a diameter slightly larger than the pipe itself. When the hole is ready, draw a line that, cutting the laminate across, will run along the center of the cut hole. You will get two plates. One is inserted between the wall and the pipe, the other is attached to it and glued.

Scheme: cutting laminate slabs for pipes
Features of laying laminate diagonally
Laying diagonally also starts from the opposite corner to the entrance, in which the line is pulled strictly at 45 ° from opposite walls. On it it will be possible to navigate and lay out the layout. Take the first strip, cut the edges at a 45° angle and lay it on the corner.

Diagonal laminate installation
Be sure to install wedges. The next row will be 2 boards. Their outer edges are cut at 45°, the ends are connected in the middle of the previous panel. Installation should be avoided 3 edged boards in the second row, otherwise the floor may subsequently walk a little, a run at the joints will appear.
Important! It is worth remembering that the laminate is a floating coating that periodically expands or shrinks, so a deformation seam must be left around the entire perimeter of the room.
Features of laying adhesive laminate flooring
The process of laying a laminate with gluing joints is actually no different from a conventional lock joint. The groove and protrusion along the entire length are coated with water-repellent glue and the boards are connected into a lock. The remaining glue is wiped off with a cloth or sponge.

Bonding laminate joints
When the laying of the laminate is completed, the wedges are removed around the entire perimeter, the protruding edges of the substrate are cut off, leaving only 1-2 cm, and the plinth is hung. Paul is ready.
An easy way to lay laminate: video
Do-it-yourself laminate laying: photo


