Wall decoration with fabric. Drapery and wall upholstery with fabric: royal chic in a new way
In the interior, it is important to take into account every detail, think over the composition, thematic combination of elements. Unity of style can be achieved when decorating walls various types fabrics. Fashion tends to come back, and it's not just about clothes. Interior design trends are also cyclical. Today, people strive to be able to do without outside help Therefore, do-it-yourself wall decoration with fabric is gaining popularity.
The technology of decorating a room with atypical materials has a number of advantages. In terms of style, it looks exclusive, expensive and luxurious. There are many photos on the network in which the interior is made in one color or stylistic solution. The functional part is distinguished by additional sound insulation, allowing the walls to breathe.
Considering installation and maintenance, there are additional benefits, such as:
- ease of care;
- ease of installation;
- ecological purity.
In addition, there is no need for complex surface preparation for finishing. High-quality fabric, additionally treated with a water-repellent and flame retardant composition, is not cheap. This is perhaps the only drawback. To get a good result, you have to spend money. The result is a chic room with original design. Indeed, the fabric is able to ennoble any room. Unlike paper, it adds coziness and warmth to the interior.
To decorate the room with textiles, the following material is used:
- velvet;
- tapestry;
- brocade;
- silk.

During the Renaissance, such fabrics could only be found in noble houses. Now they are classified as expensive, they are used to make clothes, upholstery of high-class furniture, and tapestry curtains are considered an indicator of prosperity. Jute, jacquard or sisal are suitable for wall cladding with natural textiles. Synthetic fabrics such as polyester, polyacryl, viscose do not fade, unlike natural ones, they are durable and absorb dust and odor worse.
Particular attention should be paid to how the material becomes in the sun. Drawing and color should not tire the eyesight. good example for decoration, Belgian fabrics can be called, which are easy to apply to walls, they do not require odorless special care. Their jacquard pattern has a Teflon coating, is resistant to moisture and scratches. Swiss textiles with a pattern applied with a laser look rich and beautiful on the walls.
Finishing methods
There are many video reviews on the Internet for choosing the type of installation and material. Initially, only one method of attaching textiles to walls and ceilings was known. The material was stretched with a continuous web over the entire width. Then more convenient methods appeared.
In the interior, you can use three options for decorating:
- drapery;
- gluing;
- stretch.

Each of them is relevant in specific conditions. If you plan to keep the interior for several years, then sticking is chosen. Rooms such as the dining room, kitchen, restroom are not recommended to be finished with textiles. It absorbs odors, and despite the impregnation, it attracts dust, which is then not so easy to clean.
Stretching
Stretching the fabric under the rail is probably the most difficult way.
The canvas must be fixed with nails and the fabric must be stretched well in the upper corner. We mount a decorative rail on the stretched fabric, fixing it with self-tapping screws with countersunk heads. Then we carry out the same work in the lower part of the wall. In order for the fabric to look good, it is necessary to cut the corners correctly. You can stretch the fabric on the rail, after attaching the device and insulating the wall thin layer foam. The design is connected with furniture brackets from top to bottom, then along the edges.
Sticking
The method is based on a series simple actions. In a specialized store, you need to choose the option that suits the interior. Often, textile trim sets the mood for the entire design, reflecting on curtains, furniture upholstery and small things. The material has a fabric surface located on an adhesive basis, rolled up like wallpaper.

It is clear that without finishing works not enough. We cover the wall with furniture or parquet varnish. Due to the fact that it dries for a long time, irregularities can be corrected. We take the prepared piece of fabric, smoothing it with our hands, warm it up with an iron and stick it on, gradually smoothing out the air bubbles.
Drapery
it special kind design, consisting of key elements. The interior composition is complemented by a beautifully arranged fabric on the wall. There is no need to purchase a large amount of material, to prepare the base. In addition, the element can be deleted at any time.
Preparation and step by step instructions
You need to prepare the base first. First of all, you need to wash the painted walls or remove the old finish. If there are cracks in the wall, holes from nails and staples, it is recommended to putty them. Watch for the absence of differences in the structure of the base. This effect can be achieved in three stages:
- primer (dries 5-6 hours);
- leveling putty (dries 24-40 hours);
- finishing putty, processing sandpaper.

Drywall walls, plywood and chipboard partitions also require preparation.
Here it is necessary to seal the seams and attachment points. Before gluing the fabric, be sure to check for shrinkage. To do this, cut off a small piece, wet it and dry it. The process itself is called decathing. Next, measure the textiles from the ceiling to the floor, cut into strips for ease of gluing.
When stretched on a rail, the strips, on the contrary, need to be sewn with a linen seam, in order to achieve a width equal to the wall. The glued part is approximately 1 meter. A strip of material is applied to it and gradually smoothed out. Then, with the help of nails, the rails are quickly installed. Nails can be removed after complete drying. Experts recommend trimming with nitro-lacquer.
Wall decoration with fabric can be done in four ways: stretching the material, gluing, upholstery and surface draping. Any of them improves sound insulation, allows you to hide wall defects and helps keep the heat in the room.
It is permissible to use any fabric as a finishing material for walls, however, it is desirable that it be sufficiently dense. Synthetic fabrics have proven themselves well - durable, easy to work with and do not require special care.
Another possible variant- fabrics used for furniture upholstery. They are durable, resistant to mechanical damage, moisture resistant. For drapery, you need a light and well-shaped material.
You can choose the material and method of finishing, having previously studied the photo various interiors using this approach.
It is important to remember that if the room has high humidity, this method of wall decoration will not work.
Stretching the fabric
The technology for decorating walls with fabric is quite simple.
You will need:
- wooden slats;
- dowels and screws;
- building level (hydraulic level);
- nails and hammer;
- tape measure, pencil;
- screwdriver
Between the wall and the stretched textile is formed free space, equal to the height of the used rail. If necessary, insulation can be placed in this air pocket or soundproofing material. To fix the material, a special glue is used, while the joints are carefully sealed so that it does not leak onto the fabric. 
When choosing a material, the properties of textiles are taken into account - for light ones, a heater of the same color is chosen, the dark one will shine through.
Progress
Along the entire perimeter of the room, rail mounting lines are drawn using a pencil, tape measure and building level. The lines should be located at the same height from the floor and ceiling, while the distance between them should also be maintained so that the fixed fabric is stretched evenly and there are no distortions.
With the help of dowels and self-tapping screws, wooden slats are fixed on the marked line.
 For further action two pairs of hands are required. The fabric must be stretched evenly and tightly enough. At the points of attachment to the rails, it is tucked in twice to prevent breaks. They are nailed with the help of small carnations, a piece of skin is preliminarily placed under each. Another possible way fixings - on furniture staples.
On the final stage the places of attachment of textiles to the rails are covered with a plinth or decorative strips.
Sticking fabric
Sticking - the most popular, but enough laborious process.
Surface preparation
Before you start decorating the walls with a fabric with your own hands, you need to prepare the surfaces. 
This will require:
- putty knife;
- plaster;
- paper or newspapers;
- sandpaper;
- nitro varnish (for stains on the walls, if any).
Operating procedure:
1. Using a spatula, the surface of the wall is cleaned.
2. All irregularities and recesses are sealed with a plaster solution. Wait until it dries completely.
3. The entire surface of the wall is sealed with paper or newspapers. When the glue dries, sand the wall using sandpaper.
4. If after all these operations there are stains on the wall, they are treated with nitro-lacquer so that they do not appear on the fabric. 
Fabric preparation
Unlike wallpaper, textiles are glued to the wall not in cuts, but in one piece. It is advisable to choose the widest possible cut so that there are as few joints as possible. If this is not possible, then the wall is measured, the strips of material are sewn together, leaving a margin at the top and bottom. The seams are ironed from the wrong side, the finished cut is rolled up.
The material is tested for shrinkage - a small flap is measured, immersed in water, and then dried. They measure it again, and if its dimensions have decreased, then the entire cut prepared for work is soaked, dried and ironed. 
Operating procedure
Furniture glue can be applied immediately to the entire surface of the wall, other adhesives are applied at intervals, on separate sections so that it doesn't dry out.
Work begins with the upper section of the wall. The fabric is applied and stretched. This operation will require 2 people - one will hold the roll, the second will stick finishing material and carefully smooth it with a roller so that it lies evenly and tightly.
The tissue is temporarily fixed with small nails. Align and at the same time fix by ironing with an iron, driving the device from top to bottom. When heated, the glue will harden, securely fixing the textiles on the wall. It is required to iron the entire surface of the wall several times so that there are no missed sections.
When the work is finished, the excess canvas on the ceiling and near the floor is carefully cut off, trying not to fray the edge of the material. Places of cuts are additionally coated with glue.
The process of complete solidification of the glue takes about 3 days. After this period, the fabric is carefully examined, if air bubbles are visible on the surface, they are carefully pierced and ironed.
The final stage is the design of the edges with molding, plinth or baguette. 
Drapery
Draping the walls with fabric will require the involvement of an assistant.
For finishing, you will need a large canvas, the width of which is significantly larger than the perimeter of the room - this is necessary to create folds.
The work does not involve fixing the fabric over the entire surface of the wall, most often the textile is fixed on a bar located near the ceiling, and below it falls freely.
Materials and tools that will be required for drapery:

Wall preparation
Before draping the wall with textiles, the wall surface is cleaned with a spatula, wiped with a damp cloth to remove dust. Large and small cracks are sealed with plaster. After the solution dries, they pass over the surface with sandpaper, then remove the dust again.
Fabric preparation
In order for the material to lie in even, identical folds around the entire perimeter of the room, you need to prepare it. The easiest way is to mark the folds with pins, and then sew the fabric along the entire length along the top edge. In this case, a ready-to-work canvas with already completed folds is obtained. Forming them at the stage of nailing the fabric to the wall is much more difficult, and the end result may not be satisfying.
Operating procedure
Using a level, draw a line around the entire perimeter of the room on which the rail will be installed.
The canvas is folded along the edge, fixed along the intended line with the help of carnations. Rails are fixed on top of the fixed textiles with the help of self-tapping screws and a screwdriver. Fasteners are placed no further than 30 cm from each other.
After mounting the rails around the entire perimeter of the room, they proceed to fixing the fabric from below. To understand all the intricacies of the work, it is recommended to watch a video in which the process is filmed in detail. 
Upholstery
To upholster the walls with a fabric carriage tie, you will first need to install special frame. It will not be easy to cope with the task on your own, but if you wish, this can also be done.
Upholstery will require a dense and durable fabric that is breathable and resistant to sunlight.
You will also need to create a sketch with which you can calculate the amount of material and fastening ties. The width of the cut should be greater than the height of the wall (about 10 cm). The screed can be made in the form of squares or rhombuses, a specific pattern is achieved by the location of the fastening strips (vertically or diagonally).
The fastener itself can be made of the same fabric as the upholstery, or it can be contrasting. 
Operating procedure:
- The surface of the wall is pasted over with heat and sound insulation. The degree of relief will depend on the thickness of the layer finished finish- the larger the layer, the more spectacular the walls will look.
- Textile material is marked along the entire length (marks are made in which the fabric will be fixed with nails to the wall). It is impossible to make mistakes during work - each puncture will be noticeable, it cannot be removed.
- An assistant is used for work. The upper edge of the canvas is glued along the ceiling. Nails are driven into the marked places, acting from top to bottom, placing the material evenly, making sure that there are no distortions.
Upholstery or gluing walls with fabric - spectacular way room finishing. Using this method, it is easy to mask the flaws of walls and communications. However, it is worth remembering that a large amount of dust accumulates on the textile surface, so it is necessary to take care of it regularly: vacuum and remove stains in a timely manner.
Finishing wall surfaces with fabric - original solution for interior design. The fabric on the walls looks aesthetically pleasing, creates a special cosiness in the room, and when choosing a certain type of material, it can add refined and aristocratic accents to the design. It is quite possible to cope with the work of creating a fabric coating on the walls on your own - but for this you should get acquainted with some of the intricacies of the process.
The article will give the reader useful tips on the choice of fabric for wall decoration and will also talk about the four most popular and simple methods of decoration.
How to choose the right fabric for finishing the walls?
The key point in the process of preparing for work will be the competent choice of fabric. In principle, any kind of woven fabric can be used to decorate wall surfaces, but it is most convenient and easiest to work with synthetic fabrics. They have sufficient strength, stretch well, do not wrinkle in the future, during the operation of the coating - they will not require complex and specific care.
You can also use and upholstery, that is, those types of fabrics that are used for upholstery upholstered furniture. They are characterized by increased wear resistance, resistance to moisture and mechanical damage. Another plus of upholstery fabrics is that they keep their shape perfectly and therefore it will be easy to use them to create a beautiful drapery effect on the walls of the room.
There are many ways to create a fabric covering on wall surfaces: stretching, gluing, drapery and upholstery. Below we will examine in detail the features of each technology and give step by step instructions for carrying out work.
Pull method
Stretching is one of the easiest ways to finish walls with fabric. First you need to prepare a set of tools, without which you can not do in the process of work. You will need:
- Thin slats (wood);
- Fasteners, which can be used as self-tapping screws or dowels;
- Level;
- A hammer;
- Ordinary nails;
- Marking pencil;
- Screwdriver.

The work is carried out in several main stages:
- Marking is done on all wall surfaces of the room. The marking lines will indicate the place of installation of the rails and it is extremely important that they are located at the same distance from the floor and from the ceiling. The accuracy of the markup is easy to check with a building level.
- According to the marking, wooden slats are fixed. The element is fixed to the base with self-tapping screws.
- It is best to stretch the fabric along the rails with an assistant. It is important to pull the material with force and be sure to pull it evenly. In places where the fabric is attached to the rails, the fabric must be folded 2-3 times in order to prevent the formation of tears in the future. The fabric is fastened to the slats with studs, be sure to put a thin piece of dense fabric, suede, goatskin into the fixation area. You can also nail the fabric to the slats with staples used in the upholstery of upholstered furniture.
The attachment points are masked with decorative plinths.
You will have free space between the walls and the fixed fabric. If desired and if necessary, this impromptu “pocket” can be filled with insulation or soundproofing, which are fixed to the wall base with glue. Work should be done with care to prevent the adhesive from getting on the finished fabric finish. It is also important to choose a heater by color, otherwise its layer will shine through the fabric.
Sticking fabric
Sticking fabric on the walls is a laborious process and requires mandatory pre-training surfaces. For preparatory phase work, you need to prepare the following tools and materials in advance:
- Putty knife;
- Plaster mortar;
- Sandpaper;
- Thick paper or old newspapers.
- Solution for removing stains and streaks (if there are any on the base)
First you need to completely clean the walls of the old coating with a spatula, and then repair all existing defects in the base with plaster. After plastering, the surface is allowed to dry, and then pasted over with paper. After the walls are completely dry, they are sanded with sandpaper. If stains or stains remain from the glue, they are cleaned with a special solution.

The fabric on the walls will be glued in one piece and therefore it is not necessary to cut it into strips. If the width of the fabric is insufficient, separate pieces are sewn together and carefully ironed so that there are no folds and protruding seams on the cuts.
When sticking fabric on walls - it is important to check the textile for the degree of shrinkage. To do this, a small piece of cloth is soaked for some time in water and dried. If it shrinks, the entire canvas will have to be soaked.
- The glue is not applied to the fabric, but to the wall surface. To work with textiles, it is best to use furniture or casein adhesives. Carefully read the instructions for a specific type of glue, since some types can process the entire wall at once, while other subspecies are applied in stages due to fast adhesion to the base.
- The sticker of the material is always made from the upper sections of the wall. Textiles must be applied to the surface and evenly stretched, and then smoothed with a roller so that there are no air bubbles and folds.
- The material must be temporarily fixed with small nails, and then leveled again. It is most convenient to do this with a heated iron, since it will straighten the folds on the fabric, and heat ensures fast drying of the adhesive. In order not to miss a single section, they pass along the wall with an iron several times.
After finishing work on the sticker and smoothing the coating, the excess fabric at the top and bottom is cut off, and the edges are framed with baguettes, skirting boards or moldings.
The glue will dry for about three days, after which the quality of the work is assessed. If air bubbles still remain, they must be carefully pierced and the puncture area ironed with a warm iron.
Drapery
Wall drapery is a great opportunity to get a coating of amazing beauty, but you can’t do without an assistant in the work. It is also important to consider that for this finishing option, it will be necessary to initially purchase a textile fabric with a width greater than the perimeter of the room. Otherwise, creating spectacular folds will not work.
When draping surfaces, there is no need to fasten the fabric over the entire wall area. It will be enough to strengthen the matter at the top, on a special bar near the ceiling, and below it should fall freely.
Before you start attaching the fabric to the planks near the ceiling, it is important to properly prepare the walls. Their surface must be cleaned of dirt and dust, repair defects in the base with putty or plaster mortar. After plastering works walls are sanded.
To get the effect of beautiful folds, you will have to spend time preparing the fabric for work. The folds on the piece of fabric are made with pins, the top of the piece is stitched in the right way, and only then the canvas can be fixed on the slats. It will be much more difficult to create folds on an already nailed fabric, and at the same time, the final result of the work may not be too aesthetic.
The fabric is fastened to the rails with self-tapping screws - at the top and bottom, first at the ceiling and only then at the base of the floor.
Upholstery
Another method of creating a fabric finish on wall surfaces is upholstery or carriage coupler. It is difficult to call the technology of work simple, since it will require the preliminary creation of a frame on the walls. It is also worth considering that only fabrics of increased density and strength are suitable for upholstery, but at the same time “breathable” and withstand the action of negative external factors.

In order to avoid mistakes in work and correctly calculate the amount of material, it will be useful to create a sketch in advance. The piece of fabric in terms of height should be about ten centimeters higher than the wall, and the screed on the material is carried out with special fastening strips. Arranging them in a certain way, you can get a square or diamond-shaped pattern. The stripes can be sewn from the same material used as the cover, or you can choose a contrasting fabric.
Noise and sound insulation of surfaces is carried out before the upholstery stage, then markings are made on the walls - the places of fabric fixation are determined. Markings must be done carefully, since upholstery errors are clearly visible and to correct them, you will have to remove the fabric from the walls, and start work again.
Upholstering the walls begins from the upper sections of the ceiling; for this, the fabric is glued along the ceiling base. Then nails are hammered into the pre-marked areas and the fabric is straightened and smoothed so that there are no distortions and irregularities.
Wall decoration with fabric is not only a way to create spectacular interior indoors, this is a great opportunity to mask some surface defects, hide communications. The finishing process is laborious, but subject to correct execution all stages of work - you will get an aesthetic and durable result!
Wall decoration is usually the final stage of the construction works. In such a situation, even at the design stage, a color and stylistic solution is determined, materials are selected, and the necessary blanks are made. If we are talking about the need to change the old interior that has become boring for several years, or to transform appearance one or more walls without large-scale repair activities, you can use creative ideas and independently introduce original notes into the decorative solution of the room. About how to decorate the walls with your own hands, based on fashion trends, later in our article.
Wall decor with improvised materials
If you have the skills to work with scissors and paints, quickly DIY wall decor can be from ordinary items.
Toilet paper roll decor
- By collecting the cardboard sleeves remaining after use toilet paper, they are slightly flattened and cut into equal parts, each of which will later become a flower petal.
- Now, from the cut pieces, you need to make a single composition. To do this, all the elements are glued together with side planes, then they are given the necessary shape and painted in desired color. Elegant paper wall decor ready.


It's important to know! Unusual wall decoration design in a classic house is always popular. Even with minimal financial investment, you can recreate a noble atmosphere in the interior or hallway by making cardboard bricks and painting them in the desired color.

Texture painting of walls
Textured wall painting is used to give them relief and create a bright accent in the interior. During the work, it is possible to use various technologies with which you can transform any room in accordance with your taste.
When using texture painting technology, the surface does not need to be leveled, thus, replacement of a certain section of the wall is possible at any stage.
Below are practical advice, which will help to quickly and efficiently decorate the walls, while obtaining an excellent result.
Preparatory work
For getting best result before starting work, the walls are plastered one layer good are cleared, then covered with paint emulsion based. Texture paint is applied to the surface in three ways.
- The wet method is using a cloth.
- Dry method - using a brush.
- And the last way is the knurling technology of “rolling” the texture fabric along the wall or ceiling in the same direction.

Texture painting technology:
- To begin with, the walls are cleaned of the old paint composition, all cracks are sealed, the place of puttying is polished, after which the surface is covered with a special primer.
- Further, to create a tint tone, applied base layer paints. Usually acrylic paint is used for this in light colors (light gray, beige or white). The paint is applied with a conventional roller, which can be purchased at any hardware store.
- After applying, you need to wait for the paint to set and only then proceed to create picturesque textures.
- The glaze is applied to the wall with a fly brush, pressing the tips of the bristles into the fresh coating, so that a clear structural mark remains on the surface. In order for the deep drawing not to be smeared, it is recommended to clean the bristles of the brush as often as possible.
- Depending on preferences, the brush can be replaced with a fabric, the fibrous structure of which will change the texture of the wall, giving it an interesting and unpredictable pattern. Particular attention should be paid to the corners, they must be perfectly even. For butt finishing, it is best to use small brushes.
- After the glaze is completely dry, it is necessary to apply varnish in several layers or cover the surface with a transparent glaze without texture processing. Processing the strip from floor to ceiling in one step, it is recommended to do it together.


Performing this type of work is available even to amateurs, but to achieve an excellent result, perseverance and patience will be required.
Wall photo gallery
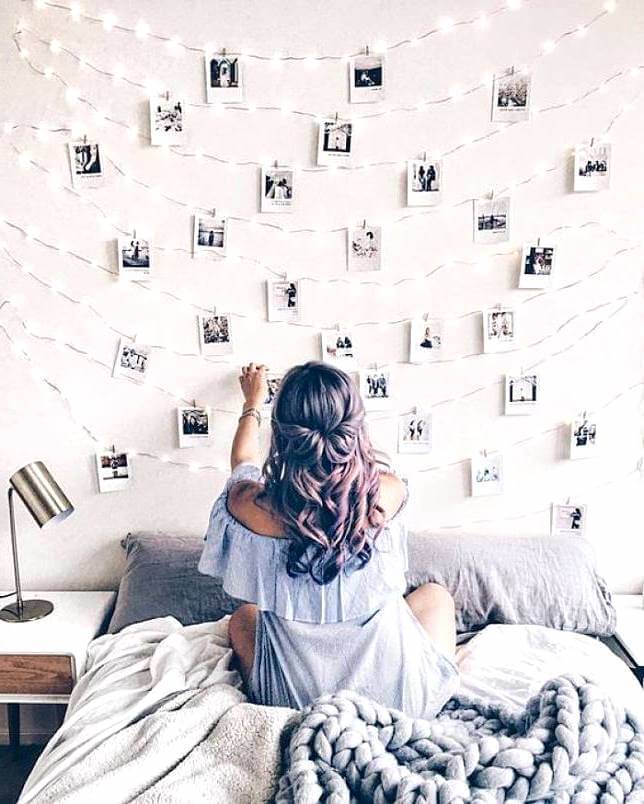
Decorating one of the walls with photographs brings a sense of family unity to the interior, creates a special mood, awakening the kindest and brightest feelings.
These can be large portraits, genre scenes or ordinary shots captured from everyday life. Collage looks great, allowing you to fit a lot of images. If desired, it can be made thematic by dedicating it to a significant event, anniversary date or one of the family members.


Volumetric photos are an elegant addition to a modern interior

Photos within different sizes and shapes give the interior a modern dynamism. For example, the space makes the space more conservative and static - the design of the wall with rectangular frames, which are arranged along a strict horizontal line in one or more lines. Unites this composition into a single whole - the color shade of the frames.
You can move away from the usual way of posting photos by decorating the wall with a stylized image of a trunk, successfully placing portraits of household members on its branches, creating a whole family tree.


To give the interior sophistication and originality, photographs will help, not framed by frames, but pasted on thick cardboard in rich colors that echo the color motifs of other objects. They are fixed on stretched cords, fishing line, chains.
Emphasized and romantic appear wise quotes, important wishes, monograms, written on high-quality thick paper in an elegant font and framed by a gilded frame. They are placed next to photographs or on an adjacent wall, thus creating a rhythm-filled space.


Important! If the wall area is small, it is not necessary to create a large composition. You can place one photo on a narrow glass shelf, highlighting it with beautiful backlighting.
Volumetric elements
The architectural decor completely changes the surrounding space, becoming the center of the entire room. Having a free wall in a spacious room, with the help of volumetric elements, you can turn it into a cozy relaxation corner, combining it with an exhibition of your favorite collectibles.
Having equipped a shallow false wall, they construct a built-in decorative, small niches with glass and soft lighting. Objects placed in such niches attract attention in such lighting. A portal with antique semi-columns and imitation of stucco will help to decorate the fireplace.
In order not to disturb the harmony, color scheme facade planes is selected for the overall style of the interior. The color stylized as noble marble looks advantageous.


Frames as an element of decor
Frames allow you to create an amazing world of aesthetics, from which glass is removed, and cardboard is painted into bright colors or removed altogether. The material and color scheme of the frame is selected for the specific style of the room.
- Strictly shaped rectangular products made of precious woods will easily fit into the classic entourage.
- In Provence style, it looks harmonious with smooth lines and rounded corners.
- For eclecticism, you can choose frames of the same shade, but of various shapes and configurations.
Another option for wall decor would be a single frame shape, but with different color and material texture.


Empty frames compose in various combinations and forms. They can create strict horizontals, verticals, move diagonally. From small frames create geometric figures or dynamic curved lines.
An interesting stylish image arises if several frames are fixed on one image, breaking it into several fragments.


Use of paintings
It is possible to create a certain mood with the help of paintings, which have long been a win-win option. wall decoration.
Wall decoration in style will be supported by images with clear, ordered lines on an achromatic background. They should have a simple frame without unnecessary decorative elements.
Important! If several small posters are selected, they are aligned along one line.


Noble, vintage style provence suggests the presence of paintings depicting idyllic rural landscapes or genre scenes, and stylized solid wood frames with impeccable lacquering and carvings will add more attractiveness to the interior.
A touch of modernity is brought into the interior Modular pictures, allowing you to create compositions according to your own preferences. Stylishly combines red furniture and black and white paintings. Adherents of calm elegant solutions will suit floral motifs in beige tones.


mirror fantasies
Designers have a special respect for mirrors, especially when decorating an interior, as with their participation the space visually expands. When fixed under the ceiling along the entire perimeter of the wall, the mirror border creates the impression of a significant increase in the height of the room.
You can bring a sense of celebration and freshness into the room if you place small mirrors framed by frames stylized as aristocratic marble or mysterious malachite on a free section of the wall. Place them randomly or in a clear order. Free layout brings swiftness, makes the interior more dynamic.


- A beautiful carved frame with gilding turns the mirror into bright accent classic interior.
- For high-tech rooms, mirrors are framed with a narrow chrome strip.
- Eco-style will be supported by deliberately rough bamboo or wooden frames.


Soft decor
Soft panels allow you to create an expressive image of the room, bring coziness and comfort to it. Their surface is created from textiles, leather or faux fur. Adds volume with environmentally friendly padding.
Such decorative elements most often make out a wall at the head of the bed.


It is possible to create a subtle and sophisticated interior in the living room if you wrap sheets of plywood the right sizes noble fabric. Brocade or velvet with bright colorful ornaments will add an unusual oriental accent.
Such panels, placed on the wall, visually highlight the guest area, where chairs and a table are placed. A decorative fireplace will also fit perfectly there.


Possessing sewing skills, you will be able to complete decorative wall element in timeless patchwork technique ( patchwork). Exclusive knitted products are crocheted or knitted. Openwork or multi-color patterns, well-chosen to the main interior style, give the room a complete author's look.
They are stretched on a round or rectangular base and create a planned compositional pattern. If necessary, use to enhance the overall perception of the frame.


Decorative paper elements
The walls can be skillfully decorated with butterflies, flowers, created from paper - corrugated, writing, papyrus. Light parts are fixed with double-sided tape and are easily restored or replaced with other decor. On the painted neutral color on the wall, the thinnest paper details form lines - horizontal, diagonal, broken, curved, concentric, vertical and others.
You can make them in joint creativity with children. Having fixed circles on the fishing line that change color saturation from yellow to orange or from blue to purple hue manages to create a special dynamic atmosphere.


Use of cymbals
Special charm and sophistication for wall decorations in the interior have wall plates. Collectible items with paintings are quite expensive. However, it is possible to make the kitchen solemnly elegant if fragments of the ornament are glued onto ordinary porcelain or plastic plates. It can be the splendor of refined Gzhel or majestic Zhostovo painting. You can decorate the kitchen surroundings with bright Gorodets motifs.
After spending a little time, you will be able to decorate the plates with elegant pastel or contrasting decoupage ornaments. Add mood and highlight special style transfer to the plates of the ornament present on the curtains. For these purposes, individual fragments can be cut out of the remnants of the fabric and, using a transparent varnish, fix them on a plywood mug.
Important! Plastic products from varnish can be deformed, so PVA glue is used to work with them.


Vinyl stickers
It will be possible to quickly update the interior if decorate the walls with ready-made vinyl stickers. Among the extensive range, you can choose images with different color combinations, shape and size.
For example, drawing a window - expands the room. The same purpose is served by the appearance on the wall of a road stretching into the distance, fields and meadows, or boundless outer space. Marine theme would be great in the bathroom. For home interior dark scenes are not suitable.
It's important to know! Vinyl stickers easy to replace if there is a need to refresh the interior or add new notes to it.


Wall art
Since ancient times, painting has been the most popular technique for decorating walls. In order for the final result to turn out to be honed graceful, it is necessary to have not artistic abilities, but also a rich imagination.
The drawing is done with tempera, acrylic, water-based, oil paints. Having mastered certain skills, you can use an airbrush, spray cans with mother-of-pearl, fluorescent paints(Figure 1).
Creative Wall Decor Ideas
- Give amazing expressiveness and depth to the wall 3D drawings, for which, at the first stage, relief semi-volumetric images are made from the gypsum mass. Then they are beautifully painted. (fig.2)
- The simplest method of giving plain walls an unusual color sound is striping. The edges are sealed masking tape, which allows you to get the perfect smooth edges Images. You can vary the width, color, direction of the stripes. (fig.3)
- Connoisseurs wall painting even without mastering artistic techniques, it will be possible to bring a special mood into the interior if you use stencils. They do not need to be made on their own, as a wide range is presented in specialized stores and salons, allowing you to choose the planned pattern. (fig.4)
- It is even easier to decorate wall planes with stamps. Pre a sketch is being developed and markup is done. This will avoid mistakes. Rubber is used as a material for stamps. There are foam and wooden crafts, as well as in the form of a roller. For home use, simple stamps are cut from ordinary potatoes. (fig.5)
Beautiful do-it-yourself wall decor is the end result of a lot of work, patience and perseverance.

(Fig. 1) Beautiful hand-made wall painting

(Fig. 2) 3D volumetric image of a musical violin, which remains to be beautifully beaten with a pattern

(Fig. 3) Bright stripes on the wall

(Fig. 4) Using a stencil, you can get original drawing on your wall

Flowers in the interior
Home floriculture lovers often place plants on the walls using planters. If ampel varieties are selected for these purposes, forming entire waterfalls of shoots descending, covered with foliage and flowers, then it will be possible to create a magnificent vertical that enhances the perception of homeliness and comfort.
The graceful shape of the pots serves as a decorative additional element, allowing you to install flower arrangements on narrow, almost invisible glass shelves. In such situations, priority is given to compact flowers, picking them up according to the shades of the petals.

flower beds. You can enhance the effect with the help of mirror elements placed on the wall behind the pots. This technique expands the space, makes it unusual and mysterious.


Video: how to decorate the walls in the house
There are many ways to decorate walls. Some of them are easy to do on your own, allowing you to quickly update them with improvised materials, and some will require certain skills. Good luck with your changes.
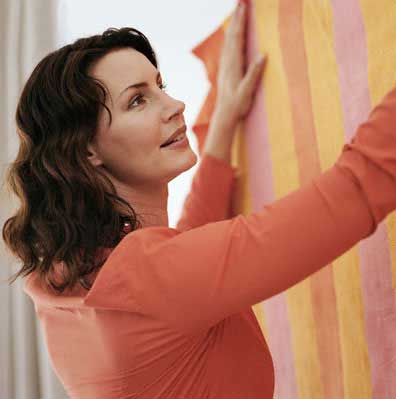
Textiles have long been used by people to decorate residential premises, and such rooms looked very solemn and luxurious. Once upon a time, wall decoration with fabric was carried out only by noble and expensive materials- velvet, silk, brocade.
Previously, a space with such walls seemed purely royal. Can now be used various fabrics with certain quality characteristics that are matched to the overall style of the room.
With the help of textiles in the room, a special feeling of coziness, warmth and comfort is created, which is difficult to achieve using ordinary paper wallpaper, plastic and wood panels or other finishing methods. There are several ways in which walls are decorated with fabric, each of which has its own advantages and disadvantages, including the method of installation. Below we consider the main of these methods, their features and applicability in various styles interior.
Common ways of textile wall decoration are: wall upholstery with fabric, similar to the installation procedure stretch ceilings, pasting the walls with a cloth, similar to pasting the surface ordinary wallpaper, and drapery of the walls with fabric, thanks to which you can decorate the room or part of it in an original way. In principle, any of these procedures can be performed independently, but this is a rather laborious process.

When these methods seem too complicated or energy-intensive, and you still want to finish the room with textiles, they often resort to using textile wallpapers, the procedure for gluing which is practically the same as gluing paper wallpaper.
Upholstery
The upholstery of the walls with fabric is, rather, a close-fitting, since a special frame is covered with a certain material around the perimeter. It is difficult to perform such a procedure on your own, but it is possible. Most often, people turn to construction companies, which shape surfaces in a similar way. In specialized firms, a choice of materials is presented from which the frame for the wall or part of it is made. They can be made from wood, metal, plastic or rubber.

Wall upholstery with fabric involves special fastening devices, thanks to which the fabric does not stick and is not nailed to the frame, but passes into the gaps on it and is fixed. To increase the soundproofing of the wall, you can use a foam rubber or synthetic winterizer backing, which will also make the surface soft.
If the procedure is performed independently, the easiest way is to make a frame of wooden planks and nail or glue the canvas to them.
But such wall decoration with fabric means that during the repair the entire structure will change along with the frame. When using the special mounting systems described above, it is possible to simply change the textile fabric by reattaching the new one to the old frame.
Often, only part of the surface is performed in this technique, making it out as a panoramic picture of fabric, which is also used for curtains, tablecloths or furniture upholstery.

Taking into account the choice of a certain color, walls are decorated in a similar way in interiors in the style of classic, modern, some ethnic styles. different colors and textures allow you to use this method of wall decoration in almost any style, except for high-tech and techno styles.

pasting
The textile fabric can also be glued to the wall surface, having prepared both the fabric and the wall surface in advance. The walls are prepared as follows: first they are cleaned, then puttied and primed.
Walls to be covered with fabric must be clean, smooth and dry in order for the textile to adhere well to the surface.
Pasting the walls with fabric also implies the preparation of the fabric itself. First of all, for this, a small piece of the material used is measured, and then soaked and dried in a warm place. If the fabric has not shrunk, it is used without pre-treatment. If she has sat down, then the entire textile fabric is then wetted and dried so that it does not sit down already in the process of gluing. In any case, before gluing the fabric, it must be carefully ironed.

The fabric is cut into strips from ceiling to floor with allowances of 10-20 cm. Then these strips are sewn together into a large canvas, which should be equal to the area of \u200b\u200bthe wall with allowances along each edge. It is desirable that the canvas be as wide as possible, so that there are as few seams as possible. Some sew a canvas equal to the entire surface area of \u200b\u200bthe walls, but it is very difficult to work with such a large area of \u200b\u200bmaterial. Before gluing the canvas to the wall surface, it is ironed again, especially at the seams, and then rolled up along the height of the wall.
Pasting the walls with a cloth is usually carried out by two people. The fabric is glued not over the entire area, but along the edges of the canvas - from above, on the sides and below. The order of gluing can be different: first one side, then the top, and at the end the second side and bottom, or first the top, then the sides and bottom.

More often, one edge of the wall is first glued, for example, the right one, then a fabric is applied to it along the entire height from floor to ceiling and ironed with a roller. Then the roll is unwound further and the upper edge is glued.
If the fabric is too heavy, it can be additionally secured with slats so that the glue "grabs".
After these two edges of the canvas are glued, i.e. the glue dries, the two remaining edges of the canvas begin to be glued. To do this, the fabric is stretched and glued to the left. Then the canvas is again slightly stretched and glued from below.
Once the glue has dried, carefully remove the slats using pliers while holding the fabric. The stock of textiles along the edges is removed or folded and left under the plinth. The choice of skirting boards at the edges depends on the style of the room. The advantage of this method is that the places where there were slats, or instead of a plinth, you can use textile decor - fringe, small draperies from the same material, etc.
Most often in modern interiors Not all walls are covered with fabric. One or two walls are chosen, most often in the living room, which will be the main ones in the room - it is they who are pasted over with silk or velvet. Mirrors, pictures or a TV are hung on them, i.e. the textile wall becomes the center of attention in the room.

Drapery
by the most in a simple way among others is the drapery of the walls with fabric, but the same method provides unlimited scope for imagination, since you can skillfully apply it in a variety of rooms.
Draping the walls with fabric provides for the installation of a decorative strip under the ceiling, which closes the semblance of a cornice. It is on the eaves that the canvas is fixed, which is much wider than the width of the room, due to which the folds necessary for drapery are formed. The installation method of the cornice is very simple, so you can easily do it yourself.
