Shower cabins installation scheme. How to assemble a shower cabin: competent installation of equipment without the involvement of a specialist. Corner cabin installation
Do-it-yourself shower cabin assembly. Chinese shower - great thing. A complete copy of the Italian work. The difference in these showers is only in one thing - in the absence of instructions from Chinese version. Because four wretched leaflets in wretched English can hardly be called instructions for assembling a shower cabin. Introduction: It is a great honor for you that you have purchased our shower enclosure.(The Chinese wanted to say exactly the opposite, but with English language they didn't have: Paragraph 1. Assemble the shower tray. Set it to level. Point 2. Install shower enclosures. Well, and so on... Also, the European origin of the shower cabin is favorably distinguished by the marking of parts and stickers - where is the top and where is the bottom. Manufacturers of Chinese shower enclosures are pinning their hopes on Russian ingenuity or on 5 thousand rubles that they will ask you in the store for assembling a shower enclosure. So, is it possible to assemble a Chinese shower cabin with your own hands, and then use it again? We'll see. Before starting, I want to say that you most likely need to stock up on additional washers with an M 16 hole, a normal, not an imitation siphon, a good sanitary silicone sealant, a Phillips screwdriver, a sharp knife, wrenches, a long level, gloves, Hammerite paint, a brush, a few clean rags, soap... and that's it for now.
 |
||
The most important thing from the shower cabin is in a separate box: all shower cabin fittings and fasteners. Be sure that something small is not enough: self-tapping screws, washers, etc. |
||
 |
 |
|
We install the shower tray on the legs. There is not a word about the assembly technology in the instructions for the shower cabin. In general, this is how: long hairpins are carefully screwed into the seats while wearing gloves. They will not stand up vertically - do not try, and this is not required. We carry out all work in gloves - arrow fiber shower tray treacherously throws up his hands! |
Having screwed the studs, we screw the nuts on them, put washers on the nuts, and then crosswise we put on the frame of the shower tray support. |
|
 |
 |
|
| Now attention: according to the mind, it would be necessary to lay under the iron thin layer foam foam - to compensate for irregularities in fiberglass. I didn't have it on hand. The second point: the welded overlay should not be directed towards the pallet: otherwise, a distortion will occur and part of the pallet will be suspended. On the short support of the shower tray we find a welded nut - this is a seat for the central leg. | The arrow marks the position of the welded overlay - from the shower tray. We fix the central leg in the loose nut as follows: we twist, put on the washer, put on the lock nut and tighten it until it stops. We put on the second nut - it will be the support locknut for the threaded adjustable leg. |
|
 |
 |
|
We attach the fixing beams of the shower tray with self-tapping screws to wooden bars embedded in fiberglass. |
Before all the self-tapping screws are screwed in, we do not tighten the fastening bolts and supports: otherwise there may be distortion and tension, which will easily turn the self-tapping screw out of the tree. |
|
 |
 |
|
| We take the Hammerite paint and paint over the critical places of the Chinese metal, which has already begun to rust. | We bring the legs under the level and slightly countergay - they still have to be twisted in place. At the same stage, plastic support brackets for the pallet screen are placed under the legs. |
|
 |
 |
|
| Installed tray screen bracket and stop brackets for installation on wooden blocks under the edge of the tray. We did not install them, since their expediency is not clear - the screen is also held in the gap between the bars and the side. | Installed screen brackets. By Chinese instructions you need to immediately set the pallet in level and fix the screen. How then to get close to the back side of the cabin - the Chinese did not think. Therefore, we did not follow their advice and installed the shower tray screen as a last resort, after connecting all the communications and leveling the cabin. |
|
 |
 |
|
With a long level, we align the plane of the legs of the shower tray. |
We install the "automatic siphon" of the shower cabin, which in fact is an automatic foot plug for draining. If there is no water (gas) key at hand, you can tighten the release in such a semi-barbaric way. |
|
 |
 |
|
| This is a Chinese improvisation on the theme of a siphon for a shower tray. In principle, this translucent product can also be made a siphon by bending the corrugation in the likeness of the letter "U". But it's safer to go buy a real one. | We begin to assemble the glass shower enclosure. Glasses of a shower cabin, naturally, are not marked. The top is where there are a lot of holes. Guides: the lower one is thinner and with curly cutouts along the edges. The top one is wider. Glasses have an installed edge in which there are grooves for fastening to the arches of the fence. We move one into the other. |
|
 |
 |
|
Then we lift the glass and apply a layer of transparent silicone sealant. Lower the glass and tighten the screw on the presser foot. Remove the excess with your finger soapy water, and then wipe with a clean cloth (finger too). |
We fasten the rack and the arch - the guide of the shower cabin with a self-tapping screw (at the top of the rack and at the bottom of the rack). |
|
 |
 |
|
| We put a silicone seal on the glass, with the "petal" inside. It is not necessary to stuff it under the presser foot - it will not fit. Putting on silicone is also not required. | We coat the shower tray under the guide with silicone and install the glass fencing. The silicone must not cover the water drain holes in the pan. We do not fasten anything to the pallet with self-tapping screws! |
|
 |
 |
|
We apply silicone to the junction with the side panel of the shower cabin. |
And on the shower tray. Silicone must not be applied to water drains - they must remain free. to drain the water back into the sump. |
|
 |
 |
|
| We fix the side panels of the shower cabin on small self-tapping screws with washers. Some of the washers prudently had one side cut off for a tighter fit (for 4 and s 22)))). The logic of the shower enclosure manufacturer is incomprehensible. | One of the side panels of the shower cabin is installed. These panels need to be fixed with self-tapping screws to the pallet. The shower tray has special holes for self-tapping screws. |
|
 |
 |
|
Install the second one in the same way. sidebar shower cabin. |
Siliconim the joint with the rear shower panel of the shower cabin.. |
|
 |
 |
|
And fix the rear shower panel on the screws. Be prepared that not all holes will match - so do not tighten all the screws at once - you need to leave a gap for adjustment - and only then tighten the screws to the end. Do not overdo it - the metal of the shower stall is delicate and breaks easily. |
The back panel of the shower cabin has been successfully installed. |
|
 |
 |
|
| We prepare the doors for installation: we install the rollers. The upper rollers are adjustable and must be turned to the maximum up, and the lower ones - pressure ones - are pulled back during installation. Silicone seals are put on the edges of the glass door of the shower cabin. The one with outer side dressed with a "petal" out. | Having installed the doors, we pull the upper rollers to adjust the position of the doors and the optimal closing of the doors of the shower cabin. |
|
 |
 |
|
Then we install the plastic plugs of the screws on the rollers of the shower doors. |
The shower cabin is half assembled. We continue to assemble the shower cabin with our own hands. |
|
 |
 |
|
Getting ready to install the roof. On it you first need to fix the watering can tropical shower, fan, speaker and backlight lamp. |
Of the four screw holes drilled by the Chinese, only two are stable. We fasten the otsalnye screws as self-tapping screws on virgin plastic. |
|
 |
 |
|
Speaker for radio and phone. In order not to rattle, we glue the edges with silicone sealant. |
We fix the long hose on the nipple from tropical watering can soul. The nut turns freely - it is not required to disconnect a hose for installation. |
|
 |
 |
|
View of the shower enclosure with the lid installed. |
We install handles, mirrors, shelves and other fittings for the shower cabin. If you work alone, then for the convenience of work, you can pre-fix the elements with silicone sealant. |
|
 |
 |
|
After connecting all communications and leveling the tray according to the level, we install the shower tray screen. |
The cabin is assembled: we arrange a trial wash to test its operation and detect leaks. If the pallet under your feet starts to crackle, then the legs are not installed in a single plane or do not reflect the curvature of the floor. Remove the screen and adjust the legs. For strength, the legs can be attached to the floor with self-tapping screws or put on a sealant. |
|
| Here you can read how to build plumbing in the house with your own hands. | After looking at this wonderful product, I built the next shower from more reliable materials. |
When installing a shower cabin, many use the services of craftsmen. However, often the installation procedure does not follow technology, as the master tries to finish as soon as possible and take money for all completed and outstanding actions. Knowledge of the installation technology will allow you to easily install a shower stall on your own or competently control the installation process by a master.
The main nuances when installing a shower stall
The main thing when installing a shower stall is to choose right place for installation. It should be next to the hood and, if the model has many additional features, connected to the mains with mandatory grounding. When assembling the pallet, you need to use building level, since the pallet must be installed strictly horizontally. When installing the pipeline, be sure to use sealants, otherwise the flow of water will force you to redo all the work. When connecting the cabin to the water supply, at least one filter must be installed. All pipes are led along the baseboards or hidden in a box or wall.
Consider detailed example installation of a shower cabin on the example of Massimo. This is a corner booth made in China with high pallet. Size - 100x100 cm. Bought for 30 thousand rubles. For other models and manufacturers, the assembly may differ.
Instruments
For installation we need:
- wrench for 19 and adjustable for 45;
- long Phillips screwdriver with PH2 bit;
- transparent sanitary silicone;
- construction gun for sealant;
- spatula for silicone;
- spray;
- fairies;
- drill with a drill 3 mm;
- roulette;
- bubble level 1 m;
- jigsaw;
- erasable marker;
- thread lock or cold welding;
- hose for water supply on 1/2″ nut-nut - 2 pcs. (length is selected locally);
- sewer crossing 40x50;
- toilet paper.
Pallet assembly
Having made locknuts on the studs, we screw them into the pan. Short - in the center. Screwing it in by hand until it stops, fix it with a nut. When twisting, do not make great efforts, you can break the thread. Only cold welding will help save the situation.
We wind on the second lock nut on each hairpin notches up.
We lay the frame on the studs, attract and fix it on both sides with nuts.
On 4 front studs we fasten plastic brackets for the screen of the shower cabin. The perforated part should hang down.
We fasten the legs with locknuts and set the pallet in place.
We adjust the height of the screen under the lower edge of the side of the pallet. It is leveled by twisting the legs.
The lower edge of the brackets must be set with a gap of 20 mm from the floor, without tightening to the end.
Sewer connection
To install the drain and siphon, remove the protective film around the drain hole. Upper rubber gasket better to replace silicone sealant. Screw on the siphon. Threads and bottom connections are also treated with sealant for reliability.
Through the adapter you need to connect the siphon to the sewer. This connection is also coated with silicone.


If everything fits, you need to disconnect from the sewer and continue installation.
Side wall installation
We remove the protective film from the top of the pallet, but leave the bottom protected for now.
 We move the pallet away from one wall and install an opaque wall there.
  We connect the holes in the pallet with a corner and fasten with 35 mm self-tapping screws (without special efforts).


 We install the partition back and remove excess silicone. Further, I will not write about removing excess, remove them immediately after pressing the parts.

 We push the pallet with the partition against the wall and try on the central panel to see if additional lining is needed.
  We apply silicone to the junction of the side wall and the center panel.
  We connect them with 10 mm self-tapping screws.
We fasten the second side wall similar to the first.
We try on a fixed transparent partition. Oblique cut metal profile should be at the bottom.
If everything fits, we silicone the profile and install the partition. Set the top edge flush with the wall. From the top outside drill a hole with a diameter of 3 mm in the profile and fasten the partition with the wall with screws. This is how it looks in practice.
Install the top and bottom profile. Rounded parts are directed towards each other, the upper profile is wider than the lower one. We apply silicone under the bottom.
Ceiling Assembly
We collect the ceiling of the shower stall. To remove the film, unscrew the ventilation grilles and the speaker. 


We install the ceiling in place, while without silicone. It is screwed from below with 4 self-tapping screws from of stainless steel 16 mm. 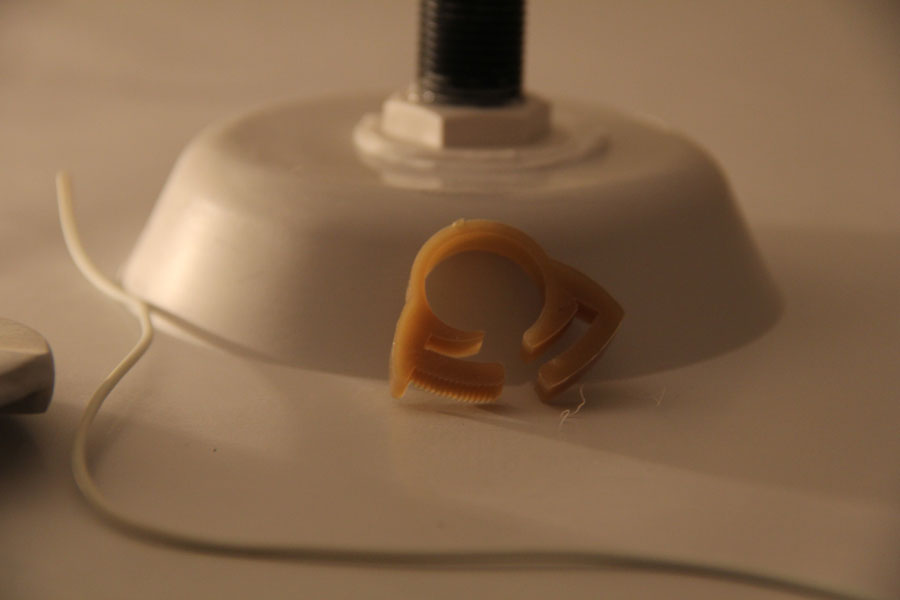


We connect and check water and electricity. Do not soak the top edge of the drip tray.
We put the booth in place and check the stability and level.
With inside we process the lower perimeter and the central rack with silicone.
Door installation


From the side of the handles, we put magnetic moldings on the doors. On the other sides - L-shaped moldings with a shelf out.

We hang the doors on the upper rollers. To start the lower ones, press the buttons.
We check the smoothness of the doors and the tightness of the junction. Doors must not open on their own from any position. The abutment is adjusted using screws on the upper rollers.
Screen installation


We remove the screen, and make marks opposite the brackets. 

We install the screen by installing wedges from below. 


When the silicone dries, we spill the joints of the cabin, check the performance of the watering cans and the switch.
Installing a shower stall is a fairly simple procedure, subject to the instructions and knowledge of the basics. plumbing work. If you have never dealt with connecting plumbing, it is better to entrust the installation work to specialists.
All more people get rid of heavy large-sized bathtubs and install shower cabins in their place - this is a really beneficial solution in many aspects. Such cabins make it possible to save space in apartments and private houses.
The existing range of shower cabins is quite wide, but just buying one or another model you like is not enough. It still needs to be properly assembled, installed and connected to communications. Many are interested in whether it is possible to install a purchased shower cabin with your own hands. In fact, you can, you just need to have the desire and minimal skills in the plumbing field.
Features of cabin types
All modern variations of shower cabins according to the type of construction can be divided into open and closed. Open ones are almost always cheaper than closed ones. On top of that, for open models, it is necessary to have high-quality waterproofing in the bathroom. It is worth considering in more detail each of the types - this will help determine the choice.
open
Open showers are integrated into the layout of the bathroom. Such structures are also called shower enclosures, since they can only be installed in a corner. Sometimes they consist of almost the same transparent doors, not all models have a pallet (in the absence of a pallet, you will also have to install the so-called drain ladder).
Steam from hot water during the operation of such a cabin comes from in large numbers, respectively, and the humidity in the room will be high, and this necessitates high-quality waterproofing. In bathrooms with such a cabin, only moisture-resistant furniture should be placed.
Closed
Closed cabins are completely autonomous boxes; in addition to doors and a pallet, they also have side and rear walls as well as the top cover. This design can even be installed in the center of the bathroom if there is enough space. Closed cabins can be different sizes- from 0.7x0.7 meters to 2x2.1 meters. The smallest are conveniently placed in small apartments.
Closed oval or square cabins, unlike corner ones, they are isolated from the general microclimate of the bathroom, and this can be considered a plus.
Some models have one or more additional options and it attracts certain category buyers. These are options such as:
- aromatherapy;
- hydromassage;
- Charcot shower.
Sometimes in the factory equipment of closed shower cabins there is even a radio receiver. They are equipped with top and side lighting, a mirror, shelves and other useful devices.
Selecting an installation site
Installation of a shower cabin cannot be carried out without a preliminary and balanced choice of a place for it. Must be nearby electrical network, water supply and drainage. The distant location of these important communications can result in additional troubles and expenses.
It is desirable that next to the cab there is also air vent(hood) - this will reduce or reduce to almost zero the accumulation of condensate on the walls.
Before fixing the booth, you should also pay attention to the floor surface - the smoother it is, the better. If the condition of the floor leaves much to be desired, you will have to level it or adjust the height of the cab legs. The walls near which it is supposed to put the cabin must also be flat. If the angle between the walls is not equal to 90 degrees, the installer will definitely encounter such a problem as the gap between the walls and the cabin. In most cases, such a gap can be sealed with a sealant.
Assembly order
The shower enclosure is delivered from the store disassembled and packed. To make it easier to assemble the structure yourself, all components are carefully sorted and laid out by the manufacturer.
In addition, the kit must have instructions, and it contains an understandable drawing or diagram, from which you can understand the procedure for assembling the kit. AT general view this order can be represented as follows.
First comes the assembly of the pallet. Actually, this involves attaching legs to it (so that it stands straight and does not have the ability to stagger), careful installation in the selected area and inserting a sewer pipe. If the pallet that comes with the kit seems too fragile, it must be further strengthened with a frame.
The system of functioning of the walls in many models may seem complicated. But in fact, even not very experienced can make the installation and combine all the spikes and grooves House master. After that, the walls are simply fixed with connecting bolts. When installing the top panel (if any), it is important to assemble it in advance and make yourself comfortable for working at a considerable height by taking a stepladder.
The installation of doors and small fittings is generally similar for all models, but there are nuances. The design of the guides and rollers, the shape of the doors may vary (they are not only semicircular, but also straight).
Sewer connection
A high-quality instruction for the correct assembly of a shower cabin usually contains information on how to equip a drain and install a siphon. So how is it done?
First, the protective film is removed from the drain pipe. Then a pipe with a diameter of 4 cm with a special adapter is connected to the installation site of the pallet. The adapter must have sufficient rigidity - this will increase the functionality of the sewer, there will be no stagnation in the corrugation area.
Next, you need to raise the back of the shower tray and lay the shower hose from below on the drain elbow of the shower. The other end of this hose should be fixed in the drain. Its edge, reinforced with fiber, must be attached to the side nipple on the drain elbow.
Now it remains only to put the tray on the place prepared for the shower stall and check if the hose or connections are leaking anywhere. Checking is simple - fully open the taps and let the water flow. At the same time, puddles should not form on the floor, and the drain should be fast and of high quality.
Water connection
As a rule, two flexible hoses (for hot and cold water), it is with their help that you need to connect. In general, the procedure is quite simple. First you need to shut off the water supply risers and open all the taps to the full, thanks to this, the pressure in the water supply decreases.
Advice! If the diameters do not match, experts advise using the appropriate adapter.
It is necessary to apply lubricant and sealant (FUM) to the threads of the installed fitting. After that, flexible hoses should be connected to the water pipes (hot and cold) and secured with an adjustable wrench. Now there is only one more action left - turn on the water and check if the system is airtight.
Electrical wiring in the shower
As a rule, expensive shower cabins with various options require electricity supply. And there is an unshakable principle, which in this case should also be observed: the elements of water communication and elements of the electrical network are placed separately.
By default, you cannot connect a shower cabin to the wiring diagram that already exists. The cabin must be properly powered, for this procedure you will need electrical installation tools and materials: double-insulated copper cable, RCD shield ( protective shutdown), waterproof socket IP44.
Note! In some cases, the manufacturer requires the pallet to be grounded (the presence or absence of such a requirement must be clarified in the instructions). In this case, the pallet is grounded by a potential balancing system.
In addition, it is desirable to install a separate machine with a power of 25 amperes and a power of 5000 watts in the apartment shield. It is this device that most of all corresponds to the maximum electric current of the cabin. RCD or differential type machine is installed in tandem with circuit breaker. Such measures are necessary to protect yourself from electric shock and prevent the failure of the shower structure as a result of a short circuit.
Ceiling panel and fittings
The ceiling panel (or simply the roof) of the shower cabin may contain several optional elements:
- shower head;
- fan;
- backlight;
- speaker.
This panel is assembled in advance, and then in ready-made fixed on a special support, formed with the help of side panels and the door frame. For a more reliable connection of the joints, you can use special lubricating and sealing materials. Processing them will help prevent the specific buzz of the shower stall when certain options are turned on.
Door fittings are usually installed last. For this operation to be successful, you need to perform a number of actions.
at the bottom and upper parts the doorway is installed with the rollers that come with the kit and turned out to the maximum. The perimeter of the door is finished with sealing material. After that, the door (usually it is made of tempered glass or fiberglass) can be installed in its place in the overall structure.
Now it is necessary to determine the optimal position of the door by adjusting the upper roller mechanisms. The screws with which the rollers are fixed here are covered with special decorative plugs. Finally, the rest of the small accessories are installed: handles, a mirror, and so on.
This completes the installation. But in order to be completely confident in your new shower enclosure, it is worth conducting a final check of all components. The connections must be airtight, and the pallet must not creak during operation (if a creak is emitted, the legs under the pallet must be adjusted again). Only then can the cabin be used.
The cost of the services of a specialist in installing a shower cabin is about a quarter of the cost of the equipment itself. Self-assembly following the instructions will help you save a lot. However, if cabins from well-known European manufacturers are accompanied detailed guides, then when installing a Russian or Chinese model, difficulties may arise.
Corner cabin installation
Corner shower cubicles are widespread: they are installed in most apartments with limited bathroom dimensions. Let's determine how to assemble a shower cabin with your own hands in corner version its location.
Instruments
To carry out the work you will need the following tools:
- Phillips and slotted screwdrivers;
- building level;
- spanners;
- silicone gun;
- screwdriver;
- transparent silicone sealant;
- elastic hoses;
- synthetic FUM seal (tow can be used for metal pipes).
It is convenient to carry out work with gloves, since the surface of the cabin elements can have unpleasant roughness. Additionally, in addition to the factory ones, self-tapping screws, nuts and washers may be required.
Cabin elements
The shower cabin kit includes the following items:
- vertical racks;
- pallet;
- back panel;
- walls and doors;
- guides for sliding doors;
- dome (in models of the closed type);
- enclosing screen;
- factory fixture.
Make sure they are intact and free from external defects. Assembly is recommended to be carried out by two people in order to avoid inaccuracies when docking cabin elements.
Pallet installation

The scheme we propose describes in detail how to assemble the pallet yourself. At the stage of preparation for installation, it is necessary to carefully align the walls and floor at the installation site, since the stability of the cabin directly depends on this moment. Frame attached to uneven wall, will have to be attracted with self-tapping screws. Such actions can lead to the appearance of deformations.
Before starting installation, the pallet must be freed from protective film and turn over so that the bottom is on top. A water drainage system is brought to the location of the drain using elastic hoses. The best option will be the exit location in sewer pipe right under the drain pan.
Important. It may be necessary to install a tee for draining in advance - in case it is supposed to drain from the side of the bathtub, sinks, washing machine and other equipment.
Frame and screen installation

The supports on which the vertical racks are attached are placed in a crosswise manner over the bottom and connected to the pallet body with studs. Nuts are screwed onto the studs, then washers. protective screen attached to brackets with screws.
Sometimes the supports can be a factory-assembled support frame - in this case, its holes must completely coincide with the holes in the pallet.
Important. On the correct location supports indicates a protrusion on one of them: make sure that it is on the outside - otherwise the pallet will be installed skewed.
Installing the legs

The pallet is mounted on special legs, which are fixed with nuts. The legs become a kind of continuation of the studs fixed in the pallet. The central leg is attached to a shorter support. The supports are set under the level and finally fixed with lock nuts.
In cases where the pallet does not require installation on legs, it is necessary to carefully level the floor surface, taking into account the requirements of the instructions for the angle of inclination towards the drain.
Siphon installation
Next, proceed to install the bottom valve in the drain hole, as well as the siphon. To avoid leaks, the joints are treated with silicone. To make sure there are no leaks, after completion of work, fill the pan with water for several hours, blocking the hole drain hose. Upon successful completion of such a test, you can connect the siphon to the drain system. When all operations are completed, the pallet is turned over and placed in a corner.
Case assembly
Elements of the shower cabin are in many cases installed on aluminum frame– it is durable, lightweight and protected from corrosion. Vertical racks the frame is fixed with screws on the guides. In open models of shower cabins, the frame is attached to the wall with a transition profile.
Installation of walls and doors
In order to rotate the walls correctly, it should be borne in mind that in their upper sections there is always large quantity holes. Guides for sliding doors two are included: the wide one is installed on top, and the narrow one is installed on the bottom. The guides have grooves into which the cabin walls are inserted.
Sliding doors are installed on rollers with seals, their position is adjusted using the upper rollers. The joint area is treated with silicone.
Advice. When applying silicone to the joint area with the walls and the back panel, do not "touch" the transverse channels in the surface of the pallet, designed to drain water.
Rear panel installation
The rear panel is also attached to the base of the pallet with self-tapping screws or bolts. If the cabin is equipped electrical appliances, after installing the back panel and connecting to the network, you can check their operation.
At the end, you can proceed with the installation of the dome, which contains:
- shower head;
- fan;
- backlight;
- speaker.
To prevent vibrations of the fan, as well as the rest of the equipment, it is recommended to treat the edges with silicone when installing them.
Final Adjustment
When the cabin is fully assembled, you can fix shelves, handles, holders on its walls. After the final adjustment and stability check, tighten the nuts and fasteners, connect to the water and drain. If the pallet makes a cracking sound when a person is in the cab, this indicates the need to further adjust the height of the legs.

Note. For a number of models of shower cabins with shallow trays, the legs are leveled at an inclination towards the drain - this moment must be prescribed in the instructions.
Features of Chinese models
The assembly scheme described by us is universal for most models of shower cabins. To determine how to assemble a Chinese corner shower cabin, if it is a model with any features, let's talk about cabins that "fall out" from the general list.
Shower cabins «Niagara»
The walls and doors of Niagara shower cabins are mounted non-standard:
- First, the base is installed, placing it close to the walls of the room;
- Next, the side walls are mounted, connecting them to the base through special holes;
- The joints are treated with silicone and wait for it to harden;
- In the side walls there are hinges into which the doors are installed.
The main requirement for the installation of these booths is good sealing with silicone. It is due to the features of the profile, loosely adjacent to the cabin elements. Also, a number of models require taking into account the pressure of water: for normal operation, it must be high and stable. Information about the pressure in the system must be specified in the organization serving your home.
Shower cabins "Ika"
Shower cabins "Ika" are mainly represented by rectangular models with a hydromassage function. When installing this equipment, you should pay increased attention to adjusting the position of the doors: the slightest inaccuracies can lead to leaks.
Shower cabins "Erlit"
Cabins of this brand have good performance characteristics, but are supplied with the most general instructions, which do not contain detailed descriptions and recommendations. Erlit cabins are characterized by the same need for careful sealing of all joints. Particular attention should be paid to the quality of the factory siphon. In many cases, consumers come to the conclusion that it needs to be replaced.
Differences in the collection of open and closed cabins

Proposed by us step-by-step instruction how to properly assemble a shower cabin is fully applicable to models of both types: open and closed. The difference is that the walls of the cabins with a dome are installed on a pallet already assembled. The installation sequence is as follows:
- first, the back panel is mounted close to the wall;
- then the rear panel equipment is connected to communications;
- at the final stage, the front part with doors is installed.
In all cases installations are possible individual characteristics, for which you need to read the instructions.
Installation of rectangular cabins

Often, rectangular cabins are equipped with expensive hydromassage equipment. In this case, the pallet can be used as a full-fledged bathroom. main feature installation of cabins of this type consists in observing the order of installation of the walls:
- first install the back panel on which the equipment is located;
- side walls are attached to it;
- in conclusion, the installation of the front part with doors is performed.
When installing a shower cabin yourself, follow the installation rules and the requirements of the manufacturer's instructions. Also, do not neglect the safety rules.
Shower cabins have long ceased to be a luxury. For today it best alternative standard pallet in apartments with small bathrooms, studios and small families. A variety of hydroboxes in plumbing stores allows everyone to choose a model that is suitable for cost and functionality.
But many owners, having learned how much it costs to assemble a shower cabin, prefer to do the assembly work with their own hands. If you are one of them, study our instructions, photos and videos in the article. With their help, you will be able to better understand the installation technology and correctly assemble a shower cabin of any design.
Types of shower cabins
There are two principles for classifying shower enclosures - by manufacturer and by type of construction (assembly method). With the first parameter, everything is simple. Chinese showers are cheaper European models, but inferior to them in quality. It is not easy to assemble a Chinese shower cabin, and not because of the complexity of the design, but because of a lack of parts or lack of available instruction. European shower enclosures are better suited for do-it-yourself assembly.
According to the type of construction, all models of shower cabins can be divided into two categories. For their comparison, look at the photo. The first are designed for installation close to two walls and consist of a triangular pallet and doors. They are called corner cabins or simply a shower corner. You can see an example of this design in the photo. The installation of such models requires preliminary work on leveling and waterproofing the walls and removing angles of 90⁰. Otherwise, the operation of the corner shower cabin may cause inconvenience.
Hydroboxes of the second type are easier to assemble - they do not require any planes for installation, except for the floor. These are rectangular shower enclosures, which can be assembled anywhere in the bathroom. Look at the photo - even a Chinese shower of this type makes the interior of the bathroom much better.
Before installing it, you will only need to level the floor plane. These models are undemanding to walls and corners. The only condition is that for ease of installation and subsequent operation of such a shower cabin, try to leave a distance of about half a meter between the pallet and other objects in the bathroom before assembly.
Required Tools
To assemble a shower cabin with your own hands, you will need not only the cabin itself, a pallet and installation instructions, but also a set of some tools.
- Building level - for leveling the pallet.
- Sharp stationery or construction knife.
- Crosshead screwdriver.
- Wrench.
Of the additional materials for the installation of a shower cabin with your own hands, you will need to purchase, collect in one place:
- good quality siphon;
- washers M16;
- sealant (preferably silicone);
- cotton and latex gloves (the latter are useful for assembling glass shower doors).
Components
Most simple models shower cabins consist of a tray, glass or plastic doors with a frame of guides and a faucet with a shower head. The roof and wall panels are not always included in the assembly kit (this applies to both Chinese shower enclosures and European models). The reason is that the walls of the bathroom can be used as a frame to install a corner shower enclosure. You can assemble the hydrobox without a pallet, as in the photo below.
Before assembling the shower cabin with your own hands, make sure that the assembly kit contains all necessary details frame and additional devices. Their list, as a rule, is given in the instructions in the format of a list or a set of photos. It is advisable to do this in the store or when delivering a shower cabin. In case of a shortage, the assembly and installation work will take you a lot of time and effort, so it’s better to play it safe in advance.
Step by step assembly instructions
To understand how to properly assemble a shower cabin, the photo instructions attached to it are not always enough. For information on some of the nuances of work, it is better to study several videos and photo guides for assembling your particular model. We will tell you how the shower cabin with a tray is installed in the general case.
Even before buying, it is advisable to correlate the dimensions of the frame of the selected model of the shower cabin and its tray with the dimensions of the bathroom. The height of the structure, including the podium for the pallet, should be 25-30 cm less than the height of the room. Do not be guided by the photos in the catalogs and video advertising! The dimensions of the shower cabin are best evaluated live in the store.
If the model you have chosen requires an electrical connection, check that there is a waterproof outlet near the installation site. It is best to draw before installation detailed plan assembly work, having calculated the dimensions of the bathroom, podium, tray and frame of the shower cabin in it.
Before installation on site, assemble the shower enclosure on free space- in a room or hallway. This will help you understand the assembly instructions and make final installation easier. In the course of work on pre-assembly do not use sealant for the pallet and doors, do not fully tighten the bolts that hold the frame together. Pre-installation It will also allow you to assess the need to assemble some structural elements in advance, before you finally assemble the shower cabin at the installation site.
Assembling vertical shower cabins on a monolithic frame takes a minimum of time, even if you have never tried to assemble them yourself before. From the photo below it is clear that the entire installation consists in installing the tray and shower cabin in the right place, assembling the siphon and connecting it to the sewer.
But before assembling a Chinese shower cabin, it is necessary to make a rough installation of the frame. Most of the Chinese models sin with incompleteness, inconsistency of the instructions and mismatch of the communication holes with the attached photo assembly diagram. Pre-assembly will help identify possible flaws in the assembly of the Chinese design and make new holes in the right places with a screwdriver or drill.
Work on the installation of a shower cabin begins with the installation of a pallet. Remove the apron from the pallet and screw the legs, leveling them. Next screw to drain hole pallet hose, the other end of which lead into the sewer. At the final installation of the pallet, use good quality gaskets to seal the drain. Additionally, it is better to treat all joints with sealant, as shown in the photo. The reliability of the design can be checked with your own hands by pouring several buckets of water into the drain. If no leaks are found, you can proceed to further work by assembly.
Tip: You can refuse to use a pallet, this will reduce the cost of the structure. If your bathroom has a floor slope towards the drain, you can assemble a shower cabin without a tray, right on the floor. With this method of installation, do not forget to seal the junction of the shower cabin frame and the floor. See how it looks in the photo.
If you have already tried to assemble a shower cabin with your own hands in an open space, there should be no problems with the final installation. Carry out the assembly work in the same way - assemble the frame of the roller mechanism, put the shutters on it and attach the resulting structure to the shower panel. If the model suggests the presence of electricians, it is worth assembling it separately and checking its operation before final installation, especially if it is a Chinese shower cabin.
Carefully place the finished frame on the pallet. This work is best done with an assistant, so as not to damage the tray and shower. Seal the joints between the frame and the door leaf guides with sealant, and only after that begin the installation of the roof. When assembling it, also do not forget about the sealant, especially if the design involves the presence of a backlight, a fan or other electrical appliances. The installation is completed by the installation of rubber seals on the doors of the shower cabin and the canopy of these doors on the frame.
The next stage of work is the assembly and connection of the drainage system for the pallet. Here it is important to keep in mind that even bundled with models with high price there are unreliable Chinese clamps, which should not be used during installation. And if you want to properly assemble Chinese cabin These parts definitely need to be replaced. Clamps are not that expensive, so it's better not to risk the result of the assembly and buy quality models. Anyway, by deciding to assemble the shower cabin with your own hands, you have already saved a lot.
To make sure that the installation is carried out correctly, after assembly, check the shower enclosure. A correctly and evenly installed pallet should not creak and sway when you stand in it. If squeaks are observed, adjust the height of the legs of the structure again. Turn on the water, check that the shower tray drain is not leaking. If no complaints are found, the assembly work can be considered completed. It remains only to assemble the pallet, putting an apron on it, and you can use the shower cabin!
How to assemble a corner cabin: video
Corner showers, with or without a tray, are most often chosen by owners of small bathrooms. This design after assembly takes up very little space - check out the example in the photo! Attractive and the price of these structures - corner models can be called budget option. However, for the correct installation of such a shower cabin, it is necessary to clearly maintain the angular distance of the walls. Approximate scheme for assembling a corner cabin with a pallet is shown in the photo below.
The frame of any corner cabin, even made in China, is very rigid. If the walls are not even enough, gaps will remain around the shower stall and tray during installation. Many owners who first decide to assemble a shower cabin with their own hands decide to get around this problem by strongly attracting the frame profile to the wall.
Do not attempt to assemble the product in this way! This action will lead to deformation of the frame, and further installation of the shower cabin will become impossible. In the photo below you can see what these assembly methods lead to.
You will learn how to assemble a corner shower cabin with a tray and properly prepare the place for its installation from the video.
Rectangular cab assembly
Unlike corner cabins, the price of rectangular models and their assembly can be quite high. But they look luxurious - take a look at the photo of a rectangular shower in the interior. Do-it-yourself assembly of such structures should be approached especially carefully so as not to spoil the pallet, frame and expensive equipment. Despite the apparent simplicity of the shower cabin, it is better to carefully study the manual attached to it and see a few photos of the master classes.
The design feature of a rectangular shower cabin is that each of its walls is responsible for a specific function. First of all, it is necessary to install the panel on the pallet with plumbing fixtures. Install the remaining parts of the frame only after assembling and checking all communications. As for the installation technology of the pallet itself, it is standard and does not differ in any way from the installation of this part in a corner cabin.
During the assembly process, do not forget to seal all possible joints. If your shower cabin model has a radio, its speaker should also be put on sealant to avoid unnecessary vibrations. At the end of the installation, do not forget to test the shower cabin, check the evenness of the installation of the tray and the reliability of the drain.
Installing a shower cabin: video
Despite the fact that each shower cabin is accompanied by instructions from the manufacturer, it is quite difficult to figure out all the intricacies of installation with your own hands the first time on how to assemble it. And if you need to assemble a Chinese cabin, the complexity only increases - these models rarely boast detailed manuals with photos or drawings. To understand how to properly assemble and install this unit, watch our video review on this topic.
Job prices
Do-it-yourself installation of a shower cabin is a certain risk. If you have not tried to assemble any plumbing before and are afraid of damaging the equipment during assembly, the average price of which is about $ 1000, it is wiser to use the services of specialists. Assembling a hydrobox at home is usually offered when buying a shower cabin, but you can find a third-party master for assembly for installation.
The price for the installation of shower cabins depends on two points:
- the complexity of the design - in order to assemble a shower cabin open type the master will request a smaller fee than for the installation of closed models;
- the need for additional equipment - for the installation of water filters, meters and other devices that are not included in the shower cabin, the assembly master will ask for an additional fee.
The average prices for the assembly and installation of a shower cabin are shown in the table below.
| Name of works | price, rub. |
| Sliding bath screen assembly | 3500 |
| Assembly of a corner cabin without mounting a pallet | 3500 |
| Canopy doors, installation shower enclosure into the opening | 3500 |
| Assembly of the frame and pallet, installation of a simple shower cabin without electrics | 3900 |
| Assembly and connection of a shower cabin with hydromassage | 4900 |
| Assembly of the frame and installation of a shower cabin with hydromassage and a steam generator | 5400 |
| Large shower enclosure assembly | from 6000 |
| Installing the cabin and pallet on the podium | 1200 |
| Dismantling the shower cabin | from 1200 |
| Sealing 1 meter cabin seam | 100 |
| Mounting the pallet on the floor and connecting it to the sewer | 1500 |
As for the prices for additional components and their installation, they can be as follows.
Of course, it is more profitable to assemble a cheap shower cabin with your own hands. But if you have bought high-quality and expensive equipment, and do not have the skills to work with it, it is better not to be afraid of prices and ask professionals to assemble the hydrobox.
Manufacturers of shower cabins strive to assemble their products unlike their counterparts. This applies both to the design features of the cab and pallet, and to the nuances of installation. Let's look at examples of the most popular models of shower cabins and the subtleties of their installation.
Cabin Serena
When assembling the Serena shower cabin shown in the photo, a poorly written manual from the manufacturer delivers a lot of trouble. If you decide to do the installation yourself, be guided by the assembly scheme of closed cabins, but with some amendments. So, you need to assemble the rear walls of this model using brackets attached to bearing wall. It is not recommended to use self-tapping screws that come with the cabin, it is better to replace them with better fasteners.
Cabin Niagara
It is easy to assemble the Niagara shower cabin shown in the photo standard scheme. For the reliability of this design, reinforced sealing of the joints is required. Rubber seals supplied may not provide sufficient fit. Cabins of this model can only work correctly if there is sufficient pressure in the system. Therefore, it is not enough to assemble them with high quality, you still need to provide good pressure.
The model shown in the photo, like all cabins of this line, is very sensitive to the mounting surface. The slightest unevenness or distortion of the frame will lead to the fact that it will not be possible to assemble the cabin doors evenly.
Cabin Luxus 530
When assembling the hydromassage cabin Luxus 530, pay attention to the system for connecting fittings. Since the design includes many different modes work, it is very important to properly organize the water supply and install the connecting pipes exactly according to the technology.