How to glue ceiling tiles: preparatory work and pasting methods. How to properly glue ceiling tiles: different ways. Where to start gluing and how to apply glue to ceiling tiles? What adhesive is best for ceiling tiles? What can be
To date, there are a large number of finishing materials for the ceiling. Most affordable option are ceiling tiles, which are square panels of polystyrene. They have a wide variety of textures and a wide range of colors. This makes them great option to create beautiful practical interior at minimal cost. The article will tell not only how to glue ceiling tiles but also how to take care of it in the future.
Advantages and disadvantages of ceiling tiles
The polystyrene from which the plates are made is a light and environmentally friendly material with good soundproofing properties. Products from it are easily cut with a simple clerical knife and quickly mounted.

It belongs to flame-retardant materials, but can be melted and deformed by a powerful light bulb. Therefore, it is recommended to place chandeliers at a distance of at least 20 cm from the tiles.
With the help of foam tiles, it is easy and quick to create Smooth surface without significant financial outlay. But, with all the advantages, the adhesive ceiling is not very durable, subject to negative influence moisture and ultraviolet.
Calculation of the required amount of material
The sizes of ceiling tiles can be different, but in most cases they are produced in square 50x50 cm. Also produced rectangular tiles 100x16.5 cm in size, but they are extremely rare on sale.
After the final choice of plates is made, it is necessary to calculate required amount. The simplest option is to divide the length and width of the ceiling by the length of the side of the slab. For example: the ceiling has a size of 300 cm by 600 cm, and the width of the tile is 50 cm. It turns out that 6 tiles fit in width and 12 in length. Multiply 6 by 12 and get 72 - this is right amount ceiling tiles.
In the event that the ceiling is not a multiple of 50, you can draw the location of the panels on paper, observing the exact proportions of the ceiling.
Tip: you need to purchase 15% more material. This is done in case of breakage, deformation or incorrect cutting.
Ceiling surface preparation
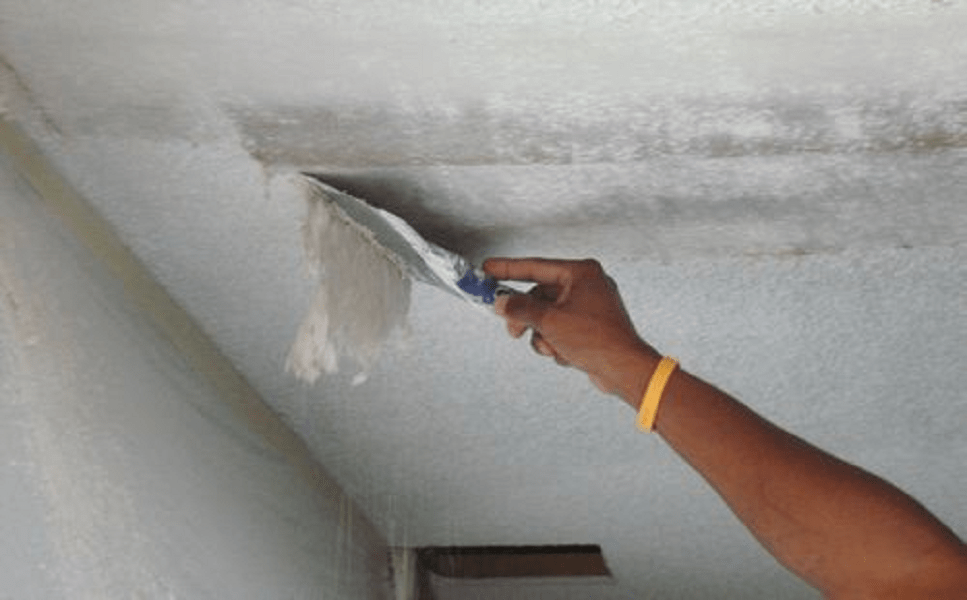
Before you start gluing the ceiling tiles, you need to clean the ceiling from the old coating and dust. If necessary, it should be leveled with putty. If the irregularities exceed 1.5 cm, then plastering is performed first and only then finishing putty. When it dries, a primer is applied to the entire surface.
The next step is to apply markings for laying tiles. Only evenly distributed panels will give the room the necessary aesthetics. To do this, two diagonal lines are drawn on it, the center is located at the point of their intersection. Then, perpendicular lines are drawn through the resulting point, dividing the ceiling into 4 equal parts.

How to glue ceiling tiles
Panels made of polystyrene can be glued to almost any surface. For kitchen fit laminated tiles, and for the bathroom - extruded.
But you need to know how to properly glue ceiling tiles, because even the simplest workflow requires compliance with the technology.
First of all, you need to decide on the glue. For these purposes, a large number of special formulations. But you can also use PVA or Moment. It is applied in a zigzag pattern on the reverse side.

The tile reacts to temperature changes and changes in humidity, which leads to deformation after installation. To avoid this, it should be left unpacked for several hours in the room where it will be mounted. The quality of the tiles will also affect the aesthetics of the glued ceiling. It must have consistent geometric dimensions and even cuts.
The first tile is installed so that one of its corners is located at the center point of the ceiling. If there are wires in this place, they are de-energized, and the corner of the panel is cut (later it will be closed with a glass of a chandelier or a decorative ceiling rosette). Align it along the lines drawn in advance on the ceiling. When sticking, the tile must be pressed tightly, but in such a way that no dents remain on it, and hold for several seconds.

All subsequent rows are arranged in parallel, without gaps between the tiles. The triangular arrows on the reverse side- they must point in the same direction.
Tiles in the last rows, in most cases, have to be cut to required size. Therefore, you first need to try them on and only then apply glue. The remaining gap between the wall and the extreme rows of panels will be closed with a ceiling plinth.
Tip: Remove all adhesive residue immediately with a sponge.
Effect seamless ceiling created with silicone sealant. They fill all the seams and level with a trowel. Excess is easily removed with a damp cloth.
The final stage of the installation of the plates will be the installation of a ceiling outlet around the hole for the chandelier and the plinth. Also, the finished ceiling can be coated with any water-based paint.
After completion of work, the doors and windows in the room are tightly closed to prevent air movement.
Tips to help you properly glue the ceiling tiles
Pressing the plate is best wooden block, not by hand. This will prevent possible dents from appearing on it.
If the ceiling has an uneven geometry and the gaps between the tiles are too large, it is recommended to use acrylic sealant which, after drying, can be painted. But this method is only suitable for white, non-laminated tiles.
If the gap between the extreme rows of plates and the wall is less than 1.5 cm, in the future it will be decorated with a ceiling plinth. But if it is larger, then they close it with a strip of the panel, cut not only in size, but also taking into account the pattern.
Glue the boards from the center to the edges in small rooms ah inappropriate. As a result, they will not create the effect of a continuous surface, but will only increase material consumption. The best way is to install the tiles from the corner to the center.
Ceiling tile care
- non-laminated tiles are cleaned with a dry cloth or very carefully with a vacuum cleaner;
- the laminated panel should be wiped with a damp sponge;
- small dirt is removed with a regular eraser;
- from direct exposure to rays, polystyrene tiles turn yellow over time;
- complex pollution, from plates white color can be cleaned with alcohol. But the use of turpentine, acetone or gasoline is unacceptable.
Ceiling tiles in the interior
Very often it is associated with simple white slabs that have a simple pattern. But today their design has become more perfect, and they are already able not only to finish the ceiling of the room on a budget, but also to add luxury to the interior.


Everyone knows how to glue ceiling tiles, even those who first have to deal with the exciting process of pasting a ceiling with tiled material. The simplest, at first glance, the process will require some skill and skill before you can glue the tiles into a monolithic ceiling surface. And there is something to try for, after a little practice, gluing a ceiling finish made of polystyrene tiles is no more difficult than gluing wallpaper, and the visual effect is an order of magnitude higher and more expressive.
Ceiling tiles: description, characteristics
The raw material for the manufacture of ceiling finishes is foamed and extruded polystyrene or foam. Depending on the technology used, tiles for ceiling decoration are produced in several versions:
- thick, with large quantity microporous textured tile, with a slightly rough, as if untreated surface. The material is produced with an edge of 20-60 cm, a thickness of 9-14 mm. Thanks to the mixture of polystyrene fibers and balls sintered in an injection mold, the material is quite strong, light, with a porous surface;
- The pressed ceiling board has a smooth, almost glossy surface. The wall thickness is 4-5 mm, the structure of the finishing plate is quite strong and dense, like PVC;
- Ceiling slabs made by hot semi-pressing of blanks from foam or low density polystyrene foam. Instead of a scattering of balls, sheets cut from a block are used in the production process.

The latter method is the simplest, so the ceiling tiles are relatively inexpensive, but not the most durable. Glossy boards are considered the most resistant to dirt and damage; it is enough to simply glue such a lining on the ceiling even without helpers. It is easy to change, if necessary, paint or add new trim elements.

Note! Due to the use of heat press finishing tiles even within the same pack may differ slightly in external dimensions.
Most tiles for decoration ceiling are made with a small processing allowance, which does not interfere with gluing plates or lamellas. A small spread is not considered a marriage. Before gluing the coating, the plates are sorted and cut exactly according to the pattern.
When choosing a ceiling tile, more attention should be paid to the presence of chips, cracks and striae in the material. Such plates are immediately rejected and sent for cutting, ceiling surfaces are glued in separate pieces in the "blind" corner areas or make a repair adhesive mass based on dichloroethane.
Calculation of the number of tiles on the ceiling and the choice of glue
Before gluing foam ceiling tiles, it is necessary to at least calculate the required amount of material. The calculation procedure itself is relatively simple and is performed in three stages:
- We measure the size of the ceiling of the room;
- We count the number of tiles;
- We make an adjustment for the width of the seam.
After measuring the dimensions of the room from wall to wall, we get the size of the ceiling in width and length. Knowing the dimensions of the tile that we will glue, we alternately divide the sides of the ceiling into the leg of one tile. Get the number of pieces tile material, which fits on the ceiling along each of the walls, we multiply and find out the total number of pieces.
Note! If the room in which the ceiling tiles are to be glued occupies several hundred squares, for greater accuracy it is necessary to take into account the width of the inter-tile joint.
Calculation features
Calculating the width of the seam is simple. It is enough to take three or four single tiles, lay them in a row with a minimum gap at the seams or even with a slight overlap, approximately as they will be located on the ceiling. It remains to measure the total length of the laid out row with a tape measure and subtract from the result the size of a single tile multiplied by the number of pieces. This determines the installation joint allowance for a certain amount of ceiling cladding. For small rooms, the seam allowance can be neglected.

If the ceiling tiles are to be glued in wooden house, the material must be laid with a slight overlap of the edges, approximately 1.5-2 mm. In this case, the estimated number of tiles must be increased by 4-5%. Without overlap, the ceiling cladding will separate over time, and thin strips of seam will appear between the plates.
If there is no desire to mess around with such difficulties, you can simply divide the quadrature of the ceiling covering, which is supposed to be pasted over with foam trim, by the area of \u200b\u200bone tile. The ceiling must be measured with your own hands, the dimensions of the tiled material can be taken from the catalog. With this approach, the material will need to be bought with a margin of 5-7% in order to be able to experiment with ceiling cladding cutouts in more critical areas.
Choosing the right glue
The modern market offers more than two dozen different adhesive compositions and products that can easily be used to glue anything on the ceiling, from wooden slats to plastic and cardboard.

If a base of plasterboard, plywood or fiberboard has already been assembled on the ceiling, then it is best to glue it with polyurethane and acrylic adhesives. They provide a very viscous and strong seam. The only drawback is that such adhesives are always made in opaque form and inconvenient packaging. You can use "Super-Moment", rubber glue, "Globe", but such adhesives are quite expensive.
It is best to glue the tiles with a transparent "Titanium" or "Dragon", you can use polypropylene hot melt adhesive, especially with a heating gun it is much more convenient to glue than with a regular tube.

Holds clear well silicone sealant, over time it becomes whitish-cloudy and can stand out at the seams. Acrylic and methacrylic sealants turn yellow over time, like the popular "liquid nails", so they are used for mounting ceiling cladding in limited quantities.
Ceiling tile options
The manufacturing technology of the ceiling slab is designed in such a way as to make the cladding as adaptable as possible to all irregularities and defects in the ceiling. The use of a soft edge for glue, the rejection of gloss and the application of a relief pattern to the surface of the tile, in addition to purely decorative qualities, helps to glue the tile to the ceiling surface with defects, peeling or a slope to one side.
Ceiling tile layouts
If the ceiling is flat and smooth, like a table, you can glue the ceiling cladding in any order, you just need to choose the right direction for the incidence of daylight and flows from the chandelier. If the ceiling surface has small defects, then it is best to glue the material according to one of the most common schemes:
- Laying material from the far corner or the main window of the room;
- Installation of plates from the geometric center or suspension point of the chandelier;
- The arrangement of the ceiling tiles with a diagonal pattern, snake, chess, with bandaging of rows.
Advice! Masters advise to glue ceiling decor so that the lower part of the ceiling is predominantly illuminated first. In this case, the decorative finish will visually look more even.
If the ceiling base has slopes or defects in several places, then it will not be possible to solve the problem by tile orientation alone, it will be necessary to glue the material with a more complex pattern, for example, a snake or diagonal stripes of several colors.
Why glue the ceiling decor from the chandelier
The first and basic rule for installing ceiling tiles is that it is necessary to start gluing the material from the place where the chandelier is suspended. Only in this way can a stable impression of even and symmetrical rows be ensured, even if the tiles are glued with a slight error.
It often happens that, at the whim of electricians or builders, the central ceiling lamp or the chandelier is not hung in the center of the room, but with a shift of half a meter to one side. In this case, it would be correct to move the laying start point from the geometric center of the ceiling to the fixture of the chandelier.
If the room has perfectly even walls, the proportions and dimensions of the ceiling plane correspond to a regular rectangle or square, you can also glue the slab material from a window or corner, but with the obligatory use of marking cords or a laser level.
How to glue ceiling tiles
The quality and durability of the plates directly depends on how well the surface is prepared and the method of fixing the ceiling cladding is chosen correctly. You can glue in two ways:
- Directly on concrete base ceiling covering;
- With the use of an intermediate sublayer laid on the surface of the ceiling.
The second option allows you to get the best quality of fastening, gluing on a prepared base is easier and easier than on concrete. In addition, the use of a slab base allows you to level the plane of the ceiling and make it as smooth as possible.
The first option is the fastest and easiest, but the quality of the sticker is worse, in addition, it will take a lot of effort to level and clean the concrete surface, otherwise it will not work to stick the tile evenly and beautifully.
Ceiling surface preparation
In any case, the ceiling surface must be cleaned of old decorative finishes, it is necessary to remove the remnants of the primer and the water-based paint layer, wallpaper and adhesive flakes. At first glance, the ceiling plane may seem quite flat, but the impression can be deceiving. In any case, at the end of the stripping, two cords are pulled, one of which is basic, the second is movable.
The base cord is pulled along the midline of the room and aligned horizontally with building level. A movable cord stretched perpendicular to the base one is sequentially rearranged along the ceiling in increments equal to the width of the tile. By the distance from the ceiling to the cords, the failures of the ceiling surface are determined and eliminated with the help of finishing putty. After drying, the stains are cleaned and primed.
Ceiling markings
For execution marking work use the same two cords as when stripping. If the tiles are planned to be glued in the classic row way from the far corner, the cords do not change, the movable cord is transferred to the first line of laying the material. To simplify the work, it is recommended to apply marking lines to the ceiling, along which you can glue the tiles without being distracted by rearranging the marking cords.
If it is supposed to glue the plates diagonally, the cords are pulled along the corners of the room, or with an offset if the initial point does not coincide with the geometric center of the ceiling surface.
How to glue tiles on a flat ceiling
The first tile must be glued in the center of the row. The technology of the sticker is quite simple, the slab is laid in place of the future gluing and risks are applied to the concrete with a pencil, indicating the dimensions of the spot. Glue is applied on the back at five points - in the center and at a distance of 3-4 cm from the corners.
The slab is laid on the spot and leveled according to the previously made risks. To be sure of positioning accuracy, we apply a thin wooden strip 80-100 cm long to the front edge of the tile, and align the position of the slab along it before gluing the next one. It is advisable not to rub the tile to the base, as is usually done with wallpaper, to expel bubbles. Before gluing the next part of the finish, you must wait at least 5-7 minutes.
Uneven ceiling tiles
Often tiled lining you have to glue without carefully leveling the ceiling base. In this case, an additional thread is pulled along the row, which determines the lower level of the facing surface. With the help of a thread, you can align the tiles even on a crooked ceiling, but it will take three times as long.
As in the previous case, initially the risks of the border of the spot are applied to the ceiling, on which the tiles will need to be glued. If there is a depression on the ceiling, an increased amount of transparent silicone is applied under the tile, the material is laid on the base. After 30-40 minutes, the plate can be aligned along the thread without pressing and fixed with an invisible pin.

Whitewash ceiling tiles
The answer to the question of whether ceiling tiles can be glued to whitewash sounds simple. You can glue on whitewash, paint or lime, subject to the pasting technology. ceiling surface subjected to pre-treatment:
- Sweep dust, chalk or lime wet wipe, rag, sponge;
- It is treated twice with a water-based primer so that the whitewash layer is saturated and saturated with a primer solution to concrete.
After the primer layer dries, the whitewash turns into a strong crust, to which any tile can be glued. Sometimes the dried primed surface is rubbed with coarse-grained emery to increase the adhesion of the adhesive to the ceiling surface.
A more difficult option is to glue the slab on the ceiling, covered with water-based emulsion or lime with soap. The coating must be carefully cleaned with a spatula along the marking lines.
Cleaning and Sealing
No matter how carefully they try to glue the ceiling cladding, there are still remains of the adhesive mass in the seam lines, and sometimes on the edges of the tile. If a facing material laid with overlap, problems, as a rule, are not present. It is necessary to carefully remove the protruding traces of glue with a carving knife. We leave everything that got on the front of the foam until the adhesive mass dries completely.

Any attempts to wipe off the adhesive ahead of time and even accidental touching will lead to the appearance of dirty spots, therefore, it is necessary to glue the material only with clean hands, preferably with cotton gloves.
In the event that it is necessary to glue the plates butt-to-butt, the resulting seam must be painted over with a special toner or covered with a plastic edging.
Ceiling tile painting
With all the advantages, foam tiles have one significant drawback - the material collects and absorbs like a sponge, great amount dust and fumes. Instead of gluing new plates every year, it is easier to paint the surface with a quality water-based emulsion or acrylic paint.
It is enough to remove the dust accumulated on the ceiling with a vacuum cleaner, and carefully apply a double layer of paint with a roller or spray gun.
Conclusion
How to glue ceiling tiles, and what is the secret High Quality work, can be understood only after a little self-practice. In each case, any master has to look for his own installation method, the most convenient scheme markings and the best glue option. To glue the ceiling decor with high quality, you do not need to save on two things - on glue and on the time allotted for the job.
Despite the emergence of new, more modern materials, polystyrene tiles have been popular and in demand for ceiling decoration for many years. This is a good option for creating a beautiful interior space at minimal cost.
Ceiling tiles - what is it?
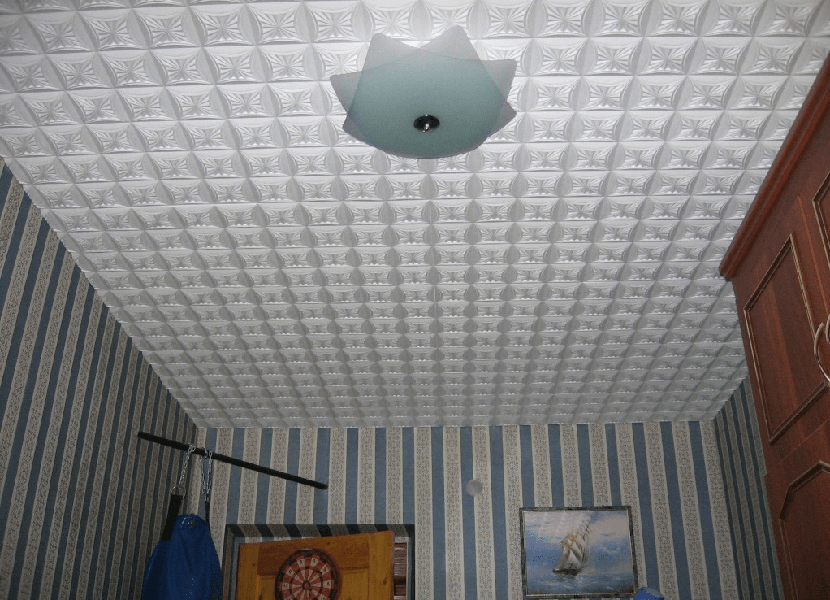
These are polystyrene boards of square or rectangular shape. The ceilings decorated with this material are called “glued”, “pasted”, “glue” (you can see the photo in our article). Their front side can be laminated or uncoated, embossed or smooth, have a wood structure or imitate stone, fabric, wood carving or stucco.
What is the tile
There are three types of this material:
- injection tiles;
- extruded;
- pressed.
Injection tiles are obtained by sintering and casting polystyrene raw materials in special molds.
The extruded samples are pressed from the extruded strip. It can be film-coated or painted.
The pressed tile is made by a stamping method.
Advantages and disadvantages of the material
The advantages of polystyrene tiles should primarily include its environmental friendliness. It also features good soundproofing and thermal insulation characteristics. Easy to install - easy to cut and easy to install.

The material is not combustible, melts only at temperatures above +80 degrees. Plates can be glued close to heating pipes. But lamps and fixtures should be located no closer than 30 cm from the ceiling. A definite plus is the very affordable price.
The disadvantages of such ceilings, experts and buyers consider their fragility - over time, they begin to turn yellow from sunlight. In addition, it is rarely possible to achieve the effect of a homogeneous surface due to the many joints.
How to glue ceiling tiles
First you need to do the preparation of the surface of the ceiling and the tile itself. This material is not capricious, but it reacts to changes in humidity and temperature. Therefore, when you bring the tile home, do not rush to unpack it, let it “lie down” with room temperature during few hours. Thus, you will protect it from deformation after installation.
We prepare the ceiling
You can often hear questions: “How to properly glue the ceiling tiles? Do you need preliminary preparation surfaces? Such preparation is necessary. whitewash, old tiles, the wallpaper should be removed. There should be no loose areas on the surface. It must be perfectly clean, even and dry. Putty will be required for small surface differences. Tiles will hide small potholes, therefore additional processing these areas are not required. But a primer never hurts.
How many tiles do you need
To find out, you need to make a scale drawing of the ceiling that you are going to trim. Then try to "place" tiles on it. Add 10-15% of the material to the amount received in case of breakage or deformation.

Marking the surface
How to glue ceiling tiles so that the surface is even and smooth? There are several methods for decorating the ceiling. Tiles can be glued at an angle, although it is more convenient to lay them parallel to the walls or diagonally.
It is better to start installing tiles from the center of the ceiling. To do this, you need to define this point. Stretch two cords from one corner of the ceiling to the other diagonally. Draw two perpendicular lines through the center point. It is important that the very first rows lie perfectly flat - the type of your future ceiling depends on this.
How to choose glue
What is the best way to glue ceiling tiles? The question is serious. From right choice adhesive composition largely depends on the quality of work. Most often, "Moment", "Titan", "Eco-naset" are used for this. "Titan" and "Eco-naset" are distinguished by good adhesive properties, but they seize for a long time. Against their background, Moment glue has a clear advantage - it seizes in seconds, holds the material for a long time and reliably. But along with this, it has a significant drawback - it is spent more, and it costs more. In addition, you will need a special gun to use it.
Beginning of installation
How to glue ceiling tiles with your own hands? A question that interests many. Therefore, today we will try to dwell on it as much as possible.
Since the material weighs little, the adhesive can be applied pointwise to the tiles. Usually the places where it should be located are indicated in the instructions. Often, beginners in this business have difficulty fitting the pattern. This happens due to inconsistencies in tile sizes that are invisible at first glance. Masters know this secret, but what if we glue the ceiling tiles with our own hands?

To prevent the pattern from shifting, take a tile that is not smeared with glue and attach it to the already glued one. If the size matches, work can continue. The first tile is glued so that one of its corners is located exactly at the center point (later the 4 central tiles will be connected here). If there is a chandelier in this place, then the corners must be cut according to the markup. In the future, this place will be covered with a socket and become completely invisible.
Trim the edges of the tiles along the marked lines. The tile must be pressed against the ceiling, but not too hard so as not to leave dents. The next tiles are glued parallel to the previous ones, without gaps. If excess glue is squeezed out in the seams, they must be removed immediately with a damp cloth or sponge. The tile for the last rows is cut to the desired size, it is tried on in place and only then glue is applied to it. The gap will be closed with a ceiling plinth.
How to glue the ceiling tiles with a rhombus? This means that the tiles will be glued diagonally to the walls, and therefore they will be perceived as diamonds. This method looks pretty impressive. However, this method will entail a greater consumption of material, since the tiles near the walls will be laid out in triangles or incomplete slabs.
We cover the cracks
How to glue ceiling tiles so that the coating is a single whole? Gaps between tiles (joints) must be filled with sealant. It is resistant to moisture. After filling the seams, they should be carefully leveled with a trowel. Remove excess with a damp sponge.
Final touches
It remains to glue the ceiling outlet, after cutting a hole in it for the chandelier. After completing the work in the room, close the windows and doors to stop the movement of air.

What is seamless tile
This is the result of fruitful cooperation between technologists and chemists. This tile has a significant advantage - after pasting on the ceiling there are absolutely no seams. This magnificent result is achieved in different ways.
What is seamless tile? It is produced in the following types:
- with decorative fill;
- with curly edge;
- with calibrated edge.
A tile with a decorative fill is a material with a decorative pattern applied to it, usually abstract.
Tiles with a figured edge have various figured cutouts, thanks to which the individual elements are connected to each other. On the ceiling, a wavy or zigzag connection remains almost invisible.
Tiles with a calibrated edge are made using a special technology, when the evenness of the sides and the straightness of the corners are maintained with an accuracy of a millimeter and a degree.
How to glue a ceiling seamless tile? In vain, someone thinks that in order to see no seams on the ceiling, it is enough to buy a tile with such a promising name and stick it on the ceiling. In fact, there are some secrets, knowing which, you can achieve high quality by doing this work yourself.

Surface preparation for seamless tiles is traditional: the ceiling must be even, clean and primed. Despite the fact that the seams on the tile are not visible, the initial marking is necessary. To do this, you need to find the center of the ceiling (you already know how to do this). Then mark up. This will help you install quickly and accurately.
A seamless tile is glued to the time-tested Dragon glue or another recommended by the manufacturer. Work starts from the center of the room. The tile is smeared with glue along the edges and in the center. After that, it is applied to the ceiling and held for 3 minutes. When the ceiling is pasted over, you can start gluing baguettes, which are sold along with the tiles. The corners are cut at a 45 degree angle. Cut a hole for the chandelier.
As you can see, the work is not too different from gluing regular tiles. The difficulty lies in the fact that long time stand with your hands up. To make the task a little easier, take someone to help you.
How to care for a tiled ceiling
Non-laminated tiles (uncoated) can only be wiped with a dry cloth or vacuumed gently. Grease spots from such a surface can be washed off with alcohol.

Today you learned how to glue ceiling tiles (you see the photo in our article). This work is not difficult, but requires accuracy. By following all the rules, you can get an excellent result, which you and your loved ones will be satisfied with.
Expanded polystyrene tiles are one of the most popular types. ceiling coverings. Therefore, the question of how to glue ceiling tiles is of interest to many novice craftsmen who plan to do the finishing work with their own hands.
How to choose a tile for finishing the ceiling?
The great popularity of this decorative material due to its following advantages:
- simple installation - everyone can handle gluing tiles;
- easy care - foam tiles can be washed with any non-abrasive agent;
- the ability to hide small defects in the base;
- speed of finishing - a small base (for example, a ceiling in a bathroom) can be easily decorated in a few hours;
- low cost - prices for ceiling tiles are quite low, so everyone can afford such a finish.
For successful completion repair work 3 questions need to be answered:
- how to choose a facing material so that it lasts for many years;
- how to glue the selected finish option so that it does not fall off;
- how to properly glue ceiling tiles so that the ceiling is not only reliable, but also attractive.
In the domestic market, ceiling tiles are presented in a wide range. Different models differ in color and texture design, production technology, geometric dimensions, quality of expanded polystyrene and cost. Therefore, before gluing tiles to the ceiling, you need to choose the right finishing material.
According to the production method, ceiling tiles are divided into 3 types:
- Injection. It has a low density and, accordingly, strength, and therefore it costs less than other types of finishes. Its thickness is no more than 14 mm. Such a tile is made by sintering foamed plastic, which is why it is called foam.
- Stamp. It is characterized by a denser structure and mechanical strength. The thickness of the product is 6-8 mm. Manufactured by extruding polystyrene foam high temperatures Oh.
- extruded. Is the most expensive and most quality tiles. At high density and strength, its thickness is about 3 mm, which, when finishing, saves extra millimeters free space. During the production process, the tile is covered with a laminated layer, which not only improves it appearance but also protects against the harmful effects of moisture. This allows the material to be used in rooms with high humidity(bathroom, kitchen).

By choosing suitable type products, its color and pattern, you need to check the quality of the material and its geometric dimensions. The first step is to inspect the edges of the sheets - they should be dense and consist of small granules. The smaller the granules, the better. Then the strength of the material is checked. To do this, from the selected batch, you need to take one element by the edge and shake it a little. If at the same time it does not deform or break, then its quality is good.
Each tile must have the correct geometric dimensions. For example, if it is a square, then all the edges must be the same length and the corners must be 90°, that is, they must not be rounded or flattened. Only in this case you will be able to finish the ceiling without seams.
Choosing a ceiling tile adhesive
When answering the question of how to glue a ceiling tile, one cannot ignore the glue, which is the connecting link between the base and the finishing material. The adhesive composition for cladding ceilings must have the following properties:
- strength and reliability;
- quick grasp;
- good adhesion;
- environmental safety;
- the ability to lay down both thin and thick layers.

If everything is more or less clear with the first four points, then the last one needs a little pause for clarification. Most old-style apartments do not have flat ceilings; they can have height differences of more than 15 mm. How to finish in this case? Exit from similar situation there are two ways: before facing, level the ceiling or use glue that can be applied in a thick layer. The first option is not optimal, since it requires additional financial investments from the contractor. So the best option is the application of the adhesive composition in a thick layer, thereby simultaneously leveling and finishing the ceiling base.
Adhesive tiles on flat ceiling can be produced using adhesives such as liquid nails, "Moment", "Eco-naset" or "Titan". They have excellent adhesion to any coating, be it plaster, wallpaper or other material, and fast time drying, which greatly facilitates installation work.
What to glue foam tiles on an uneven ceiling? In this case the best option speaks ordinary putty and glue for tiles or drywall. These compounds can be applied in layers up to 40 mm, thereby leveling even big swings heights.
Preparatory work
Any repair process begins with preparatory work. And finishing the ceiling with tiles in this regard is no exception. Before gluing this material, you must do the following:
- choose a laying scheme;
- calculate the required number of tiles;
- prepare the ceiling for finishing.
There are different ways to place tiles on the ceiling relative to the walls, the most popular are (Fig. 1):
- rows;
- in a checkerboard pattern (with a shift);
- diagonally.

Each styling option allows you to create a specific pattern that is best suited to a specific design idea.
To calculate the required amount of finishing material, it is necessary to make drawings on a sheet of paper in a box in the selected scale, which indicate the dimensions of the room and the layout of the tiles. In doing so, it should be taken into account that standard sizes ceiling tiles are 50x50 cm. You can start laying from the center of the room or from the wall opposite the window. If there is a chandelier in the center of the ceiling, then it is recommended to start finishing from it (Fig. 2).
After that, according to the drawing, the number of whole tiles and the number of elements that will be cut off are counted. If gaps remain near the walls, the width of which will be less than the width of the tile (less than 25 cm), then in this case 1 element will go to cover two rows. If the size of the gaps is more than 25 cm, then you should buy tiles at the rate of 1 piece per 1 row.

How to glue the tiles so that they do not fall off over time? To do this, it is necessary to properly prepare the finishing surface. First, the ceiling is cleared of poorly held old finish and treated with a deep penetration primer. If the base has deep cracks and chips, then they should additionally be repaired with putty. Before finishing, it is recommended to prime the ceiling made of chipboard or plywood with a special mixture with abrasive additives that increase the adhesion of the material. After the primer dries, you can glue.
How beautiful to glue the ceiling? First you need to correctly draw the finishing base and designate its center. For this, two cords are taken, which are pulled from opposite corners diagonally. The point of their intersection will be the center of the room. Then they retreat from this point by 25 cm (half of the tile) and draw lines along which the first element will be glued.
Do-it-yourself tile gluing
Before gluing the tiles, you need to prepare the following tools and materials:
- ladder;
- spatula, if a mixture for drywall or putty will be used as glue;
- roulette;
- stationery knife;
- mounting gun;
- tiles;
- adhesive composition;
- white sealant.

How to apply glue to the tile depends on what composition will be used. If gluing will be done using putty or cement mixture, then the glue is applied pointwise so as not to increase the weight of the finishing material. If it is planned to use Titanium, liquid nails or another similar composition, then it is applied around the entire perimeter of the tile with a thickness of 20-30 mm, and a small spot is also made in the center.
After applying the glue, you need to leave the tile alone for a few minutes so that the glue dries a little. After that, the finishing material is applied to the ceiling along the markings and pressed with uniform efforts over the entire area. Before mounting each subsequent element, it is applied dry to its place to see how it will lie down and whether it will spoil the drawing. The tiles in the last row, if necessary, are cut with a clerical knife on a hard surface. At the last stage finishing works ceiling plinth is glued.
Before gluing tiles, all windows and doors in the room must be closed to prevent drafts, because they adversely affect the strength of the hitch.
If for some reason small gaps have formed in some places, then you should not be upset, as they can be sealed with white sealant. After the sealant dries, it will need to be painted over.
There is nothing complicated in gluing ceiling tiles. The only thing that can cause difficulties is the marking of the ceiling, since it must be done as accurately as possible. If everything is done correctly, then the do-it-yourself ceiling will look no worse than if the installation work was carried out by the repair team.
Currently, if it is necessary to quickly and inexpensively repair the surface of the ceiling, tiles made of polystyrene foam or expanded polystyrene are often used. With the help of this finishing material, you can literally transform the appearance of rooms for various functional purposes.
The tile is fixed on the ceiling by gluing. It is quite possible to glue the facing ceiling tiles on your own, you just need to follow some technological subtleties and work rules. In this case original cover for many years will delight its owners with an attractive appearance without loss of performance.
Probably, only tiles will help to make the ceiling beautiful so quickly and inexpensively.
Ceiling tiles vary
Ceiling tiles, with the external similarity of its varieties, are different in density, surface smoothness and other parameters, on which performance characteristics and the time of trouble-free enjoyment of the coating largely depend. Depending on the manufacturing technology, the following types of ceiling tiles are produced:
- good density and smooth surface has a tile made of extruded polystyrene foam. It is characterized by the highest price, but it is easiest to glue and care for it.
- The cheapest foam tiles produced by stamping. Its surface has a porous structure, into which dirt clogs during prolonged use. The material has low mechanical strength, easily breaks under bending loads, therefore, before gluing it, a margin of at least twenty percent should be provided.
- The so-called injection tile, which belongs to the middle price category. During manufacture, it is placed in special form and exposed to high temperatures. As a result, a clear pattern appears on the surface, the performance of the product is also average, and it is easy to glue such material.
- The most common shape is a square tile, while its edges are straight or in the form of a wave. In any case, the gluing method does not change, only the appearance becomes diverse. In terms of external design There are many different options for the considered finishing material.
 Styrofoam tile options for ceiling decoration
 Choose a tile and count the number
Consider a few points that will help you choose the right material. When we choose a tile, we should take into account the totality of its technical characteristics and the specific conditions in which the latter will be used. In addition, it is necessary to pay attention to the accuracy of geometric dimensions and a good drawing of the pattern on the surface.
On the side cuts there should be no burrs and uneven edges, the edges should be located at a strictly right angle. An indispensable condition is the uniformity of the entire batch in terms of size, thickness and surface tone.
The number of tiles needed to glue it is not difficult to calculate. The standard form of the facing material is a square, the side length of which is half a meter. To finish one square meter surface will require four tiles.
Having determined the area of \u200b\u200bthe ceiling and multiplying it by four, we get the desired result. As a result, we know how many pieces of tiles will be needed to cover the entire surface.
In the process of doing the work, you have to trim and fit the material for it. quality styling. During installation, mechanical damage to some of the products is also possible.
As a result, when purchasing, a margin of about twenty percent should be provided so that there is no need to urgently go to the construction market in search of the same batch of material.
What kind of glue will we use
Of course, you need to know what glue to glue the ceiling tiles with. Most often, Titan glue or its analogues are used to fix the tiles, you can also glue it liquid nails. The inconvenience of using these compounds lies in the fact that the tile coated with them has to be pressed against the surface for some time until the glue seizes. This creates certain difficulties when working on a ceiling with constantly raised hands.
 The range of adhesive for tile stickers is wide enough
 More convenient to use manufactured industrial way special mastics for laying ceiling tiles. They have a paste-like sticky consistency that holds the facing material without prolonged pressing, gluing is greatly facilitated.
Such compositions are used in the absence of height differences on the ceiling surface. If it is uneven, putty is used to lay the tiles on plaster base or special glue "Perlfix". They allow you to simultaneously level the base and glue the facing material.
Preparing the surface for the sticker
After a visual inspection of the cleaned surface, the detected irregularities are repaired with putty. After it dries, a layer of primer is applied to the base. The surface prepared in this way is ready for gluing the ceiling tiles.
 A few steps to prepare the ceiling for tiling
 Layout scheme along the wall or diagonally
You can glue tiles in a variety of ways - placing them in a checkerboard pattern, diagonally or with edges along the walls, but its accurate installation requires accurate marking. Let's figure out how to properly mark the ceiling. First of all, the geometric center of the ceiling is determined, which is the intersection of lines. drawn from diagonally opposite corners. Through the intersection point along the walls and in the transverse direction, two more lines are drawn, located exactly at right angles to each other. Such marking is universal for any scheme of laying the facing material.
We glue the tiles with our own hands in different ways
You can stick tiles with your own hands in different ways. picking up different colors, you can create the most daring geometric patterns, bringing to life design projects, but the main styling methods are as follows:
Starting from the geometric center of the ceiling, tiles are installed with side cuts parallel to the walls. You can use two colors of material and arrange square slabs in a checkerboard pattern. The surface lined in this way well hides the defects of the ceiling.
 The option of laying tiles diagonally can be very interesting.
 The coating of elements located along the applied diagonal marking lines looks beautiful. In this case, the material consumption increases, since for accurate laying it will be necessary to trim the tiles, not all of which can be used.
Using two colors of tiles, a coiled snake can be laid out on the surface. Sticking also starts from the geometric center of the ceiling.
How to glue tiles on a flat ceiling
You can fix the tiles on a flat ceiling using Titanium glue or its analogues. The technology for performing the work is not particularly difficult. The following sequence of actions will be correct:
- on the inner surface of the tile along the diagonal and perimeter is applied thin layer glue;
- then it is installed in its place and pressed against the surface until the initial curing of the adhesive composition;
- laying of each subsequent tile is carried out with the most accurate combination of the pattern applied to the surface, while increased attention is paid to a good fit of the side surfaces;
- in places difficult for installation, the tile is cut.
 Sticking tiles on a flat ceiling with ordinary glue
 Side surfaces should fit together as tightly as possible. If a gap has formed between the tiles during installation, do not move them with your hands, as the material may break. To perform this manipulation, you need to use a wooden plank, it is applied to the side surface of the cladding element and the latter is moved to its place.
How to glue if the ceiling is uneven
In the event that the ceiling is uneven, lay the tiles on an ordinary adhesive base very problematic. To perform this work, putty compounds or special glue are used to fix drywall elements. The compositions are diluted to the consistency of a mixed dough and applied to the surface in the place of the smallest difference in height, capturing an area on which approximately four tiles can be laid. This is done to level the coating until the initial curing of the adhesive mixture.
After laying four tiles, the resulting surface is leveled using a sufficiently long building level. The tool is applied to the coating, and pressure is applied to the surface in the right place to bring it into equilibrium.
 A sticker with mastic helps to neglect irregularities
 Then the next fragment of four elements is glued and again placed in the same plane. In this case, the thickness of the adhesive composition should not be increased by more than five millimeters, in which case the facing coating may fall off.
Cleaning and sealing seams
To obtain an impeccable appearance of the lined surface during the installation of tiles, certain technological subtleties must be observed.
Quite often it turns out that the adhesive composition falls on outer surface tiles. It should be removed immediately.
Immediately after installing the tile in place, its surface is cleaned of all traces of glue, otherwise it will be impossible to wipe off the stains in the future, and they will spoil the appearance of the coating. To do this, keep a container with clean water sufficient volume and cleaning material.  Sealing gaps with sealant after tiling
The gaps remaining after laying the tiles between its side surfaces are filled with white putty and smoothed out with a rubber spatula. Surplus is wiped off immediately. Excellent results gives the use of a special sealant based on acrylic. It has good adhesion to the material from which the facing tiles are made and perfectly masks surface defects.
Ceiling tiles can be painted
Most simple method The decorative finish of the coating is its coloring. It is impossible to process seamless tiles in this way: the joints will clearly appear on the surface. The paint material must have water repellency, prevent the reproduction of pathogenic microflora, do not attract dust pollution. These requirements are best met acrylic paints water-based. Before applying them, the surface of the tile is covered with a primer layer.
 The paint adheres very well to the tiles.
 Painting is best done with a paint roller made of foam rubber, the use of such a tool makes it possible to obtain the most uniform coating layer. The technology for performing work is no different from painting walls covered with wallpaper - the application of the painting material is carried out in two layers. Thus, it is possible to realize unique design ideas- to create a unique pattern on the decoration of the ceiling.
Rules for the care of tiles on the ceiling
In order to keep the tiled ceiling surface in good condition, it must be maintained regularly. Over time, dust pollution is deposited on the coating, which give it a dark color.
leaks water pipes or a neighbor's flood form rusty spots on the surface. If you do not remove them in a timely manner, then it will be impossible to do so.
To prevent such consequences, the following rules for caring for tiles on the ceiling must be observed:
- using a vacuum cleaner, dry clean the coating at least once a month;
- every two months to carry out wet cleaning of the cladding;
- detergents should not contain aggressive chemicals and solvents;
- the drawings extruded on the surface are processed with a soft sponge moistened with a cleaning solution.
In the recesses of the ceiling tiles after wet cleaning water is retained. It should be removed with a hygroscopic cloth, leaving no ugly streaks. Especially carefully should dry the surface of geometric decorative elements. The following video is carefully selected and will certainly help the perception of the foregoing.