Luxurious calibrachoa: planting and care at home. Calibrachoa - an exquisite ampelous plant for summer cottages and balconies
Cutting is one of the most commonly practiced methods vegetative propagation plants.
Cuttings can successfully propagate many types of garden and domestic plants.
Young plants obtained by rooting cuttings develop relatively quickly and bloom soon. For example: it takes about 2.5-3 months to start flowering. And a petunia stalk, rooted from a flowering plant in the warm season, forms buds in two weeks.
Rooting cuttings is resorted to in cases where:
- I want to propagate my favorite plant;
- the plant dies, but you can still cut off a healthy cutting from it and keep it this species or grade;
- it's a pity to throw away cut branches after the formation of bushes - they can be rooted and, for example, presented to your beloved friend.
I will tell you about my experience of cutting garden flowers using the example of my caliberhoa and petunias.
Preparing Calibrachoa and Petunia Cuttings for Rooting
With a variety of colors of numerous flowers, simple or double, they are very popular with flower growers and do not need a special introduction.
Calibrachoa - continuously blooming ampelous plant, intended for cultivation in, balcony and, in high.
Calibrachoa flowers are very similar in shape to petunia, but they are much smaller - only 2-3 cm in diameter. This is by no means a disadvantage of the plant, because on each lash of caliberchoa they bloom great amount! Not without reason, the most famous variety series of calibrachoa is called “Million Bells” (“Million Bells”). Compared to petunias, caliberchoa are more cold-resistant and practically not susceptible to disease.
Calibrachoa bloom most abundantly in bright sun, but these plants look good in partial shade.
Calibrachoa is best planted in loose nutrient soil and provide the plant with regular watering and fertilizing, avoiding moisture stagnation.

Pictured: Calibrachoa blooming in a hanging basket; rooted cuttings of calibrachoa
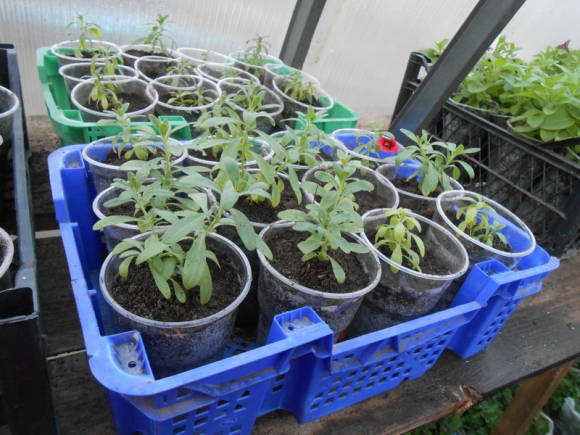
These "three heroes" are rooted and planted cuttings of calibrachoa. They do well in their pots, but require pinching to form a branched bush. I'll trim them over the fifth pair of leaves. New branches will soon form under the cut point, and the cut off top can be rooted and a new plant can be obtained.
To obtain a cutting, we cut off or pinch off the lower leaves of the caliber of the twig to expose the trunk. At the top we leave a few leaves for photosynthesis. Large leaves at the cutting can be cut in half to avoid excessive moisture loss.

In the photo: getting a cutting of calibrachoa from a cut twig
AT winter time and in early spring, cuttings of plants take root worse than in summer. Therefore, to insure against failure and speed up the process of rooting cuttings, I will resort to help (this procedure is not necessary).
I dissolve 4 drops of "Epin" in a glass of water (200 ml) and send the cuttings to swim in the solution for 20 minutes.
We do the same manipulations with petunia cuttings. We cut the cuttings so that at least two or three internodes remain on them. We expose the trunk, leaving the crown, and send the cuttings to swim in the solution with Epin.
Rooting flower cuttings in peat tablets
If you have the opportunity to root cuttings in peat tablets, root in them. Almost one hundred percent survival is guaranteed. A is pure pleasure. Easy to maintain desired humidity, easy to transplant plants. Peat tablets - wonderful invention humanity!
Before planting the cutting, soak the peat tablet for 20 minutes in clean water then squeeze lightly excess moisture and make a hole in it. To do this, you can use a toothpick.
Gently insert the cutting into the recess and lightly squeeze the tablet.

In the photo: with a toothpick we make a recess in a peat tablet; stalk planted in a peat pellet
It remains to place the tablet with the handle in a homemade greenhouse of two transparent cups. Rooting cuttings needed high humidity and light.
If there are several rooted cuttings, peat tablets with them, you can put them in a common bowl and cover it with a transparent lid or film (but so that the tops of the cuttings do not touch them).
In the lid of an impromptu greenhouse, I always make a hole for the evaporation of condensate. This allows you to get rid of the work of repeated ventilation of the cuttings. Looks like this.

In the photo: a stalk of calibrachoa takes root in a mini-greenhouse with a hole; petunia stalk planted in light soil
If there are no peat tablets, cuttings can be rooted in light soil. I mix ready flower soil with or coconut fiber in a ratio of 50:50. Such additives make the soil loose, but retain moisture and allow air to pass through.
Rooting flower cuttings in light soil
For an example of rooting in the ground, take a prepared petunia stalk and carefully place it in the soil mixture. The soil should be moist, but not squishy, and the leaves should not come into contact with the ground. So we will avoid possible troubles in the form of rot.
It is a good idea to treat the soil before planting cuttings from fungi and bacteria with suitable preparations ("", "Previkur", "Maxim", etc.).
We also close the planted petunia stalk with a glass-greenhouse with a hole and put it in a bright place.
Now our task for the next week is to remember the pets 2-3 times a day and lightly spray the leaves of the cuttings. It is important! Until the roots are formed, the plant only drinks through the leaves. No water - no life.
If on the fifth or sixth day the planted stalk looks cheerful, and its leaves have not lost turgor (elasticity), then you are doing everything right, and the root formation process has started.
After another week, rooted cuttings begin to grow new fresh leaves; their roots are shown through the walls of a glass or peat tablet.
The photo below shows that the stalk of calibrachoa is already rooted. And the petunia stalk, two weeks later, not only formed roots, but also released buds.
However, if the roots are not yet visible, and the cutting is about to bloom, then it is better to pinch off the buds - let the plant spend energy on root formation.
Calibrachoa cuttings as a way winter conservation Plants Rubric: Useful information Author: Molodtsova Tatyana In order to please you every summer with blooming clouds of self-grown calibrachoa, you need to cut the plants twice a season. In July from mother plants cut and root the cuttings, from which by the autumn queen cells will grow, which will remain to winter in a cool bright room. In February-early March, already from these queen cells grown by you, you need to cut and root the cuttings, which by the summer will become the decoration of your hanging planters. And then again - cuttings from these plants for winter storage, and in winter - again cuttings for growing new plants. It is possible by sowing seeds, but is it necessary ... Recently, caliberhoa seeds can be found on sale. Of course, if there is an irresistible desire, then you can try to grow these flowers from seeds. But is there any point ... The fact is that the thin seedlings of calibrachoa are even more capricious than petunias. In order to get flowering specimens by summer, you need to sow the seeds in the first half of February. Seedlings grow for a long time, reluctantly, slowly gaining strength. Therefore, it is much easier to propagate the plant by cuttings. It is also more profitable in material terms - from one summer mother liquor of calibrachoa you can root quite a lot of cuttings. And in February-March, cut off about the same number of cuttings from them. That is, the number of plants you produce is growing exponentially. Vegetatively propagated varieties of caliberchoa bloom more luxuriantly than those grown from seeds. The fact is that they have a "installation" at the genetic level - not to set seeds. This means that the plant does not spend energy on this, giving all of them to flowering. Faded flowers, drying up, simply fall off, leaving no seed box behind, which means they do not spoil the appearance of the bush, it always looks neat. Cutting technology Both in summer and in winter cuttings should follow the same pattern. With a sharp tool (so as not to pinch the vessels of the plant), you need to cut off the tops of the shoots so that there are 4-5 internodes on the handle. In general, I use the middle parts of the shoot as cuttings, the main thing is that the shoot is not lignified. Such cuttings, although worse, still take root and give rise to plants. Preparing for cuttings of caliberchoa Cutting of cuttings of caliberhoa Next, cut off the leaves. The bottom pair is a must, this internode will be immersed in the soil. We leave 1-2 upper pairs of leaves, the rest, which are lower at the base of the cutting, are either cut off completely, or cut off leaf blade half. If you leave a lot of green mass, the cutting will be forced to evaporate moisture from the surface of all the leaves, spending a large amount of energy not on the formation of the root system, but on evaporation. But almost all the leaves cannot be removed - after all, the stalk still feeds on them. Find the "golden mean". Apical cuttings of calibrachoa Finished cuttings of calibrachoa If the internodes are very short, then sometimes 2-3 internodes from below have to be “bare” in order to fix the cutting in the soil. Don't expect every cutting you cut will take root, but you'll still get a great yield. You can plant cuttings in pre-soaked peat tablets and place a container with plantings in a special greenhouse for plants or, for example, in a transparent cake box. But I do it my way. I cook before cutting landing tanks- in 2-3 places I cut the bottoms in small, 100-gram, plastic cups. I pour light permeable, slightly moist soil there (if the soil is stored in a bag with small holes, then it does not dry out unnecessarily, while maintaining its natural humidity. I dip the lower parts of the cuttings in Kornevin powder and gently immerse the bare internode into the soil. I crush the soil in a glass to the base of the cutting. If the cutting is not “compressed” with soil well enough, rooting will go worse. I sip the cuttings a little. But I don't flood! It is important to plant the cuttings first, and then water, because in the reverse sequence, a crust forms on the surface of the wet soil, making it difficult for small roots to breathe. Planting cuttings of calibrachoa After planting the cuttings, the soil needs to be slightly moistened. plastic box and cover with clingfilm so that there are small gaps. If you "seal" the box tightly, then the cuttings will simply rot. And if you open it too much, it will dry out. That is, I do not tuck all the edges of the film under the bottom. The film should fog up, but the condensate should not accumulate in drops. After planting the cuttings, you need to arrange a greenhouse for them. It is not necessary to close the rooted cuttings tightly with a film. I choose the place for the boxes meticulously - the direct sun should not fall on the cuttings (“cook” instantly). This point is especially relevant during summer cuttings, when "the sun is still high." Therefore, it is necessary to curtain the boxes with clean white bags. It is not necessary to put the cuttings on the floor from the greenhouse, hoping to protect them from sunlight - they will quickly rot. Now, for 1.5-2 weeks, the cuttings will have to be sprayed daily from a spray gun with a fine spray and aired mini-cuttings. In the heat, you have to spray 2 times. Ideally, in the area of the leaf apparatus of the cutting, moisture should constantly be in a state of fog, but the soil should not be waterlogged. A couple of times Zircon can be added to the spray water. It not only invigorates the plants, but also helps to speed up the rooting process. From the scorching sun, the cuttings need to be shaded. The roots of the cuttings are clearly visible through the walls of the glass. You can easily determine whether your cuttings are rooted - the roots will be visible through the transparent walls of the glass. Then you should switch to moderate soil watering and gradually free the boxes from the film - for several days, let the film just lie on the edges of the box, do not tuck it, and then remove it altogether. With lighting, look at the situation - accustom young plants to it gradually. Tops of the shoots that have begun to grow should be pinched. Then you can repeat this technique a couple more times to cause more tillering. During spring cuttings, this procedure should be given more attention in order to form a neat ball by summer. As the roots entwine the provided space, future queen cells should be transplanted into flowerpots with a diameter of 11-13 cm. You can hang them on the guides of the greenhouse. I plant in 0.5-liter glasses with holes in the bottom. It is preferable to use opaque pots so that the light does not penetrate through the walls and does not contribute to the development of algae on the inner walls of the cup. Mother liquors obtained from July cuttings should be kept in winter in a very bright room at a temperature of about + 12 ... + 15 ° C, for example, in a heated greenhouse or veranda. Do additional lighting if necessary. And in any case, do not flood! Rooted cuttings of calibrachoa Closer to spring, in February-March, everything will be repeated all over again. During rooting, the cuttings need a temperature of about + 20 ° C, but after transplantation - no more than + 15 ° C. And good lighting, so that the shoots do not stretch, the plants are squat, the leaves do not turn yellow. In April, with a successful scenario, rooted and spreading plants can move to an unheated greenhouse. Calibrachoa Calita Supercal Terra Cotta Very important point when growing calibrachoa - to prevent the appearance of powdery mildew, which likes to appear at the most unexpected moment and develops very quickly. As a preventive measure against most fungal diseases (and bacterial ones too), I regularly spray and water the caliberhoa mother liquors with a solution of "harmless" biological preparations Alirin-B or Gamair. If you find powdery mildew too late, it is better to treat the plants with Topaz (according to the instructions). Very often, especially when kept in a greenhouse, queen cells are inhabited by aphids, whiteflies, spider mite. Against aphids, I first use the biological preparation Biotlin. Usually helps. Fitoverm acts as a “biological weapon” against the last two pests. And only in the case when nothing takes pests (usually in the summer, in the heat), I use Aktara or Alatar.
It is necessary to cut the plants twice a season. In July, cut and root cuttings from mother plants, from which mother cells will grow by autumn, which will remain to winter in a cool, bright room. In February-early March, already from these queen cells grown by you, you need to cut and root the cuttings, which by the summer will become the decoration of your hanging planters. And then again - cuttings from these plants for winter storage, and in winter - again cuttings for growing new plants.
You can sow seeds, but is it necessary ...
Recently, caliberhoa seeds can be found on sale. Of course, if there is an irresistible desire, then you can try to grow these flowers from seeds. But is there any point ... The fact is that the thin seedlings of calibrachoa are even more capricious than petunias. In order to get flowering specimens by summer, you need to sow the seeds in the first half of February. Seedlings grow for a long time, reluctantly, slowly gaining strength.
Therefore, it is much easier to propagate the plant by cuttings. It is also more profitable in material terms - from one summer mother liquor of calibrachoa you can root quite a lot of cuttings. And in February-March, cut off about the same number of cuttings from them. That is, the number of plants you produce is growing exponentially.
Vegetatively propagated varieties of caliberchoa bloom more luxuriantly than those grown from seeds. The fact is that they have a "installation" at the genetic level - not to set seeds. This means that the plant does not spend energy on this, giving all of them to flowering. Faded flowers, drying up, simply fall off, leaving no seed box behind, which means they do not spoil the appearance of the bush, it always looks neat.

cutting technology
Both during summer and winter cuttings, one should act according to the same scheme. With a sharp tool (so as not to pinch the vessels of the plant), you need to cut off the tops of the shoots so that there are 4-5 internodes on the handle. In general, I use the middle parts of the shoot as cuttings, the main thing is that the shoot is not woody. Such cuttings, although worse, still take root and give rise to plants.

Next, cut off the leaves. The bottom pair is a must, this internode will be immersed in the soil. We leave 1-2 upper pairs of leaves, the rest, which are lower at the base of the cutting, either cut off completely, or cut the leaf blade in half. If you leave a lot of green mass, the cutting will be forced to evaporate moisture from the surface of all the leaves, spending a large amount of energy not on the formation of the root system, but on evaporation. But almost all the leaves cannot be removed - after all, the stalk still feeds on them. Find the "golden mean".
If the internodes are very short, then sometimes it is necessary to “bare” 2-3 internodes from below in order to fix the cutting in the soil. Don't expect every cutting you cut will take root, but you'll still get a great yield.
You can plant cuttings in pre-soaked peat tablets and place a container with plantings in a special greenhouse for plants or, for example, in a transparent cake box. But I do it my way. Before cutting, I prepare planting containers - in 2-3 places I cut the bottoms in small, 100-gram, plastic cups. I pour light permeable, slightly moistened soil there (if the soil is stored in a bag with small holes, then it does not dry out unnecessarily, retaining its natural moisture. I dip the lower parts of the cuttings in Kornevin powder and gently immerse the bare internode into the soil. I crush the soil in a cup to the base cuttings. If you "compress" the cuttings with soil is not good enough, rooting will go worse. I sip the cuttings a little. But I don’t flood! It is important to plant the cuttings first, and then water, because in the reverse sequence, a crust forms on the surface of the wet soil, making it difficult for small roots to breathe.
I put the glasses in a lattice plastic box and cover with a film so that there are small gaps. If you "seal" the box tightly, then the cuttings will simply rot. And if you open it too much, it will dry out. That is, I do not tuck all the edges of the film under the bottom. The film should fog up, but the condensate should not accumulate in drops.
I choose the place for the boxes meticulously - the direct sun should not fall on the cuttings (“cook” instantly). This point is especially relevant during summer cuttings, when "the sun is still high." Therefore, it is necessary to curtain the boxes with clean white bags. It is not necessary to put the cuttings on the floor from the greenhouse, hoping to protect them from sunlight - they will quickly rot.
Now, for 1.5-2 weeks, the cuttings will have to be sprayed daily from a spray gun with a fine spray and aired mini-cuttings. In the heat, you have to spray 2 times. Ideally, in the area of the leaf apparatus of the cutting, moisture should constantly be in a state of fog, but the soil should not be waterlogged.
A couple of times Zircon can be added to the spray water. It not only invigorates the plants, but also helps to speed up the rooting process.
You can easily determine whether your cuttings are rooted - roots will be visible through the transparent walls of the cup. Then you should switch to moderate soil watering and gradually free the boxes from the film - for several days, let the film just lie on the edges of the box, do not tuck it, and then remove it altogether. With lighting, look at the situation - accustom young plants to it gradually. Tops of the shoots that have begun to grow should be pinched. Then you can repeat this technique a couple more times to cause more tillering. During spring cuttings, this procedure should be given more attention in order to form a neat ball by summer.
As the roots entwine the provided space, future queen cells should be transplanted into flowerpots with a diameter of 11-13 cm. You can hang them on the guides of the greenhouse. I plant in 0.5-liter glasses with holes in the bottom. It is preferable to use opaque pots so that the light does not penetrate through the walls and does not contribute to the development of algae on the inner walls of the cup.
Queen cells obtained from July cuttings should be kept in winter in a very bright room at a temperature of about + 12 ... + 15 ° C, for example, in a heated greenhouse or veranda. Do additional lighting if necessary. And in any case, do not flood!
Closer to spring, in February-March, everything will be repeated all over again. During rooting, the cuttings need a temperature of about +20 ° C, but after transplantation - no more than +15 ° C. And good lighting so that the shoots do not stretch, the plants are squat, the leaves do not turn yellow. In April, with a successful scenario, rooted and spreading plants can move to an unheated greenhouse.

A very important point when growing calibrachoa is to prevent the appearance of powdery mildew, which likes to appear at the most unexpected moment and develops very quickly. As a preventive measure against most fungal diseases (and bacterial ones too), I regularly spray and water the caliberhoa mother liquors with a solution of "harmless" biological preparations Alirin-B or Gamair.
If you find powdery mildew too late, it is better to treat the plants with Topaz (according to the instructions).
Very often, especially when kept in a greenhouse, queen cells are inhabited by aphids, whiteflies, and spider mites. Against aphids, I first use the biological preparation Biotlin. Usually helps. Fitoverm acts as a “biological weapon” against the last two pests. And only in the case when nothing takes pests (usually in the summer, in the heat), I use Aktara or Alatar.
Read more about growing caliberchoa - in the article Calibrachoa: Cultivation and Reproduction.
Photo: Tatyana Molodtsova, Rita Brilliantova
Growing caliberchoa is a simple procedure that even a child can handle. This plant has an attractive appearance. It can often be found on the balconies of high-rise buildings as a decoration. Flowers planted in pots form green balls with bright and beautiful buds. What is caliberchoa and how to care for it can be viewed in this article.
General information about the plant
 Calibrachoa is a large and lush bush, consisting of many flowers and stems, which, intertwined, form a ball. The size of the opened bud is about 3 cm in diameter. Initially the favorite of millions was purple hue. Now the interest in culture is only growing. New and new colors are being displayed and that's it more people would like to have this decoration.
Therefore, you can meet:
- hot pink;
- red;
- orange;
- peach;
- blue;
- yellow;
- brown and other colors.
Calibrachoa is easy to care for. To make the flower beautiful, it is enough to follow some rules.
Until the 90s, calibrachoa was called petunia. Scientists believed that this different types the same flower. However, according to studies, it has been proven that calibrachoa differs from petunia even in DNA.
Calibrachoa is called ampelous due to the fact that it can be planted in hanging planters.  This plant falls from the pot with a long shoot. The flower itself is very simple, looks like a bell. But, interestingly, the neck of the bud always differs from the petals in shade - such a feature of caliberhoa. Often the flowers of the plant are simple in shape, but recently there are terry species that are somewhat larger than usual. There will be fewer of them on the bush than simple ones. But despite this, caliberchoa does not cease to lose its attractiveness.
Calibrachoa cultivation and outdoor care
 Location location. The plant feels great not only in pots, but also in open ground. A prerequisite successful cultivation flower is the presence a large number Sveta. The culture loves the sun, reaches out to it, but the intense heat has a detrimental effect on the bush.
A good option for growing a flower is either a terrace.
Calibrachoa should be planted only in those areas that bathe in the morning in sunshine, and in the daytime they are shaded. It is better not to keep the flower completely in the shade. Lack of sun can cause dull buds and short period flowering.
 Irrigation. The plant loves systematic watering. If you irrigate the land correctly, then the bush will have a rich shade and constantly bloom. Water should be used only well-settled. If possible, it is better to collect rain.
Proper cultivation and care of caliberchoa involves protecting the plant from strong and gusty winds. Much depends on compliance with this condition. If you plant a bush in a calm place, then the plant will delight with its unique inflorescences for the whole summer until the autumn cold.
Features of growing at home
 Calibrachoa is grown in hanging boxes and baskets. For full growth, 2-3 kg of land is taken per flower. The bush must be provided with loose and light soil, preferably slightly acidic or neutral.
  Watering should be constant, but moderate. It is very easy to pour a flower and then it will disappear. You can spray the flower with water: such activities are liked by the plant and have a beneficial effect on its growth and reproduction.
If you grow calibrachoa on a balcony, then you need to choose the south or southeast side. During the peak of the sun, it is necessary to provide protection to the flower, otherwise it may dry out. Not the best place for breeding calibrachoa is the balcony of the last floor, on which the sun constantly hits, and where the wind walks. In this case, it is recommended to bring the pot into the room at least at lunchtime.
 During the vegetative period, the flower should be actively fertilized so that as many seeds as possible ripen. It is best to choose those that contain phosphorus and potassium, and add them once a week.
In order to maintain the attractiveness of calibrachoa in winter, you should install lamps near the flowerpot daylight. Devices need to be kept almost constantly turned on above the flower. Calibrachoa is a rather delicate and fragile flower. If something heavy gets on the leaves or buds, they may die. First of all, it concerns the rain. So if flowers grow on open balcony, you can make a visor or canopy for them.
Pinching a flower and its wintering
 Many do not know how to properly pinch caliberchoa and why this procedure is needed. This event is designed to make the bush more voluminous and sprawling. Pinching is to cut off the upper cuttings and shoots of the flower. Thus, the plant will grow not up, but in breadth. You can tear off unnecessary processes both with your hands and with the help of nail scissors. The main thing at this moment is to be careful and not cut off the excess. If everything is done correctly, then calibrachoa for a short time will become lush, and the shoots will descend in a beautiful waterfall, forming an excellent decoration for your veranda.
Experts note that every year it is necessary to change almost all the land in pots to ensure the full growth and maturation of flowers. This is due to the fact that very little nutrients remain in the old soil.
Most of popular varieties caliberchoa are annuals. Therefore, you can not worry about their wintering. However, experienced gardeners know that some species can be saved and next year they will again please with their usual colors. To ensure proper wintering of calibrachoa, a pot with a bush that has finished flowering is placed in a dark place and is practically not watered or fertilized. May be sprayed lightly. 
Thus, the plant is preserved. In the spring, you need to get it and start caring in the same way as last year. It is important to provide the flower with a sufficient amount of daylight or artificial light, and then everything will go according to plan.
The main methods of reproduction of calibrachoa
 Cuttings of caliberchoa. At the end of August, you need to cut off a few tops from the mother plant. Their length should be up to 5 cm. The bottom of the cuttings must be freed from the leaves, and then planted in the ground. In order for the plant to take root as quickly as possible, it will be necessary to provide it with moist soil, and for a while to create greenhouse conditions. The easiest way to do this is with: cover the stalk with it and open it once a day for a while to planting material breathed. When the plant is established (usually after 2 weeks), you can remove the plastic and carry out the same care as for an adult bush.
 Reproduction of calibrachoa with seedlings. You can also get a new plant with the help of grains. In this case, seedlings are first grown, and only then the finished seedlings are transplanted into the ground or pots. In order for the seedlings to be healthy, you need to take care of sufficient soil moisture. For these purposes, you can plant seedlings in a box, the top of which is covered with foil. The greenhouse effect will turn out and the flowers will grow much faster.
Preparing and planting seeds
 Experts say that if you collect seeds and plant them in a pot, you will not always be able to grow beautiful flower. Often, simple buds are formed on adult bushes that look like wild caliberhoa. The plant may not bloom as abundantly as its ancestor and may have a different shade. Of course, there are exceptions to the rule: then the bush turns out to be the same size, volume and shade as the mother.
If you still decide to try growing caliberchoa from seeds at home, then be patient. Initially, you need to hold the planting material in liquid for a day, and then dry the grains with a paper towel. capacity to use small size.  Before planting caliberchoa, compost and peat must be added to the ground in advance, and it must be saturated before planting seeds. mineral fertilizers. It will take a long time to germinate, and not all seeds will bear fruit. To stimulate growth, you can use special fertilizers, as well as a weak solution of potassium permanganate. In addition, until the seedlings are planted in a pot or soil, it is necessary to feed the crop several times along with watering.
 After the appearance of two full-fledged leaves, a pick should be carried out. This is important event which requires care.
At the bottom of the flowerpot should be laid drainage layer. It may consist of pebbles or other small stones. Next, you need to pour sand, which will loosen the soil, and only then add the main earth mixture. After planting seedlings in pots, you need to choose the optimal fertilizer. After all, the abundance of flowering depends on it.
Diseases and pests
 Despite the fact that ampelous calibrachoa is often grown at home, pests still often encroach on it.
The most common are:
- thrips;
- whitefly.
In order for the plant to bloom all summer, wilted bells should be cut off.
 In addition to pests, ampelous caliberhoa is susceptible to certain diseases. The most common black leg - the plant turns black and dies. This is a fungus that appears in conditions of excessive moisture. If you notice blackening of the plant, take action immediately - treat with medicine.
 Another common disease of caliberchoa is powdery mildew. In this case, a white coating is observed on the plates. The reason for this is also an excess of moisture and sudden changes in temperature.
The flower is also striking root rot due to too wet ground. You can save the plant by emergency transplanting to a drier place.
If the bush is affected by chlorosis, small volumes of flowering are observed. This disease occurs when very hard water is used for irrigation, as well as in case of iron deficiency. By eliminating this, you will return the plant to its former attractiveness.
Calibrachoa with other plants
 In addition to decorating beds, verandas and balconies, calibrachoa is widely used in landscape design. And it is not only about ampelous types, but also about low-growing varieties. Combinations can be very diverse - from planting a flower on the hills along with mountain plants to filling street vases.
The flower gets along well with both curly and flowering representatives of the flora. Gardeners very often practice planting entire flower beds of this plant. To achieve a good result, several contrasting shades should be selected. Thus, the flower bed will be bright, will always attract attention, and if you make it geometric shape, then the created beauty will not escape the eye.
 Knowing when to plant a caliberchoa and how to care for it can grow one of the most beautiful and popular flowers of our time. Regular watering, timely feeding, providing light, warmth, proper planting and removal of cuttings - all this only contributes to the appearance of beauty on your window and in your life. A bright and original bush will give a lot of aesthetic pleasure, decorate any corner of the site or house. Choose the color of the buds you like, or plant several different shades, and you will certainly get the desired result.
Everything is in your hands in order to create beauty around you!
Amazingly beautiful plant - video
- a flower with an exotic name and a very decorative look. It is valued by flower growers for its ampelous properties - the flower falls in a cascade of small flowers, shaped like bells. To settle on garden plot or a calibrachoa balcony, you need to know the rules for growing and caring for a flower.
Calibrachoa flower: description
Genus Calibrachoa - Nightshade. Any inexperienced gardener, seeing a caliberchoa, will easily confuse it with a petunia. And for good reason - the flowers are similar in appearance and have a common genetic origin.
The first varieties of calibrachoa were developed from petunia varieties. To do this, Japanese breeders changed their chromosomes. Petunias have 14, while caliberhoa have 18. As a result, the external spectacular appearance of caliberhoa began to differ significantly from the "ancestor" - petunias.
The conditions for planting and care are almost the same, but the methods of reproduction differ: petunia is mainly propagated by seeds, and caliberhoa by cuttings.
Sometimes flower shops offer seeds or seedlings of caliberhoa under the guise of ampelous petunias, surfinia.
Considering these factors, caliberchoa is still not a type of petunia. The shape of the Calibrachoa flowers is equated to small gramophones.
The most popular shade is purple, but breeders have pleased with color hybrids:
- pink;
- red;
- white;
- yellow;
- raspberry;
- brown
- dark blue.
This is an ampelous annual plant. decorative look has when grown in flowerpots, flowerpots.
Who wants to buy a caliberchoa, and not a petunia variety, should pay attention to the characteristics:
- Flower size. Calibrachoa has miniature flowers (no more than 3.5 cm), while petunias have them much larger. Although there is an exception here - "minitunia" also have small flowers.
- "throat" of a flower- the base of the corolla. In calibrachoa, it differs sharply from the main color. Mostly bright yellow.
- Leaves. A clear difference that catches the eye. Like flowers, the leaves of calibrachoa are small, up to 1.5 cm wide, up to 4 cm long, elongated. A short cannon grows on the surface, which is also on the stem.
- Stem. Unlike petunia, it is very dense, there is a similarity with the trunk of a shrub. In petunia, it is grassy, pliable.
Calibrachoa flower
petunia flower
Growing seedlings and mature plants requires sunny areas protected from wind and drafts. It is better to give preference to fertile soil.
Reproduction is carried out in 2 ways: by seeds and vegetatively (cuttings).
Experienced gardeners prefer propagation by cuttings, since growing caliberchoa from seeds has several disadvantages:
- Flowers are not like the "mother plant". Often the result is not what was expected. Many plants are similar to wild calibrachoa. Rarely repeat "parents".
- Even with proper care sparse flowering observed: flowers may be the wrong color, too small.
How to grow caliberchoa from seeds?
Plant seedlings cost a lot. To grow on your site or decorate a balcony with calibrachoa inflorescences, it is not necessary to spend money on expensive seedlings.
It is enough to buy seeds and grow flowers yourself. The plant is a little whimsical in planting and care. But simple rules and breeding tips will allow you to get a healthy, abundant flowering plant throughout the summer.
Seed preparation
Seeds of all varieties have round shape. To increase the chances of germination (although this does not always guarantee good result), they are kept for 1.5 days in a preparation that belongs to phytohormones and stimulate rapid germination. Alternatively, use "Zircon" or "Epin". After the soaking process, dry on gauze or paper towels.
Sowing features
seedling care
Seedling care rules:
- The main care measure is timely watering and spraying. Spray the soil 3 times a day. Only warm settled water is used. 2-3 times a month it is allowed to make flowers for seedlings. It is recommended to apply them by spraying.
- If at least 3 leaves appeared on the seedlings, it should be taken out to the balcony for several hours(mostly at this time it is already spring and the temperature allows).
- When the daytime temperature outside does not drop below 23°C, you can transplant seedlings on permanent place(in pots, flowerpots). These plants are photophilous, but for permanent growth, you can choose partial shade.
- When at least 5-6 leaves appear on a young flower, pinch the top. This will help in the future to form a decorative bush, give beautiful side shoots.
- Young seedlings do not tolerate wind and frequent heat. Growing her on the balcony, remember the need for constant shading.
If the balcony is not glazed, then it is not advisable to use it because of possible drafts and temperature changes.
Planting seedlings in open ground
- A flower can be planted not only in a flower pot, but also in open ground. Transplantation is carried out in mid-late May. But everything is individual, you need to monitor the weather conditions. There should be no frost.
- If you pick up a sunny or shaded area with loamy or sandy soils, follow all the rules of care, then caliberhoa will be much more resistant to pests, infections, drafts, strong winds. Planting a plant in sunny scorching areas is unacceptable.
- Watering bushes that have already been planted in a permanent place needs moderate watering. The soil must be constantly moist. It is advisable to pour water under the root.
- Plants that have grown will not be superfluous and daily spraying especially on the hottest days. When transplanting, count on 2.5-3 kg of soil per plant.
When choosing this method of reproduction, it is better to use purchased seeds from a trusted company. Self-collection of seeds will not only worsen the decorative effect of the “mother” flower, but may also prevent flowering when grown.
How to grow more crops?
Any gardener and summer resident is pleased to receive big harvest with large fruits. Unfortunately, it is not always possible to get the desired result.
Often plants lack nutrition and useful minerals
It has the following properties:
- Allows increase yield by 50% in just a few weeks of use.
- You can get good harvest even on low-fertility soils and in adverse climatic conditions
- Absolutely safe
How to propagate caliberchoa cuttings?
Step-by-step instruction:
- Getting a cutting is easy: it is worth cutting off the top from a young plant no more than 5-6 cm.
- At the selected cutting, 2-3 lower leaves are plucked off. 40-50 minutes after the cut, place the cuttings in a bowl of water.
- The next step is planting the cutting in the ground. It is recommended to use peat tablets or a special store soil for plants that bloom. Preparation for planting: remove excess moisture from the handle and treat with Kornevin. This will facilitate the subsequent care and resistance of the plant to diseases.
- After that, you can bury the stalk in the soil. Make a hole with toothpicks or matches. Deepen to the first leaves on the handle. Place the box in a mini-greenhouse for the first time (you can just cover it with a film) and refresh the soil in a timely manner by spraying.
- Air cuttings 1-2 times a day. Optimum temperature for their rooting - 20-22 ° С. If the planting and care procedure is carried out correctly, then after 12-14 days, expect the first roots.
- Care for young shoots is simple- to hold optimal humidity and do not expose them to drafts. The first transplant is carried out when the young roots grow by 2-3 cm. For young shoots, a pot with a diameter of 5-6 cm is sufficient.
- Many gardeners mistake this flower for an annual. and discarded after the first year of flowering. Subject to certain conditions care, you can get a gorgeous next year from the same plant bright bloom. It will be enough to provide him with moderate watering in a flowerpot, the right care. The temperature for winter storage of the plant should not exceed +12°C.
Calibrachoa grown from petunias are better adapted to the effects of bad weather and pests.
Active growth of such cuttings occurs in winter. They tolerate the rooting procedure well and practically all take root. In spring, shoots can be taken from young plants for cuttings.
Caring for Calibrachoa in the Garden and at Home
There are no special differences in caring for a flower planted in a flowerpot and in open ground. But in open areas it is much harder to protect it from bad weather and pests. At the same time, "indoor" specimens may have more decorative effect.
Watering
Irrigation rules:
Fertilizers and top dressing
In order for the bushes to be healthy, resistant to various pests and diseases, to delight with lush flowering longer, carry out timely feeding of adult bushes.
During the period active growth(before flowering) top dressing is carried out 3-4 times a month. Complex fertilizers containing nitrogen are suitable. During the setting of buds and the beginning of flowering, phosphorus should also predominate in fertilizers.
Bush formation
To keep the decorative and aesthetics of the bush longer, long flowering, carry out the timely removal of buds that have already faded and withered. Thus, the forces of the plant, which were intended for the ripening of seeds, will be directed to the setting and flowering of new buds.
Getting flowering all summer is real, you need to cut, pinch long stems. They are removed by 2/3 or half. This procedure will help create a more lush bush, tie many healthy lush buds.
Video about the formation of calibrachoa:
Wintering and possible transplant
Most caliberhoa varieties are annuals. Beginning gardeners do not particularly bother to get abundant flowering from the same plant next year.
But for some varieties it is possible. To do this, a flowerpot with a flower that has faded is placed in a shaded place and watering and fertilizing are reduced to a minimum. In the cold period should be in a dormant period. It is better if watering is replaced by spraying.
 Stories from our readers!
"I am a gardener with years of experience, and this fertilizer began to be used only last year. I tested it on the most capricious vegetable in my garden - on tomatoes. The bushes grew and bloomed together, the harvest was more than usual. And they didn’t suffer from late blight, this is the main thing.
Fertilizer really gives more intensive growth garden plants, and they bear fruit much better. Now you cannot grow a normal crop without fertilizer, and this top dressing increases the number of vegetables, so I am very pleased with the result."
Pests and growing problems
Among the pests are:
- thrips;
Most frequent illnesses calibrachoa:

And also note the problems of cultivation:
- Leaves turn yellow quickly. Reason: lack of iron in the soil, too low temperature in room. If only the lower leaves turn yellow, this indicates a low level of nitrogen in the soil or the flowerpot (planter) is too small for a flower.
- The leaves dry up and curl. Reason: the plant has too little light or the humidity needs to be increased.
Most caliberchoa diseases are easier to prevent than to treat. After all, treatment does not guarantee that the flower will remain healthy and strong. BUT preventive measures consist only in the elementary rules for caring for a flower.
Types and varieties for cultivation
Thanks to hard work Breeders gardeners grow a huge number of caliberhoa of various shapes and colors. Characteristics depend on the variety. The diameter of the flower of the largest caliberchoa reaches 3.5, rarely 4 cm.
Cabloom blue
The flower is grown from seeds. During the flowering period, the bush has a form unusual beauty: up to 35 cm high, up to 40 wide, spherical shape and is covered with hundreds of small bell flowers, the diameter of which reaches up to 3.5 cm.
The culture gives a good and lush flowering only when grown in sunny areas. With proper care, you can enjoy flowering throughout the summer. Vases with flowers of this variety - bright decoration balconies, terraces, garden plot. 
Terry
The species differs in appearance flower. The corollas of the inflorescence have several layers, they look lush. Colors range from bright yellow to dark blue. The variety has a small drawback - flowering is not abundant, but it is fully compensated by the splendor of the flowers. 
Cabaret
A group of varieties that has 12 positions. Most of the flowers white shade. Other colors are rare. mature plant in a flowerpot resembling a ball, strewn with an abundance of white bells. Kind used landscape designers to create living arches. 
Super Bells (Super Bells)
The series includes 8 varieties of Calibrachoa. large - up to 3.5 cm in diameter. Color - from yellow to burgundy. It does not have many leaves, and the branches grow up to 1 meter. Flowering begins in late spring.
The species is resistant to bad weather conditions(heavy rain, hail) and temperature fluctuations, but the standard conditions of care must still be observed. The variety is in harmony with white calibrachoa. 
A million bells (Million Bells)
A variety of flower, including 18 varieties, which has received the greatest distribution due to the abundant number of small flowers, behind which no leaves are visible. Thanks to the long run looks spectacular in hanging pots. Basically, varieties differ in shades. The flowers of this species are characterized by bicolor. 
Noah (Noah)
The variety consists of 6 types of flowers. Shades - from white to light purple. Experienced flower growers note the sophistication of the variety. Flowers are painted in 2-3 shades of the same color. The length of the branches reaches 0.6 meters.
The variety is whimsical in care - it prefers partial shade and slightly high humidity (no need to overdo it with watering). It is recommended to plant as a plant for one year, because after the winter it loses strength and does not bloom.
sunset
Propagation of the variety is carried out by seeds or cuttings. The spherical bush reaches up to 33 cm in height and 35 cm in diameter. Flowering is sure to please the eye, as the flowers have an unusual yellow-orange hue.
The variety is suitable for growing in floor vases, hanging planters, whimsical care. Flowers up to 3 cm. Abundant flowering observed after 3-4 months after the appearance of the first shoots. If seedlings are grown independently, you can count the time of sowing seeds.
Calibrachoa in landscape design
The plant will not only great addition any garden, balcony, terrace, but is also actively used by landscape designers to decorate large areas.
Unusual beauty, decorativeness are possible thanks to hanging stems. This waterfall of flowers will enchant everyone.
For landscape design, not only hanging varieties are used, but also undersized. They will become great decoration outdoors and in floor vases.
The zest and originality are brought in by planting flowers different colors. Both in pots and in open ground, plants are combined with other flowers.
Calibrachoa get along best with flowers:
- function;
- ivy;
- verbena;
- love;
- pelargonium.
As a "neighbor" use and sweet pea, chlorophytum.
There were options for combining with unpretentious coleus, bright plant, which grows rapidly and fills the flower beds bright colors. The sedge is used because of the very beautiful shades some varieties. She decorates the flower bed and hides flower imperfections.
The most beautiful evergreen angelonia is also planted in areas with calibrachoa. It complements its decorative effect and requires the same growing conditions. To make flower arrangements in the flower beds, in the garden become unique, you just need to give free rein to your imagination.
Conclusion
Despite the fact that many flower growers prefer petunias, caliberchoa is increasingly decorating gardens, balconies and terraces. Conquers with its showiness, unusual decorative effect. And planting and care is much easier than that of a distant relative - petunias.