Caisson ceiling. Description, features, types and installation of the coffered ceiling. Coffered ceiling: beautiful interior decoration options
The coffered ceiling resembles a box structure: wooden beams, attached to a flat ceiling slab, are criss-crossed horizontally or diagonally, creating a grid. As a material for such a ceiling, wood, polyurethane, drywall or wood-fiber boards are usually used. Caissons and beams are decorated with moldings, plaster rosettes and other decorative elements. Such a ceiling serves not only aesthetic purposes, but also practical: you can hide pipes or wires under it, hide the imperfection of the existing ceiling.
coffered ceilings usually installed in rooms with great height. In rooms with high ceilings caissons reduce the effect of echoes and help control the level of noise from other rooms. Small caissons will add texture to the ceiling, while large panels will give the illusion of extra space. In rooms with a ceiling height below 2.5 meters, the installation of caissons is not recommended.

Mounting sequence
- ceiling design on paper;
- processing the ceiling with drywall, paint, wallpaper or ceiling tiles;
- grid marking for the location of beams on the ceiling;
- installation of a beam system;
- installation of a ceiling plinth;
- decorative ceiling.
Possible options: if it is planned to use separate ceiling slabs for caissons small size or ready-made polyurethane caissons, these elements will be attached after the installation of the beam profile (step 4), i.e. step 2 can be skipped, provided that Preliminary processing ceiling is not required.
One of the options for installing a coffered ceiling - it can be mounted on the principle of a false ceiling with a special type of ceiling cassettes in the form of an already made caisson. In this case, add functional advantage suspended ceiling - a damaged caisson can be easily replaced with a new one.

Materials and tools
Although it will take time and certain skills to install a coffered ceiling, you can design such a ceiling yourself. Take care of necessary tools for this project before it starts - this way you will save time and avoid disappointment.

Table. Use of materials and tools at every step of the installation process.
Stage 1. Ceiling design
In its simplest form, a coffered ceiling is formed by a series of beams with a plinth, where criss-crossing wooden beams directly create a grid on the ceiling, which is done fairly quickly. The basic rule here is more room, the thicker the ceiling beams should be. Commonly used beams square section, but rectangular designs are also possible. Once you have decided on the size and shape of the beams, select a ceiling plinth of the appropriate height.

Consider how the wooden beams will be located on the ceiling, with what step and what shape to set the caisson - rectangular, square or something more complex. If you are planning to install a chandelier, consider its placement relative to the beams - whether it will be in the center of the caisson or at the crosshairs of the beams, or provide a medallion for the chandelier.
Draw the proposed sketch of the ceiling on paper, not forgetting to indicate the dimensions of the room and the planned location of the fixtures. The desired placement of recessed ceiling lights must be planned at the design stage of the ceiling project. Later, when installing the beams, you will need to prepare holes through the middle of the beam or attach a cable to the side of the beam to get the desired placement of ceiling lamps.
At self installation coffered ceiling, you can facilitate its installation if you follow a few tricks that will simplify the task.
- Make straight joints on the profile. Each end of the beam is cut at a right angle. If you want more complex shape joints, it is easier to do this in the form of a decorative element attached to an already finished ceiling than to cover up all the cracks and irregularities later.
- Use ceiling plinth, not molding. Located at a 45 degree angle to the beams and ceiling tiles the plinth will hide all the imperfections of the installation of the caisson box.

Stage 2. Preparation
Wood fiber (MDF) panels or drywall can be used as ceiling panels. If the ceiling is level and in good condition, you can choose not to use panels at all, just paint the ceiling or wallpaper the ceiling, and then attach the mesh to it.
If you want to use ceiling panels that are directly inserted into the space between the beams, cut them into 1 cm smaller size each caisson, in order to make it easier to place them there. The gaps in the future will be closed with a ceiling plinth. When using ready-made caissons, their size determines the size ceiling space between beams.
How to fix PVC panels to the ceiling?
Stage 3. Grid layout
Use colored chalk, a tape measure, and a square to mark the grid for the ceiling beams. Focus on a schematic sketch made during the design of the ceiling.
Step 1. Measure the length of each side of the room, divide each length in half to determine the center of the room. Mark the center points with chalk and connect the opposite sides of the room with a line.

Step 2 Determine in which direction the main ceiling beams will be located, mark the position of the ends of the beams on opposite walls and draw lines along the ceiling connecting these points. Extend the lines to the walls a few inches lower than the final ceiling height.
Step 3 Make markings for the location of the main and cross beams. Mark Full Width ceiling beams to know the exact size of panels and beam joints. The choice of panel size, shape and quantity is up to you.
Stage 4. Installation of the beam system
This is the most crucial step in the installation, because its accuracy will ultimately depend on general form ceiling. Beams can be made hollow, with this design it is convenient to hide electrical wiring for lamps, pipes and others in them engineering Communication. If the beam is made of solid wood, for laying wires, make a groove in it.
If you are working on your own, make a T-shaped wooden slat support to the height of the ceiling minus the beam. It will hold one end of the beam against the ceiling while you work at the other end of the beam.
Step 1. Install beams around the perimeter of the room. The longest beam is installed first. If the room is square or irregular shape, start with a beam that runs perpendicular to the support beams to create a strong connection.
Step 2 Apply glue along the length of the beam and glue it at the junction of the ceiling and floor.

Step 3 Using a pneumatic nailer, nail the beam with two nails on both sides every 30 cm, starting from one end of the beam. Do the same with the opposite perimeter beam.
Step 4 Measure the distance between the beams on each side of the room and prepare the beams for the transverse sides of the perimeter. Attach them to the ceiling in the same way.
Step 5 After installing the perimeter, install the main stringers according to the markings in the same way as the perimeter beams.
Step 6 Measure the distance between the main beams and cut cross beams. Install them in the same way in the marked positions.
Step 7 Strengthen the structure - hold the nailer at a 45 degree angle close to the junction of the cross beam and main beam and drive the nail into the cross beam at an angle.
In the event that you are using prefabricated caissons or pre-cut panels for the space between the beams, insert the panels and nail them to the beams.

Alternative - plasterboard coffered ceiling
Stage 5. Installing the ceiling plinth
While the shape of the caisson and its actual depth are created by the height and placement of the beam profile, the border and visual depth of the caisson is shaped by the ceiling plinth.

Step 1. Measure the internal dimensions of all sides of one of the caissons. If there is a gap between the ceiling and the beam due to the unevenness of the ceiling, consider this height in the size of the baseboard.
Step 2 Cut the ceiling plinth to the appropriate length. On the machine, cut a 45 degree angle on each side of the baseboard.
Step 3 You can install the cut plinth directly one by one. To do this, apply glue to each part and fix it to the beams.
Step 4 Sometimes it is easier to assemble each box from the plinth separately, and then install it entirely in the caisson. In this case, use glue to assemble the baseboard box. Make sure it fits well in the caisson and glue the baseboard.
Step 5 Secure the ceiling plinth with nails to the joists at each corner of the plinth box.

Stage 6. Finishing the ceiling
The last step is to give the ceiling a finished look and hide any work bumps, if any.
Step 1. Fill all joints and gaps between beams, skirting and ceiling panels with latex sealant.
Step 2 Use wood putty and a spatula to cover the nail heads.

Step 3 Apply two coats water-based paint. Semi-gloss paint and a brush 5–7 cm wide, paint the molding. Then paint roller paint the beams.
Step 4 Install ceiling lights. If you have covered the ceiling with drywall panels, you just need to cut holes in the drywall under the fixtures. Glue the plastic rings to the lamp hole. When you install new fixtures, they should be flush with the surface of the finished ceiling.
Decorative elements of the coffered ceiling
A standard coffered ceiling will look more interesting if you add decorative and functional elements.

Video - Do-it-yourself installation of a caisson on the ceiling
The emergence of caissons architectural element buildings and structures associated with design features the simplest post-and-beam building system, which has been used since the times of Hellas and Ancient Egypt.
In modern architecture, caissons can have both an exclusively aesthetic value and combine constructive and decorative functions, as well as be used to improve the acoustics of a room, create various visual effects (for example, visually increase the height of a ceiling or vault), and serve as niches for installing lamps.
Coffered ceilings in the interior of a modern apartment and house
Today, the coffered structure is considered an exclusive design option for the ceiling. Its use allows you to give housing special chic and emphasize the status of the owner.
More often this type of ceiling can be found in classic design trends interior design, such as:, and, of course, and.
 Detail of the coffered ceiling
 The design of the decorative coffered ceiling consists of a substrate and a frame on which cornices, borders, trims (moldings) and rosettes are attached. Additionally, the caissons are decorated with lamps, overlay decor, ornaments, screen painting, stained-glass windows, and there are also illuminated caissons.
 Coffered ceiling plan
 Although the coffered ceiling in the interior of an apartment or house is not cheap, today the construction market offers relatively inexpensive and durable materials, from which you can build a beautiful coffered ceiling structure.
It should be noted that the coffered ceiling is not suitable for all rooms. To make this design look attractive, the height from floor to ceiling should be at least 2.5 meters.
You can order wooden coffered ceilings at reasonable prices at the Imperial Forest carpentry workshop!
Types of coffered ceilings
When choosing a coffered ceiling, for starters, you should familiarize yourself with its main varieties.
Wooden coffered ceiling
 |
Wood, the most noble material for coffered ceilings. Environmental friendliness and a unique wood pattern are strong arguments in favor of choosing this particular material. The most commonly used oak, walnut, alder, ash, as an economy option - pine. With proper processing and care, such a ceiling will last for decades.
It would seem an ideal option, but there are several reasons that make us consider alternatives ...
The price tag for a coffered wooden ceiling is the highest among all options. The high cost is due not only to the high cost of the source material, but also laborious process manufacturing of all parts, as well as the installation itself.
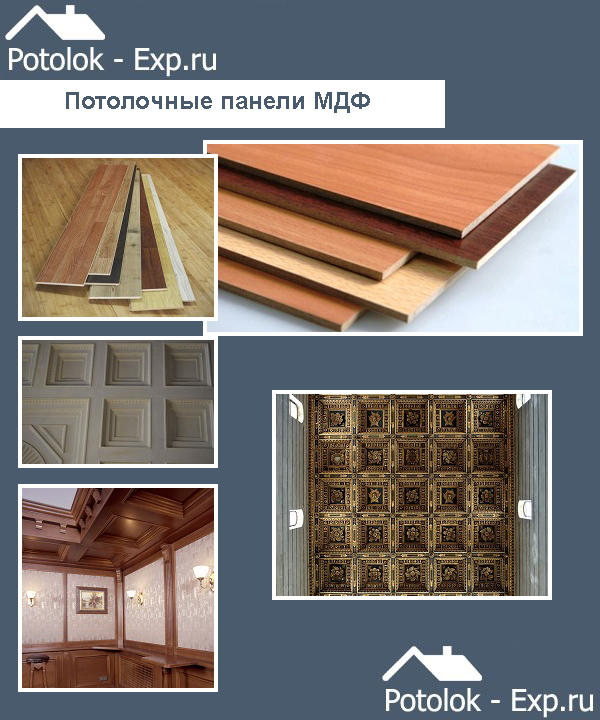
MDF coffered ceiling
Good alternative natural wood. Installation of such a ceiling is a little easier and cheaper, besides, it is not subject to drying out and deformation.
Plasterboard coffered ceiling
Plasterboard coffered ceiling even more a budget option. Decorated with plaster cornices and rosettes. Eco-friendly.
But it should also be borne in mind that drywall is afraid of moisture and, relative to the above materials, is not so practical. It requires careful operation, because it is quite fragile, and besides, it is not so easy to get around. To remove traces of dirt, it may be necessary to repaint the ceiling, partially or completely.
Polyurethane coffered ceiling
This material has a number of pleasant advantages: light weight, which greatly simplifies installation, moisture resistance, practicality, durability, and besides, it does not crack or deform over time.

Ready-made polyurethane caissons are symmetrical, they can be tinted or painted in any color. Prices for such caissons vary greatly, too cheap options may have errors, but really high-quality ones can have an indecently high price ...
Advantages and disadvantages of coffered ceilings
Positive characteristics:
- The special aesthetics and uniqueness of such a ceiling immediately attracts attention;
- Inexhaustible popularity and relevance;
- Versatility. Such a ceiling can transform any room, whether it is a living room, bedroom, study or office;
- With the help of such ceiling structure it is easy to hide almost any communications, as well as irregularities in the draft ceiling;
- Improves the acoustic characteristics of the room by absorbing and scattering sound waves;
- Such a constructive ceiling will make a room with high walls more comfortable;
- The service life largely depends on the materials of manufacture and operating conditions, but with proper and timely care, the coffered ceiling will serve for many years.
Disadvantages:
- Reduces the height of the room, which is not always the way;
- Complex installation requiring accurate preliminary calculation and preparation;
- The high cost of materials;
- Complicated life.
Since the design of coffered ceilings is quite specific, there are some important aspects to keep in mind:
- Dark-colored caissons should only be used in rooms with high walls, as they visually reduce the height of the walls;
- So that the coffered ceiling does not take all the attention, in the presence of other important accents in the room, it should be made light or even completely white;
- The larger the room, the smaller the cells should be, and vice versa, in compact rooms, caisson cells are better to make more;
- When installing wooden caissons, choose the material to match the furniture and floor to get a holistic, harmonious picture;
- It is worth considering the lighting well, because in rooms with insufficient lighting, such a ceiling will look inexpressive;
- The coffered ceiling is not for everyone, make sure that this ceiling design will look organic in your chosen design style.
Coffered ceilings in the interior - photo
| |
coffered ceiling
Everything new is well forgotten old. Coffered ceilings have entered our lives for a long time, they were used mainly in the decoration of castles and rich houses. Having reached our times, this method of finishing has become available to everyone, moreover, now it is quite possible to make a coffered ceiling with your own hands (see).
Caissons - are a type of ceiling decoration, in which square or polygonal recesses are made, made of intersecting beams. The coffered ceiling is decorated with decorative rosettes and carvings, because at all times such ceilings played not only a constructive role, but also served to decorate rooms.
It is worth noting that such a ceiling design perfectly absorbs sounds, thereby improving the sound insulation of the room.
How to make a coffered ceiling
Project
- Everything must start with an idea and a project. Try to imagine what you will really like in the future. To do this, you can view several photos on the Internet, consult with friends or relatives. Take into account the parameters of the room, illumination, height, purpose, and only after that proceed with the choice of materials. Do-it-yourself coffered ceiling is a rather complicated matter, but at the same time, it is interesting to do it.
Sketch
- The sketch is the heart of the project. It is he who will be the next step in your repair, because all thoughts need to be put together and see how they will look later. Use a regular sheet of paper and a pencil. For clarity, the sketch can be given a little color by coloring it with colored pencils.


Training
- When the ideas are ready and the coffered ceilings are laid out on the sketch, you can proceed to the repair itself. First of all, check the condition of your ceiling. If its surface is relatively even and solid, then it is quite suitable for finishing. Otherwise, smooth it with putty and let it dry well(cm. ).
- For reliable fixation of materials - the surface of the ceiling must be primed. In case of very strong absorption of the primer, cover the surface with another layer after drying (see).
- Wallpaper should be glued under the coffered ceiling. It is desirable to select a drawing that is monophonic or with a small structure. It is better to do this together, the wallpaper should be smoothed with a special plastic spatula (see).

Tip: if you buy smooth plain wallpaper, and when pasting under coffered ceilings, do not smooth it - it turns out a rather interesting “crumpled” pattern. To do this, stretch the strip from wall to wall and glue it, first pressing it with your hand in several places, then casually level it on the ceiling with a board with a round end or a mop.
Mounting
- Based on the sketch on the wallpaper, we mark up future caissons. At this time, you need to be very careful, and it is better to take measurements once again and check with the sketch.
Tip: Start marking from the center of the room, otherwise, you can break the symmetry.
- We cut out a development from construction cardboard and, bending along the lines, glue the beams

- We glue the caissons to the ceiling using mounting glue. It is important not to stain the wallpaper during gluing
- All joints and connections must also be pasted over with cardboard. This will be our main frame for the ceiling (see)
- Paste all beams self-adhesive film by choosing a pattern depending on how you want to see your ceilings. They can be white, or marbled, they also often use a pattern that imitates the structure and color of natural wood.
- On the finished beams, we glue the decor elements. You can color them if you wish.

Second way
Another option is polyurethane coffered ceilings, this option is not so difficult to work, but is more expensive. You can buy ready-made modules in the store and glue them to the ceiling. There are also modules mounted on special hidden mounts. Modules can be selected to your taste, because there is a huge selection of beams, rosettes, stucco moldings, etc.


Third way
Ideal for those who do not have high ceilings. This is the use of ceiling caissons, which consist of slabs and do not require significant labor when installing. Perfect option for apartments with low ceilings- pick up not too high plates and mount them on the ceiling. There are several options for mounting such plates.
Mounting
- Mounting on a special profile

- Fixing plates to the ceiling with mounting glue or self-tapping screws

Coffered ceilings can be decorated large socket in the center of the room, draw an ornament. Also, a great option would be to cut out the ornament and thematic drawings from the wallpaper purchased for this purpose and then stick it on the ceiling. As a photo, instead of wallpaper, you can use tapestry fabric - it will look very impressive.
Ceilings will look just great if you approach this issue judiciously and not in a hurry. After all, if you are not constantly engaged in repairs, then do not rush to create a castle right away. It is better to start with a small room and practice in it, and then proceed to more grandiose projects. Then the installation of your ceilings will be a pleasure.
Decorating the ceiling with polygonal recessed cells is far from new trend in interior design. This is how decoration was done. ceiling surfaces also in Ancient Greece to hide the ceiling beams. Today, the abundance of materials allows us to improve the old technique and successfully apply it to finish the ceiling in any room.
This method of surface finishing is very ancient, but it has not been forgotten so far due to a large number advantages:
- Versatility. Coffered ceilings organically fit into almost any style, because they are made from the most different materials. In addition, they can be installed in different rooms- bedrooms, living rooms, studies, billiard rooms, offices.
- Easy to install. Manufacturers today produce ready-made slabs that are simply fixed to the prepared crate or glued to liquid nails. The fastening method depends on the type of material.
- Variety of models. Modern technologies allow you to produce plates of different shapes, colors and textures and select suitable products for any type of interior.
- Practicality. With the help of such structures, you can hide the irregularities of the ceiling and communications.
- Durability. The service life of coffered ceilings depends on the material from which they are made and on the operating conditions. Most expensive wooden models can last more than a dozen years, which will allow for long time forget about refinishing the ceiling.
- high cost. High-quality production plates will cost a lot, although they will last a long time.
- Difficulty in care. Cleaning such coatings is quite difficult due to the large number of hard-to-reach places.
- fragility. This applies to models made of MDF, drywall and construction board.
Varieties of coffered ceiling designs

The main classification is carried out according to the type of materials used, and therefore the following types of coffered ceilings are distinguished:
- Wooden. Eco-friendly, durable, look respectable and have a relatively high price.
- Plasterboard. A budget option. The optimum ratio of price and quality.
- Polyurethane. Durable, practical, available in a wide range of shapes and colors.
- Models from MDF. The cheapest and most vulnerable material. Such ceilings are afraid of fire, moisture, deformation and require special care.
- Cardboard. Made by hand from building cardboard. They are cheap, brittle, highly flammable, hydrophobic and have a relatively short service life.
To choose suitable model you need based on your budget and taking into account the characteristics of the room in which the installation is planned. In particular, the temperature and humidity conditions in it should be taken into account.

Coffered ceilings are a specific design. The wrong selection of materials can completely spoil the design, make the room gloomy, and the interior - "pressing".
To avoid such problems, it is necessary to skillfully combine elements, adhering to the following rules:
- When installing wooden caissons, choose the material to match the furniture and floor to get a complete picture.
- Dark-colored caissons can only be used in rooms with high ceilings, as they visually reduce the vault.
- To emphasize the walls, the coffered ceiling should be as light as possible, and ideally completely white.
- The larger the room, the smaller the cells should be. In compact rooms, caissons should be about 1 meter in size.
Please note that in addition to ready-made slabs, a wide variety of decorative elements: baguettes, rosettes, stucco. With their help, you can create interesting effects on the ceiling. Do not forget also about the organization of lighting, which will organically complement the design.
Preparatory work for the installation of the coffered ceiling

The method of installing the plates depends primarily on the type of material. Wooden crafts mounted on a crate of bars, drywall - on metal carcass, polyurethane and cardboard - on self-tapping screws or liquid nails.
Though suspended structure and hides minor irregularities of the coating, but you still need to prepare the base ceiling, for this:
- We clean the surface of the old finishing layer.
- We remove unreliably fixed plaster.
- We get rid of rust stains, mold and mildew.
- putty large cracks line-up for cement base pre-primed them to improve adhesion.
- We process the walls with a deep penetration primer.
- If necessary, we level the base ceiling with putty (for irregularities up to 5 cm) or plaster (for irregularities from 5 cm).
- We paste over the surface with wallpaper if it is planned to install support beams.
The color of the wallpaper and their texture must be thought out in advance. It is important that the background is not only combined with the beams, but also "echoes" with individual decor elements in the interior. Usually monophonic wallpapers are chosen, but products with a softly pronounced texture are allowed. Otherwise, the ceiling will look "overloaded".
Features of designing coffered ceilings and marking

All work begins with drawing up a drawing. The result completely depends on the correctness of the scheme and the markup applied, therefore at this stage you need to be extremely careful and check each step several times.
In the process, we follow these instructions:
- We measure the height of the corners and the middle of the room, as well as the length of each edge of the intersection of the wall and ceiling.
- We display the obtained measurements on the drawing. It is better to do it on a sheet in a three-dimensional plane.
- We apply the layout of each cell in increments of 0.8-1 m so that a uniform and regular pattern emerges. Please note that a large recess in the center of the room looks spectacular, in which a chandelier and cells of the same type are fixed along the contour.
- With the help of a chopping paint cord, a tape measure and laser level we apply a schematic grid on the ceiling, first marking the points on opposite walls, and then connecting them together. At this stage, you need to be very careful and do the beating with a cord only if you are completely sure in accordance with the line of the drawing. Otherwise, you can ruin the wallpaper, if any.
Please note that it is possible to finish the ceiling in this way only in rooms with a ceiling height of 2.5 meters or more, since the structure will take up to 20-25 cm. Otherwise, you can choose thin planks.
Installation of a wooden coffered ceiling from support beams

For such a finish, it is not necessary to choose expensive wood (oak, walnut). You can buy more cheap material and give it showiness with stain and varnish. Please note that the moisture content of the wood should not exceed 12%.
Before installation, leave the tree for several days in the room you plan to finish. This is necessary to adapt the material to temperature and humidity. Also, wood should be treated with antiseptic compounds to protect against mold, fungus, rodents and insects.
- According to the markings applied to the ceiling, we nail the beams to the ceiling.
- We cut out a plank along the length of the ceiling and nail planks equidistant from the ends along the edges.
- We attach the frame with nails to the ceiling.
- We make strips to mask the sides and close the frame from below with a board.
- We make box-shaped beams and attach them strictly perpendicular to the longitudinal strips, paying special attention to the corners and joints.
- We process the resulting gaps with thin profile rails.
Rules for the installation of wooden caisson-slabs on the ceiling

Production models are produced in the form of already finished slabs that are fixed to the ceiling.
You need to work with them in this order:
- According to the markings applied with the help of brackets, we attach the plates, starting from the central part.
- In the resulting gaps between the individual elements, we mount decorative rails.
- Fixing ceiling plinths around the room. Please note that with the help of fillets, you can hide the gap formed due to uneven corners and walls.
Method of fixing coffered ceilings from MDF

This material is lighter, it is fixed much easier than wood, but it has worse operational properties and serve much less.
Installation of coffered ceilings from MDF is carried out as follows:
- According to the markings, we install a crate of thin strips. The wood for the frame must first be left for several days in the room for adaptation and treated with antiseptic compounds.
- We attach the first part in the center of the room for uniformity of the pattern. Fastening is carried out with self-tapping screws, which are screwed into the groove.
- According to the tenon-groove system, we mount the remaining elements.
- We install the plinth around the perimeter of the room.
Rules for fixing a plasterboard coffered ceiling

Installation of caissons from this material is similar to installation suspended ceilings. You will need ceiling profiles (CD), rails (UD) and for partition walls (UW / CW), as well as hangers, crabs and self-tapping screws different sizes.
Work is carried out according to the following plan:
- We measure and apply an additional marking line on the walls around the perimeter of the room. This is the level of placement of the first and second tiers of the structure.
- We mark the places of fixation of the suspensions at an equidistant distance from the jumpers.
- We mount the guide profile along the line on the wall.
- We fix the suspensions in the marked places
- We fix the longitudinal ceiling profile on the suspensions according to the markings.
- We fix the jumpers, using "crabs" for the connection. The frame should occupy the entire perimeter of the ceiling.
- In the places of installation of caissons, we attach a UW profile to the coating along the length of the room.
- We cut jumpers from the UW profile and attach them perpendicular to the already installed elements.
- In each rectangle formed, we set the segments of the CW profile in strictly vertical position. The length of the segments will correspond to the depth of the niche. On each edge of the figure there should be three parts (two at the edges, one in the middle). If the cell has dimensions less than a meter, then you can limit yourself to two racks.
- We connect the ends of the vertical segments with a UW profile.
- At this stage, we carry out the laying of the wiring, placing it in a plastic corrugated sleeve and attaching it to the base ceiling.
- We sheathe the resulting protrusions with drywall using self-tapping screws. The caps of the fasteners must be sunk into the base.
- We cut out parts from drywall sheets with an area equal to internal dimensions cells.
- We attach each element inside the resulting caisson.
- We glue the joints with reinforcing tape and apply a putty layer. At the same stage, we putty the places of the recesses from the fasteners.
- We strengthen the coating by pasting it with fiberglass.
- Apply finishing putty maximum thin layer and wait for complete drying.
- We rub the roughness with fine-grained paper and remove dust.
- We prime the coating with an acrylic compound to level and improve adhesion with a further finishing layer.
Technique for fastening polyurethane coffered ceilings

This material is characterized by relatively high operational characteristics. It is durable, fire resistant, not afraid of moisture and has a small weight. Polyurethane caissons will cost a lot, but their installation is very simple, and you can even do the work yourself. To do this, just glue the squares on liquid nails.
Work must be done carefully so that the adhesive composition does not stain the wallpaper. It is not necessary to carry out further finishing of the caissons, since these models are made in different shapes and shades, and therefore, among the variety on the market, you will definitely find a suitable option.
Instructions for the manufacture and installation of a cardboard coffered ceiling

For the manufacture of caissons, construction cardboard is used. This method of installing a coffered ceiling with your own hands will cost less, but such a design will not last long.
Peculiar beams are made in this order:
- On a piece of building cardboard, we draw a diagram of an expanded beam in the form of a box, not forgetting to leave space for gluing.
- For convenience, we immediately cut out the template and, circling it, cut it right amount blanks.
- We bend along the lines and glue the scan with carpentry adhesive.
- After the model hardens, we attach it with mounting glue according to the marked markings.
- We paste over gaps and joints with pieces of cardboard.
- After the structure has hardened, we finish each beam with a self-adhesive film.
For finishing ceilings in our time, not only newfangled techniques are used. The use of ancient techniques combined with modern and traditional materials surprises with the result. Our recommendations will help you choose optimum material and method of fixing coffered ceilings, as well as cope with all installation work personally.
In this article we will talk about what a coffered ceiling is, what features it has, about options for arranging it with your own hands. The coffered ceiling looks very beautiful and stylish, but it has not only pluses, but also minuses.
What is a coffered ceiling? This special kind ceiling design in the form of beams, cells, recesses. The word "caisson" in this case means a polygonal recess, a cell, a section on the ceiling. The shape of the caissons can be very different: rectangular, square, polygonal and even round. Longitudinal and transverse beams with various ornaments, cornices, borders, stucco rosettes are widely used to create caissons.
We note right away that the coffered (lacunar) ceiling has a very ancient history. Even in ancient Greece, a similar technology for arranging ceilings was widely used. However, at that time, coffered ceilings were rather a necessity, because they made it possible to give strength to the canvas, to remove some of the load from the ceiling beams. Modeling and drawings were used for beauty. Palaces were often decorated with wooden coffered ceilings in the Renaissance.
Now coffered ceilings usually do not carry any practical function they just are very noticeable, original decor premises.

Today, the coffered ceiling can be made from various materials, the choice is quite large:
- Natural wood. The most noble, but at the same time the most expensive option. Oak, ash, walnut, alder are usually used to create caissons on the ceiling. The most budget option is pine;
- MDF. A good option for replacement natural wood. It costs less, does not dry out, is easier to install;
- Drywall. Cells on the ceiling can be created from affordable drywall, which can be decorated with rosettes and cornices;
- Polyurethane. Modern, light material, which allows you to create durable and moisture-resistant structures on the ceiling;
- Cardboard. This refers to beams made of building cardboard, light, inexpensive, but short-lived and fragile. It is customary to fit them after mounting on the ceiling. self-adhesive film, which can imitate the structure of wood and other materials.

Advantages of coffered ceilings:
- aristocratic appearance, which will give special charm any room, be it a living room, kitchen or bedroom;
- Big choice materials, textures, the ability to paint in various colors, many combinations, for example, using wallpaper inside the caissons, stretch fabric, plaster, gypsum or polyurethane rosettes, all kinds of fillets;
- The design of the coffered ceiling allows you to hide any communications;
- The coffered ceiling allows you to hide all surface irregularities;
- Cells of the section on the ceiling can improve the acoustics of the room, they scatter and absorb sound waves;
- Additional heat and sound insulation of the ceiling appears;
- Arise very wide opportunities for experiments with lighting, which can be very different, including hidden light sources;
- The service life, of course, will depend on the material used to create the ceiling, but in general it is quite long.

Disadvantages of coffered ceilings:
- The suspension system of this design "eats" the height of the ceiling. Making caissons with a ceiling height of less than 2.5 m is a risky business, the effect may not turn out at all as you expected. And it is best to use caissons on ceilings from three meters high, so they will look especially luxurious;
- Installation of a coffered ceiling is quite complicated and requires careful calculations;
- If the sections are made of drywall, then the ceiling cannot be washed or cleaned, it will only have to be repainted. In general, we must not forget that drywall is a rather fragile material. This disadvantage also applies to cardboard ceilings;
- Enough high price in comparison with the usual painting of the ceiling or pasting it with wallpaper;
- It is more difficult to care for the cells of the coffered ceiling; dust can accumulate in the irregularities of the beams, on the stucco molding.

Installation of a coffered ceiling always begins with a sketch, detailed plan. First, measurements of the premises are carried out, the dimensions of the caissons are selected, which, recall, can be the most different shapes, are the same and not. For large rooms designers advise making caissons smaller, but for relatively cramped ones - larger or different sizes.
The technology for arranging the coffered ceiling will depend on the material you choose. For clarity, we will show several video instructions.
Now it is possible to purchase ready-made kits for coffered ceilings, which include such details as: long and short guide rails, cornices, borders, additional elements and coffered units.