How to install an arch in the door. Types, features of arches and how to install an arch in a doorway
Our online store offers you a wide variety of arches at affordable prices. Here you can choose the design that best suits your space. A well-chosen arch can transform it beyond recognition, giving coziness and comfort. Our company will help you install the arch in the doorway, as well as qualitatively carry out all the necessary related work.
The arches presented to your attention have a simple and unique design. They fit perfectly in home interior as well as office decor. Particularly popular are durable and environmentally friendly MDF models, which are distinguished not only by their ease of maintenance and a wide range of colors, but also by low-dust installation, provided that it is performed by professionals.
When purchasing an arch, do not forget to pay attention to its dimensions. Depending on existing doorways you can buy a finished design standard dimensions, and arrange individual order, according to the calculations.
Installation door arches, as a rule, is made at the final stage of construction, when the apartment is already acquiring the features of a living space. By this time, the floor should be done, the ceiling and walls should be decorated. The opening in the apartment, in which the installation of the arch is planned, must also be carefully prepared in a certain way.
To do this, you need to call the master measurer. Having necessary experience, he will competently fulfill his mission and answer all your questions about the preparation of the opening and installation. If the need arises, qualified craftsmen will sew up the corners of the opening with drywall, install a mounting loop, etc. You will also receive from them good advice concerning the optimal choice of arched structure. Considering the design of your apartment or office space, they will advise you on the color solution.
Installation of arches in the apartment in the doorway
Installing an MDF arch into a prepared opening takes only 3-4 hours. Our masters will do everything necessary to ensure that the work is completed quickly and efficiently. First of all, they will prepare the opening so that its depth is the same around the entire perimeter, and also perform additional related work depending on the condition of the walls. Only in this case, there will be no difficulties with installation and the product will serve the period declared by the manufacturer.
Our specialists do not use screws and nails, as they can damage the surface of pressed wood shavings. Gluing is much more preferable than the methods described above. This method of installing interior arches retains a spectacular appearance MDF construction and does not violate the integrity of its coating.
There are various types of arched structures and, accordingly, there are several ways of their construction, which directly depends on their functions and the materials used in their manufacture. At the moment, there are 2 types of openings used to install MDF arches.
First and most simple type opening is the location of two walls opposite each other. Installing arches in such a doorway takes the least time, because. no need to file cornices, platbands and plinth. The work carried out in this case leads to a slight narrowing of the opening, by about 2 - 4 cm. The installation cost, including consumables, ranges from 2500 rubles.

The second type of openings is more complex, as it requires the installation of a mounting loop. As a rule, the walls of such openings belong to the corridor type. In such cases, the mounting loop is installed on both sides. Nevertheless, installation in such openings by our specialists is carried out quite quickly, although the design itself requires additional fittings and materials. Here you can not do without timber, screws, etc. After installing the arches in the apartment, be prepared for the fact that the openings will narrow by 7-14 cm. The installation cost in this case will be from 3450 rubles, including the price Supplies. If you plan to install an MDF arch in two corridor-type walls, then you will need from 4400 rubles.
The arch can be structurally of absolutely any shape, it all depends on the preferences of customers and their capabilities. It can repeat the shape of waves, a polygon, be illuminated and decorated with niches and stained-glass windows.
Drywall arch
As a building material for the manufacture of arches, brick is used, monolithic concrete, wood, metal profile, plasterboard sheets, chipboard and fiberboard sheets, plastic material and plywood.
wooden arch
When using heavy building materials, such as brick, concrete monolith or stone, the weight of the structure being erected is taken into account. Therefore, it may require laying the foundation and connecting reinforcement to bind to bearing walls. When erecting arches from these materials, it is not uncommon to expand the doorway.

stone arch
The choice of material depends on interior design dwellings. For example, metal perfect material for high-tech rooms. The only drawback of this material is the difficulty of making an arch of an unusual configuration and its high cost. In addition, not every metal can be used for such purposes. Galvanized material is not suitable everywhere, but stainless steel- too expensive option.

Arch with forging elements
Wood is a beautiful, natural and noble material. Wooden arches will fit into any interior and transform it. It does not require additional finishing and special care.
arches from chipboard sheets and fiberboard, plasterboard and plywood are very easy to install and allow you to implement any design idea. An invaluable advantage of these materials is wide choose decorative building material for their subsequent finishing. In the future, they can be treated with varnishes, paints, decorative or ordinary plaster, lined decorative stone or covered with wallpaper.

Chipboard arch
The most inexpensive building material for the manufacture of an arched structure is plastic, which is easily transformed and mounted, and does not require its subsequent finishing.

plastic arch
When creating an arched structure, you can combine several building materials, the combination of which will recreate beautiful and stylish design solutions for a certain style of interior design. Modern market offers ready-made arched structures from different building materials.

Finished arch structure
Width and height of the finished structure
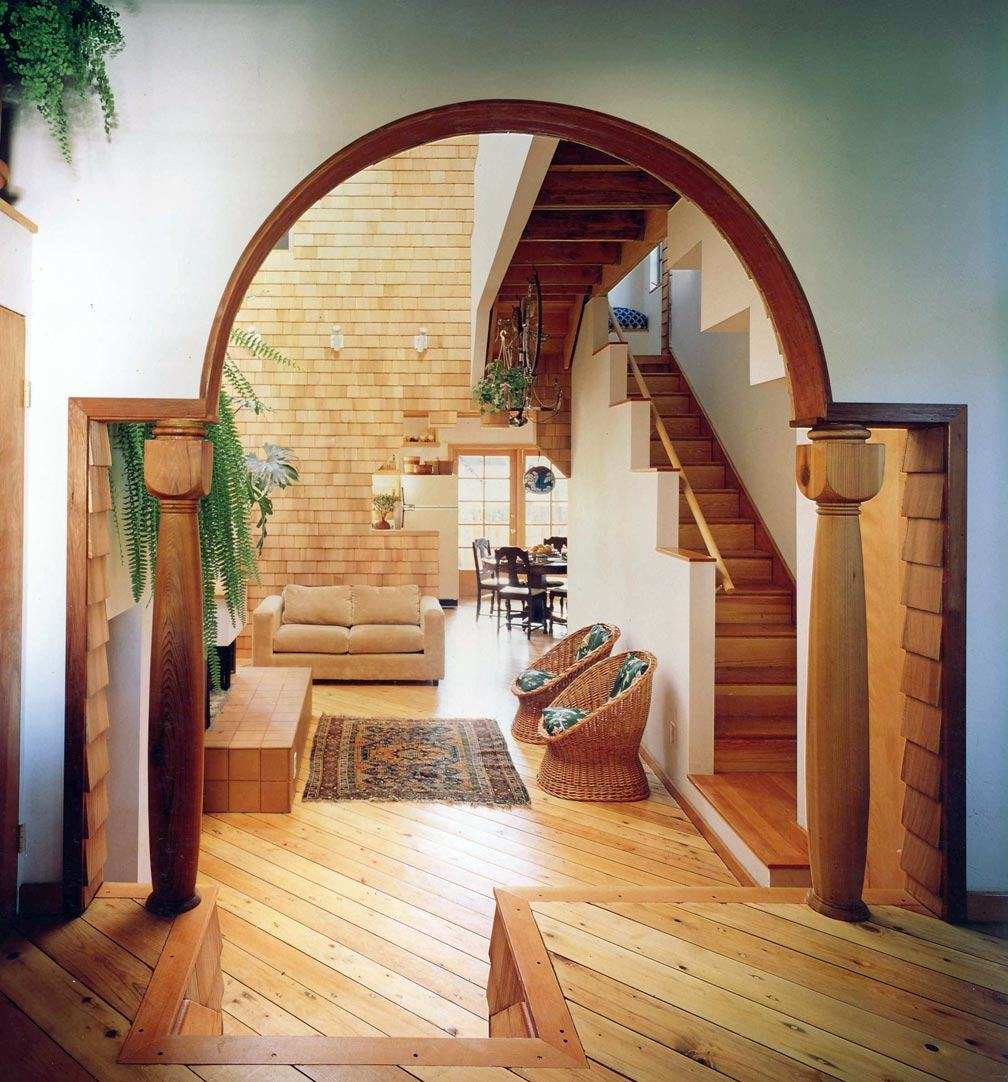
Arches always look elegant, allowing you to successfully save the space needed to open and close doors. The arched design allows you to visually separate 2 adjacent rooms. Most often, this design element is erected to decorate the hallway, thus increasing its space and effectively separating it from the rest of the premises.

Separation of adjacent rooms by an arch
Arches are classified according to their appearance and shape. It all depends on the specific repair room where the arched structure will be installed. The height of the room ceilings, the width of the doorway and design features the arch itself. Structurally, the arch must fit into general interior, and both of its sides can be represented in different styles. It is not recommended to build an arch in doorway with a ceiling height of less than 2 m, as this will lead to a visual reduction in the doorway.

An example of the calculation of the arched structure
Repair room for the construction of an arched structure in classical style must have high ceiling, since the radius of the arched bend is half the doorway. Art Nouveau arched construction has a larger bending radius than the width of the doorway, and its corners are sharp or rounded. romantic style may require an arched structure with a straight insert, located in the middle, located strictly horizontally or at an angle.

Arch in romantic style
The portal is created in U-shaped in a doorway with polygonal or undulating elements. Gothic style top part arched structure forms an acute angle with 2 converging planes.

Gothic style arch
The arched structure, going in an arc with the correct radius, will fit into rooms with a height ceiling from 3 m. The formed arc will occupy half the height of the interior doorway. Therefore, a height of 2.5 m is insufficient due to the increase in the interior door opening with a bending radius. Arched door structure, connecting a straight segment with curved symmetrical corners into a semicircle, - perfect solution for a wide doorway and interior design techno, high-tech or minimalism.

Hi-tech arch
To determine the shape of the arch and the materials used for it, its life-size template is created, or the doorway is outlined along the contour. The material of creation and decoration depends on the features room interior. At the same time, the arched structure can be decorated on both sides in different ways, depending on the style of the rooms being connected.

Varieties of forms of arches
The initial stage of work is the determination of the installation site of the arch. After measuring the width and height of the doorway, the height of the arched structure is calculated, approximately, this is 10% of the width of the opening. When making the necessary parts, they should be created a little larger in size than those indicated in the calculations. This is done because of the need to join the parts and impose them on each other. To begin with, it is better to work with templates in order to avoid mistakes and create a ready-made matrix for making an arched part without damaging the material.
Calculations are made and more simply. Above the door, the height of the arch is measured, to which an additional 5-7 cm is added - the height of the arched opening. If the height of the arch is higher than the doorway, the puncher will have to remove the missing cm for the arched structure.

Parameters for measuring the interior opening
Do-it-yourself installation of a wooden arched portal in a panel house
Prior to the creation of the arched structure, the existing door leaf and his box. Further, if necessary, the resulting opening expands to fit the dimensions of the future arch. At the same stage, the connecting elements of the future opening and its decoration, glazing and lighting are thought out. For simplicity of all work, of course, you can take a ready-made arched structure in a prefabricated version.

Prefabricated wooden arch
The frame of the arched structure made of plasterboard or chipboard and fiberboard sheets is mounted on specially prepared aluminum profiles, cut at the bends.

Base for fastening a wooden arch
The frame elements, made according to the template, are fastened with screws to the side wall panels.

Elements of an arched structure made of wood
The aluminum base is closed with a strip of purchased finishing material. To change the shape of these materials, it is enough to moisten them with water. Their finishing is made only after their complete drying.
An arched wooden structure can be made using various technologies. The first option for creating an arch involves cutting it out according to a template from solid wood. But this is fraught with cracking of the material along the fibers and a decrease in its strength and reliability of the entire arch structure. Another disadvantage of this method is the excessive consumption of wood material.

Carving an arch from solid wood
The second option involves softening wooden elements for the future arch by boiling in large metal molds. To do this, all wooden parts are aged for hours in special large metal containers with boiling water. After such pre-treatment at the folds necessary details for the arched structure, mechanical stress is created and the elements acquire the shape necessary for the design of the arched structure.

Bend of softened wood
In this case, each of the elements treated in this way is fixed in the desired position until it dries completely. So the dried elements remain curved. The third option is a multilayer gluing of wooden strips on a bar, giving them the necessary shapes, but this technology a very time-consuming process that requires a certain level of skill and time.

Wood bonding
How to install an arch in a doorway yourself: what can an arch be made of, installation of a wooden arched portal in panel house do-it-yourself, width and height of the finished structure, video
Further
How to embed a lock in a corrugated fence  Interior Italian and Milanese doors in walnut color
  Finishing front door clapboard, MDF panels or chipboard with your own hands
  Soundproofing entrance and interior doors
  Dimensions of standard interior doors with a frame How to open, open interior door keyless Mounting the handle with snaps for plastic balcony doors
- a very popular technique, and therefore the question often arises, how to properly install the arch? It is relatively easy to install such a structure with your own hands, if you know the features of the work using certain materials.
Exist various ways make an arch in the doorway
Features of arched structures
Do-it-yourself installation of an interior model of arches is somewhat different from the usual installation of a door frame. This design has a lighter and more elegant look, and therefore it is important not to spoil it all with inaccurate movement or distortion of the main elements.
There are many forms and configurations of arches. However, the most popular is classic version with a gently rounded vault. It is with the formation of such a form that arises largest number difficulties.
A variety of materials can be used for work:
- Fiberboard or MDF;
- natural wood;
- plastic;
- drywall;
- etc.

Varieties of arched structures depending on the material of manufacture
The arch consists of several parts:
- vault;
- side stand;
- decorative elements e.g. moldings.
Basically, installation is carried out in the direction from top to bottom. However, there are some differences in the arch installation technology. various types. Consider the most popular options and how to install them in the opening.

Typical design interior arch
fiberboard models
One of the simplest variations is an interior arch made of a material such as fiberboard. Installing such an arch in a doorway with your own hands is quite simple. For work you will need:
- hacksaw or jigsaw;
- pencil and tape measure;
- level;
- drill;
- self-tapping screws;
- screwdriver;
- glue.
As an adhesive, it is best to use a transparent sealant, it will be the least noticeable when protruding at the seams.
In addition to the arch kit, you also need to choose the right thickness wooden blocks or metal profile.

A simple option for making an interior arch from a fiberboard sheet
The installation of an interior fiberboard arch begins with trimming the elements. First of all, the vault is processed. Often, 150 cm is enough. Fiberboard is inserted into the groove of the arc of the arch and a cut line with a protrusion of 10-15 mm is marked. After sawing off the excess, the arc is placed in a groove with identical protrusions along the edges and glued with a sealant. The second side of the structure is worked out in the same way. After that, bars or profiles are screwed along the perimeter of the opening to fix the elements of the arch. The arcs are fixed on such a frame with self-tapping screws or foam.
Next is the installation of the side racks of the arch. It is necessary to saw them off with an offset of 5-7 mm for docking with the arch. The front panels are also fixed in the grooves of the sidewalls with glue and installed in the opening. Moldings are used to mask the joints.
wooden arch
Slightly more difficult to install wooden arches with your own hands. In this case, it is almost impossible to bend the arch to the shape you have conceived. Think in advance about the shape and size of the future design, and only after that purchase the parts of the kit.

Schematic representation of two options for wooden interior arches
Do-it-yourself installation of the arch is carried out according to the principle of fixing the elements on a pre-finished opening. This allows you to hide the irregularities of the wall and minimize the differences. Thus, first you need to complete the derivation of the shape of the vault and carefully putty the walls.
After preparing the opening, you can proceed directly to installation work. If the vault consists of several parts, it must first be assembled by fastening the parts special glue. For solid elements, this step is skipped. Fixation of the vault in the opening can be carried out different methods. The best is to use polyurethane foam And liquid nails. You can also nail parts to wooden beam and then mask the attachment points and moldings.
After installing the vault, the side parts are mounted in the opening, which are wooden vertical panels. The final stage is the elimination of errors and masking of attachment points.
Drywall
The most popular option is the construction of an interior plasterboard arch. It can be created as independent element, and as part of a complex composition inside drywall partition. This material allows you to create any design, and therefore limited standard options do not have to. Not only asymmetric vaults are available here, but also their smooth transition into another element of wall decoration.
Drywall bends easily, so it can be given any shape. To do this, moisten the material and make cuts on one side of the cardboard.
Plasterboard arches are installed using aluminum frame from profiles different type. This includes rails and racks, as well as various connectors and adapters. For curved arched vaults, a special profile is used, or its alternative is a self-cut rack.

Installation steps for a simple arched plasterboard structure
In order to do the installation with your own hands, it is necessary to fix the guide profiles in the opening and screw the rack elements to them with self-tapping screws. On top of the frame, drywall sheets of the appropriate shape and size are screwed onto the screws. The inner part of the arch in the opening is formed from a bent thin sheet of drywall. Further, all joints are puttied and performed finishing interior partition, including opening.
Additionally, you can frame the arch opening with platbands, if we are talking about a standard form. Otherwise, you can supplement the design with lighting, in addition, all the wires can be hidden inside the structure.
It is difficult to say which option is better to choose, since each person has his own taste and priorities. Be sure to consider all options before starting the installation of the arch.
The arch is one of the most popular interior elements, the demand for which flares up about once every ten years. Probably the most popular arch in interior openings reached in the nineties, when the long-running "Santa Barbara" was broadcast on TV. Others migrated from Western TV series to domestic interiors interesting elements, but the number of arches that appeared in those years in apartments was amazing. Today you can independently install an arch of any kind, type and complexity. And the arches of the house can be different.
What arches are
Arches differ in both shape and dimensions. You should rely on the interior style that is noted in the apartment or house. Most often this is a classic, but the options may be different.

Types of arches:
- Classical - a semicircle without corners;
- Modern - something between a portal and a classic, a smooth transition, usually used in rooms with low ceilings;
- The portal is no longer quite an arch, but an alternative frame for rectangular interior openings;
- Trapeze - the name is speaking, it is not suitable for narrow openings;
- Romance - In such arches there are only rounded corners, they use this view in wide openings.
The ellipse arch is very similar to the Art Nouveau look, only with smooth transitions. On the one hand, the semi-arch is made according to the type of portal, and on the other, it is of an arbitrary shape. It remains only to choose suitable option which will be in harmony with the interior.
Do-it-yourself installation of an arch in a doorway
The design to be installed consists of several parts. This is a side stand, arch and some decorative elements, for example, moldings. Mounting is usually done from top to bottom. But it all depends on the type of arch and the material from which it is made. You can consider the installation of the arch on one of the most popular types arched structures - a classic drywall arc.

For work you will need the following materials:
- GKL with a thickness of 12.5 mm;
- Special arched drywall increased flexibility with a thickness of 7 mm;
- Metal profiles;
- Rack reinforced profiles;
- Arched plaster corners;
- dowels;
- Self-tapping screws for metal;
- A large compass or at least an ordinary rope;
- Primer;
- putty;
- Reinforced mesh.
To assemble the arch yourself, you will need such tools - a puncher, drills, a screwdriver, a jigsaw, a hammer, a stationery knife, a construction compass, a bubble level. Not required, but it's good if it is - a peeling planer, which is very convenient to process the ends. Actually, when all this is available, the assembly of the arch begins.
Step by step: how to assemble an arch
Before the arch is inserted into the doorway, it must be prepared. You need to remove the door, if it is, remove it door frame and platbands. It is important that at the edges of the opening there is no decorative finishes, no wallpaper, no plastic, no wooden component, etc.

Then measurements are taken, without which it is definitely impossible to put the arch correctly. With a tape measure, you need to carefully measure the width and, accordingly, the height of the opening. It would be nice to mark the beginning of the radius of the arch on the walls. And the distance from the sexual part to the beginning of the radius on one and the other side of the opening must match so that the bend does not turn out to be crooked.
- Plasterboard width = doorway width. Let the upper edge of the drywall sheet remain flat, and on the lower edge with a compass or a rope with a pencil, you can mark the radius of the arch.
- You can fix an awl or a nail in the center of the future semicircle, and draw a stretched thread with a pencil at the end the right sizes arc.
- In the same way, you need to mark the arched bend on two sheets of the same size.
Then cutting is carried out drywall sheets along a curved line. It is quite difficult to cut the first sheet with a drawn arc. It is very important that the line is straight and the material remains intact. Therefore, it is more correct to use a jigsaw for this purpose. It is easier to practice on the remnants of the GKL in order to more confidently cut a sheet with an arc. The second sheet is easier to cut: the cut material is superimposed on the whole sheet, the arc is cut like a pattern.
The second part of the work: how to assemble an interior arch
Then the profile is mounted to the top and side parts of the opening. Facial arched sheets will subsequently be attached to the profile around the perimeter. Holes for dowels are drilled with a puncher. You need to fasten the profile to high-quality fittings.

Further work plan:
- Fixing the facade of the arch to the profile - do not forget to drown the hats of the fittings into the material;
- A radius profile is mounted - so that it is flexible, cuts are made on it every 3-3.5 cm;
- The arched end sheet of drywall is mounted, it must be bent very carefully;
- Mounting under the putty of the arched corner, a stapler is useful for this work so that the fittings are mounted to the curved edges of the arch;
- Finishing - a primer is used, which dries for about a day;
- Then the surface of all arched elements is leveled - a spatula and putty are used, as well as a reinforcing mesh.
It remains only to paint the arch. First, the dry surface is dedusted, then all the elements of the arch are again covered with a primer. And the easiest way to paint the arch water-based paint. Dries quickly, has no smell, does not fade. Here is the finished arch!
Is it possible to install ready-made arches in a doorway
Not such a small part of the arches - prefabricated structures. These can be arched systems made of MDF or solid wood, plastic arches, chipboard arches. Since the structure is already assembled, its installation will not be difficult at all. The main thing is to purchase an arched system that is completely suitable for this doorway in size.

A kit is usually purchased, the standard composition of which is as follows:
- 4 things. platbands;
- Vaults;
- Accordingly, dilators;
- Banquets;
- Intermediate plates;
- Top and side squares;
- Docking and end strips;
- dowels;
- Self-adhesive plugs.
If it is decided not to mount the arch adhesive method, and mechanical, then in the vaults and platbands you need to make holes for fasteners. On the reverse side such platbands - mounting grooves, in order to insert them into the intermediate plates, it is necessary to install the platbands so that the edges of the grooves are not hidden behind the corner edge of the opening. When the infill plates are mounted, the docking panels are put on them and this connects the sidewalls to the vault. Do not forget to cover the attachment points with plugs.
How to install an arch with your own hands (video)
Arches are an element that has not lost its relevance. This is not only a way to design a doorway, but an interior, and sometimes style-forming accent.
Attention, only TODAY!
- All about arches: forms, materials, installation
- Varieties of interior arches
- The material used in the manufacture of arches
- Installation of a drywall arch
All about arches: forms, materials, installation
If you have difficulty choosing a door inside the apartment, consider installing an arch. Interroom arch - great alternative transitional doors, moreover, it has a number of undeniable advantages:
- visual expansion of the space of the room;
- giving the interior an elegant and stylish appearance;
- avoiding standard solutions used in standard construction.
Interior arches are part of the interior that will allow you to expand the space and create comfort in the house.
Back to index
Varieties of interior arches
IN modern world interior arches managed to gain immense popularity, there are a large number of different forms, now the following types of arched vaults can be distinguished:
- The most common type is classical, such a vault has the shape of a regular circle, reminiscent of a vault. This type arches are perfect for any interior space.
- The arch in the form of an ellipse "Modern" will allow you to get away from standard circles and emphasize the individuality and severity of the interior of the room.
- A vault resembling the shape of a yoke.
- The vault with rounded corners and a straight line in the central part was called "Romance".
Back to index
The material used in the manufacture of arches
Also important is the choice of material from which the arch will be made. In the modern world, a large number of different materials are used.

Consider the most common types, it will help to do optimal choice and decide what exactly one or another design should be made of.
Back to index
Installation of a drywall arch
If you decide to make the arch yourself, the continuation will be very useful for you. The most common method will be described here. self-assembly interior arches classical form from drywall.
To make an arch, the following tools are needed:
- screwdriver, can be replaced with a Phillips screwdriver;
- construction knife;
- roulette;
- simple pencil;
- needle roller, which can be replaced with an awl;
- metal scissors;
- a hole punch for metal, or a drill (screwdriver) with a 3.5 mm drill;
- riveter;
- hammer.

Materials needed for work (the amount of material depends on the size of the structure):
- drywall;
- metal profile UD (PN);
- rivets 3.2 mm, length special significance does not have, but not less than 4 mm;
- screws (self-tapping screws) for metal, not shorter than 25 mm;
- expansion dowels;
- thick cardboard (for the template).
First you need to make a project, for this they calculate the arc of the arch and the height of the installation. It is better to first cut out the arch from thick cardboard on a scale of 1: 1. This will make it easier to make metal carcass, drywall will be attached to it in the future.
For the manufacture of the frame of the interior arch, a guide metal profile and tools will be needed: a hole punch for piercing the profile and metal scissors. The use of metal screws is not recommended as caps will prevent the drywall from fitting snugly to the frame.
After preparation metal profile of the required length, corresponding to the size of the arch, cuts are made on it on both sides along the walls, after 1 cm. This will help to effortlessly give the profile the desired shape (according to cardboard template). Next, the profile is fastened on both sides with a hole punch and rivets. Then make the second same guide. This will be the frame for the future arch.
The guides are fixed on both sides in the doorway using spacer dowels, stepping back from the edge of the wall 2.5 cm. To stiffen the structure, segments of a metal profile are attached between the profile arcs. Then on both sides metal structure fasten the side parts of the drywall arch, screwing them with screws.
Next comes the preparation of drywall for the arched vault. Better to use ceiling view, this one is a little thinner than the wall, therefore, it is easier to give the desired shape. For this there is great way, which is recommended to be used to give various shapes drywall.
Punctures are made on the cut drywall strip using a special needle roller (on inside) over the entire surface. Then moistened with water, you can cover wet towel. It takes 10-15 minutes to impregnate the strip, then an arch is formed directly on the previously made frame. The arch arch is fixed first with adhesive tape, and after complete drying - with screws. At the final stage, the arch is puttyed and painted.