Beautiful kitchen sets. How to make a kitchen set with your own hands: useful information
Russia, Moscow region, Moscow +79041000555
How to do kitchen set: do-it-yourself drawing and diagram
 Modern kitchen sets made from simple modular elements. The ease of working with materials will make the assembly process simple and fun. As simple as playing lego. In addition, assembling furniture with your own hands will save a decent amount of money. Assembly firms value the cost of their work very highly: up to half of the entire budget.
These funds can be spent on more expensive and beautiful facades. Refusing the help of specialists, you can assemble a headset that meets the wishes of the owner to the maximum extent.

Before you start designing a headset, you should decide how it will fit into the overall layout of the interior of the room. The use of simple modular elements will solve both issues of functionality and ease of assembly and operation. The choice of layout also depends on the personal preferences of the assembler. There are the following main types of kitchen sets according to the design scheme.
- Linear. The simplest. Used in long rooms. The whole set goes along one wall. As a rule, it is used in narrow kitchens.
- corner. Very compact and difficult option. With such a layout, it is very important to correctly calculate the corner modules in which the sink is most often placed. You have to take into account all the irregularities of the interior of the room.
- In the shape of the letter "P". This design can be used in spacious rooms. Excess space is occupied by functional modules. You can even place a dining table in the center.
- peninsular. Part of the headset in this layout can act as a bar or work surface. Looks very stylish and effective.
Features of the relative position
When choosing a kitchen layout option, there are some features to consider. They are associated with mutual arrangement its various modules. Below is a list of key rules.
- Do not place gas pipes and flexible hoses above or below the communications of the plumbing system;
- gas stove or hob should be at a distance of 1.5 - 2 m from the main gas pipe;
- The sink and the gas pipe are separated from each other by a distance of 50 - 80 cm.

The latter is especially important in corner layouts. They should not contain a sink and gas stove immediately on both sides of the corner cabinet. There is always a chance that the hostess will flood the burning gas burner or put a towel on it.
General design workflow
 Designing circuits is a very important and difficult part when assembling a kitchen set. It can be divided into several key stages:
- the material from which the frame part of the product will be made is selected;
- materials are selected for the manufacture of the most expensive items headset - facades and countertops;
- specific models of fittings are defined, such as handles, hinges and door closing mechanisms.
- the dimensions of the room in which the furniture will be placed are measured, taking into account the requirements of safety and convenience;
- a design scheme is created, which accurately indicates the location of all modules (lockers, drawers, cabinets, sink, stove);
- the desired dimensions of the headset modules are reduced to physical dimensions (room dimensions, material thickness, location of air ducts, pipes and connections);
After completing these steps, you can proceed with the assembly.
Material selection
Carrier module materials
Most of the load-bearing elements will be hidden behind the facade and under the countertop. The cheapest and most common today is chipboard with a laminated coating (LDSP). It goes very well with any facade materials. At the same time, there is a wide choice decorative coatings. Maximum length cannot exceed 3.5 m. This length is quite enough for the manufacture of any modules.
Chipboard thickness the following is selected:
- 16 mm- for side walls and shelves;
- 18 mm- for the base of the lower row of pedestals;
- 10 mm- for decorative inserts.
Countertops can be created from Chipboard 24–32 mm thick. With sufficient funds, you can use more expensive materials: fake diamond, acrylic, glass, natural stone. There are even styling options. decorative tiles on the surface of its functional areas.

Facades and fittings
Facades are the face of the kitchen set. Their main function is aesthetics. The most common facade material today is MDF. Made from environmentally friendly material, they are covered with various decorative films that form color and texture. Save on this material is not worth it. There is nothing to worry about if its share of the entire budget is more than half of the total.
If the facades perform a decorative function, then the fittings mainly perform a functional one. Handles are an exception - they should look beautiful. Without functional elements, all furniture will be just a set of empty drawers in which it will be difficult to find the right thing.
Design features of individual elements
In the kitchen wall, everything is located in two rows:
- lower- cupboards with doors or drawers;
- upper– cabinets with doors or open.
At the same time, the construction has a number of features, depending on where they are located.
Standard
 Along the straight sections of the kitchen are the simplest design modules: cabinets and cabinets. The drawing of a standard locker starts with two side planks. They are made from 16 mm chipboard. They are located vertically. Then the horizontal boards are placed end-to-end between the vertical ones. The result is a cabinet-box. The thickness of the material is taken the same. For hinged carriers are exactly side walls. For them, elements of the fastening system are attached.
The cabinet is made differently. First, the bottom board is taken - Chipboard 18 mm. Two lateral ones, 16 mm thick, are placed on it. From above, guide strips are placed between the side elements. They don't even need to be laminated on all sides. A countertop will subsequently be attached to them, which will hide the slats. At the bottom of the pedestal, all the load falls on the bottom. Since the finish cover (tabletop) is not immediately attached, only stiffeners are placed.
The rear wall, made of 4 mm thick fiberboard, is placed uniformly for the cabinet and cabinet. At the design stage, this thickness cannot be neglected. All adjacent modules are interconnected with special ties. They cannot be covered with shelves. Mounting the fasteners will require drilling holes with a diameter of 6 - 8 mm.
All sliding components, such as drawers, are designed with a margin for the thickness of the fittings. For example, if the roller guides are 22 mm thick and the side walls are 16 mm each, then the planned dimension is taken for the width of the box minus the sum: 16 + 22 + 22 + 16 mm. Consistently go: wall, guide, box, guide and wall.
non-standard
 In any kitchen, you will definitely find such interior elements as pipes, protrusions for an air duct, sloping walls, etc. In this case, cabinets and cabinets will play not so much the function of storing things as masking interior flaws.
Hiding a niche is easy enough. To do this, you just need to make the depth of the cabinet more by the amount of the protrusion. But, the protrusions will already be cut out of the furniture elements, and "eat" part usable space. Shelves can also be cut to size.
The pipes inside the cabinets will require an appropriate recess. If part of the pipe passes over the apron, you can make an additional box according to the color of the apron or countertop. There are times when sewer pipes protrude more than 30 cm from the wall. You can hide them with a beveled product. One side of which has a wall with a depth of standard 30 cm, the second - by an amount sufficient to mask pipes, for example, 50.
Features of the corner kitchen components
Corner cabinets and cabinets in the inner curve of the kitchen the hardest to design. It is not very noticeable in the drawing that opening doors will block access to neighboring ones. In this case, a huge space is formed, to the far corners of which it is difficult to get close. Most often in corner cabinet have a sink instantaneous water heater and a trash can. The tabletop is made with a small margin in depth so that it protrudes 2–3 cm and hides the door.
![]() Corner cupboard can mask the water supply communications system, which is most often located in the corner. Such an element of furniture must be made with a cut of 45 °. It should be done in such a way that the horizontal partitions are located inside the vertical ones. If the confusion of this sequence is forgivable, then the door of the facade simply will not fall into place.
Corner cupboard can mask the water supply communications system, which is most often located in the corner. Such an element of furniture must be made with a cut of 45 °. It should be done in such a way that the horizontal partitions are located inside the vertical ones. If the confusion of this sequence is forgivable, then the door of the facade simply will not fall into place.
facade design
Despite its simplicity, for the elements of the facade, it is necessary to make drawings that indicate the dimensions. Door leaves can be both overhead and internal. The way they are placed depends entirely on the choice of loops. Their width should be made with a margin of 4 - 5 mm on each side. For example, with a cabinet width of 0.6 m, the horizontal dimensions of the doors are 29.2 centimeters each.
Another difficult moment that everyone has facade structures: special drank under the loop dies. It is done, as a rule, with special cutters. The drilling depth of the recesses for some hinges may differ from the standard. Loops allow adjustment in depth. The placement of the dies in this case can have a spread of 2 - 6 mm from the edge of the door.
Whole headset design diagram
Taking room measurements
 When performing measurements, it is necessary to take into account a number of features. Despite the fact that you want to fill the entire space of the room along the wall as much as possible, some areas will remain blind. First of all, this concerns the basement. A gap of 10 - 15 cm under the ceiling does nothing. If there is a hood right under the ceiling, then the border should be drawn along its lower level. At a lower position air vent, air ducts are conducted in the upper cabinets, which leads to a loss of interior space.
From the bottom of the floor stumbles 7 - 10 cm. Most kitchen cabinets placed on special legs that allow you to change their height. They withstand a load of up to 200 - 300 kg per element. The number of legs must be taken based on the design weight of the cabinet with the things stored in it. When passing pipes of the heating system, a margin of 5 - 10 cm should be provided. It is better to hang a curtain in this place. This will hide the pipes, while maintaining free access to them.

The countertop can fit closely to the rest of the walls. The lower cabinets themselves will be 100 mm from the wall, allowing you to carry out communication elements behind them: gas hoses, water supply, sewer pipes. Before installation, it is better to lay out the apron on the wall. Made from tiles, it will take an additional 10 - 15 mm. In its absence, this margin should be taken into account when designing.
Layout of modular elements
 schematic drawing kitchen furniture
compiled at this stage. It is necessary to arrange all cabinets of the upper row and cabinets of the lower one in such a way that it is convenient to work with them later. You should be very scrupulous about the location of such important elements of the kitchen as a sink, hob and refrigerator. It is between them that the hostess will have to run the most. When arranging them, the rule of a functional triangle is used.
schematic drawing kitchen furniture
compiled at this stage. It is necessary to arrange all cabinets of the upper row and cabinets of the lower one in such a way that it is convenient to work with them later. You should be very scrupulous about the location of such important elements of the kitchen as a sink, hob and refrigerator. It is between them that the hostess will have to run the most. When arranging them, the rule of a functional triangle is used.
The plate is located in the center. It is advisable to place it immediately under the duct. This will allow you to fix the hood in the same place and avoid placing long and bulky boxes. The stove is often worked with two hands, for example, to rearrange hot objects.
They also work with both hands at the sink. It should be located on one side of the stove, for example, on the right. The refrigerator should be placed on the other side. In our case, on the left. It is better to make the distance between the sink and the stove no more than 1.5 m. It is better to place the refrigerator at a smaller distance, for example, 1.2 m. It will be convenient to arrange a cutting table in the area between the refrigerator and the stove. This will save energy when pulling out products before cutting.
In addition to the horizontal layout, take into account the rules of ergonomics when removed upper cabinets. It should be located in such a way that the lower edge is at the level of the hostess's chest. The top shelf should be accessible from the floor at arm's length. When choosing the height of the cabinets to the ceiling, it will be possible to get to the top shelf only from the stool.

Drawing of a homemade kitchen set with dimensions
When designing the dimensions of cabinets and cabinets, several rules should be taken into account for choosing sizes that have already become the standard:
- 30 cm - the depth of the upper;
- 60 cm - depth of the bottom row of pedestals;
- 85 cm - the height at which the countertop is located;
- 72 cm or up to the ceiling, minus the basement zone - the height of the cabinets;
- 35 - 80 cm - the width of the cabinets, closed with one or two doors.
Regarding the last size, it should be noted that with a standard swing door opening, with a leaf width of 40 cm, the structure will sag greatly. If you make a cabinet with two doors with a width of more than 80 cm, then there will be excessive pressure on the hinges. An additional reinforcement of 3 or 4 loops will look ugly and take up a lot of space inside.
It will look nice homemade kitchen with a mezzanine board located under the plinth. At the same time, you can leave a distance between it and a number of cabinets. Equipped lighting fixtures, it will perform not only a decorative function, but will also become a lighting fixture.
Since the cabinets are not mounted close to the wall, their depth is only 45 - 50 cm. But at the same time, the facades will be located at a distance of 60 cm (plus the thickness of the facade) from the wall. This is the width of standard countertops.
If the space of the room allows, then you can choose the same width of the top row cabinets, for example, 30 - 60 cm. The entire facade will be made of doors of the same width. If you alternate glass and solid doors at regular intervals, the overall pattern of the kitchen will look spectacular.
Keeping the vertical, the doors of the cabinets of the bottom row should be made the same width. The only exceptions will be functional elements, such as Dishwasher. Having a non-standard width, they can leave tails 15–25 cm wide. You can add width to vertical alignment in ways such as a pull-out vertical drawer for storing bottles and cutlery.
How to do the calculations yourself
 One cabinet consists of 8 - 10 elements: 4 walls, 2 front doors, rear panel, 1 - 3 shelves. At the same time, each part has three-digit dimensions. The simplest headset can consist of a dozen blocks. How not to get confused in such a quantity and do everything right? You can draw everything on a piece of paper schematically, but it will be very difficult to calculate and cut it with your own hands.
They come to help computer programs. It is not always necessary to use such bulky and expensive products as AutoCAD. There is, for example, the Pro 100 program. It contains a huge base standard elements. In it, you can calculate not only furniture for the kitchen, but also draw drawings of wardrobes. In addition, it allows you to take into account the location of all modules without overlap. If something sticks out, it will be visible at the design stage. A schematic design of a headset is built in it in a couple of hours.
The sawing of the boards itself also does not need to be done on graph paper with your hands.
In order to cut all the elements on the sheets of chipboard, you can use the Astra program. It takes into account not only the dimensions of standard chipboard sheets, but also takes into account the thickness of the seam that forms the saw stroke. In addition, she will calculate the length of the edges and the total cost of the sawing work.
After completing all the design stages, you can begin to assemble the furniture.
How to make and design kitchen furniture with your own hands (drawings)


And tell your friends.
You have made a kitchen renovation - yourself or with the help of designers and finishers. Now you need new interior complete with kitchen furniture that matches the style and meets your requirements. Someone will buy ready-made, others will want to make or assemble a kitchen set with their own hands.
The reason can be anything - from the desire to save money to the desire to do it yourself. The main thing is that the hands grow from where they need to. Hands + possession of some programs = the success of the venture. But since you found and are reading this article, it means that you are great friends with the computer. Then let's start.
Step 1. Kitchen design
Layout future furniture can be done in two ways.
- If your drawing was “5”, you can draw a sketch of the headset by hand, providing for all fasteners, tie-ins, installation of shelves, facades and other nuances.
- Use one of the graphics programs that display a projection in 3D format. It can be PRO100, Basis furniture maker, Blum Dynalog or AutoCad.
Measure your kitchen carefully- a wall along which furniture will cost. Consider what large-sized appliances you will have installed there: Sink, refrigerator, oven, washing machine, microwave oven, hob, extractor hood, dishwasher. It is advisable to already know the dimensions of the devices in order to accurately fit them into a future project.
Calculate how many and what kind of cabinets you need: hanging and floor, wall and corner, with drawers and opening doors.
![]()
Some programs (Blum Dynalog) process the finished sketch and issue a printout with fittings, accessories, markup and assembly diagram. Others are only able to draw a layout with dimensions, albeit detailed, but without a cutting module. In this case, you can transfer the detailing to another program (Astra or Cutting), calculate everything and print it out.
Advice. You are a beginner in the furniture business - you should not excel in complex forms and fancy colors. Choose simpler prototype models. They are not difficult to cut, and it will be easier to assemble them. simple designs, mechanisms are always more reliable, as practice shows. In the future, you can either update the kitchen set, or simply replace individual cabinets or just facades.
Step 2. Material selection
All parts of the kitchen set are divided into four groups. This is a countertop, cabinet cases, an apron and facades.
- For the frame, mainly laminated chipboard is used;
- Facades can be glass, rattan, wooden, from the same chipboard;
- Countertops are made of laminated MDF, chipboard or stone (natural, artificial). Since you are making a kitchen set with your own hands, the saved money can be spent on a high-quality and durable countertop, and the article will help you choose the right countertop:;
- The apron is the distance between the floor and wall cabinet. It is laid out with tiles, a mirror, finished with panels, painted and glued with washing wallpaper.

With the finished printout, you can safely go to a hardware store for material for the body, facades, shelves, guides, hinges, door handles and other accessories. Do not forget about glue, nails, dowels, screws and other fixing small things.
To decorate cabinets we buy various decor- balusters, flutes, curlicues, ornamental overlays, decoupage napkins or stencils for painting - everything that the fantasy displayed on paper suggests.

If you have a jigsaw at home, you can cut the parts yourself - there would be material. And you can order cutting in the same hardware store , in furniture company or at the sawmill. Just be sure to number the sheets and mark each of them.
Advice. The standard sizes of cabinets from manufacturers are multiples of 15: 30 cm, 45 cm, 60 and so on. Apparently, it is more convenient to consider it this way and it is accepted in furniture business. In furniture workshops, sheets with similar dimensions are usually already prepared. And if your furniture fits into these parameters, you can immediately buy required amount. However, you can move away from stereotypes and give your sizes for cutting. But then the sheets will cost a little more - be prepared for this.
Step 3. Preparing the Parts
To assemble cabinet furniture, fasteners are not always enough. You need to drill holes in the walls for the chopsticks and insert them. Drill holes with a jig. And they twist the furniture with confirmations - they look like self-tapping screws.
![]()
The basis of the furniture is usually simple and easily sawn out of chipboard or plywood sheets. For the walls, plywood or fiberboard is used. Another thing is facades. If it is glass, then it must be inserted into wooden frame, like a rattan facade. But glass and wooden facade needs an edge - this is both aesthetically pleasing and practical. Edgebands can be purchased at a store or furniture company, where you can order their pasting with a special lamp.
The countertop, if it is made of stone, is better to order from professionals. They will take measurements. kitchen sink, hob, the required length or width and cut out all unnecessary. with plastic or wooden countertop with a strong desire, you can handle it yourself - the rule “measure 7 times, and cut 1 time” applies here. Do not forget to treat the cuts with silicone so that moisture does not spoil the material in the future.
Step 4. Assembling the kitchen set
On the wall with a pencil we mark the places where the cabinets will stand or hang. Do not rely on the level of the floor or ceiling - they are not always even. Use a markup rule. We take into account all the nuances, up to water, gas pipes and heating systems.

We disassemble the sawn parts into cabinets and assemble them with the help of tools, referring to the diagram and using the assembly instructions. We leave the hanging of facades and the installation of drawers and shelves for dessert. But we install the hinges and guides immediately.
Step 5. Installing the kitchen unit
Cabinets are assembled. It remains to add a few nuances and put everything in its place.
Install floor cabinets on the frame or fasten the legs to them. The number of legs and their attachment points will be given in one of the computer programs mentioned above.
We hang ready-made cabinets and arrange them in their places. For greater stability, they can be fastened together. We decorate the facades, as it was originally intended. Involve household members in such creativity - and the work goes well, and work is more fun.

Now it's time to install the countertop. We install a sink in the allotted place, connect plumbing. The same with the oven or stove, hob. We connect electricity and gas.

We mount a cornice on top of the cabinets. It usually has a spotlight on it. Illumination will also be needed above the cooking zone - dotted, going along the bottom wall cabinet, or a fluorescent lamp screwed to the kitchen apron.
We fasten to the facades, drawers handles, hang and insert them, install shelves and bars.
We wipe the dust, check the backlight, the connection to the pipes and enjoy our work.
Breathing new life into old furniture
What to do, if old furniture still looks dignified, but does not fit the style, is out of fashion or the facades are worn. How to update the kitchen set in this case?

If the furniture is suitable in size, capacity, design, make new headset it won't be that difficult. But kitchen cabinets still needs to be sorted out. Remember, or rather mark, which side parts, back wall, facade refer to a specific cabinet. For example: Z1, BP1, BL1, F1. So then it will be easier to assemble the constructor.
Remove all fasteners, hinges, handles - they need to be replaced with new ones. We take an electric planer or sandpaper and skin all surfaces, rinse and dry them. You may have to treat them with antifungal agents, apply a primer.

We measure the facades and make new ones in their likeness. If your doors are in good condition, then they need to be cleaned, primed and decorated as the style of the kitchen suggests. A budget option- This is a self-adhesive film (it comes in different textures and colors). A more expensive option is laminating the facade in desired color. We can advise needlewomen to paint and paint or decorate the doors in the same style.

We buy fasteners and assemble kitchen cabinets and cabinets again. We drill, where necessary, recesses for appliances, sockets, plumbing or gas pipes. From above we install a cornice with lighting. Below is the base. We twist the legs. We set it to the level on the floor or on the wall. We install sinks, stoves, faucets, countertops. The final stage is the doors and shelves.
What tools will be needed
To assemble a kitchen set from scratch or update an existing one, the tools that each owner has may not be enough. Check out the list.
- Rule or level.
- Construction meter or laser rangefinder.
- Screwdriver.
- Screwdriver - there are so many fixing confirmations that you simply cannot do without it.
- Sandpaper or electric planer.
- Hacksaw.
- Electric drill.
- Electric jigsaw.
- Jig for drilling holes for dowels.
- File.
- Screwdriver.
- Pliers.
- Hammer.

Pick up work clothes and goggles to protect your eyes. Tools such as planer, jigsaw, range finder, jig in Everyday life you won't need, so you can rent them from a power tool store.
Pros and cons of self-creation of kitchen furniture
It may be difficult for you to decide to make a kitchen set with your own hands - you are not a professional. It is even likely that the result will disappoint you somewhat - nevertheless, it is made at home, and not in furniture shop where you always have extra chipboard sheets, workbenches, tools, varnishes and other material. But if you do not rush, make accurate measurements of the kitchen and furniture, carefully assemble everything, then the household and your guests will be surprised with the result.
Do you know why custom furniture is so expensive? Not because it is difficult to transport, assemble and install. This is just the most simple and unskilled work. With the assembly of the kitchen set and a neighbor can help.
The most expensive thing in furniture production is a project that takes into account the measurements of the kitchen, the degree of the angle, the design and features of the cabinets. But you can already save on this by building a sketch and a drawing in one of the computer programs or with a pencil on paper.
And already according to the project (you don’t even need to calculate anything, the program will do everything) materials are being prepared. And if you choose standard sizes, then there should be no problems with buying them at all.
The kitchen furniture market can be represented as follows: high-quality and very expensive, just expensive and not the fact that high-quality. Therefore, many are looking for a way to make a kitchen set yourself. Moreover, today you can buy almost any material, accessories, tools, etc. On practice homemade models often turn out to be no worse, and often even better than the factory ones.
But to make a kitchen set with your own hands, you will have to work with both your hands and your head.
Choice of design and material
Simplicity and functionality
So, if you decide to work with your own hands, then you immediately face a dilemma: which design to choose? The answer is simple - we choose the most simple, functional and convenient design.
Here the classics of kitchen furniture come to our aid - these are cabinets with drawers that are assembled together and covered with a common tabletop (as in the photo above).
This modification has several advantages:
- Possibility modular assembly when each element is designed and assembled separately;
- This design suitable for both large and small kitchens;
- During the production of furniture of a similar configuration, accumulated great amount methodological material and worked out the most workable combinations of materials, fittings and sizes;
- In practice, such furniture is comfortable, roomy and durable enough;
- If you don’t know how to make a kitchen set yourself, a standard and time-tested model will require a minimum of knowledge and creative effort, which is much better for a beginner;
- When cutting parts, you do not have to work with complex curvilinear cutting and obtuse corners, which will greatly facilitate your task;
- How easier mechanism, the more reliable it is in work. This is a universal rule of mechanics;
- It is much easier to find the necessary fittings, facades, countertops, etc.
- When assembling, ordinary standard ways connections: screws, dowels, nails, glue;
- The standardized sizing system, which is a multiple of 15 centimeters, also greatly facilitates the design and subsequent cutting, assembly and fitting.
In addition, do not forget about such an opportunity as altering the kitchen set with your own hands. This is quite a worthy option, because you will get rid of the lion's share of manipulation, design and other headaches.
materials
First, let's list all the possible options:
- solid wood. The most durable and preferred option, but also the most expensive;
- Painted MDF. Very, very good choice, excellent performance, but the price is also appropriate;
- Laminated chipboard. Significantly cheaper than the first two options, has proven itself well in practice. Used even by Italian masters.
- Postforming. The most practical and wear-resistant material. Not quite natural, as plastic. Often has very bright colors, but you can find not very saturated.
- Chipboard without coating. Can be used for side and back walls of cabinets, cabinets and drawers. Fiberboard - for the rear walls of your cabinets and cabinets.
Advice!
You should choose the material that you touched and saw with your own eyes.
To do this, before you make a kitchen set yourself, it will not be superfluous to take a walk to a furniture store or a hardware supermarket and consider all types of materials.
So what is the best kitchen furniture? As a rule, for self-manufacturing furniture is chosen either painted MDF, or veneered chipboard. You can also use, and collect the rest of the sections from uncoated chipboard or MDF boards.
Design
Important!
There is an opinion that only professionals in factories use drawings, and for self-produced they are not really needed.
This is not true.
Everything is just the opposite: the master can work based on his knowledge and experience, but for a beginner, a project and a drawing are simply necessary.
So, before we make a kitchen set ourselves, we need to draw up a project and complete a drawing. How can this be done without knowledge of descriptive geometry, engineering graphics and all sorts of standards?
The answer is obvious: you should use a computer that is in every home today. Moreover, all the complex and routine work has already been done for us - a lot of programs have been written, there are many editors and descriptions for them.
You can use AutoCAD, but it's better to start with something simpler. One of the simplest and most intuitive programs is PRO100. Almost any user will deal with this editor in a couple of hours. As a result, you will get something like this:
For calculations of fittings and schemes for its installation with markup, you can use proprietary programs written for a specific brand (all self-respecting companies have acquired such software). Here, for example, is the Blum Dynalog program:
Advice!
At the design stage, you must decide on the appliances: oven, stove, sink, washing and dishwashers.
If you have not yet purchased all the equipment, you can download the technical documentation for these devices with dimensions online.
This will save you from all sorts of adjustments, additional milling and other surprises.
Where to buy materials
So, we have already drawn up a project, the result of which should be a drawing and detailing of all parts. Based on these documents, we compile a list of the parts we need and draw it up in the form of an Excel file:
With this file in paper and electronic form, we go to the workshop of the company that is engaged in the production furniture facades and sales of plywood, solid wood, MDF, etc.
Important!
Façade companies have a so-called chipboard stock program, which includes the color and thickness options for plywood that they keep in stock at all times.
It is desirable that the list we need be included in this program, then you will not have to buy extra material in sheets, but it will be possible to order cutting of exactly the amount that we need.
Companies engaged in edging and cutting chipboard, MDF and the production of facades are present today in almost every major city Russia and CIS countries.
Buying from such companies is more profitable for several reasons:
- Lower price;
- More choice;
- Better quality cutting and edging;
- Possibility of purchasing non-standard parts.
Production based on an old headset
If your old headset suits you in terms of geometry, and you are used to it, it is better to use it as a basis. But how to remake a kitchen set with your own hands?
Very simple:
- First, it must be taken apart. We disconnect all collapsible elements of the old headset. We remember what and where should be.
- Secondly, we clean the old surfaces with sandpaper, wash and put in order all the details of the furniture.
- Thirdly, we remove the dimensions of the facades and doors. We will replace them with new ones.
- Finally, we change all fittings, screws and connections. These are the most worn items.
- According to the obtained sizes, we order new parts in a store or in a warehouse, as in the previous paragraph, and assemble the headset again.
Advice!
Before you make a new one from an old kitchen set, you need to make sure that it suits you completely in terms of design, location, height and spaciousness.
Otherwise, you will waste your time and resources.
This is the most rational and inexpensive option. All furniture is made typical schemes, only the facades and fittings differ. So why reinvent the wheel and make the whole body from scratch when there is a ready-made one that is easy enough to update?
On our site you can find a lot of descriptions of such work. You can say this modern trend, since not everyone has the opportunity to buy ready-made furniture, not everyone has enough time and desire to make furniture from scratch, but renovating an old one usually does not cause problems.
Assembling a headset from scratch
So, we have a project, on the basis of which we purchased everything necessary materials. Cutting individual elements can be done independently, or can be ordered from the seller.
Let's break down the process step by step:
- We choose a set of a simple design (in our case, these are cabinets with drawers, connected by a table top);
- We master the PRO100 program and create a project with a drawing, detailing the dimensions, fasteners and parameters of all elements;
- Using the program for selecting accessories (in our case it is Blum Dynalog), we create a scheme for installing fasteners, hinges, handles and sliding mechanisms;
- Making a list of all the right details and fittings into a separate Excel file, on the basis of which we purchase all materials and accessories;
- In accordance with the drawing, we cut or order it from the seller (we buy from the manufacturer, he has such an opportunity);
- If we assemble furniture on dowels, then with the help of a jig we make holes and spikes, it is better to use a confirmation for these purposes;
- We assemble each individual pedestal according to the drawing (a frame with fittings for drawers), then we assemble the boxes, attach facades to them, close the pedestals with a back wall, mount the legs;
- We make holes in the back walls for sockets and all kinds of pipes;
- We assemble the cabinets together, fix them with clamps, set them according to the level, put the stove, washing machine and mount;
- We install a sink, taps and connect plumbing to the sink and household appliances;
- We mount the crocodile loops and hang the doors.
Tool
To work, you will need the following set of tools:
- Hammer;
- Hacksaw;
- Electric saw;
- Electric jigsaw;
- Electroplaner;
- Roulette;
- Level;
- Ruler;
- Plumb;
- clamps;
- Workbench or sturdy table;
- Vise;
- Screwdriver;
- Screwdriver;
- Conductor for holes for dowels;
- Electric drill and a set of drills;
- Construction knife;
- A set of files and files;
- Sandpaper;
- Fomka;
- Pliers.
Advice!
If you are having trouble with money, then it is not necessary to buy all the listed power tools.
Modern supermarkets have a rental department where you can rent almost any power tool.
Also, protective equipment will not interfere: gloves, goggles, a respirator and a gown. Do not neglect these things - health is more expensive than any money, especially since these funds are inexpensive.
Advice!
If possible, it is better to use a laser rangefinder for measurements.
As practice shows, the lion's share of errors occurs precisely during measurements, because the error when using a tape measure is quite large.
Conclusion
Those who decide to make a kitchen set on their own should remember a few things: it will take a lot of time, patience, effort and attention. You should also understand that not everything works out the first time, and do not get upset if you fail, a mistake is also an experience.
It would be nice for beginners to enlist the support of a more experienced friend, in extreme cases, just an intelligent assistant will do, because two heads, as you know, "width="640" allowfullscreen="" frameborder="0">
Finally, you should prepare as much as possible in terms of theory. For these purposes, you can find a video on our website.
It would be nice for beginners to enlist the support of a more experienced comrade, in extreme cases, just an intelligent assistant will do, because two heads, as you know, are better.
A kitchen set is an extremely necessary and quite expensive piece of furniture. You can significantly reduce costs by making a kitchen set with your own hands. Fortunately, there are no problems with the purchase of accessories and materials for the manufacture of the kitchen, but various projects kitchen furniture is just huge.
Preparation of a project for the manufacture of a kitchen set
The production of a kitchen set begins with a project. The project requires dimensions the place where the kitchen will be installed. After that, you can begin to select the constituent elements of the kitchen set.
The kitchen set consists of drawers in which there can be various fillings, from shelves to pull-out baskets. For drawers of both the upper and lower rows, standard width sizes are set from 15 cm to 100 cm, in increments of 5 cm, i.e. 15, 20, 25, 30, 35 cm, etc.
When preparing a project, one should be guided by standard sizes, because All accessories are made taking into account these dimensions.
When determining the layout of the kitchen set, it should be borne in mind that standard height The bottom row of drawers is 72 cm, the top row can be 60, 72 or 90 cm. The depth of the bottom row of drawers is 55 cm, the top row is 30 cm. facade), and all elements are made according to individual sizes.
In case if standard boxes the entire space allotted for the kitchen is not filled, then in the remaining space they make either a box according to individual sizes, or install open shelves.
A distinctive feature is the corner kitchen set, it has a corner element. corner element there can be several options: straight (Fig. 2) and with an angle of 135 degrees (Fig. 3). The same feature applies to the top row of cabinets (Fig. 4).

Fig.2.

Fig.3.

Fig.4.
Traditionally, a sink is installed in the lower corner cabinet. A rectangular or round sink is installed in a straight cabinet, a corner or round sink is installed in a corner cabinet.
When preparing a project for a kitchen set, the following recommendations should be observed:
- The place for installing the slab should be equal to the width of the slab, usually 50, 60 cm.
- For a built-in cooker, the drawer must be 60 cm wide and at least 55 cm deep. The same applies to the oven.
- The space for the hood should be 60 cm for built-in and 90 for other types of hoods.
- The distance between the hood and the stove must be at least 70 cm.
- The space under the refrigerator must be at least 60 cm.
- Roll-out baskets are installed in kitchen cabinets only standard size.
Production of kitchen accessories
The traditional material for the manufacture of kitchen units is laminated chipboard, abbreviated chipboard, 16 mm thick. Frames of boxes are made from chipboard.
The facade of the kitchen set can be made of laminated chipboard, chipboard glued with plastic (postforming technology), MDF.
The rear wall is made of fiberboard or laminated fiberboard, 4.6 mm thick.
The countertop of the kitchen set is made using postforming technology. The tabletop comes in thicknesses of 28.32 and 38 (40) mm.
There are two approaches to making a kitchen set with your own hands. The first option is to make all the details yourself from chipboard boards, the second option is to make all the details to order, the third option is to buy ready-made boxes and assemble a kitchen set from them with your own hands. Ready-made boxes can be purchased at stores such as IKEA, Leroy Merlin and etc.
The most economical and medium degree of complexity is the option of ordering parts and self assembly. The advantage of this option is that you can make the details of the kitchen set according to individual sizes.
To order parts, it is necessary to determine their dimensions, the need for gluing edging material and the availability required holes for assembly.
The dimensions of the side walls of the drawers are the height and depth of the drawer. Dimensions of the bottom and lid of the box: the width is equal to the width of the box minus 32 mm, the height is equal to the depth of the box.
The edge is made of plastic with a thickness of 0.4 and 2 mm. It is necessary to protect the ends of the chipboard from moisture and mechanical damage. It is desirable to glue the edge on all ends of the parts. In order to save edging tape you can not glue on the invisible ends.
Ready-made holes for fasteners (additive) greatly facilitate the assembly of the kitchen set, but introduce additional costs for the manufacture of kitchen elements.
The table top and front, as well as the drawers, can be made to order or purchased ready-made. With the exception of the manufacture of non-standard elements, the choice of countertops and facades is up to your preferences in terms of color and texture.
Assembling a kitchen set
The assembly of the kitchen set begins with the assembly of drawers. The details of the boxes are connected with the help of a confirmation (Fig. 8). Holes for confirmation are drilled, stepping back from the end of 8 mm. It is convenient to assemble boxes using special device as in fig. 5. It is easy to make it from scraps with your own hands. To simplify the drilling of holes for confirmation, it is convenient to use special drill(Fig. 6). You can make an additive in each part separately; for this, it is convenient to use a jig (Fig. 7).

Fig.5.

Fig.6.

Fig.7.

Fig.8.
On the assembled crates back wall is installed. Next, the legs are attached to the boxes. The legs can be decorative or adjustable plastic, then the kitchen base is attached to the legs. The legs are available in lengths of 100, 120 and 150 mm.
Increase 
Fig.9.
The boxes are placed one by one in their places and pulled together. A special intersectional screed is used to tighten the boxes. It is possible to pull adjacent boxes with the help of self-tapping screws 30 mm long. They will work no worse than an intersectional screed. Self-tapping screw caps can be hidden with a self-adhesive plug, and the confirmation caps are also masked.
Increase 
Fig.10.
The top drawers are pulled together after being put in place. An adjustable suspension is used to fasten the upper drawers. It allows you to set the boxes horizontally and vertically.
Increase 
Fig.11.
The final step in assembling the frame of the kitchen set is the installation of the countertop. The tabletop is attached to the drawers with self-tapping screws 30 mm long.
Installation of the facade of the kitchen set, sink, plinth
On the finished frame you can install a facade, plinth, sink, etc.
The facade is attached with hinges. On the elements of the facade, recesses (milling) are made under the loop cup. Depending on the size of the loop, the diameter of the recess is different. It is advisable to order milling for hinges during manufacture. It's not expensive, but it will help you avoid additional work, possible errors and the need to purchase a special Forstner drill.
When installing doors in corner cabinets it is necessary to use hinges with a non-standard opening angle.
Increase 
Fig.14.
After the doors are installed, you can install the handles.
For a kitchen base, a chipboard part or a special plastic strip can be used. The use of the latter is preferable, as it is protected from moisture and will last much longer.
The base plate is attached to the legs of the kitchen set. It is advisable to drown the plinth into the body of the kitchen set by 7-10 cm. So it will be more convenient to use the kitchen.
Increase 
Fig.15.
Most of the sink models cut into the countertop of the kitchen set. Using the template that comes with the sink, the cut line is marked. After sawing out the hole, the sink is installed and secured using special fasteners, as a rule, fasteners are sold with the sink.
Apron for kitchen set
An apron is an element of a kitchen set that decorates and protects the wall between the countertop and the top row of cabinets. The apron of the kitchen set can be made of MDF or ceramic tiles.
MDF apron can be purchased ready-made or made to order. The MDF apron is attached to the wall with self-tapping screws. Self-tapping screws are further hidden by corner plates.
The installation of a tile backsplash is longer, because. tiling work can take several days. A tile apron is more durable and fundamental, which cannot but affect the design of the kitchen set.
The final element of the apron is the wall plinth. The skirting board has functional purpose. It closes the junction of the apron and the kitchen unit. Thus, preventing dirt and moisture from entering unprotected areas of the kitchen.
The kitchen can safely be called the heart of the home. Every day they cook and eat food, arrange gatherings with family and friends. Therefore, it is so important to create a cozy and comfortable atmosphere in the kitchen. Big role in creating the interior plays a kitchen set. It should be as functional as possible and fit into the design of the room.
Color selection
In order for the furniture to be a harmonious composition with decoration and other interior details, when choosing a color, a number of nuances should be taken into account:
- Lighting and background. If the kitchen is located sunny side, use furniture in cold colors (gray, blue, purple). Suitable for poorly lit rooms warm colors(orange, vanilla, light green). Colors such as lilac, moderate shades of blue and green are neutral and suitable for rooms of any degree of illumination.
Furniture should not merge with the walls, but contrast with interior decoration kitchens. In doing so, it should be taken into account that light furniture on the background dark walls looks larger, visually reducing the room. dark furniture on a light background makes the room visually more voluminous.
- Room size. When choosing the color of furniture for the kitchen great importance is the size of the room. Dark headset even in big kitchen will create a heavy gloomy atmosphere. Better furniture complement light colors with bright details. A small area definitely needs to be equipped with furniture light shades which will visually enlarge the space.
- Psychological factor. Psychologists advise when choosing a color to take into account the temperament of the inhabitants of the apartment. For example, red color will increase the tone of melancholic natures, and it is better for excitable people to choose a calmer shade. White is a universal color, but so that the kitchen does not look pale and boring, it is better to dilute it with bright details. Green - adjusts to proper nutrition, gives the room a feeling of freshness. Blue - reduces appetite and will allow the inhabitants to keep themselves in shape without special diets. Violet - soothes, brings notes of harmony.
Color variety in the photo
 Blue color reduces appetite
  Dark furniture on the background light walls
 Decorating the kitchen gray color
![]() Kitchen in white
Kitchen in white 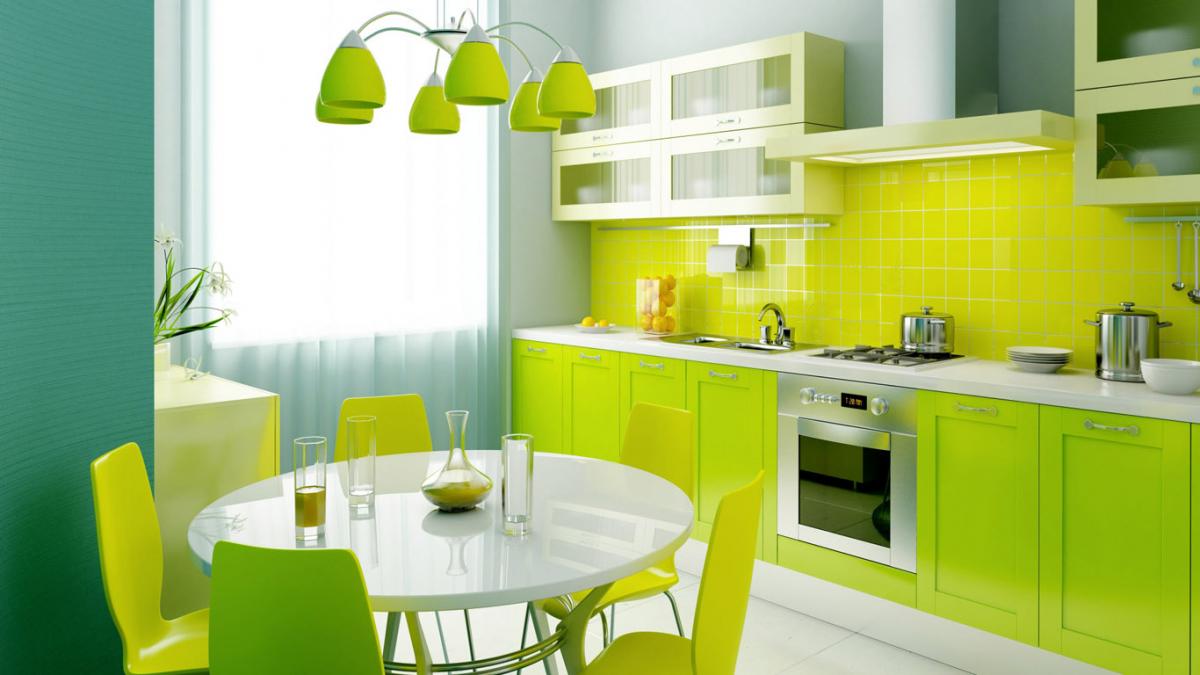 light green color in kitchen design
  purple kitchen decor
Material
The choice of material for furniture should be approached in terms of practicality, attractiveness and cost. The facade of the headset is the "face" of the kitchen, so it should be given maximum attention. The most common materials for its manufacture are:
- Chipboard – chipboard. Lumber is impregnated with synthetic resins, making the material resistant to moisture and steam. The flexibility and elasticity of the plates allows you to create structures of any complexity from them. Chipboard has a smooth and hard surface with high performance properties.
- MDF- fibreboard. Represents wood waste glued with natural carbamide resins, therefore it is an environmentally friendly material. MDF is very different high strength, resistance to moisture, bio- and fire resistance. The plates are quite soft in processing, due to which they have wide design possibilities.
- Wood– natural beautiful and environmentally friendly pure material. However, in order to protect it from temperature and humidity fluctuations typical for the kitchen, wooden furniture is treated with antiseptics, special impregnations and varnished. Such processing reduces the environmental friendliness of the material, besides lacquered surface requires special care. To minimize the deformation of the front facade, only the door frame is made of wood, and MDF is used for the panel.
- Plastic– modern material resistant to fire, scratches and high humidity. The plastic is stuck on MDF panel, as if wrapping it from all sides. This way you get a facade increased strength and sustainability. Thanks to the textural and decorative variety of plastic, such a set can become a decoration for a kitchen made in one of the modern styles.
To ensure the strength, durability and beauty of kitchen furniture will allow the combination of materials in its manufacture. For example, the body of the headset is made of chipboard, the facade is made of fiberboard, and the countertop is made of stone.
Gallery of materials for the kitchen set
Along with the facade, the headset should also take care of the countertop, because it is she who is subjected to the maximum load during operation. Most practical option- this is a stone (marble, marble chips, granite, basalt). Such a countertop is not afraid of mechanical damage and hot pots. alternative natural stone can be acrylic resin, porcelain tile. In addition to stone, countertops are made of laminated chipboard, of stainless steel, laminated plastic.
Headset dimensions
To choose the right size for a kitchen set, you need to draw a project of the room, making preliminary measurements:
- door and window openings;
- the length of all walls;
- distance from floor to ceiling and window sill;
- the location of the protruding elements ( heating appliances, pipes, sockets, etc.);
- existing household appliances.
Large furniture stores have a measurer on staff. It will be much easier and more reliable to use his services.

Experts recommend purchasing a kitchen set, in which the work surfaces are located on different height(sink, stove, food cutting area). Due to this, the load on the back during cooking is reduced.
In addition to the area of \u200b\u200bthe room, when calculating the size of the headset, one should take into account the growth of the hostess, who will most often have to use it. Despite the fact that the standard worktop height is 85 cm, kitchens with a worktop height of 90 cm are commercially available. Its depth can be in the range of 60-90 cm.
Wall cabinets also have a certain standard. With a depth of 30 cm, their height can be 36 cm, 72 cm or 92 cm. Optimal Distance between the countertop and hanging cabinets - 90 cm, it can be reduced to 50 cm.
Form and design
The shape of the kitchen set depends on the layout of the kitchen. Conventionally, all models can be divided into two types.
- Linear. Rectangular headset without protruding parts and massive decorative elements, installed along one or two parallel walls, will become profitable solution for an elongated shape. At the same time, the distance between parallel walls must exceed 2 m.
- corner. Headsets G shape will look good in small square kitchens. They can help you save free space using corners. L shape the headset is universal and suitable for rooms of any size and configuration.

The design of the kitchen set should match the style of the room:
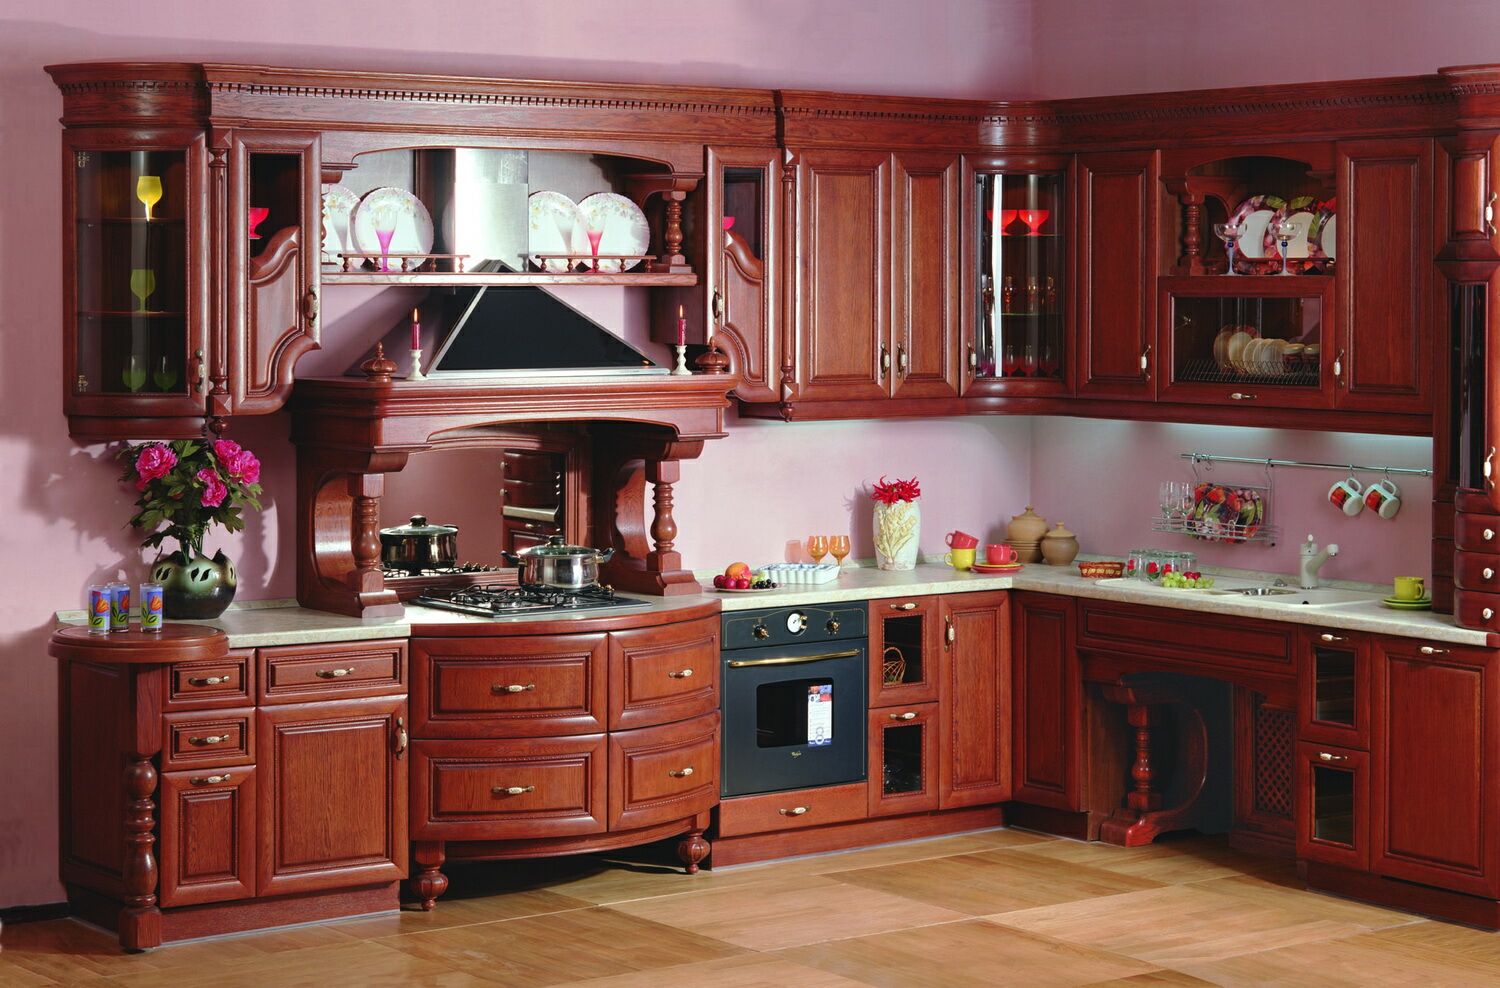
- classic. The nobility of style will be emphasized by furniture made under wood in natural shades and metal fittings. Appliances usually hidden behind facades decorated with carved cornices and balustrades. Such a headset is suitable for any layout and footage;
- country music. Wooden furniture with details made of glass, metal, stone will help to embody the style of village life. Since the style implies massiveness and solidity, it is only suitable for spacious kitchens;
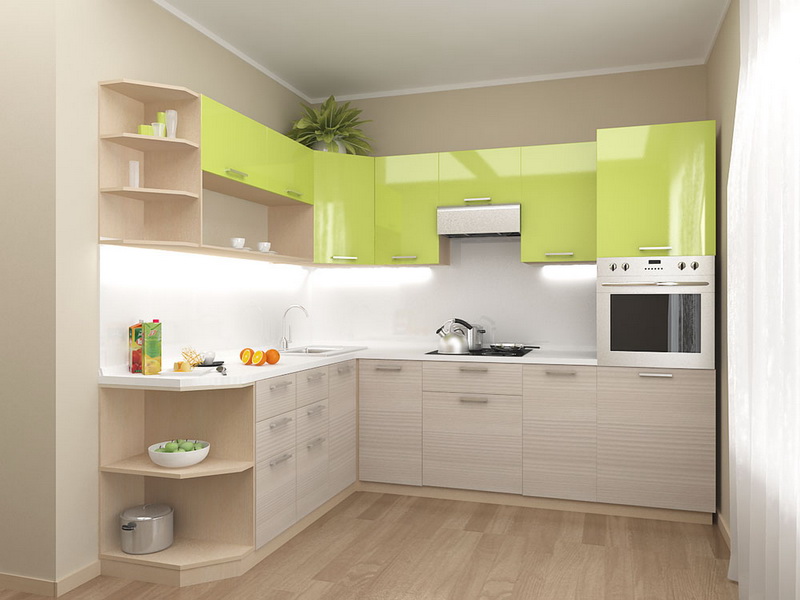
- modern. Modern style will make the most daring design solutions. The functionality of the furniture and the absence of unnecessary details will save space and give small room ease;
- high tech. The style allows experimentation with materials and colors. Modern technology and facades with a glossy surface look equally good both in a spacious room and in a limited space;
- loft. The style is built on the contrast of old and new. Therefore, in the background brick walls or plank floor will harmoniously look like a set made of modern materials, metal, glass.
Design styles (photo gallery)
Functionality
To make the kitchen set not only beautiful, but also comfortable, you need to carefully plan the location of its component parts. Designers advise doing this taking into account the following nuances:
- You need to start planning from the dishwashing area. Storage space is usually created under the sink household chemicals and waste, and a dishwasher is installed to the right or left of it, if necessary.
- Next to the sink is a place for cooking, under which it is convenient to place shelves for storing dry food and household utensils.
- Next, there should be a hob with an exhaust system installed above it.
- Consider the placement of other appliances (refrigerator, microwave oven, electric ovens, etc.).
Preference should be given to a headset, the floor cabinets of which are installed on adjustable legs. They will allow you to set the cabinet to the required height and protect it from moisture.
Special devices will help to increase the functionality of the headset:
- retractable section "cargo";
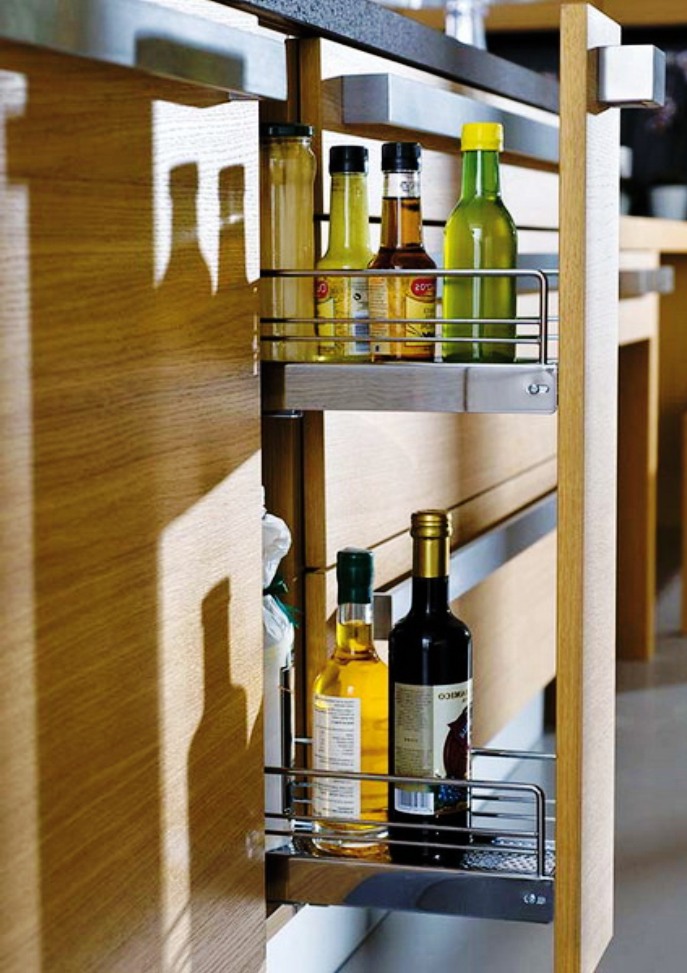
Retractable section ‘cargo’
- "carousel" for easy access to corner cabinets;

- sections with hooks that are located between working surface and wall cabinets;

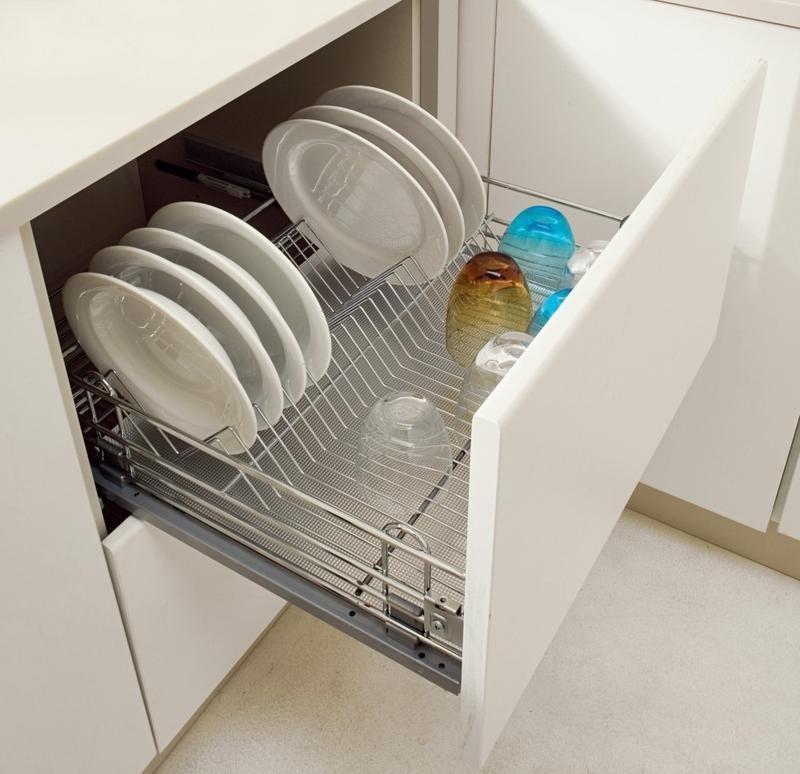
- drawers with "full extension" guide system;

- sections for drying dishes with removable trays.
You should not buy a kitchen set, guided by fashion trends. It should be comfortable, match the design and size of the room, please all family members. Therefore, before buying, you need to carefully consider the smallest details or consult a professional designer.