Making wooden windows with your own hands: the choice of material, the necessary tools, instructions. Do-it-yourself wooden windows How to make frames with your own hands
Joinery work on the manufacture of windows is considered to be one of the most difficult, it requires considerable skill and understanding of the window structure. Do not flatter yourself and think that a wooden window can be made on your knee, with a couple of simple carpentry tools. In the process of making a wooden window with your own hands, the carpenter has to spend a lot of time and effort preparing the material and making additional hinged elements, from glazing beads to awnings and fittings. Therefore, wooden windows simply cannot be cheap and at the same time of high quality if they were made by hand.
How to make a wooden window
In addition, you will need equipment for cutting grooves, cutting chamfers and internal transitions, otherwise it simply will not work to make a wooden window with high quality. To build a window you will need:
- A circular saw;
- Milling cutter for wood easel and manual;
- Grooving and slotting machine;
- Hand drill, tape measure, a set of carpentry clamps.
The window can be completely blind, for example, if you plan to make glazing in a barn, garage or utility room. For residential premises, as a rule, a ventilation system is used with the help of a window leaf and an opening sash. General form window device is shown in the photo. You can make the main part of the window frame in the presence of tools, equipment and prepared material in a day, if you have a clear idea of \u200b\u200bhow to make a wooden window with your own hands, and drawings for the manufacture of the main parts.
Note! In order to make a window with an opening sash, you must first prepare a set of canopies and two window locks.
It is clear that before you make a window out of wood, you need to take the dimensions of the window opening and the box into which it will be inserted window block. In this case, a window will be made with an opening sash-window window measuring 130x110 cm.

What is the best way to make a window
In order to make a wooden window quickly and efficiently, you first need to choose quality material. Forget about oak, larch, Karelian pine, all sorts of options production of a window frame from a glued bar. In order to make a wooden window soundly the first time, you need to buy a well-dried pine blank without knots, without fiber defects and traces of wood damage by microflora or bark beetles.
To make a wooden window frame, we need:
- Three blanks 115 cm long and 40x140 mm in section for vertical window pillars;
- Two blanks 140 cm and a section of 40x140 mm for horizontal crossbars;
- Two blanks of 50 cm each and two blanks of 110 cm each, with a section of 40x50 mm, for the manufacture of an opening sash.
Note! All workpieces must have an ideal geometry, without "propeller" and cracks.
If wooden blanks long time stored outside, before starting work, allow the material to mature and gain initial moisture. Wooden planks and beams should not be dried in the sun, in drafts or in a warm, dry room. It is clear that processing wood blanks protective compounds it is necessary in advance, after which the material is folded into operation and dried thoroughly. If possible, for the first experiment, it is better to make a stock of blanks, since often, due to errors, it is necessary to redo or restore connections or entire elements wooden frame window.

How to make a wooden window
If you have the necessary equipment at your disposal, then cutting the material for a wooden frame on a window is quite easy to do in 2-3 hours, you will need a circular saw and a groove cutter.
The order of work is as follows:
- Quarters are stretched on vertical and horizontal blanks;
- Wooden beams are trimmed and cut to size for assembly;
- At the ends of the blanks, an undercut is made for a corner connection into the frame;
- On the central crossbar and the left pillar, a selection is cut out for the arrangement of the opening sash.
It remains to assemble a wooden window box, make a window, install awnings and fittings. In order to install canopies and make locks, you will need to spend at least 4 hours. About as much as it took to make the main part of the frame.

Making a wooden window frame
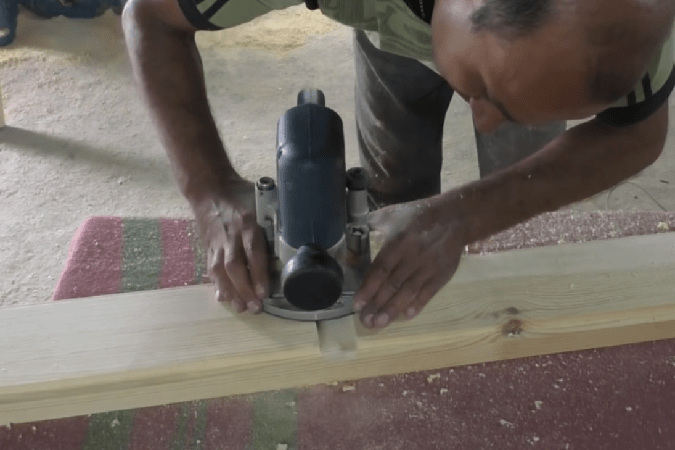
The first operation for joiners involved in the manufacture of wooden windows is called the selection of quarters. In an understandable language, this means making rectangular cuts at the ends of the blanks, which, after the frame is assembled, will be used to install glasses. Groove dimensions 10x12 mm.

On the side uprights sampling must be done at the corners of the wide side of the beam, facing the inside of the frame. On the central vertical rack, quarters are selected along all four faces of the timber.

You can do it on a circular manual router or any end mill. If the tree is very dry, then before cutting the corner grooves, it is necessary to remove a small chamfer from the edges. This will avoid chipping.
After milling the quarters, it is necessary to trim the vertical posts and horizontal crossbars to size. That is, the vertical racks are cut to a landing size of 104 cm. The design height of the window is 110 cm. The thickness of the horizontal crossbars of a wooden window is 40 mm. In order to ensure that the vertical post is inserted into the upper corner of the horizontal beam, it is necessary to make a sample of 10 mm in it, the rest of the body is 30 mm. The same selection must be made for the lower corner and horizontal beam.
The vertical post must be installed in the upper and lower recesses on the crossbars. This means that the size of the rack is 1100-2x30 \u003d 1040 mm or 104 cm. In a similar way, you need to trim the second side and central pillar of a wooden window.

Let's make lateral selections in the horizontal beams of the window under the sidewalls.

With the side posts, everything is more or less clear, it remains to choose a place for the grooves in the upper and lower crossbars to install the central post, on which the opening sash of the wooden window will close.
For the opening sash, we selected four wooden bars, two of 110 cm and two of 50 cm. At the ends of the upper and lower horizontal beams, we have already made samples of 40 mm. Set aside the width of the future sash from the edge - 45 cm.

On each transverse beam we make two cuts hand saw to a depth of 10 mm and cut a groove 40 mm wide.
We assemble a box of a wooden window using self-tapping screws.

We make an opening sash and install it on the frame
Unlike the box, we will assemble the wooden frame of the sash on tongue-and-groove joints. This type of connection will provide high rigidity frames and guarantees the absence of deformation and sagging of the sash. If you try to make it on self-tapping screws or even on the corners, the sash will still deform and crack the glass.
First you need to cut grooves in horizontal segments with a cutter. Best suited for these purposes end mill or a groove cutter, but in their absence, the grooves can be made manually with an ordinary chisel and a mallet.

On the vertical racks of the sash, spikes 40 mm long are cut out. Before making spikes, it is necessary to make a selection of quarters under glass, as was done earlier for a large box.

We assemble the frame on spikes, after having smeared the joints with carpentry glue. After an hour and a half, the assembled sash frame is doweled and ground along the plane of the sash to the main wooden frame of the window.

The size of the sash frame is 50x1100 mm. In order for the sash to close into the window opening, it is necessary to cut a sample along the perimeter of the frame in the size of 1040 mm.

The sash frame of the wooden window is almost ready, now it easily fits into the main box. It remains to make canopies and install locks. Small window hinges can be used as awnings, but their installation is quite long and requires careful cutting of hidden grooves for awnings. In addition, the strength of a conventional canopy for a heavy sash is not enough, and sculpting three loops will already be ugly. Therefore, barrels with pinned fastening are used as canopies.

You can install the barrel in a couple of minutes, but only if there is an appropriate device for drilling holes in the frame and sash. The problem of installing the barrel is how to perform perfectly precise drilling in the wooden beam of the frame at an angle of 45 o, the drill diameter is 6.8 mm, the thread on the barrel is M8. Trying to do this by eye does not make sense, it is better to spend an extra hour, but to achieve a high-quality result.
In order to make a fixture, you will need an oak bar with a section of 40x40 mm. We cut off one face of a wooden block along the entire length. The bar is exposed to drilling machine and drilled exactly diagonally.

On the reverse side of the bar, a quarter of 6x12 mm is selected along the edge. This is necessary so that the fixture fits tightly and rigidly on the edge of the sash and frame of the wooden window.
Before drilling the sash and frame, you need to make markings for installing the barrel. To do this, we apply the risk of installing a canopy on the frame, step back up the rack by 13 mm and transfer the risk to the sidewall of the sash, along which drilling will be performed for the counterpart of the barrel.

After drilling the holes, it remains to wrap the barrel screws into the frame and into the sash, after which you can hang the sash on the installed canopies.


Cut handles and finish
It remains to make pens and execute finishing wooden window. For convenience, it is best to use balcony handles with hidden locks. domestic production made of steel, aluminum will not work, they last for 2-3 months, no more.
We fix the sash on the frame with clamps. On the front part we mark the points for the output of the lock handles. From the points we transfer the line to the end plane of the sash. To install the lock, you need to make groove milling. It will be most convenient to cut the groove with a hand router with an 8 mm drill. The depth of milling the groove is 28 millimeters, it is impossible to drill less - the lock will not fit, more - too, can break through wooden beam through.

At the second stage, you need to mill a shelf to hide the mounting flange of the lock. Next, you need to drill holes for the installation of handles and fix the "ears" of the handles on the wooden plane of the sash.

To install the reciprocal part of the lock, you need to get the entry point of the lock tongue on the frame. To do this, simply turn with a little effort to make a dent in the surface of the B-pillar. We cut a groove along this dent and install a counter metal bar castle.

Conclusion
Before assembling the window, it is necessary to carefully sand the entire surface of the frame and sash, especially the ends and quarters. After grinding, we process wooden surface impregnation, varnishing and installation of glass. After the varnish or oil-paraffin impregnation has dried, we sew up the glass with a glazing bead and install locks and slats, and the wooden window is almost ready.
Of course, plastic windows have long won our hearts. However, for budget way window replacement is suitable for a wooden frame. And if you decide to carry out such repair work in your country house or on the veranda, then you can make wooden windows with your own hands. When I added a veranda to my house, I immediately decided to glaze it and the option with plastic windows did not suit me. Of course, production machines assemble window frames much better and faster, but you always want to do something with your own hands. But if you follow all the rules for processing wooden material and the technology for connecting parts, then it is quite possible to achieve good results. Today we will look at step-by-step instructions for making wooden windows.
Making a wooden box

wooden box
When I decided to make a wooden window with my own hands, I thought about what kind of wood to use. From myself I want to advise you to use pine - it is quite affordable due to its cost. If you, like me, decided to try to make a wooden frame for windows yourself, then give preference to this particular material. Oak can be considered a good alternative, but it is more expensive than pine and I was afraid to use it for the first time.
Important! If you decide to experiment, then you should not immediately purchase expensive materials. It is possible that you will not succeed and the wood elements will be damaged.
Stock up on the necessary tools in advance, although many home craftsmen have all these items in constant use:
- Drill and screwdriver - mechanized way tightening screws will speed up the assembly process
- glass cutter
- electric planer
- Chisel and hammer
Before buying, always check the condition of the boards. They should not have cracks or chips, protruding knots or any deformations. They must also be completely dry. Step technology:
- For my window, I chose a board measuring 150x50 mm
- In all wooden blanks made a groove resembling the letter "G". The depth of the groove was 15 mm
- After that, I connected 4 parts together. For joints, wood glue is used, and the corners should be 90 degrees each. After the box is glued, drill holes in it for a wooden rod, which is 3 cm long. This is an additional fixation and provides 90 degree corners
- The box is inserted into the already prepared opening for the window. Everything is simple here: you drill holes into which you insert dowels, and then fix the box with self-tapping screws. I did not perform such actions - my goal was to make a window with my own hands
Important! All cracks must be filled mounting foam. With this fixing, the mobility of the tree with a temperature difference is not taken into account.

Wooden windows do it yourself
The wooden box is standing - we make a frame
DIY wooden windows
Step-by-step instructions for making a frame for windows with your own hands depends on what kind of window you want to make. I made a single-glass profile with 2 grooves:
- The window frame is made from a wooden bar, the size of which depends on the design of the windows. I used a 6x4 cm wooden beam, but you can take larger sizes
- If the window profile is double-glazed, then the design will have 1 more groove - 2 grooves for glass and 1 for fixing in a box
- The profile is made using a milling cutter or an electric planer - I chose 4 mm glass, and 10 mm bead
- In order to assemble the parts, they need to be cut. To get 90 degrees, cut the edges obliquely, that is, 45 degrees. Self-tapping screws should be used for high-quality fixing and immobility
As a beginner in this business, it was not immediately clear to me how the whole process takes place. Instructions for the manufacture of wooden windows were written for me as if in an incomprehensible language, but having bought everything necessary materials and tools, I started work. Having considered all the drawings and photos that can be found on the Internet without any problems, it turned out that making a wooden window with your own hands is not such a difficult task.
Important! More recently, cashing was used to hide flaws in the installation of wooden windows or their thermal insulation. Now cashing out plays not only practical, but also decorative role. Cash is suitable for wooden houses and is only used for them. It can be carved or resemble images of animals - it all depends on the imagination of the master.
Only a little remains - we insert glass

We make wooden windows with our own hands
The most important thing in this process is the exact choice of glass dimensions. Thanks to this, cold bridges are not created, and the glasses adhere qualitatively to the wooden window frame. Deviations of 1 mm can already have negative consequences - and we do not need this.
Important! Remember safety precautions when cutting glass. You should definitely have gloves to protect your hands and goggles - protection from glass chips is a must.
You need to cut glass with a diamond glass cutter, and fine-grained sandpaper is suitable for polishing the edge. The cutting technique is very simple. It is enough to stock up on a ruler that will longer glass and lead along it with a glass cutter. Before you smear the edges with sealant, you need to attach a glass for fitting. If everything is successful, then sealant is applied to the grooves, after which the glass is finally inserted into the frame. After that, we use a glazing bead - it should hook both the frame and the glass, and then fix it with thin nails. If the fillers are wider, then fix them with self-tapping screws - choose thin fasteners.
On this, the manufacture of wooden windows with their own hands is completely completed and only one thing remains: the placement of wooden windows in prepared boxes. I did not need this action, but if you still decide to install, then:
- We insert the structure into the block and fix it in the grooves
- Using self-tapping screws, we fix the frame - the elements must pass through it directly into the wall
- All cracks are blown out using mounting foam and waiting for it to dry completely
- In the future, you can make slopes with your own hands in the most convenient way for you. But for wooden structures, everyone is used to using plaster, since plastic slopes will not look harmonious
Renovation of an old wooden structure

We restore old windows with our own hands
I would like to raise another important question: how to update old wooden windows with your own hands? Despite all the defects that appear on wooden structures after many years, they remain very strong and durable. Therefore, there is not always a desire to change old window structures and spend a lot of money on it.
Usually, do-it-yourself restoration of wooden windows involves installing seals and painting frames, but in some cases more laborious process. When gaps appear between wooden frame and the box, seals should be used. You can use rubber, foam rubber or polyvinyl chloride. But if a skew has formed, then closing or opening the sash on the windows becomes a real problem. In order to correct the situation, you can try 2 methods: first, check the loops - maybe they have settled and it’s enough just to find a new place for them or to cut off the excess with a planer. The fact is that wood tends to swell and therefore there may be places that need to be adjusted over time.
Very often, windows do not close due to a corny thick layer of applied paint. To do this, it is necessary to remove excess layers of paintwork materials from wooden structures with sandpaper. However, the most terrible problem may seem to be rot in certain areas. Oddly enough, this is usual solution: using a chisel, you need to cut out the damaged area, it would be better if you grab a little more suitable material. Lubricate the resulting recess with epoxy or wood glue, then insert new material and secure it. When the adhesive solution dries, the entire surface is processed with a grinder. The final decision will be to open the frame with varnish or paint with paintwork materials.
Results

As you can see, there is nothing wrong with making new wooden structures or updating old wooden windows. In order to do all the work yourself, it is enough to study the technology, as well as stock up on the necessary tools and wooden materials. By choosing the right wood, you will be able to build your own window construction and in the future to carry out the glazing of your summer house or veranda, and possibly summer kitchen.
window frames it is very difficult to make it out of wood with your own hands, because the profile must be made strictly observing the dimensions. All elements window system must fit snugly against each other, only then the product will be airtight.
Ebbs are also difficult to manufacture. They can be done correctly by people who have experience working with wood. It is best to cut the elements on special machines, then the windows will last a long time. Not everyone has machines, so at home it is better to focus on the simplest project. Of course, a home-made product will not be airtight, but it is suitable for glazing a summer residence, a balcony and a summer kitchen.
How to make windows with your own hands, spending a minimum of effort? The manufacturing process consists of the following steps:
- Choosing the right profile. Purchase of building materials.
- Manufacturing of boxes and frames.
- Installation of window blocks. Glazing.
On the preparatory stage choose glass. It can be an ordinary sheet, which is well suited for country windows. In addition, ready-made double-glazed windows can be installed in wooden frames.
Each option has its own merits. For example, in the first case, it is possible to independently choose and buy cheap material. But the use of double-glazed windows in wooden frames is different in that such windows will significantly reduce heat loss.
When making double-glazed windows, manufacturers pump inert gas into the space between the sheets of glass. Such windows can be used for glazing cottages and country house.
Wooden windows can be made from larch. Oak is also in demand, but it is much more difficult to process it. good option will be the manufacture of structures from Angarsk pine. Even novice builders can work with glued beams; products made from this material will last at least 50 years.
Blueprints must be purchased in advance. by the most simple option, which is suitable for novice builders, can be called the manufacture of windows with a double frame and single glazing. For carpentry, you will need the following tools:
- a hammer;
- saw;
- chisel.
The work will be done faster if an electric planer and cutter are available. How to make a window so that it lasts a long time? Much depends on the quality of the material. Only dry wood is suitable for work. It should be carefully examined at the construction base. It is important that there are no knots, then the frame will not crack. A good option would be glued material. For self-manufacturing windows will require a drawing, glass, metal corners and wood glue.
Glued laminated timber is good because it is practically not deformable. A frame made of this material will not change shape even when high humidity. The window frame can be made from boards 50x150 mm and bars 50x50 mm. All wooden structures treated with an antiseptic. This prevents rotting.
The factory window profile has complex structure, it is very difficult for beginners to repeat it. Therefore, it is easiest to use the simplest project. For example, to create window profile plywood can be used. It is necessary to fasten 4 strips in the form of a rectangle. To make a profile, several rectangles are assembled. So you can make a blind frame or a window with 3 and 2 glasses.
To make a frame with 1 glass, 8 strips of plywood are required, they form 2 rectangles. Stripes of 2 layers are made smaller in width. Self-tapping screws are used to connect parts. All parts of the structure are coated with carpentry glue, then the frame will last for many years.
How to make a box out of planks

The amount of material depends on the size of the windows. First you need to make a box, a frame will be installed on it. The box protects its deformation during shrinkage of the building. All elements are made from a dry board, it must be free of cracks. It is treated with sandpaper, this allows you to remove small burrs. Then markup is applied, parts of the structure are cut out.
In the process of performing work, it is important to pay attention to the outer perimeter of the product. It should be about 3 cm smaller sizes window opening in the wall. Next, you should look at the inner perimeter, it should be about 3 mm over size frames.
All elements of the box are connected according to the groove-thorn principle. You can make it with a cutter or a hacksaw. For work, you will need a chisel and a mallet. The spike is made on the part that they plan to install in vertical position. The groove is cut out on the element, which will be installed in the window opening in a horizontal view.
Next, you need to take sandpaper and carefully sand all the elements. The box is collected on the floor or other flat surface. Spikes and grooves are lubricated with carpentry glue, this increases the strength of the installation. It is necessary to ensure that all parts of the window are connected at an angle of 90 °. For this, a metal corner is used.
In order to give the structure greater rigidity, 2 holes are drilled diagonally in the box. This must be done in those places where the tenon-groove fastening takes place. With the help of a mallet, wooden pins are inserted into them (this is how a right angle is fixed). All pins are pre-lubricated with wood glue. It needs to dry, so the box needs to be left for a while. The next step is the manufacture of the window frame.

The window size determines its configuration. Having decided to make a window frame for the first time, it should be borne in mind that it is easiest to make standard products. In order for the product to be of high quality and last for a long time, it is necessary to buy glued pine timber. It is less prone to torsion, this is an indisputable advantage of the material.
It is important to choose the right type of glazing. It can be double or single. The first is most often used in areas with a harsh climate, such windows are installed in houses. For a summer kitchen and a balcony, it is enough to make windows with single glazing. Experienced craftsmen they are made in 1 day.
Work begins with the marking of the bars, you need to select the grooves on them. The easiest way to do this is with a cutter, it is installed on electric drill. The lower grooves are necessary in order to install the frame in the box profile, and the upper ones will be needed for mounting the glass. The joints should be glued with wood glue.
The window frame should be assembled according to the drawing, the process is similar to assembling a box. When the work is completed, the window frame must be laid on the floor until the glue has completely dried.
In order to properly install the windows made by yourself, you will need to pre-cut holes in the wall. It is important to remove construction debris and dirt.
Holes must be drilled in the walls, subsequently dowels will be placed in them. The pitch between the holes should not exceed 80 mm.
Most high-quality fastening achieved through the use of self-tapping screws. When the box is installed, all the cracks should be “blown out” with mounting foam. You can use other heat-insulating materials.
When installing windows, it is important to observe the geometry. The angles must be strictly 90 °, the deviation is not more than 1 mm per 1 m.
Glass cutting consists of the following steps:
- The material is placed on flat surface without tubercles. This is very important point, because on an uneven surface, brittle material can crack. The table is suitable for work.
- Markup is being done. Then you need to put a ruler on the glass.
- The glass cutter should be pressed against the material, and then held over the glass along the ruler. There should be a solid scratch on the material.
- The glass is shifted to the edge of the table, placing it so that the cut line coincides with the edge.
- The part of the glass that lies on the table should be held with one hand, and the other should be slightly pressed on the part hanging above the floor. The pressure should be increased until the glass breaks along the line drawn by the glass cutter.
It is best to practice on an old piece of glass in advance, and then cut out a new one. There is one more glazing option. You need to take measurements, and then order glass cutting in the workshop. When the work is done, the material should be picked up, brought to country cottage area and insert into the frame.
Glass installation is carried out as follows:
- The sheet is placed in a frame. Then it is removed, silicone sealant is applied along its edges. The glass is set in place.
- Staple fixing. Each element of the frame must be measured. The bead is cut, the ends are cut down at an angle of 45 °.
- Silicone sealant is applied to the glass in those places where the glazing bead will be installed, which is then nailed with small nails.
As a result of using silicone sealant and glazing beads, the glass will be securely fixed in the frame, there will be no gaps. When installing windows, it is important to ensure that all cracks are filled with mounting foam. If they are not removed, cold bridges form.
When working with glass and wood, you should not forget about protection. Hands are covered with gloves, and eyes when cutting glass - with special glasses.
Installing the finished double-glazed window in the frame, do not forget about the installation of the window sill. It can be made from different materials. When the windows are securely fixed in the opening, they are coated with a primer and then painted. On the side of the room, any paint can be used, but for painting the side facing the street, it is worth using a paint that is resistant to temperature changes.
Conclusion
A do-it-yourself wooden window can be made in a few days if you choose the most simple model. It is important to measure correctly. To avoid mistakes, you should focus on the old frames. Frames are made from well-dried wood. Usually pine is used in construction, but oak and glued beams can be used.
The first association that arises when mentioning eurowindows is single-chamber or two-chamber PVC structures white color. It is these windows that are in most apartments and private houses, replacing the outdated frame structures. Alternative plastic windows inferior to wood in terms of environmental friendliness, but winning in terms of performance characteristics- eurowindows made of wood. They have impressive parameters, and appearance at the level, and they are “friendly” with the environment. Unlike plastic, a wooden window box with a proud prefix "euro" can be made independently. Making wooden windows with your own hands is a common thing for many FORUMHOUSE users.
Do-it-yourself Eurowindow
Eurowindow - what is it and how is it done
Eurowindow is a structure consisting of a frame, a double-glazed window and perimeter fittings controlled by a handle.
Perimeter fittings are a prefabricated harness, completed from several parts mounted around the entire perimeter of the profile. It provides locking of the sash at several points, using one handle, which allows you to achieve the most snug fit and eliminates blowing. Thanks to this fitting, a window with an opening sash can operate in two modes - turning and tilt-and-turn. In the rotary mode, the window opens only by turning, in the combined mode - casement opens and retracts.
The fundamental structural difference between "euro" and ordinary windows is one frame, in which several double-glazed windows can stand. Home from specifications"Euro" - complete tightness, achieved through various seals. Thermal conductivity will also depend on the number of air chambers, and on the type of glass in the double-glazed window, and on the correct installation of the window. Therefore, the material from which the profile is made does not play a role, the functionality of the structure and its characteristics are important.
Eurowindows: do-it-yourself made of wood
The process of manufacturing a wooden euro-window will require certain financial investments - the cost of wood, components, equipment. Window double-glazed windows are also easier to order from professionals, although some craftsmen manage to assemble this assembly on their own. But given the impressive cost finished product, belonging to the elite, and therefore quite expensive products, the savings will be substantial. When it comes to building new house or about the full glazing of the old one, the difference can be tens of thousands.

DIY windows: step by step instructions
Windows are constantly exposed to external influences and temperature differences inside and outside, which inevitably leads to a change in the geometry of the structure when it comes to wood. To minimize possible warping, frames and sashes are made not from solid timber, but from glued. You can buy ready-made, if there are reliable suppliers, or you can glue it yourself. In the second case, a workpiece of at least three lamellas is collected, so that the fibers are directed in opposite directions. If possible, choose radial sawn wood, tangential "leads" stronger. For gluing, use special, moisture-resistant compounds.
The cross section of the beam is chosen based on the number of double-glazed windows - for a window with one chamber, a beam of 6 x 4 cm is usually used. Under production conditions, grooves are chosen in the frame not only for the double-glazed window and external seals, but also for internal ones. One of the former manufacturers of wooden eurowindows shared his drawings, by simplifying which you can get high-quality structures that are almost as good as finished ones. In order to make, the drawings are quite suitable.


Considering that not everyone has professional equipment, and its purchase will nullify all savings and is justified only for the purpose of making windows for sale, home craftsmen choose grooves for double-glazed windows, external seals and fittings.
For these purposes, a milling cutter, a circular saw, hand tool for fine-tuning. Members of our portal are equipped with all necessary devices and Ravildon decided to make a window with his brother (nickname Khalva Sr.) for his house.
Ravildon Member of FORUMHOUSE
We had manual, machine tools and other devices. We welded the table, attached a manual milling cutter to it, bought a micro-thorn cutter and a movable carriage, decided to dial the profile in length and thickness. A purchased profile costs from 1,600 rubles for six meters, so we will trim the finished timber, glue it, then gain in thickness.
They made such a pepelats: I had guides with carriages lying around, welded the frame, attached a manual circular to the movable table, and it turned out to be the simplest impost. The grooves are rectangular, so you can do without shaped cutters. The depth of cut is adjusted by a movable stop, the height - by a set of plates and rectangular pipes. The groove was cut in five passes, changing the linings, finished with a file.
The brothers trained on waste, the results were recorded in a journal in order to choose the most successful option in the future. And as they filled their hands, they began to manufacture the frames themselves.

Our other forum member used ready-made glued beams. The photos show this whole process in detail.
cyan__ Member FORUMHOUSE
I passed the purchased beam through a thickness gauge and trimming, on a circular with a home-made fixture (a high parallel stop with guides and rulers of 0.5 mm each) I made spikes and a profile, glued it, chose the fitting grooves with a milling cutter, hung the fittings - I checked how it works, removed it, polished for painting. There are no special tricks, but you must either have experience in carpentry, or first make a few frames for ejection - practice.
Since the double-glazed window is planned to be two-chamber, the total cross-section of the beam turned out to be 80 x 78 mm.

If equipment and experience allow, the frame elements are cut obliquely, at an angle of 45⁰, and can be joined without a bevel, although less decorative, but technically easier. The parts are assembled on a spike-groove connection, with the vertical parts being lugs, and the horizontal ones being spikes. It is easier to make a single connection, but a double one is stronger and more durable, as the gluing area increases, and a triple spike is even stronger. When there is one spike, it is worth additionally reinforcing the frame with a corner, since the double-glazed window significantly burdens the structure.

Our portal member cyan__ tells how to make a wooden window using a three-stud connection.
cyan__ Member FORUMHOUSE
I made three spikes for myself and put them on PU D4 glue, on another glue and one spike under a double-glazed window, I would probably put a corner. As a test, you can glue one corner and test it for strength and deformation by loading it along the hypotenuse with a mass of one and a half double-glazed windows. Then it will become clear whether additional reinforcement is needed.
Corner templates
Halva Sr. typed a box of two lamellas to make it easier to choose quarters and grooves for seals circular saw. dried lumber required thickness, neither solid nor glued, was on sale at that time, I had to get by with a material with a smaller cross section. But the beam was dry, already jointed from all sides. The frames were glued to a smooth fugue due to the lack of a comb of suitable width. To insure, the design was reinforced with self-tapping screws - obliquely, from the edge to the center (the fastener heads will later be hidden by a quarter). After the final purge with pneumatics, the finished frames were given to the eldest son for fine-tuning - for puttying

Industrially made windows are no better than the so-called do-it-yourself windows - the photo confirms this.
Grooves for fittings in the sashes are selected based on its variety and dimensions. To simplify his work, Halva Sr. made metal templates, according to which he chose all the necessary grooves, here step by step description this stage of work:

Halva Senior Member of FORUMHOUSE
Before cutting the tenon groove, I prepared the grooves for the locks - I made a template from a bent steel corner. Holes - with a diameter of 8 mm, a hole for wrapping - with a diameter of 10 mm. First, marking the centers, then we drill 8 holes - a depth of 26 mm. I set the stop and combined the holes into a groove with a manual milling cutter, dimensions: depth 28 mm, width 8 mm. I managed without limiters in length - the boundaries of the groove are felt to the touch.

A cut or rounded corner is covered with a thicker layer paintwork materials than acute, therefore, more resistant to all external influences. Forum member Sukhov76, who made wooden windows for himself, advises his own method.
Sukhov76 Member of FORUMHOUSE
Instead of chamfers under 45⁰, it is better to round the corner to a radius of 3 mm - it looks more aesthetically pleasing and lies well under the paint. Paints and varnishes are “afraid” of sharp edges, according to the law of surface tension, on sharp surfaces the layer of coatings is thinner, and according to the law of meanness, it is the edges that are the most vulnerable in operation, and the coating is erased faster, while at the radius the layer is even and it is harder to damage it.
The assembled window frames and sashes are sanded and treated with special impregnations, then varnished or painted. In order for each subsequent layer to fit well and hold for a long time, all compositions used must be on the same basis, water, etc. The glass in the frame is fixed with glazing beads.
It is not enough to make a window with your own hands - the video on our portal will teach you how to paint it correctly in order to protect the surface for many years!
For the second floor of his house, cyan__ also made wooden windows himself, using the technology already given. After the workpieces have been cut, grooves are selected and spike connections, holes for fittings and frames were assembled, the final part remained - finishing and installing glass.
cyan__ Member FORUMHOUSE
Primed and painted the outer white side. Then, by sanding away the paint drip on masking tape in a couple of places - internal, translucent. Stain is not paint, it is easy to wipe off with a wet cloth on the white side. I installed the glass on the spacers and nailed the glazing beads - a copper-plated nail looks good after even ten cm. I sealed it with neutral (this is important) silicone, acidic can destroy the sealant of the bag. Turned over onto a sheet of foam rubber and sealed reverse side, mounted fittings, mounting plates and inserted into the opening. final stage adjusted the sash and inserted seals into the grooves.

Making a wooden window with your own hands is an opportunity not only to save money, but also to prove yourself. Long years a beautiful, eco-friendly design will not remind you of the money spent, but of your own skill.
Everything related to the technical parameters and features of Eurowindows, as well as step by step instructions, diagrams, subtleties of installation and product characteristics different manufacturers are discussed in the section. Details of the manufacture of the wooden windows mentioned in the article are laid out step by step in the topic "". After studying the article about, you will learn how to get a high-quality and durable timber for future frames. Our article will tell you how to properly install a window with your own hands, the video will teach you how to properly install windows and hidden roller shutters. How to replace wooden windows with your own hands without dismantling the old frame - video about new technology answers this question.
Plastic windows have been able to win the hearts of millions of buyers around the world. However, they are classified as budget decisions maybe with a stretch. More affordable option become wooden frames for windows. Special machines handle the production of frames faster, but when it comes to the desire to create something with my own hands, then this material will definitely come in handy. In addition, wooden windows with double-glazed windows will become the best option for a country house or cottage, where the requirements for external gloss are much lower. So, how to make a window with your own hands?
Design features
It is unlikely that even a professional will be able to make a window that is not inferior in quality to products on sale. The reason is simple: the construction of a wooden window must be made as accurately as possible, including the frame and binding - a deviation of a few millimeters threatens with considerable problems with thermal insulation. Despite this, create more simple design many are quite capable.
Homemade window block made of wood
Wooden windows, which are produced today in factories, are almost identical to plastic ones with the only exception - the material used. They differ enough complex design, due to the possibility of opening the valves in two planes. If you do the manufacture of the frame yourself, then it is better to simplify the design by replacing all engineering refinements with an ordinary rectangle of bars.
The frame manufacturing process is carried out in several stages:
- profile selection, procurement of materials;
- frame manufacturing;
- installation and glazing of the window unit.
Choose a profile
First of all, you should find out whether it is planned to use ordinary sheet glass or double-glazed windows in future wooden frames. Each option has its own advantages: in the first case, it is low cost and the possibility of self-cutting, in the second, lower thermal conductivity.
 The thermal conductivity of a classic window is greater than that of a double-glazed window
 One of the features of double-glazed windows is a special inert gas that the manufacturer pumps between individual sheets. Over time, its concentration may decrease. Do not be afraid in advance - heat loss through the window, if they increase, then minimally, this will practically not be noticeable.
There is also a special hybrid option - the so-called Finnish eurowindow (or Scandinavian). It includes sheet glass and 2- or 3-chamber double-glazed windows. This approach will achieve high thermal insulation.
 The Finnish window has the highest thermal insulation properties.
 The simplest and at the same time reliable and popular solution among the people today is the option with a pair of glasses, between which there is an air gap of 2 cm or more wide. Another option is to make do-it-yourself wooden windows with single glazing and double glazing.
Material selection
Most often, pine is used to make a wooden frame.. It is practical, easy to handle and inexpensive material. Alternatively, you can use oak, but for the first experiments it will be too expensive.
 As a rule, pine is used to make a window block.
 Whatever material is chosen, the beam must be thoroughly dried, there should not be any flaws on its surface: knots, cracks or other damage - it is impossible to make windows from low-quality material.
Frame manufacturing
The main nuance in the manufacture of wooden frames is the preservation of shape and geometry during assembly - this will help pre-prepared drawings. The beam for work is selected based on the planned thickness of the glass. Minimum size section - 60x40 mm. To create grooves, an electric planer or milling cutter is used. Experts recommend that beginners practice on small pieces before starting work - make a vertical or horizontal cut.
 Typical drawing for the manufacture of a window frame with dimensions
 Before starting work, all measurements should be carefully taken. If there is such an opportunity, it is better to entrust this work to professionals - a deviation of a millimeter can lead to undesirable consequences, make a wooden window in this case will not work. The ends are cut at an angle of 45 degrees.
Do-it-yourself assembly of elements of a wooden double-glazed window is made on carpentry glue. To give additional strength, holes are made at the corners into which wooden rods are inserted, also smeared with glue. For additional reinforcement on the connecting elements, a groove is knocked out with a cutter into which the key is installed. As a result, the structure must become immovable so that the homemade binding is almost monolithic.
 Corner Connection Types
 As an alternative, you can use a thorn-groove connection. However, working with it can be much more laborious, as it requires very high accuracy. Therefore, most often in the manufacture of wooden windows, the option described above is used. After that, the manufacture of the window proceeds to the final stage.
Frame assembly
Do-it-yourself installation of a wooden frame is done in a pre-prepared hole in the wall. The opening should first be prepared: level it, remove all dirt and debris. Holes for dowels are prepared in the walls in increments of up to 80 cm. The box is fastened with self-tapping screws, subsequently the gaps are sealed with mounting foam or other heat-insulating materials.
 Installing a box in a window opening
 In the process, it is very important to observe the geometry of wooden windows: angles of 90 degrees, a deviation in evenness of not more than 1 mm per 1 m, a diagonal difference of up to 10 mm.
Glazing
This is followed by the placement of double-glazed windows in wooden frames. The main nuance is the exact choice of sizes, because. the device of a wooden window does not allow deviations. A deviation of a millimeter will create the so-called cold bridges, which lead to extremely negative consequences. Also, safety precautions should not be neglected - it is necessary to wear gloves and goggles to protect hands and eyes.
 During glazing, it is necessary to ensure the tightness of the connection between the glass and the frame.
 Traditionally used for cutting diamond glass cutter, polishing is done sandpaper with fine grain. The technique itself is simple - measure right size, we apply a ruler along a straight line and draw a glass cutter along it. After trimming, you should check whether the glass is suitable and, if so, then all that remains is to install it in the frame, not forgetting about the sealant. The glass is fixed in the frame with the help of a glazing bead - when making wooden windows with double-glazed windows, you should take care of it in advance.
Windowsill
One of the stages of installing wooden windows with double-glazed windows is working with a window sill. The material for it can be anything.
 Window sill installation
 The window sill is installed in the following sequence:
- From the purchased window sill, cut the desired shape.
- The window sill must be partially brought under the frame; in the lower part, the fixation is carried out using wedges made of wood.
- The empty space below is filled with foam. Subsequently, the protruding excess is removed with a knife.
Painting
Painting wooden windows with your own hands is not particularly difficult. However, you must remember the following nuances:
- If this has not been done before assembly, the binding ready for painting should be treated with an antiseptic. In this case, special attention should be paid to the ends, since it is through them that the pest most often penetrates the tree.
- Before painting, the surface must be primed. This is done for two purposes at once: firstly, the primer will help reduce paint consumption, and secondly, it will play the role of an antiseptic, increasing the life of the window.
- Painting is recommended to be done with a brush, the procedure is carried out in several layers.
- For outer side recommended to use special paint for outdoor work, but with room side you can use any.
 The frame is painted with a brush in 2-3 layers
 On this, the manufacture of a wooden frame for windows can be considered complete.
Results
As you can see, it is quite possible to make a wooden window with your own hands. Of course, in quality it will be inferior to factory models, but the difference in price is very significant. In order to cope with everything on your own, you will need not only to thoroughly study the technology, but also stock up suitable material and tool. If everything is done correctly, the result will surely please you and your loved ones with both beauty and warmth, which wooden double-glazed windows and binding will help to keep in the house.